Roasted Tomato Soup

Servings: 4
Prep Time: 10 minutes
Cook Time: 40–45 minutes
Total Time: 55 minutes

Description

Roasted tomato soup is a comforting, flavourful dish made by roasting fresh tomatoes, onion, and garlic until caramelised and tender. Roasting intensifies the natural sweetness of the vegetables while adding a rich, smoky depth of flavour. Blended with broth and finished with a touch of cream, this soup is smooth, nourishing, and perfect as a light meal or appetiser. Pair it with crusty bread or a grilled cheese sandwich for a satisfying dining experience.

Ingredients

  • 6 ripe tomatoes, halved
  • 1 red onion, quartered
  • 1 whole garlic bulb (or 8 garlic cloves)
  • 2 tbsp olive oil
  • 1 tsp dried oregano or Italian seasoning
  • Salt and black pepper, to taste
  • 1–2 cups vegetable or chicken broth
  • 2 tbsp cream (optional)

Instructions

  1. Preheat your oven to 425°F (220°C).
  2. Arrange the halved tomatoes and quartered onion on a baking tray. If using a whole garlic bulb, slice off the top to expose the cloves and place it on the tray.
  3. Drizzle everything with olive oil and sprinkle with oregano, salt, and pepper.
  4. Roast for 35–40 minutes, or until the vegetables are soft and lightly caramelised.
  5. Allow the vegetables to cool slightly. Squeeze the roasted garlic cloves from their skins if using a whole bulb.
  6. Transfer the roasted vegetables to a blender. Add 1 cup of broth and blend until smooth.
  7. Pour the mixture into a saucepan. Add more broth as needed to reach your desired consistency.
  8. Simmer over medium heat for 5–10 minutes.
  9. Stir in the cream if desired and adjust seasoning to taste.
  10. Serve hot and garnish with fresh herbs, croutons, or a swirl of cream.

Notes

  • Roma or vine-ripened tomatoes provide the best flavour.
  • For a dairy-free version, omit the cream or use coconut cream.
  • Vegetable broth keeps the recipe vegetarian.

Tips

  • Roast the vegetables until slightly charred for deeper flavour.
  • Blend carefully while ingredients are warm.
  • Add fresh basil after blending for a classic tomato-basil variation.
  • Store leftovers in an airtight container in the refrigerator for up to 4 days.

Nutritional Information (Per Serving)

Approximate values:

  • Calories: 120
  • Protein: 3g
  • Carbohydrates: 12g
  • Fiber: 3g
  • Fat: 7g
  • Saturated Fat: 1g
  • Sodium: 350mg
  • Vitamin C: 35% DV

Health Benefits

  • Rich in Antioxidants: Tomatoes contain lycopene, which may support heart health.
  • Vitamin-Rich: Provides vitamins A, C, and potassium.
  • Low in Calories: A filling option suitable for balanced diets.
  • Immune Support: Garlic contains beneficial compounds that may support immune function.
  • Heart-Friendly: Olive oil provides healthy monounsaturated fats.

Frequently Asked Questions

Q: Can I use canned tomatoes?
A: Yes. Use about 2 cans (28 oz total) of whole peeled tomatoes and roast them with the onion and garlic.

Q: Can I freeze this soup?
A: Yes. Cool completely and freeze for up to 3 months. Thaw overnight before reheating.

Q: How can I make it thicker?
A: Use less broth or simmer longer to reduce excess liquid.

Q: What can I serve with roasted tomato soup?
A: Grilled cheese sandwiches, garlic bread, crackers, or a fresh green salad pair wonderfully.

Q: Is the cream necessary?
A: No. The soup is naturally creamy from the roasted vegetables and tastes excellent without it.

Amazing Lemon Basil Salmon Rolls

Amazing Lemon Basil Salmon Rolls are a light, elegant, and flavour-packed dish featuring tender salmon wrapped or rolled with fresh basil, lemon zest, and simple seasoning. This recipe delivers a perfect balance of bright citrus, aromatic herbs, and rich, flaky salmon. It works beautifully as an appetiser, healthy lunch, or protein-rich dinner and can be served warm or chilled for a refreshing Mediterranean-style meal.

Ingredients

For the Salmon

  • 1 lb salmon fillet, skin removed
  • 1 tablespoon olive oil
  • 1 teaspoon garlic powder
  • 1 teaspoon paprika
  • Salt and black pepper to taste
  • Zest of 1 lemon
  • Juice of ½ lemon

For the Filling

  • ½ cup fresh basil leaves, finely chopped
  • 1 teaspoon lemon zest (extra for brightness)
  • 1 tablespoon cream cheese or Greek yogurt (optional for creaminess)

For Serving (Optional)

  • Lemon wedges
  • Fresh basil leaves
  • Olive oil drizzle

Instructions

1. Prepare the Salmon

Preheat oven to 400°F (200°C). Place salmon on a lined baking sheet. Rub with olive oil, garlic powder, paprika, salt, pepper, lemon zest, and lemon juice.

2. Bake the Salmon

Bake for 12–15 minutes, or until the salmon is cooked through and flakes easily with a fork. Let it cool slightly so it is easier to handle.

3. Flake and Mix

Flake the cooked salmon into a bowl. Add chopped basil, extra lemon zest, and cream cheese or Greek yoghurt if using. Mix gently until combined.

4. Form the Rolls

Lay out parchment paper or plastic wrap. Spoon the salmon mixture into small portions and gently roll into log shapes, or serve as open rolls using lettuce leaves, cucumber slices, or tortilla wraps.

5. Chill or Serve

For firmer rolls, refrigerate for 20–30 minutes before serving. Serve with lemon wedges and fresh basil.

Description

These Lemon Basil Salmon Rolls are fresh, vibrant, and nutrient-dense. The salmon provides a rich, buttery texture, while lemon adds brightness and basil delivers an aromatic herbal note. The optional creamy element helps bind everything together, creating a smooth, flavourful filling. Every bite feels light yet satisfying, making this dish perfect for healthy eating without sacrificing taste.

Servings

  • Serves: 4
  • Serving Size: 2–3 rolls or portions

Nutritional Information (Per Serving)

  • Calories: 280
  • Protein: 32g
  • Carbohydrates: 2g
  • Fat: 15g
  • Fiber: 0g
  • Sugar: 0g
  • Sodium: 380mg

Values are approximate and may vary depending on ingredients used.

Health Benefits

High in Omega-3s

Salmon supports brain health and heart health and reduces inflammation.

Rich in Protein

Helps muscle recovery and keeps you full longer.

Vitamin-Rich

Lemon and basil provide antioxidants and vitamin C.

Low-Carb Meal

Ideal for keto, low-carb, or clean eating plans.

Heart-Healthy Fats

Olive oil and salmon provide beneficial fats for overall wellness.

Notes

  • You can use canned salmon for a quicker version.
  • Greek yoghurt gives a lighter texture than cream cheese.
  • Add cucumber or avocado for extra freshness.
  • Works well as lettuce wraps or sandwich filling.

Tips for Success

  • Do not overbake salmon—keep it moist and flaky.
  • Cool salmon slightly before mixing to preserve texture.
  • Add lemon zest, not just juice, for stronger citrus flavour.
  • Chill rolls before slicing for cleaner presentation.
  • Use fresh basil only for best aroma and taste.

Frequently Asked Questions

Can I make these ahead of time?

Yes. Store rolled salmon in the fridge for up to 2 days.

Can I serve them cold?

Absolutely—they taste great chilled like a salmon salad roll.

Can I use canned salmon?

Yes, it works well and saves time.

What can I serve with them?

Fresh salad, roasted vegetables, or rice bowls pair well.

Are these keto-friendly?

Yes, they are naturally low in carbs.

Loaded Sweet Potato with Spinach, Mushrooms & Avocado

Loaded Sweet Potato with Spinach, Mushrooms & Avocado

Ingredients 🛒

  • 3 large sweet potatoes
  • 2 cups spinach
  • 1 cup mushrooms, sliced
  • 1 avocado, diced
  • ½ cup feta cheese, crumbled
  • 1 tbsp olive oil
  • Salt and black pepper to taste

Detailed Steps 👩‍🍳

1️⃣ Bake the Sweet Potatoes

➡️ Preheat the oven to 400°F (200°C).
➡️ Wash and dry the sweet potatoes.
➡️ Place them on a baking tray.
➡️ Bake for 45–50 minutes until fork-tender.
➡️ Let them cool for a few minutes.

2️⃣ Cook the Mushrooms

➡️ Heat olive oil in a skillet over medium heat.
➡️ Add the sliced mushrooms.
➡️ Cook for 5–6 minutes, stirring occasionally.
➡️ Continue until golden brown and lightly caramelized.

3️⃣ Add the Spinach

➡️ Add spinach to the skillet.
➡️ Stir for 2–3 minutes until wilted.
➡️ Season with salt and black pepper.
➡️ Cook until excess moisture evaporates.

4️⃣ Prepare the Sweet Potatoes

➡️ Slice each sweet potato lengthwise.
➡️ Gently fluff the inside with a fork.
➡️ This creates a soft base for the toppings.

5️⃣ Add the Filling

➡️ Spoon the spinach and mushroom mixture into each potato.
➡️ Sprinkle feta cheese over the top.
➡️ Add diced avocado evenly.

6️⃣ Final Touch

➡️ Return to the oven for 5 minutes if you prefer warm feta.
➡️ Remove and rest for 2 minutes before serving.

7️⃣ Serve

➡️ Serve warm as a healthy lunch or light dinner.
➡️ Enjoy immediately for the best flavor and texture.


Nutrition Benefits 💪

✅ Rich in fiber for healthy digestion.
✅ Avocado provides heart-healthy fats.
✅ Spinach is packed with vitamins A, C, and K.
✅ Sweet potatoes are an excellent source of vitamin A.
✅ Feta cheese adds protein and flavor.
✅ A balanced meal with vegetables, healthy fats, and protein.

Approximate Protein Content

Per Serving: 10–14g protein
Whole Recipe: 30–40g protein


Quick Q&A ❓

Can I make it ahead of time?
➡️ Yes, prepare the filling in advance and assemble before serving.

Can I use kale instead of spinach?
➡️ Yes, kale is a great substitute.

Can I add more protein?
➡️ Yes, add grilled chicken, shrimp, or chickpeas.

Mediterranean Baked Chicken

Mediterranean Baked Chicken is a wholesome, flavour-packed dinner featuring juicy chicken breasts baked with sweet cherry tomatoes, briny olives, garlic, fresh herbs, and a bright touch of lemon. This easy one-pan recipe brings together the vibrant flavours of the Mediterranean diet while keeping preparation simple and cleanup minimal. Perfect for busy weeknights or casual entertaining, this dish is high in protein, naturally low in carbohydrates, and bursting with fresh ingredients.

Ingredients

  • 4 boneless, skinless chicken breasts
  • 2 cups cherry tomatoes, halved
  • ½ cup black olives, sliced
  • 3 cloves garlic, minced
  • 2 tablespoons olive oil
  • 1 tablespoon Italian seasoning
  • 1 teaspoon paprika
  • Salt and black pepper, to taste
  • 2 tablespoons fresh basil, chopped
  • Juice of ½ lemon

Instructions

1. Prepare the Oven

Preheat oven to 400°F (200°C). Lightly grease a 9×13-inch baking dish or oven-safe skillet.

2. Season the Chicken

Pat the chicken breasts dry with paper towels. Rub with olive oil, then season evenly with Italian seasoning, paprika, salt, and pepper.

3. Assemble the Dish

Arrange the chicken breasts in the baking dish. Scatter the cherry tomatoes, sliced olives, and minced garlic around and over the chicken.

4. Bake

Bake uncovered for 25–30 minutes, or until the chicken reaches an internal temperature of 165°F (74°C).

5. Finish and Serve

Remove from the oven and drizzle with fresh lemon juice. Sprinkle chopped basil over the top. Let rest for 5 minutes before serving.

Description

This Mediterranean-inspired chicken dish combines tender, perfectly seasoned chicken with juicy roasted tomatoes and savoury olives. As the ingredients bake together, the tomatoes release their natural juices, creating a light and flavourful sauce infused with garlic, herbs, and lemon. The result is a healthy, colourful meal that pairs beautifully with rice, quinoa, couscous, roasted vegetables, or a fresh salad.

Servings

  • Serves: 4
  • Serving Size: 1 chicken breast with vegetables

Preparation Time

  • Prep Time: 10 minutes
  • Cook Time: 30 minutes
  • Total Time: 40 minutes

Nutritional Information (Per Serving)

  • Calories: 290
  • Protein: 38g
  • Carbohydrates: 6g
  • Fat: 12g
  • Saturated Fat: 2g
  • Fiber: 2g
  • Sugar: 3g
  • Sodium: 420mg

Nutritional values are approximate and may vary depending on ingredients used.

Health Benefits

High in Protein

Chicken breast provides lean protein that supports muscle growth, repair, and satiety.

Heart-Healthy Fats

Olive oil contains monounsaturated fats that may support cardiovascular health.

Rich in Antioxidants

Tomatoes provide lycopene, while garlic and herbs contribute beneficial antioxidants.

Low-Carb Friendly

This recipe is naturally low in carbohydrates, making it suitable for many healthy eating plans.

Nutrient-Dense

The combination of vegetables, herbs, and lean protein offers vitamins, minerals, and fibre in every serving.

Notes

  • Use chicken thighs if you prefer darker meat.
  • Kalamata olives can be substituted for black olives for a more authentic Mediterranean flavour.
  • Fresh basil is recommended, but dried basil may be used if necessary.
  • Adjust lemon juice according to your taste preference.

Tips for Success

  • Pound chicken breasts to an even thickness for uniform cooking.
  • Avoid overcooking to keep the chicken juicy and tender.
  • Let the chicken rest after baking to retain its natural juices.
  • Add crumbled feta cheese before serving for extra Mediterranean flavour.
  • For a complete meal, serve with roasted potatoes or a Greek-style salad.

Frequently Asked Questions

Can I make this recipe ahead of time?

Yes. Assemble the dish several hours ahead, cover, and refrigerate until ready to bake.

How do I store leftovers?

Store leftovers in an airtight container in the refrigerator for up to 3 days.

Can I freeze it?

Yes. Freeze cooked chicken and vegetables for up to 3 months. Thaw overnight before reheating.

What side dishes pair well with Mediterranean baked chicken?

Rice, quinoa, couscous, roasted vegetables, mashed cauliflower, or a fresh cucumber salad are excellent choices.

Can I add more vegetables?

Absolutely. Bell peppers, zucchini, red onions, and artichoke hearts make wonderful additions.

Mediterranean Baked Chicken is an easy, nutritious, and delicious meal that delivers bright Mediterranean flavours with minimal effort, making it a perfect addition to your weekly dinner rotation.

Steak, Eggs & Avocado Breakfast Plate

Steak, Eggs & Avocado Breakfast Plate

Ingredients

  • 1 beef steak (8–10 oz)
  • 2 eggs
  • 1 avocado, sliced
  • 1 tbsp butter
  • Salt, to taste
  • Black pepper, to taste

Chimichurri Sauce (Optional)

  • 2 tbsp parsley, chopped
  • 1 tbsp olive oil
  • 1 garlic clove, minced

Instructions

➡️ Remove the steak from the refrigerator 20 minutes before cooking.

➡️ Season both sides generously with salt and black pepper.

➡️ Heat a skillet over medium-high heat and add the butter.

➡️ Place the steak in the hot skillet and cook for 3–5 minutes per side, depending on your preferred doneness.

➡️ Transfer the steak to a plate and let it rest for 5 minutes.

➡️ In the same skillet, crack in the eggs and cook until the whites are set and the yolks remain runny.

➡️ Slice the avocado into thin strips.

➡️ Mix the parsley, olive oil, and garlic to make a simple chimichurri sauce.

➡️ Place the steak on a serving plate.

➡️ Add the fried eggs, avocado slices, and a small bowl of chimichurri sauce.

➡️ Serve immediately while hot.

Q&A

Q: What steak cut works best?
A: Ribeye, New York strip, or sirloin are excellent choices.

Q: Can I use scrambled eggs instead?
A: Yes, scrambled eggs work perfectly with this meal.

Q: Is this a high-protein meal?
A: Yes! It is packed with protein, healthy fats, and nutrients, making it a great breakfast or brunch option. 🥩🍳🥑

Grilled Herb and Garlic Shrimp

Grilled Herb and Garlic Shrimp

Ingredients

  • 500g shrimp, peeled and cleaned
  • 2 tbsp olive oil
  • 3 garlic cloves, minced
  • 1 tbsp chopped parsley
  • Salt and black pepper, to taste
  • Lemon wedges, for serving

Instructions

  • 🍤 Pat the shrimp dry and place in a bowl.
  • 🧄 Add olive oil, garlic, parsley, salt, and black pepper. Mix well.
  • ⏳ Marinate for 10–15 minutes.
  • 🔥 Heat a grill pan over medium-high heat.
  • 🍤 Grill shrimp for 2–3 minutes per side until pink and lightly charred.
  • 🍋 Transfer to a serving plate and squeeze fresh lemon juice over the top.
  • 🍽️ Serve hot and enjoy!

Q & A

Q: Can I use frozen shrimp?
A: Yes, thaw completely and pat dry before cooking.

Q: How do I know the shrimp are done?
A: They turn pink, opaque, and curl into a “C” shape.

Creamy Crab & Cucumber Salad

Creamy Crab & Cucumber Salad

🛒 Ingredients

  • 250 g imitation crab sticks, shredded
  • 2 cucumbers, diced
  • ½ cup mayonnaise
  • 1 tbsp lemon juice
  • 1 tbsp fresh dill, chopped
  • Salt, to taste
  • Black pepper, to taste

👩‍🍳 Step-by-Step Instructions

🥒 Step 1:
Wash the cucumbers thoroughly and cut them into small bite-sized cubes.

🦀 Step 2:
Shred the crab sticks into thin strips using your hands or a fork.

🥣 Step 3:
Place the shredded crab and diced cucumbers into a large mixing bowl.

🌿 Step 4:
Add the chopped fresh dill and gently mix to distribute evenly.

🥄 Step 5:
In a separate bowl, combine mayonnaise, lemon juice, salt, and black pepper. Stir until smooth and creamy.

➡️ Step 6:
Pour the dressing over the crab and cucumber mixture.

🥗 Step 7:
Gently toss everything together until all ingredients are evenly coated with the dressing.

❄️ Step 8:
Cover and refrigerate for 15–20 minutes to allow the flavors to blend.

🍽️ Step 9:
Serve chilled and garnish with extra dill and a sprinkle of black pepper.

❓Q & A

Q: Can I use real crab meat instead of imitation crab?
A: Yes! Real crab meat adds a richer seafood flavor and works wonderfully.

Q: How long can I store this salad?
A: Store in an airtight container in the refrigerator for up to 2 days.

Q: Can I prepare it in advance?
A: Yes, making it a few hours ahead actually helps the flavors develop even more.

Cheesy Zucchini Breakfast Bake

Ingredients

  • 2 medium zucchini, grated
  • 4 eggs
  • 1 cup shredded mozzarella cheese
  • ½ cup diced ham (or cooked chicken)
  • ¼ cup grated Parmesan cheese
  • ½ tsp salt
  • ½ tsp black pepper

👩‍🍳 Step-by-Step Instructions

1️⃣ Prepare the Zucchini

  • Grate the zucchini into a large bowl.
  • Sprinkle with a little salt and let sit for 10 minutes.
  • Squeeze out as much liquid as possible using a clean kitchen towel.

2️⃣ Mix the Ingredients

  • Add eggs to the zucchini.
  • Add mozzarella cheese, diced ham, Parmesan cheese, black pepper, and salt.
  • Mix well until everything is evenly combined.

3️⃣ Prepare the Baking Dish

  • Preheat oven to 375°F (190°C).
  • Lightly grease a square baking dish or line it with parchment paper.

4️⃣ Fill the Dish

  • Pour the mixture into the baking dish.
  • Spread evenly with a spoon.

5️⃣ Bake

  • Bake for 30–35 minutes until golden brown on top.
  • The center should be set and no longer jiggly.

6️⃣ Cool and Slice

  • Let cool for 5–10 minutes.
  • Cut into squares.

7️⃣ Serve

  • Serve warm for breakfast, lunch, or a light dinner.
  • Enjoy with a fresh salad or yogurt dip.

🌟 Why You’ll Love It

  • High in protein
  • Low carb
  • Easy to make
  • Great for meal prep
  • Kid-friendly

❓Q&A

Q: Can I make it without ham?
✅ Yes! Simply leave it out or replace it with cooked vegetables.

Q: Can I store leftovers?
✅ Yes, refrigerate for up to 3 days.

Q: Can I freeze it?
✅ Yes, freeze individual slices and reheat when needed.

⏱️ Prep Time: 15 minutes
⏱️ Bake Time: 35 minutes
🍽️ Servings: 6 squares
🥒🧀✨ Perfect for a quick, healthy, and satisfying meal!

Creamy Crab & Cucumber Salad

Creamy Crab & Cucumber Salad

Ingredients

  • 250 g imitation crab sticks, shredded
  • 2 cucumbers, diced
  • ½ cup mayonnaise
  • 1 tbsp lemon juice
  • 1 tbsp fresh dill, chopped
  • Salt, to taste
  • Black pepper, to taste

Instructions

🥒 Step 1:
Wash and dice the cucumbers into small bite-sized pieces.

🦀 Step 2:
Shred the crab sticks into thin strips and place them in a large mixing bowl.

🥒 Step 3:
Add the diced cucumbers and fresh dill to the bowl.

🥣 Step 4:
In a small bowl, mix mayonnaise, lemon juice, salt, and black pepper until smooth.

➡️ Step 5:
Pour the dressing over the crab and cucumber mixture.

🥄 Step 6:
Gently toss everything together until evenly coated.

❄️ Step 7:
Refrigerate for 15–20 minutes before serving for the best flavor.

🍽️ Step 8:
Serve chilled and garnish with extra dill and black pepper if desired.

Q & A

Q: Can I use real crab meat?
A: Yes, real crab meat works perfectly in this recipe.

Q: How long does it last in the refrigerator?
A: Up to 2 days in an airtight container.

Q: Can I make it ahead of time?
A: Yes, prepare it a few hours ahead and keep it chilled until serving.

Egg Muffins with Veggies

Egg Muffins with Veggies

Ingredients

  • 12 large eggs
  • 1/4 cup milk
  • 1/2 teaspoon salt
  • 1/4 teaspoon black pepper
  • 1 cup broccoli florets, chopped
  • 1/2 cup bell pepper, diced
  • 1/2 cup shredded cheddar cheese
  • Non-stick cooking spray

Instructions

1️⃣ Prepare the Oven

  • Preheat oven to 375°F (190°C).
  • Lightly grease a 12-cup muffin tin.

2️⃣ Prepare the Vegetables

  • Finely chop the broccoli.
  • Dice the bell pepper into small pieces.

3️⃣ Make the Egg Mixture

  • In a large bowl, whisk together eggs, milk, salt, and black pepper until smooth.

4️⃣ Fill the Muffin Cups

  • Divide the broccoli and bell pepper evenly among the muffin cups.
  • Sprinkle cheese over the vegetables.

5️⃣ Add the Eggs

  • Pour the egg mixture into each muffin cup, filling about 3/4 full.

6️⃣ Bake

  • Bake for 18–22 minutes or until the centers are set and the tops are lightly golden.

7️⃣ Cool & Serve

  • Let cool for 5 minutes.
  • Carefully remove from the muffin tin and serve warm.

Q & A

Q: Can I add other vegetables?
➡️ Yes, spinach, mushrooms, onions, zucchini, and tomatoes work well.

Q: Can I freeze them?
➡️ Yes, freeze for up to 2 months and reheat when needed.

Q: How long do they last in the fridge?
➡️ Up to 4 days in an airtight container.

Servings: 12 egg muffins 🥚🧀🥦🫑

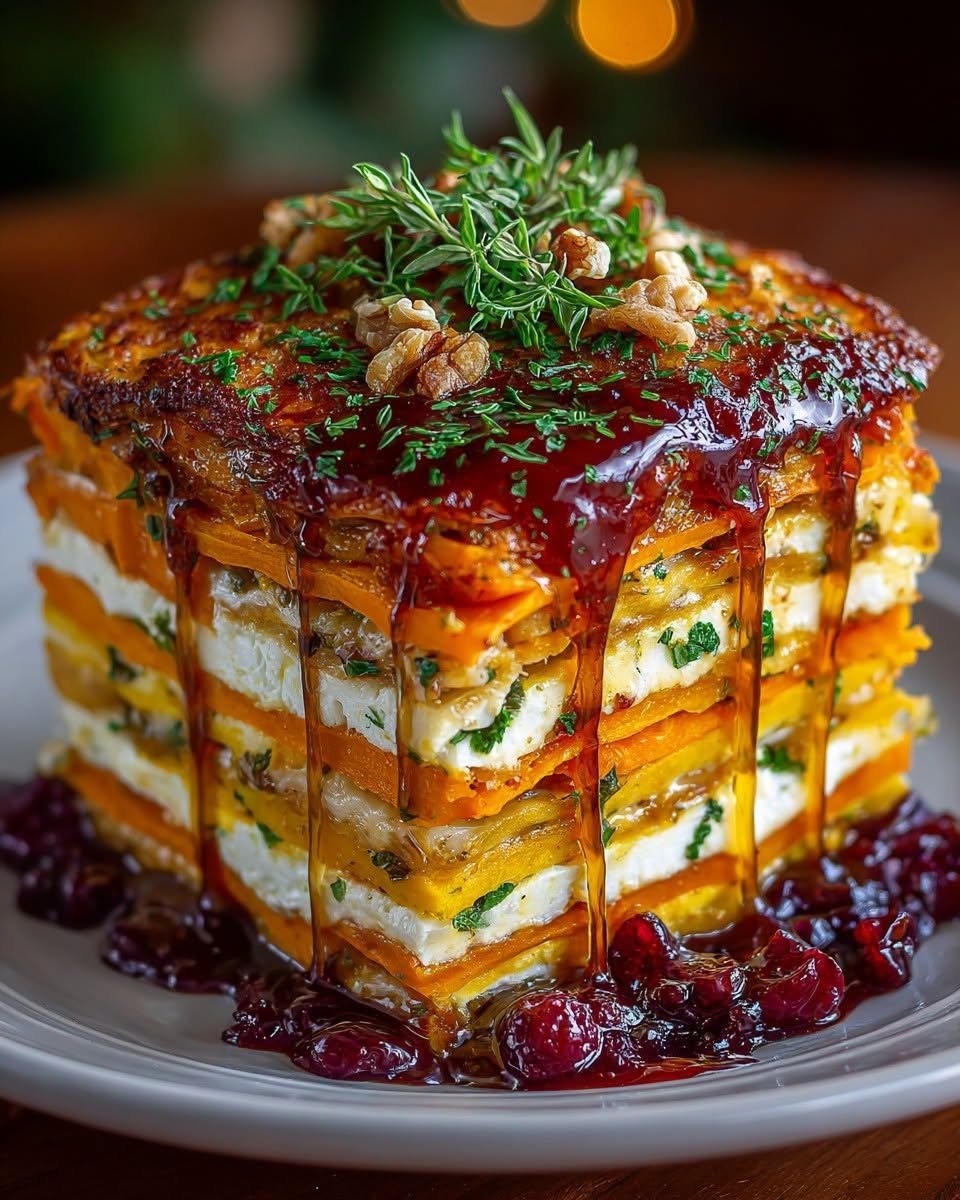
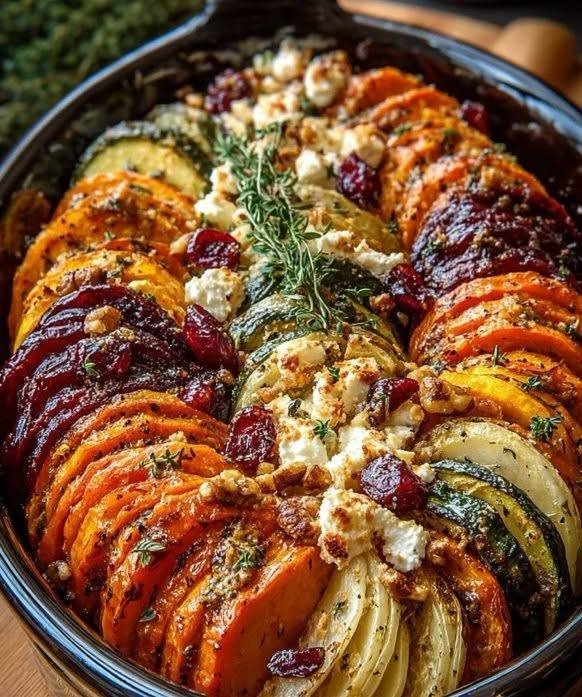
Roasted Butternut Squash with Burrata, Walnuts, and Cranberries

Using butternut squash instead of sweet potato keeps the carbohydrate count lower while maintaining that beautiful caramelized orange color, making it an excellent fit for a low-carb or Mediterranean framework.

Prep time: 10 minutes | Cook time: 30 minutes | Servings: 4-6

Ingredients

For the Roast:

  • 1 large butternut squash (or 3 medium sweet potatoes), peeled, deseeded, and cut into 1.5-inch cubes

  • 3 tbsp extra-virgin olive oil

  • 1 tsp coarse sea salt

  • ½ tsp freshly cracked black pepper

  • 1 tsp dried oregano or Italian seasoning

For the Toppings:

  • 8 oz (about 2 balls) fresh Burrata cheese (can substitute with dollops of whipped whole-milk ricotta)

  • ½ cup raw walnuts, roughly chopped

  • ⅓ cup dried cranberries (look for unsweetened or apple-juice sweetened to keep sugars low)

  • Fresh sprigs of rosemary and thyme

  • Optional garnish: A finishing drizzle of extra-virgin olive oil and a pinch of red pepper flakes for warmth.

Instructions

  1. Prepare the Oven and Pan: Preheat your oven to 200°C (400°F). Line a large, rimmed baking sheet with parchment paper for easy cleanup, or roast directly on a dark metal pan (as seen in the photo) for a deeper sear and better caramelization on the edges.

  2. Season and Roast: Place the cubed squash onto the baking sheet. Drizzle with the extra-virgin olive oil and sprinkle evenly with sea salt, black pepper, and dried oregano. Toss well until every cube is fully coated. Spread them out into a single, even layer so they roast rather than steam.

  3. Bake: Roast in the preheated oven for 25–30 minutes, tossing halfway through, until the squash is fork-tender and the edges have developed a deep, golden-brown caramelization.

  4. Toast the Walnuts: While the squash is roasting, place the chopped walnuts in a dry skillet over medium heat. Toast for 3–5 minutes, stirring frequently, until fragrant. Remove from heat immediately so they don’t burn.

  5. Assemble the Dish: Remove the roasted squash from the oven. While the vegetables are still warm, gently tear the balls of Burrata into large pieces and nestle them evenly across the pan among the hot squash. The residual heat will soften the cheese beautifully.

  6. Garnish and Serve: Scatter the toasted walnuts and dried cranberries over the top. Artfully arrange fresh sprigs of thyme and rosemary across the dish. Finish with a light drizzle of high-quality extra-virgin olive oil and a pinch of red pepper flakes directly over the burrata. Serve immediately straight from the pan!

Southern Green Beans with Bacon

Southern Green Beans with Bacon

Ingredients 🛒

  • 4 cups green beans (fresh, frozen, or canned)
  • 6 slices bacon, chopped
  • 1 small onion, diced
  • 1 cup chicken broth
  • Salt and black pepper, to taste

Detailed Steps 👩‍🍳

1️⃣ Cook the Bacon

  • Place a large skillet or pot over medium heat.
  • Add the chopped bacon.
  • Cook for 6–8 minutes, stirring occasionally, until crispy.
  • Remove half of the bacon and set aside for garnish.

2️⃣ Sauté the Onion

  • Add the diced onion to the bacon drippings.
  • Cook for 3–4 minutes until soft and lightly golden.
  • Stir frequently so the onion doesn’t burn.

3️⃣ Add the Green Beans

  • Add the green beans to the pot.
  • Stir well so they are coated with the bacon and onion mixture.

4️⃣ Pour in the Broth

  • Add the chicken broth.
  • Season with a little salt and black pepper.
  • Stir everything together.

5️⃣ Simmer

  • Bring the mixture to a gentle simmer.
  • Cover with a lid and cook for 20–25 minutes.
  • Stir occasionally.
  • The beans should become tender and absorb the smoky bacon flavor.

6️⃣ Finish the Dish

  • Remove the lid.
  • Let any excess liquid reduce for 2–3 minutes if needed.
  • Stir in the reserved crispy bacon.

7️⃣ Serve

  • Transfer to a serving bowl.
  • Spoon a little of the flavorful broth over the top.
  • Serve warm as a side dish with chicken, beef, or your favorite comfort-food meal.

Nutrition Benefits 💪

Good Source of Protein

  • Bacon and green beans provide protein to help keep you satisfied.

Rich in Fiber

  • Green beans contain fiber that supports healthy digestion.

Low-Carb Side Dish

  • Naturally lower in carbohydrates than many traditional side dishes.

Approximate Protein Content

  • Per Serving: 8–10g protein
  • Whole Recipe: 30–40g protein

Quick Q/A ❓

Can I use canned green beans?
➡️ Yes, drain them well before adding.

Can I use frozen green beans?
➡️ Yes, no need to thaw first.

Can I make this ahead of time?
➡️ Yes, it tastes even better the next day after the flavors have blended.

Lemon Herb Salmon with Roasted Vegetables

Lemon Herb Salmon with Roasted Vegetables

Ingredients 🛒

For the Salmon

  • 4 salmon fillets
  • 1 tbsp olive oil
  • Salt and black pepper

For the Vegetables

  • 2 cups baby potatoes, halved
  • 1 zucchini, sliced
  • 1 cup broccoli florets
  • 1 tbsp olive oil
  • Salt and black pepper

For Serving

  • Lemon wedges
  • ½ cup Greek yogurt (optional)

Detailed Steps 👩‍🍳

1️⃣ Prepare the Vegetables

  • Wash the potatoes, zucchini, and broccoli thoroughly.
  • Cut the potatoes in half so they cook faster.
  • Slice the zucchini into thick rounds.
  • Cut the broccoli into bite-sized florets.
  • Place all vegetables in a large mixing bowl.
  • Add olive oil, salt, and black pepper.
  • Toss well until every piece is lightly coated.

2️⃣ Roast the Vegetables

  • Preheat the oven to 400°F (200°C).
  • Spread the vegetables evenly on a baking tray.
  • Make sure they are in a single layer for even roasting.
  • Bake for 25 minutes, stirring once halfway through.
  • The vegetables should be golden and tender when done.

3️⃣ Prepare the Salmon

  • Pat the salmon fillets dry with paper towels.
  • Rub both sides with olive oil.
  • Season generously with salt and black pepper.

4️⃣ Cook the Salmon

  • Heat a non-stick skillet over medium heat.
  • Place the salmon in the skillet.
  • Cook for 4–5 minutes on the first side without moving it.
  • Carefully flip and cook for another 3–4 minutes.
  • The salmon should be golden on the outside and flaky inside.

5️⃣ Assemble the Plate

  • Arrange the roasted vegetables on a serving plate.
  • Place the salmon fillets on top or beside the vegetables.
  • Add a lemon wedge on the side.
  • If desired, serve with a spoonful of Greek yogurt.

6️⃣ Serve

  • Serve immediately while warm.
  • Squeeze fresh lemon juice over the salmon just before eating for extra flavor.

Nutrition Benefits 💪

High in Protein

  • Salmon is packed with high-quality protein.
  • Each serving provides approximately 35–40g of protein, helping keep you full and supporting muscle health.

Rich in Healthy Fats

  • Salmon contains omega-3 fatty acids that support heart and brain health.

Loaded with Nutrients

  • Broccoli, zucchini, and potatoes provide fiber, vitamins, and minerals for a balanced meal.

Approximate Protein Content

  • Per Serving: 35–40g protein
  • Whole Recipe: 140–160g protein

Quick Q/A ❓

Can I use frozen salmon?
➡️ Yes, thaw completely before cooking.

Can I air-fry the salmon?
➡️ Yes, air-fry at 400°F (200°C) for 8–10 minutes.

Is this recipe good for meal prep?
➡️ Yes, store in the refrigerator for up to 3 days.

Zesty Cucumber & Pepper Garden Salad

Zesty Cucumber & Pepper Garden Salad

Ingredients 🛒

  • 2 large cucumbers, thinly sliced
  • 1 red bell pepper, thinly sliced
  • ½ red onion, thinly sliced
  • 2 tbsp olive oil
  • 1 tbsp fresh lemon juice
  • 1 tsp honey
  • ½ tsp salt
  • ¼ tsp black pepper
  • ½ tsp chili flakes (optional)
  • 1 tbsp fresh parsley, chopped

Detailed Steps 👩‍🍳

1️⃣ Prepare the Vegetables

  • Wash the cucumbers, bell pepper, and onion thoroughly.
  • Slice the cucumbers into thin rounds.
  • Cut the bell pepper into thin strips.
  • Slice the red onion into thin half-rings.
  • Chop the parsley finely.

2️⃣ Make the Dressing

  • In a small bowl, add olive oil, lemon juice, honey, salt, and black pepper.
  • Whisk well until the dressing looks smooth and fully combined.

3️⃣ Combine the Salad

  • Place the sliced cucumbers, bell pepper, and onion into a large mixing bowl.
  • Sprinkle the chopped parsley over the vegetables.
  • Pour the prepared dressing evenly over the top.

4️⃣ Toss Well

  • Using salad tongs or a large spoon, gently toss everything together.
  • Continue mixing for 1–2 minutes so every vegetable slice is coated with the dressing.

5️⃣ Chill for Better Flavor

  • Cover the bowl or transfer the salad to a glass container.
  • Refrigerate for 20–30 minutes.
  • Chilling helps the vegetables absorb the dressing and become more flavorful.

6️⃣ Serve

  • Give the salad one final toss before serving.
  • Serve cold as a refreshing side dish, light lunch, or healthy snack.

Quick Q/A ❓

Can I make it ahead of time?
➡️ Yes, it can be prepared up to 24 hours in advance.

Can I add cheese?
➡️ Yes, crumbled feta cheese pairs perfectly with this salad.

How long does it stay fresh?
➡️ Store in the refrigerator for up to 2 days.

Marinated Cucumber Onion Salad

Ingredients

  • 2 large cucumbers, thinly sliced
  • 1 medium white onion, thinly sliced
  • 1 cup cold water
  • ½ cup white vinegar
  • 2 tbsp sugar
  • 1 tsp salt
  • ½ tsp black pepper

Instructions

Step 1

  • Wash the cucumbers and slice them into thin rounds.
  • Slice the onion into thin rings.

Step 2

  • Place the cucumbers and onions in a large container or bowl.

Step 3

  • In a separate bowl, whisk together water, vinegar, sugar, salt, and black pepper until the sugar dissolves.

Step 4

  • Pour the mixture over the cucumbers and onions.

Step 5

  • Cover and refrigerate for at least 2 hours.

Step 6

  • Stir gently before serving.

Step 7

  • Serve chilled as a refreshing side dish.

Q & A

Q: Can I make this ahead of time?
A: Yes, it tastes even better after chilling overnight.

Q: How long will it keep?
A: Store covered in the refrigerator for up to 5 days.

Q: Can I add fresh herbs?
A: Yes, dill or parsley adds extra flavor.

Keto Broccoli Cheddar Chicken Rollups – Cheesy & Low-Carb!

Keto Broccoli Cheddar Chicken Rollups

Ingredients

  • 4 boneless, skinless chicken breasts
  • 1 cup broccoli, finely chopped
  • 1 cup cheddar cheese, shredded
  • 2 oz cream cheese, softened
  • 1 tsp garlic powder
  • 1 tsp paprika
  • Salt and black pepper to taste
  • 1 tbsp olive oil

Instructions

Step 1

Preheat the oven to 375°F (190°C). Lightly grease a baking dish.

Step 2

Place the chicken breasts between two sheets of plastic wrap and pound them to an even thickness.

Step 3

In a bowl, combine the broccoli, cheddar cheese, cream cheese, garlic powder, salt, and black pepper.

Step 4

Spread the broccoli mixture evenly over each chicken breast.

Step 5

Roll up the chicken tightly and secure with toothpicks if needed.

Step 6

Brush the rollups with olive oil and sprinkle with paprika.

Step 7

Place the rollups seam-side down in the prepared baking dish.

Step 8

Bake for 30–35 minutes, or until the chicken reaches an internal temperature of 165°F (74°C).

Step 9

Let rest for 5 minutes before serving.

Q&A

Can I use frozen broccoli?
Yes. Thaw and drain well before mixing with the cheese.

Can I make these ahead of time?
Yes. Assemble the rollups up to 24 hours in advance and refrigerate until ready to bake.

Are these keto-friendly?
Yes. They are low in carbs and high in protein and healthy fats.

Sourdough Blueberry Bagels

Sourdough Blueberry Bagels

These Sourdough Blueberry Bagels are soft, chewy, and packed with juicy blueberries in every bite. Made with active sourdough starter, they have a delicious depth of flavor that sets them apart from store-bought bagels. The slight tang of sourdough pairs perfectly with the natural sweetness of blueberries, creating a bakery-style breakfast that’s both comforting and satisfying.Whether you enjoy them toasted with cream cheese or fresh from the oven, these homemade blueberry bagels are worth the effort and make a wonderful addition to your breakfast routine.

Why You’ll Love This Recipe

Made with active sourdough starter

Soft, chewy bagel texture

Naturally flavored with blueberries

Perfect for breakfast or brunch

Freezer-friendly and meal-prep friendly

Better than store-bought bagels

Prep Time: 30 minutes

Rise Time: 8–12 hours

Cook Time: 25 minutes

Total Time: About 10–13 hours

Servings: 8 bagels

Cuisine: American

Course: Breakfast, Bread

Ingredients

For the Bagel Dough

1 cup active sourdough starter

1 cup warm water

3 tablespoons honey

4 cups bread flour

1½ teaspoons salt

1 cup fresh or frozen blueberries

For Boiling

8 cups water

1 tablespoon honey

Optional Toppings

Coarse sugar

Lemon zest

Cinnamon sugar

Instructions

Step 1: Make the Dough

In a large bowl, mix together the sourdough starter, warm water, and honey.

Add the bread flour and salt, then mix until a shaggy dough forms.

Gently fold in the blueberries, being careful not to crush them too much.

Step 2: Knead the Dough

Transfer the dough to a lightly floured surface and knead for about 8–10 minutes until smooth and elastic.

Place the dough in a lightly greased bowl and cover.

Step 3: First Rise

Allow the dough to rise at room temperature for 8–12 hours, or overnight, until noticeably puffy.

Step 4: Shape the Bagels

Divide the dough into 8 equal pieces.

Roll each piece into a ball, then poke a hole through the center and gently stretch to form a bagel shape.

Place the shaped bagels on a parchment-lined baking sheet.

Step 5: Boil the Bagels

Preheat the oven to 425°F (220°C).

Bring the water and honey to a gentle boil.

Boil each bagel for 30 seconds per side, then transfer back to the baking sheet.

Step 6: Bake

Bake for 22–25 minutes, or until golden brown and cooked through.

Allow the bagels to cool on a wire rack before serving.

Notes & Tips
Recipe Notes

Fresh blueberries hold their shape better during mixing.

Frozen blueberries can be used directly from the freezer.

Bread flour creates the classic chewy bagel texture.

Expert Tips

Use an active, bubbly sourdough starter for the best rise.

Wet your hands slightly when shaping sticky dough.

Don’t skip the boiling step, as it’s essential for authentic bagel texture.

Add lemon zest to the dough for a fresh blueberry-lemon flavor.

Frequently Asked Questions

Can I use frozen blueberries?

Yes. Add them frozen to help prevent excess moisture and color bleeding.

Why do bagels need to be boiled?

Boiling creates the chewy exterior that makes bagels unique.

Can I make the dough ahead of time?

Absolutely. After shaping, refrigerate the bagels overnight and bake the next day.

How do I store sourdough blueberry bagels?

Store in an airtight container at room temperature for up to 3 days.

Can I freeze them?

Yes. Freeze cooled bagels for up to 3 months and thaw as needed.

Nutritional Information

Calories: 260

Protein: 8g

Carbohydrates: 52g

Fiber: 2g

Sugar: 7g

Fat: 1g

Saturated Fat: 0g

Sodium: 350mg

Final Thoughts

These Sourdough Blueberry Bagels are a delicious homemade treat that combines the tangy flavor of sourdough with bursts of sweet blueberries. They’re chewy, flavorful, and perfect for breakfast, brunch, or a snack any time of day. Once you make a batch from scratch, you’ll understand why homemade bagels are so hard to resist.

Homemade Gluten Free Pizza

Homemade Gluten-Free Pizza

Making gluten-free pizza at home is easier than you might think. This Homemade Gluten-Free Pizza features a crispy crust, a flavorful tomato sauce, and plenty of melted cheese for a delicious pizza that’s every bit as satisfying as the traditional version. Whether you’re following a gluten-free diet or simply looking for a homemade pizza recipe everyone can enjoy, this recipe delivers great flavor and texture with simple ingredients.Best of all, you can customize the toppings to suit your taste, making it perfect for family pizza nights, parties, or easy weeknight dinners.

Why You’ll Love This Recipe

Easy homemade gluten-free pizza dough

Crispy edges with a tender center

Naturally customizable with your favorite toppings

Perfect for gluten-free diets

Family-friendly and freezer-friendly

Prep Time: 20 minutes

Rise Time: 30 minutes

Cook Time: 15 minutes

Total Time: 1 hour 5 minutes

Servings: 8 slices

Cuisine: Italian-Inspired

Course: Main Course, Dinner

Ingredients

For the Gluten-Free Pizza Dough

2 cups gluten-free all-purpose flour blend

1 teaspoon xanthan gum (if not included in the flour blend)

1 teaspoon instant yeast

1 teaspoon sugar

¾ teaspoon salt

¾ cup warm water

2 tablespoons olive oil

1 large egg

For the Pizza Toppings

½ cup pizza sauce

1½ cups shredded mozzarella cheese

¼ cup grated Parmesan cheese

Optional Toppings

Bell peppers

Mushrooms

Red onions

Black olives

Fresh basil

Pepperoni

Grilled chicken

Spinach

Instructions

Step 1: Prepare the Dough

In a large mixing bowl, combine the gluten-free flour, xanthan gum, yeast, sugar, and salt.

Add the warm water, olive oil, and egg. Mix until a soft dough forms. Gluten-free pizza dough will be wetter than traditional dough.

Step 2: Let the Dough Rise

Cover the bowl and allow the dough to rest in a warm place for about 30 minutes.

Meanwhile, preheat the oven to 425°F (220°C).

Step 3: Shape the Crust

Line a pizza pan or baking sheet with parchment paper.

Transfer the dough onto the prepared pan and use lightly oiled hands to spread it into a 10 to 12-inch circle.

Step 4: Pre-Bake the Crust

Bake the crust for 8 minutes.

This step helps create a crispier gluten-free pizza base.

Step 5: Add the Toppings

Remove the crust from the oven.

Spread the pizza sauce evenly over the surface, leaving a small border around the edges.

Top with mozzarella cheese, Parmesan cheese, and your favorite toppings.

Step 6: Bake the Pizza

Return the pizza to the oven and bake for 12–15 minutes, or until the cheese is melted and bubbly and the crust is lightly golden.

Step 7: Slice and Serve

Allow the pizza to cool for 5 minutes before slicing.

Serve warm and enjoy.

Notes & Tips
Recipe Notes

Different gluten-free flour blends absorb moisture differently.

Xanthan gum helps improve the texture and structure of the crust.

Pre-baking is essential for a crispier crust.

Expert Tips

Use parchment paper for easy handling.

Lightly oil your hands when shaping the dough.

Add fresh basil after baking for the best flavor.

For an extra crispy crust, bake the pizza on a preheated pizza stone.

Frequently Asked Questions

What is the best flour for gluten-free pizza?

A high-quality gluten-free all-purpose flour blend designed for baking usually works best.

Can I make the dough ahead of time?

Yes. The dough can be prepared and refrigerated for up to 24 hours before baking.

Can I freeze gluten-free pizza dough?

Absolutely. Freeze the dough for up to 2 months and thaw overnight in the refrigerator before using.

Why is my gluten-free pizza crust crumbly?

This often happens when there isn’t enough moisture or binder in the dough. Xanthan gum can help improve texture.

How do I store leftover pizza?

Store slices in an airtight container in the refrigerator for up to 3 days.

Nutritional Information

Calories: 220

Protein: 9g

Carbohydrates: 24g

Fiber: 2g

Sugar: 2g

Fat: 10g

Saturated Fat: 4g

Sodium: 310mg

Final Thoughts

This Homemade Gluten-Free Pizza proves that you don’t have to sacrifice flavor or texture when eating gluten-free. With a crispy homemade crust, melty cheese, and your favorite toppings, it’s a recipe that’s simple enough for weeknights yet delicious enough for special occasions. Once you try it, you’ll never miss takeout pizza again.

Greek Yogurt Chia Pudding

Greek Yogurt Chia Pudding

If you’re looking for a healthy breakfast that’s creamy, satisfying, and incredibly easy to make, this Greek Yogurt Chia Pudding is the perfect recipe. Made with protein-rich Greek yogurt, nutrient-packed chia seeds, and naturally sweet ingredients, this simple pudding creates a delicious make-ahead breakfast or snack that keeps you full for hours.Not only is it rich in protein and fiber, but it’s also highly customizable. Whether you top it with fresh berries, nuts, granola, or a drizzle of honey, this Greek yogurt chia pudding is a nutritious recipe you’ll want to make again and again.

Why You’ll Love This Recipe

High in protein and fiber

Perfect for meal prep

Naturally gluten-free

Quick and easy to make

Great for breakfast, snacks, or healthy desserts

Easily customizable with your favorite toppings

Prep Time: 5 minutes

Chill Time: 4 hours

Total Time: 4 hours 5 minutes

Servings: 2

Cuisine: Healthy, Mediterranean-Inspired

Course: Breakfast, Snack, Dessert

Ingredients

For the Chia Pudding

1 cup plain Greek yogurt

2 tablespoons chia seeds

½ cup milk of choice

1 tablespoon honey or maple syrup

1 teaspoon vanilla extract

Optional Toppings

Fresh strawberries

Blueberries

Raspberries

Sliced banana

Granola

Chopped almonds

Walnuts

Coconut flakes

Extra honey

Instructions

Step 1: Mix the Ingredients

In a medium bowl or mason jar, combine:

Greek yogurt

Chia seeds

Milk

Honey

Vanilla extract

Whisk until smooth and well combined.

Step 2: Let the Chia Seeds Absorb

Allow the mixture to sit for 5 minutes, then stir again to prevent clumping.

Step 3: Refrigerate

Cover and refrigerate for at least 4 hours or overnight.

During this time, the chia seeds will absorb the liquid and create a thick, creamy pudding.

Step 4: Add Toppings and Serve

Before serving, stir the pudding and add your favorite toppings.

Serve chilled and enjoy.

Notes & Tips
Recipe Notes

Full-fat Greek yogurt creates the creamiest texture.

Overnight chilling produces the best consistency.

Adjust the sweetness to your preference.

Expert Tips

Stir the mixture twice during the first 10 minutes to prevent chia seed clumps.

Add fresh fruit right before serving.

For extra protein, use high-protein Greek yogurt.

If the pudding becomes too thick, stir in a splash of milk before serving.

Frequently Asked Questions

Is Greek yogurt chia pudding healthy?

Yes. It’s packed with protein, fiber, calcium, probiotics, and healthy fats, making it a balanced breakfast or snack.

How long does chia pudding last?

Stored in an airtight container, it will stay fresh in the refrigerator for up to 5 days.

Can I make it dairy-free?

Absolutely. Use dairy-free yogurt and plant-based milk alternatives.

Why didn’t my chia pudding thicken?

The most common reason is not using enough chia seeds or not allowing enough chilling time.

Can I freeze chia pudding?

Yes, although the texture may change slightly after thawing.

What are the best toppings for chia pudding?

Fresh berries, bananas, nuts, seeds, granola, nut butter, and coconut flakes are all excellent options.

Nutritional Information 

Calories: 220

Protein: 16g

Carbohydrates: 14g

Fiber: 5g

Sugar: 8g

Fat: 10g

Saturated Fat: 3g

Sodium: 65mg

Storage Instructions

Store Greek yogurt chia pudding in airtight jars or containers in the refrigerator for up to 5 days. For the freshest texture, add fruit and crunchy toppings just before serving.

Final Thoughts

This Greek Yogurt Chia Pudding is one of the easiest healthy recipes you can prepare ahead of time. The combination of creamy Greek yogurt and nutrient-rich chia seeds creates a delicious breakfast that’s filling, nutritious, and endlessly customizable. Whether you’re meal prepping for the week or need a quick grab-and-go breakfast, this recipe delivers both flavor and convenience.

Easy Shrimp Scampi

Easy Shrimp Scampi

This Easy Shrimp Scampi is a classic seafood dish that’s elegant enough for guests but simple enough for a weeknight dinner. Juicy shrimp are cooked in a buttery garlic sauce with fresh lemon juice and a touch of parsley, creating a light yet incredibly flavorful meal.The best part? It comes together in just 20 minutes using simple pantry ingredients. Serve it over pasta, rice, or with crusty bread to soak up every last drop of the delicious sauce.

Prep Time: 10 minutes

Cook Time: 10 minutes

Total Time: 20 minutes

Servings: 4

Cuisine: Italian-American

Course: Dinner, Main Course

Ingredients

For the Shrimp Scampi

1 pound large shrimp, peeled and deveined

2 tablespoons olive oil

3 tablespoons unsalted butter

4 garlic cloves, minced

Juice of 1 lemon

¼ teaspoon red pepper flakes

2 tablespoons fresh parsley, chopped

Salt and black pepper, to taste

Optional for Serving

Cooked linguine or spaghetti

Steamed rice

Crusty bread

Extra lemon wedges

Grated Parmesan cheese

Instructions

Step 1: Season the Shrimp

Pat the shrimp dry with paper towels and season lightly with salt and black pepper.

Step 2: Cook the Shrimp

Heat the olive oil and 1 tablespoon of butter in a large skillet over medium-high heat.

Add the shrimp and cook for 1–2 minutes per side until pink and opaque.

Transfer the shrimp to a plate.

Step 3: Make the Garlic Butter Sauce

Reduce the heat to medium.

Add the remaining butter and minced garlic to the skillet.

Cook for about 30 seconds until fragrant, being careful not to burn the garlic.

Step 4: Add Lemon and Seasoning

Stir in:

Lemon juice

Red pepper flakes

Parsley

Allow the sauce to simmer for 1 minute.

Step 5: Combine and Serve

Return the shrimp to the skillet and toss to coat in the sauce.

Cook for another minute until heated through.

Serve immediately over pasta, rice, or alongside warm bread.

Notes & Tips
Recipe Notes

Large or jumbo shrimp work best for this recipe.

Fresh lemon juice provides the brightest flavor.

Use unsalted butter so you can better control the seasoning.

Expert Tips

Don’t overcook the shrimp, as they can become rubbery.

Pat the shrimp dry before cooking for better browning.

Add a splash of white wine to the sauce for extra depth of flavor.

Garnish with extra parsley and lemon wedges before serving.

Frequently Asked Questions

Can I use frozen shrimp?

Yes. Thaw completely and pat dry before cooking.

How do I store leftovers?

Store in an airtight container in the refrigerator for up to 2 days.

Can I make shrimp scampi without pasta?

Absolutely. It pairs wonderfully with rice, zucchini noodles, vegetables, or crusty bread.

What type of shrimp should I use?

Large or jumbo shrimp are ideal because they stay juicy and tender during cooking.

Can I add vegetables?

Yes. Spinach, asparagus, cherry tomatoes, or broccoli make excellent additions.

Nutritional Information

Calories: 260

Protein: 25g

Carbohydrates: 3g

Fiber: 0g

Sugar: 1g

Fat: 16g

Saturated Fat: 6g

Sodium: 420mg

Final Thoughts

This Easy Shrimp Scampi is one of those recipes that proves simple ingredients can create incredible flavor. The combination of tender shrimp, garlic butter, fresh lemon, and herbs makes for a quick, satisfying meal that feels both comforting and elegant. Whether served over pasta or enjoyed on its own, it’s a recipe you’ll want to keep in regular rotation.

Pesto Chicken Flatbread with Mozzarella

Pesto Chicken Flatbread with Mozzarella

This Pesto Chicken Flatbread with Mozzarella is an easy, restaurant-quality meal that’s perfect for busy weeknights, quick lunches, or casual entertaining. Crispy flatbread is topped with juicy chicken, creamy mozzarella, and flavorful basil pesto, then baked until golden and bubbly.Every bite is packed with fresh Italian-inspired flavors, making it a simple recipe that feels special without requiring much effort. Best of all, it’s ready in under 30 minutes.

Prep Time: 10 minutes

Cook Time: 12 minutes

Total Time: 22 minutes

Servings: 4

Cuisine: Italian-Inspired

Course: Lunch, Dinner, Appetizer

Ingredients

For the Flatbread

2 flatbreads or naan breads

1½ cups cooked chicken breast, shredded or sliced

½ cup basil pesto

1½ cups shredded mozzarella cheese

½ cup cherry tomatoes, halved

2 tablespoons grated Parmesan cheese

Optional Toppings

Fresh basil leaves

Red pepper flakes

Arugula

Balsamic glaze

Sun-dried tomatoes

Instructions

Step 1: Prepare the Oven

Preheat your oven to 425°F (220°C).

Line a baking sheet with parchment paper.

Step 2: Assemble the Flatbreads

Place the flatbreads on the baking sheet.

Spread the pesto evenly over each flatbread, leaving a small border around the edges.

Top with:

Chicken

Mozzarella cheese

Cherry tomatoes

Parmesan cheese

Step 3: Bake

Bake for 10–12 minutes, or until the cheese is melted and bubbly and the edges are lightly golden.

Step 4: Finish and Serve

Remove from the oven and let cool for 2 minutes.

Top with fresh basil, arugula, red pepper flakes, or a drizzle of balsamic glaze if desired.

Slice and serve warm.

Notes & Tips
Recipe Notes

Rotisserie chicken works perfectly for a quick shortcut.

Fresh mozzarella can be used for a creamier texture.

Homemade or store-bought pesto both work well.

Expert Tips

Pre-bake the flatbread for 2–3 minutes if you prefer a crispier crust.

Don’t overload the flatbread with toppings to keep it crispy.

Add arugula after baking for a fresh peppery flavor.

A drizzle of balsamic glaze adds a delicious sweet and tangy finish.

Frequently Asked Questions

Can I make this ahead of time?

Yes. Assemble the flatbread up to 8 hours ahead and refrigerate until ready to bake.

What type of flatbread works best?

Naan, pita flatbread, or store-bought flatbread all work well.

Can I use a different cheese?

Absolutely. Provolone, fontina, burrata, or a mozzarella blend are great options.

How do I store leftovers?

Store in an airtight container in the refrigerator for up to 3 days.

What should I serve with pesto chicken flatbread?

It pairs well with a green salad, Caesar salad, roasted vegetables, or a bowl of soup.

Nutritional Information 

Calories: 420

Protein: 30g

Carbohydrates: 24g

Fiber: 2g

Sugar: 3g

Fat: 22g

Saturated Fat: 8g

Sodium: 620mg

Final Thoughts

This Pesto Chicken Flatbread with Mozzarella is a simple yet flavorful recipe that delivers big results with minimal effort. The combination of crispy flatbread, savory chicken, creamy mozzarella, and fragrant pesto creates a delicious meal that’s perfect for any day of the week. Whether you’re serving it as a quick dinner or sharing it as an appetizer, it’s guaranteed to be a crowd-pleaser.

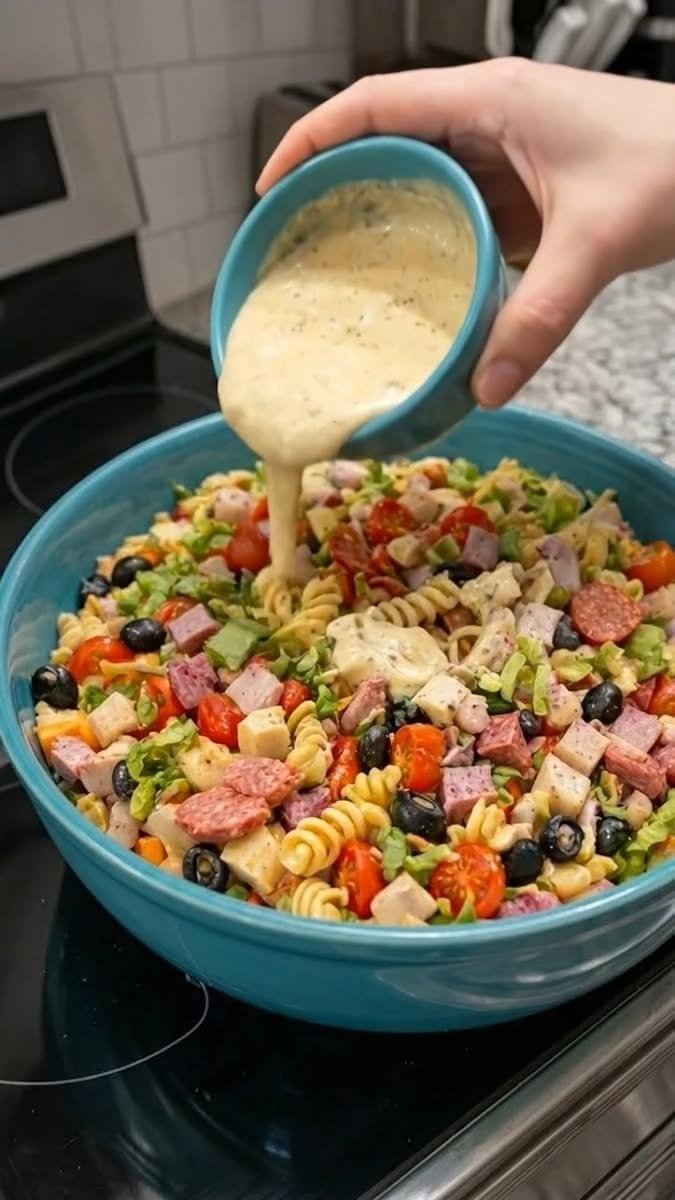
Olive Garden Pasta Salad

Olive Garden Pasta Salad

This Olive Garden Pasta Salad brings all the flavors of the famous restaurant salad into a hearty and satisfying pasta dish. Tender pasta is tossed with crisp vegetables, olives, pepperoncini peppers, and a zesty Italian dressing, creating a refreshing salad that’s perfect for potlucks, barbecues, meal prep, or easy lunches.The best part is that it comes together quickly and tastes even better after chilling, allowing all the flavors to blend beautifully.

Prep Time: 15 minutes

Cook Time: 10 minutes

Total Time: 25 minutes

Chill Time: 30 minutes

Servings: 6

Cuisine: Italian-American

Course: Salad, Side Dish, Lunch

Ingredients

For the Salad

12 oz rotini pasta

1 cup cherry tomatoes, halved

1 cucumber, diced

1 green bell pepper, diced

¼ red onion, thinly sliced

½ cup black olives, sliced

¼ cup pepperoncini peppers, sliced

½ cup Parmesan cheese, grated

For the Dressing

½ cup Italian dressing

1 tablespoon red wine vinegar

½ teaspoon Italian seasoning

¼ teaspoon garlic powder

Freshly ground black pepper, to taste

Optional Add-Ins

Grilled chicken

Salami

Mozzarella pearls

Chickpeas

Croutons

Instructions

Step 1: Cook the Pasta

Bring a large pot of salted water to a boil.

Cook the pasta according to package instructions until al dente. Drain and rinse under cold water to cool completely.

Step 2: Prepare the Vegetables

While the pasta cools, chop the tomatoes, cucumber, bell pepper, onion, olives, and pepperoncini peppers.

Step 3: Make the Dressing

In a small bowl, whisk together the Italian dressing, red wine vinegar, Italian seasoning, garlic powder, and black pepper.

Step 4: Assemble the Salad

In a large bowl, combine:

Cooked pasta

Tomatoes

Cucumber

Bell pepper

Red onion

Olives

Pepperoncini peppers

Pour the dressing over the salad and toss until everything is evenly coated.

Step 5: Finish and Serve

Sprinkle the Parmesan cheese over the top and toss gently.

For the best flavor, refrigerate for at least 30 minutes before serving.

Notes & Tips
Recipe Notes

Rotini pasta holds the dressing exceptionally well.

Chilling the salad helps the flavors develop.

Add extra dressing before serving if the pasta absorbs too much.

Expert Tips

Cook the pasta just until al dente to prevent it from becoming soft.

Use freshly grated Parmesan for the best flavor.

Add grilled chicken to turn this into a complete meal.

Reserve a little dressing to refresh leftovers.

Frequently Asked Questions

Can I make this pasta salad ahead of time?

Yes! In fact, it’s even better after a few hours in the refrigerator.

How long does it last?

Store in an airtight container in the refrigerator for up to 4 days.

What pasta works best?

Rotini, fusilli, bow ties, or penne all work well.

Can I make it vegetarian?

Absolutely. Simply leave out any meat additions and enjoy as is.

What can I serve with Olive Garden Pasta Salad?

It pairs perfectly with grilled chicken, burgers, sandwiches, seafood, or Mediterranean-inspired dishes.

Nutritional Information

Calories: 310

Protein: 9g

Carbohydrates: 38g

Fiber: 3g

Sugar: 4g

Fat: 14g

Saturated Fat: 3g

Sodium: 520mg

Final Thoughts

This Olive Garden Pasta Salad is fresh, colorful, and full of bold Italian flavors. The combination of tender pasta, crunchy vegetables, tangy pepperoncini peppers, and zesty dressing makes it a crowd-pleasing recipe that’s easy enough for everyday meals and impressive enough for gatherings. It’s a simple dish you’ll find yourself making all year long.

Avocado Hummus Recipe

Avocado Hummus

This Avocado Hummus is a creamy, flavorful twist on traditional hummus. By combining ripe avocados with protein-rich chickpeas, you get a smooth and delicious dip that’s packed with healthy fats, fiber, and fresh Mediterranean flavors. The addition of lemon, garlic, and tahini creates a bright and satisfying spread that’s perfect for snacking, sandwiches, wraps, or serving as an appetizer.Not only is this recipe quick to make, but it’s also naturally vegetarian, nutritious, and ideal for meal prep.

Prep Time: 10 minutes

Cook Time: 0 minutes

Total Time: 10 minutes

Servings: 6

Cuisine: Mediterranean

Course: Appetizer, Dip, Snack

Ingredients

1 ripe avocado

1 can (15 oz) chickpeas, drained and rinsed

2 tablespoons tahini

Juice of 1 lemon

1 garlic clove

2 tablespoons extra virgin olive oil

2–4 tablespoons water

½ teaspoon ground cumin

½ teaspoon salt

¼ teaspoon black pepper

Optional Toppings

Extra olive oil

Paprika

Chopped parsley

Sesame seeds

Pine nuts

Red pepper flakes

Instructions

Step 1: Add Ingredients to a Food Processor

Place the avocado, chickpeas, tahini, lemon juice, garlic, olive oil, cumin, salt, and black pepper into a food processor.

Step 2: Blend Until Smooth

Blend for 1–2 minutes until creamy. Gradually add water, one tablespoon at a time, until the hummus reaches your desired consistency.

Step 3: Taste and Adjust

Taste the hummus and adjust the seasoning if needed. You may want extra lemon juice, garlic, or salt depending on your preference.

Step 4: Serve

Transfer to a serving bowl and drizzle with olive oil. Garnish with paprika, parsley, or your favorite toppings before serving.

Notes & Tips

Recipe Notes

Use a perfectly ripe avocado for the creamiest texture.

Fresh lemon juice provides the best flavor.

Tahini adds richness and authentic hummus flavor.

Expert Tips

Blend the hummus longer for an ultra-smooth texture.

If it’s too thick, add a little more water or lemon juice.

Chill for 15 minutes before serving for even better flavor.

Store with plastic wrap touching the surface to help prevent browning.

Frequently Asked Questions

Can I make avocado hummus ahead of time?

Yes. It can be made up to 24 hours ahead and stored in the refrigerator.

How long does avocado hummus last?

It stays fresh for about 2–3 days when stored in an airtight container.

Can I make it without tahini?

Absolutely. The hummus will still be delicious, although slightly less rich.

What can I serve with avocado hummus?

Serve it with pita bread, crackers, fresh vegetables, wraps, sandwiches, or grain bowls.

Is avocado hummus healthy?

Yes. It’s rich in fiber, healthy fats, plant-based protein, vitamins, and minerals.

Nutritional Information 

Calories: 180

Protein: 5g

Carbohydrates: 12g

Fiber: 5g

Sugar: 1g

Fat: 13g

Saturated Fat: 2g

Sodium: 220mg

Final Thoughts

This Avocado Hummus is creamy, fresh, and packed with wholesome ingredients. The combination of buttery avocado, hearty chickpeas, and bright lemon creates a dip that’s both satisfying and nutritious. Whether you’re serving it as a healthy snack, party appetizer, or sandwich spread, it’s a recipe you’ll find yourself making again and again.

Radish and Cucumber Salad Recipe

Radish and Cucumber Salad

If you’re looking for a light, refreshing salad that’s packed with crunch and flavor, this Radish and Cucumber Salad is the perfect choice. Crisp cucumbers and peppery radishes are tossed in a simple lemon-herb dressing, creating a fresh side dish that pairs beautifully with grilled meats, seafood, or Mediterranean-inspired meals.Not only is this salad incredibly easy to make, but it’s also naturally low in calories and loaded with vitamins, making it a healthy addition to any meal.

Prep Time: 10 minutes

Cook Time: 0 minutes

Total Time: 10 minutes

Servings: 4

Cuisine: Mediterranean

Course: Salad, Side Dish

Ingredients

For the Salad

1 large cucumber, thinly sliced

8–10 radishes, thinly sliced

¼ red onion, thinly sliced

2 tablespoons fresh parsley, chopped

1 tablespoon fresh dill, chopped

For the Dressing

2 tablespoons extra virgin olive oil

1 tablespoon fresh lemon juice

1 teaspoon red wine vinegar

½ teaspoon honey

Salt and black pepper, to taste

Optional Add-Ins

Crumbled feta cheese

Avocado slices

Cherry tomatoes

Sunflower seeds

Chickpeas

Instructions

Step 1: Prepare the Vegetables

Wash and slice the cucumber, radishes, and red onion as thinly as possible for the best texture.

Step 2: Make the Dressing

In a small bowl, whisk together the olive oil, lemon juice, red wine vinegar, honey, salt, and black pepper until well combined.

Step 3: Assemble the Salad

Place the cucumber, radishes, red onion, parsley, and dill in a large bowl.

Pour the dressing over the vegetables and toss gently until evenly coated.

Step 4: Serve

Serve immediately for maximum freshness, or chill for 15 minutes before serving to allow the flavors to blend.

Notes & Tips

Recipe Notes

English cucumbers work especially well because they have fewer seeds.

Fresh herbs add the most flavor, but dried herbs can be used if necessary.

This salad tastes even better after a few minutes of chilling.

Expert Tips

Slice the vegetables thinly using a mandoline for a restaurant-style presentation.

Add feta cheese for a Mediterranean twist.

For extra crunch, sprinkle with toasted sunflower seeds before serving.

Taste the dressing before adding it and adjust the lemon or salt as needed.

Frequently Asked Questions

Can I make this salad ahead of time?

Yes. You can prepare it a few hours in advance and keep it refrigerated until serving.

How long does it last?

The salad stays fresh in an airtight container in the refrigerator for up to 2 days.

Can I use different herbs?

Absolutely. Mint, cilantro, or chives all work well in this recipe.

Is this salad vegan?

Yes, simply replace the honey with maple syrup or omit it entirely.

What dishes pair well with this salad?

It pairs wonderfully with grilled chicken, salmon, shrimp, kebabs, or Mediterranean grain bowls.

Nutritional Information

Calories: 90

Protein: 1g

Carbohydrates: 5g

Fiber: 2g

Sugar: 3g

Fat: 7g

Saturated Fat: 1g

Sodium: 120mg

Final Thoughts

This Radish and Cucumber Salad is simple, crisp, and incredibly refreshing. The combination of crunchy vegetables, fresh herbs, and bright lemon dressing makes it a versatile side dish that’s perfect for spring and summer meals. Whether you’re serving it at a barbecue, packing it for lunch, or enjoying it alongside grilled proteins, this salad brings freshness and flavor to every bite.

Carrot Tortillas with 3 Ingredients

3-Ingredient Carrot Tortillas

These 3-Ingredient Carrot Tortillas are soft, flexible, and surprisingly easy to make. They’re a healthy alternative to traditional tortillas, using simple ingredients you probably already have at home. The carrots add natural sweetness, color, and extra nutrients, while the result is perfect for wraps, tacos, or healthy lunch ideas.Best of all, there’s no complicated dough-making involved, making this recipe ideal for beginners and busy weekdays.

Prep Time: 10 minutes

Cook Time: 20 minutes

Total Time: 30 minutes

Servings: 6 tortillas

Cuisine: Healthy, Vegetarian

Course: Bread, Wraps

Ingredients

2 cups carrots, peeled and chopped

1 cup oat flour

¼ teaspoon salt

Instructions

Step 1: Cook the Carrots

Place the chopped carrots in a pot of boiling water and cook for 10–12 minutes, or until fork-tender.

Drain well and allow them to cool slightly.

Step 2: Make the Dough

Transfer the cooked carrots to a food processor and blend until smooth.

Add the oat flour and salt, then mix until a soft dough forms.

If the dough feels sticky, add a little more oat flour, one tablespoon at a time.

Step 3: Shape the Tortillas

Divide the dough into 6 equal portions.

Place each portion between two sheets of parchment paper and roll into thin circles about 6 inches wide.

Step 4: Cook

Heat a non-stick skillet over medium heat.

Cook each tortilla for 2–3 minutes per side until lightly golden and cooked through.

Step 5: Serve

Serve warm with your favorite fillings, or store for later use.

Notes & Tips
Recipe Notes

Oat flour creates a soft texture and mild flavor.

The dough should be soft but not sticky.

Thin tortillas will be more flexible after cooking.

Expert Tips

Let the tortillas cool completely before stacking.

Store with parchment paper between each tortilla to prevent sticking.

Reheat briefly in a skillet before serving.

Add garlic powder, paprika, or herbs for extra flavor.

Frequently Asked Questions

Can I use regular flour instead of oat flour?

Yes. Whole wheat flour or all-purpose flour can work, although the texture may be slightly different.

Are these tortillas gluten-free?

Yes, if you use certified gluten-free oat flour.

How do I store them?

Store in an airtight container in the refrigerator for up to 4 days.

Can I freeze carrot tortillas?

Absolutely. Place parchment paper between each tortilla and freeze for up to 2 months.

What can I fill them with?

They work well with grilled chicken, roasted vegetables, hummus, tuna salad, eggs, or Mediterranean fillings.

Nutritional Information 

Calories: 65

Protein: 2g

Carbohydrates: 13g

Fiber: 2g

Sugar: 2g

Fat: 1g

Saturated Fat: 0g

Sodium: 95mg

Final Thoughts

These 3-Ingredient Carrot Tortillas are proof that healthy recipes don’t need to be complicated. They’re soft, versatile, naturally colorful, and perfect for wraps, tacos, or quick lunches. Whether you’re looking for a nutritious tortilla alternative or simply want to use up extra carrots, this easy recipe is worth adding to your collection.