Air Fryer Cheesy Egg Muffins

Fluffy air fryer cheesy egg muffins with melted cheddar, bell peppers, and green onions served on a breakfast plate

Air Fryer Cheesy Egg Muffins

Air Fryer Cheesy Egg Muffins are an easy breakfast option when you want something warm, savory, and filling without spending much time in the kitchen. They are made with simple ingredients and cook quickly in the air fryer, making them ideal for busy mornings.

These egg muffins have a soft, fluffy center with melted cheese in every bite. You can add vegetables, cooked bacon, sausage, or herbs to create different flavors without changing the basic method.

Unlike traditional baked egg cups, these mini breakfast muffins do not require a large oven or long cooking time. The air fryer provides steady circulating heat that helps the eggs cook evenly while the cheese melts into a golden topping.

They are also easy to prepare ahead of time. Make a batch on the weekend, refrigerate the cooked muffins, and reheat them for a quick breakfast during the week.

Ingredients

The ingredients for these cheesy egg bites are simple and easy to find at most American grocery stores.

  • 6 large eggs
  • ½ cup shredded cheddar cheese
  • ¼ cup milk
  • ¼ cup diced bell pepper
  • 2 tablespoons finely chopped green onion
  • ¼ teaspoon garlic powder
  • ¼ teaspoon black pepper
  • ¼ teaspoon salt
  • Cooking spray

Cheddar cheese gives the muffins a rich, classic flavor, but you can use mozzarella, Monterey Jack, Colby, or a Mexican-style cheese blend.

Whole milk creates a soft texture, while low-fat milk also works if that is what you have available.

For vegetables, bell peppers and green onions add color and mild flavor without releasing too much moisture. If you use watery vegetables such as zucchini or fresh tomatoes, remove excess moisture before adding them to the egg mixture.

How to Make Air Fryer Cheesy Egg Muffins

Step 1: Prepare the Egg Mixture

Crack the eggs into a medium mixing bowl and add the milk, salt, black pepper, and garlic powder.

Whisk until the yolks and whites are fully combined and the mixture looks smooth.

Avoid over-whisking because excessive air can cause the egg mixture to puff dramatically during cooking and then collapse as it cools.

Step 2: Add the Fillings

Stir the shredded cheddar cheese, diced bell pepper, green onion into the eggs.

Reserve a small amount of cheese for sprinkling over the tops if you want a more golden finish.

Keep the fillings finely chopped so each muffin cooks evenly and holds together when removed from the basket.

Step 3: Prepare the Molds

Use silicone egg molds or small silicone muffin cups that are safe for your air fryer.

Lightly coat the molds with cooking spray to make removing the cooked egg muffins easier.

Do not fill the cups completely because the egg mixture expands slightly as it cooks. Filling each cup about three-quarters full leaves enough room for the eggs to rise.

Step 4: Fill the Cups

Carefully divide the egg mixture between the prepared silicone cups.

Try to distribute the cheese and vegetables evenly so every muffin contains a good balance of egg and filling.

Place a little extra shredded cheese on top if desired.

Step 5: Air Fry

Preheat the air fryer to 330°F for about 3 minutes if your model recommends preheating.

Place the filled silicone cups carefully inside the air fryer basket.

Cook at 330°F for approximately 8 to 12 minutes, or until the eggs are set in the center and the tops are lightly golden.

Cooking time can vary between air fryer models and cup sizes. Start checking around 8 minutes and continue cooking until the centers no longer look wet.

Step 6: Cool and Serve

Remove the silicone cups carefully because they will be hot.

Let the egg muffins rest for 2 to 3 minutes before removing them from the molds.

Serve them warm with fresh fruit, toast, avocado, breakfast potatoes, or your favorite breakfast sauce.

Why These Egg Muffins Work in an Air Fryer

An air fryer is useful for small egg recipes because it heats the food quickly without requiring a full-size oven.

The circulating hot air cooks the individual portions from all sides, helping the egg mixture set while the cheese melts.

Using silicone cups also keeps the portions contained and makes serving simple. Each muffin can be removed individually, which makes this recipe convenient for meal preparation.

The moderate cooking temperature is important because eggs can become rubbery when exposed to excessive heat. Cooking them gently gives the center a softer and more tender texture.

Best Cheese for Egg Muffins

Cheddar is one of the easiest choices because it melts well and provides a strong savory flavor.

Mozzarella creates a milder flavor with a stretchy melted texture. Monterey Jack melts smoothly and adds a creamy taste without overpowering the eggs.

Pepper Jack is a good choice if you enjoy a little heat. For a breakfast-inspired flavor, try a combination of cheddar and Monterey Jack.

Freshly shredded cheese often melts more smoothly than some pre-shredded varieties because packaged shredded cheese may contain anti-caking ingredients.

Easy Add-Ins and Variations

These breakfast egg cups are easy to customize with ingredients you already have.

For a sausage version, add cooked breakfast sausage that has been drained of excess grease.

For a bacon and cheddar version, use crispy crumbled bacon with sharp cheddar cheese.

For a vegetable version, add finely chopped spinach, bell peppers, mushrooms, or green onions.

For a spicy version, add diced jalapeño, a pinch of red pepper flakes, or Pepper Jack cheese.

For a Mediterranean-style version, add spinach, feta cheese, and a small amount of chopped roasted red pepper.

For a cheese version, add finely diced cooked ham and Swiss or cheddar cheese.

Always cook raw meat before adding it to the egg mixture. The air fryer cooking time is designed to cook the egg mixture, not raw meat safely.

Tips for Fluffy Egg Muffins

Use fresh eggs for the best flavor and texture.

Whisk the eggs and milk until combined, but do not whip excessive air into the mixture.

Cut vegetables and meats into small pieces so they distribute evenly.

Do not overfill the silicone cups because the eggs need room to expand.

Cook at a moderate temperature instead of using maximum heat.

Check the center before removing the muffins because the tops can look finished while the middle still needs more time.

Allow the muffins to rest briefly after cooking so the eggs can finish setting.

If your first batch comes out too firm, reduce the cooking time slightly on the next batch.

How to Serve Cheesy Egg Muffins

These savory egg bites are versatile enough for breakfast, brunch, or a quick snack.

Serve them with fresh berries and toast for a balanced breakfast. Pair them with crispy breakfast potatoes and fruit when you want a more filling morning meal.

For brunch, arrange the muffins on a serving platter with avocado slices, tomatoes, toast, and a simple dipping sauce.

They are also convenient for busy mornings because each muffin can be eaten without utensils.

For a quick lunch, serve two or three egg muffins with a side salad or roasted vegetables.

How to Store and Reheat

Allow the cooked muffins to cool completely before storing them.

Place them in an airtight container and refrigerate for up to 3 to 4 days.

For longer storage, wrap individual muffins and freeze them in a freezer-safe container or bag.

To reheat refrigerated muffins, place them in the air fryer at 300°F for about 2 to 4 minutes.

Frozen muffins can be thawed overnight in the refrigerator before reheating for the best texture.

Avoid overheating the eggs because prolonged high heat can make them dry and rubbery.

Common Mistakes to Avoid

One of the most common mistakes is using too much milk. Excess liquid can make the egg muffins watery and prevent them from setting properly.

Another mistake is adding vegetables without removing excess moisture. Watery ingredients can release liquid as they cook and change the texture.

Overfilling the silicone cups can also cause the mixture to spill as it expands.

Cooking at a very high temperature may brown the cheese quickly while making the eggs tough.

Finally, do not remove the muffins immediately if the centers still look wet. Give them another minute or two of cooking time and check again.

Frequently Asked Questions

Can I make egg muffins without milk?

Yes, you can omit the milk, although a small amount helps create a softer and more tender texture.

What temperature is best for air fryer egg muffins?

330°F is a good starting temperature because it cooks the eggs gently without quickly over-browning the cheese.

How long do egg muffins take in an air fryer?

Most individual egg muffins take about 8 to 12 minutes, depending on the cup size and air fryer model.

Can I use silicone muffin cups?

Yes, food-safe silicone cups designed for cooking are convenient because they prevent sticking and make the muffins easy to remove.

Why are my egg muffins rubbery?

Egg muffins can become rubbery when they are overcooked or exposed to excessive heat, so check them early and remove them once the centers are set.

Can I freeze cheesy egg muffins?

Yes, cooked egg muffins can be frozen in an airtight freezer-safe container and reheated when needed.

What vegetables work best in egg muffins?

Bell peppers, spinach, mushrooms, and green onions work well when finely chopped and drained of excess moisture.

Can I make these egg muffins ahead of time?

Yes, prepare a batch ahead and refrigerate them for up to 3 to 4 days for quick breakfasts.

Final Thoughts

Air Fryer Cheesy Egg Muffins are a simple way to make a warm, protein-rich breakfast in convenient individual portions. The combination of fluffy eggs, melted cheese, and colorful vegetables makes each bite satisfying without requiring complicated preparation.

The key to good results is using the right amount of filling, avoiding excess moisture, and cooking the muffins at a moderate temperature. Silicone cups make the process even easier by keeping the mixture contained and helping the cooked muffins release cleanly.

You can keep the recipe simple with cheddar and green onions or customize it with  sausage, vegetables, ham, or spicy cheese. Make a batch ahead of time and keep them refrigerated for an easy breakfast whenever your morning gets busy.

For a quick American-style breakfast that is easy to customize and simple to reheat, these cheesy air fryer egg muffins are a recipe worth keeping in your regular meal rotation.
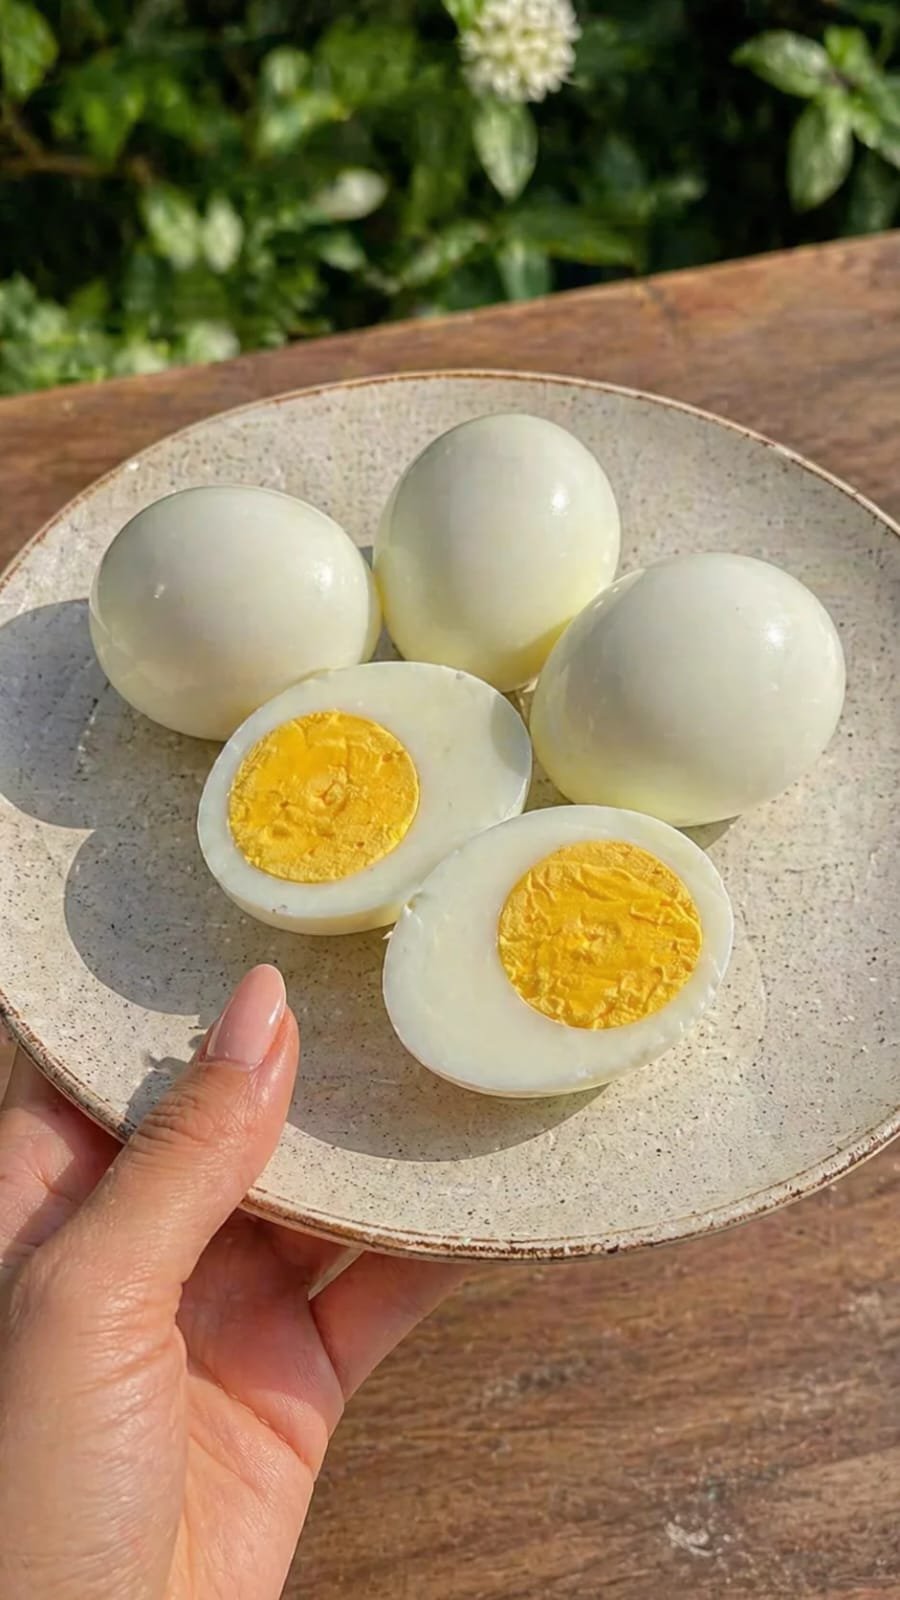
 Perfect Classic Hard-Boiled Eggs
Perfect Hard-Boiled Eggs

🥚 Perfect Classic Hard-Boiled Eggs

Description

Perfect Classic Hard-Boiled Eggs are a simple yet essential recipe that delivers consistently tender whites and creamy, golden yolks every time. Whether you prefer them fully firm or slightly soft in the center, mastering this method ensures easy peeling and great texture. These eggs are incredibly versatile—ideal for breakfast, snacks, salads, or meal prep—and packed with nutrition, making them a staple in any kitchen.

Ingredients Main Ingredients:

  • 4–6 large eggs
  • Water (enough to cover eggs)

Optional:

  • Salt (for taste)
  • Black pepper
  • Ice (for ice bath)

Step-by-Step Instructions

  1. Place eggs in pot:
    Arrange eggs in a single layer in a saucepan.
  2. Add water:
    Fill with cold water until eggs are covered by about 1 inch.
  3. Bring to boil:
    Place on medium-high heat and bring water to a rolling boil.
  4. Turn off heat:
    Once boiling, turn off heat, cover the pot, and let sit:
  • 9–10 minutes for fully set yolks
  • 7–8 minutes for slightly creamy centers
  1. Ice bath:
    Transfer eggs immediately into a bowl of ice water for 5–10 minutes to stop cooking.
  2. Peel and serve:
    Gently crack and peel. Serve as is or season with salt and pepper.

Notes

  • Older eggs peel more easily than fresh ones.
  • Ice bath prevents green ring around yolk.
  • Cooking time can vary slightly based on egg size.

Tips

  • Add a splash of vinegar to water to help with peeling.
  • Roll eggs gently on the counter before peeling for easier shell removal.
  • Store unpeeled eggs for better freshness.
  • For meal prep, keep eggs in the fridge for quick snacks.

Servings

  • Serves: 2–3 people (depending on quantity)

Nutritional Info (Per egg approx)

  • Calories: 70 kcal
  • Protein: 6g
  • Fat: 5g
  • Carbohydrates: 0g
  • Cholesterol: ~185mg

Health Benefits

  • High-quality protein: Supports muscle growth and repair
  • Rich in vitamins: Contains B12, D, and choline for brain health
  • Healthy fats: Helps keep you full longer
  • Low-carb & keto-friendly: Ideal for various diets

Q&A

Q: Why do my eggs have a green ring?
Overcooking causes this—use an ice bath to prevent it.

Q: How long do boiled eggs last?
Up to 1 week in the refrigerator (unpeeled).

Q: Can I reheat boiled eggs?
Yes, but gently—avoid overheating to prevent rubbery texture.

Q: What are ways to use them?

  • Salads
  • Sandwiches
  • Deviled eggs
  • Snacks with seasoning

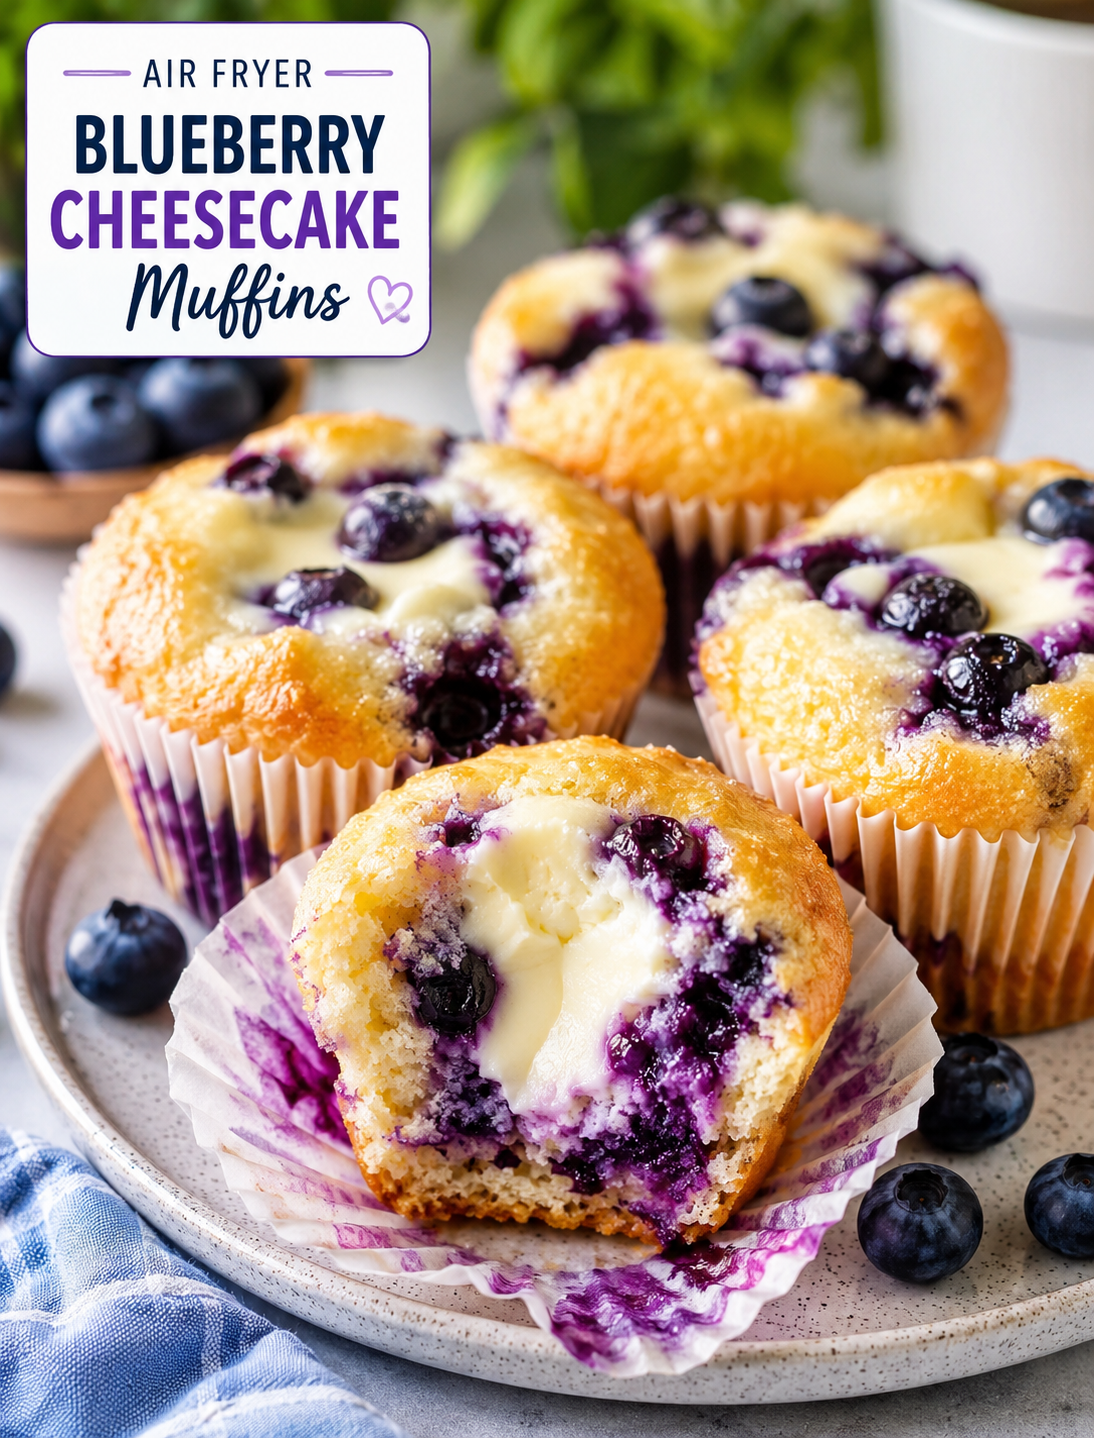
Air Fryer Blueberry Cheesecake Muffins

Air Fryer Blueberry Cheesecake Muffins with juicy blueberries and creamy cheesecake filling

Air Fryer Blueberry Cheesecake Muffins

These Air Fryer Blueberry Cheesecake Muffins are soft, fluffy, and filled with juicy blueberries and a creamy cheesecake center. They have golden tops, tender crumbs, and a sweet cream cheese filling in every bite. The air fryer makes a small batch quickly, so you do not need to heat the whole oven.

This easy muffin recipe is perfect for breakfast, brunch, afternoon snacks, or a simple homemade dessert. Fresh or frozen blueberries both work well, and the ingredients are easy to find at any U.S. grocery store.

Why You’ll Love This Recipe

  • Quick to make: The muffins cook in about 12–16 minutes.
  • Small-batch friendly: The recipe makes about 8 muffins, making it useful for smaller households.
  • Creamy center: Sweetened cream cheese creates a cheesecake-style filling.
  • Fresh blueberry flavor: Blueberries add natural sweetness and a juicy texture.
  • No large oven needed: An air fryer handles the baking with less preheating.
  • Easy ingredients: Most items are pantry and refrigerator staples.
  • Great for meal prep: Store the finished muffins in the refrigerator for easy breakfasts or snacks.

Ingredients

For the Muffins

  • 1 cup all-purpose flour
  • 1/2 cup granulated sugar
  • 1 teaspoon baking powder
  • 1/4 teaspoon baking soda
  • 1/4 teaspoon salt
  • 1 large egg
  • 1/3 cup whole milk
  • 1/4 cup melted unsalted butter
  • 1 teaspoon vanilla extract
  • 3/4 cup fresh blueberries

For the Cheesecake Filling

  • 4 ounces softened cream cheese
  • 3 tablespoons granulated sugar
  • 1/2 teaspoon vanilla extract
  • 1 tablespoon all-purpose flour

Optional Topping

  • 1 tablespoon coarse sugar
  • 1/4 cup powdered sugar for a simple glaze

How to Make Air Fryer Blueberry Cheesecake Muffins

Step 1: Prepare the Cheesecake Filling

Place the softened cream cheese in a small bowl. Add the sugar, vanilla extract, and flour.

Mix until the filling is smooth and creamy. Set it aside while you prepare the muffin batter.

  • Use softened cream cheese for a smooth filling.
  • Do not overmix once the ingredients are combined.
  • If the cream cheese is cold, let it sit at room temperature for about 20–30 minutes.

Step 2: Mix the Dry Ingredients

Add the flour, sugar, baking powder, baking soda, and salt to a medium mixing bowl.

Whisk the ingredients until evenly combined. Breaking up any flour lumps at this stage helps create a smooth muffin batter.

Step 3: Mix the Wet Ingredients

In a separate bowl, whisk together the egg, milk, melted butter, and vanilla extract.

Make sure the melted butter has cooled slightly before adding the egg. Very hot butter can partially cook the egg.

Step 4: Make the Batter

Pour the wet mixture into the bowl of dry ingredients.

Stir gently with a spatula until the flour is almost incorporated. Avoid overmixing because it can make the muffins dense instead of tender.

Fold in the blueberries carefully so they remain whole.

  • Fresh blueberries work best for a firm batter.
  • If using frozen berries, add them directly from the freezer.
  • Do not thaw frozen blueberries because they can release too much liquid.

Step 5: Fill the Muffin Cups

Place silicone muffin cups or sturdy paper liners into your air fryer basket if your model allows them.

Add a small spoonful of batter to each cup. Place about 1 tablespoon of cheesecake filling in the center, then cover it with more muffin batter.

Fill each cup about two-thirds to three-quarters full.

Sprinkle a little coarse sugar over the tops if you want a lightly crisp finish.

Step 6: Preheat the Air Fryer

Preheat the air fryer to 320°F for about 3 minutes.

Air fryer models vary, so check the manufacturer’s instructions before using silicone cups, liners, or baking accessories.

Step 7: Air Fry the Muffins

Carefully place the filled muffin cups into the air fryer basket.

Cook at 320°F for 12–16 minutes.

Start checking around the 12-minute mark. The tops should look golden, and a toothpick inserted into the muffin portion should come out mostly clean.

Avoid inserting the toothpick directly into the cheesecake center because the filling will remain soft.

Step 8: Cool Before Serving

Remove the muffins carefully and place them on a cooling rack.

Let them cool for at least 10 minutes before serving. The cheesecake filling becomes thicker as it cools, making the center easier to enjoy.

Tips for the Best Results

  • Do not overmix: Stir only until the dry ingredients are incorporated.
  • Use room-temperature cream cheese: It creates a smoother cheesecake filling.
  • Watch the cooking time: Smaller air fryers may cook muffins faster.
  • Leave space between cups: Good airflow helps the muffins cook evenly.
  • Use a light touch with blueberries: Gentle folding prevents crushed berries.
  • Check early: Air fryers can differ in temperature and cooking speed.
  • Cool completely: The creamy center sets as the muffins cool.
  • Avoid overcrowding: Cook in batches if the basket does not have enough room.

Fresh vs. Frozen Blueberries

Both fresh and frozen blueberries can be used in this recipe.

Fresh blueberries provide a bright flavor and usually keep the batter cleaner. Frozen blueberries are convenient and work especially well when fresh berries are out of season.

If using frozen berries, do not thaw them first. Add them directly to the batter and fold them in gently.

Serving Suggestions

Serve these muffins warm or chilled depending on your preference.

For breakfast, pair one with coffee, tea, or a glass of milk. For brunch, arrange them on a serving platter with fresh blueberries and a light dusting of powdered sugar.

You can also add a simple glaze by mixing powdered sugar with a small amount of milk or lemon juice. Drizzle it over completely cooled muffins.

For a dessert-style serving, add a few fresh berries and a spoonful of whipped cream.

Storage and Reheating

Because the muffins contain cream cheese, store leftovers in an airtight container in the refrigerator.

They are best enjoyed within 3–4 days.

To warm one muffin, place it in the air fryer at 300°F for 2–3 minutes. Let it cool briefly before eating because the cheesecake center can become very hot.

You can also enjoy them cold straight from the refrigerator for a firmer cheesecake texture.

Nutrition Facts

Approximate nutrition per muffin, based on 8 muffins:

  • Calories: 245
  • Protein: 4g
  • Carbohydrates: 31g
  • Fat: 12g
  • Saturated Fat: 7g
  • Sugar: 16g
  • Fiber: 1g
  • Sodium: 180mg

Nutrition values are estimates and can change depending on the brands and ingredients used.

Frequently Asked Questions

Can I use frozen blueberries?

Yes. Add frozen blueberries directly to the batter without thawing them to prevent excess moisture.

What temperature should I use for these muffins?

Cook them at 320°F for about 12–16 minutes, checking early because air fryer models vary.

Can I make these muffins without paper liners?

Yes. Silicone muffin cups are a good alternative, but make sure they fit securely inside your air fryer basket.

How do I know when the muffins are done?

The tops should be lightly golden, and a toothpick inserted into the muffin portion should come out mostly clean.

Can I use low-fat cream cheese?

Yes, but full-fat cream cheese gives the filling a richer texture and smoother cheesecake flavor.

Why are my muffins dense?

Overmixing the batter can develop too much gluten and make the muffins dense. Stir just until the ingredients are combined.

How should I store leftover muffins?

Store them in an airtight container in the refrigerator for up to 3–4 days because the filling contains cream cheese.

Can I freeze these muffins?

Yes. Cool them completely, wrap them individually, and freeze them in a sealed freezer-safe container for up to about 2 months.

Final Thoughts

These Air Fryer Blueberry Cheesecake Muffins combine everything you want in an easy homemade treat: fluffy muffin batter, juicy blueberries, and a creamy cheesecake center. The air fryer keeps the process simple and works especially well when you want a small batch without turning on a full-size oven.For the best texture, avoid overmixing, use softened cream cheese, and check the muffins early during cooking. Serve them with coffee for breakfast, add them to a weekend brunch spread, or enjoy one as a sweet afternoon snack.

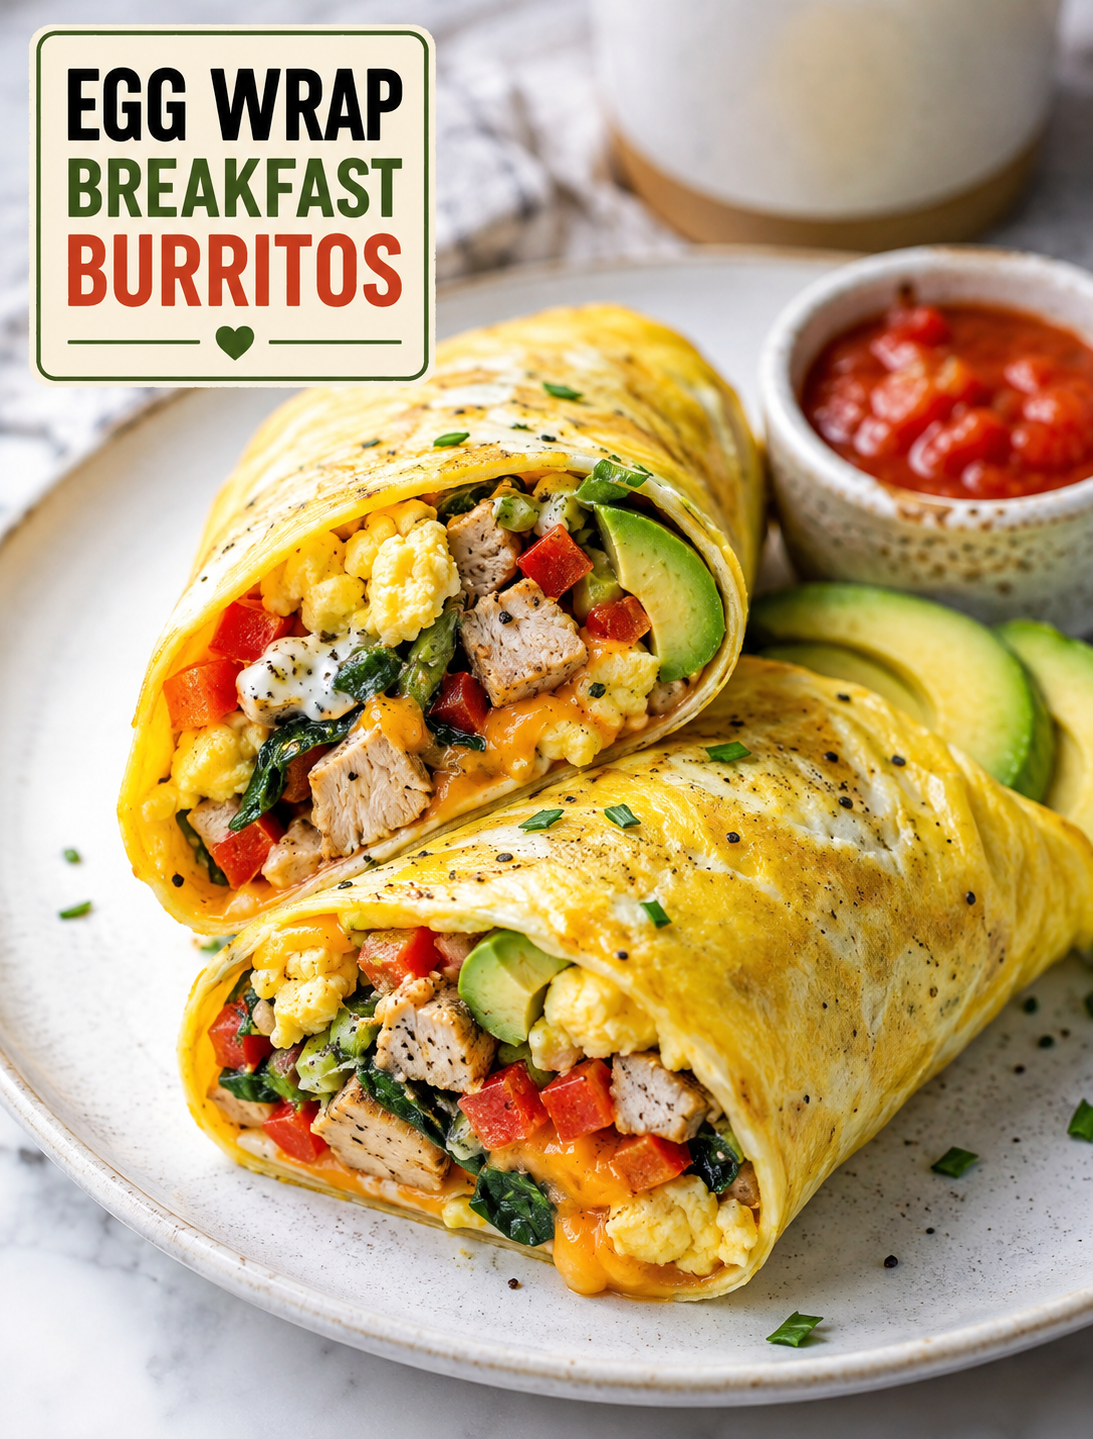
Egg Wrap Breakfast Burritos

Egg Wrap Breakfast Burritos – High-Protein Low-Carb Breakfast

Egg Wrap Breakfast Burritos

Egg Wrap Breakfast Burritos are a simple way to enjoy a filling breakfast without using a traditional flour tortilla. A thin egg wrap holds seasoned protein, colorful vegetables, cheese, avocado, and a creamy or spicy sauce for a balanced meal.

These breakfast burritos are high in protein and lower in carbohydrates than many tortilla-based versions. They are also flexible enough to fit different tastes and meal plans. Use cooked chicken, turkey, or lean beef for a hearty filling, or choose beans and tofu for a vegetarian option.

The egg wraps cook in minutes and have a soft, crepe-like texture that makes them easy to fold around the filling. You can serve the burritos right away or prepare them ahead for busy mornings. A quick toast in a skillet adds a lightly crisp outside while keeping the center warm and tender.

Ingredients

Egg Wraps

  • 4 large eggs
  • 2 tablespoons milk
  • Pinch of salt
  • Pinch of black pepper
  • Light cooking spray or oil for the pan

Eggs form the base of the wrap and provide protein while keeping the recipe naturally gluten-free when all other ingredients are gluten-free. Milk helps create a smooth egg mixture that spreads easily in the pan.

Filling Options

  • 1 cup cooked chicken, turkey, or lean beef
  • ½ cup sautéed bell peppers
  • ½ cup fresh spinach
  • ¼ avocado, sliced
  • ¼ cup shredded cheese
  • Optional: cooked beans or diced potatoes

Use leftover cooked chicken or turkey to save preparation time. Bell peppers add sweetness and crunch, while spinach adds color and nutrients without making the filling heavy.

Cheddar, Monterey Jack, or Mexican-style shredded cheese works well in these burritos. If you want more fiber and a heartier texture, add black beans or pinto beans.

Sauce

  • ¼ cup plain Greek yogurt or salsa
  • 1 teaspoon hot sauce
  • 1 teaspoon fresh lemon or lime juice

Greek yogurt creates a creamy sauce with extra protein, while salsa gives the burrito a fresh tomato and pepper flavor. Hot sauce can be adjusted to match your preferred spice level.

Instructions

1. Make Egg Wraps

Whisk the eggs, milk, salt, and black pepper in a bowl until the mixture is smooth. Heat a non-stick skillet over medium-low heat and lightly grease the surface.

Pour enough egg mixture into the pan to create a thin layer. Quickly tilt and swirl the skillet so the egg spreads evenly, similar to making a thin crepe.

Cook for about 1–2 minutes, or until the egg is mostly set. Carefully flip the wrap and cook for another 30 seconds. Transfer it to a plate and repeat with the remaining egg mixture.

Keep the heat moderate to prevent the egg from becoming dry or rubbery. A non-stick skillet makes flipping the delicate wraps much easier.

2. Prepare Filling

If your protein is not already cooked, cook it completely before assembling the burritos. Chop chicken, turkey, or beef into small pieces so it distributes evenly inside each wrap.

Sauté the bell peppers until they are tender but still slightly crisp. Add the spinach near the end and cook just until it wilts.

Warm the beans or potatoes if you are using them. Keeping the filling warm helps the cheese melt when the burritos are assembled.

3. Assemble Burritos

Place one egg wrap on a clean surface or plate. Add a portion of the cooked protein to the center, leaving enough space around the edges for folding.

Add the sautéed vegetables, shredded cheese, avocado, and your preferred sauce. Avoid overfilling the wrap because too much filling can make it difficult to roll without tearing.

For a balanced bite, spread the ingredients in a narrow line across the center rather than creating a large mound.

4. Wrap

Fold the bottom edge of the egg wrap over the filling. Fold both sides toward the center, then roll the burrito forward tightly.

Use gentle pressure while rolling because the egg wrap is more delicate than a flour tortilla. If a wrap develops a small tear, place the seam underneath when serving or toasting.

5. Serve

Serve the burritos warm immediately after assembly. For a crispier finish, place them seam-side down in a lightly greased skillet and toast for 1–2 minutes per side.

Serve with extra salsa, Greek yogurt, hot sauce, or fresh lime on the side. These burritos also pair well with fresh fruit or a simple side salad for a more complete breakfast.

Frequently Asked Questions

Are these low-carb?

Yes, egg wraps contain far fewer carbohydrates than most flour tortillas, although the final carb count depends on fillings such as beans, potatoes, and sauces.

Can I meal prep them?

Yes, assemble the burritos without avocado or other ingredients that become watery, then refrigerate them in an airtight container for up to 2–3 days.

Can I freeze them?

Yes, freeze fully cooled burritos without avocado or other fresh vegetables, wrap them individually, and reheat thoroughly before serving.

Can I make them vegetarian?

Yes, replace the meat with black beans, pinto beans, tofu, mushrooms, or extra sautéed vegetables for a satisfying vegetarian breakfast.

Can I use dairy-free milk?

Yes, unsweetened dairy-free milk can replace regular milk in the egg mixture without changing the basic cooking method.

How do I keep egg wraps from tearing?

Cook the egg over medium-low heat and let it set before flipping; a good non-stick skillet also helps prevent sticking and tearing.

What protein works best?

Cooked chicken, turkey, lean beef, beans, and tofu all work well because they can be seasoned and chopped into small pieces for even distribution.

How should I reheat the burritos?

Reheat refrigerated burritos in a skillet, microwave, or oven until the center is hot, then briefly toast them in a skillet for a crisp exterior.

Nutritional Information

The estimated nutrition for one serving is about 220 calories, 18–22 grams of protein, 6–10 grams of carbohydrates, 12 grams of fat, and 2 grams of fiber.

Actual nutrition can vary based on the type and amount of meat, cheese, avocado, beans, potatoes, and sauce used. For the most accurate nutrition information, calculate the recipe using the exact brands and quantities in your kitchen.

These egg-based breakfast burritos are especially useful when you want a protein-rich meal without relying on a standard tortilla. The combination of eggs, lean protein, vegetables, and optional avocado creates a filling breakfast that can be adjusted to suit different dietary preferences.

For a lighter version, use lean turkey or chicken, reduce the cheese, and choose salsa instead of a creamy sauce. For a higher-fiber version, add black beans, spinach, and extra vegetables. If you need more calories for a busy morning, cooked potatoes and additional avocado make the burrito more substantial.

With a short ingredient list and several easy filling options, Egg Wrap Breakfast Burritos can become a practical breakfast for weekdays, meal prep, or a quick post-workout meal. The recipe is also easy to customize with different vegetables, seasonings, cheeses, and sauces while keeping the egg wrap as the main base.