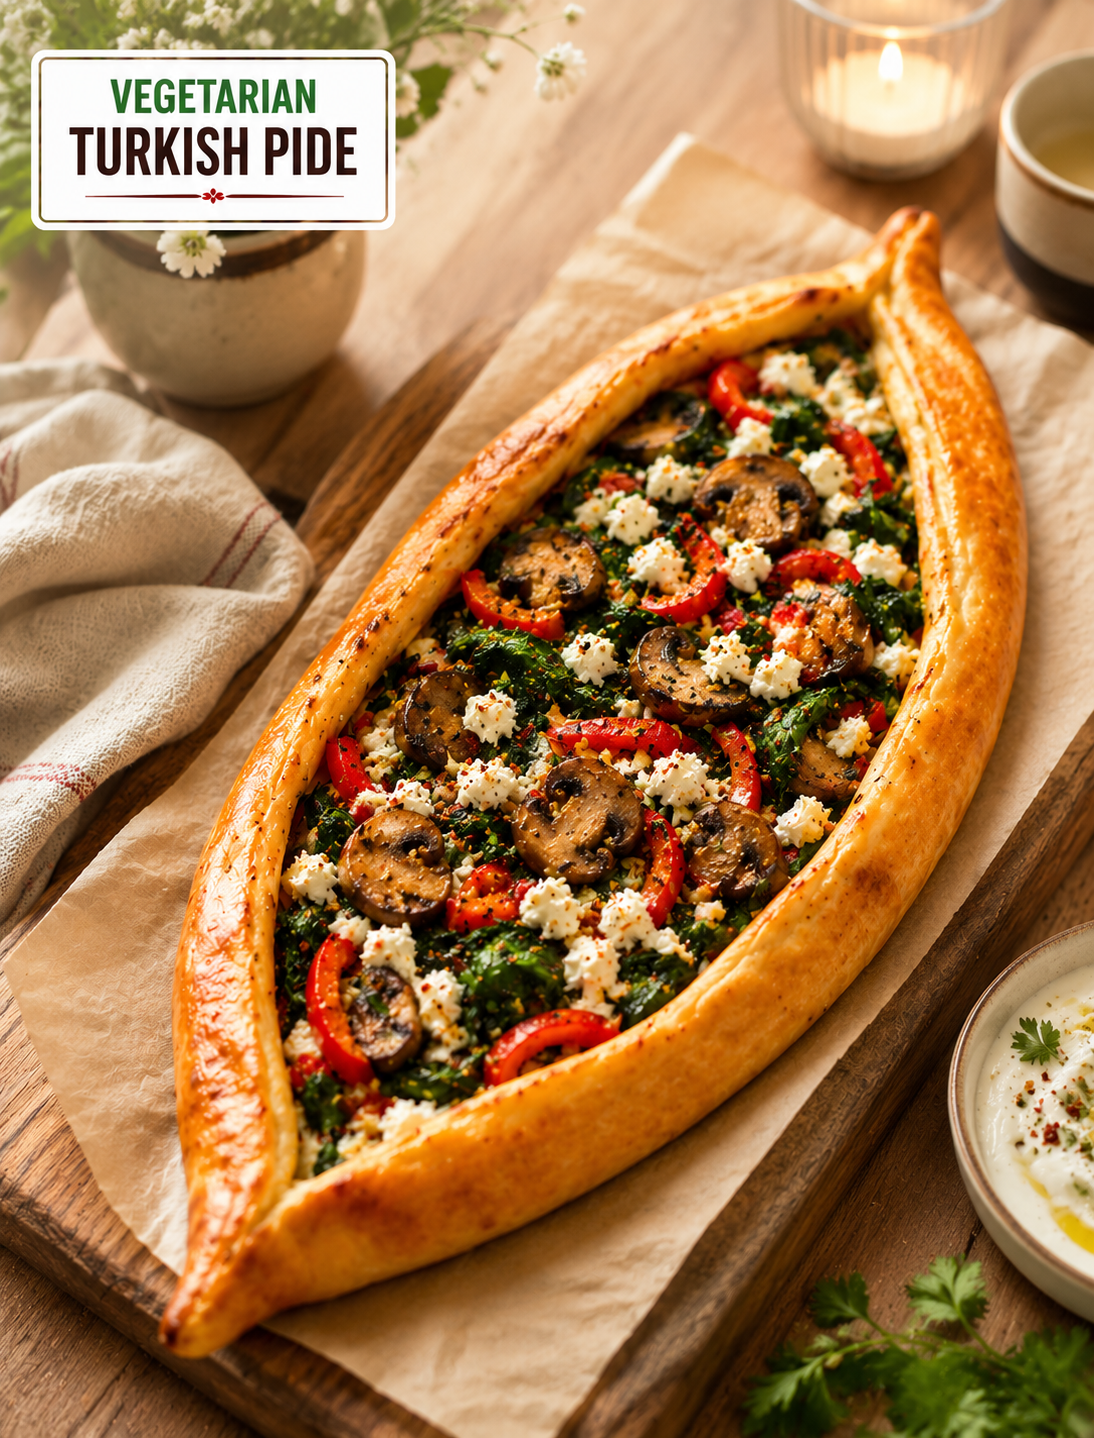
Vegetarian Turkish Pide

Vegetarian Turkish pide with spinach, mushrooms, red peppers, feta cheese, and golden crispy homemade flatbread

Vegetarian Turkish Pide

Vegetarian Turkish Pide is a golden, oval-shaped flatbread filled with sautéed vegetables, spinach, mushrooms, feta cheese, and mild Turkish spices. It has crisp edges, a soft center, and a savory filling that makes it satisfying enough for lunch, dinner, or a casual weekend meal.

This Turkish-inspired flatbread is a great meatless option when you want something hearty without making a complicated dish. The vegetables are cooked before they go into the dough, which gives the filling a rich flavor and prevents the pide from becoming watery while baking.

The recipe uses simple ingredients that are easy to find in most U.S. grocery stores. Serve the finished pide warm, cut it into slices, and enjoy it with a fresh salad, yogurt sauce, or your favorite Mediterranean side.

Why You’ll Love This Vegetarian Turkish Pide

This homemade Turkish pide combines homemade yeast dough with a flavorful vegetable filling and salty feta cheese. The dough becomes lightly crisp around the edges while staying tender in the middle.

Mushrooms provide a meaty texture, while red bell pepper adds natural sweetness and color. Spinach brings freshness, and feta gives the filling a creamy, tangy finish.

Another advantage is that the dough can be prepared ahead of time. Once the vegetables are cooked, assembling the pide is simple, making this recipe useful for busy weeknight dinners or relaxed family meals.

Ingredients For:

Dough

  • 1 cup warm water, about 90–110°F
  • 2 ¼ teaspoons instant dry yeast
  • 1 teaspoon granulated sugar
  • 2 ¼ cups all-purpose flour, about 300 g
  • 1 teaspoon sea salt or kosher salt
  • 3 tablespoons olive oil, divided

Vegetable Filling

  • 2 tablespoons olive oil, divided
  • 1 medium onion, finely chopped
  • 4 garlic cloves, minced
  • 8 ounces cremini or white button mushrooms, sliced
  • 1 large red bell pepper, thinly sliced
  • 5 ounces fresh spinach, washed and patted dry
  • ¾ cup crumbled feta cheese
  • 1 teaspoon Aleppo pepper
  • Salt and freshly ground black pepper, to taste

Egg Wash

  • 1 large egg, beaten
  • 1 tablespoon olive oil

How to Make Vegetarian Turkish Pide

Prepare the Dough

Preheat your oven to 400°F and line two baking sheets with parchment paper.

Mix the warm water, instant yeast, and sugar in a medium bowl. Stir gently and let the mixture stand for 5–8 minutes until it becomes slightly foamy.

In a large bowl, whisk together the flour and salt. Make a well in the center and add the yeast mixture and 2 tablespoons of olive oil.

Mix with a wooden spoon or spatula until a sticky, shaggy dough forms. Transfer the dough to a lightly floured surface and knead for 3–4 minutes until smooth and soft.

Add the remaining tablespoon of olive oil and continue kneading. If the dough feels overly wet, add flour one tablespoon at a time rather than adding too much at once.

Place the dough in a lightly oiled bowl and turn it once to coat the surface. Cover it with plastic wrap and let it rise in a warm place for about 1 hour, or until doubled in size.

Cook the Vegetable Filling

Heat 1 tablespoon of olive oil in a large skillet over medium heat. Add the chopped onion, garlic, mushrooms, and red bell pepper.

Cook for about 10 minutes, stirring occasionally. The onions should become translucent, the mushrooms should soften, and the peppers should lose their raw texture.

Turn off the heat and stir in the spinach, feta cheese, and Aleppo pepper. Season with salt and freshly ground black pepper.

Let the filling cool before assembling the flatbreads. Cooling the mixture helps prevent excess moisture from weakening the dough.

Shape the Pide

Transfer the risen dough to a lightly floured surface and knead it for 1–2 minutes to release some of the air.

Divide the dough into two equal portions and shape each portion into a smooth ball.

Stretch each dough ball into an oval approximately 8 x 16 inches. Use a rolling pin for an even shape, or gently stretch the dough with your hands.

Place one oval on a prepared baking sheet. Spread half of the vegetable mixture down the center while leaving about a 1-inch border around the edges.

Fold the long sides inward slightly to create a raised border. Pinch and twist both ends so the pide has its classic pointed shape.

Repeat with the second dough portion and remaining filling.

Add the Egg Wash and Bake

Whisk the beaten egg with 1 tablespoon of olive oil. Brush the mixture over the exposed dough edges.

Bake the two pides at 400°F for 23–25 minutes, or until the crust is golden brown and the edges look crisp.

Let the pide rest for a few minutes before slicing. Serve warm for the best texture and flavor.

Tips for the Best Turkish Pide

Use warm rather than hot water for the yeast. Water that is too hot can interfere with proper yeast activity.

Avoid adding too much flour while kneading. A slightly soft dough produces a more tender crust.

Cook the vegetables until their excess moisture has evaporated. This keeps the center of the pide from becoming soggy.

Do not overload the dough with filling. A moderate layer allows the crust to bake evenly and remain crisp.

For extra browning, brush the dough border evenly with egg wash before baking.

If you prefer a richer cheese flavor, add a small amount of shredded mozzarella alongside the feta.

Serving Suggestions

Slice the baked pide into strips or smaller portions and serve it while warm. A simple cucumber and tomato salad adds freshness and balances the savory filling.

For a creamy side, serve the pide with plain Greek yogurt mixed with lemon juice, garlic, and a pinch of salt.

It also works well with hummus, olives, roasted vegetables, or a light Mediterranean salad. For a casual gathering, cut the pide into small pieces and serve it as a vegetarian appetizer.

Storage and Reheating

Store leftover Turkish pide in an airtight container in the refrigerator for up to 3 days.

Reheat slices in a 350°F oven or air fryer until warmed through and crisp around the edges. Avoid microwaving for too long because it can make the crust soft.

You can also prepare the dough ahead of time and refrigerate it overnight. Let it come closer to room temperature before shaping.

Nutrition Information

Nutrition values vary based on ingredient brands, portion size, and the amount of filling used. An approximate serving may provide carbohydrates from the flour, protein from the feta and egg, fiber from the vegetables, and healthy fats from olive oil.

For a more balanced meal, serve one portion with a large vegetable salad or another fiber-rich side.

Frequently Asked Questions

What is Turkish pide?

Turkish pide is an oval-shaped flatbread traditionally baked with different savory toppings, including vegetables, cheese, meat, or eggs.

Is Vegetarian Turkish Pide healthy?

It can be part of a balanced diet because it combines vegetables, spinach, mushrooms, feta, and olive oil in one meal.

Can I make pide without eggs?

Yes. You can skip the egg wash and brush the edges with olive oil for a simple vegetarian finish.

Can I use whole wheat flour?

Yes, but replacing all the flour may produce a denser crust; start by replacing part of the all-purpose flour with whole wheat flour.

Can I make the dough ahead of time?

Yes. Refrigerate the covered dough overnight and allow it to warm slightly before shaping and baking.

What vegetables can I use in Turkish pide?

You can add zucchini, tomatoes, roasted peppers, broccoli, or other vegetables, but cook watery vegetables first to reduce excess moisture.

How do I keep pide crispy?

Cook the filling until excess moisture is gone, avoid overfilling the dough, and bake until the edges are deeply golden.

What should I serve with Turkish pide?

Serve it with Greek yogurt sauce, hummus, cucumber salad, tomatoes, olives, or a fresh Mediterranean-style salad.

Final Thoughts

Vegetarian Turkish Pide is an easy way to bring Turkish-inspired flavors to your home kitchen. The combination of crisp homemade dough, tender vegetables, spinach, mushrooms, feta, and Aleppo pepper creates a flavorful meatless meal without complicated cooking techniques.

Bake it for a family dinner, weekend lunch, or casual gathering and serve it warm with your favorite Mediterranean sides. Once you master the dough and shaping technique, you can experiment with different vegetable and cheese combinations to create your own version.
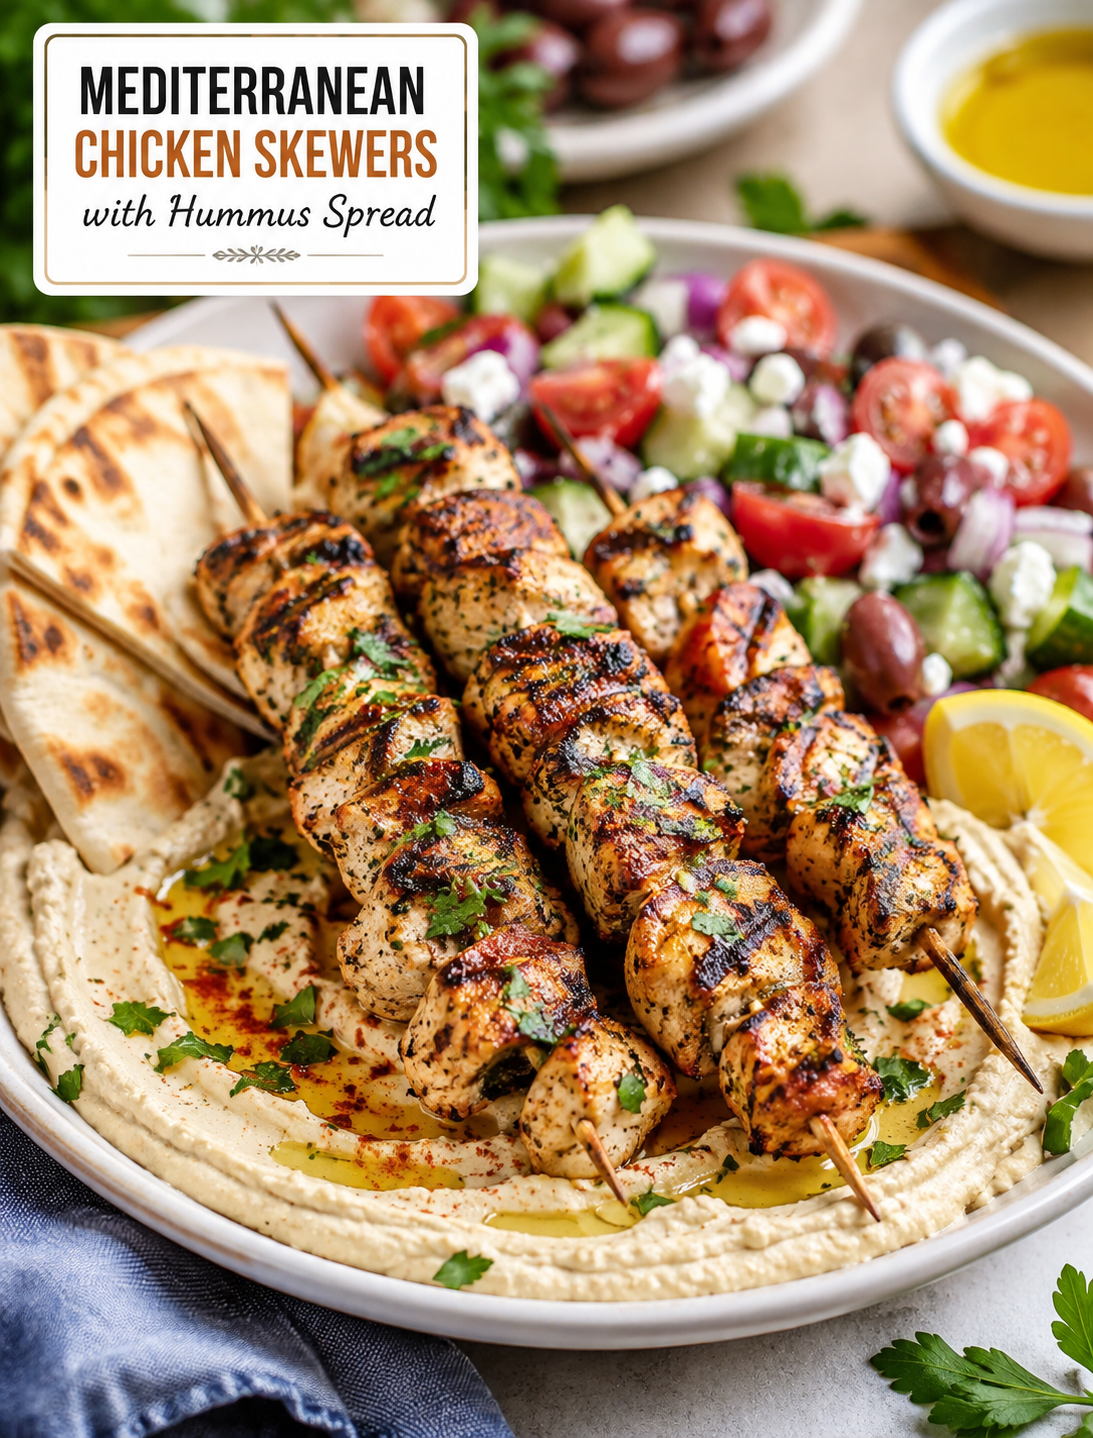
Mediterranean Chicken Skewers with Hummus Spread

Mediterranean chicken skewers served over creamy hummus with pita, cucumber, tomatoes, olives, and fresh herbs.

Mediterranean Chicken Skewers with Hummus Spread

Mediterranean Chicken Skewers with Hummus Spread bring juicy grilled chicken, bright lemon, garlic, herbs, and creamy hummus together in one easy meal. The chicken is marinated with olive oil, lemon juice, garlic, oregano, paprika, and cumin before it is grilled until tender with lightly charred edges. A smooth hummus spread adds a creamy, savory finish that pairs perfectly with the seasoned chicken.

This Mediterranean-inspired recipe is a great choice for a quick family dinner, weekend cookout, or casual gathering. Serve the skewers with warm pita, fresh vegetables, Greek salad, or roasted potatoes for a complete meal. The simple ingredients also make this dish easy to adjust for different tastes.

Prep Time, Cook Time, and Servings

Prep Time: 25 minutes
Marinating Time: 30 minutes to 4 hours
Cook Time: 12–15 minutes
Total Time: About 1 hour, excluding longer marinating time
Servings: 4

Why You’ll Love This Recipe

These chicken skewers are easy to prepare and full of fresh Mediterranean flavor. Lemon juice adds brightness, while garlic, oregano, paprika, and cumin give the chicken a warm, savory taste.

Chicken thighs are especially juicy on the grill, while chicken breast provides a leaner option. The hummus spread can be prepared in minutes, so there is no need for a complicated sauce.

This recipe also works well for meal prep. Cooked chicken can be added to salads, grain bowls, wraps, or pita sandwiches later in the week.

Ingredients For:

Chicken Skewers

  • 700 g boneless, skinless chicken breast or thighs, cut into even cubes
  • 3 tablespoons extra virgin olive oil
  • 2 tablespoons fresh lemon juice
  • 3 garlic cloves, minced
  • 1 teaspoon smoked paprika
  • 1 teaspoon dried oregano
  • ½ teaspoon ground cumin
  • ¾ teaspoon salt
  • ½ teaspoon black pepper
  • 1 tablespoon chopped fresh parsley or cilantro

Hummus Spread

  • 1½ cups classic hummus
  • 1 tablespoon extra virgin olive oil
  • 1 tablespoon fresh lemon juice
  • 1 small garlic clove, finely grated
  • Salt to taste

Serving

  • Warm pita bread or flatbread
  • Chopped cucumber
  • Fresh tomatoes
  • Kalamata or green olives
  • Fresh parsley
  • Extra virgin olive oil
  • Lemon wedges

How to Make Mediterranean Chicken Skewers

Start by preparing the chicken marinade. Add olive oil, lemon juice, minced garlic, smoked paprika, oregano, cumin, salt, and black pepper to a large bowl.

Add the cubed chicken and toss until every piece is evenly coated. Cover the bowl and refrigerate for at least 30 minutes. For a stronger flavor, let the chicken marinate for up to 4 hours.

If you are using wooden skewers, soak them in water for about 20 minutes. This helps reduce the chance of the wood burning during cooking.

Thread the chicken pieces onto the skewers, leaving small spaces between them. Evenly sized pieces will cook more consistently.

Preheat a grill, grill pan, or oven broiler over medium-high heat. Place the skewers on the hot cooking surface and grill for about 6–7 minutes per side. Turn them carefully so the chicken develops an even golden-brown surface.

Cook the chicken until the center reaches 165°F (74°C) on a food thermometer. Avoid relying only on color to judge doneness.

While the chicken cooks, combine the hummus, olive oil, lemon juice, grated garlic, and a small amount of salt. Stir until smooth and creamy.

Spread the hummus over a serving platter. Place the hot chicken skewers on top and finish with fresh parsley, a drizzle of olive oil, and lemon wedges.

Tips for the Best Chicken Skewers

Cut the chicken into similar-sized pieces so smaller pieces do not dry out before larger pieces are cooked.

Use chicken thighs when you want especially juicy skewers. Chicken breast is a good choice when you prefer a leaner cut.

Do not marinate the chicken for more than 4 hours when using a strongly acidic marinade. Extended exposure to lemon juice can affect the texture.

Preheat the grill before adding the chicken. A hot cooking surface helps create browned edges and attractive grill marks.

Avoid overcrowding the skewers. Small gaps allow heat to circulate around the chicken.

Use a meat thermometer to check the thickest piece before serving. The chicken should reach 165°F for food safety.

Let the cooked chicken rest for a few minutes before serving. This helps the meat stay moist and tender.

Variations

For extra tenderness, add a few tablespoons of plain Greek yogurt to the marinade.

Add sliced bell peppers and red onions between the chicken pieces for colorful vegetable skewers.

Use roasted red pepper hummus or spicy hummus when you want a different flavor.

Sprinkle the finished dish with sumac or za’atar for a bright Middle Eastern-inspired touch.

Add a pinch of red pepper flakes to the marinade for mild heat.

Replace chicken with lamb cubes for a richer variation.

Turn the leftovers into pita wraps with hummus, lettuce, tomatoes, cucumbers, and pickles.

For a lighter meal, serve the chicken over greens instead of pita bread.

Serving Suggestions

Serve these grilled chicken skewers with warm pita bread and extra hummus for an easy Mediterranean-style dinner. A fresh Greek salad with cucumber, tomato, red onion, olives, and feta makes a refreshing side.

Roasted vegetables, lemon rice, couscous, or quinoa also pair well with the seasoned chicken. For a casual party, arrange the skewers on a large platter with hummus, pita wedges, olives, sliced vegetables, and lemon wedges.

Leftover chicken can be chilled and added to lunch bowls or salads the next day. Keep cooked chicken refrigerated in an airtight container and use it within 3–4 days.

Nutrition Facts

Approximate nutrition per serving:

  • Calories: 420
  • Protein: 38 g
  • Fat: 22 g
  • Carbohydrates: 20 g
  • Fiber: 5 g
  • Iron: 15% DV

Nutrition values can vary depending on the chicken cut, hummus brand, serving size, and amount of olive oil used.

Frequently Asked Questions

Can I make these chicken skewers in the oven?

Yes. Arrange the skewers on a lined baking sheet and broil under high heat, turning once, until the chicken reaches 165°F.

How long should I marinate the chicken?

Marinate the chicken for at least 30 minutes and up to 4 hours for stronger flavor and better seasoning.

Can I use chicken breast instead of thighs?

Yes. Chicken breast works well, but cook it carefully because it can become dry if overcooked.

Can I prepare the hummus ahead of time?

Yes. Mix the hummus ingredients up to one day ahead and keep it covered in the refrigerator until serving.

How do I know when the chicken is cooked?

Check the thickest piece with a food thermometer and remove the chicken when it reaches 165°F (74°C).

Can I freeze the marinated chicken?

Yes. Freeze the seasoned raw chicken in an airtight freezer-safe container for up to 1 month and thaw it safely before cooking.

What can I serve with Mediterranean chicken skewers?

Warm pita, Greek salad, roasted vegetables, couscous, quinoa, rice, olives, and fresh cucumber all pair well with the chicken.

Is this recipe spicy?

No. The basic recipe has mild seasoning, but you can add red pepper flakes or cayenne if you prefer more heat.

Final Thoughts

Mediterranean Chicken Skewers with Hummus Spread are an easy way to bring fresh, bold flavors to the dinner table. The lemon-garlic marinade keeps the chicken flavorful, while oregano, paprika, and cumin add depth without overpowering the meat.

Creamy hummus makes a simple spread that ties the whole dish together. Add warm pita, crisp vegetables, and a fresh salad for a balanced meal that feels special without requiring much effort.

Whether you are cooking a weeknight dinner or serving guests at a backyard gathering, these grilled chicken skewers are easy to prepare, simple to customize, and packed with Mediterranean-inspired flavor.

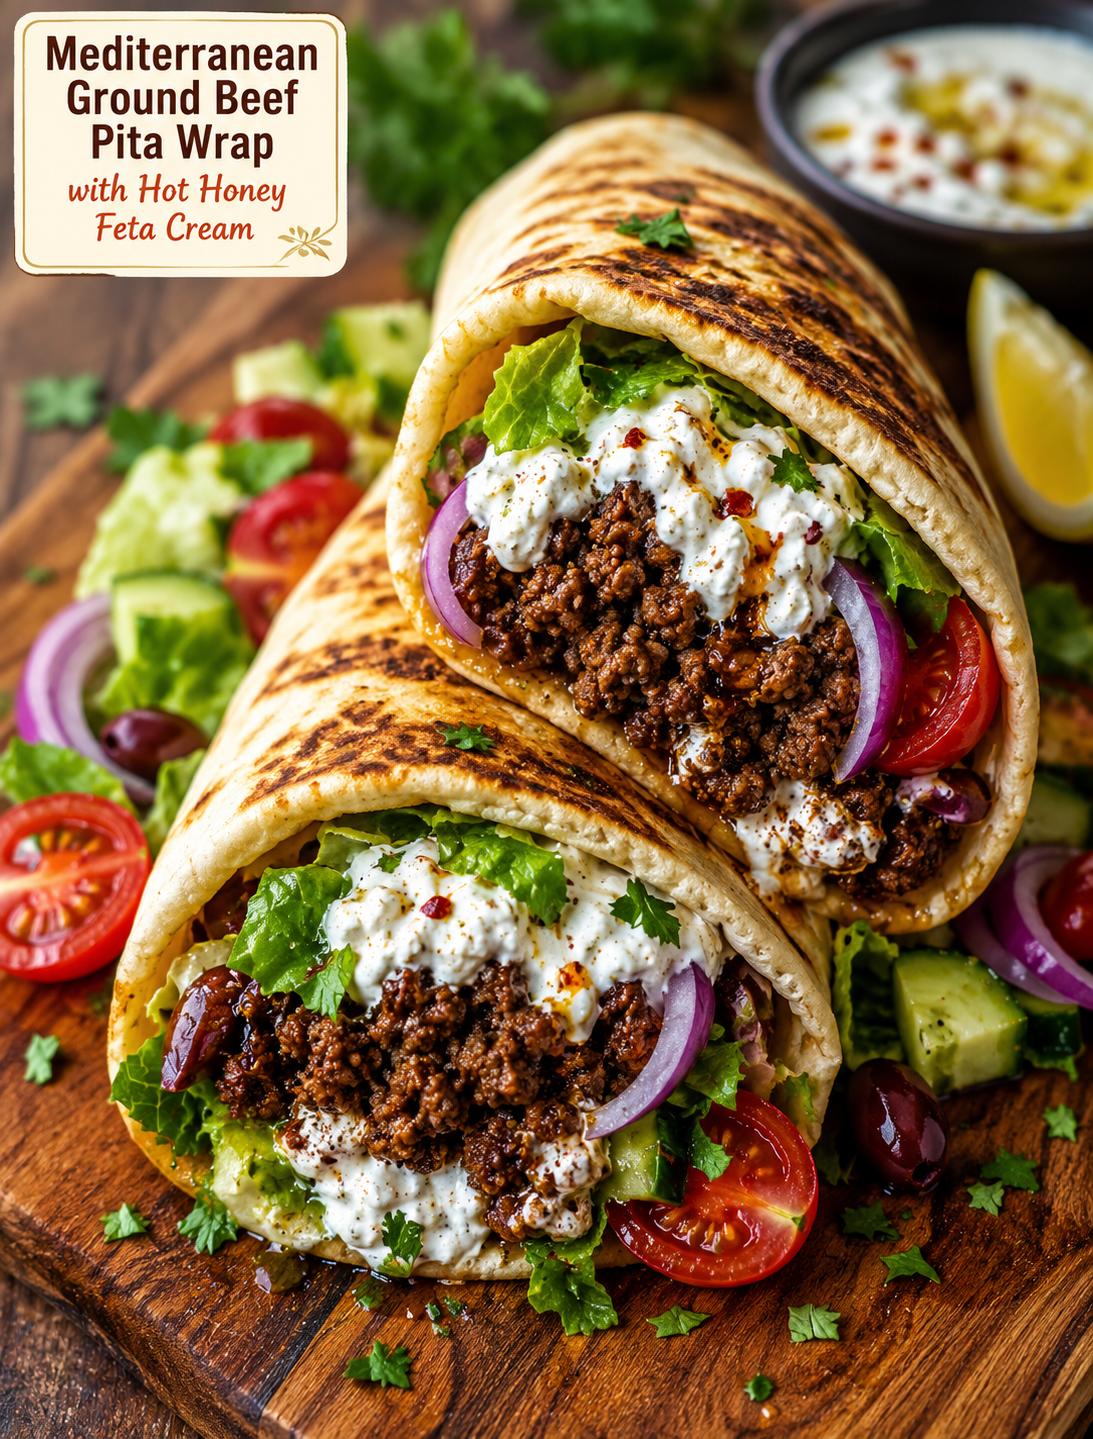
Mediterranean Ground Beef Pita Wrap with Hot Honey Feta Cream

Mediterranean Ground Beef Pita Wrap

Mediterranean Ground Beef Pita Wrap with Hot Honey Feta Cream

Difficulty: Easy
Servings: 4
Prep Time: 15 minutes
Cook Time: 15 minutes
Total Time: 30 minutes

Description

These Mediterranean Ground Beef Pita Wraps with Hot Honey Feta Cream are packed with bold, fresh, savoury flavours. Seasoned ground beef is cooked with garlic, paprika, cumin, oregano, and lemon, then tucked into warm pita bread with crisp vegetables and a creamy feta sauce.

The star of the recipe is the hot honey feta cream—a smooth, tangy, slightly sweet sauce with a gentle spicy kick. The combination of salty feta, creamy yoghurt, honey, and chilli creates an irresistible contrast with the warmly spiced beef.

These wraps are perfect for a quick weeknight dinner, lunch, meal prep, or casual entertaining.

Ingredients For;

Beef

  • 500 g ground beef
  • 1 tablespoon olive oil
  • 3 garlic cloves, minced
  • 1 teaspoon paprika
  • 1 teaspoon ground cumin
  • 1 teaspoon dried oregano
  • 1/2 teaspoon smoked paprika
  • 1/2 teaspoon salt
  • 1/4 teaspoon black pepper
  • 1 tablespoon fresh lemon juice
  • 2 tablespoons chopped fresh parsley

Hot Honey Feta Cream

  • 100 g feta cheese, crumbled
  • 1/2 cup plain Greek yogurt
  • 1 tablespoon hot honey
  • 1 tablespoon fresh lemon juice
  • 1 small garlic clove, minced
  • 1 tablespoon extra-virgin olive oil
  • 1/4 teaspoon chili flakes, optional
  • 1–2 tablespoons water, as needed

Wraps

  • 4 pita breads
  • 1 cup chopped lettuce
  • 1/2 cucumber, diced
  • 1 cup cherry tomatoes, halved
  • 1/4 red onion, thinly sliced
  • 1/4 cup Kalamata olives, sliced, optional
  • Fresh parsley or mint
  • Extra feta, optional
  • Lemon wedges for serving

Instructions

1. Prepare the Beef Seasoning

In a small bowl, combine the paprika, cumin, oregano, smoked paprika, salt, and black pepper.

Mix well.

Having the seasoning prepared beforehand makes it easier to season the beef evenly while it cooks.

2. Cook the Ground Beef

Heat 1 tablespoon olive oil in a large skillet over medium-high heat.

Add the ground beef.

Cook for approximately 5–7 minutes, breaking it apart with a wooden spoon or spatula as it cooks.

Continue until the beef is browned and cooked through.

If there’s a large amount of excess fat, carefully drain some of it from the skillet.

3. Add the Garlic and Spices

Add the minced garlic to the cooked beef.

Cook for about 30–60 seconds, stirring frequently.

Add the prepared spice mixture.

Stir thoroughly so the spices coat the beef.

Cook for another 1–2 minutes to allow the spices to become fragrant.

4. Finish the Beef

Turn off the heat.

Add fresh lemon juice and chopped parsley.

Stir well.

Taste and adjust the seasoning if necessary.

The finished beef should be savoury, aromatic, slightly smoky, and bright from the lemon.

Set aside while you prepare the feta cream.

5. Make the Hot Honey Feta Cream

Add the crumbled feta, Greek yoghurt, hot honey, lemon juice, garlic, olive oil, and chilli flakes to a blender or food processor.

Blend until smooth and creamy.

If the mixture is too thick, add 1 tablespoon water at a time until you reach a smooth, spreadable consistency.

Taste and adjust the flavour For;

Sweetness, add another small drizzle of honey.

More heat, add additional chilli flakes.

Tang, add another squeeze of lemon juice.

6. Prepare the Fresh Vegetables

Wash and prepare the vegetables.

Chop the lettuce and cucumber.

Halve the cherry tomatoes.

Thinly slice the red onion.

Slice the olives if using.

Place everything in separate bowls or combine them into a simple salad mixture.

7. Warm the Pitta

Warm the pita breads in a dry skillet over medium heat for approximately 20–30 seconds per side.

You can also warm them in the oven or microwave.

Don’t overheat them, or they may become brittle and difficult to fold.

If using thick pita pockets, carefully open them.

For flat pita bread, simply place the fillings in the centre and fold like a wrap.

8. Assemble the Wraps

Spread a generous spoonful of hot honey feta cream over each warm pita.

Add a layer of lettuce.

Top with the seasoned ground beef.

Add cucumber, tomatoes, red onion, and Kalamata olives.

Sprinkle with fresh parsley or mint and additional feta if desired.

Finish with a small drizzle of hot honey for an extra sweet-spicy kick.

9. Fold and Serve

Fold the bottom of the pita upward slightly, then fold in the sides.

Roll tightly into a wrap.

Serve immediately with fresh lemon wedges.

For an extra Mediterranean touch, serve with hummus, a Greek salad, or roasted vegetables.

Recipe Notes

Choose the right ground beef

Ground beef with moderate fat content works especially well because it keeps the filling juicy and flavourful.

If using very lean beef, you may need an additional drizzle of olive oil during cooking.

Don’t overcook the beef

Cook just until browned and cooked through. Overcooking can make ground beef dry.

Fresh lemon makes a difference

The lemon juice added at the end brightens the spices and balances the richness of the beef and feta.

Blend the feta sauce

Blending creates a smooth, creamy sauce. If you prefer a more rustic texture, mash the ingredients together with a fork instead.

Adjust the heat

Hot honey and chilli flakes can vary significantly in spiciness. Start with a small amount and increase according to your taste.

Helpful Tips

1. Prep everything first.
Because the beef cooks quickly, prepare the vegetables and sauce before you start cooking.

2. Don’t overcrowd the skillet.
A large skillet helps the beef brown instead of steaming.

3. Warm the pita immediately before assembling.
Warm pita is softer and less likely to crack.

4. Keep the sauce cold.
The contrast between warm spiced beef and cool feta cream is especially delicious.

5. Add crunch.
Cucumber, lettuce, and red onion provide a refreshing contrast to the tender beef.

6. Use fresh herbs.
Parsley and mint add a bright Mediterranean finish.

Delicious Variations

Chicken Pita Wrap

Replace ground beef with ground chicken or turkey.

Use the same seasoning mixture and cook until the meat reaches a safe internal temperature.

Lamb Pita Wrap

Ground lamb works beautifully with cumin, oregano, garlic, and feta.

The richer lamb pairs particularly well with the bright lemony sauce.

Vegetarian Version

Replace the beef with roasted chickpeas, lentils, mushrooms, or a combination of vegetables.

Extra-Spicy Wrap

Add diced jalapeño or crushed red pepper to the beef and increase the chilli flakes in the feta cream.

Greek-Inspired Version

Add cucumber, tomato, red onion, Kalamata olives, oregano, and a generous amount of feta.

Make-Ahead Instructions

You can prepare most of the components ahead of time.

Cook the beef and refrigerate it in an airtight container for up to 3–4 days.

The feta cream can also be refrigerated for approximately 3–4 days.

Store the vegetables separately when possible.

When ready to eat, warm the beef and pita, then assemble the wrap with the chilled feta cream and fresh vegetables.

Storage

For the best texture, store the components separately rather than assembling the entire wrap in advance.

Fully assembled wraps can become soggy because of the sauce and vegetables.

Keep:

  • Beef in one container
  • Feta cream in another
  • Vegetables separately
  • Pita wrapped tightly

Assemble immediately before serving.

Approximate Nutritional Information

Per wrap, based on 4 servings:

  • Calories: approximately 650–700
  • Protein: approximately 35–40 g
  • Carbohydrates: approximately 45–50 g
  • Fat: approximately 32–36 g
  • Fiber: approximately 5–7 g
  • Sugar: approximately 7–10 g
  • Sodium: approximately 800–1,000 mg

Nutrition is an estimate and will vary depending on the ground beef, pita, feta, yoghurt, and amount of sauce used.

For a lighter option, use smaller pita breads, leaner ground beef, and a reduced amount of feta cream.

Benefits of This Recipe

Protein-rich

Ground beef, Greek yoghurt, and feta contribute substantial protein, making these wraps satisfying and suitable for a protein-focused meal.

Includes vegetables

Fresh lettuce, cucumber, tomatoes, and onion add fibre, freshness, colour, and texture.

Healthy fats

Olive oil, feta, and Greek yoghurt contribute fats that help create a satisfying meal.

Flavorful without complicated cooking

The combination of cumin, paprika, garlic, oregano, lemon, and herbs creates a lot of flavour with simple ingredients.

Balanced meal

A pita wrap combines protein, carbohydrates, vegetables, and fats in one convenient meal.

These are general nutritional benefits of the ingredients and aren’t medical claims.

Frequently Asked Questions

Can I use ground turkey instead of beef?

Yes. Ground turkey is an excellent substitute. Because it is often leaner than beef, avoid overcooking it.

Can I make the feta cream without Greek yoghurt?

Yes. You can use a little extra feta with olive oil and lemon juice, although the texture will be thicker and more intensely salty.

Can I use regular honey instead of hot honey?

Absolutely. Add regular honey and a pinch of chilli flakes to create your own sweet-spicy sauce.

Is the sauce very spicy?

Not necessarily. The heat depends on the hot honey and chilli flakes. Start with a small amount and adjust.

Can I use naan instead of pita?

Yes. Naan, flatbread, or tortillas can all work as alternatives.

Can I make this recipe gluten-free?

Yes. Use certified gluten-free pita or another gluten-free flatbread.

Can I prepare the beef ahead of time?

Yes. Cooked beef can be refrigerated for up to 3–4 days and reheated before assembling.

How can I make the wrap lower in carbohydrates?

Use a low-carb pita or wrap and increase the amount of lettuce, cucumber, and other non-starchy vegetables.

Can I add hummus?

Definitely. Spread a thin layer of hummus underneath the feta cream for another delicious Mediterranean flavour.

What should I serve with these wraps?

Try them with Greek salad, hummus, roasted vegetables, cucumber salad, or a simple lentil soup.

Final Thoughts

This Mediterranean Ground Beef Pita Wrap with Hot Honey Feta Cream is a fantastic combination of savoury, creamy, fresh, sweet, and spicy flavours. The cumin-and-paprika-seasoned beef provides a hearty filling, while the tangy feta cream adds richness and a subtle kick.

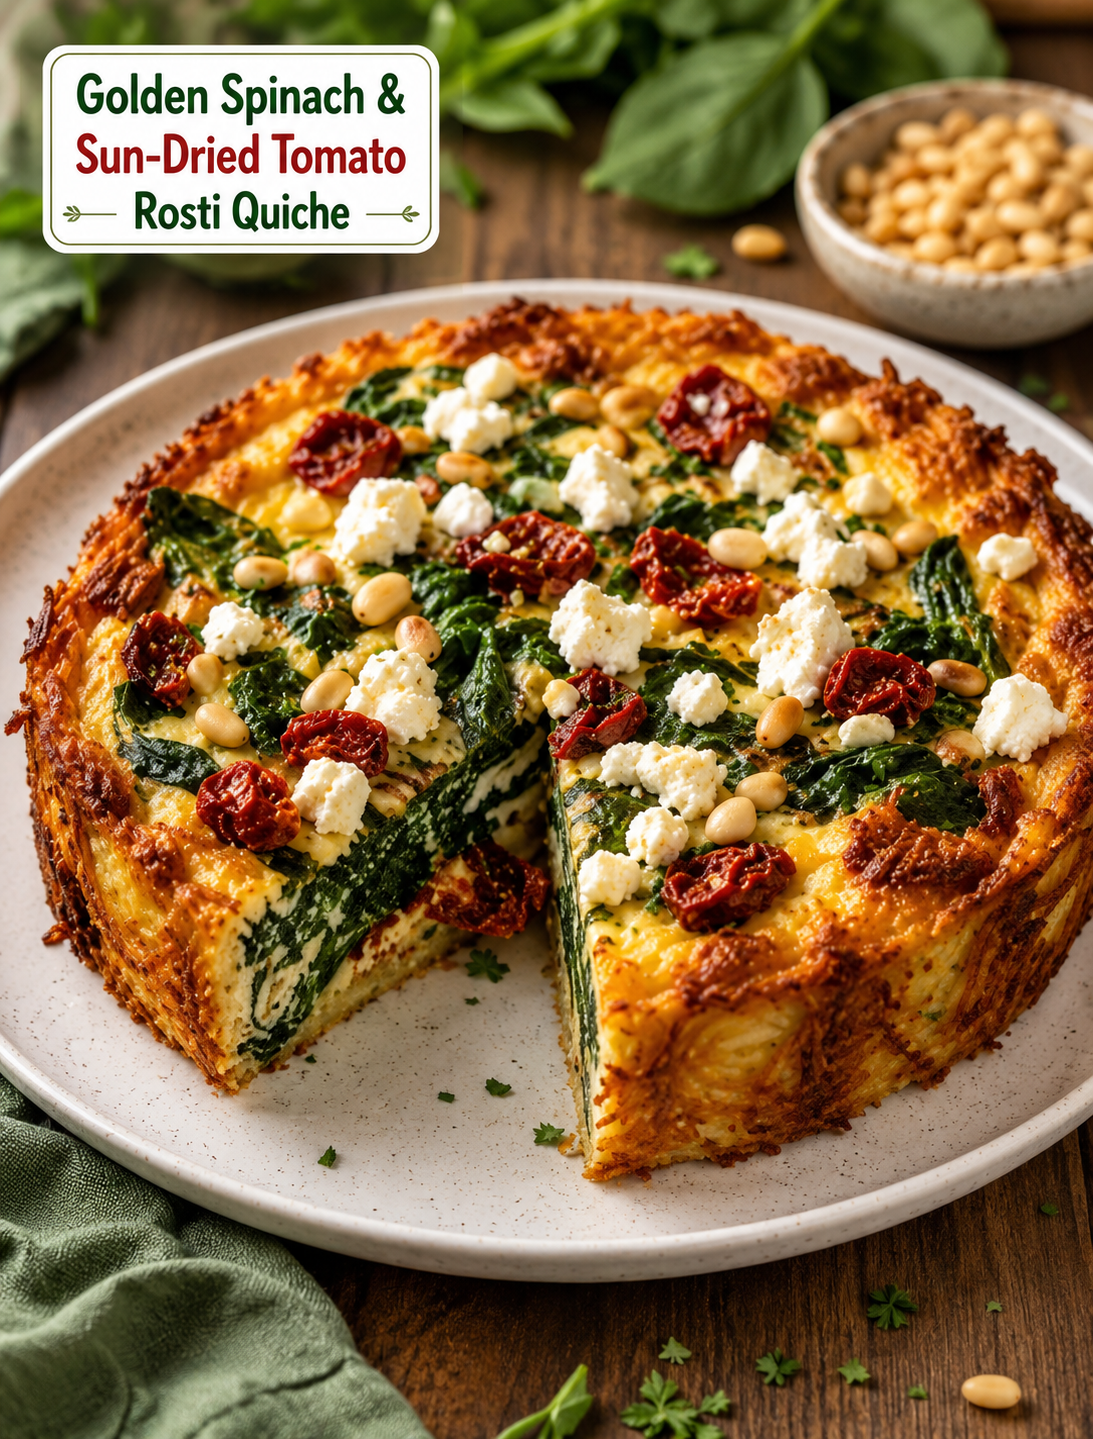
Golden Spinach & Sun-Dried Tomato

Golden Spinach & Sun-Dried Tomato Rosti Quiche with Feta & Pine Nuts Recipe – Crispy, Creamy & Flavorful Savory Delight

Golden Spinach & Sun-Dried Tomato Rosti Quiche with Feta & Pine Nuts Recipe – Crispy, Creamy & Flavorful Savory Delight

Description

Golden Spinach & Sun-Dried Tomato Rosti Quiche with Feta & Pine Nuts is a beautiful combination of a crispy potato rosti crust and a creamy, flavorful quiche filling. This unique recipe blends the comforting texture of golden shredded potatoes with nutritious spinach, tangy feta cheese, sweet sun-dried tomatoes, and crunchy toasted pine nuts.

Unlike traditional quiche made with pastry crust, this recipe uses a crispy potato rosti base that creates a naturally gluten-free style crust with incredible flavor and texture. The outside becomes golden and crunchy while the inside remains soft, creamy, and packed with delicious ingredients.

This savory quiche is perfect for breakfast, brunch, lunch, meal prep, or a light dinner. It is elegant enough for special occasions but simple enough to prepare for everyday meals. The combination of vegetables, protein-rich eggs, cheese, and healthy fats makes it both satisfying and nourishing.

The Mediterranean-inspired flavors of spinach, feta, tomatoes, and herbs create a restaurant-quality dish that looks impressive on any table. Serve it warm with a fresh salad, roasted vegetables, or soup for a complete meal.

Ingredients For:

Rosti Potato Crust

  • 4 large potatoes, peeled and grated
  • 1 teaspoon salt
  • 1/2 teaspoon black pepper
  • 2 tablespoons olive oil
  • 2 tablespoons melted butter

Spinach & Quiche Filling

  • 3 cups fresh spinach
  • 1/2 cup sun-dried tomatoes, chopped
  • 1 cup crumbled feta cheese
  • 6 large eggs
  • 1/2 cup heavy cream or milk
  • 1/2 cup shredded mozzarella cheese
  • 2 cloves garlic, minced
  • 1/2 teaspoon dried oregano
  • 1/2 teaspoon dried basil
  • 1/4 teaspoon chili flakes (optional)
  • Salt and black pepper to taste

The Topping

  • 1/4 cup toasted pine nuts
  • Fresh parsley or basil leaves
  • Extra feta cheese for garnish

Step-by-Step Instructions

Step 1: Prepare the Potato Rosti Crust

Preheat your oven to 400°F (200°C).

Peel and grate the potatoes using a box grater. Place the grated potatoes in a clean kitchen towel and squeeze firmly to remove as much moisture as possible.

Removing extra water is important because it helps create a crispy golden crust instead of a soft or soggy base.

Transfer the grated potatoes to a bowl. Add salt, black pepper, olive oil, and melted butter. Mix well until the potatoes are evenly coated.

Step 2: Bake the Rosti Base

Grease a round baking dish or tart pan with oil.

Press the potato mixture firmly into the bottom and sides of the pan, creating an even crust.

Bake for 25–30 minutes until the potatoes become golden and crispy around the edges.

Remove from the oven and allow it to cool slightly while preparing the filling.

Step 3: Prepare the Spinach Filling

Heat a skillet over medium heat and add a small amount of olive oil.

Add minced garlic and cook for about 30 seconds until fragrant.

Add fresh spinach and cook until wilted. This usually takes 2–3 minutes.

Remove from heat and allow it to cool slightly.

Chop the spinach if needed and remove any excess liquid.

Step 4: Make the Quiche Mixture

In a large bowl, whisk together eggs and cream until smooth.

Add:

  • Cooked spinach
  • Sun-dried tomatoes
  • Feta cheese
  • Mozzarella cheese
  • Oregano
  • Basil
  • Chili flakes
  • Salt and pepper

Mix gently until all ingredients are evenly combined.

Step 5: Assemble the Quiche

Pour the spinach and feta mixture into the baked potato rosti crust.

Spread evenly using a spoon.

Sprinkle additional feta cheese on top for extra flavor.

Step 6: Bake the Quiche

Reduce oven temperature to 375°F (190°C).

Bake for 30–40 minutes until:

  • The filling is completely set.
  • The top is lightly golden.
  • The cheese is melted.

Insert a knife into the center. If it comes out clean, the quiche is ready.

Step 7: Add Final Garnish

Remove from the oven and allow the quiche to rest for 10 minutes.

Top with toasted pine nuts, fresh parsley, or basil.

Slice and serve warm.

Tips for Perfect Golden Spinach & Sun-Dried Tomato Rosti Quiche

1. Remove Moisture From Potatoes

Dry potatoes create a crispy crust. Always squeeze grated potatoes well before baking.

2. Cook Spinach First

Fresh spinach releases water during cooking. Removing excess moisture prevents a watery filling.

3. Use Quality Feta Cheese

Good-quality feta provides a creamy texture and delicious salty flavor that balances the sweetness of sun-dried tomatoes.

4. Toast Pine Nuts

Lightly toasting pine nuts enhances their natural nutty flavor and adds extra crunch.

5. Let the Quiche Rest

Allowing the quiche to cool slightly helps the filling set and makes slicing easier.

6. Customize the Filling

You can add:

  • Mushrooms
  • Roasted peppers
  • Caramelized onions
  • Broccoli
  • Chicken
  • Smoked salmon

Recipe Notes

  • This quiche can be served warm or at room temperature.
  • It is perfect for meal preparation because it stores well.
  • Refrigerate leftovers in an airtight container for up to 4 days.
  • Reheat slices in the oven for the best texture.
  • The potato crust can be prepared one day ahead.
  • For a lighter version, replace heavy cream with milk or Greek yogurt.
  • Use sweet potatoes instead of regular potatoes for a different flavor.

Benefits of Golden Spinach & Sun-Dried Tomato Rosti Quiche

1. Rich in Protein

Eggs, feta cheese, and mozzarella provide protein that supports muscle repair and helps keep you feeling full.

2. Supports Healthy Digestion

Spinach contains dietary fiber that supports healthy digestion and regular bowel function.

3. Provides Essential Vitamins

Spinach provides vitamins A, C, and K, along with important minerals like iron and magnesium.

4. Contains Healthy Fats

Olive oil and pine nuts provide beneficial unsaturated fats that support overall wellness.

5. Supports Bone Health

Cheese provides calcium and phosphorus, important nutrients for maintaining strong bones.

6. Balanced Meal Option

This recipe combines vegetables, protein, carbohydrates, and healthy fats, making it a satisfying meal choice.

Note: Benefits depend on ingredients, serving size, and overall diet.

Servings & Nutritional Information

Recipe Name: Golden Spinach & Sun-Dried Tomato Rosti Quiche with Feta & Pine Nuts
Preparation Time: 25 minutes
Cooking Time: 60 minutes
Total Time: 1 hour 25 minutes
Servings: 8 slices

Approximate Nutrition Per Serving

  • Calories: 320 kcal
  • Protein: 14g
  • Carbohydrates: 22g
  • Fat: 21g
  • Saturated Fat: 8g
  • Fiber: 3g
  • Sugar: 3g
  • Calcium: 220mg
  • Iron: 3mg
  • Sodium: 520mg

Nutritional values may vary depending on brands and ingredient quantities.

Frequently Asked Questions (Q&A)

Can I make this quiche ahead of time?

Yes. This recipe is perfect for meal prep. Prepare it a day ahead and store it in the refrigerator. Reheat before serving.

Can I freeze Rosti Quiche?

Yes. Allow it to cool completely, wrap slices individually, and freeze for up to 2 months. Thaw and reheat before serving.

Can I use frozen spinach?

Yes. Frozen spinach works well. Thaw completely and squeeze out excess water before adding.

Can I make this recipe vegetarian?

Yes. The recipe is naturally vegetarian and packed with flavorful vegetables and cheese.

Can I make it dairy-free?

Yes. Replace dairy cheese with plant-based alternatives and use dairy-free milk.

What can I serve with this quiche?

It pairs well with:

  • Fresh green salad
  • Tomato salad
  • Roasted vegetables
  • Vegetable soup
  • Fresh fruit

Why is my potato crust not crispy?

The most common reason is excess moisture in potatoes. Make sure to squeeze grated potatoes very well before baking.

Conclusion

Golden Spinach & Sun-Dried Tomato Rosti Quiche with Feta & Pine Nuts is a delicious Mediterranean-inspired recipe that combines crispy potatoes, creamy eggs, flavorful vegetables, and rich cheese into one impressive dish.

With its golden crust, colorful filling, and satisfying texture, this quiche is perfect for breakfast, brunch, lunch, or dinner. It is easy to customize, packed with nutrients, and guaranteed to become a favorite recipe for family and guests.