Vegan Cherries in the Snow Dessert

Vegan Cherries in the Snow Dessert with a fluffy vanilla cream layer and glossy cherry topping served chilled

Vegan Cherries in the Snow Dessert

Description

Vegan Cherries in the Snow Dessert is a creamy, no-bake treat made with vegan cream cheese, fluffy whipped topping, and a bright cherry layer. It has a soft vanilla “snow” base with a sweet and slightly tart cherry topping that makes every spoonful refreshing.

This easy dessert is a great choice when you want something special without turning on the oven. It works well for holiday dinners, family gatherings, potlucks, birthdays, and simple weeknight treats. You can prepare it in one dish or serve it in individual glasses for a more elegant presentation.

The recipe takes about 15 minutes to prepare, but it needs at least 2 hours in the refrigerator to set and chill. For the best texture, keep it cold until you are ready to serve.

Time Required

  • Prep time: 15 minutes
  • Chilling time: 2 hours minimum
  • Total time: About 2 hours 15 minutes
  • Difficulty: Very easy
  • Servings: 6–8

There is no baking, complicated equipment, or advanced cooking technique needed for this dessert.

Ingredients (Serves 6–8)

Snow Layer (Base)

  • 1 cup vegan cream cheese, softened to room temperature
  • 1 cup coconut whipped cream or soy whipping cream
  • ½ cup powdered sugar
  • 1 teaspoon vanilla extract
  • 1 cup mini vegan marshmallows, optional

Cherry Layer (Top)

For a quick version:

  • 1 can (400 g) cherry pie filling

For a homemade cherry topping:

  • 2 cups pitted cherries
  • ¼ cup granulated sugar
  • 1 tablespoon cornstarch
  • ¼ cup water

Room-temperature vegan cream cheese blends more smoothly and helps prevent lumps in the creamy layer. If using coconut whipped cream, choose a variety with a mild flavor so the vanilla and cherry flavors remain noticeable.

Instructions

Step 1: Make the Snow Layer

Place the softened vegan cream cheese in a large mixing bowl.

Beat the cream cheese until smooth and creamy. Scrape the sides of the bowl as needed so no firm pieces remain.

Add the powdered sugar and vanilla extract. Mix until the sugar is fully blended and the mixture looks smooth.

Gently fold in the coconut whipped cream or soy whipping cream. Use a spatula and fold slowly to keep the mixture light and fluffy.

Add the mini vegan marshmallows if you want the traditional soft, chewy texture. Stir gently until they are evenly distributed.

Spread the finished mixture into a glass baking dish or serving bowl. Smooth the top with a spatula so the cherry layer can sit evenly over the surface.

Step 2: Prepare the Cherry Topping

If you are using canned cherry pie filling, simply open the can and set it aside.

For homemade cherry topping, place the pitted cherries, sugar, cornstarch, and water in a saucepan.

Cook over medium heat while stirring often. Continue cooking until the mixture becomes thick and glossy.

Remove the saucepan from the heat and allow the cherry mixture to cool completely. Do not spread hot cherries over the creamy layer because the heat can soften the base.

Step 3: Assemble the Dessert

Spoon the cooled cherry topping evenly over the snow layer.

Use the back of a spoon or a spatula to spread the cherries from edge to edge.

Cover the dish tightly and place it in the refrigerator.

Chill for at least 2 hours before serving. A longer chilling time can give the dessert a firmer texture and allow the vanilla and cherry flavors to blend.

Step 4: Serve Chilled

Remove the dessert from the refrigerator just before serving.

Spoon it directly from the dish or portion it into individual dessert glasses.

For a simple finishing touch, add a fresh cherry or a small mint leaf to each serving.

Serving Suggestions

Vegan Cherries in the Snow Dessert looks especially attractive when served in clear glass cups. The white creamy layer and red cherry topping create a simple layered effect without extra decoration.

For holidays, serve it in small dessert glasses so guests can enjoy individual portions. This also makes the recipe convenient for parties and family gatherings.

Fresh cherries can add color and a slightly firmer fruit texture. A small mint leaf provides a fresh contrast and makes each serving look more polished.

This chilled dessert pairs nicely with coffee, black tea, or herbal tea. Since it is rich and creamy, small portions are usually enough after a full meal.

Storage

Cover leftover dessert tightly and keep it refrigerated.

For the best texture and flavor, enjoy it within 3 days. Keep the dessert cold between serving times and return it to the refrigerator as soon as possible.

If you are preparing it ahead for a gathering, make it the day before. The extra chilling time allows the layers to firm up and the flavors to develop.

Nutritional Information

Approximate nutrition per serving:

  • Calories: 240–270 kcal
  • Carbohydrates: 30 g
  • Fat: 12 g
  • Protein: 3 g
  • Sugar: 20 g
  • Fiber: 2 g

Nutrition values can change depending on the vegan cream cheese, whipped topping, marshmallows, and cherry filling used. Check individual product labels when exact nutrition information is important.

Questions & Answers

Can I make Vegan Cherries in the Snow Dessert ahead of time?

Yes. Prepare it the day before and keep it covered in the refrigerator for a convenient make-ahead dessert.

Can I skip the vegan marshmallows?

Yes. The marshmallows are optional, and the dessert will still have a creamy, fluffy texture without them.

What can I use instead of coconut whipped cream?

Soy whipping cream or oat-based whipping cream can replace coconut whipped cream while keeping the dessert dairy-free.

Can I use homemade cherry topping?

Yes. Cook pitted cherries with sugar, cornstarch, and water until thick, then cool the topping completely before assembling.

Is this dessert gluten-free?

It can be gluten-free, but check every package, especially the marshmallows, whipped topping, cream cheese, and cherry filling.

Can I use frozen cherries?

Yes. Thaw frozen pitted cherries first and drain excess liquid before cooking the homemade topping.

Can I use other fruit instead of cherries?

Yes. Blueberries, strawberries, raspberries, or mixed berries can replace the cherries for a different fruit flavor.

How long does this dessert last in the refrigerator?

Store it covered in the refrigerator and enjoy it within 3 days for the best taste and texture.
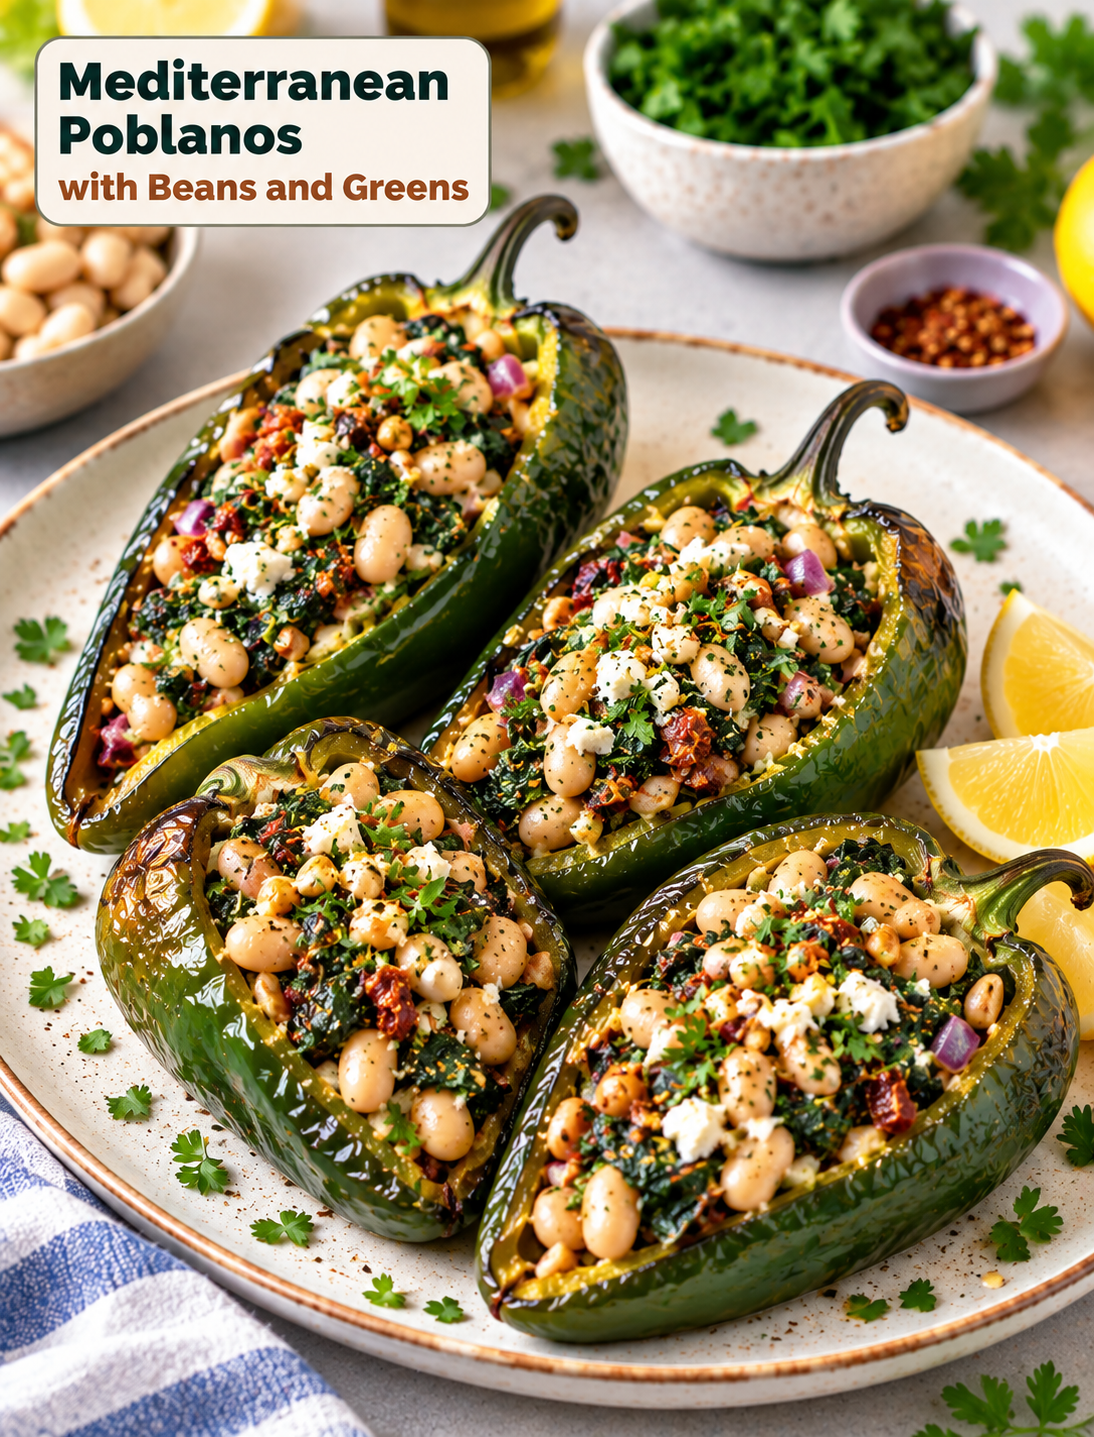
Mediterranean Poblanos with Beans and Greens

Mediterranean poblano peppers stuffed with white beans, leafy greens, herbs, and spices

Mediterranean Poblanos with Beans and Greens

Mediterranean Poblanos with Beans and Greens are a flavorful plant-based meal made with roasted poblano peppers, creamy white beans, leafy greens, fresh herbs, garlic, and warm spices. The peppers become tender and slightly smoky while the filling stays hearty, bright, and satisfying.

This stuffed pepper recipe is naturally vegan and gluten-free, making it a simple choice for weeknight dinners, meal prep, or a light lunch. Lemon juice and fresh herbs add a fresh finish, while cumin, smoked paprika, and oregano give the bean filling a savory Mediterranean-style flavor.

Ingredients

For the Poblanos

  • 4 large poblano peppers
  • 1 tablespoon olive oil
  • Salt to taste

For the Filling

  • 1 ½ cups cooked cannellini or Great Northern beans
  • 3 cups chopped spinach, kale, or Swiss chard
  • 1 small red onion, finely chopped
  • 2 garlic cloves, minced
  • 2 tablespoons olive oil
  • 1 tablespoon fresh lemon juice
  • 1 teaspoon ground cumin
  • ½ teaspoon smoked paprika
  • ½ teaspoon dried oregano or za’atar
  • Salt and black pepper to taste
  • 2 tablespoons chopped fresh parsley or mint
  • 2 tablespoons pine nuts or chopped walnuts, optional

For Serving

  • Lemon wedges
  • Tahini sauce
  • Dairy-free yogurt
  • Vegan feta
  • Olives

How to Make Mediterranean Poblanos with Beans and Greens

Step 1: Roast the Poblanos

Preheat your oven to 400°F (200°C). Lightly coat the poblano peppers with olive oil and place them on a baking sheet.

  • Roast for 15–20 minutes.
  • Turn the peppers once during roasting.
  • Cook until the skins are blistered and lightly charred.
  • Transfer the hot peppers to a bowl.
  • Cover and let them steam for about 10 minutes.

Steaming loosens the skins and makes the peppers easier to peel. Gently remove the skin, then make a slit down one side and remove the seeds.

Step 2: Cook the Aromatics

Heat 2 tablespoons of olive oil in a large skillet over medium heat. Add the chopped red onion and cook for 3–4 minutes until softened.

Add the minced garlic, cumin, and smoked paprika. Stir for about 1 minute until the garlic and spices become fragrant.

Step 3: Add the Greens

Add the chopped leafy greens to the skillet and stir well. Cook until the greens wilt and become tender.

If the greens release a lot of moisture, cook them uncovered for another minute. The filling should be moist but not watery.

Step 4: Add the Beans and Seasoning

Stir the cooked white beans into the skillet. Add lemon juice, oregano or za’atar, salt, and black pepper.

Cook for another 2–3 minutes, stirring gently, until the beans are heated through.

Remove the skillet from the heat and fold in the fresh parsley or mint. Add pine nuts or walnuts if you want extra crunch.

Step 5: Taste the Filling

Before stuffing the peppers, taste the mixture and adjust the seasoning.

  • Add lemon juice for more brightness.
  • Add black pepper for extra savory flavor.
  • Add chili flakes for heat.
  • Add a little salt if the beans taste flat.

This quick taste test helps balance the filling before it goes into the peppers.

Step 6: Stuff the Poblanos

Place the roasted peppers in a lightly oiled baking dish. Carefully spoon the bean and greens mixture into each pepper.

Do not pack the filling too tightly. Leave enough room for the mixture to sit naturally inside the softened peppers.

You can fold the peppers partly closed or leave them open for a colorful presentation.

Step 7: Bake and Finish

For a warmer, more blended dish, bake the stuffed poblanos at 375°F (190°C) for 10–12 minutes.

The short second bake allows the flavors to meld and heats the filling evenly. Serve the peppers warm with lemon wedges, tahini, dairy-free yogurt, or vegan feta.

Tips for the Best Results

  • Choose large, firm poblanos that are easy to stuff.
  • Roast the peppers until the skin is blistered but the flesh is not overly soft.
  • Let the peppers steam before peeling to make the skin easier to remove.
  • Drain canned beans well before adding them to the filling.
  • Cook excess liquid from the greens so the stuffing does not become soggy.
  • Taste the filling before stuffing to adjust the lemon, salt, and spices.
  • Use fresh parsley or mint just before serving for a brighter flavor.
  • Add toasted nuts or seeds if you want more texture.

Easy Variations

White beans give this recipe a creamy texture, but you can easily change the filling. Chickpeas provide a firmer bite, while cooked lentils create a softer and more earthy mixture.

Spinach works quickly for weeknight cooking, while kale and Swiss chard create a heartier filling. You can also add chopped dill, basil, or cilantro for a different herbal flavor.

For extra Mediterranean flavor, stir in chopped olives, roasted tomatoes, or artichoke hearts. Cooked quinoa or bulgur can also be added when you want a more substantial meal.

If you enjoy spicy food, add crushed red pepper flakes or finely chopped jalapeño. For a milder stuffed pepper, replace poblanos with bell peppers.

Serving Suggestions

Serve these stuffed peppers as a complete vegetarian dinner with a simple salad or roasted vegetables. A spoonful of tahini sauce adds creamy texture and a nutty flavor without dairy.

For a fresh finish, squeeze lemon juice over the peppers just before eating. Olives, vegan feta, toasted seeds, or fresh herbs also work well as toppings.

They are also useful for meal prep because the filling can be prepared ahead and the stuffed peppers can be reheated before serving.

Storage and Make-Ahead Instructions

Allow leftover peppers to cool before placing them in an airtight container. Refrigerate for up to 3–4 days.

To make them ahead, prepare the roasted peppers and filling separately, then refrigerate them until ready to assemble. Stuff the peppers and reheat them in a 375°F oven until hot throughout.

For freezing, place fully cooked stuffed peppers in a freezer-safe airtight container. Thaw them in the refrigerator before reheating for the best texture.

Frequently Asked Questions

Can I use bell peppers instead of poblanos?

Yes. Bell peppers are a good mild substitute and provide a sweeter flavor with little to no heat.

Are poblano peppers spicy?

Poblanos are usually mild to moderately spicy, but their heat can vary. Removing the seeds and membranes can make the finished dish milder.

What beans work best for this recipe?

Cannellini and Great Northern beans work especially well because they have a creamy texture, but chickpeas and cooked lentils are also good choices.

Can I use frozen spinach?

Yes. Thaw and drain frozen spinach well before adding it so the filling does not become watery.

Can I prepare these stuffed peppers ahead?

Yes. Roast the peppers and prepare the filling ahead, then assemble and bake them when you are ready to serve.

How should I reheat Mediterranean stuffed peppers?

Reheat them in a 375°F oven until the filling is hot. You can also microwave individual portions, although the peppers may be softer.

Can I make this recipe without nuts?

Yes. Simply leave out the pine nuts or walnuts. Toasted sunflower or pumpkin seeds can provide similar crunch.

What can I serve with these peppers?

Serve them with a green salad, roasted vegetables, quinoa, hummus, olives, or a simple tahini and lemon sauce.

Nutrition Information

Approximate nutrition per serving, based on four servings:

  • Calories: 250
  • Protein: 10g
  • Fat: 12g
  • Carbohydrates: 28g
  • Fiber: 8g
  • Sugar: 4g
  • Sodium: 300mg

Nutrition values can vary depending on the beans, toppings, sauces, and other ingredients used.

Conclusion

Mediterranean Poblanos with Beans and Greens combine tender roasted peppers with a hearty filling of white beans, leafy greens, garlic, herbs, and Mediterranean-inspired spices. Lemon juice keeps the flavors bright, while tahini, vegan feta, or toasted nuts can add a creamy or crunchy finish.

This recipe is an easy way to build a satisfying plant-based dinner from simple ingredients. It works well for weeknight meals, vegetarian entertaining, and make-ahead meal prep while offering plenty of fiber, plant protein, and colorful vegetables.