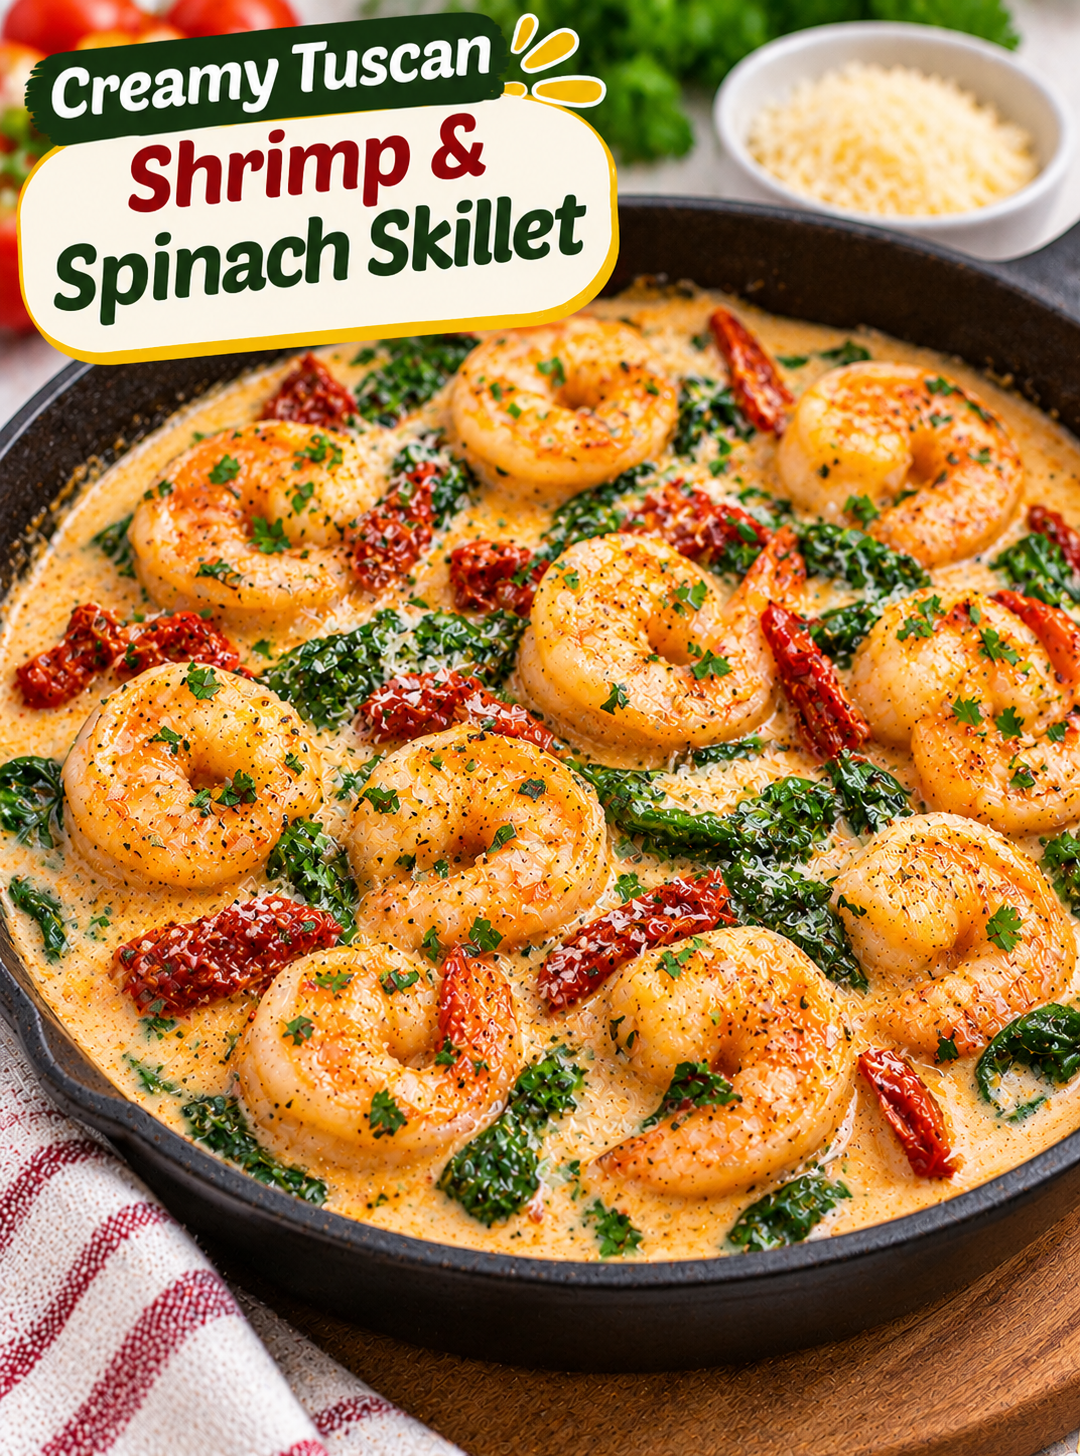
Creamy Tuscan Shrimp & Spinach Skillet

Creamy Tuscan Shrimp & Spinach Skillet

Creamy Tuscan Shrimp & Spinach Skillet is a delicious one-pan dinner made with tender shrimp, fresh spinach, sun-dried tomatoes, garlic, and a rich Parmesan cream sauce. Every bite combines savory seafood with creamy Italian-inspired flavors that feel special without requiring hours in the kitchen.

This easy skillet recipe is perfect for busy weeknights when you want a flavorful meal with simple ingredients. The shrimp cook quickly, while garlic, Italian seasoning, and sun-dried tomatoes give the sauce a bold flavor. Fresh spinach adds color and blends naturally into the creamy Parmesan mixture.

You can serve this dish over pasta, rice, or zucchini noodles. It also tastes delicious with warm crusty bread for soaking up the extra sauce. With one skillet and a few basic steps, you can prepare a satisfying dinner for the whole family.

Why You’ll Love This Creamy Tuscan Shrimp & Spinach Skillet

  • Quick weeknight dinner: Shrimp cook in just a few minutes, making this recipe ideal for busy evenings.
  • Rich and creamy sauce: Heavy cream, Parmesan, garlic, and Italian herbs create a smooth, savory coating.
  • Fresh ingredients: Spinach and sun-dried tomatoes add color, texture, and delicious flavor.
  • One-pan cooking: Most of the recipe comes together in one skillet, which means fewer dishes to wash.
  • Easy to customize: Adjust the sauce, add vegetables, or serve it with your favorite pasta or grain.
  • Restaurant-inspired flavor: The creamy garlic sauce and tender shrimp create a meal that feels special at home.
  • Perfect for different sides: Serve it with pasta, rice, mashed potatoes, or crusty bread.

Ingredients You’ll Need for Creamy Tuscan Shrimp & Spinach Skillet

This recipe makes approximately 4 servings. Use peeled and deveined shrimp to reduce preparation time.

For the Shrimp

  • 1 pound large shrimp, peeled and deveined
  • 1 tablespoon olive oil
  • 1 tablespoon unsalted butter
  • ½ teaspoon garlic powder
  • ½ teaspoon Italian seasoning
  • ¼ teaspoon smoked paprika
  • ¼ teaspoon salt
  • ¼ teaspoon black pepper

Creamy Tuscan Sauce

  • 2 tablespoons unsalted butter
  • 3 garlic cloves, minced
  • ½ cup sun-dried tomatoes, drained and chopped
  • 1 cup heavy cream
  • ½ cup low-sodium chicken broth
  • ½ cup freshly grated Parmesan cheese
  • ½ teaspoon Italian seasoning
  • ¼ teaspoon red pepper flakes, optional
  • ¼ teaspoon black pepper
  • Salt to taste

The Spinach

  • 3 cups fresh baby spinach
  • 1 teaspoon olive oil, if needed
  • 1 tablespoon fresh lemon juice

Optional Garnishes

  • 2 tablespoons chopped fresh parsley
  • Extra grated Parmesan cheese
  • Fresh basil leaves
  • Lemon wedges

For Serving

  • 3 cups cooked pasta
  • Steamed rice
  • Zucchini noodles
  • Mashed potatoes
  • Warm crusty bread

How to Make Creamy Tuscan Shrimp & Spinach Skillet

Follow these simple steps to prepare juicy shrimp and a smooth garlic Parmesan sauce.

Step 1: Prepare the Shrimp

If using frozen shrimp, thaw them completely in the refrigerator or according to the package directions. Remove any remaining shells and devein if needed.

Pat the shrimp dry with paper towels. Removing extra moisture helps them sear instead of release too much liquid in the skillet.

Place the shrimp in a bowl. Add garlic powder, Italian seasoning, smoked paprika, salt, and black pepper.

Toss gently until the shrimp are evenly coated. Keep them refrigerated while you prepare the other ingredients.

Step 2: Prepare the Garlic and Tomatoes

Mince the garlic cloves and chop the sun-dried tomatoes into small pieces.

Drain the sun-dried tomatoes well if they are packed in oil. You can reserve a little of the oil for cooking if you enjoy its flavor.

Measure the heavy cream, chicken broth, and Parmesan cheese before starting the sauce. Having everything ready makes the cooking process easier because the sauce comes together quickly.

Step 3: Sear the Shrimp

Heat olive oil and one tablespoon of butter in a large skillet over medium heat.

Add the seasoned shrimp in a single layer. Avoid overcrowding the pan because shrimp need direct contact with the hot surface to sear properly.

Cook for about 1–2 minutes per side, depending on their size. The shrimp should turn pink, opaque, and lightly golden.

Transfer the shrimp to a clean plate. They will finish heating when added back to the sauce, so avoid overcooking them at this stage.

Step 4: Make the Garlic Butter Base

Reduce the heat to medium-low. Add two tablespoons of butter to the same skillet.

Once the butter melts, add the minced garlic. Stir for about 30 seconds until fragrant.

Do not let the garlic turn dark brown because burnt garlic can make the sauce taste bitter.

Add the chopped sun-dried tomatoes and Italian seasoning. Stir for about 1 minute so the tomatoes release their flavor into the butter.

Step 5: Add the Cream and Chicken Broth

Pour the heavy cream and chicken broth into the skillet. Stir gently to combine the liquids with the garlic and tomatoes.

Add black pepper and optional red pepper flakes. Bring the mixture to a gentle simmer over medium-low heat.

Avoid boiling the sauce rapidly because high heat can cause the cream to separate. Let it simmer for about 2–3 minutes until it begins to thicken slightly.

Step 6: Add the Parmesan Cheese

Reduce the heat to low. Add the grated Parmesan cheese a little at a time while stirring.

Continue stirring until the cheese melts and the sauce becomes smooth and creamy.

Taste the sauce before adding more salt. Parmesan and sun-dried tomatoes already contain salt, so additional seasoning may not be needed.

If the sauce becomes too thick, add a splash of chicken broth. If it is too thin, let it simmer gently for another minute or two.

Step 7: Add the Fresh Spinach

Add the baby spinach to the skillet in small handfuls. Stir gently as the leaves begin to wilt.

Cook for about 1–2 minutes until the spinach is soft but still bright green.

Fresh spinach reduces in volume as it cooks, so three cups may look like a large amount at first. Add it gradually to make stirring easier.

Step 8: Return the Shrimp to the Skillet

Add the seared shrimp back into the creamy sauce. Spoon some sauce over the shrimp so they are coated evenly.

Simmer gently for another 1–2 minutes, or until the shrimp are heated through and fully cooked.

Shrimp should be opaque and pearly with a firm texture. Avoid prolonged cooking because shrimp can become rubbery when overdone.

Step 9: Add Lemon and Fresh Herbs

Turn off the heat. Add fresh lemon juice and stir gently.

Sprinkle chopped parsley or fresh basil over the skillet. Add extra Parmesan if desired.

The lemon juice brightens the rich cream sauce and balances the savory flavor of the cheese and sun-dried tomatoes.

Step 10: Serve Warm

Serve the creamy shrimp and spinach directly from the skillet or spoon it over cooked pasta, rice, or zucchini noodles.

Add warm crusty bread on the side to enjoy the extra sauce. Finish each serving with fresh herbs and a lemon wedge.

Tips for the Creamy Tuscan Shrimp & Spinach Skillet

Use large shrimp: Large shrimp are easier to sear and are less likely to overcook during preparation.

Pat shrimp dry: Removing surface moisture helps create better browning and prevents excess liquid in the skillet.

Do not overcook the shrimp: Shrimp cook quickly and become firm and opaque when done. Remove them from the pan while preparing the sauce.

Use freshly grated Parmesan: Freshly grated cheese melts more smoothly than many pre-shredded varieties.

Keep the heat low: A gentle simmer helps the cream sauce stay smooth and prevents separation.

Drain sun-dried tomatoes: Excess oil can make the sauce greasy, so drain the tomatoes before adding them.

Add spinach gradually: Fresh spinach wilts quickly, making it easier to stir into the sauce in small portions.

Finish with lemon juice: A little fresh lemon adds brightness and balances the rich Parmesan cream.

Easy Variations and Substitutions for Creamy Tuscan Shrimp & Spinach Skillet

This skillet recipe is easy to adjust with ingredients you already have in your kitchen.

Add Mushrooms

Slice 1 cup of mushrooms and sauté them after removing the shrimp. Cook until their moisture evaporates and the edges turn golden before making the sauce.

Make It Spicier

Add extra red pepper flakes or a pinch of cayenne pepper. Start with a small amount and adjust the heat to your preference.

Use Half-and-Half

Replace heavy cream with half-and-half for a lighter sauce. The result will be thinner, so simmer gently and add Parmesan gradually.

Add More Vegetables

Chopped zucchini, roasted red peppers, or steamed broccoli work well in this creamy skillet. Cook vegetables before adding the cream if they release a lot of moisture.

Make It Low-Carb

Serve the shrimp over zucchini noodles or cauliflower rice instead of regular pasta. These options keep the meal lighter while allowing the creamy sauce to shine.

Use Chicken Instead of Shrimp

Replace the shrimp with bite-sized chicken breast pieces. Cook the chicken fully to an internal temperature of 165°F before preparing the sauce.

Add Fresh Basil

Stir in a few chopped basil leaves at the end of cooking. Basil adds a fresh aroma that pairs well with sun-dried tomatoes and Parmesan.

What to Serve with Creamy Tuscan Shrimp & Spinach Skillet

This rich skillet tastes delicious with simple sides that balance its creamy texture.

  • Fettuccine or linguine: Pasta holds the creamy garlic sauce and makes the dish more filling.
  • Steamed white rice: A simple rice base absorbs the Parmesan sauce.
  • Garlic bread: Warm bread is perfect for scooping up the extra sauce.
  • Roasted asparagus: Its fresh flavor pairs well with shrimp and spinach.
  • Garden salad: Lettuce, cucumber, and tomatoes add a crisp contrast.
  • Mashed potatoes: Creamy potatoes make a hearty side for a family dinner.
  • Zucchini noodles: A lighter option that works well with the rich sauce.

For a simple dinner, serve the skillet with garlic bread and a fresh green salad.

Make-Ahead and Storage Instructions for Creamy Tuscan Shrimp & Spinach Skillet

This recipe is best served fresh because shrimp can become firm when reheated too many times. You can still prepare some ingredients in advance to save time.

Make ahead: Peel and devein the shrimp, chop the garlic, and prepare the sun-dried tomatoes up to one day in advance. Store everything separately in covered containers in the refrigerator.

Store leftovers: Transfer cooled shrimp and sauce to an airtight container and refrigerate within 2 hours. Use within 3–4 days for best quality.

Reheat on the stovetop: Warm leftovers in a skillet over low heat, stirring gently until heated through. Add a splash of broth or cream if the sauce has thickened.

Reheat in the microwave: Heat in short intervals at reduced power, stirring between intervals to prevent the shrimp from overcooking.

Store pasta separately: If serving with pasta, keep the pasta and sauce in separate containers when possible. This helps the pasta maintain a better texture.

Freezing: Cream-based sauces may separate after freezing and thawing, and shrimp can become rubbery. Refrigerating and enjoying this dish fresh is the better option.

Helpful Cooking and Food Safety Resources

Want to make your favorite recipes with greater confidence? Following reliable food preparation and safety guidance can help you handle ingredients properly and prepare meals safely at home. Visit the Selecting and Serving Fresh and Frozen Seafood Safely – FDA for practical food safety tips and helpful guidance to support your everyday cooking.

Frequently Asked Questions About Creamy Tuscan Shrimp & Spinach Skillet

1. Can I use frozen shrimp for this recipe?

Yes. Thaw frozen shrimp completely, remove excess moisture, and pat them dry before seasoning and cooking.

2. Can I use milk instead of heavy cream?

Whole milk can be used, but the sauce will be thinner; add Parmesan gradually and simmer gently to improve the texture.

3. How do I know when shrimp are fully cooked?

Shrimp should turn opaque and pearly with a firm texture; avoid cooking them until tightly curled or rubbery.

4. Can I make this recipe without spinach?

Yes. Replace spinach with kale, chopped zucchini, or another vegetable that works well in a creamy sauce.

5. What pasta works best with Tuscan shrimp?

Fettuccine, linguine, penne, and spaghetti all pair well with the creamy garlic Parmesan sauce.

6. Why is my Parmesan cream sauce grainy?

High heat or pre-shredded cheese can affect the texture; use freshly grated Parmesan and stir it into the sauce over low heat.

7. Can I make this dish ahead of time?

You can prepare the ingredients ahead, but cook the shrimp and finish the sauce shortly before serving for the best texture.

8. How long do leftovers last?

Store leftovers in an airtight container in the refrigerator and use within 3–4 days, reheating gently until hot throughout.

Final Thoughts of Creamy Tuscan Shrimp & Spinach Skillet

Creamy Tuscan Shrimp & Spinach Skillet is an easy way to bring restaurant-inspired flavor into your home kitchen. Tender shrimp, fresh spinach, sun-dried tomatoes, garlic, and Parmesan come together in a rich sauce that works with pasta, rice, or crusty bread.

The key to getting the best results is to cook the shrimp briefly, keep the cream sauce at a gentle simmer, and add the spinach near the end. These simple steps help the shrimp stay tender and the sauce remain smooth.

Make it for a quick weeknight dinner or serve it with your favorite sides for a relaxed family meal. With simple ingredients and one skillet, this creamy seafood recipe is easy to enjoy any day of the week.

Discover More Delicious Recipes

Love trying simple, flavorful recipes at home? Explore more delicious ideas at The Protein Blogger, where you can find easy recipes, satisfying meals, and inspiration for your everyday cooking. Try our Spicy Garlic Butter Prawn Lettuce Boats next and discover another tasty dish to add to your meal plan!

Air Fryer Spinach Feta Tortilla Quiche Cups

Air Fryer Spinach Feta Tortilla Quiche Cups

Imagine biting into a golden, crispy tortilla cup filled with fluffy eggs, creamy feta, tender spinach, and tangy sun-dried tomatoes. These Air Fryer Crispy Spinach, Feta & Sun-Dried Tomato Tortilla Quiche Cups bring the delicious flavors of a Mediterranean-style breakfast into one easy, handheld meal.

Unlike traditional quiche, this recipe uses small flour tortillas instead of pastry dough. The tortillas form crisp edible cups that hold a savory egg filling without requiring complicated preparation. Everything cooks in the air fryer, making this a convenient option for busy mornings, weekend brunch, or a quick lunch.

Each cup combines simple ingredients that work beautifully together. Spinach adds freshness, feta brings a salty and creamy flavor, and sun-dried tomatoes provide a rich, slightly sweet taste. A little mozzarella helps bind the filling and creates a delicious cheesy finish.

You can prepare these individual quiche cups for breakfast, serve them at a brunch gathering, or make a batch for convenient weekday meals. They are easy to customize with your favorite vegetables, herbs, and cheeses.

Why You’ll Love These Tortilla Quiche Cups

There are plenty of reasons to add this recipe to your breakfast rotation:

  • Crispy tortilla shells: Small flour tortillas create golden, crunchy cups without making pastry dough.
  • Flavorful Mediterranean filling: Spinach, feta, and sun-dried tomatoes deliver a delicious combination of savory and tangy flavors.
  • Quick preparation: The filling takes only a few minutes to mix.
  • Individual portions: Each tortilla cup is easy to serve and enjoy.
  • Air fryer convenience: You can cook small batches without heating a full-sized oven.
  • Easy to customize: Add mushrooms, bell peppers, olives, or your favorite cheese.
  • Great for meal prep: Prepare several cups ahead of time and refrigerate the leftovers.

Preparation and Cooking Time

Detail Time
Prep Time 12 minutes
Cook Time 8–12 minutes
Total Time 20–24 minutes
Servings 4 tortilla cups
Air Fryer Temperature 325°F (163°C)

Cooking time may vary depending on tortilla thickness, filling depth, and air fryer model.

Ingredients You’ll Need

These ingredients create four individual tortilla quiche cups.

For the Tortilla Cups

  • 4 small flour tortillas (approximately 6 inches each)
  • 1 teaspoon olive oil or cooking spray

For the Egg Filling

  • 4 large eggs
  • 2 tablespoons milk
  • ½ cup fresh spinach, finely chopped
  • ⅓ cup crumbled feta cheese
  • ¼ cup sun-dried tomatoes, drained and finely chopped
  • ¼ cup shredded mozzarella cheese
  • 2 tablespoons finely diced red onion
  • 1 tablespoon chopped fresh parsley
  • ¼ teaspoon garlic powder
  • ¼ teaspoon dried oregano
  • ⅛ teaspoon black pepper
  • A small pinch of salt, if needed

Optional Toppings

  • Extra crumbled feta
  • Fresh parsley or basil
  • A pinch of red pepper flakes
  • A little shredded mozzarella
  • Freshly cracked black pepper

Ingredient tip: Use sun-dried tomatoes packed in oil, but drain them well before chopping. This prevents excess oil from making the egg filling greasy.

How to Make Air Fryer Crispy Spinach, Feta & Sun-Dried Tomato Tortilla Quiche Cups

Follow these simple steps to create crisp tortilla shells with a soft, flavorful egg center.

Step 1: Prepare the Tortillas

  • Take four small flour tortillas and let them sit at room temperature for a few minutes.
  • Lightly warm each tortilla for about 10–15 seconds in the microwave to make it easier to shape.
  • Brush both sides lightly with olive oil or use a little cooking spray.
  • Gently press each tortilla into a small, air-fryer-safe ovenproof ramekin or silicone baking cup.
  • Fold the edges naturally to create a cup shape.

Choose containers that fit comfortably inside your air fryer basket and are rated for the cooking temperature.

Step 2: Pre-Crisp the Tortilla Shells

  • Preheat the air fryer to 325°F (163°C), if your model requires preheating.
  • Place the prepared tortilla cups in their heat-safe containers.
  • Air fry for approximately 2–3 minutes.
  • Check that the tortillas have started to firm up but are not overly browned.

Pre-crisping helps the tortilla shells hold their shape after adding the wet egg mixture.

Step 3: Prepare the Spinach and Tomato Filling

  • Wash and dry the fresh spinach thoroughly.
  • Chop it into small pieces so it distributes evenly through the egg mixture.
  • Drain the sun-dried tomatoes and chop them into small pieces.
  • Finely dice the red onion.
  • If the spinach is very wet, briefly sauté it in a pan and allow it to cool before using.

Removing excess moisture helps prevent watery quiche cups.

Step 4: Whisk the Egg Mixture

  • Crack the four eggs into a medium mixing bowl.
  • Add the milk, garlic powder, dried oregano, and black pepper.
  • Add a small pinch of salt only if needed because feta already contains salt.
  • Whisk until the eggs and milk are fully combined.

A smooth egg mixture helps the filling cook evenly and creates a soft, fluffy texture.

Step 5: Add the Vegetables and Cheese

  • Add the chopped spinach to the egg mixture.
  • Stir in the sun-dried tomatoes and diced red onion.
  • Add the crumbled feta and shredded mozzarella.
  • Mix gently until the ingredients are evenly distributed.
  • Add the chopped parsley for a fresh herbal flavor.

Keep a little feta and mozzarella aside if you want to garnish the tops before cooking.

Step 6: Fill the Tortilla Cups

  • Carefully remove the pre-crisped tortilla cups from the air fryer.
  • Divide the egg mixture evenly among the four cups.
  • Fill each tortilla approximately two-thirds to three-quarters full.
  • Avoid filling them to the top because the eggs expand as they cook.
  • Sprinkle the reserved cheese over each cup.

Make sure the filling stays inside the tortilla shells. Do not overfill, as the egg mixture may spill during cooking.

Step 7: Air Fry Until the Eggs Are Set

  • Arrange the filled tortilla cups in a single layer inside the air fryer.
  • Leave enough space between them for hot air to circulate.
  • Air fry at 325°F (163°C) for approximately 8–12 minutes.
  • Begin checking around the 8-minute mark.
  • Continue cooking until the egg centers are firm and no longer liquid.

For food safety, the egg mixture should reach an internal temperature of 160°F (71°C). Check the center with a food thermometer.

Step 8: Add the Final Toppings

  • Carefully remove the quiche cups from the air fryer.
  • Allow them to rest for approximately 2–3 minutes.
  • Sprinkle with fresh parsley, extra feta, or black pepper.
  • Add a pinch of red pepper flakes if you enjoy a little heat.

The resting time helps the filling settle and makes the cups easier to remove from their containers.

Step 9: Serve and Enjoy

  • Carefully lift the tortilla cups out of their ramekins or silicone molds.
  • Arrange them on a serving plate.
  • Serve warm with fresh fruit, avocado slices, or a simple green salad.

Enjoy the contrast between the crispy tortilla edges and the soft, cheesy Mediterranean-inspired filling.

Tips for Perfect Crispy Tortilla Quiche Cups

A few simple techniques can make a big difference in the final texture.

  1. Use small tortillas: Six-inch flour tortillas are easier to shape into individual cups.
  2. Warm before shaping: Slightly warming the tortillas helps prevent cracks and makes them more flexible.
  3. Pre-crisp the shells: A short initial cooking time helps the tortillas hold their shape.
  4. Drain sun-dried tomatoes: Excess oil can affect the texture of the egg filling.
  5. Dry the spinach: Wet spinach can release moisture and make the centers soggy.
  6. Avoid overfilling: Leave room for the egg mixture to expand during cooking.
  7. Use heat-safe containers: Silicone molds and oven-safe ramekins help support the tortilla shells.
  8. Check the egg centers: Cooking times vary, so use a thermometer to confirm the eggs reach 160°F (71°C).
  9. Cook in batches: Avoid overcrowding the air fryer basket for more even results.

Delicious Variations to Try

You can easily change the filling while keeping the same tortilla-cup method.

1. Mediterranean Olive Quiche Cups

Add 2 tablespoons of chopped Kalamata olives to the filling. Their briny flavor pairs especially well with feta and sun-dried tomatoes.

2. Mushroom and Spinach Cups

Add ¼ cup of finely chopped, sautéed mushrooms. Cook off their moisture before mixing them into the eggs.

3. Bell Pepper and Feta Cups

Mix in ¼ cup of finely diced red or yellow bell pepper for extra color, sweetness, and crunch.

4. Turkey Bacon Quiche Cups

Add ¼ cup of fully cooked, crumbled turkey bacon for a smoky, savory variation.

5. Cheddar and Spinach Cups

Replace the mozzarella with sharp cheddar for a stronger cheese flavor. Keep the feta for its creamy, salty taste.

6. Spicy Mediterranean Cups

Add a pinch of red pepper flakes and a little chopped jalapeño to create a spicy breakfast option.

What to Serve with Tortilla Quiche Cups

These individual quiche cups are satisfying on their own, but pairing them with a few simple sides creates a more complete meal.

  • Fresh fruit salad: Strawberries, blueberries, melon, and grapes add natural sweetness.
  • Avocado slices: Creamy avocado balances the tangy feta and tomato flavors.
  • Greek yogurt: Plain Greek yogurt provides a cool, creamy side.
  • Roasted breakfast potatoes: Crispy potatoes make a hearty brunch combination.
  • Fresh cucumber salad: Cucumber, lemon juice, and parsley add a refreshing contrast.
  • Green salad: Serve with mixed greens and a light lemon dressing.
  • Fresh orange juice: A glass of orange juice complements the savory breakfast flavors.

Storage and Reheating Instructions

How to Store

Allow the tortilla quiche cups to cool slightly.

  • Place leftovers in an airtight container.
  • Refrigerate within 2 hours of cooking.
  • Store in the refrigerator for up to 3–4 days.
  • Keep the cups in a single layer when possible to help protect their shape.

How to Reheat

The air fryer is the best option for bringing back some of the tortilla’s crispness.

  • Preheat the air fryer to 300°F (150°C).
  • Place the refrigerated quiche cups in the basket.
  • Heat for approximately 3–5 minutes, or until warmed through.
  • Check that the center reaches 165°F (74°C).

You can also use a microwave, but the tortilla shell may become softer.

Can You Freeze These Quiche Cups?

Yes, but the tortilla texture may change slightly after freezing.

  • Allow the cups to cool completely.
  • Wrap each portion individually.
  • Place them in a freezer-safe container.
  • Freeze for up to 2 months for best quality.
  • Thaw overnight in the refrigerator before reheating.

For the best crispy texture, freshly prepared cups are recommended.

Frequently Asked Questions

1. Can I use corn tortillas instead of flour tortillas?

Yes, but corn tortillas are less flexible. Warm them gently before shaping and check that they fit securely inside your cooking containers.

2. Can I make these tortilla quiche cups without milk?

Yes. Simply leave out the milk or replace it with an unsweetened milk alternative. The eggs will still cook properly.

3. Why are my tortilla cups soggy?

Excess moisture from spinach or tomatoes can make the shells soft. Dry the vegetables, drain the tomatoes, and pre-crisp the tortillas before filling.

4. Can I use frozen spinach?

Yes. Thaw it completely, squeeze out excess water, and chop it before adding it to the egg mixture.

5. Can I prepare these cups ahead of time?

Yes. Prepare the vegetable and cheese filling in advance and refrigerate it separately. Assemble and cook the tortilla cups shortly before serving.

6. How do I know when the eggs are fully cooked?

The center should be firm with no liquid egg remaining. Use a food thermometer to confirm an internal temperature of 160°F (71°C).

7. Can I make these quiche cups dairy-free?

Yes. Use an unsweetened dairy-free milk alternative and dairy-free cheese. Check the pesto or other added ingredients if using them to make sure they contain no dairy.

8. Can I make larger tortilla quiche cups?

Yes. Use larger tortillas and appropriately sized oven-safe containers. Add a little more filling and adjust the cooking time while checking the center for doneness.

Final Thoughts

These Air Fryer Crispy Spinach, Feta & Sun-Dried Tomato Tortilla Quiche Cups are a delicious way to make breakfast more interesting. The crispy tortilla shell, fluffy egg filling, tangy feta, and rich sun-dried tomatoes create a combination that feels special without requiring complicated cooking techniques.

They are easy to customize, simple to portion, and suitable for breakfast, brunch, or a quick lunch. Keep the ingredients on hand and you can prepare a flavorful batch whenever you need a convenient meal.

Ready to give your breakfast a Mediterranean-inspired upgrade? Try these crispy tortilla quiche cups and tell us which addition you love most: extra feta, Kalamata olives, or sautéed mushrooms!

Save this recipe for your next breakfast, share it with a friend who loves easy egg recipes, and let us know how your batch turns out.

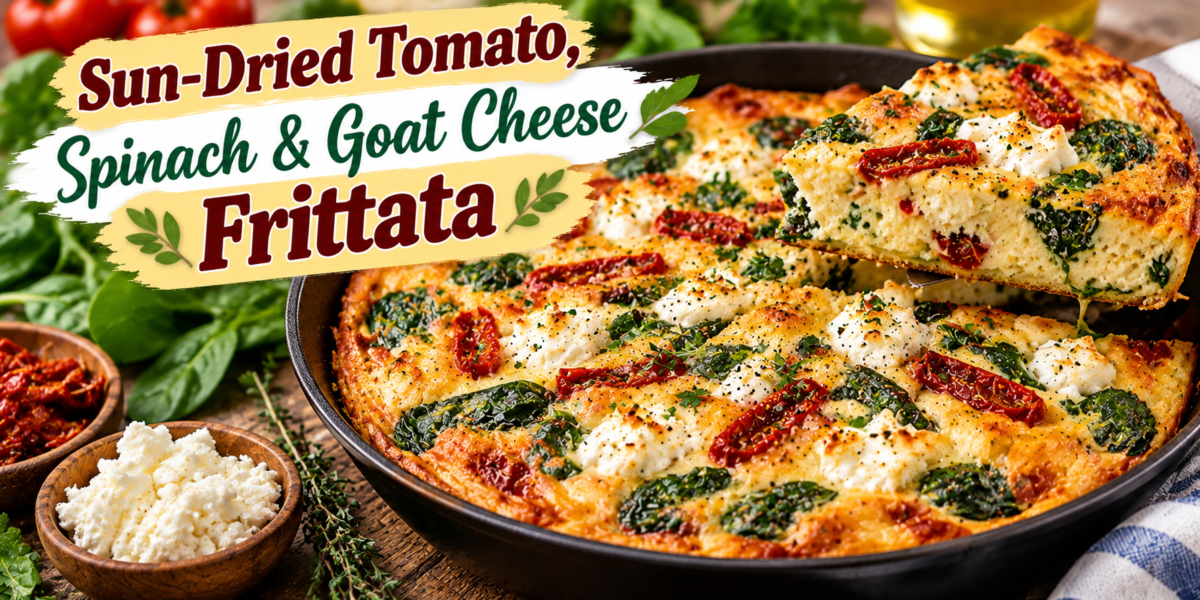
Sun-Dried Tomato, Spinach & Goat Cheese Frittata

Goat Cheese Frittata with sun-dried tomatoes, spinach, eggs, fresh herbs, and creamy goat cheese

Sun-Dried Tomato, Spinach & Goat Cheese Frittata

Goat Cheese Frittata is a colorful, protein-rich breakfast or brunch recipe made with eggs, tangy goat cheese, tender spinach, sun-dried tomatoes, fresh herbs, and a touch of garlic. The eggs bake into a soft, custardy base while the cheese melts into creamy pockets and the tomatoes add concentrated sweet-savory flavor.

This frittata is easy enough for a weekday breakfast but elegant enough for brunch, holidays, or entertaining. It can be served warm, at room temperature, or chilled, and it pairs beautifully with toast, roasted potatoes, fruit, or a simple green salad.

Prep Time: 15 minutes
Cook Time: 25 minutes
Total Time: 40 minutes
Servings: 6

Ingredients

For the Egg Base

  • 8 large eggs
  • 1/2 cup whole milk or half-and-half
  • 1/2 teaspoon salt
  • 1/4 teaspoon black pepper
  • 1/2 teaspoon dried oregano
  • 1/4 teaspoon smoked paprika
  • 1 tablespoon chopped fresh parsley
  • 1 tablespoon chopped fresh basil

For the Filling

  • 1 tablespoon extra virgin olive oil
  • 1 small shallot or 1/2 small red onion, finely chopped
  • 2 garlic cloves, minced
  • 3 cups baby spinach
  • 1/2 cup sun-dried tomatoes, drained and sliced
  • 4 ounces goat cheese, crumbled
  • 1/4 cup grated Parmesan cheese
  • 1 tablespoon chopped fresh chives, optional

Optional Garnishes

  • Extra goat cheese
  • Fresh basil
  • Chopped parsley
  • Red pepper flakes
  • Lemon zest

Why You’ll Love This Recipe

Goat Cheese Frittata is simple, flavorful, and flexible. The combination of creamy eggs, tangy cheese, spinach, and sun-dried tomatoes creates a balanced Mediterranean-style flavor without requiring complicated ingredients.

Another reason to love this frittata is that it works well for meal prep. You can bake it ahead, slice it into portions, and reheat it during the week for a quick breakfast or light lunch.

It is also easy to customize with mushrooms, roasted peppers, asparagus, olives, zucchini, or different herbs.

How to Make Goat Cheese Frittata

Step 1: Preheat the Oven

Preheat the oven to 375°F or 190°C.

Lightly grease a 10-inch oven-safe skillet with olive oil or cooking spray.

Using an oven-safe skillet allows the Goat Cheese Frittata to start on the stovetop and finish in the oven without transferring the mixture to another dish.

Step 2: Whisk the Egg Mixture

Crack the eggs into a large bowl.

Add the milk, salt, black pepper, oregano, smoked paprika, parsley, and basil.

Whisk until the yolks and whites are fully combined and the mixture looks slightly frothy.

A well-whisked base helps Goat Cheese Frittata bake evenly and gives it a softer texture.

Step 3: Sauté the Aromatics

Heat the olive oil in the skillet over medium heat.

Add the shallot and cook for 2 to 3 minutes until softened.

Stir in the garlic and cook for about 30 seconds, just until fragrant.

Avoid browning the garlic because it can become bitter.

Step 4: Wilt the Spinach

Add the spinach to the skillet in batches.

Stir gently until the leaves wilt, which should take about 2 minutes.

If the spinach releases excess liquid, cook for another minute so most of the moisture evaporates.

Removing extra moisture helps Goat Cheese Frittata stay tender instead of watery.

Step 5: Add the Sun-Dried Tomatoes

Stir the sliced sun-dried tomatoes into the spinach mixture.

Spread the vegetables evenly across the bottom of the skillet.

The sun-dried tomatoes give Goat Cheese Frittata a concentrated tomato flavor that pairs especially well with tangy goat cheese.

Step 6: Pour in the Eggs

Reduce the heat to medium-low.

Pour the egg mixture evenly over the vegetables.

Use a spatula to gently move the ingredients so the spinach and tomatoes are distributed throughout the pan.

Let the eggs cook undisturbed for about 2 minutes, just until the edges begin to set.

Step 7: Add the Cheese

Scatter the goat cheese and Parmesan evenly over the top.

Press a few pieces of goat cheese lightly into the egg mixture while leaving some visible on the surface.

This creates creamy pockets throughout Goat Cheese Frittata while also giving the top an attractive finish.

Step 8: Bake

Transfer the skillet to the preheated oven.

Bake for 15 to 18 minutes, or until the center is just set.

The eggs should no longer look wet, but avoid baking until very firm because overcooked eggs can become rubbery.

Goat Cheese Frittata will continue to set slightly as it rests.

Step 9: Rest Before Slicing

Remove the skillet from the oven and let it rest for 5 to 10 minutes.

This gives the eggs time to settle and makes the slices cleaner.

Step 10: Garnish and Serve

Sprinkle with fresh chives, basil, parsley, or a little lemon zest.

Add extra crumbled goat cheese or red pepper flakes if desired.

Serve Goat Cheese Frittata warm or at room temperature.

Serving Suggestions

This frittata is delicious with toasted sourdough, warm pita, roasted breakfast potatoes, or a simple arugula salad.

For brunch, serve it with fresh fruit, Greek yogurt, avocado, olives, and sliced tomatoes.

You can also pair Goat Cheese Frittata with soup or a grain salad for a light lunch.

Its room-temperature appeal also makes it convenient for picnics and brunch buffets.

For another crispy and flavorful side dish, try our Air Fryer Butternut Squash Fries with Garlic Aioli.

Recipe Tips

Use room-temperature eggs if possible because they blend more smoothly with the milk.

Drain oil-packed sun-dried tomatoes well before adding them.

Cook the spinach until excess moisture evaporates.

Use an oven-safe skillet so the eggs can move directly from stovetop to oven.

Do not overbake Goat Cheese Frittata. Remove it when the center is just set.

Crumbled goat cheese works best when distributed in small and medium pieces.

Let the frittata rest before slicing.

For a richer texture, use half-and-half instead of milk.

Easy Variations

Add sautéed mushrooms for an earthy flavor.

Goat Cheese Frittata can also be made with roasted red peppers, asparagus, zucchini, or artichoke hearts.

For a stronger Mediterranean profile, add chopped Kalamata olives and a pinch of red pepper flakes.

If goat cheese is not available, feta, ricotta, or soft cream cheese can be used, although the flavor will be different.

For extra protein, add cooked chicken sausage, turkey sausage, or smoked salmon.

You can also add fresh dill, thyme, or chives for a different herb profile.

Make-Ahead Instructions

Goat Cheese Frittata is an excellent make-ahead breakfast.

Bake it one day in advance, let it cool completely, then cover and refrigerate.

You can serve it chilled, at room temperature, or gently reheated.

For meal prep, cut it into individual slices and refrigerate for quick breakfasts.

Storage and Reheating

Store leftover Goat Cheese Frittata in an airtight container in the refrigerator for up to 4 days.

Reheat slices in a 325°F or 165°C oven for about 8 to 10 minutes, or microwave in short intervals.

Avoid overheating because eggs can become dry.

Freeze individual slices for up to 2 months; thaw overnight and reheat gently.

Nutrition Information

Approximate nutrition per serving:

Calories: 260
Protein: 17 g
Carbohydrates: 7 g
Fat: 18 g
Saturated Fat: 8 g
Fiber: 2 g
Sugar: 4 g
Sodium: 520 mg

Nutrition values are estimates and may vary depending on the milk, cheese, sun-dried tomatoes, and serving size.

Frequently Asked Questions

Can I make this without an oven-safe skillet?

Yes. Cook the vegetables in a regular skillet, transfer them to a greased baking dish, pour the egg mixture over the top, add the cheese, and bake.

Can I use feta instead of goat cheese?

Yes. Feta works well, although it is firmer and saltier than goat cheese.

Can I use frozen spinach?

Yes. Thaw it completely and squeeze out as much water as possible before adding it.

How do I know when the frittata is done?

The center should look set and no longer wet. A slight jiggle is fine because it will continue cooking as it rests.

Can I make this dairy-free?

Yes. Use unsweetened dairy-free milk and replace the goat cheese and Parmesan with dairy-free alternatives.

Can I serve it cold?

Yes. Goat Cheese Frittata tastes good chilled or at room temperature, making it convenient for meal prep and brunch.

Can I add meat?

Yes. Cooked chicken sausage, turkey sausage, bacon, or smoked salmon can be added before baking.

Final Thoughts

Goat Cheese Frittata is an easy, colorful way to combine eggs, spinach, sun-dried tomatoes, herbs, and creamy cheese in one satisfying dish. It feels special enough for brunch but is simple enough for everyday cooking.

Because Goat Cheese Frittata stores well and can be served warm or at room temperature, it is also a practical choice for meal prep, holidays, and casual entertaining.

Keep this Goat Cheese Frittata recipe in your rotation whenever you want a flavorful Mediterranean-inspired breakfast or light meal that comes together with simple ingredients.

If you enjoy cheesy and comforting baked recipes, you may also like our Cheesy Garlic Pizza Bread.

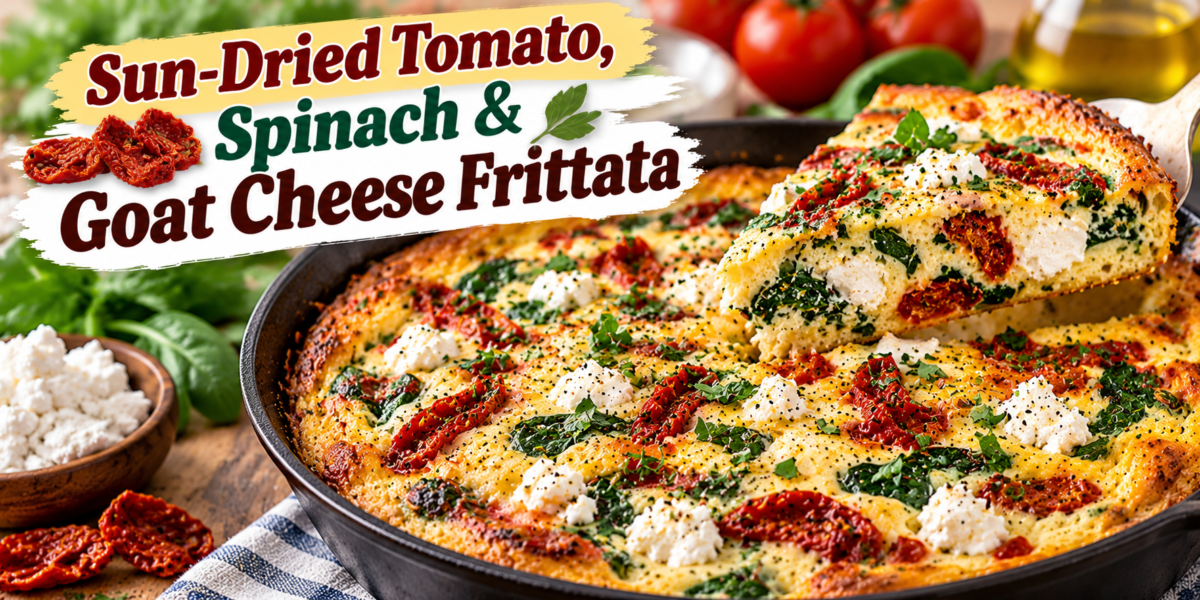
Sun-Dried Tomato, Spinach & Goat Cheese Frittata

Goat Cheese Frittata with sun-dried tomatoes, spinach, eggs, fresh herbs, and creamy goat cheese

Sun-Dried Tomato, Spinach & Goat Cheese Frittata

Goat Cheese Frittata is a colorful, protein-rich breakfast or brunch dish made with eggs, tangy goat cheese, tender spinach, sun-dried tomatoes, herbs, and a touch of garlic. The eggs bake into a soft, custardy base while the goat cheese melts into creamy pockets and the sun-dried tomatoes add a sweet, savory intensity.

This Goat Cheese Frittata is easy enough for weekdays but elegant enough for brunch or entertaining. Serve it warm, at room temperature, or chilled with toast, roasted potatoes, fruit, or a simple green salad.

Prep Time: 15 minutes
Cook Time: 25 minutes
Total Time: 40 minutes
Servings: 6

Ingredients

For the Egg Base

  • 8 large eggs
  • 1/2 cup whole milk or half-and-half
  • 1/2 teaspoon salt
  • 1/4 teaspoon black pepper
  • 1/2 teaspoon dried oregano
  • 1/4 teaspoon smoked paprika
  • 1 tablespoon chopped fresh parsley
  • 1 tablespoon chopped fresh basil

For the Filling

  • 1 tablespoon extra virgin olive oil
  • 1 small shallot or 1/2 small red onion, finely chopped
  • 2 garlic cloves, minced
  • 3 cups baby spinach
  • 1/2 cup sun-dried tomatoes, drained and sliced
  • 4 ounces goat cheese, crumbled
  • 1/4 cup grated Parmesan cheese
  • 1 tablespoon chopped fresh chives, optional

Optional Garnishes

  • Extra goat cheese
  • Fresh basil
  • Chopped parsley
  • Red pepper flakes
  • Lemon zest

Why You’ll Love This Recipe

Goat Cheese Frittata is simple, flavorful, and flexible. The combination of creamy eggs, tangy cheese, spinach, and sun-dried tomatoes gives the dish a balanced Mediterranean-style flavor without needing complicated ingredients.

Another reason to love this recipe is that it works well for meal prep. You can make it ahead, slice it into portions, and reheat it during the week for a quick breakfast or light lunch.

It is easy to customize with mushrooms, roasted peppers, asparagus, olives, or different cheeses.

How to Make Goat Cheese Frittata

Step 1: Preheat the Oven

Preheat the oven to 375°F or 190°C.

Lightly grease a 10-inch oven-safe skillet with olive oil or cooking spray.

Using an oven-safe skillet allows the Goat Cheese Frittata to start on the stovetop and finish in the oven without transferring the mixture to another dish.

Step 2: Whisk the Egg Mixture

Crack the eggs into a large bowl.

Add the milk, salt, black pepper, oregano, smoked paprika, parsley, and basil.

Whisk until the yolks and whites are fully combined and the mixture looks slightly frothy.

A well-whisked base helps Goat Cheese Frittata bake evenly and gives it a softer texture.

Step 3: Sauté the Aromatics

Heat the olive oil in the skillet over medium heat.

Add the shallot and cook for 2 to 3 minutes until softened.

Stir in the garlic and cook for about 30 seconds, just until fragrant.

Avoid browning the garlic because it can become bitter.

Step 4: Wilt the Spinach

Add the spinach to the skillet in batches.

Stir gently until the leaves wilt, which should take about 2 minutes.

If the spinach releases excess liquid, cook for another minute so most of the moisture evaporates.

Removing extra moisture helps Goat Cheese Frittata stay tender instead of watery.

Step 5: Add the Sun-Dried Tomatoes

Stir the sliced sun-dried tomatoes into the spinach mixture.

Spread the vegetables evenly across the bottom of the skillet.

The sun-dried tomatoes give Goat Cheese Frittata a concentrated tomato flavor that pairs especially well with tangy goat cheese.

Step 6: Pour in the Eggs

Reduce the heat to medium-low.

Pour the egg mixture evenly over the vegetables.

Use a spatula to gently move the ingredients so the spinach and tomatoes are distributed throughout the pan.

Let the eggs cook undisturbed for about 2 minutes, just until the edges begin to set.

Step 7: Add the Cheese

Scatter the goat cheese and Parmesan evenly over the top.

Press a few pieces of goat cheese lightly into the egg mixture while leaving some visible on the surface.

This creates creamy pockets throughout Goat Cheese Frittata while also giving the top an attractive finish.

Step 8: Bake

Transfer the skillet to the preheated oven.

Bake for 15 to 18 minutes, or until the center is just set.

The eggs should no longer look wet, but avoid baking until very firm because overcooked eggs can become rubbery.

Goat Cheese Frittata will continue to set slightly as it rests.

Step 9: Rest Before Slicing

Remove the skillet from the oven and let it rest for 5 to 10 minutes.

This gives the eggs time to settle and makes the slices cleaner.

Step 10: Garnish and Serve

Sprinkle with fresh chives, basil, parsley, or a little lemon zest.

Add extra crumbled goat cheese or red pepper flakes if desired.

Serve Goat Cheese Frittata warm or at room temperature.

Serving Suggestions

It is delicious with toasted sourdough, warm pita, roasted breakfast potatoes, or a simple arugula salad.

For brunch, serve it with fresh fruit, Greek yogurt, avocado, olives, and sliced tomatoes.

You can also pair Goat Cheese Frittata with soup or a grain salad for a light lunch.

Its room-temperature appeal also makes it convenient for picnics and brunch buffets.

For another light Mediterranean-inspired dish, try our Light Baked Ricotta with Burst Cherry Tomatoes.

Recipe Tips

Use room-temperature eggs if possible because they blend more smoothly with the milk.

Drain oil-packed sun-dried tomatoes well before adding them.

Cook the spinach until excess moisture evaporates.

Use an oven-safe skillet so the eggs can move directly from stovetop to oven.

Do not overbake Goat Cheese Frittata. Remove it when the center is just set.

Crumbled goat cheese works best when distributed in small and medium pieces.

Let the frittata rest before slicing.

For a richer texture, use half-and-half instead of milk.

Easy Variations

Add sautéed mushrooms for an earthy flavor.

Goat Cheese Frittata can also be made with roasted red peppers, asparagus, zucchini, or artichoke hearts.

For a stronger Mediterranean profile, add chopped Kalamata olives and a pinch of red pepper flakes.

If goat cheese is not available, feta, ricotta, or soft cream cheese can be used, although the flavor will be different.

For extra protein, add cooked chicken sausage, turkey sausage, or smoked salmon.

You can also add fresh dill, thyme, or chives for a different herb profile.

Make-Ahead Instructions

This frittata is an excellent make-ahead breakfast.

Bake it one day in advance, let it cool completely, then cover and refrigerate.

You can serve it chilled, at room temperature, or gently reheated.

For meal prep, cut it into individual slices and refrigerate for quick breakfasts.

Storage and Reheating

Store leftover Goat Cheese Frittata in an airtight container in the refrigerator for up to 4 days.

Reheat slices in a 325°F or 165°C oven for about 8 to 10 minutes, or microwave in short intervals.

Avoid overheating because eggs can become dry.

Freeze individual slices for up to 2 months; thaw overnight and reheat gently.

Nutrition Information

Approximate nutrition per serving:

Calories: 260
Protein: 17 g
Carbohydrates: 7 g
Fat: 18 g
Saturated Fat: 8 g
Fiber: 2 g
Sugar: 4 g
Sodium: 520 mg

Nutrition values are estimates and may vary depending on the milk, cheese, sun-dried tomatoes, and serving size.

Frequently Asked Questions

Can I make this without an oven-safe skillet?

Yes. Cook the vegetables in a regular skillet, transfer them to a greased baking dish, pour the egg mixture over the top, add the cheese, and bake.

Can I use feta instead of goat cheese?

Yes. Feta works well, although it is firmer and saltier than goat cheese.

Can I use frozen spinach?

Yes. Thaw it completely and squeeze out as much water as possible before adding it.

How do I know when the frittata is done?

The center should look set and no longer wet. A slight jiggle is fine because it will continue cooking as it rests.

Can I make this dairy-free?

Yes. Use unsweetened dairy-free milk and replace the goat cheese and Parmesan with dairy-free alternatives.

Can I serve it cold?

Yes. Goat Cheese Frittata tastes good chilled or at room temperature, making it convenient for meal prep and brunch.

Can I add meat?

Yes. Cooked chicken sausage, turkey sausage, bacon, or smoked salmon can be added before baking.

Final Thoughts

Goat Cheese Frittata is an easy, colorful way to combine eggs, spinach, sun-dried tomatoes, herbs, and creamy cheese in one satisfying dish. It feels special enough for brunch but is simple enough for everyday cooking.

Because Goat Cheese Frittata stores well and can be served warm or at room temperature, it is also a practical choice for meal prep, holidays, and casual entertaining.

Keep this Goat Cheese Frittata recipe in your rotation whenever you want a flavorful Mediterranean-inspired breakfast or light meal that comes together with simple ingredients.

If you enjoy savory baked recipes, you may also like our Cheesy Chicken Puff Pastry Squares.

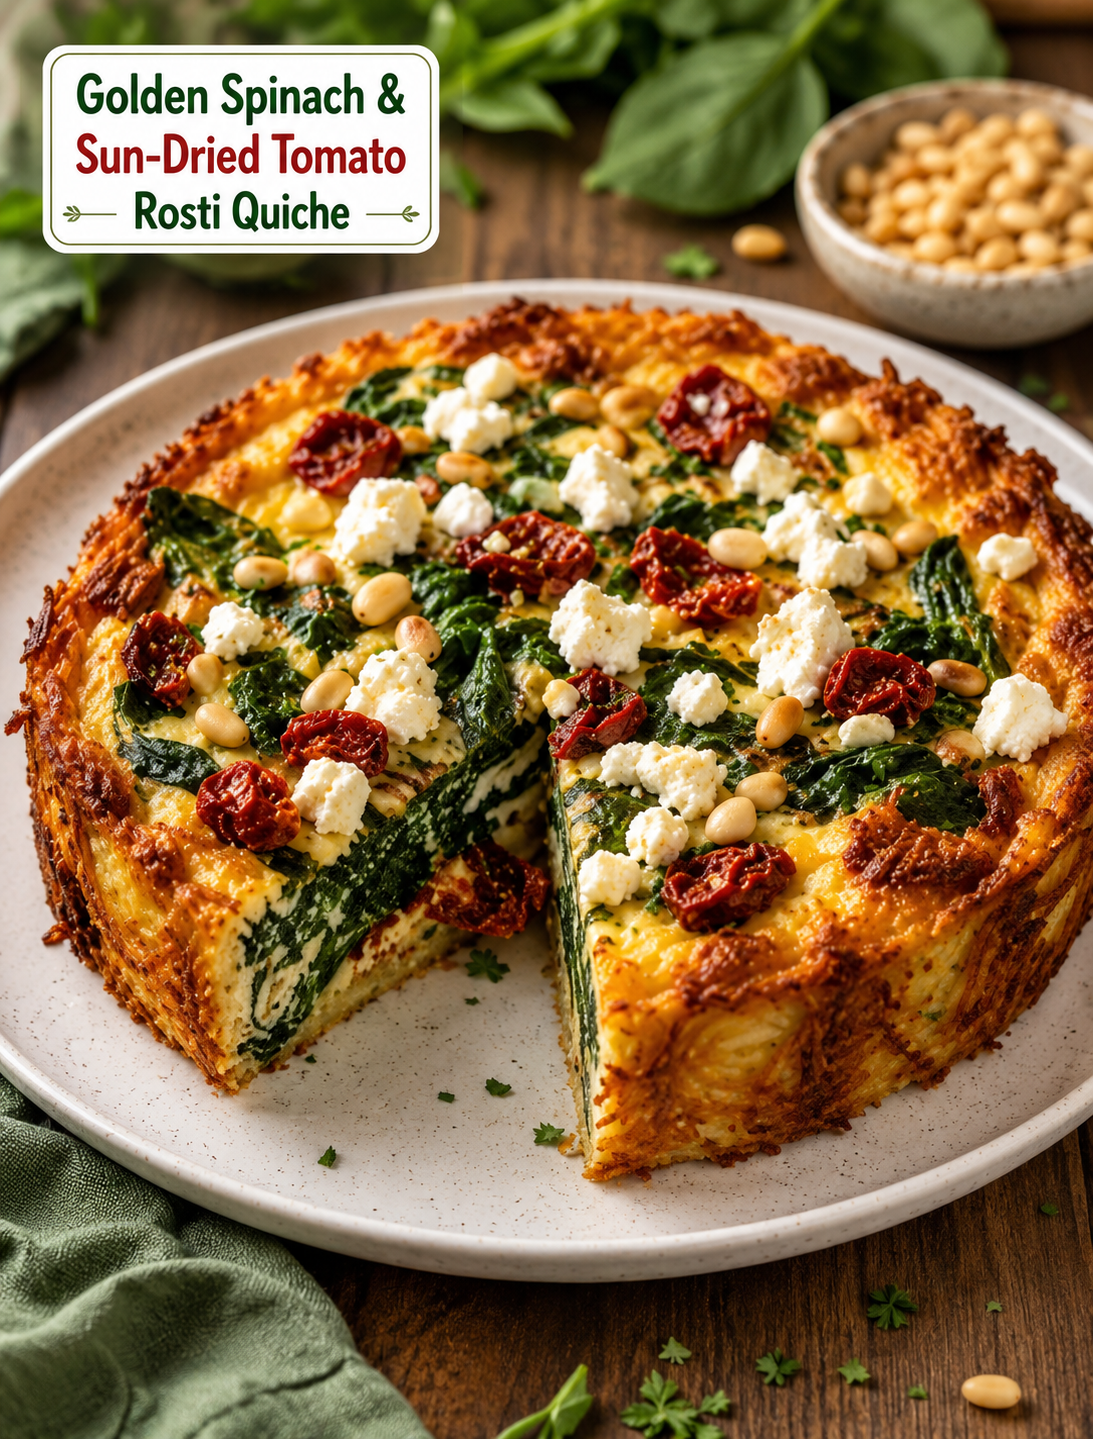
Golden Spinach & Sun-Dried Tomato

Golden Spinach & Sun-Dried Tomato Rosti Quiche with Feta & Pine Nuts Recipe – Crispy, Creamy & Flavorful Savory Delight

Golden Spinach & Sun-Dried Tomato Rosti Quiche with Feta & Pine Nuts Recipe – Crispy, Creamy & Flavorful Savory Delight

Description

Golden Spinach & Sun-Dried Tomato Rosti Quiche with Feta & Pine Nuts is a beautiful combination of a crispy potato rosti crust and a creamy, flavorful quiche filling. This unique recipe blends the comforting texture of golden shredded potatoes with nutritious spinach, tangy feta cheese, sweet sun-dried tomatoes, and crunchy toasted pine nuts.

Unlike traditional quiche made with pastry crust, this recipe uses a crispy potato rosti base that creates a naturally gluten-free style crust with incredible flavor and texture. The outside becomes golden and crunchy while the inside remains soft, creamy, and packed with delicious ingredients.

This savory quiche is perfect for breakfast, brunch, lunch, meal prep, or a light dinner. It is elegant enough for special occasions but simple enough to prepare for everyday meals. The combination of vegetables, protein-rich eggs, cheese, and healthy fats makes it both satisfying and nourishing.

The Mediterranean-inspired flavors of spinach, feta, tomatoes, and herbs create a restaurant-quality dish that looks impressive on any table. Serve it warm with a fresh salad, roasted vegetables, or soup for a complete meal.

Ingredients For:

Rosti Potato Crust

  • 4 large potatoes, peeled and grated
  • 1 teaspoon salt
  • 1/2 teaspoon black pepper
  • 2 tablespoons olive oil
  • 2 tablespoons melted butter

Spinach & Quiche Filling

  • 3 cups fresh spinach
  • 1/2 cup sun-dried tomatoes, chopped
  • 1 cup crumbled feta cheese
  • 6 large eggs
  • 1/2 cup heavy cream or milk
  • 1/2 cup shredded mozzarella cheese
  • 2 cloves garlic, minced
  • 1/2 teaspoon dried oregano
  • 1/2 teaspoon dried basil
  • 1/4 teaspoon chili flakes (optional)
  • Salt and black pepper to taste

The Topping

  • 1/4 cup toasted pine nuts
  • Fresh parsley or basil leaves
  • Extra feta cheese for garnish

Step-by-Step Instructions

Step 1: Prepare the Potato Rosti Crust

Preheat your oven to 400°F (200°C).

Peel and grate the potatoes using a box grater. Place the grated potatoes in a clean kitchen towel and squeeze firmly to remove as much moisture as possible.

Removing extra water is important because it helps create a crispy golden crust instead of a soft or soggy base.

Transfer the grated potatoes to a bowl. Add salt, black pepper, olive oil, and melted butter. Mix well until the potatoes are evenly coated.

Step 2: Bake the Rosti Base

Grease a round baking dish or tart pan with oil.

Press the potato mixture firmly into the bottom and sides of the pan, creating an even crust.

Bake for 25–30 minutes until the potatoes become golden and crispy around the edges.

Remove from the oven and allow it to cool slightly while preparing the filling.

Step 3: Prepare the Spinach Filling

Heat a skillet over medium heat and add a small amount of olive oil.

Add minced garlic and cook for about 30 seconds until fragrant.

Add fresh spinach and cook until wilted. This usually takes 2–3 minutes.

Remove from heat and allow it to cool slightly.

Chop the spinach if needed and remove any excess liquid.

Step 4: Make the Quiche Mixture

In a large bowl, whisk together eggs and cream until smooth.

Add:

  • Cooked spinach
  • Sun-dried tomatoes
  • Feta cheese
  • Mozzarella cheese
  • Oregano
  • Basil
  • Chili flakes
  • Salt and pepper

Mix gently until all ingredients are evenly combined.

Step 5: Assemble the Quiche

Pour the spinach and feta mixture into the baked potato rosti crust.

Spread evenly using a spoon.

Sprinkle additional feta cheese on top for extra flavor.

Step 6: Bake the Quiche

Reduce oven temperature to 375°F (190°C).

Bake for 30–40 minutes until:

  • The filling is completely set.
  • The top is lightly golden.
  • The cheese is melted.

Insert a knife into the center. If it comes out clean, the quiche is ready.

Step 7: Add Final Garnish

Remove from the oven and allow the quiche to rest for 10 minutes.

Top with toasted pine nuts, fresh parsley, or basil.

Slice and serve warm.

Tips for Perfect Golden Spinach & Sun-Dried Tomato Rosti Quiche

1. Remove Moisture From Potatoes

Dry potatoes create a crispy crust. Always squeeze grated potatoes well before baking.

2. Cook Spinach First

Fresh spinach releases water during cooking. Removing excess moisture prevents a watery filling.

3. Use Quality Feta Cheese

Good-quality feta provides a creamy texture and delicious salty flavor that balances the sweetness of sun-dried tomatoes.

4. Toast Pine Nuts

Lightly toasting pine nuts enhances their natural nutty flavor and adds extra crunch.

5. Let the Quiche Rest

Allowing the quiche to cool slightly helps the filling set and makes slicing easier.

6. Customize the Filling

You can add:

  • Mushrooms
  • Roasted peppers
  • Caramelized onions
  • Broccoli
  • Chicken
  • Smoked salmon

Recipe Notes

  • This quiche can be served warm or at room temperature.
  • It is perfect for meal preparation because it stores well.
  • Refrigerate leftovers in an airtight container for up to 4 days.
  • Reheat slices in the oven for the best texture.
  • The potato crust can be prepared one day ahead.
  • For a lighter version, replace heavy cream with milk or Greek yogurt.
  • Use sweet potatoes instead of regular potatoes for a different flavor.

Benefits of Golden Spinach & Sun-Dried Tomato Rosti Quiche

1. Rich in Protein

Eggs, feta cheese, and mozzarella provide protein that supports muscle repair and helps keep you feeling full.

2. Supports Healthy Digestion

Spinach contains dietary fiber that supports healthy digestion and regular bowel function.

3. Provides Essential Vitamins

Spinach provides vitamins A, C, and K, along with important minerals like iron and magnesium.

4. Contains Healthy Fats

Olive oil and pine nuts provide beneficial unsaturated fats that support overall wellness.

5. Supports Bone Health

Cheese provides calcium and phosphorus, important nutrients for maintaining strong bones.

6. Balanced Meal Option

This recipe combines vegetables, protein, carbohydrates, and healthy fats, making it a satisfying meal choice.

Note: Benefits depend on ingredients, serving size, and overall diet.

Servings & Nutritional Information

Recipe Name: Golden Spinach & Sun-Dried Tomato Rosti Quiche with Feta & Pine Nuts
Preparation Time: 25 minutes
Cooking Time: 60 minutes
Total Time: 1 hour 25 minutes
Servings: 8 slices

Approximate Nutrition Per Serving

  • Calories: 320 kcal
  • Protein: 14g
  • Carbohydrates: 22g
  • Fat: 21g
  • Saturated Fat: 8g
  • Fiber: 3g
  • Sugar: 3g
  • Calcium: 220mg
  • Iron: 3mg
  • Sodium: 520mg

Nutritional values may vary depending on brands and ingredient quantities.

Frequently Asked Questions (Q&A)

Can I make this quiche ahead of time?

Yes. This recipe is perfect for meal prep. Prepare it a day ahead and store it in the refrigerator. Reheat before serving.

Can I freeze Rosti Quiche?

Yes. Allow it to cool completely, wrap slices individually, and freeze for up to 2 months. Thaw and reheat before serving.

Can I use frozen spinach?

Yes. Frozen spinach works well. Thaw completely and squeeze out excess water before adding.

Can I make this recipe vegetarian?

Yes. The recipe is naturally vegetarian and packed with flavorful vegetables and cheese.

Can I make it dairy-free?

Yes. Replace dairy cheese with plant-based alternatives and use dairy-free milk.

What can I serve with this quiche?

It pairs well with:

  • Fresh green salad
  • Tomato salad
  • Roasted vegetables
  • Vegetable soup
  • Fresh fruit

Why is my potato crust not crispy?

The most common reason is excess moisture in potatoes. Make sure to squeeze grated potatoes very well before baking.

Conclusion

Golden Spinach & Sun-Dried Tomato Rosti Quiche with Feta & Pine Nuts is a delicious Mediterranean-inspired recipe that combines crispy potatoes, creamy eggs, flavorful vegetables, and rich cheese into one impressive dish.

With its golden crust, colorful filling, and satisfying texture, this quiche is perfect for breakfast, brunch, lunch, or dinner. It is easy to customize, packed with nutrients, and guaranteed to become a favorite recipe for family and guests.