Banana Oat Smoothie

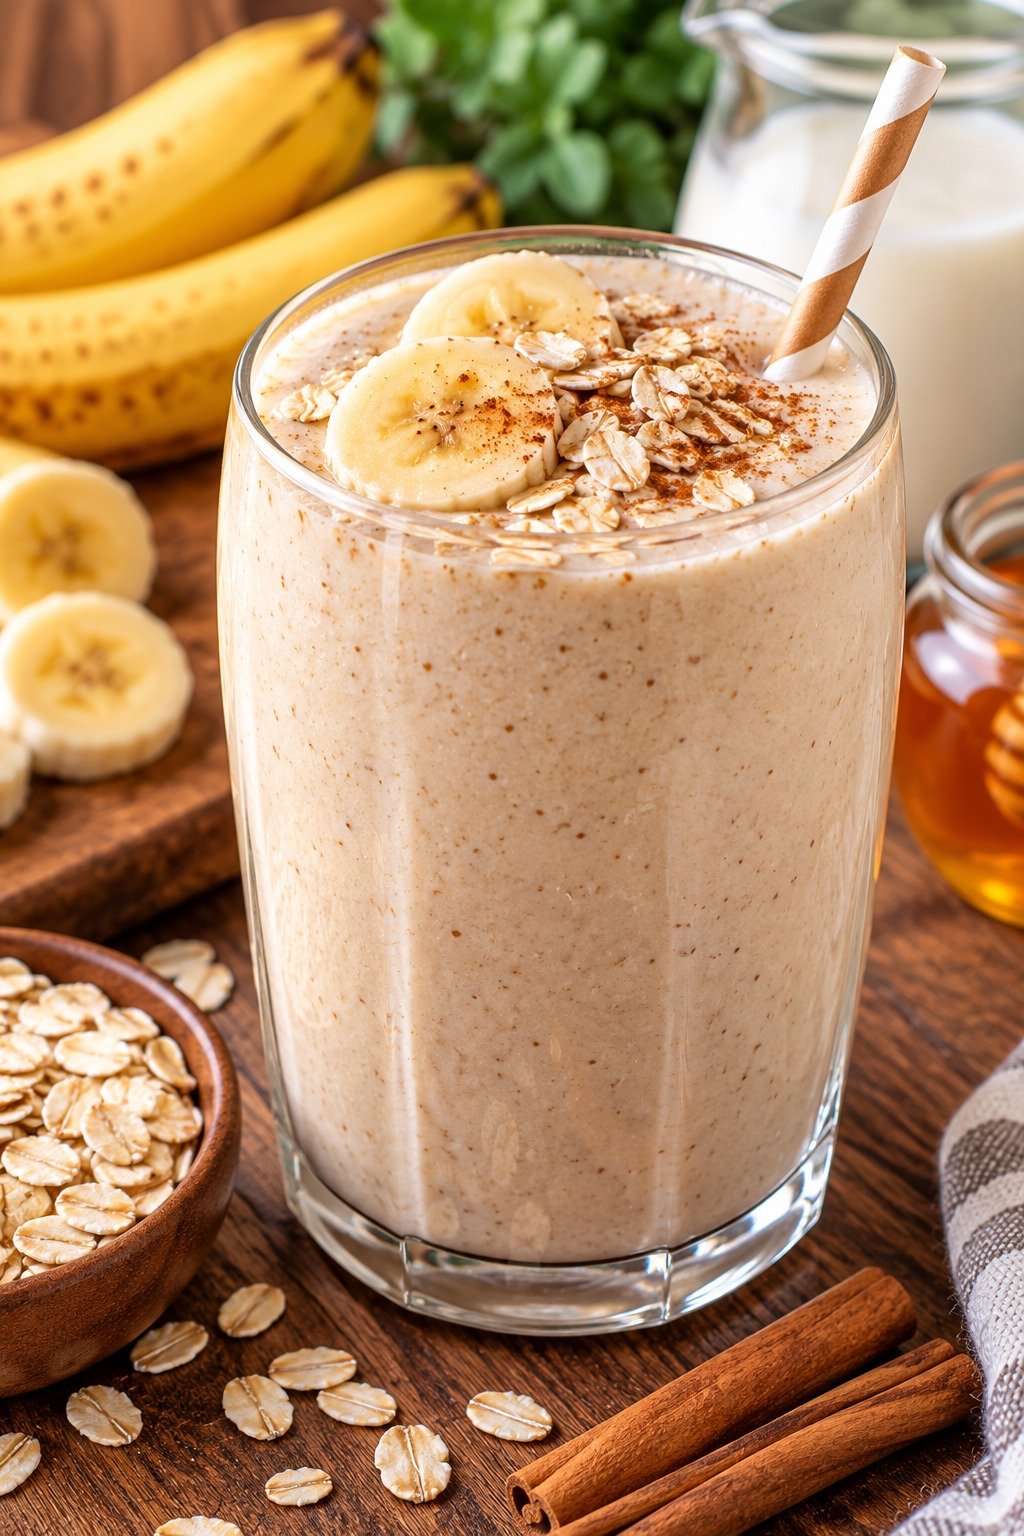
Banana Oat Smoothie with ripe bananas, rolled oats, Greek yogurt, cinnamon, and a creamy breakfast texture

Banana Oat Smoothie

Banana Oat Smoothie is a creamy, filling, and easy breakfast drink made with ripe banana, rolled oats, milk, Greek yogurt, cinnamon, and a touch of natural sweetness. It blends in minutes and works well for busy mornings, quick snacks, post-workout fuel, or an easy grab-and-go breakfast.

This Banana Oat Smoothie has a naturally thick texture from oats and banana, while yogurt adds extra creaminess and protein. It is also easy to customize with peanut butter, berries, chia seeds, cocoa, or different types of milk.

Prep Time: 5 minutes
Blend Time: 1 minute
Total Time: About 6 minutes
Servings: 2

Ingredients

For the Smoothie

  • 2 ripe bananas
  • 1/2 cup rolled oats
  • 1 cup milk of choice
  • 1/2 cup plain Greek yogurt
  • 1 tablespoon honey or maple syrup, optional
  • 1/2 teaspoon ground cinnamon
  • 1 teaspoon vanilla extract
  • 1 cup ice
  • Pinch of salt

Optional Add-Ins

  • 1 tablespoon peanut butter or almond butter
  • 1 tablespoon chia seeds
  • 1 tablespoon ground flaxseed
  • 1 scoop vanilla protein powder
  • 1 tablespoon cocoa powder
  • 1/2 cup berries
  • Extra milk, as needed

Why You’ll Love This Recipe

Banana Oat Smoothie is quick, simple, and made with ingredients that are easy to keep on hand. It takes only a few minutes to prepare, which makes it ideal for mornings when you need something fast but still satisfying.

Another reason to love Banana Oat Smoothie is its texture. The banana makes it naturally sweet and creamy, while the oats thicken the drink and help make it more filling. Greek yogurt adds a smooth finish and gives the smoothie a little extra protein.

It is also very flexible. You can make it thicker, thinner, sweeter, more chocolatey, or higher in protein depending on what you add.

How to Make Banana Oat Smoothie

Step 1: Add the Oats to the Blender

Place the rolled oats in the blender first.

Blend them on their own for about 10 to 15 seconds until they become a coarse oat flour.

This extra step helps Banana Oat Smoothie turn out smoother and prevents noticeable oat pieces in the finished drink.

Step 2: Add the Banana

Peel the bananas and break them into chunks.

Add them to the blender.

For the coldest and thickest smoothie, use frozen banana slices. Fresh bananas also work well if you prefer a lighter texture.

Step 3: Add the Yogurt and Milk

Pour in the milk and add the Greek yogurt.

The milk helps everything blend smoothly, while yogurt creates extra body and creaminess.

Step 4: Add Flavorings

Add cinnamon, vanilla, a tiny pinch of salt, and honey or maple syrup if needed.

Very ripe bananas may already provide enough sweetness, so taste before adding extra sweetener.

Step 5: Add Ice

Add the ice to the blender.

If using frozen bananas, you can reduce the amount of ice slightly.

Too much ice can dilute the flavor, so start with a smaller amount and add more if you want Banana Oat Smoothie extra cold and thick.

Step 6: Blend Until Smooth

Blend on high for 45 to 60 seconds.

Stop and scrape down the sides if needed.

The finished mixture should look creamy and pourable with no large pieces of oats or banana remaining.

Step 7: Adjust the Consistency

If the smoothie is too thick, add a splash of milk and blend again.

If it is too thin, add a few more oats, extra yogurt, or a handful of ice.

This makes it easy to adjust Banana Oat Smoothie to your preferred texture.

Step 8: Taste and Adjust

Taste the smoothie before serving.

Add more cinnamon, vanilla, sweetener, or a tiny pinch of salt if needed.

A small spoonful of peanut butter can also add richness.

Step 9: Serve Immediately

Pour the smoothie into glasses and serve right away.

For a simple garnish, sprinkle a little cinnamon or a few oats over the top.

Serving Suggestions

Banana Oat Smoothie works well on its own for a quick breakfast or snack, but you can pair it with other foods when you need a more substantial meal.

Serve it with boiled eggs, whole-grain toast, nut butter, cottage cheese, or a small bowl of fresh fruit.

For a busy morning, Banana Oat Smoothie can be poured into a travel cup and enjoyed on the go.

If serving it as an afternoon snack, pair it with a handful of nuts or a small yogurt bowl.

For another cozy and hearty meal, try our Homestyle Beef and Tender Cabbage Roll Soup with savory beef, tender cabbage, tomatoes, and comforting homestyle flavor.

Recipe Tips

Use ripe bananas with plenty of brown spots for the best natural sweetness.

Frozen bananas create a thicker, colder smoothie without needing as much ice.

Blend the oats first if you want the smoothest texture.

Rolled oats work best for Banana Oat Smoothie because they soften quickly and blend easily.

Quick oats can also work, although the texture may be slightly softer.

Do not use steel-cut oats unless they have been cooked first because they are too firm for this type of smoothie.

Start with less liquid and add more gradually if you prefer a thick consistency.

Easy Variations

Banana Oat Smoothie is easy to customize with different flavors.

For a peanut butter version, add 1 to 2 tablespoons creamy peanut butter.

For chocolate flavor, blend in cocoa powder and a few chocolate chips.

A berry version can include strawberries, blueberries, raspberries, or a mixed berry blend.

For extra fiber, add chia seeds or ground flaxseed.

To increase protein, add protein powder, extra Greek yogurt, or cottage cheese.

You can also add spinach for a green smoothie. Banana and cinnamon help keep the flavor mild.

For a warm-spice variation, add a small pinch of nutmeg or cardamom.

You may also enjoy our Creamy Tomato Chicken Pasta with Mozzarella for an easy cheesy dinner with tender chicken and rich tomato cream sauce.

Make-Ahead Instructions

Banana Oat Smoothie is best immediately after blending, but you can prepare some ingredients ahead of time.

Slice bananas and freeze them in individual portions.

Measure the oats, cinnamon, chia seeds, or protein powder into small containers so they are ready to add to the blender.

You can also assemble freezer smoothie packs with banana, oats, and optional fruit. In the morning, add the contents to the blender with milk and yogurt.

If you need to blend the smoothie ahead, store it in a tightly sealed jar in the refrigerator and shake or blend briefly before drinking.

Storage

Store leftover Banana Oat Smoothie in an airtight jar or bottle in the refrigerator for up to 24 hours.

The oats will continue absorbing liquid as the smoothie sits, so it may become thicker.

Add a splash of milk and shake well before serving.

For the best flavor and texture, drink it the same day.

Freezing a fully blended smoothie is possible, but the texture may change slightly after thawing. Another option is to freeze it in ice cube trays and blend the frozen cubes with a little milk later.

Nutrition Information

Approximate nutrition per serving:

Calories: 330
Protein: 13 g
Carbohydrates: 58 g
Fat: 6 g
Saturated Fat: 2 g
Fiber: 7 g
Sugar: 25 g
Sodium: 120 mg

Nutrition values are estimates and will vary depending on the milk, yogurt, sweetener, and optional add-ins used.

Frequently Asked Questions

Can I use quick oats?

Yes. Quick oats blend easily and work well, though rolled oats usually create a slightly heartier texture.

Do I need to cook the oats first?

No. Rolled oats can be added directly to the blender.

Can I make this without yogurt?

Yes. Replace the yogurt with extra milk, cottage cheese, or a dairy-free yogurt alternative.

Can I make it dairy-free?

Yes. Use oat milk, almond milk, soy milk, or another dairy-free milk and choose a plant-based yogurt.

Can I add protein powder?

Yes. One scoop of vanilla or unflavored protein powder works well in Banana Oat Smoothie.

Why is my smoothie too thick?

The oats absorb liquid quickly. Add a little more milk and blend until you reach the consistency you prefer.

Can I use frozen bananas?

Yes. Frozen bananas are ideal for a colder, thicker smoothie.

Final Thoughts

Banana Oat Smoothie is an easy way to turn basic breakfast ingredients into a creamy, filling drink in just a few minutes.

Because Banana Oat Smoothie can be customized with berries, nut butter, protein powder, cocoa, seeds, or different types of milk, it works for many tastes and routines.

Keep this Banana Oat Smoothie recipe handy whenever you need a fast breakfast, a simple snack, or a convenient drink for busy mornings.

With naturally sweet banana, hearty oats, creamy yogurt, and simple pantry ingredients, Banana Oat Smoothie is a practical homemade option that is easy to blend and easy to enjoy.
Creamy Tomato Chicken Pasta with Mozzarella

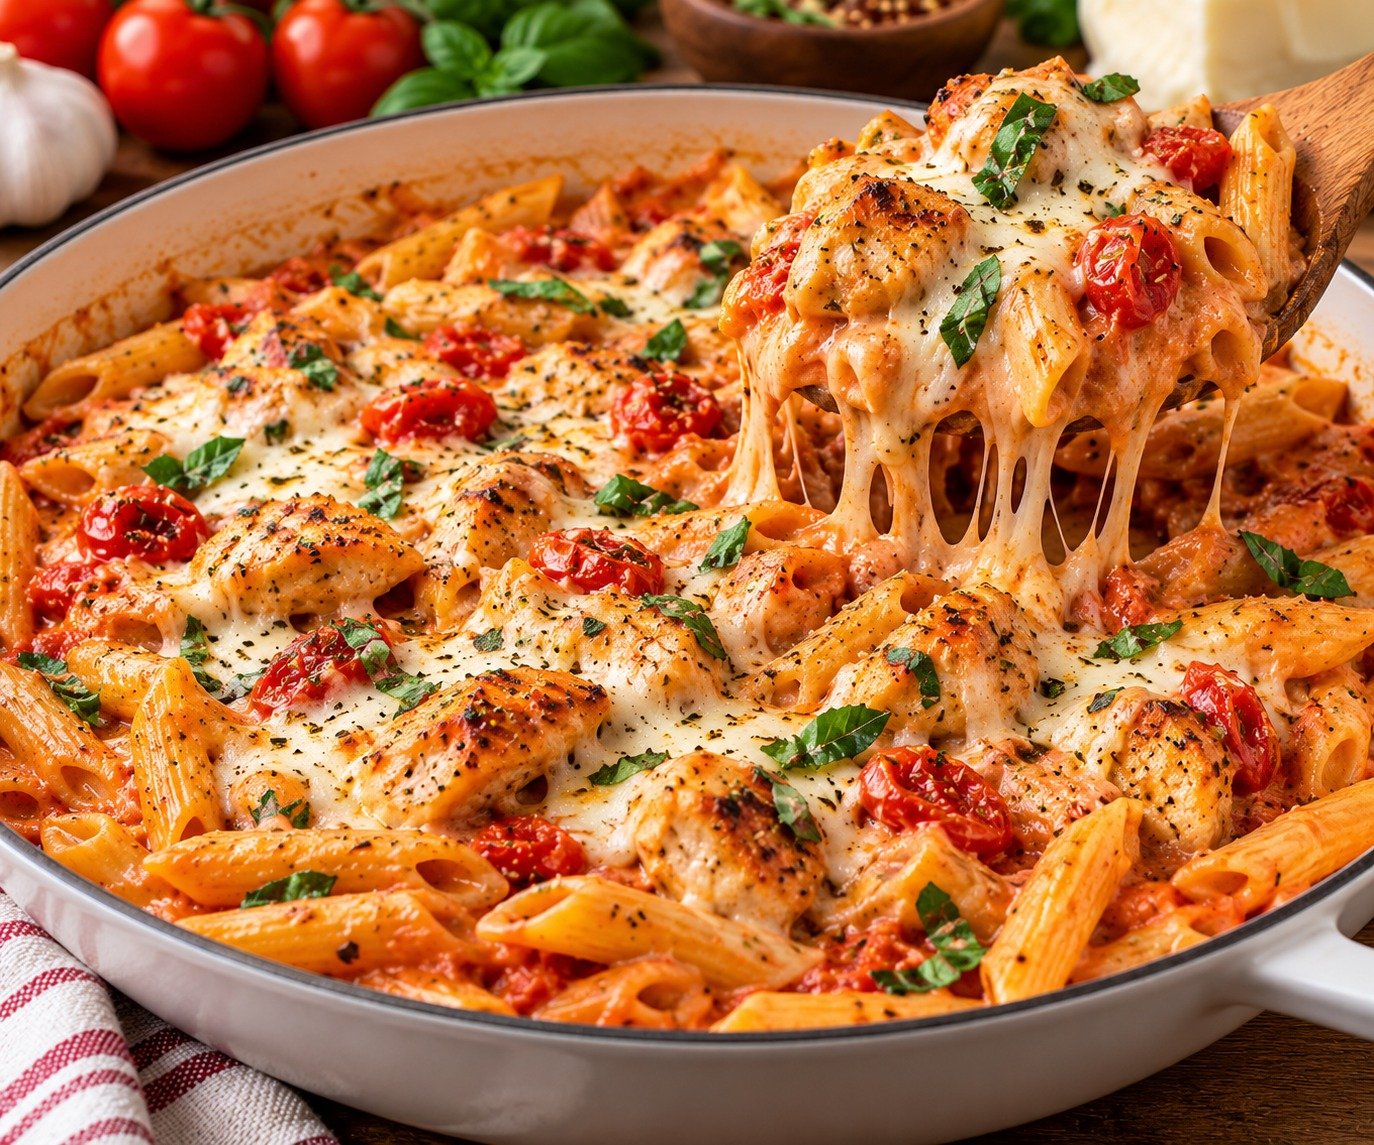
Tomato Chicken Pasta with tender chicken, creamy tomato sauce, melted mozzarella, Parmesan, herbs, and pasta

Creamy Tomato Chicken Pasta with Mozzarella

Tomato Chicken Pasta is a creamy, comforting dinner made with tender chicken, juicy tomatoes, garlic, herbs, pasta, and plenty of melted mozzarella. The combination of tomato, cream, Parmesan, and mozzarella gives every bite a smooth, savory finish.

This Tomato Chicken Pasta is perfect for busy weeknights because it uses simple ingredients and comes together in one skillet while the pasta cooks separately.

Prep Time: 15 minutes
Cook Time: 30 minutes
Total Time: About 45 minutes
Servings: 6

Ingredients

For the Chicken

  • 1 1/2 pounds boneless, skinless chicken breasts
  • 1 tablespoon olive oil
  • 1 teaspoon Italian seasoning
  • 1/2 teaspoon garlic powder
  • 1/2 teaspoon smoked paprika
  • 3/4 teaspoon salt
  • 1/4 teaspoon black pepper

For the Pasta and Sauce

  • 12 ounces penne, rigatoni, or fusilli
  • 1 tablespoon olive oil
  • 3 garlic cloves, minced
  • 1 small onion, finely chopped
  • 1 can (14.5 ounces) diced tomatoes
  • 1 cup tomato sauce
  • 1/2 cup heavy cream
  • 1/2 cup chicken broth
  • 1 teaspoon Italian seasoning
  • 1/2 teaspoon dried basil
  • 1/4 teaspoon red pepper flakes, optional
  • 1/2 cup grated Parmesan cheese
  • 1 1/2 cups shredded mozzarella cheese
  • Salt and black pepper, to taste

For Finishing

  • 2 tablespoons chopped fresh basil or parsley
  • Extra Parmesan
  • Extra mozzarella, optional
  • Red pepper flakes, optional

Why You’ll Love This Recipe

Tomato Chicken Pasta combines creamy sauce, juicy chicken, tender pasta, and melted cheese in a meal that feels comforting but still has plenty of bright tomato flavor.

Another reason to love Tomato Chicken Pasta is how flexible it is. You can use different pasta shapes, add spinach or mushrooms, make it a little spicy, or lighten the sauce with half-and-half instead of heavy cream.

How to Make Tomato Chicken Pasta

Step 1: Cook the Pasta

Bring a large pot of salted water to a boil.

Add the pasta and cook until just al dente according to the package directions.

Before draining, reserve about 1 cup of pasta water. Drain the pasta and set it aside.

Step 2: Season the Chicken

Pat the chicken dry and cut it into bite-size pieces.

Season with Italian seasoning, garlic powder, smoked paprika, salt, and black pepper.

Toss until the pieces are evenly coated.

Step 3: Cook the Chicken

Heat 1 tablespoon olive oil in a large skillet over medium-high heat.

Add the chicken in a single layer and cook for 5 to 7 minutes, stirring occasionally, until golden and cooked through.

Transfer the chicken to a clean plate.

The chicken should reach an internal temperature of 165°F or 74°C.

Step 4: Sauté the Onion and Garlic

Reduce the heat to medium.

Add the remaining olive oil to the same skillet.

Stir in the onion and cook for 3 to 4 minutes until softened.

Add the garlic and cook for about 30 seconds, just until fragrant.

Step 5: Build the Tomato Sauce

Pour in the diced tomatoes, tomato sauce, and chicken broth.

Add Italian seasoning, dried basil, and red pepper flakes if using.

Stir well and scrape up any browned bits from the bottom of the pan because they add extra flavor to Tomato Chicken Pasta.

Let the sauce simmer for 7 to 8 minutes so the tomatoes soften and the flavors blend.

Step 6: Add the Cream

Reduce the heat to medium-low.

Stir in the heavy cream and let the sauce gently simmer for 2 to 3 minutes.

Do not let it boil aggressively after adding the cream.

Step 7: Add Parmesan

Stir in the Parmesan until melted.

Taste and adjust the salt and pepper.

If the sauce seems too thick, add a little reserved pasta water or extra chicken broth.

Step 8: Return the Chicken

Add the cooked chicken back to the skillet and stir to coat it in the creamy tomato sauce.

Let it warm for 1 to 2 minutes.

At this point, Tomato Chicken Pasta should have a rich sauce that clings easily to both the chicken and the pasta.

Step 9: Add the Pasta

Add the drained pasta to the skillet.

Gently toss everything together until the pasta is evenly coated.

If needed, add a splash of reserved pasta water to loosen the sauce.

Step 10: Add the Mozzarella

Sprinkle the shredded mozzarella over the pasta.

Stir half of it into the sauce, then leave the remaining cheese over the top.

Cover the skillet for 2 to 3 minutes, or until the mozzarella is melted and stretchy.

Step 11: Garnish and Serve

Finish Tomato Chicken Pasta with fresh basil or parsley, extra Parmesan, and a pinch of red pepper flakes if desired.

Serve immediately while the mozzarella is warm and melted.

Serving Suggestions

Tomato Chicken Pasta is hearty enough to serve as a complete dinner, but simple sides make it even better.

Pair it with garlic bread, toasted sourdough, or warm dinner rolls to soak up the creamy sauce.

A crisp green salad, Caesar salad, cucumber tomato salad, or roasted vegetables can add freshness to the meal.

For another easy chicken dinner, try our Lemon & Garlic Chicken Bites with juicy chicken, fresh lemon, garlic, and simple herbs.

Recipe Tips

Cut the chicken into similar-size pieces so it cooks evenly.

Do not overcook the pasta. Al dente pasta holds its shape better once mixed with the sauce.

Use freshly shredded mozzarella when possible because it melts more smoothly than many pre-shredded varieties.

Low-moisture mozzarella works best for Tomato Chicken Pasta because it creates a creamy, stretchy finish without releasing too much liquid.

Keep the heat moderate after adding the cream to prevent the sauce from separating.

Reserve pasta water before draining. Its starch helps loosen the sauce while keeping it creamy.

Easy Variations

Tomato Chicken Pasta is easy to customize with ingredients you already have.

Add a few handfuls of baby spinach during the final minutes of cooking for extra color and vegetables.

Sliced mushrooms can be sautéed with the onion before the tomatoes are added.

For a spicy version, increase the red pepper flakes or stir in a spoonful of chili paste.

You can also replace chicken breast with boneless chicken thighs for a juicier result.

For a lighter sauce, use half-and-half instead of heavy cream.

A handful of sun-dried tomatoes can deepen the tomato flavor, while chopped roasted red peppers add a mild sweetness.

You may also enjoy our Cheesy Potato Packs for a comforting side dish with tender potatoes, melted cheese, garlic, and herbs.

Make-Ahead Instructions

Tomato Chicken Pasta can be partially prepared in advance.

Cook and season the chicken up to one day ahead and store it covered in the refrigerator.

The sauce for Tomato Chicken Pasta can also be made in advance without the cream and cheese. Reheat it gently, then add the cream, Parmesan, mozzarella, chicken, and freshly cooked pasta when ready to serve.

Storage and Reheating

Store leftover Tomato Chicken Pasta in an airtight container in the refrigerator for up to 4 days.

The sauce in Tomato Chicken Pasta will thicken as it cools, so add a splash of milk, broth, or water before reheating.

Warm individual portions in the microwave in short intervals, stirring between each interval.

For a larger portion, reheat gently in a covered skillet over low heat.

You can add a little fresh mozzarella or Parmesan after reheating to refresh the creamy texture.

Nutrition Information

Approximate nutrition per serving:

Calories: 560
Protein: 42 g
Carbohydrates: 49 g
Fat: 22 g
Saturated Fat: 10 g
Fiber: 4 g
Sugar: 7 g
Sodium: 780 mg

Nutrition values are estimates and will vary depending on the pasta, cheese, cream, tomato products, and exact serving size.

Frequently Asked Questions

Can I use chicken thighs instead of chicken breasts?

Yes. Boneless, skinless chicken thighs work well and stay especially juicy.

Can I use another pasta shape?

Yes. Penne, rigatoni, fusilli, farfalle, shells, and rotini all work well because they hold the creamy sauce.

Can I make this without heavy cream?

Yes. Half-and-half can be used for a lighter sauce, although the texture will be slightly less rich.

Why did my sauce become too thick?

The pasta may have absorbed extra liquid. Add a small splash of reserved pasta water, broth, or milk until the desired consistency returns.

Can I add vegetables?

Yes. Spinach, mushrooms, zucchini, bell peppers, peas, and broccoli are all good additions to Tomato Chicken Pasta.

Can I use fresh tomatoes?

Yes. Chopped ripe tomatoes can replace canned tomatoes, although you may need to simmer them a little longer so the sauce develops enough body.

Can I freeze leftovers?

You can freeze the dish for up to 2 months, but creamy sauces and pasta can become softer after thawing. Refrigerated leftovers usually give the best texture.

Final Thoughts

Tomato Chicken Pasta is an easy way to turn chicken, pasta, tomatoes, cream, and cheese into a cozy family dinner with simple ingredients.

Because Tomato Chicken Pasta is flexible, you can adjust the vegetables, pasta shape, spice level, or cheese without changing the basic method.

Keep this Tomato Chicken Pasta recipe handy for busy evenings when you want something creamy, cheesy, and satisfying without spending hours in the kitchen.

With tender chicken, rich tomato cream sauce, melted mozzarella, and plenty of comforting flavor, Tomato Chicken Pasta is the kind of meal that works just as well for a weeknight dinner as it does for casual entertaining.

Cheesy Potato Packs

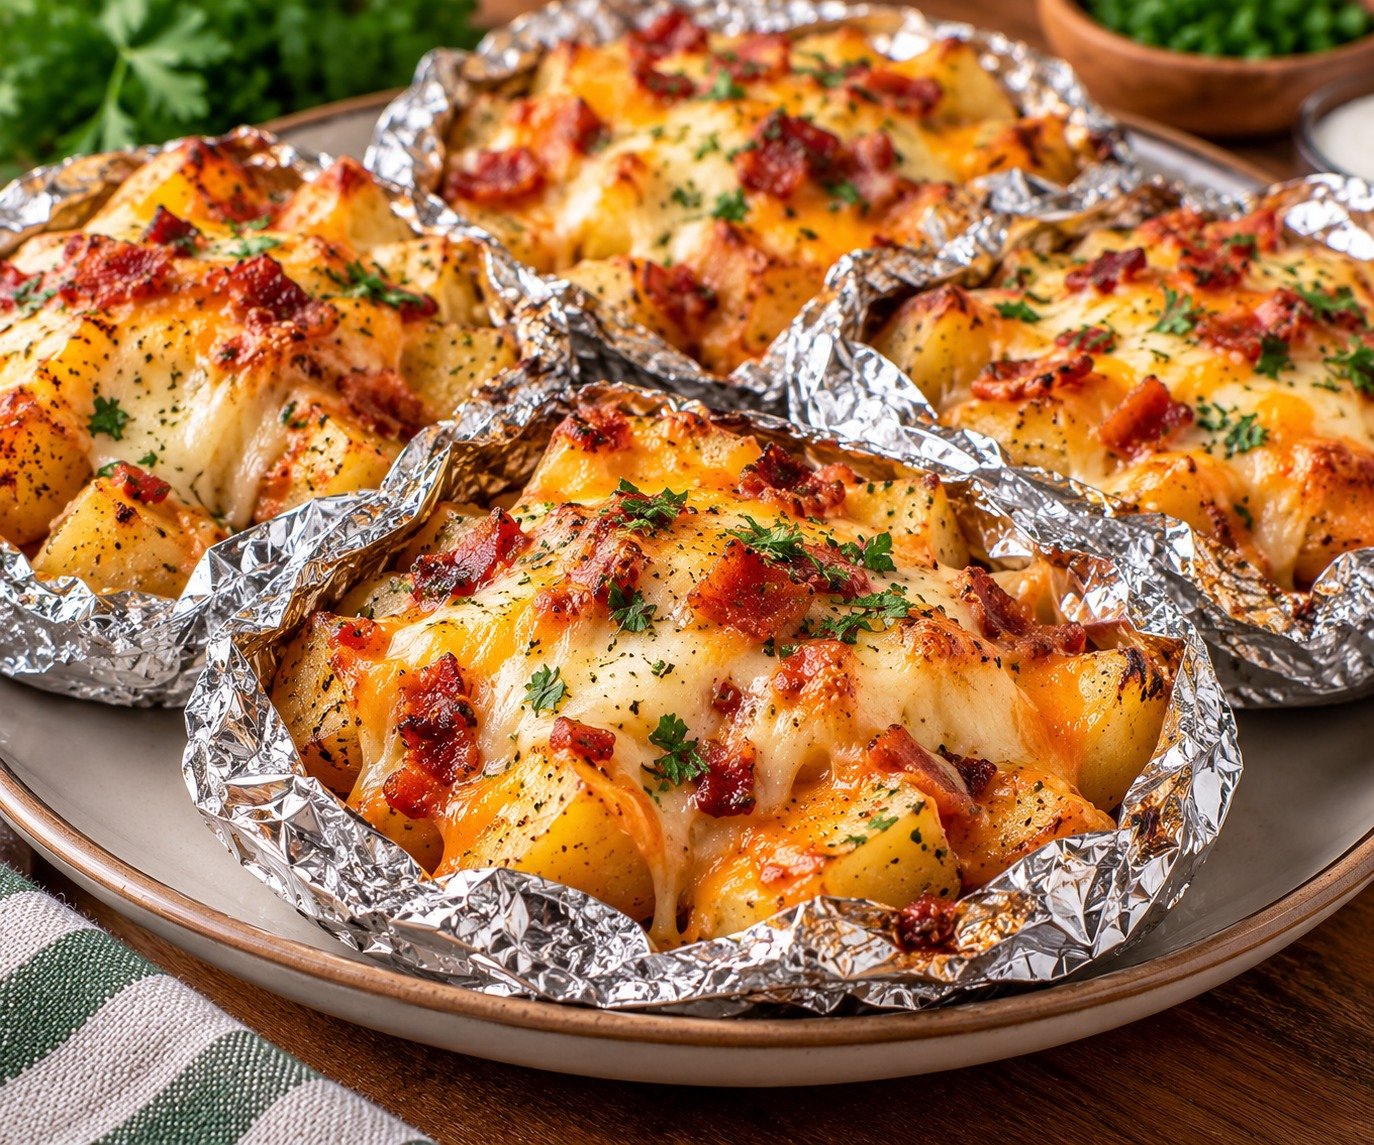
Cheesy Potato Packs with tender sliced potatoes, melted cheddar and mozzarella, garlic, herbs, and golden cheesy edges

Cheesy Potato Packs

Cheesy Potato Packs are easy foil packet potatoes made with tender sliced potatoes, melted cheese, butter, garlic, herbs, and simple seasonings. They are perfect for grilling, oven baking, camping meals, cookouts, or easy family dinners.

This Cheesy Potato Packs recipe is especially useful when you want a simple side dish with very little cleanup. The packets can be prepared ahead, customized with different cheeses or vegetables, and cooked in the oven or on the grill. They pair well with chicken, steak, burgers, fish, or a fresh salad.

Prep Time: 15 minutes
Cook Time: 30–40 minutes
Total Time: About 50 minutes
Servings: 4

Ingredients

For the Potato Packs

  • 2 pounds Yukon Gold or red potatoes, thinly sliced
  • 2 tablespoons melted butter
  • 1 tablespoon olive oil
  • 3 garlic cloves, minced
  • 1 teaspoon onion powder
  • 1 teaspoon dried parsley
  • 1/2 teaspoon smoked paprika
  • 1/2 teaspoon dried oregano
  • 3/4 teaspoon salt
  • 1/2 teaspoon black pepper
  • 1 1/2 cups shredded cheddar cheese
  • 1/2 cup shredded mozzarella cheese

For Finishing

  • 2 tablespoons chopped fresh parsley
  • 2 green onions, thinly sliced
  • 1/4 cup sour cream, optional
  • Extra shredded cheese, optional
  • Cooked crumbled bacon, optional

Why You’ll Love This Recipe

Cheesy Potato Packs are simple, comforting, and easy to customize. Thinly sliced potatoes cook inside foil with butter, garlic, herbs, and cheese, creating tender layers with plenty of savory flavor.

Another reason to love Cheesy Potato Packs is how little cleanup they require. Each portion cooks in its own foil packet, so there is no large casserole dish to scrub afterward.

They also work for many occasions. You can make them for a casual weeknight dinner, serve them beside grilled meat at a barbecue, or prepare the packets before a camping trip and cook them when needed.

How to Make Cheesy Potato Packs

Step 1: Prepare the Oven or Grill

Preheat the oven to 400°F or 200°C.

If using a grill, preheat it to medium heat, around 375°F to 400°F.

Tear four large sheets of heavy-duty aluminum foil. Lightly coat the center of each sheet with cooking spray or a small amount of oil.

Step 2: Slice the Potatoes

Wash and dry the potatoes.

Slice them into thin rounds, about 1/8 to 1/4 inch thick. Keeping the slices similar in thickness helps Cheesy Potato Packs cook evenly.

Step 3: Season the Potatoes

Place the sliced potatoes in a large bowl.

Add melted butter, olive oil, minced garlic, onion powder, parsley, smoked paprika, oregano, salt, and black pepper.

Toss well until every slice is lightly coated with the seasoned butter mixture.

Step 4: Assemble the Foil Packets

Divide the seasoned potatoes evenly among the four foil sheets.

Arrange them in loose stacks or slightly overlapping layers rather than one thick pile.

Sprinkle cheddar and mozzarella between some of the potato layers and over the top.

Step 5: Seal the Packets

Bring the long sides of the foil together above the potatoes and fold them down several times.

Fold the short ends inward to create a sealed packet.

Step 6: Bake in the Oven

Place the packets on a large baking sheet.

Bake for 30 to 40 minutes, depending on the thickness of your potato slices.

Carefully open one packet after 30 minutes and test a potato with a fork.

If it is still firm, reseal the packet and continue cooking.

Step 7: Cook on the Grill

For grilled Cheesy Potato Packs, place the sealed packets directly on the grill grates over medium heat.

Cook for 25 to 35 minutes, turning the packets once halfway through.

Step 8: Add Extra Cheese

When the potatoes are tender, carefully open each packet.

Steam will escape quickly, so keep your hands and face away from the opening.

Sprinkle a little extra cheese over the potatoes if desired.

Leave the packets open and return them to the oven or grill for 3 to 5 minutes, just until the cheese melts.

Step 9: Garnish and Serve

Top Cheesy Potato Packs with chopped parsley and green onions.

Add sour cream, cooked bacon, or extra black pepper if desired.

Serve immediately while the potatoes are hot and the cheese is melted.

Serving Suggestions

Cheesy Potato Packs make an easy side dish for grilled chicken, steak, burgers, pork chops, sausages, or baked fish.

They also work well with barbecue meals. Serve them alongside coleslaw, corn on the cob, grilled vegetables, or a fresh green salad.

For a vegetarian meal, pair Cheesy Potato Packs with roasted vegetables, black bean burgers, grilled mushrooms, or a hearty bean salad.

A simple tomato and cucumber salad is another good choice because its fresh flavor balances the richness of the cheese and butter.

For another cheesy and easy side, try our Broccoli & Cheddar Savory Muffins with tender broccoli, cheddar, and a soft savory texture.

Recipe Tips

Slice the potatoes evenly so they finish cooking at the same time.

Do not overfill the packets. Smaller portions cook more evenly and are easier to handle.

Use heavy-duty foil or double-wrap regular foil if cooking on the grill.

Cheddar gives Cheesy Potato Packs strong flavor, while mozzarella adds extra meltiness.

Always open hot foil packets carefully because trapped steam can cause burns.

If you prefer crispier potatoes, open the packets during the final few minutes and let some of the moisture escape. In the oven, you can also place the opened packets under the broiler briefly to brown the cheese.

Easy Variations

Cheesy Potato Packs are easy to change depending on the ingredients you have available.

For a loaded potato version, add cooked bacon, green onions, and sour cream after cooking.

A spicy version can include diced jalapeños, red pepper flakes, or pepper jack cheese.

For extra vegetables, add thinly sliced onions, bell peppers, zucchini, or mushrooms.

You can create a ranch-style version by adding a little ranch seasoning to the butter mixture.

For a smoky flavor, use smoked cheddar or increase the smoked paprika slightly.

Parmesan, Monterey Jack, Colby, Gruyère, or a Mexican cheese blend can also replace part of the cheddar.

If you want a simple homemade dessert, you may also enjoy our Yogurt Loaf Cake with a soft, moist crumb and light vanilla flavor.

Make-Ahead Instructions

Cheesy Potato Packs can be assembled several hours before cooking.

Prepare the potatoes, season them, divide them among the foil sheets, and add the cheese.

Seal the packets and refrigerate them until needed.

For best results, cook them within the same day because raw potatoes can discolor after being cut.

If preparing ahead for a cookout, keep the packets chilled until the grill is ready.

Storage and Reheating

Store leftover Cheesy Potato Packs in an airtight container in the refrigerator for up to 4 days.

To reheat in the oven, place the potatoes in a baking dish, cover loosely with foil, and warm at 375°F for about 10 to 15 minutes.

For crispier edges, spread the leftovers on a baking sheet and heat uncovered for a few minutes at the end.

A microwave can also be used for quick reheating, although the potatoes will stay softer than they would in the oven.

Nutrition Information

Approximate nutrition per serving:

Calories: 410
Protein: 13 g
Carbohydrates: 42 g
Fat: 22 g
Saturated Fat: 11 g
Fiber: 4 g
Sugar: 3 g
Sodium: 610 mg

Nutrition values are estimates and may change depending on the type and amount of cheese, butter, potatoes, and optional toppings used.

Frequently Asked Questions

What potatoes are best for this recipe?

Yukon Gold and red potatoes work especially well because they hold their shape while becoming creamy inside.

Can I use russet potatoes?

Yes. Russets can be used, but they tend to become softer and may break apart more easily.

Can I make these without foil?

Yes. Place the ingredients in a covered baking dish and bake until the potatoes are tender, although you will lose the individual packet presentation.

Why are my potatoes still firm?

The slices may be too thick, or the packets may need more time. Reseal them and continue cooking until fork-tender.

Can I add raw chicken to the packets?

It is better to cook chicken separately unless you are following a recipe specifically designed for chicken and potatoes together with appropriate cooking times and temperatures.

Can I use pre-shredded cheese?

Yes, although freshly shredded cheese usually melts more smoothly and creates a creamier finish.

Can I freeze the cooked potatoes?

You can, but the texture may become slightly grainy after freezing. Refrigerated leftovers usually have the best texture.

Final Thoughts

Cheesy Potato Packs are an easy way to turn simple potatoes into a warm, flavorful side dish with melted cheese, garlic, butter, and herbs.

Because Cheesy Potato Packs can be cooked in the oven or on the grill, they work for weeknight dinners, backyard barbecues, camping meals, and casual family gatherings.

Keep this Cheesy Potato Packs recipe handy whenever you want a side dish that can be prepared ahead and served with very little cleanup.

With tender potatoes, melted cheese, savory seasonings, and plenty of options for toppings, Cheesy Potato Packs are a simple comfort-food side that fits almost any casual meal.

Yogurt Loaf Cake

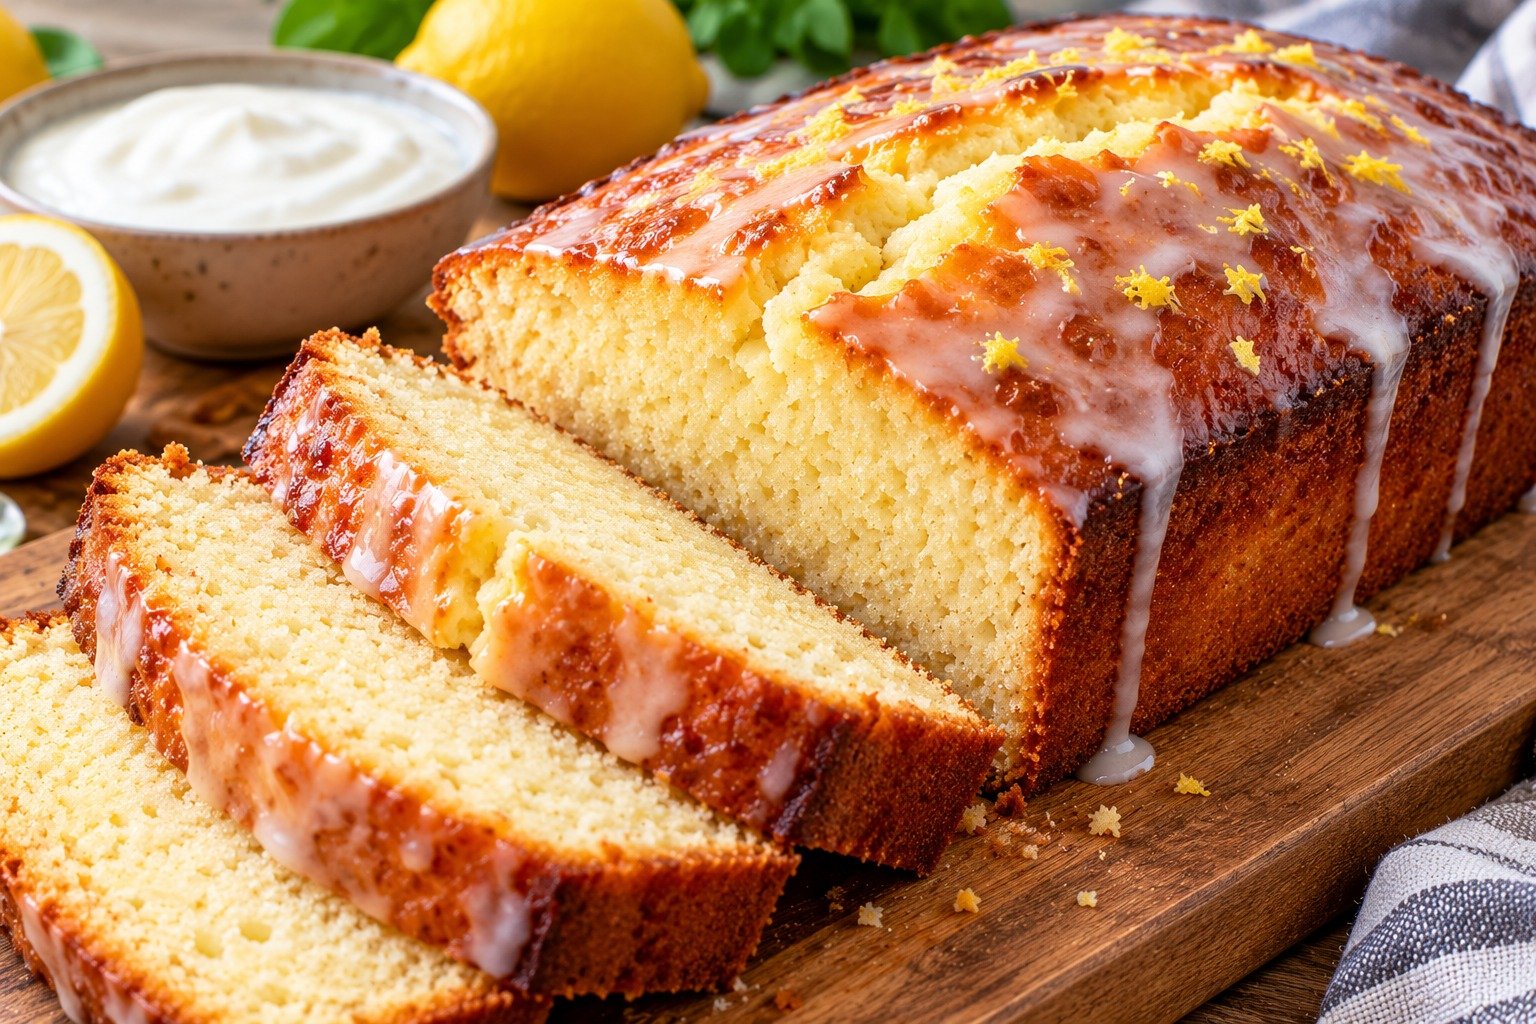
Yogurt Loaf Cake with a soft moist crumb, golden top, creamy yogurt, vanilla, and a classic homemade loaf shape

Yogurt Loaf Cake

Yogurt Loaf Cake is a soft, moist, and simple homemade cake made with creamy yogurt, eggs, oil, sugar, vanilla, and basic pantry ingredients. It has a tender crumb, a light sweetness, and a classic loaf shape that makes it perfect for breakfast, afternoon tea, lunchboxes, or an easy family dessert.

This Yogurt Loaf Cake is especially useful when you want a reliable cake without complicated steps or heavy frosting. Yogurt adds moisture and a gentle tang, while oil keeps the crumb soft even after the cake cools. You can serve it plain, dust it with powdered sugar, add a light glaze, or pair it with fresh berries.

Prep Time: 15 minutes
Bake Time: 45–55 minutes
Cooling Time: 20 minutes
Total Time: About 1 hour 25 minutes
Servings: 10 slices

Ingredients

For the Cake

  • 1 1/2 cups all-purpose flour
  • 2 teaspoons baking powder
  • 1/4 teaspoon baking soda
  • 1/4 teaspoon salt
  • 2 large eggs
  • 3/4 cup granulated sugar
  • 1 cup plain Greek yogurt or regular plain yogurt
  • 1/2 cup neutral oil
  • 2 teaspoons vanilla extract
  • 1 tablespoon lemon zest, optional

Optional Toppings

  • Powdered sugar
  • Fresh berries
  • Lemon glaze
  • Honey drizzle
  • Chopped almonds or pistachios

Why You’ll Love This Recipe

Yogurt Loaf Cake is easy to prepare because it uses simple ingredients and does not require a mixer. A whisk, two bowls, and a loaf pan are enough.

Another reason to love Yogurt Loaf Cake is its texture. The yogurt keeps the inside tender and moist, while the outside develops a delicate golden crust. The flavor is mild enough to enjoy plain but also works beautifully with lemon, berries, chocolate, or nuts.

It is also a practical make-ahead cake because the loaf stays soft for several days when stored properly.

How to Make Yogurt Loaf Cake

Step 1: Preheat the Oven

Preheat the oven to 350°F or 175°C.

Grease a 9 x 5-inch loaf pan and line it with parchment paper, leaving a little overhang on the sides so the cake is easy to lift out.

Step 2: Mix the Dry Ingredients

In a medium bowl, whisk together the flour, baking powder, baking soda, and salt.

Mixing the dry ingredients separately helps the leavening spread evenly through the batter and gives Yogurt Loaf Cake a consistent rise.

Step 3: Whisk the Eggs and Sugar

In a large bowl, whisk the eggs and sugar for about 1 minute until the mixture looks smooth and slightly lighter.

You do not need to whip in lots of air, but a good whisk helps the sugar begin to dissolve.

Step 4: Add the Yogurt and Oil

Add the yogurt, oil, vanilla, and lemon zest if using.

Whisk until the mixture is completely smooth.

The yogurt gives Yogurt Loaf Cake its soft texture, while the oil helps the loaf stay moist even after refrigeration.

Step 5: Add the Dry Ingredients

Add the flour mixture to the wet ingredients in two additions.

Fold gently with a spatula just until no dry streaks remain.

Do not overmix the batter because too much mixing can make the loaf dense or slightly tough.

Step 6: Fill the Loaf Pan

Pour the batter into the prepared loaf pan and smooth the top.

Tap the pan gently on the counter once or twice to release large air bubbles.

Step 7: Bake the Cake

Bake Yogurt Loaf Cake for 45 to 55 minutes.

The top should be golden, and a toothpick inserted into the center should come out clean or with a few moist crumbs.

If the top begins browning too quickly, loosely cover the loaf with foil during the final 10 to 15 minutes.

Step 8: Cool in the Pan

Let the cake cool in the pan for about 15 minutes.

Use the parchment paper to lift it onto a wire rack.

Allow it to cool for at least another 20 minutes before slicing.

Yogurt Loaf Cake becomes easier to cut as it cools, and the crumb sets without becoming dry.

Step 9: Add a Topping

Serve the loaf plain or dust the top with powdered sugar.

For extra flavor, drizzle with a simple lemon glaze made from powdered sugar and lemon juice.

Fresh berries also make a bright and colorful topping.

Serving Suggestions

Yogurt Loaf Cake works well for breakfast, brunch, snacks, or dessert.

Serve a slice with coffee, black tea, green tea, or a cold glass of milk.

For breakfast, pair Yogurt Loaf Cake with Greek yogurt, berries, or sliced fruit.

For dessert, add whipped cream, fresh strawberries, blueberries, or a spoonful of fruit compote.

A light drizzle of honey or lemon glaze adds sweetness without making the loaf feel too heavy.

For a lighter high-protein option, try our Fluffy No-Flour High Protein Cloud Bread with a soft, airy texture and simple ingredients.

Recipe Tips

Use room-temperature eggs and yogurt when possible. Ingredients at a similar temperature combine more smoothly.

Plain full-fat yogurt gives the richest texture, but low-fat yogurt can also work.

Measure the flour carefully. Too much flour can make Yogurt Loaf Cake dry.

Do not overmix once the flour is added.

Check the loaf a few minutes before the suggested baking time because ovens vary.

Let the cake cool before slicing so the crumb does not break apart.

If using Greek yogurt that is extremely thick, add 1 or 2 tablespoons of milk to loosen the batter slightly.

Easy Variations

Yogurt Loaf Cake is easy to customize without changing the basic method.

Add extra lemon zest and finish with a light lemon glaze for a bright citrus variation.

Fresh blueberries, raspberries, or chopped strawberries can be gently folded into the batter for a fruity loaf.

Chocolate lovers can mix in 1/2 cup mini chocolate chips for a richer, sweeter version.

A nutty version can include chopped almonds, walnuts, pecans, or pistachios.

For warm spice flavor, add cinnamon, nutmeg, or cardamom.

You can also replace the vanilla with almond extract or add orange zest for a fresh citrus twist.

You may also enjoy our Banana Oat Blender Muffins for an easy make-ahead breakfast or wholesome snack.

Make-Ahead Instructions

Yogurt Loaf Cake is a good recipe to prepare in advance because the crumb stays moist after cooling.

Bake the loaf one day before serving, allow it to cool completely, then wrap it tightly in plastic wrap or place it in an airtight container.

If adding powdered sugar, glaze, or fresh fruit, wait until shortly before serving for the best appearance.

The loaf can also be sliced ahead of time and packed into individual containers for breakfast or snacks.

Storage and Freezing

Store Yogurt Loaf Cake in an airtight container at room temperature for up to 2 days.

For longer storage, keep it in the refrigerator for up to 5 days.

Bring refrigerated slices to room temperature before serving, or warm them briefly in the microwave.

To freeze, wrap the whole cooled loaf or individual slices tightly, then place them in a freezer-safe bag.

Freeze for up to 2 months.

Thaw overnight in the refrigerator or for a few hours at room temperature.

Nutrition Information

Approximate nutrition per slice:

Calories: 260
Protein: 5 g
Carbohydrates: 33 g
Fat: 12 g
Saturated Fat: 2 g
Fiber: 1 g
Sugar: 17 g
Sodium: 180 mg

Nutrition values are estimates and may vary depending on the yogurt, oil, toppings, and exact slice size.

Frequently Asked Questions

Can I use Greek yogurt?

Yes. Greek yogurt works very well and gives the loaf a rich, tender crumb. If it is extremely thick, add a small splash of milk.

Can I use flavored yogurt?

Yes, but flavored yogurt usually contains extra sugar. Reduce the added sugar slightly if needed.

Why is my cake dense?

Overmixing the batter, adding too much flour, or using old baking powder can make the loaf dense.

Can I make this cake with olive oil?

Yes. Use a mild olive oil if you do not want a strong olive flavor.

Can I add fruit?

Yes. Blueberries, raspberries, diced strawberries, or chopped peaches work well.

Can I make muffins with this batter?

Yes. Divide the batter into muffin cups and begin checking for doneness after about 18 to 22 minutes.

How do I know when the loaf is done?

The center should spring back lightly when touched, and a toothpick should come out clean or with a few moist crumbs.

Final Thoughts

Yogurt Loaf Cake is a simple homemade recipe that delivers a soft crumb, gentle sweetness, and plenty of moisture without complicated techniques.

Because Yogurt Loaf Cake can be flavored with citrus, berries, chocolate, nuts, or warm spices, it is easy to adapt for different seasons and occasions.

Keep this Yogurt Loaf Cake recipe handy whenever you need an easy breakfast loaf, a tea-time snack, or a simple dessert that can be prepared ahead.

With basic pantry ingredients, a classic loaf shape, and a tender texture, Yogurt Loaf Cake is an easy recipe that fits comfortably into everyday baking.

Banana Oat Blender Muffins

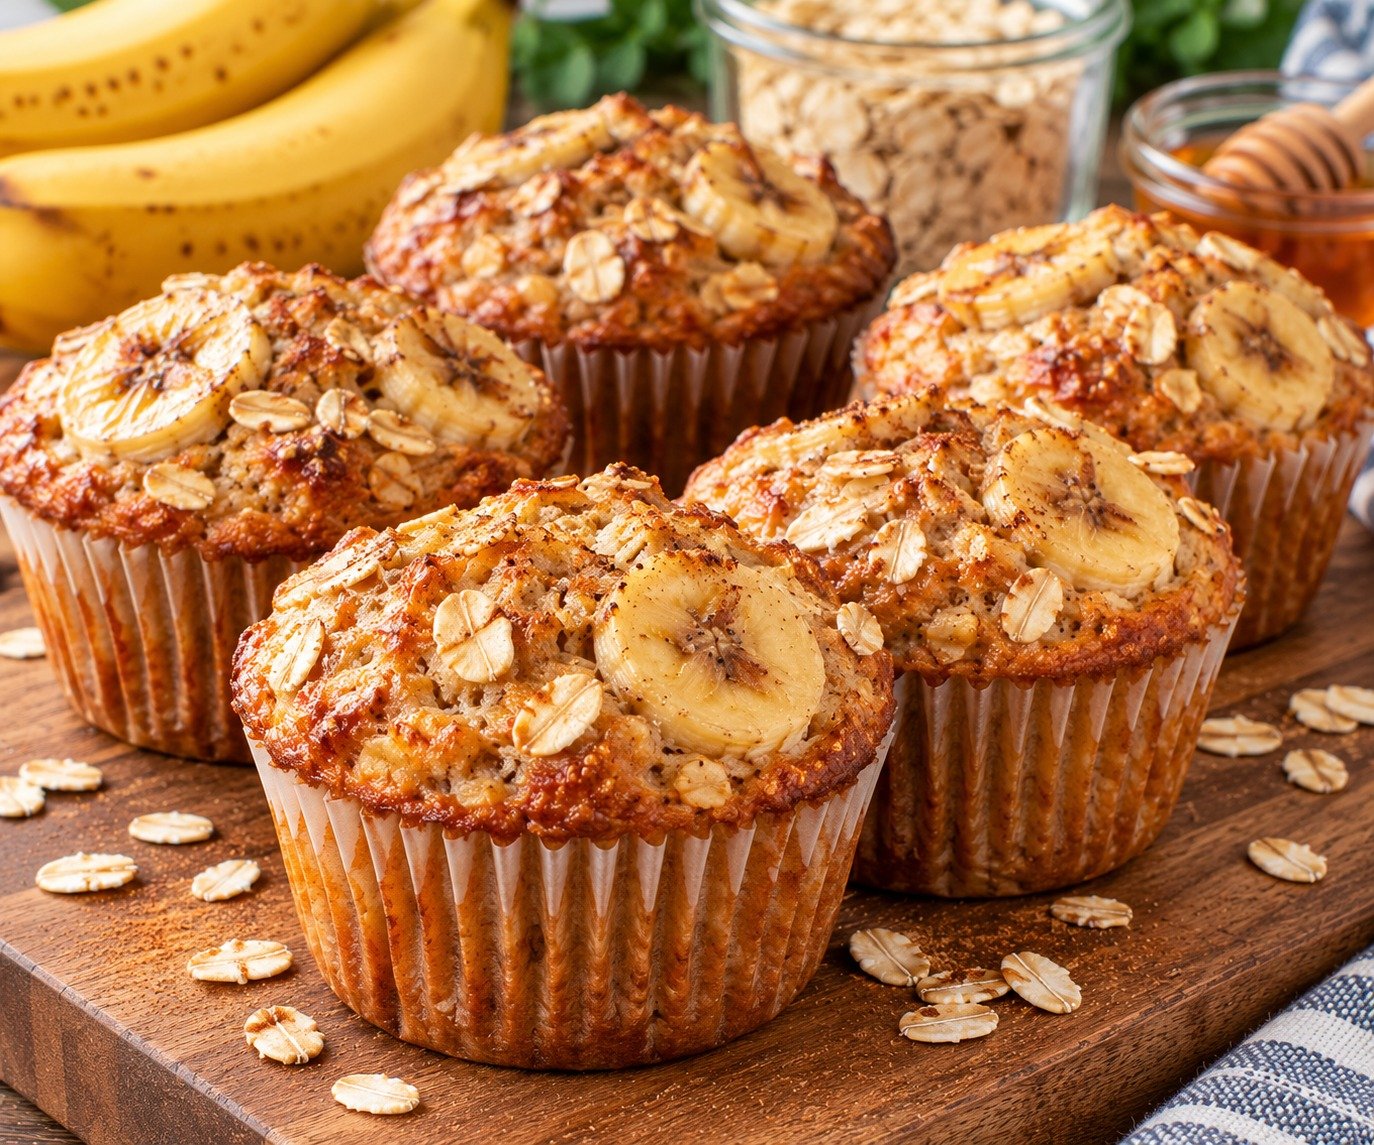
Banana Oat Muffins with ripe bananas, rolled oats, soft centers, golden tops, and a healthy homemade breakfast texture

Banana Oat Blender Muffins

Banana Oat Muffins are soft, wholesome, naturally sweetened muffins made with ripe bananas, rolled oats, eggs, yogurt, and a few simple pantry ingredients. The entire batter comes together in a blender, which makes this recipe quick to prepare and easy to clean up. These muffins are perfect for breakfast, lunchboxes, snacks, or meal prep.

This Banana Oat Muffins recipe is a practical way to use overripe bananas while creating a tender, satisfying muffin without relying on a long list of ingredients. The oats give the muffins a hearty texture, while bananas add moisture and natural sweetness.

Prep Time: 10 minutes
Bake Time: 18–22 minutes
Total Time: About 30 minutes
Servings: 12 muffins

Ingredients

For the Muffin Batter

  • 2 large ripe bananas
  • 2 cups rolled oats
  • 2 large eggs
  • 1/2 cup plain Greek yogurt
  • 1/4 cup maple syrup or honey
  • 1/4 cup milk
  • 1 teaspoon vanilla extract
  • 1 1/2 teaspoons baking powder
  • 1/2 teaspoon baking soda
  • 1 teaspoon ground cinnamon
  • 1/4 teaspoon salt

Optional Add-Ins

  • 1/2 cup mini chocolate chips
  • 1/2 cup chopped walnuts or pecans
  • 1/3 cup blueberries
  • 2 tablespoons chia seeds
  • 2 tablespoons ground flaxseed

Why You’ll Love This Recipe

Banana Oat Muffins are especially convenient because the blender does most of the mixing. There is no need to mash bananas in a separate bowl or whisk dry ingredients by hand.

Another reason to love Banana Oat Muffins is their simple ingredient list. Rolled oats provide a satisfying base, bananas add sweetness and moisture, and Greek yogurt helps keep the crumb tender.

They are also easy to customize. You can keep them plain for a simple breakfast or add chocolate chips, nuts, berries, seeds, or warm spices.

How to Make Banana Oat Muffins

Step 1: Preheat the Oven

Preheat the oven to 350°F or 175°C.

Line a 12-cup muffin pan with paper liners or lightly grease each cup with cooking spray.

Step 2: Add the Wet Ingredients

Place the bananas, eggs, Greek yogurt, maple syrup, milk, and vanilla into the blender.

Blend for about 20 to 30 seconds until the mixture is smooth.

Using very ripe bananas gives Banana Oat Muffins the best flavor because bananas become sweeter and softer as they ripen.

Step 3: Add the Oats and Dry Ingredients

Add the rolled oats, baking powder, baking soda, cinnamon, and salt to the blender.

Blend again until the batter looks smooth and creamy.

Stop once or twice to scrape down the sides if needed.

Do not overblend for several minutes because too much blending can make the batter warmer and slightly heavier.

Step 4: Rest the Batter

Let the batter sit in the blender for 5 minutes.

This short rest allows the oats to absorb some moisture and helps Banana Oat Muffins bake with a softer, more even texture.

Step 5: Add Optional Mix-Ins

If you are using chocolate chips, nuts, blueberries, chia seeds, or flaxseed, stir them in by hand after blending.

Avoid blending delicate add-ins such as blueberries because they can disappear into the batter.

Step 6: Fill the Muffin Cups

Divide the batter evenly among the prepared muffin cups.

Fill each cup about three-quarters full.

If desired, sprinkle a few extra oats, chocolate chips, chopped nuts, or banana slices over the top.

Step 7: Bake the Muffins

Bake Banana Oat Muffins for 18 to 22 minutes.

The tops should look set and lightly golden, and a toothpick inserted into the center should come out clean or with a few moist crumbs.

Avoid overbaking because oat-based muffins can become dry if left in the oven too long.

Step 8: Cool Briefly

Let the muffins cool in the pan for about 5 minutes.

Transfer them to a wire rack and allow them to cool for another 10 to 15 minutes.

Banana Oat Muffins become slightly firmer as they cool, so this resting time helps create the best texture.

Serving Suggestions

Banana Oat Muffins are easy to serve in several ways.

Enjoy one warm with peanut butter, almond butter, or a small amount of softened butter.

For a more filling breakfast, serve Banana Oat Muffins with Greek yogurt, fresh berries, boiled eggs, or a fruit smoothie.

They are also convenient for school lunchboxes, road trips, office snacks, or quick breakfasts when mornings are busy.

A warm muffin with coffee or tea also makes a simple afternoon snack.

For a savory dinner idea, try our Honey Garlic Shrimp, Sausage, and Broccoli with juicy shrimp, smoky sausage, crisp broccoli, and a sweet garlic glaze.

Recipe Tips

Use very ripe bananas with plenty of brown spots because they provide more sweetness and moisture.

Rolled oats work best for this recipe. Quick oats can also work, but the texture may be slightly softer.

Do not replace the oats with steel-cut oats because they will not blend or bake in the same way.

Measure the oats carefully so Banana Oat Muffins do not turn out too dense.

Let the batter rest for a few minutes before baking.

If your bananas are extremely large, reduce the milk slightly so the batter does not become too thin.

For sweeter muffins, add another tablespoon of maple syrup or a small handful of chocolate chips.

Easy Variations

Banana Oat Muffins are simple to change depending on what you have available.

For chocolate banana muffins, add 2 tablespoons cocoa powder and 1/2 cup chocolate chips.

For blueberry muffins, gently fold in fresh or frozen blueberries after blending.

A banana nut version can include chopped walnuts or pecans plus a pinch of nutmeg.

For extra fiber, stir in chia seeds or ground flaxseed.

You can also add shredded coconut, raisins, diced apples, or a spoonful of peanut butter.

For a stronger cinnamon flavor, increase the cinnamon to 1 1/2 teaspoons.

If you want an easy dessert afterward, you may also enjoy our No Bake Twix Bars with a buttery biscuit base, gooey caramel, and smooth chocolate topping.

Make-Ahead Instructions

Banana Oat Muffins are a useful make-ahead breakfast because they store and freeze well.

Bake the muffins, let them cool completely, and place them in an airtight container.

You can prepare a batch on the weekend and keep several muffins ready for quick weekday breakfasts.

The batter is best baked soon after blending because the oats continue to absorb moisture as they sit.

If you want freshly baked muffins in the morning, measure the dry ingredients the night before and blend everything together when ready to bake.

Storage and Freezing

Store Banana Oat Muffins in an airtight container at room temperature for up to 2 days.

For longer storage, refrigerate them for up to 5 days.

Place a paper towel in the container to help absorb excess moisture.

To freeze, arrange cooled muffins in a freezer-safe bag or container and freeze for up to 3 months.

Thaw overnight in the refrigerator or at room temperature.

You can also microwave a frozen muffin in short intervals until warmed through.

Nutrition Information

Approximate nutrition per muffin without optional add-ins:

Calories: 145
Protein: 5 g
Carbohydrates: 24 g
Fat: 4 g
Saturated Fat: 1 g
Fiber: 3 g
Sugar: 8 g
Sodium: 170 mg

Nutrition values are estimates and will vary depending on the yogurt, milk, sweetener, and optional add-ins used.

Frequently Asked Questions

Can I use quick oats instead of rolled oats?

Yes. Quick oats work, although the muffins may have a slightly softer texture.

Can I make these muffins without yogurt?

Yes. You can replace the yogurt with applesauce or another thick plain dairy or non-dairy yogurt.

Can I use frozen bananas?

Yes. Thaw them first and drain off any excessive liquid before blending.

Why are my muffins dense?

Too much oat flour, overbaking, or inaccurate measuring can make Banana Oat Muffins dense. Measure carefully and remove them once the centers are set.

Can I make them sweeter?

Yes. Increase the maple syrup or honey slightly, or add chocolate chips.

Can I make mini muffins?

Yes. Divide the batter among mini muffin cups and begin checking them after about 10 to 12 minutes.

Can I freeze them?

Yes. Freeze cooled muffins for up to 3 months and thaw as needed.

Final Thoughts

Banana Oat Muffins are an easy way to turn ripe bananas and oats into a simple homemade breakfast or snack without making a pile of dirty dishes.

Because Banana Oat Muffins can be customized with chocolate chips, berries, nuts, seeds, or spices, one basic recipe can create several different flavors.

Keep this Banana Oat Muffins recipe handy whenever you need a quick blender breakfast, a lunchbox snack, or an easy make-ahead option for busy mornings.

With soft centers, gentle banana sweetness, hearty oats, and simple ingredients, Banana Oat Muffins are a convenient homemade recipe that works well for both kids and adults.

No Bake Twix Bars

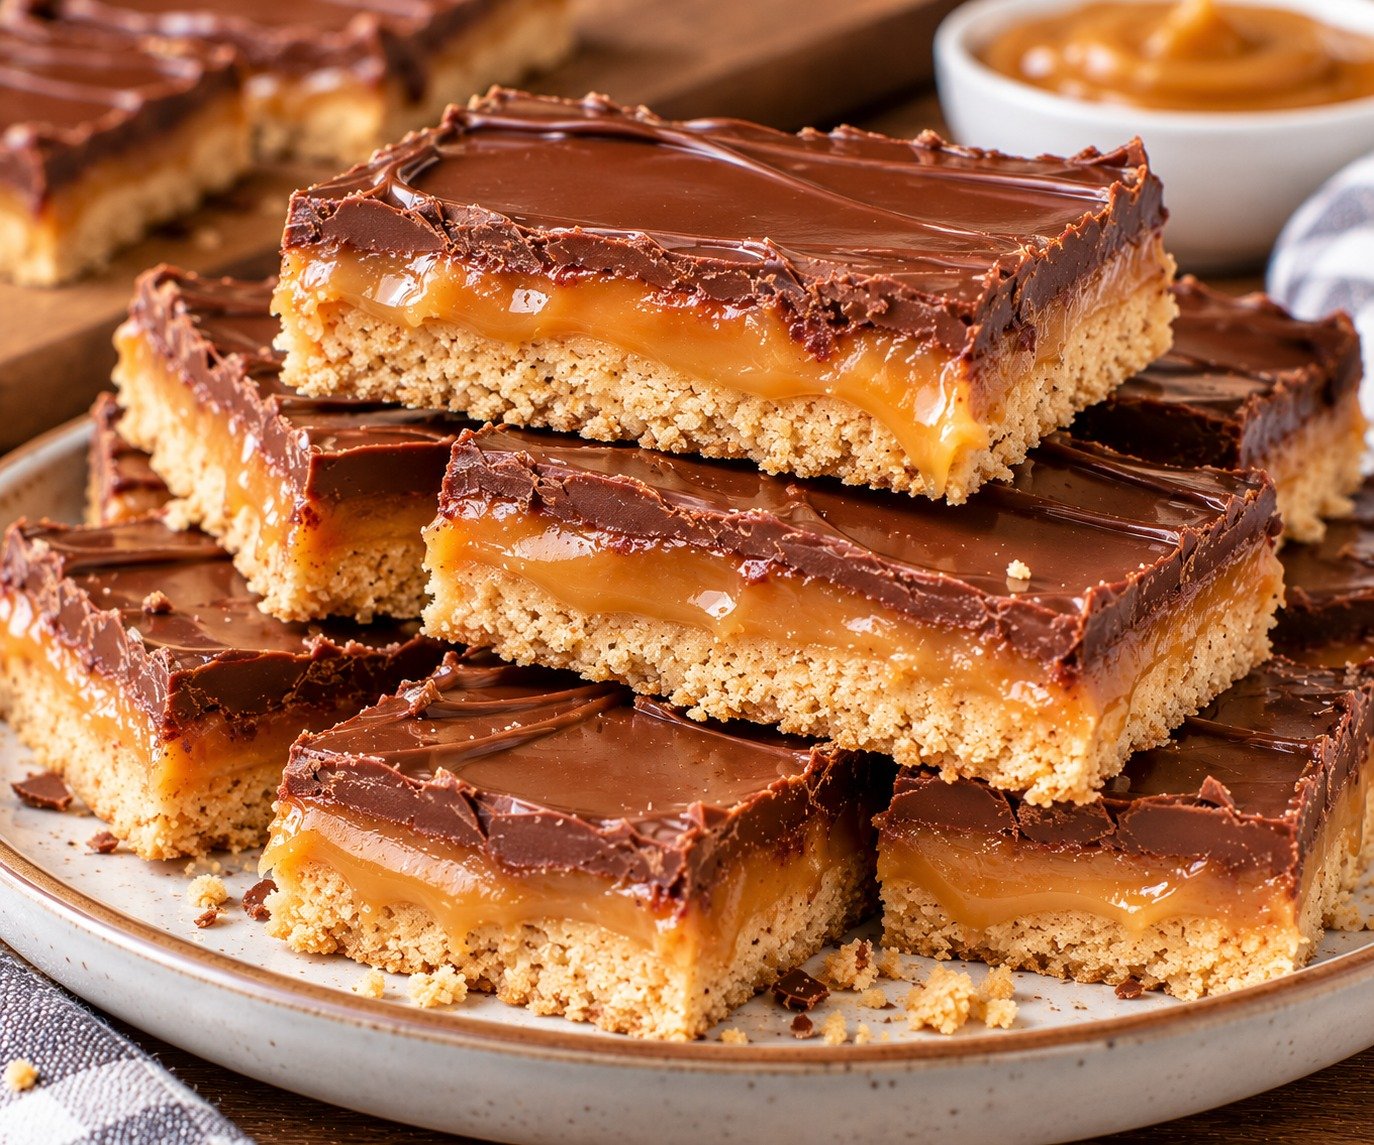
No Bake Twix Bars with buttery biscuit base, gooey caramel center, smooth chocolate topping, and flaky sea salt

No Bake Twix Bars

No Bake Twix Bars are a rich, easy dessert inspired by the classic combination of buttery cookie layers, gooey caramel, and smooth chocolate. They are made without turning on the oven, which makes them especially convenient for warm days, holiday trays, parties, or anytime you want a simple homemade treat with a candy-bar feel.

These No Bake Twix Bars have three easy layers: a firm biscuit-style base, a soft caramel center, and a glossy chocolate topping. The texture is rich but balanced, with a little crunch underneath and a creamy finish on top. They are easy to slice, store well in the refrigerator, and can be prepared ahead for busy days.

Prep Time: 25 minutes
Chill Time: 2 hours
Total Time: About 2 hours 25 minutes
Servings: 16 bars

Ingredients

For the Base

  • 2 cups crushed digestive biscuits or graham crackers
  • 1/2 cup unsalted butter, melted
  • 2 tablespoons brown sugar
  • 1 teaspoon vanilla extract
  • Pinch of salt

For the Caramel Layer

  • 1 cup soft caramel candies, unwrapped
  • 1/4 cup heavy cream
  • 2 tablespoons unsalted butter
  • 1/2 teaspoon vanilla extract
  • Pinch of sea salt

For the Chocolate Topping

  • 1 1/2 cups milk chocolate chips or chopped milk chocolate
  • 1 tablespoon coconut oil or unsalted butter
  • Flaky sea salt, optional

Why You’ll Love This Recipe

No Bake Twix Bars are perfect when you want a dessert that looks impressive without complicated baking. Each layer is simple, and the refrigerator does most of the work.

Another reason to love No Bake Twix Bars is the classic flavor combination. The base gives a cookie-like crunch, the caramel adds a soft chewy center, and the chocolate creates a smooth finish.

How to Make No Bake Twix Bars

Step 1: Prepare the Pan

Line an 8-inch square pan with parchment paper, leaving enough paper hanging over the sides to lift the bars out later.

Step 2: Crush the Biscuits

Place the digestive biscuits or graham crackers in a food processor and pulse until they become fine crumbs.

Fine crumbs help the base of No Bake Twix Bars hold together cleanly when sliced.

Step 3: Make the Base

Add the biscuit crumbs to a bowl.

Pour in melted butter, brown sugar, vanilla, and a small pinch of salt.

Mix until the crumbs look evenly moistened and hold together when pressed.

Step 4: Press Into the Pan

Transfer the crumb mixture to the prepared pan.

Press it down firmly and evenly using the bottom of a measuring cup or glass.

Take time to compact the base well because this helps No Bake Twix Bars stay neat and firm.

Refrigerate the base for 20 minutes.

Step 5: Prepare the Caramel

Add the caramel candies, heavy cream, and butter to a small saucepan.

Heat over low to medium-low heat, stirring constantly until smooth.

Do not let the caramel boil aggressively.

Once melted, stir in vanilla and a pinch of sea salt.

Step 6: Add the Caramel Layer

Pour the warm caramel over the chilled base.

Use a spatula to spread it evenly all the way to the edges.

Return the pan to the refrigerator and chill for 30 to 40 minutes, or until the caramel feels mostly set.

The chilled caramel layer is what gives No Bake Twix Bars their soft, chewy center.

Step 7: Melt the Chocolate

Place the chocolate chips and coconut oil in a microwave-safe bowl.

Microwave in 20-second intervals, stirring after each interval, until smooth.

You can also melt the chocolate gently in a heatproof bowl over barely simmering water.

Step 8: Add the Chocolate Topping

Pour the melted chocolate over the caramel layer.

Tilt the pan or use an offset spatula to spread the chocolate evenly.

For a sweet-salty finish, sprinkle a small amount of flaky sea salt over the top before the chocolate sets.

Step 9: Chill Until Firm

Refrigerate No Bake Twix Bars for at least 1 hour, or until all three layers are completely firm.

For the cleanest slices, chilling for 2 hours is even better.

Step 10: Slice the Bars

Lift the dessert from the pan using the parchment paper.

Place it on a cutting board.

Allow it to sit at room temperature for about 5 minutes, then cut into 16 squares or rectangular bars using a sharp knife.

Wipe the knife clean between cuts for neat edges.

Serving Suggestions

No Bake Twix Bars are rich, so small portions are usually enough.

For parties, arrange No Bake Twix Bars on a dessert platter with strawberries, brownies, cookies, or small cheesecake bites.

You can also serve them alongside coffee or tea after dinner, or add them to a mixed dessert tray for holidays and celebrations.

For another crispy comfort-food side, try our Crispy Old-Fashioned Potato Pancakes with Butter, perfect with sour cream, herbs, or a simple salad.

Recipe Tips

Press the base firmly into the pan so it does not crumble when cut.

Melt the caramel over gentle heat and stir constantly to prevent scorching.

Let the caramel chill before adding the chocolate layer. If the caramel is too warm, the layers can blend together.

Adding coconut oil helps the chocolate topping stay slightly softer, making No Bake Twix Bars easier to slice after chilling.

For cleaner cuts, use a warm sharp knife and wipe it between slices.

Do not leave the bars at room temperature for too long because the caramel can soften.

Easy Variations

No Bake Twix Bars can be adapted to suit different tastes.

To make salted caramel bars, increase the sea salt slightly in the caramel layer and add flaky salt on top.

A peanut butter version can be made by spreading a thin layer of creamy peanut butter over the chilled base before adding caramel.

For extra crunch, add chopped toasted pecans, almonds, or peanuts between the caramel and chocolate layers.

You can also use dark chocolate instead of milk chocolate for a deeper, less sweet finish.

If you want an easy high-protein main dish, you may also enjoy our Crispy Air Fryer Chicken Breast Recipe with a golden crunchy coating and juicy center.

Make-Ahead Instructions

No Bake Twix Bars are ideal for making ahead because they need time to chill.

Prepare the entire recipe the night before serving and keep it covered in the refrigerator.

For the best appearance, wait until the bars are fully chilled before slicing, then store the pieces in a single layer or with parchment paper between layers.

This recipe is especially useful when you need dessert prepared before a party, holiday meal, or family gathering.

Storage and Freezing

Store No Bake Twix Bars in an airtight container in the refrigerator for up to 5 days.

To freeze, place the sliced bars in a single layer on a tray until firm, then transfer them to a freezer-safe container with parchment between layers.

Freeze for up to 2 months.

For serving, move frozen bars to the refrigerator and let them thaw gradually so the caramel and chocolate layers keep a pleasant texture.

Nutrition Information

Approximate nutrition per bar:

Calories: 285
Protein: 3 g
Carbohydrates: 34 g
Fat: 16 g
Saturated Fat: 10 g
Fiber: 1 g
Sugar: 24 g
Sodium: 170 mg

Nutrition values are estimates and may vary depending on the biscuits, chocolate, caramel, and exact serving size.

Frequently Asked Questions

Can I use graham crackers instead of digestive biscuits?

Yes. Graham crackers work very well and give the base a slightly sweeter flavor.

Can I make the caramel from scratch?

Yes. Homemade caramel can be used, but make sure it is thick enough to set when chilled.

Why is my base crumbly?

The crumbs may not have been fine enough, or the base may need a little more melted butter. Pressing firmly also helps.

Why is the chocolate cracking when I cut the bars?

The topping may be too cold. Let the pan sit at room temperature for 5 to 10 minutes before slicing.

Can I use dark chocolate?

Yes. Dark chocolate creates a less sweet, more intense flavor and works especially well with salted caramel.

Do these bars need to stay refrigerated?

Yes. The bars hold their shape best when kept chilled.

Can I double the recipe?

Yes. Double the ingredients and use a 9 x 13-inch pan. The chilling time may be slightly longer.

Final Thoughts

No Bake Twix Bars are an easy layered dessert that delivers buttery crunch, soft caramel, and smooth chocolate without requiring an oven.

Because No Bake Twix Bars can be prepared ahead and stored in the refrigerator, they are especially useful for parties, holidays, potlucks, or busy weeks when you want dessert ready in advance.

Keep this No Bake Twix Bars recipe handy whenever you want a simple homemade treat inspired by a classic candy bar.

With three easy layers, simple ingredients, and a rich chocolate-caramel finish, No Bake Twix Bars are a crowd-pleasing dessert that is easy to make and even easier to enjoy.