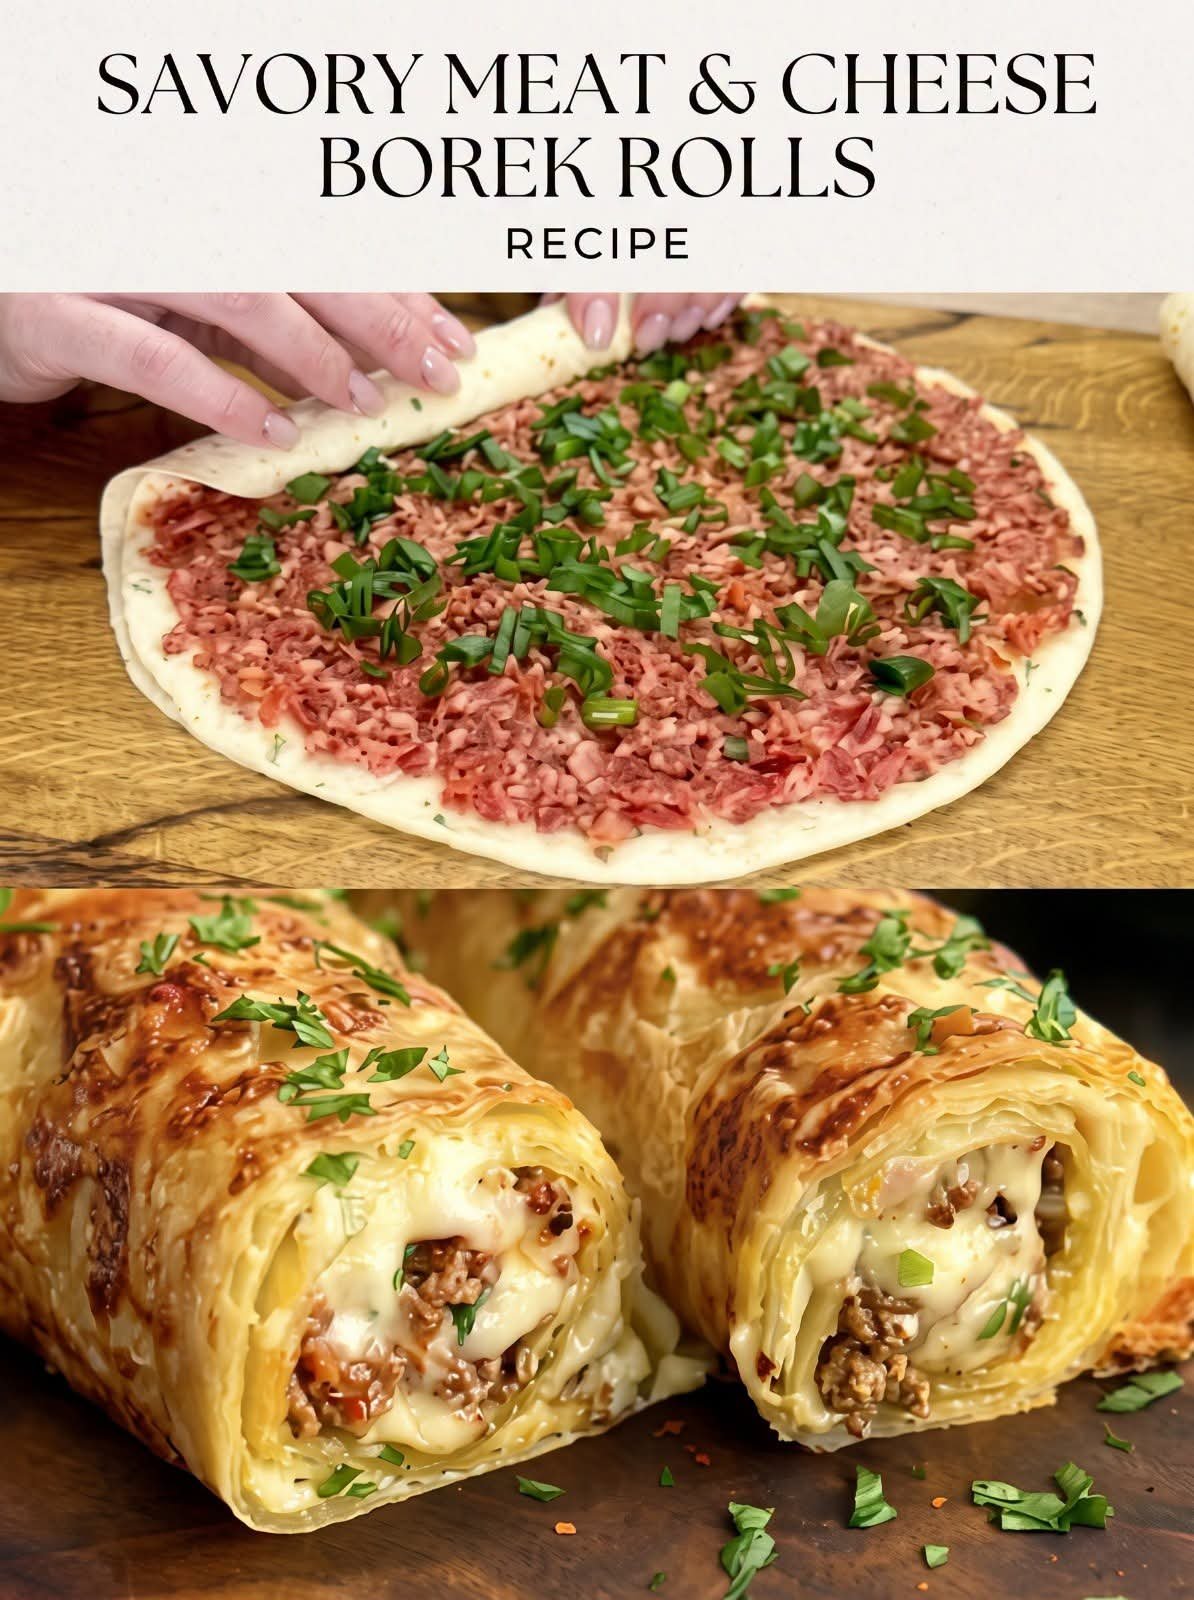
Savory Meat & Cheese Borek Rolls

 *Savory Meat & Cheese Borek Rolls* – 

This is super juicy inside and crispy outside, Turkish style.


*Ingredients:*


*For Filling:*

– 250g qeema (beef or chicken) – finely minced

– 1 onion chopped very fine

– 1 tomato grated (pani nahi)

– 1/2 cup green onion / hara pyaz chopped

– 1/2 tsp salt, 1/2 tsp black pepper, 1/2 tsp paprika / lal mirch

– 1 cup mozzarella cheese shredded

– 1/2 cup cheddar cheese (optional but makes it extra cheesy)

– Fresh parsley /


*For Rolls:*

– 4 large yufka sheets or large tortilla / Manda patti

– 1 egg + 2 tbsp milk for wash

– 2 tbsp yogurt + 2 tbsp oil + 1 egg mix – for brushing inside (is se soft hoga)


*Method:*


*1. Make Filling:* In a bowl mix raw minced,  finely chopped onion, grated tomato, all spices, salt. Don’t cook it –  Mix well.


*2. Prepare Sheet:* Lay one yufka sheet flat. Brush with the yogurt-oil-egg mix. This is the Turkish secret for soft layers.


*3. Spread & Roll:* Spread thin layer of minced mix all over the sheet  – keep it thin otherwise it won’t cook. Sprinkle green onions and LOTS of cheese. Now roll tightly like a swiss roll.


*4. Bake:* Place rolls on greased tray. Brush top with egg+milk wash for golden color. Sprinkle some cheese on top if you want.


Bake at 190°C for 22-28 minutes till top is deep golden and crispy, cheese melted inside.


*5. Serve:* Let rest 5 mins, then cut. Serve with yogurt dip or ketchup.


*Pro Tip:* If using tortilla, add only a little filling and don’t over-bake – 15 mins is enough. Yufka sheets give that exact flaky layers.

Tips for perfect *Meat & Cheese Borek

 *Savory Meat & Cheese Borek Rolls:*


*1. Keep The Meat Layer Thin:* Spread a very thin layer of minced meat. If it’s thick, the inside will stay raw and the outside will burn. Thin = juicy and perfectly cooked.


*2. No Water in Filling:* This is the #1 rule.

Squeeze the water out of your grated onion and tomato. If the filling is watery, the yufka/tortilla will get soggy and tear apart.


*3. The Cheese Trick:* Don’t use mozzarella alone. Mix mozzarella + a little cheddar or cream cheese. It melts better and gives you that cheese pull . Put most cheese in the center, not near the edges.


*4. For Crispy Outside, Soft Inside:* Don’t just brush with oil. Mix 2 tbsp yogurt + 2 tbsp oil + 1 egg and brush your sheets with it. That’s the real Turkish bakery secret.


*5. Golden Top:* Mix 1 egg + 2 tbsp milk + a pinch of turmeric. Brush it on top. You’ll get that exact deep golden color .


*6. Don’t Cut Hot:* Wait 7-8 minutes after baking. If you cut immediately, all the melted cheese will run out. Let it set.


*7. Make-Ahead / Freezer:* You can make these rolls and freeze them WITHOUT baking. When guests come, brush with egg wash and bake directly from frozen. Just add 5 extra minutes. Perfect for meal prep.


*8. No Soggy Bottom:* Always use parchment paper on your tray, and bake on the middle rack.
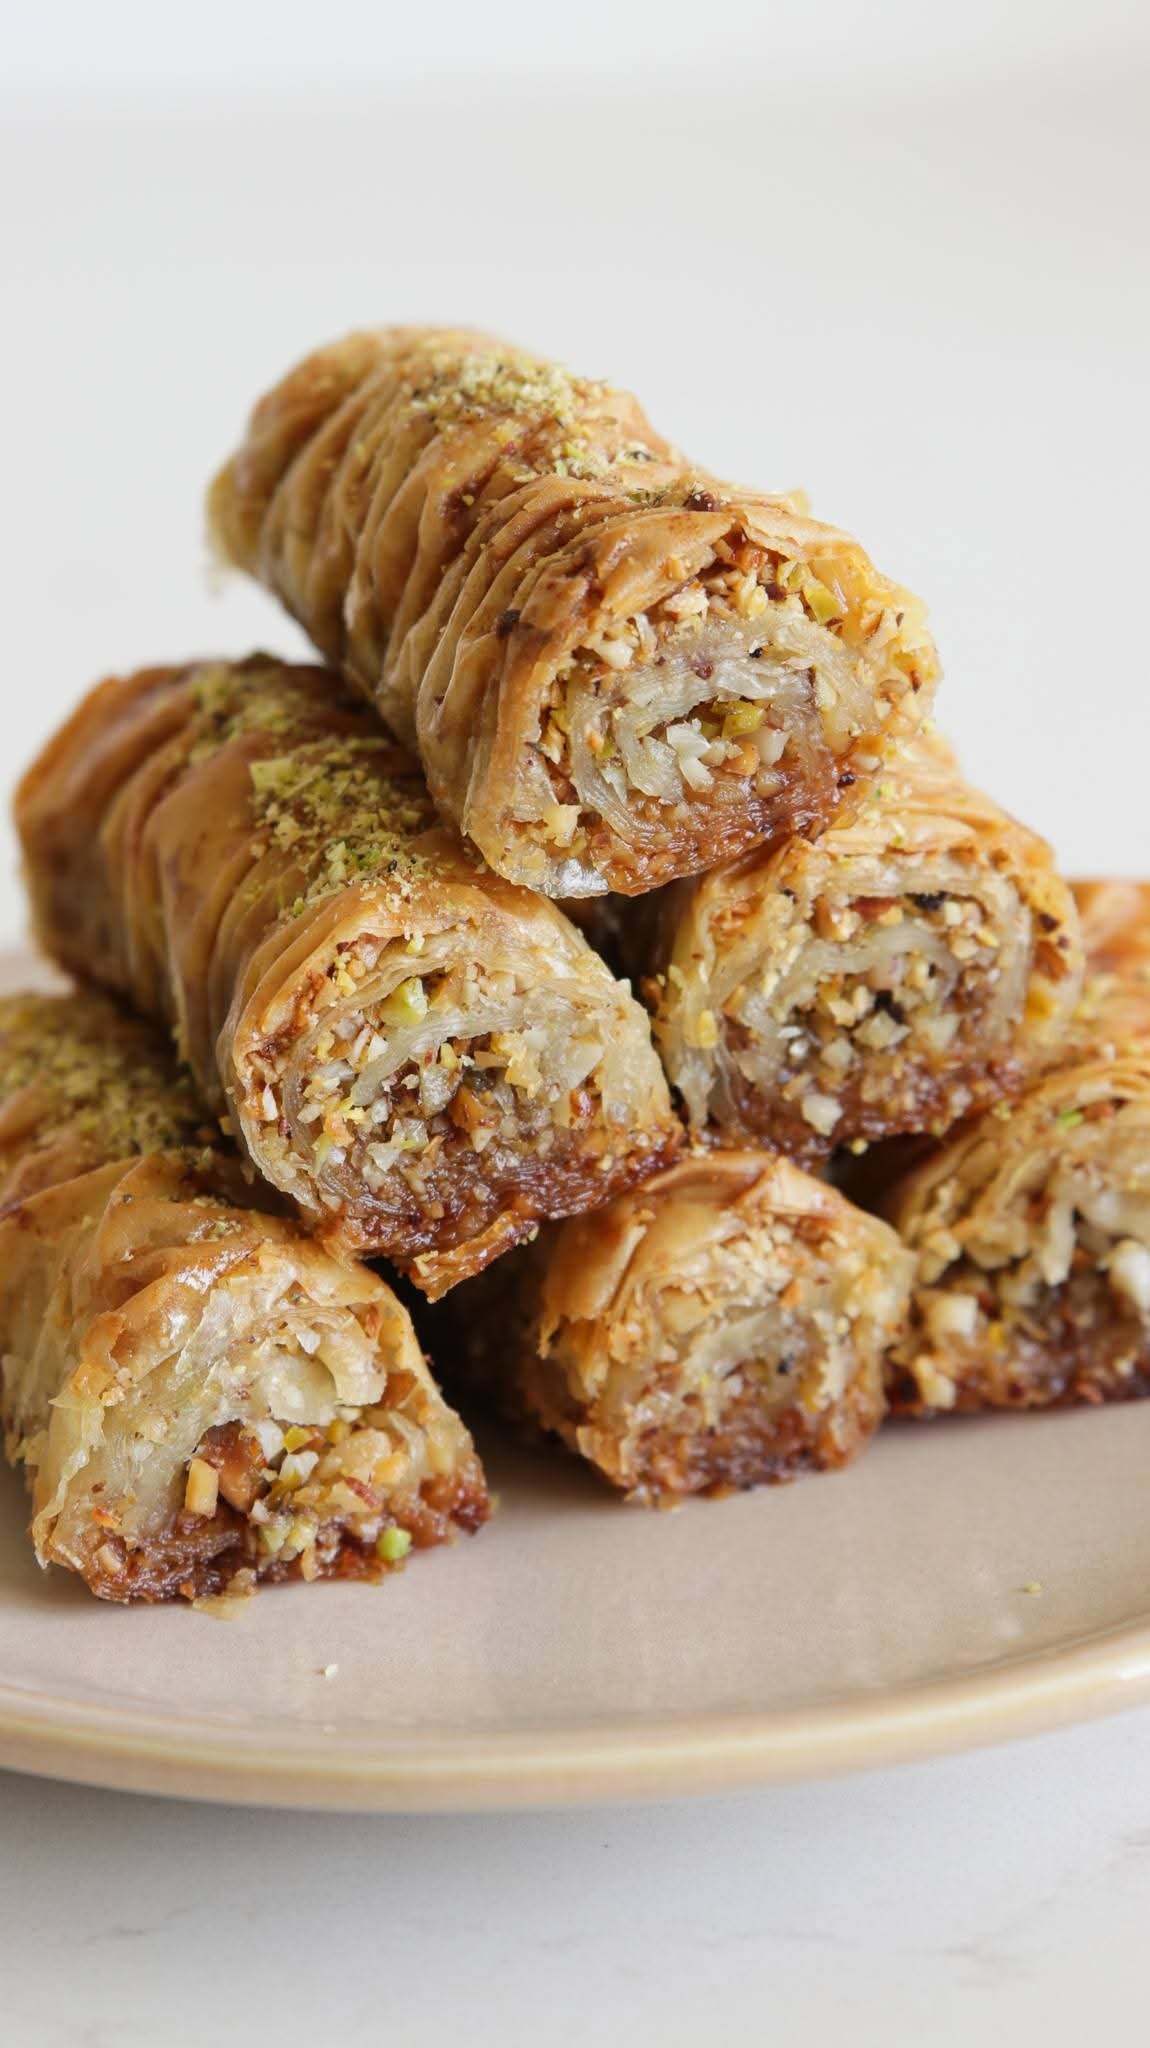
Turkish Baklava Rolls / Sarma Baklava

 *Turkish Baklava Rolls / Sarma Baklava* – so crispy and nutty!


Here is the full recipe:

*Ingredients:*

*For Rolls:*

– 12 sheets phyllo pastry / baklava sheets (frozen mil jaty hain – Metro/Imtiaz se)

– 1 cup walnuts crushed

– 1/2 cup pistachios crushed

– 1/2 cup almonds crushed

– 100g melted butter / ghee


*For Sugar Syrup

– 1.5 cup sugar

– 1 cup water

– 1 tbsp lemon juice

– 1 tbsp honey

– 1 small cinnamon stick or 1 tsp rose water


*Method:*


*1. Make Syrup first:* In a pan add sugar, water, lemon juice. Boil for 8-10 mins till slightly thick. Add honey & rose water. Let it cool completely. Syrup must be cold, baklava hot.


*2. Prepare Filling:* Mix all crushed nuts with 1 tsp cinnamon powder and 1 tbsp sugar.


*3. Make Rolls:* Take one phyllo sheet, brush full with melted butter. Sprinkle 2 tbsp nut mix. Take a thin wooden stick / chopstick, and roll the sheet tightly around it like a cigar. Then push both ends to center to make it crinkled. Pull the stick out.


*4. Place on Tray:* Grease baking tray, place all rolls side by side. Brush top again with lots of butter. This makes it golden and crispy.


*5. Bake:* Bake at 170°C for 25-30 minutes till golden brown and super crispy.


*6. Final Step:* As soon as you take hot rolls out of oven, pour the COLD syrup all over them. You will hear the sizzle – that’s perfect! Sprinkle crushed pistachio on top.


*7. Rest:* Let it soak for at least 2-3 hours. Best taste after 1 day!


Crispy, sweet, nutty – just like market wala Turkish Baklava.

Tips for perfect Baklava Rolls .


*1. Phyllo Sheet Secret:* Sheets dry out in 2 minutes! Always cover them with a damp cloth while working. If they break, just brush butter and overlap – nobody will know.


*2. Butter is King:* Don’t be stingy with butter/ghee. Every sheet must be brushed properly, otherwise it won’t be crispy and flaky.


*3. Nut Cutting:* Don’t make powder! Nuts should be coarsely crushed – small pieces. Powder will make it soft, not crunchy.


*4. The Hot-Cold Rule:* This is MOST important!

Hot Baklava + Cold Sheera = Crispy

If both are hot, it will become soggy. Never pour hot syrup on hot baklava.


*5. Sheera Thickness:* Sheera should be like honey, not too thick. 1 thread is enough. If too thick, it won’t go inside the roll.


*6. Soggy Problem?* If your baklava gets soft after 1 day, you didn’t bake it enough. It should be deep golden, not light yellow. Bake 5 mins extra on low heat.


*7. Easy Stick Trick:* Use a thin BBQ stick or even a pencil wrapped in foil to roll. After rolling, scrunch it from both ends to get those beautiful wrinkles like in your pic.


*8. Storage:* Keep in open box at room temp for 1 week. Don’t put in fridge – fridge makes phyllo soft.

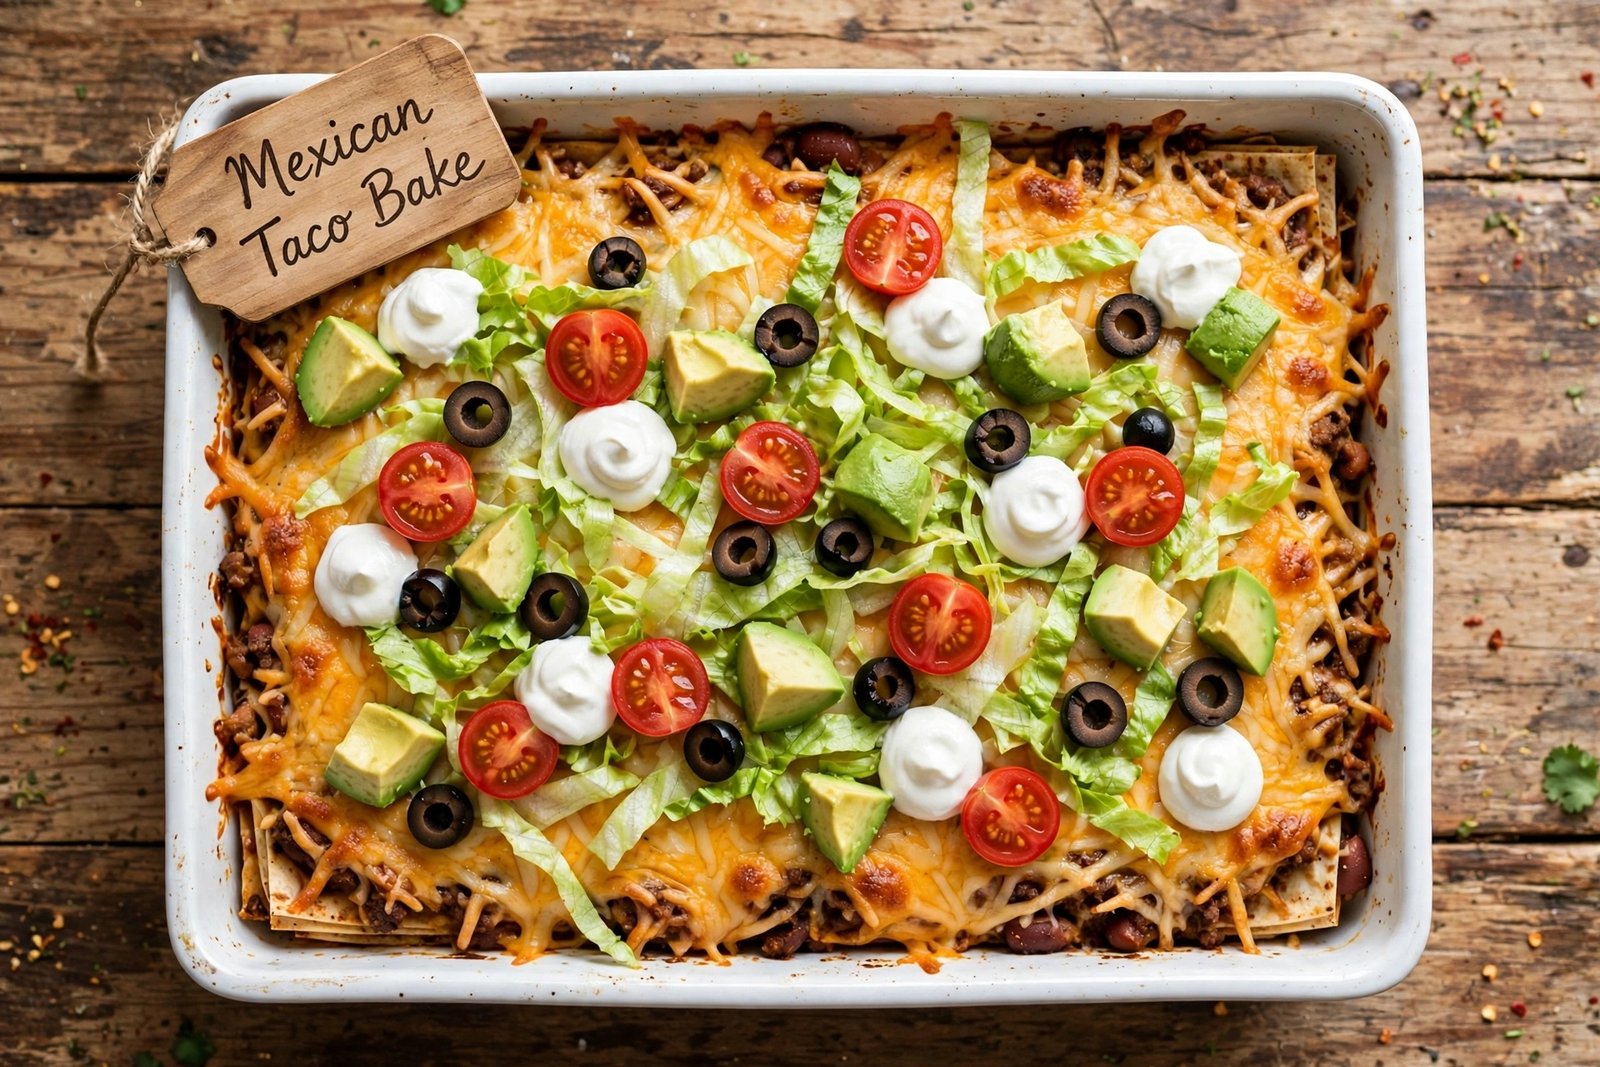
Mexican Taco Bake Casserole* – layered, cheesy and so tasty!

 *Mexican Taco Bake Casserole* – layered, cheesy and so tasty!


Here is the full recipe:


*Ingredients:*


*For Meat Layer:*

– 500g Chicken or Beef Qeema (minced)

– 1 cup cooked rice

– 1 onion chopped

– 2 garlic cloves minced

– 1 packet Taco seasoning (or 1 tsp cumin, paprika, salt, black pepper)

– 1/2 cup tomato salsa / ketchup

– 2 tbsp oil


*For Topping:*

– 1 cup sour cream (or hung curd / mayonnaise + dahi mix)

– 1 cup shredded cheddar / mozzarella cheese

– 1 cup iceberg lettuce chopped

– 1/2 cup cherry tomatoes sliced

– 1 avocado diced (optional)

– 1/4 cup black olives sliced

– Fresh coriander


*Method:*


*1. Cook Qeema:* Heat oil, fry onion & garlic, add qeema, cook till brown. Add taco spices and salsa. Mix in cooked rice. Cook 5 mins.


*2. Layer in Dish:* In a baking dish, spread the qeema-rice mixture as first layer. Press it flat.


*3. Cheese Layer:* Spread sour cream on top, then sprinkle all the cheese.


*4. Bake:* Bake in preheated oven at 180°C for 15-20 mins till cheese melts.


*5. Fresh Topping:* Take out from oven and immediately top with lettuce, tomatoes, avocado, olives and coriander.

Serve hot! It’s a complete meal –

Want me to give you the desi version without avocado and sour cream?

Tips for perfect *Taco Bake* 


*1. Don’t make it watery:* After cooking qeema, dry all water. If mixture is watery, the bake will break while serving.


*2. Rice tip:* Use leftover boiled rice or 90-second microwave rice. Don’t use fresh hot sticky rice.


*3. Cheesy pull:* Mix mozzarella + cheddar. Mozzarella gives stretch, cheddar gives taste.


*4. Sour cream substitute (Desi):* Mix 1/2 cup thick dahi + 2 tbsp mayo + pinch salt + lemon juice. Same taste!


*5. Don’t bake the salad:* Lettuce, tomato, avocado & olives always add AFTER baking. Otherwise they become black and soggy.


*6. Spicy version:* Add chopped jalapenos or 1 tsp chili flakes in qeema layer.


*7. Make it crispy:* For a crunchy base, you can add a layer of crushed nachos or khasta papad at the bottom before the qeema.


*8. Storage:* Best to eat fresh. If you want to store, store only the baked qeema+cheese part in fridge for 2 days. Add fresh veggies only when serving.

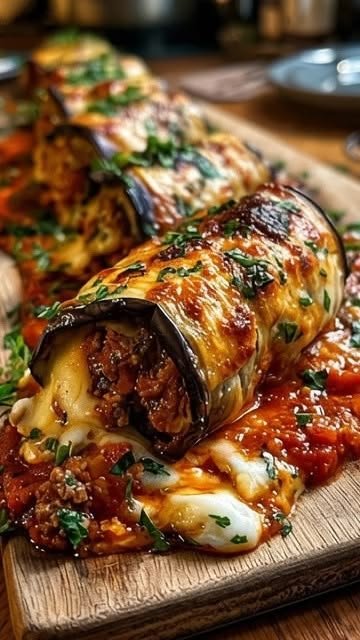
Cheesy Eggplant Roll-Ups 

Cheesy Eggplant Roll-Ups

Ingredients

For the Eggplant:

  • 2 large eggplants
  • 2 tablespoons olive oil
  • ½ teaspoon salt
  • ½ teaspoon black pepper
  • ½ teaspoon Italian seasoning

For the Cheesy Filling:

  • 1 cup ricotta cheese
  • 1 cup shredded mozzarella, divided
  • ½ cup grated Parmesan cheese
  • 2 cloves garlic, minced
  • 2 tablespoons fresh parsley, chopped
  • ½ teaspoon dried oregano
  • ¼ teaspoon black pepper
  • 1 egg

For the Sauce:

  • 2 cups marinara or tomato sauce
  • 1 tablespoon olive oil
  • ½ teaspoon dried basil
  • ¼ teaspoon red pepper flakes, optional

Instructions

Preheat your oven to 400°F (200°C). Slice the eggplants lengthwise into thin, even strips, about ¼ inch thick. Avoid making them too thin because they need to hold the filling without tearing.

Arrange the eggplant slices on a baking sheet lined with parchment paper. Brush both sides lightly with olive oil and season with salt, black pepper, and Italian seasoning. Roast for 15–20 minutes, turning once halfway through, until the slices are tender and flexible. Remove them from the oven and allow them to cool slightly.

While the eggplant is roasting, prepare the filling. In a bowl, combine ricotta, half of the mozzarella, Parmesan, minced garlic, parsley, oregano, black pepper, and egg. Mix until everything is evenly incorporated and creamy.

Spread about 1½ tablespoons of the cheese mixture over each roasted eggplant slice. Starting from the narrow end, gently roll each slice into a neat cylinder.

Spread a thin layer of marinara sauce across the bottom of a baking dish. Place the eggplant roll-ups seam-side down in the dish. Pour the remaining sauce around and lightly over the rolls. Sprinkle the remaining mozzarella on top.

Cover the dish loosely with foil and bake at 375°F (190°C) for 20 minutes. Remove the foil and continue baking for another 10–15 minutes, until the cheese is melted, bubbling, and lightly golden.

For an extra golden top, place the dish under the broiler for 1–2 minutes, watching carefully so the cheese does not burn.

Let the roll-ups rest for 5 minutes before serving. Garnish with fresh parsley or basil and a little extra Parmesan.

Serving Suggestions

Serve these cheesy eggplant roll-ups with a crisp green salad, roasted vegetables, garlic bread, or a simple Mediterranean cucumber and tomato salad. They also pair beautifully with a spoonful of creamy tzatziki on the side.

Tips

Choose firm, medium-to-large eggplants with smooth skin. Slice them evenly so they cook at the same rate. If your eggplant contains many seeds or seems particularly bitter, lightly salt the slices and let them sit for 15 minutes before patting them dry.

For extra flavor, add chopped spinach, sun-dried tomatoes, or fresh basil to the cheese filling. You can also substitute cottage cheese for part of the ricotta.

Servings & Storage

Servings: 4–6
Prep Time: 20 minutes
Cook Time: 40–45 minutes
Total Time: About 1 hour

Store leftovers in an airtight container in the refrigerator for up to 3 days. Reheat gently in the oven or microwave until warmed through.

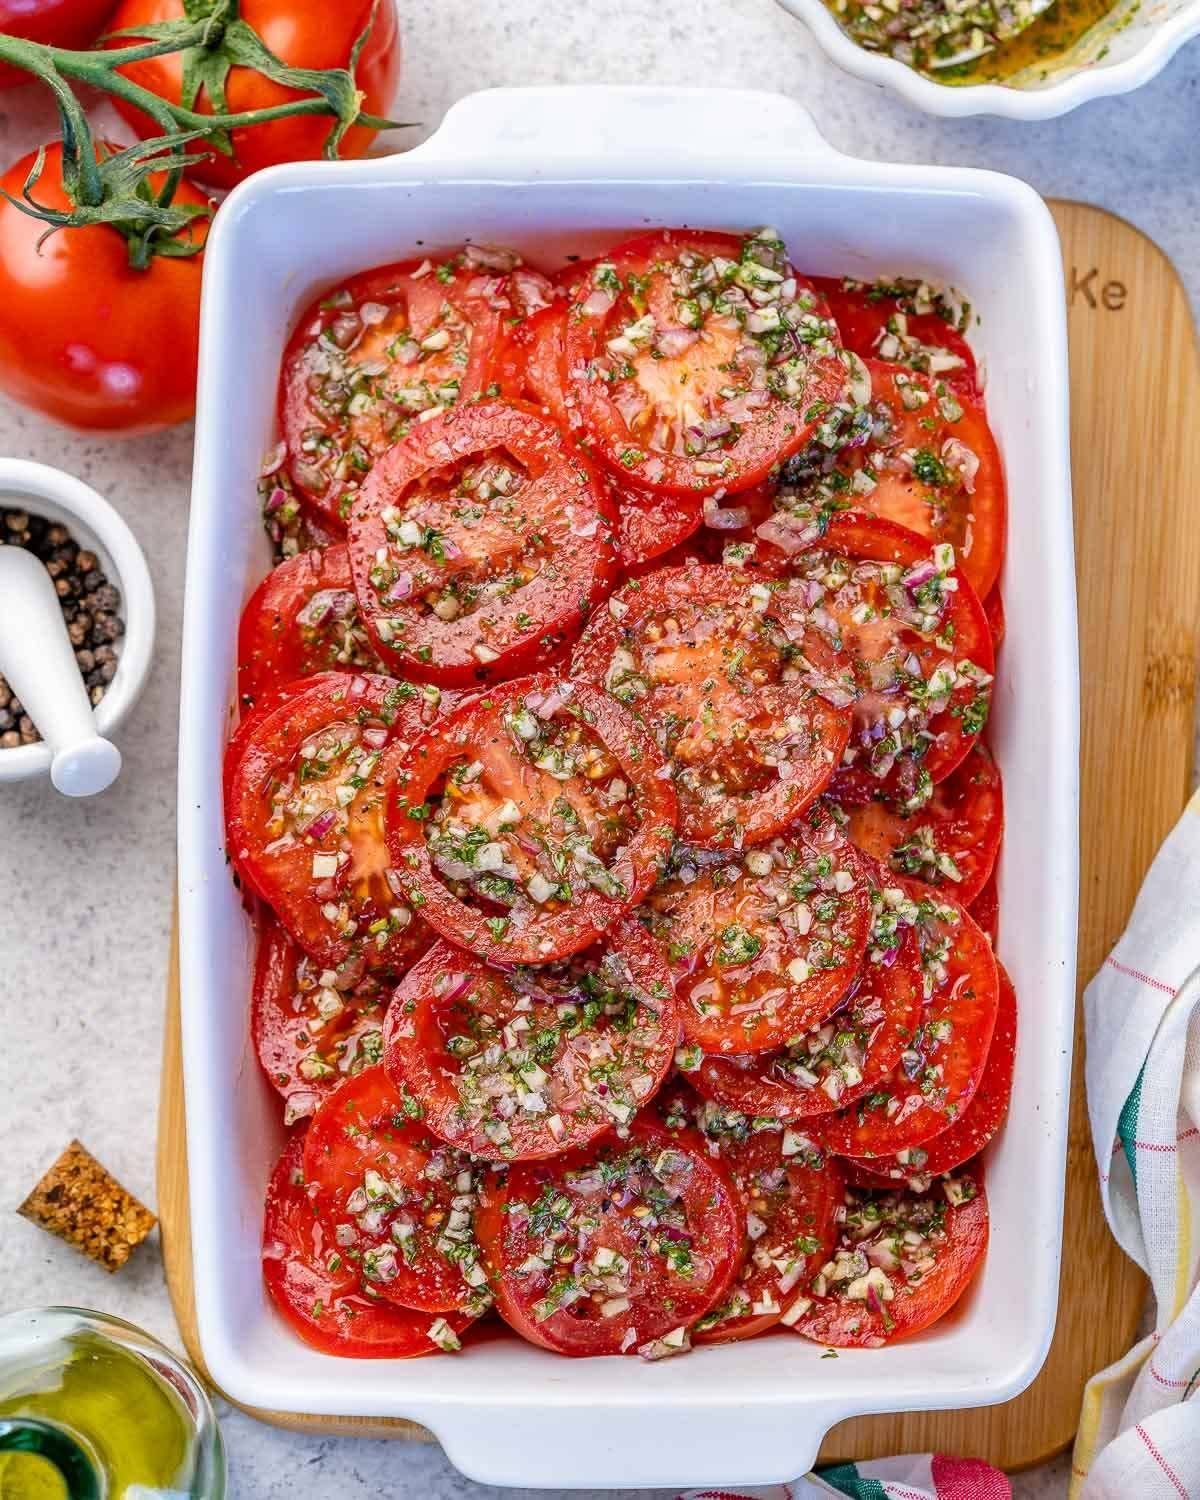
Marinated Sliced Tomato Salad

Marinated Sliced Tomato Salad

Ingredients

4 large ripe tomatoes, thinly sliced
¼ small red onion, very thinly sliced
2 tablespoons extra-virgin olive oil
1½ tablespoons red wine vinegar
1 garlic clove, finely minced
1 teaspoon honey or maple syrup
1 teaspoon dried oregano
2 tablespoons fresh parsley, chopped
1 tablespoon fresh basil, chopped
½ teaspoon salt
¼ teaspoon freshly ground black pepper
¼ cup crumbled feta cheese, optional

Instructions

1. Prepare the Tomatoes
Wash and dry the tomatoes thoroughly. Slice them into even rounds, about ¼-inch thick. Arrange the slices on a large serving platter, slightly overlapping each slice.
Scatter the thinly sliced red onion evenly over the tomatoes.
2. Make the Marinade
In a small bowl, whisk together the olive oil, red wine vinegar, minced garlic, honey, oregano, salt, and black pepper.
Add the fresh parsley and basil, stirring gently to combine.
Taste the marinade and adjust the vinegar, salt, or sweetness according to your preference.
3. Marinate the Salad
Slowly drizzle the marinade over the tomato slices, making sure each tomato gets some of the flavorful dressing.
Cover the platter and refrigerate for 20–30 minutes. This allows the tomatoes to absorb the garlic, herbs, and tangy dressing while keeping their fresh texture.
For the best flavor, let the salad sit at room temperature for about 10 minutes before serving.
4. Serve
Sprinkle the marinated tomatoes with crumbled feta and a little extra fresh basil or parsley.
Serve alongside grilled meats, seafood, roasted vegetables, sandwiches, or warm crusty bread. The flavorful tomato juices make an excellent dip for bread.

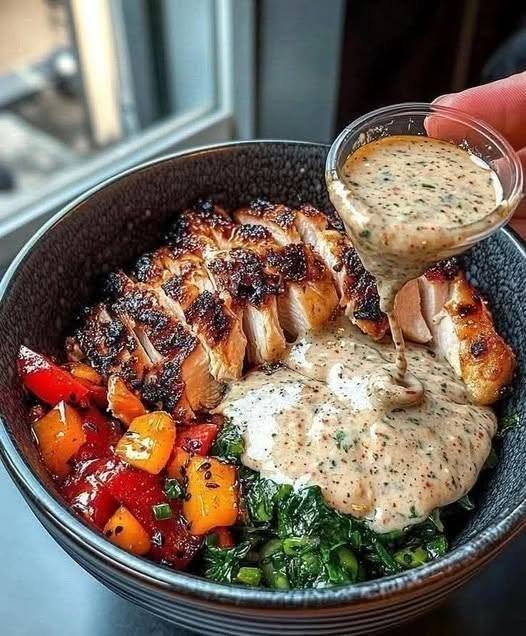
Honey Mustard Glazed Chicken with Roasted Vegetables

Honey Mustard Glazed Chicken with Roasted Vegetables

Ingredients

For the Chicken
4 boneless, skinless chicken breasts
2 tablespoons olive oil
2 tablespoons Dijon mustard
2 tablespoons honey
1 tablespoon lemon juice
2 garlic cloves, minced
½ teaspoon paprika
½ teaspoon dried thyme
½ teaspoon salt
¼ teaspoon black pepper
For the Vegetables
2 cups broccoli florets
1 red bell pepper, sliced
1 zucchini, sliced
1 red onion, cut into wedges
1 tablespoon olive oil
½ teaspoon Italian seasoning
Salt and black pepper, to taste

Instructions

Preheat the Oven: Heat oven to 425°F (220°C). Line a large baking sheet with parchment paper.
Make the Glaze: In a small bowl, whisk together Dijon mustard, honey, lemon juice, minced garlic, paprika, thyme, salt, and pepper.
Prepare the Chicken: Pat the chicken breasts dry. Brush each piece generously with the honey mustard glaze, reserving a little glaze for later.
Prepare the Vegetables: Place broccoli, bell pepper, zucchini, and red onion on the baking sheet. Toss with olive oil, Italian seasoning, salt, and pepper. Spread the vegetables around the chicken.
Roast: Bake for approximately 20–25 minutes, depending on the thickness of the chicken. Halfway through cooking, brush the chicken with the remaining glaze and gently toss the vegetables.
Check Doneness: The chicken should reach an internal temperature of 165°F (74°C), while the vegetables should be tender with lightly caramelized edges.
Serve: Let the chicken rest for 5 minutes before slicing. Serve with the roasted vegetables and spoon any remaining pan juices over the top.
Reply