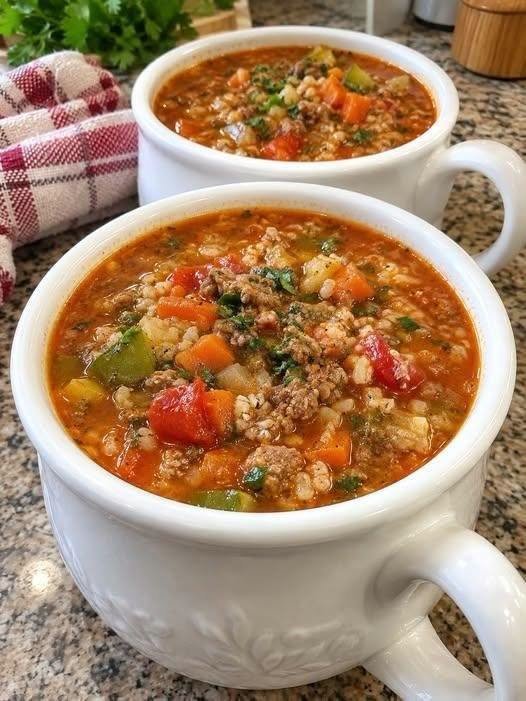
Stuffed Pepper Soup,,,

This  Stuffed Pepper  Soup is unquestionably one of those recipes that feel like a cosy hug in a bowl.

I was first introduced to the concept by a friend who suggested substituting traditional  stuffed peppers with stuffed pepper soup. It had all the comforting flavours she loves, she informed me, but it didn’t require the added effort of stuffing and roasting individual peppers. I tried it because I was interested, and to be honest, after the first spoonful, I understood the infatuation.

I prepared a large pot for my family last weekend. The aroma of garlic and onions seemed to lure everyone into the kitchen at different times during one of those leisurely, carefree weekends…

Stuffed Pepper Soup — Anti-Inflammatory Style

A cozy, hearty Stuffed Pepper Soup made with lean ground beef or turkey, colorful bell peppers, tomatoes, onions, garlic, herbs, and brown rice. This anti-inflammatory-inspired version emphasizes vegetables, olive oil, garlic, herbs, and antioxidant-rich tomatoes while keeping added sugar and highly processed ingredients low.

Note: No single food or soup can treat inflammation or disease. This recipe simply uses ingredients commonly associated with an overall nutrient-dense, Mediterranean-style eating pattern.

🥣 Description

This soup has all the comforting flavors of classic stuffed peppers without the work of stuffing individual peppers. Tender bell peppers and onions simmer with savory ground meat, tomatoes, garlic, herbs, and rice in a rich tomato broth.

For a more nutrient-dense version, use extra-virgin olive oil, lean protein, brown rice or quinoa, low-sodium broth, and plenty of vegetables.

Prep Time

15 minutes

Cook Time

35–40 minutes

Total Time

50–55 minutes

Servings

6


🛒 Ingredients

For the soup

  • 1 tablespoon extra-virgin olive oil
  • 1 pound lean ground turkey or 90–93% lean ground beef
  • 1 medium yellow onion, diced
  • 4 cloves garlic, minced
  • 3 bell peppers, diced — preferably a mixture of red, yellow, and green
  • 1 can (14.5 oz) diced tomatoes, preferably no-salt-added
  • 1 can (15 oz) tomato sauce, preferably no-salt-added
  • 5 cups low-sodium chicken or vegetable broth
  • ¾ cup uncooked brown rice
  • 2 tablespoons tomato paste
  • 1 teaspoon smoked paprika
  • 1 teaspoon dried oregano
  • ½ teaspoon dried thyme
  • ½ teaspoon ground black pepper
  • ½ teaspoon turmeric, optional
  • ¼ teaspoon red pepper flakes, optional
  • 1 bay leaf
  • 1 tablespoon chopped fresh parsley
  • Salt, to taste
  • 1–2 teaspoons lemon juice, optional

Optional toppings

  • Fresh parsley
  • Fresh basil
  • Sliced avocado
  • Plain Greek yogurt
  • Pumpkin seeds
  • A small amount of grated Parmesan
  • Freshly ground black pepper
  • Red pepper flakes

👩‍🍳 How to Make Stuffed Pepper Soup

1. Brown the meat

Heat the olive oil in a large Dutch oven or soup pot over medium heat.

Add the ground turkey or beef and cook for approximately 5–7 minutes, breaking it apart with a spoon until browned. Drain excess fat if necessary.

2. Sauté the vegetables

Add the onion and bell peppers.

Cook for about 5 minutes, stirring occasionally, until the vegetables begin to soften.

Add the garlic and cook for another 30–60 seconds.

3. Add the tomato ingredients

Stir in the tomato paste, diced tomatoes, tomato sauce, smoked paprika, oregano, thyme, black pepper, turmeric, and red pepper flakes.

Cook for 1–2 minutes to develop the flavors.

4. Add broth and rice

Pour in the low-sodium broth and add the uncooked brown rice and bay leaf.

Bring the soup to a boil.

5. Simmer

Reduce the heat to low, cover partially, and simmer for approximately 30–35 minutes, or until the rice is tender.

Stir occasionally and add a little extra broth if the soup becomes thicker than desired.

6. Finish the soup

Remove the bay leaf.

Stir in fresh parsley and, if desired, a small amount of lemon juice to brighten the tomato flavor.

Taste and adjust the seasonings.

Serve hot.

🌿 Why This Can Fit an Anti-Inflammatory Diet

This recipe combines several nutrient-dense  foods that can fit into a balanced anti-inflammatory eating pattern:

Bell peppers: Rich in vitamin C and carotenoid compounds.

Tomatoes: Provide lycopene and other antioxidant compounds.  Cooking tomatoes also makes this  soup particularly flavorful.

Extra-virgin olive oil: A source of monounsaturated fat and polyphenols and a staple of Mediterranean-style eating.

Garlic and onions: Contain sulfur-containing compounds and other plant compounds.

Herbs and spices: Oregano, thyme, paprika, turmeric, and black pepper add flavor without requiring large amounts of salt or sugar.

Whole grains: Brown rice provides more fiber than white rice. You can substitute quinoa for an alternative whole-food option.

For overall health, the bigger picture matters: plenty of vegetables and fruits, adequate fiber, regular physical activity, sufficient sleep, and an overall balanced dietary pattern are more important than any individual “anti-inflammatory” food.


🍽️ Serving Suggestions

Make this a complete healthy dinner by serving it with:

  • A large green salad with olive oil and lemon
  • Roasted vegetables
  • Steamed broccoli
  • Whole-grain bread
  • Quinoa
  • A small side of avocado
  • Plain Greek yogurt as a creamy topping

For a high-protein meal, use lean ground turkey and add extra beans or lentils.

For meal prep, portion the cooled soup into airtight containers and refrigerate for several days. The rice will continue absorbing liquid, so add a splash of broth when reheating.


🔄 Healthy Variations

1. Anti-Inflammatory Turkey Stuffed Pepper Soup

Replace beef with lean ground turkey for a lighter, high-protein option.

2. Vegetarian Stuffed Pepper Soup

Skip the meat and add:

  • 1 can black beans
  • 1 can kidney beans
  • 1 cup cooked lentils

This increases plant protein and fiber.

3. Low-Carb Stuffed Pepper Soup

Replace the rice with:

  • Cauliflower rice
  • Chopped zucchini
  • Shredded cabbage

Add the vegetables during the final 10–15 minutes of cooking.

4. Keto-Friendly Version

Use cauliflower rice instead of brown rice and choose a higher-fat ground beef if it fits your dietary goals.

5. Gluten-Free Stuffed Pepper Soup

The basic recipe can be naturally gluten-free, but always check broth, canned ingredients, and seasonings for gluten-containing additives if you need strict gluten avoidance.

6. Mediterranean-Style Version

Use ground turkey, extra-virgin olive oil, oregano, parsley, tomatoes, chickpeas, and quinoa. Finish with lemon juice and fresh herbs.

7. Spicy Stuffed Pepper Soup

Add cayenne, chili powder, jalapeño, or extra red pepper flakes.

🥑 Approximate Nutrition

Per serving, assuming 6 servings and using lean ground turkey with brown rice:

Nutrient Approximate Amount
Calories 350–400 kcal
Protein 25–30 g
Carbohydrates 40–45 g
Fiber 6–8 g
Fat 10–14 g
Saturated Fat 3–4 g
Sodium ~500–700 mg*
Vitamin C High
Potassium Moderate–high

*Sodium varies considerably depending on the broth, canned tomatoes, tomato sauce, and added salt. For a heart-healthy recipe, choose no-salt-added canned products and low-sodium broth.

Nutrition is an estimate and will change with substitutions and serving size.


💡 Tips for the Best Stuffed Pepper Soup

Don’t overcook the peppers. They should become tender while retaining some texture.

Use several pepper colors. Red, yellow, orange, and green peppers create better flavor and visual appeal.

Don’t skip the tomato paste. A small amount adds concentrated tomato flavor and gives the broth greater depth.

Use fresh herbs at the end. Parsley or basil gives the finished soup a fresher taste.

Control the sodium. Low-sodium broth and no-salt-added tomatoes make a significant difference.

Make it thicker. Simmer uncovered for several additional minutes.

Make it more brothy. Add another ½–1 cup of low-sodium broth when reheating.


❓ Related Questions

Is stuffed pepper soup healthy?

It can be a nutritious meal, particularly when prepared with lean protein, plenty of vegetables, whole grains, and low-sodium ingredients. The nutritional profile depends heavily on the ingredients and portion size.

Is stuffed pepper soup good for meal prep?

Yes. It is an excellent meal-prep recipe because the flavors often become even better after resting. Store portions in airtight containers and refrigerate promptly.

Can I make  stuffed pepper soup without rice?

Absolutely. Use cauliflower rice, quinoa, barley, lentils, or additional vegetables depending on your dietary preferences.

Can I make it vegetarian?

Yes. Beans and lentils are excellent substitutes for the meat and provide plant-based protein and dietary fiber.

Is stuffed pepper  soup gluten-free?

It can be. Rice, vegetables, meat, tomatoes, and herbs are naturally gluten-free, but packaged broth and seasonings should be checked carefully.

Can I freeze stuffed pepper soup?

Yes. For the best texture, you may prefer freezing the soup before adding the rice, then  cooking fresh rice when you’re ready to serve. If freezing the completed soup, allow it to cool properly before transferring it to freezer-safe containers.

How can I make this recipe lower in sodium?

Use no-salt-added tomatoes and tomato sauce, low-sodium broth, and herbs and spices instead of relying heavily on salt. Lemon juice can also make the flavors taste brighter.


🥄 Final Thoughts

This Stuffed Pepper Soup is a comforting way to bring together lean protein, colorful vegetables, tomatoes, whole grains, herbs, and healthy fats in one easy meal. It works particularly well for healthy meal prep, easy weeknight dinners, high-protein meals, Mediterranean-style eating, and nutrient-dense family meals.

Cheesy Roasted Cabbage Steaks with Garlic Butter & Spicy Herb

If you’re looking for a low-carb dinner recipe, healthy weight-loss meal idea, or a budget-friendly vegetarian dish, these  cheesy roasted cabbage  steaks are a game changer. This recipe transforms simple green cabbage into a crispy, caramelized, flavor-packed dish topped with melted  cheese, garlic butter, and herbs. Perfect for keto diets, gluten-free lifestyles, and clean eating meal plans.


🛒 Ingredients

  • 1 large green cabbage

  • 3 tablespoons melted butter (or olive oil for vegan option)

  • 3 cloves garlic (minced)

  • 1 teaspoon smoked paprika

  • ½ teaspoon black pepper

  • 1 teaspoon salt (adjust to taste)

  • 1 teaspoon Italian seasoning

  • 1 cup shredded mozzarella cheese

  • ¼ cup grated Parmesan cheese

  • 1 tablespoon red chili flakes (optional)

  • Fresh parsley (for garnish)


👩‍🍳 Step-by-Step Instructions

1️⃣ Prepare the Cabbage

Preheat your oven to 400°F (200°C). Remove outer leaves of the cabbage and slice it into ¾-inch thick “steaks.” Keep the core intact so the slices hold together.

2️⃣ Make the Garlic Butter

In a small bowl, mix melted butter, minced garlic, smoked paprika, salt, pepper, and Italian seasoning.

3️⃣ Brush & Roast

Place cabbage steaks on a lined baking tray. Brush generously with the garlic butter mixture on both sides. Roast for 20 minutes until slightly golden and tender.

4️⃣ Add Cheese & Finish Baking

Remove from oven, sprinkle mozzarella and Parmesan evenly on top, and add chili flakes if desired. Return to oven for 10–15 minutes until cheese is melted, bubbly, and lightly browned.

5️⃣ Garnish & Serve

Top with fresh parsley and serve hot. Pair with grilled chicken, baked salmon, or enjoy as a standalone low-calorie vegetarian main dish.


🥗 Nutritional Benefits

  • Rich in fiber for digestive health

  • Low in carbohydrates (great for keto meal prep)

  • Budget-friendly ingredient

  • High in antioxidants and vitamin C

  • Supports healthy weight management


🔥 Pro Tips for Extra Flavor

  • Add crispy bacon bits for a high-protein twist

  • Drizzle balsamic glaze for gourmet flavor

  • Use cheddar or gouda for a richer cheese crust

  • Try air fryer cabbage steaks for a quicker cooking method


❓ Frequently Asked Questions (FAQ)

1. Is roasted cabbage good for weight loss?
Yes! Cabbage is low in calories and high in fiber, making it ideal for weight-loss meal plans and low-carb diets.

2. Can I make this recipe vegan?
Absolutely. Use olive oil instead of butter and dairy-free shredded cheese.

3. How do I store leftovers?
Store in an airtight container in the refrigerator for up to 3 days. Reheat in the oven or air fryer for best texture.

4. Can I use purple cabbage instead?
Yes, but cooking time may vary slightly. Purple cabbage offers additional antioxidants.

5. What protein pairs well with cabbage steaks?
Grilled chicken breast, baked salmon, tofu steaks, or even grass-fed beef are excellent high-protein dinner pairings.

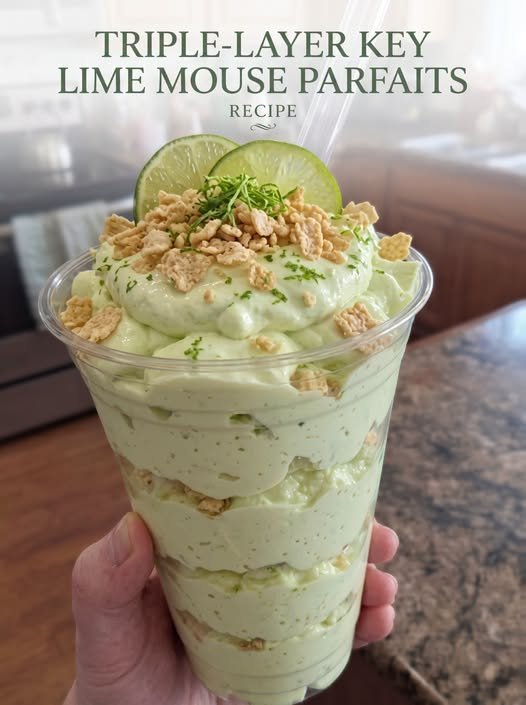
Key Lime Cheesecake Mousse Parfait

Creamy desserts stacked in little cups have a way of instantly softening and brightening life. My cousin insisted that I try combining cheesecake mousse with zesty key lime flavor, so last weekend I cooked this Key Lime Cheesecake Mousse Parfait for my family. To be honest, I thought it might just taste like another typical no-bake dessert, but I was totally taken aback by the first spoonful.

The combination of the buttery crushed cookies, vibrant zesty lime, and creamy cheesecake filling tasted like summer in a cup. My mother kept telling me, “You need to make this again next weekend,” after my younger brother finished two portions before supper even began. In our family kitchen, that’s typically the indication that a recipe is set in stone…

Key Lime Cheesecake Mousse Parfait (Anti-Inflammatory Recipe)

This creamy Key Lime Cheesecake Mousse Parfait is a refreshing, anti-inflammatory dessert packed with wholesome ingredients that support wellness while satisfying your sweet tooth. Made with probiotic-rich yogurt, heart-healthy avocado, fresh lime juice, and naturally sweetened layers, this parfait delivers tropical cheesecake flavor without heavy processed sugars or artificial ingredients.

Perfect for healthy dessert lovers, weight-conscious snackers, and anyone searching for easy anti-inflammatory recipes, this mousse parfait is smooth, tangy, lightly sweet, and absolutely indulgent.


Why You’ll Love This Recipe

  • Rich, creamy cheesecake flavor
  • Naturally anti-inflammatory ingredients
  • Refined sugar-free option
  • High in healthy fats and probiotics
  • Easy no-bake dessert
  • Great for meal prep
  • Gluten-free adaptable
  • Perfect for summer gatherings

Anti-Inflammatory Benefits

Key Ingredients & Benefits

  • Avocado – Loaded with healthy monounsaturated fats that help reduce inflammation.
  • Greek Yogurt – Supports gut health with probiotics.
  • Lime Juice & Zest – Rich in vitamin C and antioxidants.
  • Honey or Maple Syrup – Natural sweeteners with less processing than refined sugar.
  • Chia Seeds (optional) – Excellent source of omega-3 fatty acids.
  • Ginger (optional) – Known anti-inflammatory powerhouse.

Full Recipe

Key Lime Cheesecake Mousse Parfait

Prep Time

15 minutes

Chill Time

1 hour

Total Time

1 hour 15 minutes

Servings

4 parfaits


Ingredients

For the Cheesecake Mousse

  • 1 ripe avocado
  • 8 oz cream cheese, softened
  • 1 cup plain Greek yogurt
  • 1/4 cup fresh key lime juice
  • 1 tablespoon lime zest
  • 1/4 cup honey or pure maple syrup
  • 1 teaspoon vanilla extract
  • 1 teaspoon grated fresh ginger (optional)
  • 1 tablespoon chia seeds (optional)

For the Layers

  • 1 cup crushed graham crackers or gluten-free granola
  • 1 tablespoon melted coconut oil
  • 1 tablespoon honey

Garnish

  • Lime slices
  • Extra lime zest
  • Crushed granola
  • Mint leaves

Instructions

Step 1: Prepare the Crunch Layer

In a bowl, combine:

  • crushed graham crackers or granola
  • melted coconut oil
  • honey

Mix until crumbly and set aside.


Step 2: Make the Cheesecake Mousse

In a blender or food processor, combine:

  • avocado
  • cream cheese
  • Greek yogurt
  • key lime juice
  • lime zest
  • honey
  • vanilla
  • ginger

Blend until silky smooth and fluffy.

For a thicker texture, stir in chia seeds and let sit for 5 minutes.


Step 3: Assemble the Parfaits

Layer in serving glasses:

  1. Crunch mixture
  2. Key lime mousse
  3. Repeat layers

Top with:

  • whipped yogurt
  • lime zest
  • granola
  • fresh lime slices

Step 4: Chill

Refrigerate for at least 1 hour before serving.


Serving Suggestions

Serve these parfaits:

  • As a healthy summer dessert
  • After spicy meals
  • At brunch gatherings
  • For meal-prep snacks
  • As a refreshing post-workout treat

Pair with:

  • herbal tea
  • sparkling lime water
  • fresh berries
  • coconut flakes

Delicious Variations

1. Vegan Version

Replace:

  • cream cheese → dairy-free cream cheese
  • Greek yogurt → coconut yogurt
  • honey → maple syrup

2. High-Protein Version

Add:

  • 1 scoop vanilla protein powder
  • extra Greek yogurt

Perfect for fitness-focused meal plans.


3. Keto Key Lime Mousse

Use:

  • monk fruit sweetener
  • low-carb granola
  • full-fat cream cheese

4. Tropical Twist

Add:

  • pineapple chunks
  • toasted coconut
  • mango puree

5. Berry Lime Parfait

Layer with:

  • blueberries
  • raspberries
  • strawberries

Extra antioxidants and vibrant flavor.


Nutrition Information (Approximate Per Serving)

Nutrient Amount
Calories 320
Protein 10g
Carbohydrates 22g
Fiber 5g
Sugar 12g
Fat 22g
Saturated Fat 8g
Omega-3s 1g
Vitamin C 18% DV

Storage Tips

  • Refrigerate up to 3 days
  • Store in airtight jars
  • Add crunchy topping right before serving
  • Do not freeze for best texture

Frequently Asked Questions

Can I make this ahead of time?

Yes. It’s actually better chilled overnight because the flavors deepen.


Can I use regular limes instead of key limes?

Absolutely. Key limes are more aromatic, but standard limes work well too.


Is avocado noticeable in the flavor?

Not strongly. It mainly creates an ultra-creamy texture while adding healthy fats.


Can I make this sugar-free?

Yes. Use monk fruit sweetener, stevia, or erythritol.


Is this recipe gluten-free?

Use gluten-free granola instead of graham crackers.


Pro Tips for the Best Mousse Parfait

  • Use room-temperature cream cheese for smooth blending.
  • Fresh lime juice tastes dramatically better than bottled.
  • Chill mixing bowls beforehand for fluffier mousse.
  • Layer neatly using a piping bag for presentation.

Final Thoughts

This Key Lime Cheesecake Mousse Parfait combines indulgent cheesecake flavor with nourishing anti-inflammatory ingredients in one beautiful layered dessert. It’s creamy, refreshing, easy to prepare, and versatile enough for healthy meal prep, elegant entertaining, or satisfying late-night cravings.

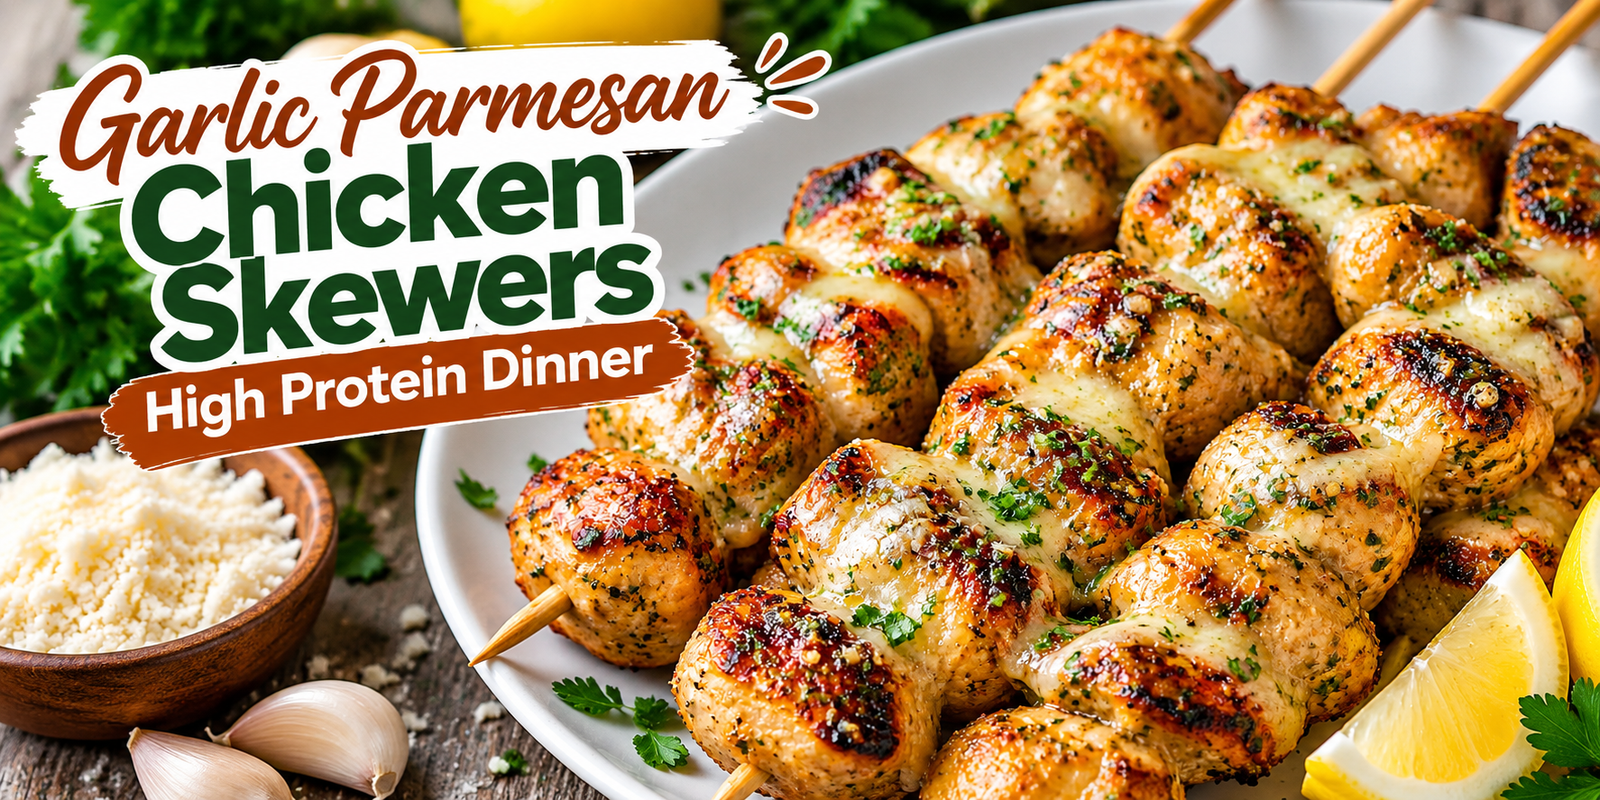
Garlic Parmesan Chicken Skewers

Garlic Parmesan Chicken Skewers high protein dinner

Garlic Parmesan Chicken Skewers – High Protein Dinner

Description:
These Garlic Parmesan Chicken Skewers are juicy, flavorful, easy to prepare, and perfect for a high-protein dinner. Tender pieces of chicken are seasoned with garlic, paprika, herbs, and Parmesan cheese, then cooked until golden and lightly crisp around the edges. A buttery garlic Parmesan coating is brushed over the hot skewers for extra flavor and a delicious savory finish.

This recipe is ideal for busy weeknights, meal prep, family dinners, or healthy high-protein meals. You can serve the skewers with rice, roasted potatoes, salad, grilled vegetables, or a simple yogurt dip. They are naturally low in carbs and easy to customize with different seasonings.

Ingredients for the Garlic Parmesan Chicken Skewers

For the Chicken

1½ pounds boneless, skinless chicken breast
2 tablespoons olive oil
1 teaspoon salt
½ teaspoon black pepper
1 teaspoon smoked paprika
1 teaspoon garlic powder
½ teaspoon onion powder
1 teaspoon Italian seasoning
¼ teaspoon red pepper flakes, optional

For the Garlic Parmesan Butter

3 tablespoons unsalted butter, melted
4 garlic cloves, finely minced
½ cup freshly grated Parmesan cheese
1 tablespoon chopped fresh parsley
½ teaspoon Italian seasoning
1 tablespoon lemon juice
Pinch of salt, if needed

For Serving

Fresh parsley
Lemon wedges
Extra grated Parmesan
Greek yogurt garlic dip, optional

Step-by-Step Instructions

1. Prepare the Chicken

Cut the chicken breast into evenly sized pieces, about 1 to 1½ inches each. Keeping the pieces similar in size helps them cook evenly.

Pat the chicken dry with paper towels. Removing excess moisture helps the seasoning stick better and encourages browning.

2. Season the Chicken

Place the chicken pieces in a large bowl. Add olive oil, salt, black pepper, smoked paprika, garlic powder, onion powder, Italian seasoning, and red pepper flakes if using.

Toss everything well until every piece of chicken is evenly coated.

For stronger flavor, cover the bowl and refrigerate for about 20 to 30 minutes. If you are short on time, you can cook the chicken immediately.

3. Prepare the Skewers

If using wooden skewers, soak them in water for at least 20 minutes before cooking to prevent burning.

Thread the chicken pieces onto the skewers, leaving a very small amount of space between each piece.

Do not pack the pieces too tightly because a little airflow helps the chicken brown more evenly.

4. Make the Garlic Parmesan Butter

In a small bowl, combine melted butter, minced garlic, grated Parmesan, parsley, Italian seasoning, and lemon juice.

Mix until well combined.

Set aside about one-third of the mixture for brushing onto the cooked chicken. Use the remaining mixture during cooking.

5. Cook the Chicken Skewers

Oven Method

Preheat the oven to 425°F (220°C).

Place the chicken skewers on a lined baking sheet or wire rack.

Bake for about 18 to 22 minutes, turning halfway through.

Brush the skewers with some garlic Parmesan butter during the final few minutes of cooking.

For extra color, broil for 1 to 2 minutes at the end.

Grill Method

Preheat the grill to medium-high heat.

Cook the skewers for about 10 to 14 minutes, turning every few minutes until golden and fully cooked.

Brush with garlic Parmesan butter during the final minutes.

Stovetop Method

Heat a large grill pan or skillet over medium-high heat.

Add a small amount of olive oil.

Cook the skewers for approximately 4 to 5 minutes per side, turning as needed until cooked through.

6. Check for Doneness

Chicken is safely cooked when the thickest piece reaches an internal temperature of 165°F (74°C).

Avoid overcooking because chicken breast can become dry if cooked too long.

7. Add the Final Garlic Parmesan Coating

While the chicken is still hot, brush the reserved garlic Parmesan butter generously over the skewers.

Sprinkle with extra Parmesan cheese and chopped parsley.

8. Serve

Serve immediately with lemon wedges on the side.

Squeeze fresh lemon juice over the skewers before eating for a bright, fresh finish.

Tips and Notes

Use chicken breast for a leaner, higher-protein meal. Chicken thighs can also be used if you prefer a juicier result.

Freshly grated Parmesan melts and coats the chicken better than pre-shredded Parmesan.

Cut the chicken into equal-sized pieces so everything finishes cooking at the same time.

Do not skip the olive oil. A small amount helps keep the chicken moist and helps the seasonings adhere.

If using wooden skewers, always soak them before cooking.

For extra garlic flavor, add one more minced garlic clove to the butter mixture.

For a spicy version, increase the red pepper flakes or add a little cayenne pepper.

Allow the chicken to rest for about 3 to 5 minutes before serving.

Serving Ideas

These Garlic Parmesan Chicken Skewers pair well with many healthy side dishes.

Serve them with a large green salad for a lighter dinner.

Pair them with roasted broccoli, asparagus, zucchini, or green beans for a low-carb meal.

For a more filling dinner, serve them with brown rice, quinoa, couscous, or roasted potatoes.

You can also remove the chicken from the skewers and add it to a high-protein bowl with rice, cucumber, tomato, avocado, and Greek yogurt sauce.

Meal Prep Instructions

These skewers are excellent for meal prep.

Allow the cooked chicken to cool completely before storing.

Remove the chicken from the skewers if desired and divide it into meal-prep containers.

Store in the refrigerator for up to 3 to 4 days.

Reheat gently in the microwave, skillet, or oven until hot.

Avoid overheating because this can dry out the chicken.

Q&A

Can I make Garlic Parmesan Chicken Skewers ahead of time?
Yes. You can season the chicken and assemble the skewers several hours before cooking. Keep them covered in the refrigerator until ready to cook.

Can I use chicken thighs instead of chicken breast?
Yes. Boneless, skinless chicken thighs work very well and stay especially juicy. They may require slightly more cooking time.

Can I cook these without skewers?
Yes. You can cook the seasoned chicken pieces directly in a skillet or spread them on a baking sheet.

How do I keep the chicken juicy?
Avoid cutting the pieces too small and do not overcook them. Checking the internal temperature is the best way to prevent dry chicken.

Can I make this recipe low carb?
Yes. The chicken skewers themselves are naturally low in carbohydrates. Serve them with salad or low-carb vegetables.

Can I freeze Garlic Parmesan Chicken Skewers?
Yes. Cooked chicken can be frozen in an airtight container for up to about 2 months. Thaw overnight in the refrigerator before reheating.

Servings & Nutrition

Servings: 4

Approximate nutrition per serving:

Calories: 390
Protein: 47 g
Carbohydrates: 3 g
Fat: 21 g
Saturated Fat: 9 g
Fiber: 0.5 g
Sugar: 1 g
Sodium: 650 mg

Nutrition values are estimates and may vary depending on the type of chicken, Parmesan, butter, and serving size used.

Final Thoughts

These Garlic Parmesan Chicken Skewers make an easy high-protein dinner that delivers plenty of flavor without requiring complicated ingredients. The combination of juicy seasoned chicken, garlic, Parmesan, herbs, and lemon creates a simple but satisfying meal.

They are easy enough for a weeknight dinner but flavorful enough to serve to guests. Pair them with vegetables for a lighter meal or add rice or potatoes for a more filling plate.

Because they are high in protein and easy to meal prep, these skewers are also a great option for anyone trying to build simple, balanced meals during a busy week.

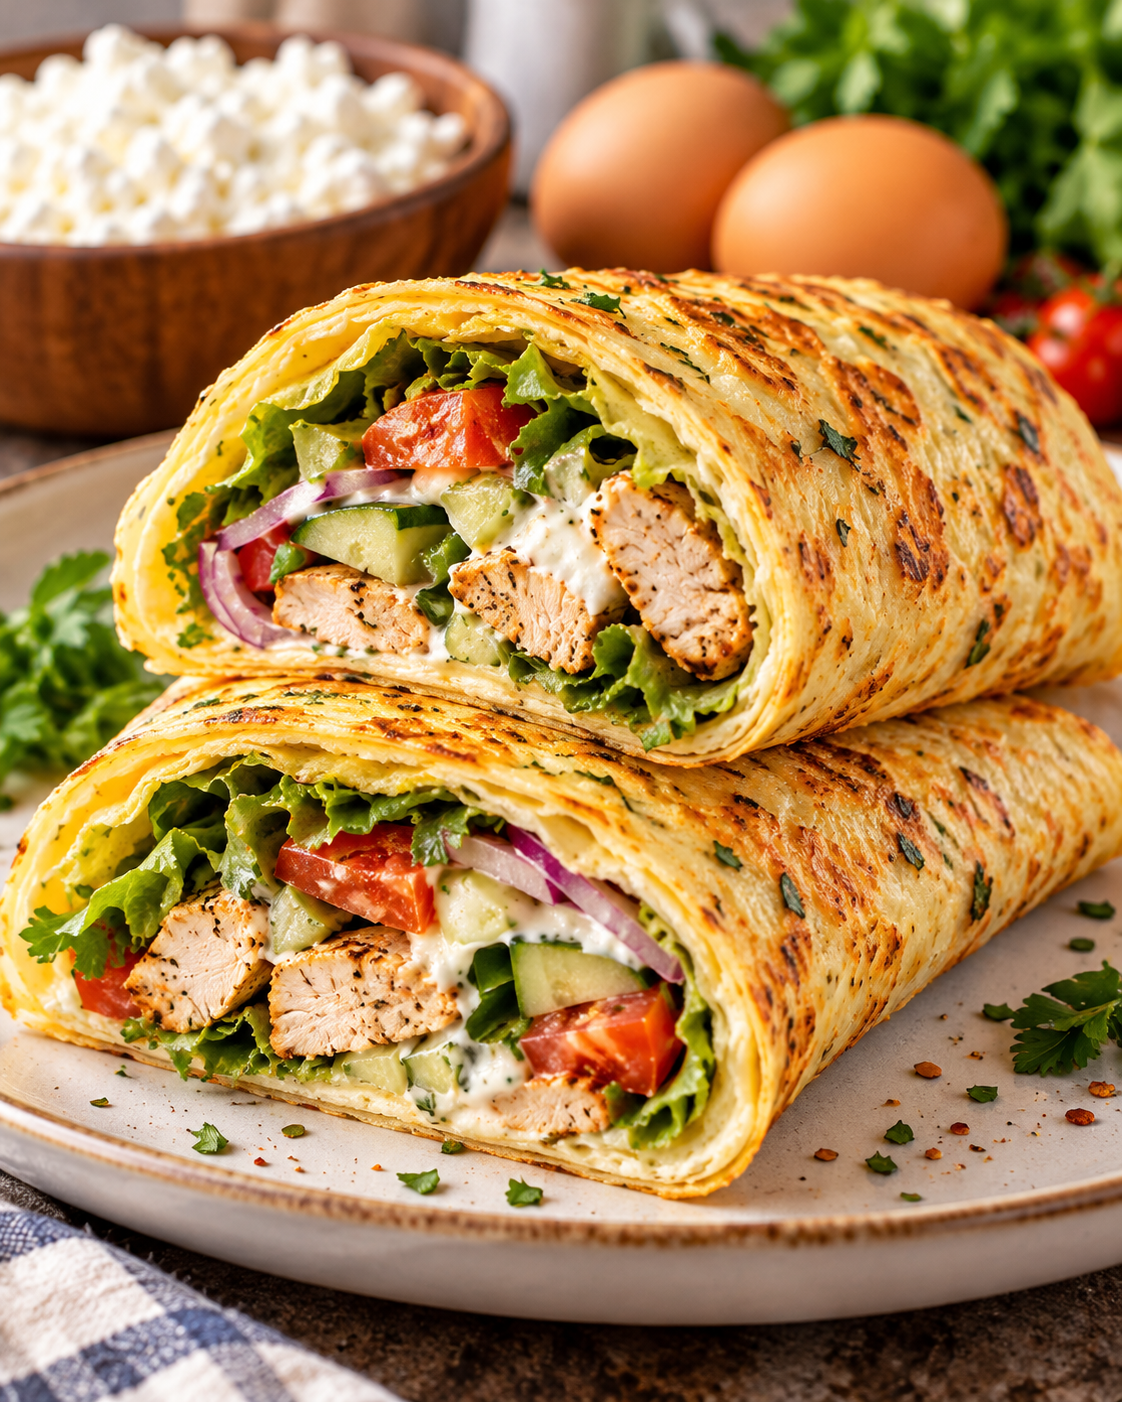
High Protein Cottage Cheese Wrap

2-Ingredient High Protein Cottage Cheese Wrap

2-Ingredient

High Protein Cottage Cheese Wrap

Description:
This 2-Ingredient High Protein Cottage Cheese Wrap is one of the easiest protein-packed wraps you can make at home. It uses just cottage cheese and eggs to create a soft, flexible wrap that works perfectly for breakfast, lunch, meal prep, or a quick high-protein snack. It is naturally flourless, low in carbs, and can be filled with chicken, turkey, tuna, avocado, salad, or your favorite vegetables. The wrap has a light cheesy flavor, holds together well once cooled slightly, and is a simple option when you want more protein without using regular tortillas.

Ingredients for the Cottage Cheese Wrap

Main Ingredients

1 cup cottage cheese
2 large eggs

Optional Seasonings

¼ teaspoon salt
¼ teaspoon black pepper
½ teaspoon garlic powder
½ teaspoon Italian seasoning or dried herbs

Step-by-Step Instructions

1. Preheat the Oven

Preheat your oven to 375°F (190°C). Line a large baking sheet with parchment paper. Lightly grease the parchment if your paper tends to stick.

2. Blend the Ingredients

Add the cottage cheese and eggs to a blender or food processor. Blend until completely smooth and creamy. There should be very few visible cottage cheese curds left.

If you want extra flavor, add salt, black pepper, garlic powder, or dried herbs before blending.

3. Spread the Mixture

Pour the blended mixture onto the prepared baking sheet.

Use the back of a spoon or spatula to spread it into a thin rectangular layer. Try to keep the thickness even so the wrap cooks at the same rate throughout.

Do not make it extremely thin, or it may become too crispy around the edges.

4. Bake

Bake for approximately 25 to 30 minutes, depending on your oven and the thickness of the wrap.

The wrap is ready when the center looks fully set and the edges are lightly golden.

5. Cool Slightly

Remove the baking sheet from the oven and allow the wrap to cool for about 5 to 10 minutes.

Cooling is important because the wrap becomes more flexible and easier to remove from the parchment.

6. Remove from the Paper

Gently peel the wrap away from the parchment paper.

If needed, use a thin spatula to loosen the edges first.

7. Add Your Filling

Place your favorite filling in the center of the wrap.

Good options include grilled chicken, turkey, tuna salad, sliced avocado, cucumber, spinach, lettuce, tomatoes, roasted vegetables, or scrambled eggs.

Fold the sides inward and roll tightly like a traditional wrap.

Tips and Notes

Use full-fat or low-fat cottage cheese depending on your preference. Full-fat cottage cheese usually creates a slightly richer and softer wrap.

Blend the mixture until very smooth. This helps produce a more even texture.

Do not remove the wrap from the parchment immediately after baking. Letting it rest for several minutes makes it much easier to handle.

If the wrap feels too soft, return it to the oven for another 3 to 5 minutes.

If the edges become crispier than the middle, trim them slightly before rolling.

For meal prep, prepare the wrap ahead of time and refrigerate it without filling. Add your filling when ready to eat.

You can also cut the baked wrap into smaller pieces and use them as protein-rich sandwich alternatives.

Filling Ideas

Chicken Avocado Wrap

Fill with grilled chicken, avocado, lettuce, cucumber, and Greek yogurt sauce.

Turkey Veggie Wrap

Add sliced turkey breast, spinach, tomato, cucumber, and mustard.

Tuna Protein Wrap

Fill with tuna mixed with Greek yogurt, celery, black pepper, and lettuce.

Breakfast Wrap

Add scrambled eggs, spinach, tomatoes, and a little shredded cheese.

Mediterranean Wrap

Fill with grilled chicken, cucumber, tomato, olives, spinach, and a spoonful of tzatziki.

Q&A

Can I make this cottage cheese wrap without a blender?
You can mash the cottage cheese very well and whisk it with the eggs, but a blender gives a much smoother and more flexible wrap.

Can I make it in an air fryer?
Yes, but only if your air fryer has a flat baking tray or suitable pan. Bake at a slightly lower temperature and watch carefully because air fryers cook faster.

Why did my wrap stick to the parchment paper?
Some parchment papers stick more than others. Lightly greasing the parchment can help. Allowing the wrap to cool before peeling it away also makes a big difference.

Can I store the wrap?
Yes. Store the cooled wrap in an airtight container in the refrigerator for about 2 to 3 days.

Can I freeze it?
Yes. Place parchment paper between wraps and freeze them in an airtight freezer-safe bag. Thaw in the refrigerator before using.

Is this wrap low carb?
Yes, it is much lower in carbohydrates than traditional flour tortillas because it contains no flour.

Can I use flavored cottage cheese?
Plain cottage cheese works best because flavored varieties may contain extra sugar or ingredients that affect the texture.

Servings & Nutrition

Servings: 1 large wrap or 2 smaller wraps

Approximate nutrition for the full basic recipe:

Calories: 300–340
Protein: 30–35 g
Carbohydrates: 8–10 g
Fat: 15–18 g
Fiber: 0 g

Nutrition will vary depending on the cottage cheese brand, fat percentage, egg size, and any fillings you add.

Final Thoughts

The 2-Ingredient High Protein Cottage Cheese Wrap is a simple way to turn two everyday ingredients into a flexible, protein-rich meal base. It is especially useful when you want something quick, flourless, and easy to customize. Fill it with vegetables and lean protein for lunch, turn it into a breakfast wrap, or keep it simple with avocado and greens.

Because the base recipe contains only cottage cheese and eggs, it is easy to prepare and works well for anyone looking for a convenient high-protein alternative to traditional wraps.

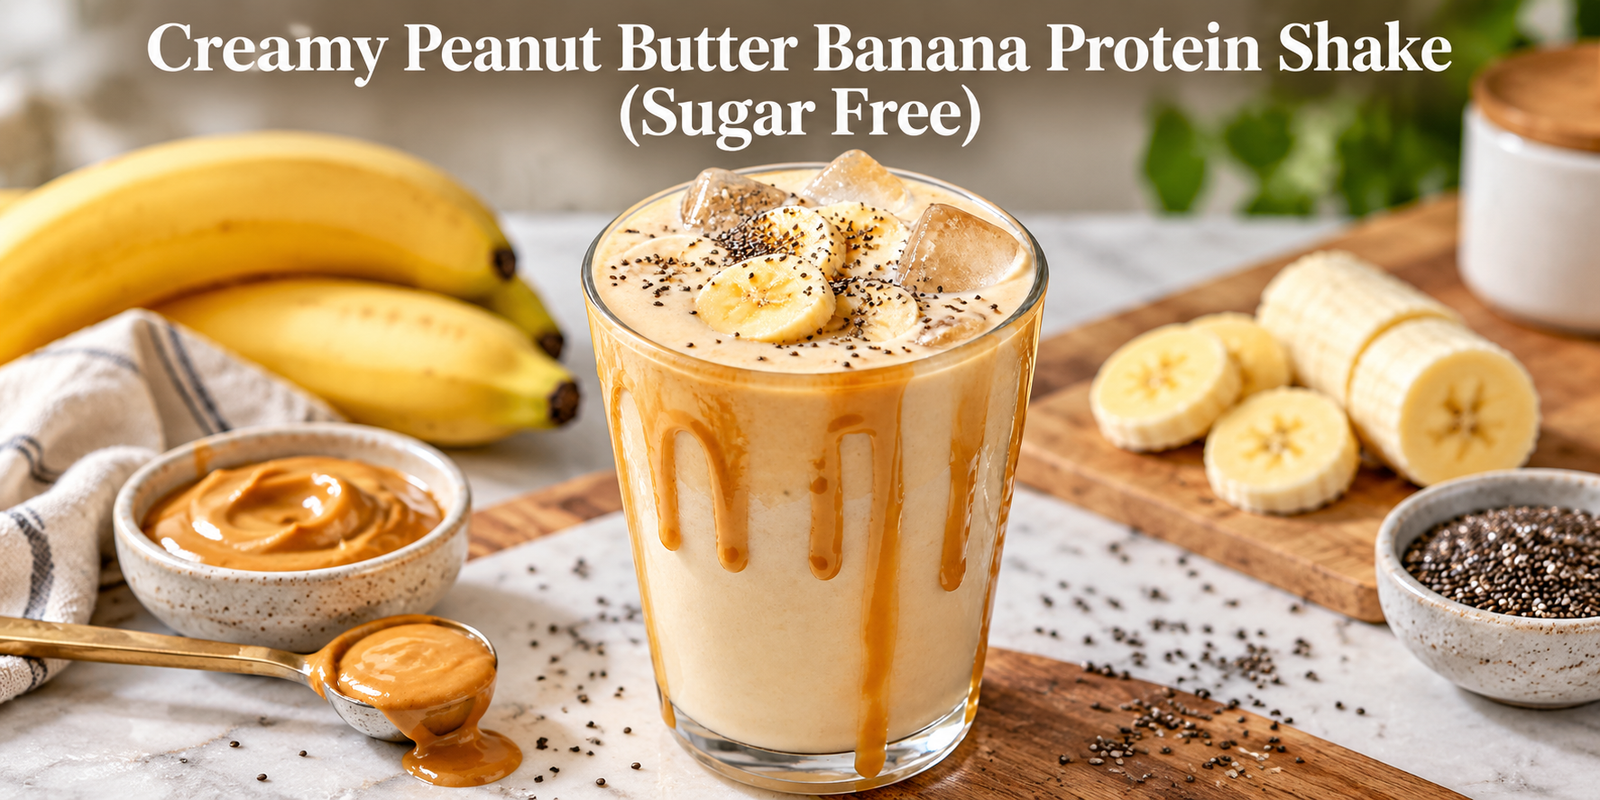
Creamy Peanut Butter Banana Protein Shake

Creamy Peanut Butter Banana Protein Shake with banana slices, peanut butter and chia seeds

Creamy Peanut Butter Banana Protein Shake (Sugar Free)

Description

Creamy Peanut Butter Banana Protein Shake is a thick, smooth, high-protein drink made with banana, peanut butter, Greek yogurt, protein powder, and milk. It is naturally sweet, easy to prepare, and does not need added sugar.

This shake works well for breakfast, after a workout, or as a quick snack when you want something filling but simple. Banana gives natural sweetness and creaminess, peanut butter adds healthy fats and rich flavor, while Greek yogurt and protein powder increase the protein.

You can make it in about 5 minutes with only a blender.

Ingredients

For the Shake

1 medium ripe banana, preferably frozen

2 tablespoons natural peanut butter, no added sugar

1 scoop vanilla protein powder

3/4 cup plain Greek yogurt

1 cup unsweetened almond milk or regular milk

1/2 teaspoon vanilla extract

1/4 teaspoon ground cinnamon

4 to 6 ice cubes

1 tablespoon chia seeds, optional

1 tablespoon ground flaxseed, optional

Pinch of salt, optional

Optional Add-Ins

1 teaspoon unsweetened cocoa powder

1 tablespoon rolled oats

1/2 teaspoon instant coffee

Extra cinnamon

Sugar-free sweetener, only if needed

Step-by-Step Instructions

Step 1: Prepare the Banana

Peel the banana and cut it into pieces.

For the thickest shake, use a frozen banana. Frozen banana gives the shake a creamy texture without needing ice cream.

Step 2: Add the Liquid

Pour the almond milk or regular milk into the blender first.

Adding the liquid first helps the blender mix everything more easily.

Step 3: Add the Protein Ingredients

Add the Greek yogurt, protein powder, and peanut butter.

Use natural peanut butter without added sugar for the best sugar-free version.

Step 4: Add the Banana and Flavoring

Add the banana, vanilla extract, cinnamon, and optional pinch of salt.

If using chia seeds, flaxseed, oats, or cocoa powder, add them now.

Step 5: Add Ice

Add 4 to 6 ice cubes.

Use fewer ice cubes if you prefer a thinner shake.

Use more if you want it extra cold and thick.

Step 6: Blend

Blend on high speed for about 30 to 60 seconds.

Stop and scrape down the sides if needed.

Blend again until smooth and creamy.

Step 7: Adjust the Texture

If the shake is too thick, add a small splash of milk.

If it is too thin, add a few more ice cubes or a little extra Greek yogurt.

Step 8: Serve

Pour into a tall glass and serve immediately.

You can sprinkle a little cinnamon on top if desired.

Tips and Notes

Use a frozen banana for the best texture.

Choose unsweetened milk to keep added sugar low.

Check your protein powder label because some flavored powders contain added sugar.

Natural peanut butter should ideally contain only peanuts and salt.

Use less milk or add extra ice cubes to make the shake thicker.

Replace regular peanut butter with powdered peanut butter for a lighter version.

Add chia seeds or ground flaxseed to increase the fiber.

Mix in oats or extra peanut butter to make the shake more filling.

Use only 1 tablespoon of peanut butter to reduce the calories.

Health Benefits

High in Protein

Protein powder and Greek yogurt make this shake filling and helpful for supporting muscle maintenance and recovery.

Healthy Fats

Peanut butter contains mostly unsaturated fats.

Potassium

Bananas are a good source of potassium, which supports normal muscle and nerve function.

Calcium

Greek yogurt and dairy milk can provide calcium.

Fiber

Banana, chia seeds, flaxseed, and oats can increase fiber.

No Added Sugar Needed

The banana adds natural sweetness, so you usually do not need sugar, syrup, or honey.

Serving Suggestions

Drink it for breakfast when you need something quick.

Use it as a post-workout shake.

Serve it as an afternoon snack.

Pair it with boiled eggs for an even higher-protein breakfast.

Add oats if you want a more filling meal replacement.

Storage Tips

This protein shake tastes best immediately after blending.

If needed, store it in a sealed container in the refrigerator for up to 24 hours.

Shake or stir well before drinking because separation can occur.

Do not freeze the finished shake unless you plan to reblend it later.

For meal prep, you can freeze banana pieces in advance and keep the dry ingredients measured and ready.

Q&A

Can I make this shake without protein powder?

Yes. Use extra Greek yogurt or cottage cheese, but the protein will be lower.

Can I use almond butter instead of peanut butter?

Yes. Almond butter works well.

Can I make it dairy-free?

Yes. Use plant-based yogurt and unsweetened plant milk.

Can I use fresh banana instead of frozen?

Yes, but the shake will be less thick. Add more ice.

Is this shake completely sugar free?

It has no added sugar if you use unsweetened ingredients, but banana and dairy products naturally contain some sugar.

Can I add oats?

Yes. Add 1 to 2 tablespoons for more fiber and a thicker texture.

Can I make it chocolate flavored?

Yes. Add 1 teaspoon unsweetened cocoa powder.

Servings & Nutrition

Servings: 1 large shake

Prep Time: 5 minutes

Cook Time: 0 minutes

Total Time: 5 minutes

Approximate Nutrition Per Serving

Calories: 430–500

Protein: 35–45g

Carbohydrates: 35–45g

Fiber: 5–8g

Total Fat: 15–20g

Saturated Fat: 3–5g

Natural Sugar: 15–20g

Added Sugar: 0g if all ingredients are unsweetened

Calcium: approximately 300–450mg

Potassium: approximately 700–900mg

Nutrition varies depending on the protein powder, milk, yogurt, and peanut butter used.

Final Thoughts

Creamy Peanut Butter Banana Protein Shake is one of the easiest ways to make a quick, satisfying high-protein drink at home.

It has a naturally sweet banana flavor, rich peanut butter taste, and smooth creamy texture without needing added sugar.

The combination of protein, healthy fats, and carbohydrates makes it useful for breakfast, post-workout nutrition, or a filling snack.

You can also customize it easily. Add cocoa for a chocolate version, oats for extra energy, or chia seeds for more fiber.

For the best result, use a frozen banana, unsweetened milk, and natural peanut butter.

Overall, this Creamy Peanut Butter Banana Protein Shake (Sugar Free) is quick, creamy, protein-rich, and easy to fit into a balanced eating routine.