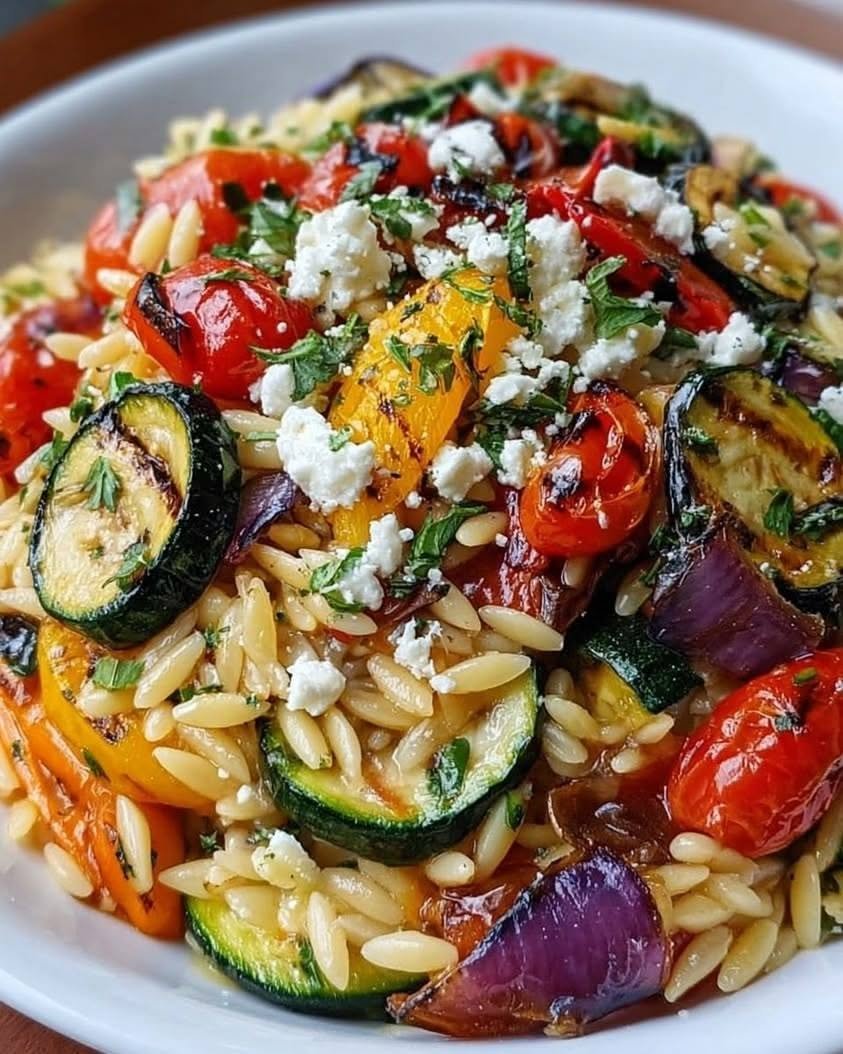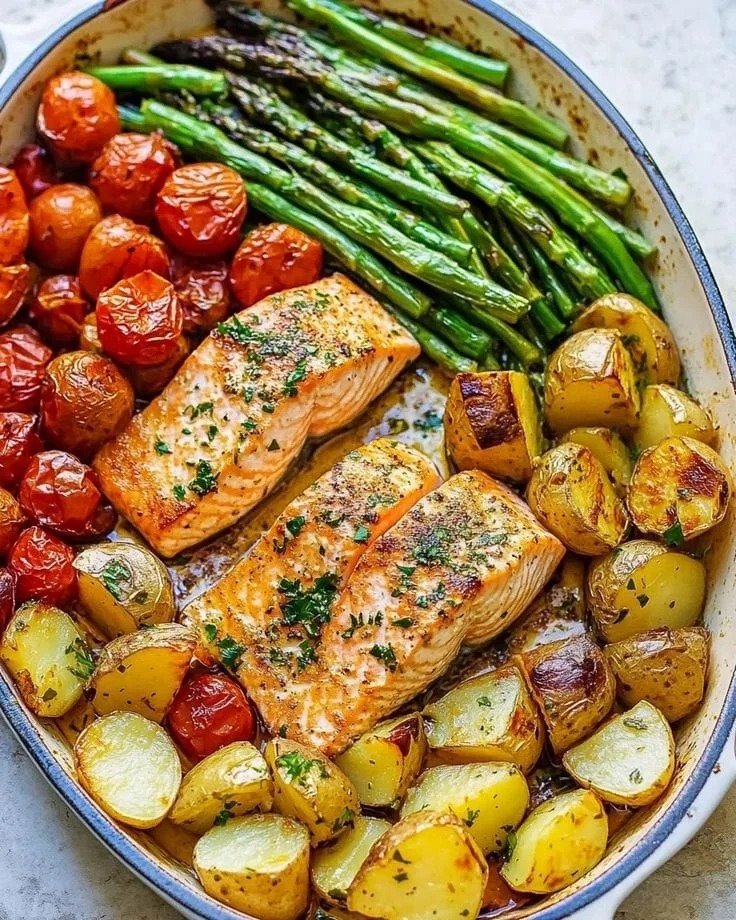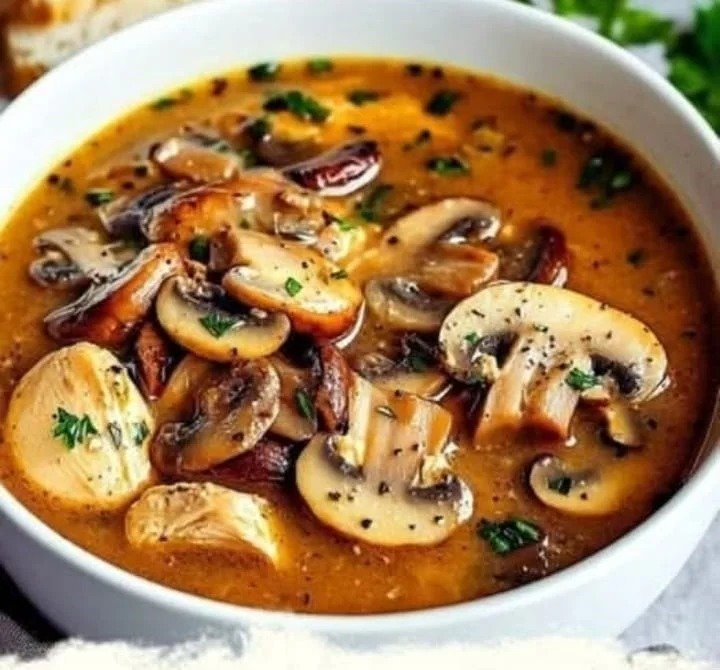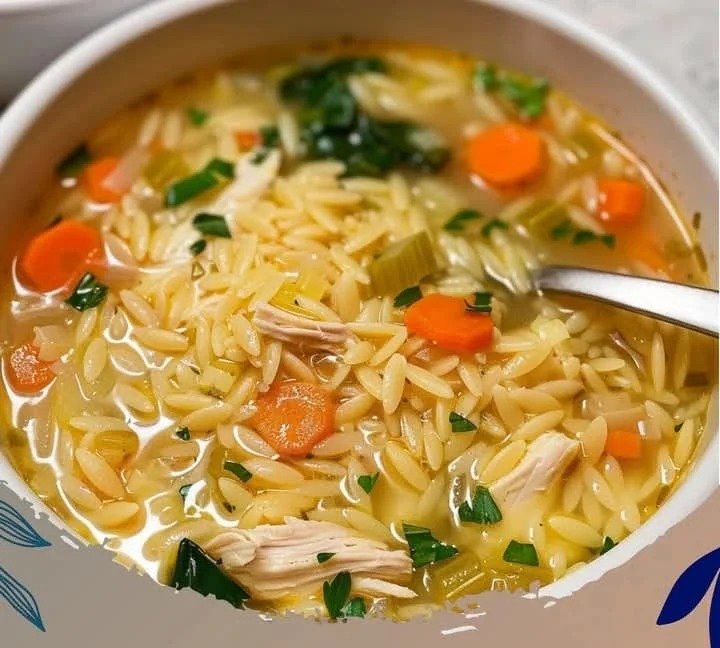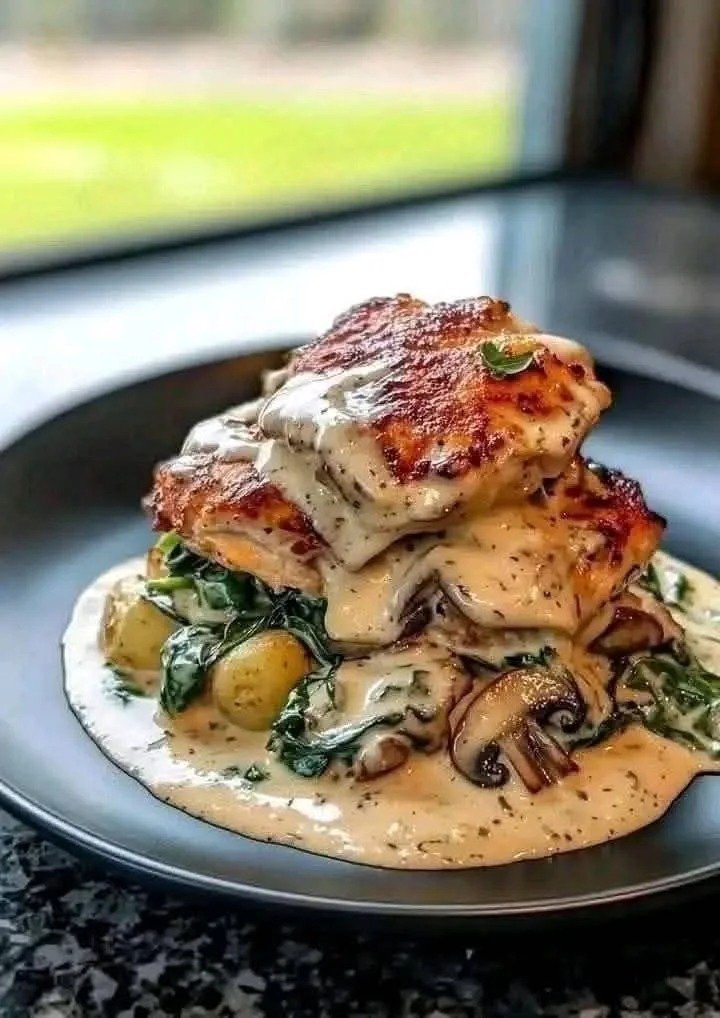
Easy Tuscan Chicken Orzo Recipe 

Easy Tuscan Chicken Orzo Recipe 

Description

Easy Tuscan Chicken Orzo is a creamy, comforting, and flavorful Italian-inspired one-pan meal that combines juicy seasoned chicken, tender orzo pasta, sun-dried tomatoes, spinach, garlic, and Parmesan cheese in a rich Tuscan-style sauce. This restaurant-quality dish brings together simple ingredients to create a cozy homemade dinner that is perfect for busy weeknights, family meals, or special occasions. The tender chicken is seasoned with herbs and spices, then paired with creamy orzo that absorbs all the delicious flavors from the garlic, broth, and Parmesan sauce. Sun-dried tomatoes add a sweet and tangy depth, while fresh spinach brings color, freshness, and extra nutrients. This recipe is a perfect balance of protein, creamy texture, and Mediterranean-inspired flavors. Unlike traditional pasta dishes, orzo cooks quickly and creates a risotto-like texture while still being easy to prepare. It is a great option for anyone who loves creamy pasta dishes but wants something unique and flavorful. Serve this Tuscan Chicken Orzo with a side salad, roasted vegetables, or crusty bread to complete the meal. Whether you are cooking for your family or preparing a comforting dinner for guests, this easy Tuscan recipe will quickly become a favorite.

Ingredients For the Chicken

  • 1½ pounds boneless, skinless chicken breasts or thighs
  • 2 tablespoons olive oil
  • 1 teaspoon Italian seasoning
  • 1 teaspoon paprika
  • 1 teaspoon garlic powder
  • ½ teaspoon onion powder
  • 1 teaspoon salt
  • ½ teaspoon black pepper

For the Tuscan Orzo

  • 2 cups uncooked orzo pasta
  • 3 cloves garlic, minced
  • 1 small onion, finely diced
  • 3 cups chicken broth
  • 1 cup heavy cream
  • 1 cup grated Parmesan cheese
  • 1 cup sun-dried tomatoes, chopped
  • 3 cups fresh spinach
  • 1 tablespoon butter
  • 1 teaspoon Italian seasoning
  • ½ teaspoon red pepper flakes (optional)
  • Fresh basil or parsley for garnish

Optional Additions

  • Mushrooms
  • Cherry tomatoes
  • Mozzarella cheese
  • Extra spinach
  • Lemon zest
  • Fresh oregano

Step-by-Step Instructions

  1. Season the chicken breasts or thighs with Italian seasoning, paprika, garlic powder, onion powder, salt, and black pepper. Make sure the chicken is evenly coated.
  2. Heat olive oil in a large skillet over medium-high heat.
  3. Add the chicken and cook for 5–7 minutes per side until golden brown and fully cooked. Remove the chicken from the pan and set aside.
  4. In the same skillet, add butter and diced onion. Cook for 2–3 minutes until softened.
  5. Add minced garlic and cook for 30 seconds until fragrant.
  6. Stir in the uncooked orzo pasta and lightly toast for 1 minute to enhance the flavor.
  7. Pour in chicken broth and bring the mixture to a gentle simmer.
  8. Cook the orzo for 8–10 minutes, stirring occasionally, until tender and most of the liquid is absorbed.
  9. Add heavy cream, Parmesan cheese, Italian seasoning, and sun-dried tomatoes. Stir until the sauce becomes creamy.
  10. Add fresh spinach and cook until wilted.
  11. Slice the cooked chicken and place it back into the skillet over the creamy Tuscan orzo.
  12. Simmer for another 2–3 minutes so the flavors combine.
  13. Garnish with fresh basil, parsley, extra Parmesan, or lemon zest before serving.

Tips, Notes & Q/A

  • Use chicken thighs for a juicier result or chicken breast for a leaner version.
  • Do not rinse orzo before cooking because the starch helps create a creamy texture.
  • Stir the orzo occasionally while cooking to prevent sticking.
  • Freshly grated Parmesan melts better and creates a smoother sauce.
  • Add extra chicken broth if the orzo absorbs too much liquid before becoming tender.
  • For a lighter version, replace heavy cream with half-and-half or evaporated milk.
  • Add mushrooms or roasted vegetables for extra flavor and nutrition.
  • Let the dish rest for a few minutes before serving so the sauce thickens naturally.
  • Store leftovers in an airtight container in the refrigerator for up to 4 days.
  • Reheat gently with a splash of broth or cream to bring back the creamy texture.

Can I use rotisserie chicken?
Yes, shredded rotisserie chicken can be added at the end for a faster version.

Can I make this recipe gluten-free?
Yes, use gluten-free orzo or another gluten-free pasta alternative.

Can I freeze Tuscan Chicken Orzo?
Cream-based pasta dishes are best fresh, but leftovers can be frozen. The texture may slightly change after reheating.

What can I serve with this dish?
It pairs well with garlic bread, Caesar salad, roasted vegetables, or steamed greens.

Can I add more vegetables?
Yes, zucchini, mushrooms, broccoli, or bell peppers work beautifully.

Servings & Nutrition

This recipe makes approximately 6 servings. Each serving contains an estimated 520–600 calories, 40–45g protein, 45–55g carbohydrates, 22–30g fat, and 4–6g fiber, depending on ingredients used. Chicken provides lean protein, while spinach and sun-dried tomatoes add vitamins, minerals, and antioxidants. Parmesan cheese adds calcium and rich flavor, while orzo provides satisfying energy. Easy Tuscan Chicken Orzo is a delicious, creamy, and wholesome meal perfect for family dinners, meal prep, and comforting Italian-inspired cooking.

Mexican Street Corn White Chicken Chilli

Mexican Street Corn White Chicken Chilli

This Mexican street corn white chicken chilli is creamy, comforting, and packed with bold flavour. Inspired by the flavours of elote (Mexican street corn), this dish combines tender shredded chicken, a rich and creamy broth, sweet corn, jalapeño heat, and cheesy goodness in every spoonful. It’s hearty enough for dinner, cosy enough for cold nights, and flavourful enough to become a family favourite.

Ingredients

  • 4 boneless, skinless chicken breasts
  • 1 yellow onion, chopped
  • 1 jalapeño, diced (remove seeds for less heat)
  • 4 cups chicken bone broth
  • 1½ cups sour cream
  • ½ cup shredded Monterey Jack cheese (or a Monterey Jack + mild cheddar blend)
  • 4 cloves garlic, minced
  • 2 cups corn kernels (fresh, frozen, or canned and drained)
  • 1 tablespoon olive oil
  • 1 teaspoon cumin
  • 1 teaspoon chili powder
  • ½ teaspoon smoked paprika
  • Salt and black pepper to taste
  • Juice of 1 lime
  • Fresh coriander for garnish
  • Optional topping: cotija cheese, tortilla strips, avocado slices

Instructions

  1. Heat olive oil in a large pot over medium heat. Add chopped onion and sauté for 3–4 minutes until softened.
  2. Add minced garlic and jalapeño. Cook for another 30–60 seconds until fragrant.
  3. Stir in cumin, chilli powder, smoked paprika, salt, and black pepper.
  4. Add chicken breasts and pour in chicken bone broth. Bring to a gentle boil, then reduce heat and simmer for 20–25 minutes until chicken is fully cooked and tender.
  5. Remove chicken, shred it using two forks, and return it to the pot.
  6. Stir in corn and simmer for 5–10 minutes so flavours combine.
  7. Lower heat and mix in sour cream and shredded cheese until the chilli becomes creamy and smooth. Do not boil after adding dairy.
  8. Finish with lime juice and adjust seasoning if needed.
  9. Serve warm, garnished with cilantro and optional toppings like cotija cheese, tortilla strips, or avocado.

Description Notes

This chilli brings together the smoky, creamy, and tangy flavours of Mexican street corn in a warm, hearty bowl. The bone broth adds depth, while sour cream and cheese create a silky texture. Corn adds natural sweetness, and jalapeño gives just the right amount of heat.

Helpful Tips

  • Use rotisserie chicken for a quicker version.
  • Don’t let the chilli boil after adding sour cream to prevent curdling.
  • Fresh lime juice brightens the entire dish.
  • Add extra cheese for a thicker, richer texture.
  • For more spice, include extra jalapeño or a pinch of cayenne.

Servings

Serves 6–8 people.

Nutritional Information (Approximate Per Serving)

  • Calories: 420
  • Protein: 38g
  • Carbohydrates: 14g
  • Fat: 24g
  • Fiber: 2g
  • Sugar: 4g

Benefits of This Recipe

  • High in protein for muscle support and fullness.
  • Bone broth adds collagen and nutrients.
  • Corn provides fibre and natural sweetness.
  • Jalapeños may boost metabolism.
  • A comforting, balanced one-pot meal.

Questions & Answers

Q: Can I make this ahead of time?
Yes, it reheats well and can be stored for up to 4 days in the fridge.

Q: Can I freeze this chilli?
It can be frozen, but add sour cream and cheese after reheating for best texture.

Q: Can I use rotisserie chicken?
Absolutely. Add shredded chicken during the final simmer stage.

Q: How can I make it thicker?
Simmer longer or add extra cheese or a small cornflour slurry.

Q: Is this recipe spicy?
It’s mild to medium, but you can adjust heat by changing the jalapeño amount.

Q: What toppings work best?
Cotija cheese, avocado, lime wedges, cilantro, and tortilla strips all work great.

This Mexican Street Corn White Chicken Chilli is creamy, bold, and deeply satisfying — a cosy bowl of comfort with a bright, zesty twist.

Cheesy Low-Calorie Vegetable Casserole

Cheesy Low-Calorie Vegetable Casserole

A Colorful, Creamy & Satisfying Vegetable Bake

This cheesy low-calorie vegetable casserole is loaded with colourful vegetables, a light and creamy herb sauce, and a delicious golden cheese topping.

The casserole shown is packed with tender broccoli, juicy cherry tomatoes, sweet bell peppers, and red onion. Everything is coated in a creamy, herb-seasoned sauce and baked until the vegetables are tender and the cheese is melted and bubbly.

It makes a wonderful lunch, light dinner, or healthy side dish. You can also customise the vegetables based on what you have at home.

Important note: This recipe can be part of a balanced, calorie-conscious eating plan, but eating one food “day and night” does not guarantee rapid weight loss. Sustainable results usually come from an overall balanced diet and appropriate portions.

 Ingredients

For the Vegetable Casserole

  • 4 cups broccoli florets
  • 1½ cups cherry tomatoes
  • 1 large yellow or orange bell pepper, chopped
  • 1 red bell pepper, chopped
  • ½ medium red onion, sliced
  • 1 tablespoon olive oil
  • ½ teaspoon salt, or to taste
  • ¼ teaspoon black pepper
  • ½ teaspoon garlic powder
  • ½ teaspoon dried Italian herbs

For the Creamy Herb Sauce

  • 1 cup plain Greek yogurt
  • ½ cup low-fat cottage cheese
  • 2 cloves garlic, finely minced
  • 1 tablespoon fresh lemon juice
  • 2 tablespoons fresh parsley, finely chopped
  • 1 tablespoon fresh dill, chopped
  • ½ teaspoon dried oregano
  • ¼ teaspoon black pepper
  • Salt, to taste

For the Cheese Topping

  • ¾ cup shredded mozzarella cheese
  • ¼ cup grated Parmesan cheese

Optional Additions

  • 1 teaspoon Dijon mustard
  • Red pepper flakes for heat
  • 1 cup sliced mushrooms
  • 1 small zucchini, sliced
  • Fresh basil
  • Extra herbs for garnish

 Instructions

Step 1: Preheat the oven.

Preheat your oven to 400°F (200°C).

Lightly grease a large baking dish with a small amount of olive oil or cooking spray.

A casserole dish measuring approximately 9×13 inches works well for this recipe.

Step 2: Prepare the Broccoli

Wash the broccoli thoroughly and cut it into medium-sized florets.

Try to keep the pieces relatively similar in size so they cook evenly.

If your broccoli florets are very large, cut them into smaller pieces. This helps them become tender without overcooking the other vegetables.

Place the prepared broccoli into a large mixing bowl.

Step 3: Prepare the Remaining Vegetables

Wash the cherry tomatoes and leave them whole.

Cut the yellow or orange bell pepper into bite-sized chunks.

Chop the red bell pepper.

Thinly slice the red onion.

Add all the vegetables to the bowl with the broccoli.

Drizzle with 1 tablespoon olive oil and season with salt, black pepper, garlic powder, and dried Italian herbs.

Toss everything together until the vegetables are lightly coated.

Step 4: Make the Creamy Herb Sauce

In a medium bowl, combine:

  • Greek yogurt
  • Cottage cheese
  • Minced garlic
  • Fresh lemon juice
  • Chopped parsley
  • Fresh dill
  • Dried oregano
  • Black pepper
  • Salt

Mix well until combined.

For an extra-smooth sauce, you can blend the cottage cheese and Greek yoghurt together before adding the remaining ingredients.

The sauce should be creamy but thick enough to coat the vegetables.

If it seems extremely thick, add 1–2 tablespoons of water or milk to loosen it slightly.

Step 5: Combine the Vegetables and Sauce

Pour about three-quarters of the creamy herb sauce over the vegetables.

Toss gently until the broccoli, peppers, onion, and tomatoes are lightly coated.

Do not worry if every piece is not completely covered. The vegetables will release some moisture as they bake, creating a delicious creamy mixture.

Transfer the vegetables to your prepared casserole dish.

Spread them evenly across the dish.

Step 6: Add the Remaining Sauce

Spoon the remaining creamy herb sauce over the top of the vegetables.

Use the back of a spoon to spread it gently.

This creates a rich and creamy layer throughout the casserole without requiring a large amount of heavy cream.

Step 7: Add the Cheese

Sprinkle the shredded mozzarella evenly over the vegetables.

Finish with the grated Parmesan cheese.

The mozzarella creates a delicious melted topping, while the Parmesan adds extra savoury flavour and helps the surface become lightly golden.

Step 8: Bake the Casserole

Cover the baking dish loosely with foil.

Bake for 20 minutes.

After 20 minutes, remove the foil and continue baking for another 10–15 minutes.

The casserole is ready when:

  • The broccoli is tender but still has some texture.
  • The tomatoes are soft and juicy.
  • The peppers are tender.
  • The cheese is melted and lightly golden.

For a more golden cheese topping, place the casserole under the broiler for 1–2 minutes.

Watch it carefully during broiling because the cheese can brown quickly.

Step 9: Rest Before Serving

Remove the casserole from the oven and allow it to rest for 5–10 minutes.

This gives the creamy sauce time to settle slightly.

Sprinkle with fresh parsley, dill, or basil before serving if desired.

Serve warm and enjoy!

 Recipe Description

This vegetable casserole is a wonderful example of how simple vegetables can be transformed into a comforting and satisfying meal.

The broccoli provides a hearty base, while the colourful bell peppers add natural sweetness. Cherry tomatoes become soft and juicy during baking, creating little bursts of flavour throughout the dish.

Red onion adds a mild savoury flavour that becomes sweeter as it cooks.

The creamy Greek yoghurt and cottage cheese mixture provides richness while also adding protein. Fresh herbs, garlic, and lemon juice brighten the flavour and prevent the casserole from tasting heavy.

Finally, a modest layer of mozzarella and Parmesan creates the delicious melted cheese topping that makes this dish feel comforting and satisfying.

 Recipe Notes

Use Fresh Vegetables

Fresh broccoli and firm bell peppers work especially well in this casserole.

Frozen broccoli can also be used, but it should be thawed and drained well first. Frozen vegetables often release extra water during baking.

Don’t Overcook the Broccoli

The broccoli should become tender but should not turn completely mushy.

Keep an eye on the casserole during the final few minutes of baking.

Cooking time may vary depending on the size of your vegetable pieces and your oven.

Choose Thick Greek Yogurt

Thick Greek yoghurt works best for the creamy sauce.

Very thin yoghurt may release additional liquid during baking.

If your yoghurt is thin, you can strain it briefly before using.

Cottage Cheese Adds Creaminess

Cottage cheese gives the sauce a creamy texture and adds protein.

If you do not enjoy its texture, blend it before mixing it with the other sauce ingredients.

This creates a smoother, creamier result.

 Helpful Tips

1. Cut Vegetables Evenly

Try to cut the broccoli and peppers into similar-sized pieces.

This helps everything cook evenly.

Large pieces may remain firm while smaller pieces become too soft.

2. Don’t Add Too Much Oil

Vegetables do not need a large amount of oil to roast successfully.

One tablespoon is usually enough to lightly coat the vegetables.

This helps keep the recipe lighter while still adding flavour.

3. Add More Protein

If you want to turn this casserole into a more filling main meal, add one of the following:

  • 1½ cups cooked shredded chicken
  • 1 can chickpeas, drained and rinsed
  • 1 cup cooked white beans
  • Lean ground turkey
  • Cooked lentils

Add cooked protein before baking.

4. Make It Vegetarian

The basic recipe is vegetarian.

For a vegetarian meal, make sure any Parmesan or cheese you use fits your preferred dietary requirements.

5. Make It Lower in Dairy

You can reduce the amount of cheese or use your preferred lower-fat cheese.

For a dairy-free version, experiment with a plant-based yoghurt and cheese alternative suitable for baking.

The texture and flavour may vary.

6. Add More Vegetables

This recipe is easy to customise.

Try adding:

  • Zucchini
  • Mushrooms
  • Cauliflower
  • Spinach
  • Green beans
  • Brussels sprouts

Be aware that watery vegetables such as zucchini may release additional moisture.

 Serving Suggestions

This casserole can be enjoyed in several ways.

As a Light Main Dish

Serve a generous portion with a fresh side salad.

For additional protein, add grilled chicken, fish, beans, or chickpeas.

As a Side Dish

Pair it with:

  • Grilled chicken
  • Baked salmon
  • Turkey
  • Lean beef
  • Mediterranean-style fish

For Meal Prep

Divide the cooled casserole into individual containers.

Pair each serving with your preferred protein source for convenient lunches.

 Servings

This recipe makes approximately the following:

6 servings as a side dish

or

4 servings as a light main meal

Serving sizes can be adjusted depending on what else you serve with the casserole.

 Preparation and Cooking Time

Preparation Time: 20 minutes
Cooking Time: 30–35 minutes
Resting Time: 5–10 minutes

Total Time: Approximately 55–65 minutes

 Nutritional Information

Approximate nutrition per serving

Based on 6 servings:

  • Calories: 180–230 kcal
  • Protein: 11–14 g
  • Carbohydrates: 16–20 g
  • Fat: 8–11 g
  • Fiber: 4–6 g
  • Sugar: 7–10 g
  • Sodium: Varies depending on the cheese and added salt

These values are estimates and may vary depending on the exact brands, ingredients, and serving sizes used.

Adding chicken, beans, extra cheese, or other ingredients will change the nutritional values.

 Potential Benefits

1. Contains a Variety of Vegetables

This casserole includes broccoli, tomatoes, peppers, and onion.

Including a variety of vegetables can add different flavours, textures, vitamins, minerals, and fibre to your overall eating pattern.

2. Provides Dietary Fiber

Vegetables naturally contribute dietary fibre.

Fibre is an important part of a balanced diet and can help support normal digestion and contribute to feelings of fullness.

3. Contains Protein

Greek yoghurt, cottage cheese, and cheese contribute protein to the recipe.

If you need a higher-protein meal, you can add chicken, beans, or another protein source.

4. Lower in Calories Than Many Creamy Casseroles

Traditional creamy casseroles may use large amounts of butter, heavy cream, or rich sauces.

This version uses Greek yoghurt and cottage cheese to create creaminess without relying entirely on heavy cream.

However, the total calorie content still depends on portion size and the exact ingredients used.

5. Colorful and Satisfying

A variety of colourful vegetables can make meals more visually appealing and enjoyable.

The creamy sauce and melted cheese also make the vegetables feel comforting and satisfying.

 Frequently Asked Questions

Q1: Can I make this casserole ahead of time?

Yes.

You can prepare the vegetables and creamy sauce ahead of time.

Store them separately in the refrigerator and assemble before baking.

For the best texture, bake the casserole shortly before serving.

Q2: Can I use frozen broccoli?

Yes.

Thaw the frozen broccoli first and drain it well.

Excess water can make the casserole watery.

Q3: Can I add chicken?

Absolutely!

Add approximately 1½ to 2 cups of cooked shredded or diced chicken.

Mix it with the vegetables before adding the sauce and baking.

Q4: Can I make this recipe vegan?

Yes, with substitutions.

Use a thick plant-based yoghurt, a dairy-free cottage cheese alternative if available, and plant-based shredded cheese.

The final flavour and texture may differ from the original recipe.

Q5: Why is my casserole watery?

Vegetables naturally release moisture during cooking.

To reduce excess liquid:

  • Dry-washed vegetables well.
  • Avoid overcrowding the dish.
  • Use thick Greek yoghurt.
  • Drain frozen vegetables thoroughly.
  • Avoid adding too much extra liquid.

Q6: Can I use cauliflower instead of broccoli?

Yes!

Cauliflower works very well in this recipe.

You can replace all or half of the broccoli with cauliflower florets.

Q7: How do I store leftovers?

Allow the casserole to cool completely.

Store leftovers in an airtight container in the refrigerator for up to 3 days.

Q8: How do I reheat it?

Reheat individual portions in the microwave until hot.

For a larger amount, reheat in the oven at 350°F (175°C) until warmed through.

You may cover the dish with foil while reheating to prevent the cheese from becoming too brown.

Q9: Can I freeze this casserole?

Freezing is possible, but the texture of the vegetables and yoghurt-based sauce may change after thawing.

For the best texture, this casserole is recommended fresh or refrigerated for a few days.

Q10: Will eating this casserole alone make me lose weight quickly?

No single recipe can guarantee quick weight loss.

This casserole can be a nutritious, lower-calorie meal option, but weight changes depend on many factors, including your overall diet, portion sizes, activity level, and individual needs.

For sustainable results, enjoy a variety of balanced foods rather than relying on only one dish day and night.

 Final Thoughts

This cheesy low-calorie vegetable casserole is fresh, colourful, creamy, and incredibly satisfying.

With tender broccoli, juicy cherry tomatoes, sweet peppers, savoury onion, a creamy herb sauce, and a golden melted cheese topping, it’s a delicious way to enjoy more vegetables.

Cranberry Almond Feta Orzo Salad

Cranberry Almond Feta Orzo Salad

Description

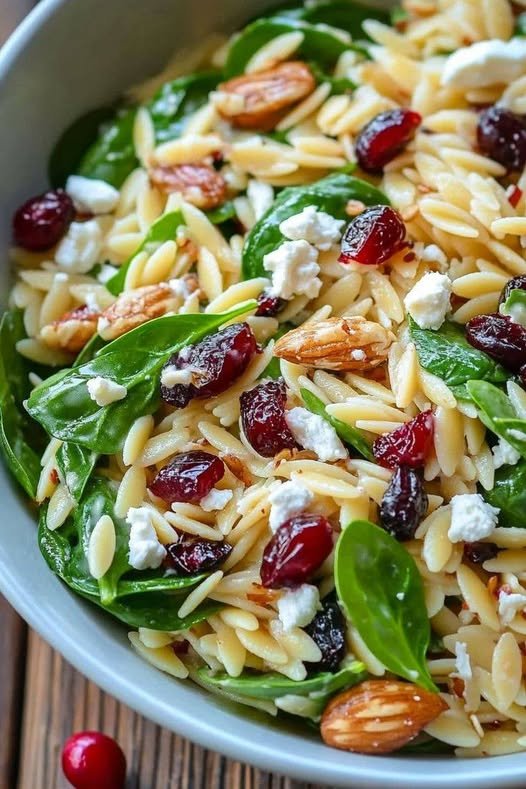
Cranberry Almond Feta Orzo Salad is a colorful Mediterranean-inspired salad that brings together tender orzo pasta, fresh spinach, sweet dried cranberries, crunchy sliced almonds, and creamy, salty feta cheese. Everything is tossed in a bright homemade lemon-herb dressing that gives the salad a fresh, tangy flavor.

This salad is especially delicious because every bite has a different texture. The orzo is soft and satisfying, cranberries add chewy sweetness, almonds provide crunch, spinach brings freshness, and feta adds a creamy, savory finish. The combination of sweet, salty, tangy, and nutty flavors makes this a salad that feels much more special than an ordinary pasta salad.

It works beautifully as a light lunch, side dish, potluck recipe, meal-prep option, or Mediterranean-inspired dinner. It can be served slightly warm, at room temperature, or chilled.

 Ingredients

For the Orzo Salad

  • 1½ cups dry orzo
  • 3 cups fresh baby spinach, roughly chopped
  • ¾ cup dried cranberries
  • ½ cup sliced almonds
  • ¾ cup crumbled feta cheese
  • ¼ cup fresh parsley, chopped
  • 2 tablespoons fresh mint, chopped, optional
  • ¼ cup thinly sliced red onion
  • ½ cup cucumber, diced, optional

For the Lemon-Herb Dressing

  • ⅓ cup extra-virgin olive oil
  • 3 tablespoons fresh lemon juice
  • 1 teaspoon lemon zest
  • 1 tablespoon red wine vinegar
  • 1 teaspoon Dijon mustard
  • 1 teaspoon honey or maple syrup
  • 1 small garlic clove, finely minced
  • ½ teaspoon dried oregano
  • ¼ teaspoon black pepper
  • ¼ teaspoon salt, or to taste

Optional Garnishes

  • Extra feta
  • Extra toasted almonds
  • Fresh parsley
  • Lemon zest
  • Lemon wedges
  • A drizzle of olive oil

 How to Make Cranberry Almond Feta Orzo Salad

Step 1: Cook the Orzo

Bring a large pot of salted water to a boil. Add the orzo and cook according to the package instructions until al dente.

Avoid overcooking the orzo because soft pasta can make the salad mushy. Once cooked, drain thoroughly.

For a chilled salad, rinse the orzo briefly under cool water to stop the cooking process. For a warmer salad, simply drain it and allow it to cool slightly.

Transfer the cooked orzo to a large mixing bowl.

Step 2: Toast the Almonds

While the orzo cooks, place the sliced almonds in a dry skillet over medium-low heat.

Toast for approximately 3–5 minutes, stirring frequently. The almonds should become lightly golden and fragrant.

Watch them carefully because sliced almonds can burn quickly.

Remove them from the skillet immediately and allow them to cool.

Toasting the almonds is optional, but it gives them a deeper nutty flavor and makes the salad much more aromatic.

Step 3: Prepare the Dressing

In a small bowl or jar, combine:

  • Olive oil
  • Fresh lemon juice
  • Lemon zest
  • Red wine vinegar
  • Dijon mustard
  • Honey
  • Garlic
  • Oregano
  • Black pepper
  • Salt

Whisk vigorously until the dressing becomes smooth and slightly emulsified.

Taste the dressing and adjust it according to your preference. Add more lemon for brightness, a little honey for sweetness, or extra black pepper for more flavor.

Step 4: Combine the Salad

Add the fresh spinach, dried cranberries, toasted almonds, red onion, parsley, and optional cucumber to the bowl with the orzo.

Pour approximately three-quarters of the dressing over the mixture.

Toss gently until everything is evenly coated.

The slightly warm orzo can absorb the dressing beautifully, helping the flavors develop throughout the salad.

Step 5: Add the Feta

Gently fold in the crumbled feta cheese.

Don’t overmix after adding the feta because you want some larger pieces of cheese to remain visible throughout the salad.

Reserve a little feta and a few almonds for the top.

Step 6: Rest Before Serving

Allow the salad to rest for approximately 10–15 minutes before serving.

This gives the orzo time to absorb the lemon-herb dressing and allows the cranberries to soften slightly.

Taste again before serving. Add the remaining dressing if needed.

Finish with fresh parsley, extra feta, toasted almonds, and a little lemon zest.

 Servings

Serves: 6–8 as a side dish
Serves: 4–5 as a light main meal

This recipe is easy to double for parties, family gatherings, picnics, or potlucks.

 Recipe Timing

Prep Time: 15 minutes
Cook Time: 10–12 minutes
Cooling/Resting: 10–15 minutes
Total Time: Approximately 35–40 minutes


🌿 Why You’ll Love This Salad

There are many reasons this recipe deserves a place in your regular meal rotation.

1. Easy to Make

The entire recipe comes together with simple ingredients and straightforward preparation. There are no complicated cooking techniques.

2. Beautiful Presentation

The green spinach, ruby-red cranberries, white feta, golden almonds, and pale orzo create a colorful dish that looks beautiful on a serving table.

3. Amazing Texture

The combination of tender orzo, chewy cranberries, crunchy almonds, fresh spinach, and creamy feta makes every bite interesting.

4. Great for Gatherings

This salad can easily be prepared in advance, making it excellent for potlucks, picnics, barbecues, holidays, and family dinners.

5. Versatile

You can easily change the ingredients depending on what you have available.

 Important Recipe Tips

Don’t Overcook the Orzo

Orzo cooks quickly. Check it a minute or two before the package’s recommended cooking time. You want it tender but still slightly firm.

Toast Your Almonds

Although optional, toasted almonds make a noticeable difference. Their nutty aroma and crunchy texture elevate the entire salad.

Use Fresh Lemon

Freshly squeezed lemon juice provides a much brighter flavor than bottled lemon juice.

Add Feta Last

Feta can break down if tossed too aggressively. Fold it in gently toward the end.

Don’t Overdress

Start with most of the dressing and reserve some for later. Orzo absorbs liquid as it sits, so you may want to add additional dressing just before serving.

Taste Before Adding Salt

Feta and dried cranberries can already contribute plenty of flavor, so taste the salad before adding more salt.

 Recipe Variations

Mediterranean Chickpea Version

Add 1 cup drained and rinsed chickpeas for additional texture and a more filling salad.

Chicken Orzo Salad

Add approximately 1½ cups cooked diced or grilled chicken to transform this side dish into a complete meal.

Lemon-herb grilled chicken works particularly well.

Spinach-Free Version

If you don’t have spinach, substitute arugula, baby kale, chopped romaine, or mixed greens.

Nut Substitutions

Replace almonds with:

  • Walnuts
  • Pecans
  • Pistachios
  • Cashews
  • Pumpkin seeds

Pistachios are especially delicious with cranberries and feta.

Add Fresh Fruit

For a sweeter summer version, add diced apple, pear, grapes, or fresh orange segments.

Add More Mediterranean Flavor

Try adding:

  • Kalamata olives
  • Roasted red peppers
  • Artichoke hearts
  • Cherry tomatoes
  • Cucumber
  • Fresh basil
  • Fresh mint

 Dressing Adjustments

The lemon-herb dressing is one of the most important components of this recipe.

For a more tangy dressing, increase the lemon juice.

For a sweeter dressing, add another teaspoon of honey or maple syrup.

For a more savory dressing, increase the garlic and oregano.

For a spicier dressing, add a pinch of red pepper flakes.

For a stronger Mediterranean flavor, add a little more extra-virgin olive oil and dried oregano.

 Make-Ahead Instructions

This salad is excellent for meal preparation.

You can cook the orzo and prepare the dressing several hours ahead of time. Store them separately until you’re ready to assemble the salad.

If making the entire salad ahead, refrigerate it in an airtight container.

Before serving, allow it to sit at room temperature for approximately 10–15 minutes and toss gently.

The orzo may absorb some of the dressing while refrigerated. If the salad seems dry, add another splash of olive oil and lemon juice.

 Storage

Store leftovers in an airtight container in the refrigerator.

The salad is best enjoyed within approximately 3 days.

Because spinach can soften over time, the freshest texture comes from eating the salad within the first day or two.

If preparing this specifically for meal prep, consider keeping the spinach separate and mixing it in shortly before serving.

 Approximate Nutritional Information

Nutrition varies depending on the exact ingredients and portion size.

Estimated per serving:

  • Calories: 350–400
  • Protein: 9–12 g
  • Carbohydrates: 40–45 g
  • Fat: 18–21 g
  • Saturated Fat: 4–5 g
  • Fiber: 3–4 g
  • Sugar: 9–11 g
  • Sodium: 350–450 mg

Adding chicken or chickpeas will increase the protein and overall calorie content.

 Benefits of the Ingredients

This recipe contains a variety of nutrient-rich ingredients, although it should still be viewed as a balanced meal or side rather than a specific health treatment.

Spinach

Fresh spinach contributes fiber and several vitamins and minerals while adding beautiful color and freshness.

Almonds

Almonds provide plant-based protein, fiber, and unsaturated fats. They also add satisfying crunch.

Feta

Feta contributes protein and calcium along with its characteristic salty, tangy flavor.

Cranberries

Dried cranberries provide sweetness and chewy texture. Many commercially available varieties contain added sugar, so reduced-sugar versions can be used if preferred.

Olive Oil

Extra-virgin olive oil contributes monounsaturated fats and is a staple of Mediterranean-style cooking.

Lemon

Fresh lemon juice adds acidity and brightness, helping balance the richness of the olive oil and feta.

Herbs

Parsley, mint, and oregano add fresh flavor without needing large amounts of salt or heavy sauces.

 Frequently Asked Questions

Can I make this salad ahead of time?

Yes. In fact, the flavors often become even better after resting. Prepare it several hours ahead and refrigerate until ready to serve.

Can I serve it warm?

Absolutely. Serve the orzo slightly warm with fresh spinach, feta, cranberries, and almonds. The spinach will soften slightly from the warmth of the pasta.

Should I rinse the orzo?

For a cold pasta salad, rinsing the cooked orzo under cool water helps stop the cooking process and cool it quickly. For a warm salad, draining without rinsing works well.

Can I use another pasta?

Yes. Small pasta shapes such as pearl couscous, small shells, ditalini, or farfalle can work well.

Can I use fresh cranberries?

Dried cranberries are recommended because they provide the chewy sweetness that balances the feta. Fresh cranberries are much more tart and have a different texture.

Can I make it dairy-free?

Yes. Omit the feta or use a dairy-free feta alternative.

Can I make it vegetarian?

Yes. The basic recipe is vegetarian as written.

Can I add chicken?

Definitely. Grilled lemon-herb chicken is an excellent addition and turns the salad into a satisfying main course.

Can I use baby kale instead of spinach?

Yes. Baby kale works particularly well, although it has a slightly stronger flavor and firmer texture.

How can I prevent the salad from becoming dry?

Reserve some dressing when initially mixing the salad. Add it shortly before serving if the orzo absorbs too much moisture.

What cheese can replace feta?

Goat cheese is a great substitute. Crumbled ricotta salata can also work, although the flavor will be different.

Is this good for a party?

Absolutely. Its colorful appearance and make-ahead convenience make it an excellent potluck or party salad.

Can I make it gluten-free?

Yes, use certified gluten-free orzo or substitute it with a gluten-free grain such as quinoa or rice.

Cranberry Pistachio Shortbread Cookies

Cranberry Pistachio Shortbread Cookies

Description

These Cranberry Pistachio Shortbread Cookies are buttery, tender, lightly crisp, and filled with the perfect combination of sweet-tart dried cranberries and crunchy pistachios. They have a delicate melt-in-your-mouth texture and a beautiful festive appearance, making them perfect for holiday cookie trays, afternoon tea, gifting, parties, or simply enjoying with a cup of coffee.

Shortbread is wonderfully simple because it relies on a few quality ingredients. Butter provides richness, powdered sugar creates a delicate texture, and flour gives the cookies their classic crumbly structure. Dried cranberries add chewy bursts of fruity flavor, while pistachios contribute a pleasant crunch and subtle nuttiness.

The dough can be prepared ahead of time and chilled, making these cookies convenient for entertaining or holiday baking. You can also prepare the dough, shape it into a log, freeze it, and slice and bake the cookies whenever you need a fresh batch.

 Ingredients

For the Cookies

  • 1 cup (226 g) unsalted butter, softened
  • ¾ cup (90 g) powdered sugar
  • 1 teaspoon pure vanilla extract
  • ½ teaspoon almond extract, optional
  • 2 cups (250 g) all-purpose flour
  • ¼ teaspoon salt
  • ¾ cup (90 g) dried cranberries, finely chopped
  • ½ cup (60 g) shelled pistachios, finely chopped
  • 1 teaspoon orange zest, optional

Optional Decoration

  • ½ cup white chocolate, melted
  • 2 tablespoons finely chopped pistachios
  • 2 tablespoons finely chopped dried cranberries

 Instructions

1. Prepare the Dough

Start by placing the softened butter in a large mixing bowl. Beat it with an electric mixer for about 1–2 minutes until smooth and creamy.

Add the powdered sugar and continue mixing until the butter becomes light and fluffy. Add vanilla extract, almond extract if using, and orange zest.

The orange zest is optional, but it adds a beautiful citrus note that complements both the cranberries and pistachios.

2. Add the Dry Ingredients

In a separate bowl, whisk together the flour and salt.

Gradually add the dry ingredients to the butter mixture. Mix on low speed just until a soft dough begins to form.

Avoid overmixing. Shortbread should remain tender and crumbly rather than becoming tough.

3. Add Cranberries and Pistachios

Fold the chopped dried cranberries and pistachios into the dough using a spatula.

Make sure they are distributed evenly throughout the mixture so every cookie gets plenty of cranberry and pistachio pieces.

4. Shape the Dough

Place the dough on a sheet of parchment paper.

Shape it into a log approximately 2 inches in diameter. Roll the parchment tightly around the dough and twist the ends to secure it.

For a slightly different shape, you can press the dough into a lined square baking pan and cut it into bars after baking.

5. Chill

Refrigerate the dough for at least 1 hour.

Chilling is an important step because it firms the butter and helps the cookies maintain their shape while baking.

For convenience, the dough can be refrigerated overnight.

6. Slice the Cookies

Preheat your oven to 350°F (175°C).

Remove the chilled dough from the refrigerator and unwrap it. Using a sharp knife, slice it into rounds approximately ¼-inch thick.

Arrange the cookies on parchment-lined baking sheets, leaving about 1 inch of space between them.

7. Bake

Bake for approximately 10–14 minutes, or until the edges are lightly golden.

The centers may still look pale, which is completely normal for shortbread. Avoid overbaking because this can make the cookies dry and overly hard.

Allow the cookies to cool on the baking sheet for about 5 minutes before transferring them to a wire rack.

8. Decorate

Once completely cool, drizzle the cookies with melted white chocolate.

Immediately sprinkle with chopped pistachios and dried cranberries if desired.

Allow the chocolate to set before serving or storing.

 Recipe Information

Prep Time: 20 minutes
Chilling Time: 1 hour
Bake Time: 10–14 minutes
Total Time: About 1 hour 35 minutes

Yield: Approximately 28–32 cookies

Difficulty: Easy

 Serving Suggestions

These cookies are delicious on their own, but they also pair beautifully with hot beverages.

Serve them with:

  •  Coffee
  •  Black tea
  •  Chai
  • Hot chocolate
  •  Warm milk
  •  Orange-spiced tea

For a beautiful holiday dessert platter, arrange the cookies alongside chocolate-dipped strawberries, truffles, biscotti, or other homemade cookies.

They also make lovely edible gifts. Place them in a decorative tin or clear cookie bag tied with ribbon for a simple homemade present.

 Important Tips for Perfect Shortbread

Use Softened Butter

The butter should be softened enough to mix easily but should not be melted. Melted butter can cause the cookies to spread excessively.

Don’t Overmix

Once the flour is incorporated, stop mixing. Overworking the dough can develop gluten and make the shortbread less tender.

Chill the Dough

Don’t skip the chilling step. Cold dough produces cookies with cleaner edges and a better texture.

Chop the Mix-Ins

Large pieces of pistachio or cranberry can make the dough difficult to slice. Finely chopping them creates more evenly distributed flavor.

Use Fresh Pistachios

Pistachios should taste fresh and pleasantly nutty. Avoid nuts that have a stale or bitter flavor.

Don’t Overbake

Shortbread should be delicate and lightly golden around the edges. If the cookies become deeply brown, they may lose their tender texture.

Cool Completely Before Decorating

White chocolate melts easily, so make sure the cookies are completely cool before decorating.

 Easy Variations

Orange Cranberry Pistachio Shortbread

Add 1–2 teaspoons of orange zest to the dough. Orange and cranberry create a classic sweet-tart combination, while pistachios add richness.

Chocolate-Dipped Shortbread

Dip half of each cooled cookie into melted dark or white chocolate. Sprinkle with chopped pistachios before the chocolate sets.

Lemon Pistachio Shortbread

Replace the orange zest with 1 teaspoon lemon zest for a brighter citrus flavor.

Almond Cranberry Shortbread

Use almond extract and add a small handful of sliced almonds for an extra nutty variation.

White Chocolate Cranberry Pistachio Cookies

Add ½ cup white chocolate chips directly to the dough for an extra creamy, sweet flavor.

Gluten-Free Version

Use a reliable 1:1 gluten-free all-purpose flour blend designed for baking. The texture may vary slightly depending on the flour blend.

 Make-Ahead & Storage

One of the best things about these cookies is that they can be prepared ahead of time.

Refrigerator

Store baked cookies in an airtight container at room temperature for approximately 5–7 days.

Freezer

The baked cookies can be frozen in a freezer-safe container for up to 2–3 months.

To prevent sticking, place parchment paper between layers.

Freezing the Dough

The shaped dough log can also be wrapped tightly and frozen. When ready to bake, allow it to thaw in the refrigerator until firm but sliceable, then cut and bake as directed.

 Approximate Nutritional Information

Nutrition will vary depending on the exact ingredients and cookie size.

Estimated per cookie:

  • Calories: 135–150
  • Protein: 1.5–2 g
  • Carbohydrates: 15–17 g
  • Fat: 8–9 g
  • Saturated Fat: 4–5 g
  • Fiber: 0.5–1 g
  • Sugar: 6–7 g
  • Sodium: 35–50 mg

Because these are shortbread cookies, they are naturally rich in butter and should be enjoyed as a treat.

 Benefits of the Ingredients

While these cookies are primarily a dessert, several ingredients contribute useful nutrients.

Pistachios

Pistachios provide plant-based protein, unsaturated fats, fiber, and minerals. They also contribute satisfying crunch and nuttiness.

Dried Cranberries

Cranberries provide a fruity flavor and small amounts of fiber and naturally occurring plant compounds. Choose reduced-sugar dried cranberries if you want to lower the sweetness.

Orange Zest

Orange zest adds bright citrus flavor without requiring much additional sugar or liquid.

Butter

Butter provides the rich flavor and classic tender texture that define traditional shortbread.

Remember that these nutritional benefits don’t turn the cookies into a health food—they’re best enjoyed as part of a balanced diet.

 Frequently Asked Questions

Can I use salted butter?

Yes. If using salted butter, reduce or omit the additional salt in the recipe.

Why did my shortbread spread?

The butter may have been too warm, or the dough may not have been chilled sufficiently. Make sure the shaped dough is firm before slicing and baking.

Can I use fresh cranberries?

Fresh cranberries contain significantly more moisture than dried cranberries and aren’t ideal for this particular shortbread recipe. Dried cranberries provide better texture and concentrated flavor.

Can I use other nuts?

Absolutely. Pecans, almonds, walnuts, or hazelnuts can replace pistachios. Keep the quantity approximately the same.

Can I make these without almond extract?

Yes. Simply use vanilla extract instead. The almond extract is optional.

Why are my cookies hard?

Overbaking or overmixing can make shortbread hard. Bake just until the edges are lightly golden and mix the dough only until the flour disappears.

Can I make the cookies smaller?

Yes. Smaller cookies may require less baking time, so start checking them around 8–10 minutes.

Can I add chocolate?

Definitely. White chocolate pairs especially well with cranberry and pistachio, while dark chocolate provides a delicious contrast to the sweet cranberries.

Can I prepare the dough the day before?

Yes. Wrap the dough tightly and refrigerate it overnight. Let it sit at room temperature for a few minutes if it becomes too firm to slice.

How do I keep the cookies crisp?

Store completely cooled cookies in an airtight container at room temperature. Make sure the cookies are fully cooled before sealing them.

Turmeric Lentil Soup – Easy, Cozy & Nourishing Red Lentil Soup

Turmeric Lentil Soup – Easy, Cozy & Nourishing Red Lentil Soup

Turmeric Lentil Soup – Easy, Cozy & Nourishing Red Lentil Soup

A warm, cozy, and nourishing soup made with red lentils, vegetables, and comforting spices. This golden soup is hearty, healthy, and perfect for busy weeknights or meal prep. The turmeric and ginger add rich flavor while the lentils create a naturally creamy texture without any dairy.

Ingredients

  • 2 tablespoons olive oil
  • 1 medium yellow onion, diced
  • 2 carrots, diced
  • 2 celery stalks, diced
  • 4 garlic cloves, minced
  • 1 tablespoon fresh ginger, grated
  • 2 teaspoons ground turmeric
  • 1 teaspoon ground cumin
  • ½ teaspoon smoked paprika (optional)
  • 2 tablespoons tomato paste
  • 1 cup red lentils, rinsed
  • 6 cups vegetable broth or water
  • Salt and black pepper, to taste
  • Juice of ½ lemon
  • Fresh parsley or cilantro for garnish

Instructions

1. Cook the Vegetables

Heat the olive oil in a large pot over medium heat. Add the diced onion, carrots, and celery. Cook for about 6–8 minutes, stirring occasionally, until the vegetables soften and the onion becomes translucent.

2. Add Garlic and Spices

Stir in the minced garlic and grated ginger. Cook for 1 minute until fragrant. Add the turmeric, cumin, and smoked paprika, stirring well so the spices coat the vegetables evenly.

3. Build the Flavor

Mix in the tomato paste and cook for another minute. This helps deepen the flavor and gives the soup a rich, savory taste.

4. Simmer the Soup

Add the rinsed red lentils and pour in the vegetable broth. Stir well and bring the soup to a gentle boil. Reduce the heat to low and simmer uncovered for 25–30 minutes, stirring occasionally, until the lentils are soft and creamy.

5. Blend if Desired

For a smoother soup, blend part of the soup with an immersion blender. Leave it chunky if you prefer a rustic texture.

6. Finish and Serve

Season with salt and black pepper to taste. Stir in the lemon juice for brightness. Ladle into bowls and garnish with fresh parsley or cilantro. Serve warm with crusty bread or naan.

Q & A

Can I use green or brown lentils?

Yes, but they take longer to cook and the texture will be less creamy than red lentils.

How do I store leftovers?

Store in an airtight container in the refrigerator for up to 4 days.

Can I freeze this soup?

Absolutely. Freeze for up to 3 months and thaw overnight before reheating.

Can I make it spicy?

Yes. Add chili flakes or cayenne pepper for extra heat.

Nutrition (Approx. Per Serving)

  • Calories: 220
  • Protein: 10g
  • Carbohydrates: 28g
  • Fiber: 9g
  • Fat: 7g
  • Sodium: 520mg
  • Vitamin A: 70% DV
  • Iron: 20% DV

Creamy Tuna & Veggie Salad Dip 

Creamy Tuna & Veggie Salad Dip 

Creamy Tuna & Veggie Salad Dip 

Description

This Creamy Tuna & Veggie Salad Dip is a chilled, protein-packed spread combining flaky tuna with sweet corn, peas, red onion, and creamy mayonnaise dressing. It has a soft yet chunky texture that pairs perfectly with crackers, toast, or sandwiches. It’s ideal for parties, quick lunches, or make-ahead snacks.

Ingredients

  • 2 cans tuna in water or oil, drained
  • ½ cup mayonnaise
  • 2 tablespoons Greek yogurt (optional for lighter texture)
  • ½ cup sweet corn (boiled or canned)
  • ½ cup green peas (boiled or thawed frozen)
  • ¼ cup red onion, finely chopped
  • ¼ cup cheddar cheese cubes (optional)
  • 1–2 tablespoons pickle relish or chopped pickles (optional)
  • 1 teaspoon mustard
  • Salt and black pepper to taste
  • 1 teaspoon lemon juice
  • Optional garnish: parsley or paprika

Instructions

Step 1: Prepare Ingredients

Drain tuna well and fluff it with a fork.

Boil or thaw peas if needed.

Step 2: Mix Dressing

In a bowl, combine mayonnaise, Greek yogurt, mustard, lemon juice, salt, and pepper.

Mix until smooth and creamy.

Step 3: Combine Salad

Add tuna, corn, peas, onion, and optional cheddar cheese and pickles.

Fold everything gently until well coated.

Step 4: Chill

Refrigerate for at least 30 minutes for best flavor.

Step 5: Serve

Serve chilled with crackers, toast, or bread.

Notes

  • Draining tuna well prevents watery texture.
  • Fresh vegetables add crunch and color.
  • Greek yogurt makes it lighter and tangier.
  • Chilling improves flavor and texture.

Tips

  • Add boiled egg for extra protein.
  • Use sweet corn for better flavor balance.
  • Don’t overmix to keep texture chunky.
  • Add paprika or chili flakes for spice.
  • Serve in a glass bowl for a party presentation.

Servings

  • Serves: 4–6 people

Nutritional Information (Approximate Per Serving)

  • Calories: 280
  • Protein: 22g
  • Carbohydrates: 10g
  • Fat: 18g
  • Fiber: 2g
  • Sugar: 3g
  • Sodium: 520mg

Benefits

High in Protein

Tuna supports muscle health and keeps you full longer.

Quick No-Cook Recipe

Perfect for fast meals and snacks.

Budget Friendly

Uses simple pantry ingredients.

Great for Meal Prep

Stores well for several days.

Versatile Dish

Works as dip, sandwich filling, or salad.

Storage

Refrigerator

Store in airtight container for up to 3 days.

Freezer

Not recommended due to mayonnaise texture changes.

Q&A

Can I use chicken instead of tuna?

Yes, shredded chicken works perfectly.

Can I make it healthier?

Use light mayo or replace half with Greek yogurt.

What can I serve it with?

Crackers, toast, lettuce wraps, or sandwiches.

Can I make it spicy?

Yes, add chili flakes, hot sauce, or jalapeños.

Why is my salad watery?

Vegetables or tuna may not be drained properly.

Can I prepare it ahead?

Yes, it tastes even better after chilling.

Is this kid-friendly?

Yes, just reduce onion or spice if needed.

The Mediterranean Diet Mistake Almost Everyone Makes 😱

Mediterranean diet meal with vegetables, salmon, whole grains, olive oil, and healthy foods

The Mediterranean Diet Mistake Almost Everyone Makes 😱

The Mediterranean diet is often praised as one of the easiest healthy eating patterns to follow. It focuses on vegetables, fruits, beans, whole grains, fish, olive oil, nuts, and other minimally processed foods. But there is one common mistake that can quietly turn this healthy eating style into a high-calorie diet.

The mistake is assuming that healthy foods can be eaten without paying attention to portions.

Olive oil, nuts, cheese, whole-grain bread, avocado, and hummus can all fit into a Mediterranean-style meal. However, many of these foods are calorie-dense. Eating large amounts can make it harder to manage your calorie intake, even when every ingredient looks healthy.

The good news is that you do not need to give up your favorite foods. You simply need to build balanced plates, use reasonable portions, and focus on the overall quality of your meals.

Why Portion Size Still Matters

Healthy food is not automatically low in calories. Your body still responds to the total amount of energy you eat.

For example, olive oil is a staple in Mediterranean cooking, but one tablespoon contains about 120 calories. Pouring several tablespoons over a salad can add hundreds of calories before you add cheese, nuts, dressing, or bread.

The same issue can happen with nuts and seeds. They provide healthy fats, protein, fiber, vitamins, and minerals, but a small handful contains far fewer calories than a large bowl.

This does not mean these foods are unhealthy. It means portion awareness matters, especially if your goal is weight management.

A simple approach is to measure calorie-dense ingredients at first. Use a tablespoon for olive oil and a small handful for nuts. Once you learn what normal portions look like, you can estimate them more easily.

The Mediterranean Diet Is More Than Olive Oil

Another common misunderstanding is treating olive oil as the main feature of every meal.

Extra-virgin olive oil is an important part of Mediterranean-style eating, but traditional meals also include plenty of vegetables, legumes, whole grains, seafood, fruit, and herbs.

Instead of making olive oil the star, use it to enhance the flavor of your meal.

Try roasting vegetables with a light coating of olive oil rather than soaking them. Add a small amount to a bean salad or use it as part of a simple dressing.

This approach gives you the flavor and healthy fats associated with Mediterranean cooking while keeping portions under control.

Build Your Plate Around Plants

One of the best ways to follow this eating pattern is to make plant foods the foundation of your meals.

Fill a large part of your plate with vegetables such as tomatoes, spinach, broccoli, peppers, zucchini, carrots, cucumbers, or leafy greens. Add beans, lentils, or peas for plant-based protein and fiber.

Then include a moderate portion of fish, chicken, eggs, or another protein source if desired. Finish the meal with a serving of whole grains such as brown rice, oats, barley, or whole-grain bread.

This creates a satisfying meal without relying heavily on calorie-dense ingredients.

For example, a balanced dinner could include grilled salmon, roasted vegetables, lentils, and a small portion of whole-grain bread with a little olive oil.

Watch Out for the “Healthy Snack” Trap

Snacking can also cause problems.

Foods such as trail mix, nuts, dried fruit, granola, hummus, and whole-grain crackers can be nutritious choices, but portions can grow quickly.

Dried fruit is especially easy to overeat because removing water makes the food smaller and more concentrated. A large bowl of dried fruit can contain much more sugar and energy than the same amount of fresh fruit.

Instead, choose a planned serving and pair it with another filling food when needed.

A small portion of almonds with an apple or plain Greek yogurt with fresh berries can provide a better balance of protein, fiber, and healthy fats.

Don’t Turn Mediterranean Eating Into Processed Food

The Mediterranean diet does not mean every product labeled “Mediterranean” is automatically healthy.

Packaged crackers, sweetened granola, flavored yogurt, processed dips, frozen meals, and refined breads can still be high in added sugar, sodium, or calories.

Look beyond the marketing on the package.

Choose foods with simple ingredient lists and build most meals from basic ingredients. Fresh or frozen vegetables, beans, lentils, fruit, fish, eggs, whole grains, nuts, and plain dairy products can form the foundation of a Mediterranean-inspired grocery list.

You do not need expensive specialty foods to eat this way.

Be Careful With Restaurant Portions

Eating out can make portion control harder.

A restaurant salad may sound healthy but can contain large amounts of cheese, creamy dressing, nuts, croutons, and oil. A Mediterranean-style entrée can also come with large servings of bread, rice, dips, or sauces.

Ask for dressing or sauces on the side when possible. Choose grilled fish or chicken, vegetables, beans, or whole grains as the main parts of your meal.

You can also eat part of a large restaurant serving and save the rest for another meal.

Focus on Food Quality and Balance

The goal is not to count every calorie or avoid fats.

A healthy Mediterranean-style eating pattern is about balance. Choose mostly minimally processed foods, eat plenty of plants, include quality protein, and use unsaturated fats in sensible amounts.

Fiber-rich foods can help you feel full for longer. Protein can support muscle maintenance and satiety. Healthy fats can make meals more satisfying and improve flavor.

You also do not need to follow the diet perfectly.

A pizza night, dessert, or restaurant meal does not erase your healthy habits. What matters most is what you eat regularly over time.

A Simple Mediterranean Meal Formula

If you are unsure how to build a meal, use this simple formula:

½ plate: Non-starchy vegetables
¼ plate: Protein such as fish, chicken, beans, lentils, or eggs
¼ plate: Whole grains or starchy vegetables
Small portion: Healthy fat such as olive oil, nuts, seeds, or avocado
Optional: Fresh fruit for dessert

This formula makes healthy eating easier because you do not have to create a complicated meal plan.

For breakfast, try oatmeal topped with berries, walnuts, and plain Greek yogurt. For lunch, make a chickpea salad with tomatoes, cucumber, greens, herbs, and a measured amount of olive oil.

For dinner, serve grilled fish with roasted vegetables and brown rice.

These meals are simple, filling, and easy to adjust to your personal preferences.

The Biggest Takeaway

The biggest Mediterranean diet mistake is not eating olive oil, bread, cheese, or nuts. The problem is overeating calorie-dense foods simply because they are considered healthy.

Healthy eating still benefits from reasonable portions.

Use olive oil thoughtfully, keep nuts and cheese moderate, choose fresh fruit instead of large amounts of dried fruit, and make vegetables, legumes, whole grains, and quality protein the foundation of your meals.

When you combine nutritious foods with portion awareness, the Mediterranean diet becomes much easier to follow for the long term.

Frequently Asked Questions

Is the Mediterranean diet good for weight loss?

Yes, it can support weight management when meals are balanced and overall calorie intake matches your goals.

What is the biggest Mediterranean diet mistake?

The most common mistake is overeating calorie-dense foods such as olive oil, nuts, cheese, avocado, and hummus.

Can I eat olive oil every day?

Yes. Olive oil can be part of a healthy eating pattern, but using measured portions can help control calorie intake.

Can I eat bread on the Mediterranean diet?

Yes. Choose whole-grain bread when possible and keep the serving moderate, especially when eating it with other carbohydrate-rich foods.

Are nuts healthy on the Mediterranean diet?

Yes. Nuts provide healthy fats, protein, fiber, and minerals, but a small serving is usually enough because they are calorie-dense.

Can the Mediterranean diet help with heart health?

A Mediterranean-style eating pattern emphasizes vegetables, fruits, whole grains, legumes, fish, and unsaturated fats, which are associated with better cardiovascular health.

Do I need to avoid cheese?

No. Cheese can fit into this eating pattern, but smaller portions are sensible because many cheeses are high in saturated fat and sodium.

Is the Mediterranean diet expensive?

It does not have to be. Beans, lentils, oats, seasonal vegetables, frozen produce, whole grains, and canned fish can provide affordable Mediterranean-style staples.

Final Thoughts

You do not need a perfect diet to eat healthier.

The Mediterranean approach works best when you focus on simple meals, whole foods, vegetables, legumes, seafood, whole grains, and reasonable portions of healthy fats.

So the next time you prepare a Mediterranean-style meal, remember one important rule: healthy ingredients still need healthy portions.

That small change can make your meals more balanced without taking away the flavor, variety, or enjoyment that makes Mediterranean cooking so appealing.

Vegetarian Turkish Pide

Vegetarian Turkish pide with spinach, mushrooms, red peppers, feta cheese, and golden crispy homemade flatbread

Vegetarian Turkish Pide

Vegetarian Turkish Pide is a golden, oval-shaped flatbread filled with sautéed vegetables, spinach, mushrooms, feta cheese, and mild Turkish spices. It has crisp edges, a soft center, and a savory filling that makes it satisfying enough for lunch, dinner, or a casual weekend meal.

This Turkish-inspired flatbread is a great meatless option when you want something hearty without making a complicated dish. The vegetables are cooked before they go into the dough, which gives the filling a rich flavor and prevents the pide from becoming watery while baking.

The recipe uses simple ingredients that are easy to find in most U.S. grocery stores. Serve the finished pide warm, cut it into slices, and enjoy it with a fresh salad, yogurt sauce, or your favorite Mediterranean side.

Why You’ll Love This Vegetarian Turkish Pide

This homemade Turkish pide combines homemade yeast dough with a flavorful vegetable filling and salty feta cheese. The dough becomes lightly crisp around the edges while staying tender in the middle.

Mushrooms provide a meaty texture, while red bell pepper adds natural sweetness and color. Spinach brings freshness, and feta gives the filling a creamy, tangy finish.

Another advantage is that the dough can be prepared ahead of time. Once the vegetables are cooked, assembling the pide is simple, making this recipe useful for busy weeknight dinners or relaxed family meals.

Ingredients For:

Dough

  • 1 cup warm water, about 90–110°F
  • 2 ¼ teaspoons instant dry yeast
  • 1 teaspoon granulated sugar
  • 2 ¼ cups all-purpose flour, about 300 g
  • 1 teaspoon sea salt or kosher salt
  • 3 tablespoons olive oil, divided

Vegetable Filling

  • 2 tablespoons olive oil, divided
  • 1 medium onion, finely chopped
  • 4 garlic cloves, minced
  • 8 ounces cremini or white button mushrooms, sliced
  • 1 large red bell pepper, thinly sliced
  • 5 ounces fresh spinach, washed and patted dry
  • ¾ cup crumbled feta cheese
  • 1 teaspoon Aleppo pepper
  • Salt and freshly ground black pepper, to taste

Egg Wash

  • 1 large egg, beaten
  • 1 tablespoon olive oil

How to Make Vegetarian Turkish Pide

Prepare the Dough

Preheat your oven to 400°F and line two baking sheets with parchment paper.

Mix the warm water, instant yeast, and sugar in a medium bowl. Stir gently and let the mixture stand for 5–8 minutes until it becomes slightly foamy.

In a large bowl, whisk together the flour and salt. Make a well in the center and add the yeast mixture and 2 tablespoons of olive oil.

Mix with a wooden spoon or spatula until a sticky, shaggy dough forms. Transfer the dough to a lightly floured surface and knead for 3–4 minutes until smooth and soft.

Add the remaining tablespoon of olive oil and continue kneading. If the dough feels overly wet, add flour one tablespoon at a time rather than adding too much at once.

Place the dough in a lightly oiled bowl and turn it once to coat the surface. Cover it with plastic wrap and let it rise in a warm place for about 1 hour, or until doubled in size.

Cook the Vegetable Filling

Heat 1 tablespoon of olive oil in a large skillet over medium heat. Add the chopped onion, garlic, mushrooms, and red bell pepper.

Cook for about 10 minutes, stirring occasionally. The onions should become translucent, the mushrooms should soften, and the peppers should lose their raw texture.

Turn off the heat and stir in the spinach, feta cheese, and Aleppo pepper. Season with salt and freshly ground black pepper.

Let the filling cool before assembling the flatbreads. Cooling the mixture helps prevent excess moisture from weakening the dough.

Shape the Pide

Transfer the risen dough to a lightly floured surface and knead it for 1–2 minutes to release some of the air.

Divide the dough into two equal portions and shape each portion into a smooth ball.

Stretch each dough ball into an oval approximately 8 x 16 inches. Use a rolling pin for an even shape, or gently stretch the dough with your hands.

Place one oval on a prepared baking sheet. Spread half of the vegetable mixture down the center while leaving about a 1-inch border around the edges.

Fold the long sides inward slightly to create a raised border. Pinch and twist both ends so the pide has its classic pointed shape.

Repeat with the second dough portion and remaining filling.

Add the Egg Wash and Bake

Whisk the beaten egg with 1 tablespoon of olive oil. Brush the mixture over the exposed dough edges.

Bake the two pides at 400°F for 23–25 minutes, or until the crust is golden brown and the edges look crisp.

Let the pide rest for a few minutes before slicing. Serve warm for the best texture and flavor.

Tips for the Best Turkish Pide

Use warm rather than hot water for the yeast. Water that is too hot can interfere with proper yeast activity.

Avoid adding too much flour while kneading. A slightly soft dough produces a more tender crust.

Cook the vegetables until their excess moisture has evaporated. This keeps the center of the pide from becoming soggy.

Do not overload the dough with filling. A moderate layer allows the crust to bake evenly and remain crisp.

For extra browning, brush the dough border evenly with egg wash before baking.

If you prefer a richer cheese flavor, add a small amount of shredded mozzarella alongside the feta.

Serving Suggestions

Slice the baked pide into strips or smaller portions and serve it while warm. A simple cucumber and tomato salad adds freshness and balances the savory filling.

For a creamy side, serve the pide with plain Greek yogurt mixed with lemon juice, garlic, and a pinch of salt.

It also works well with hummus, olives, roasted vegetables, or a light Mediterranean salad. For a casual gathering, cut the pide into small pieces and serve it as a vegetarian appetizer.

Storage and Reheating

Store leftover Turkish pide in an airtight container in the refrigerator for up to 3 days.

Reheat slices in a 350°F oven or air fryer until warmed through and crisp around the edges. Avoid microwaving for too long because it can make the crust soft.

You can also prepare the dough ahead of time and refrigerate it overnight. Let it come closer to room temperature before shaping.

Nutrition Information

Nutrition values vary based on ingredient brands, portion size, and the amount of filling used. An approximate serving may provide carbohydrates from the flour, protein from the feta and egg, fiber from the vegetables, and healthy fats from olive oil.

For a more balanced meal, serve one portion with a large vegetable salad or another fiber-rich side.

Frequently Asked Questions

What is Turkish pide?

Turkish pide is an oval-shaped flatbread traditionally baked with different savory toppings, including vegetables, cheese, meat, or eggs.

Is Vegetarian Turkish Pide healthy?

It can be part of a balanced diet because it combines vegetables, spinach, mushrooms, feta, and olive oil in one meal.

Can I make pide without eggs?

Yes. You can skip the egg wash and brush the edges with olive oil for a simple vegetarian finish.

Can I use whole wheat flour?

Yes, but replacing all the flour may produce a denser crust; start by replacing part of the all-purpose flour with whole wheat flour.

Can I make the dough ahead of time?

Yes. Refrigerate the covered dough overnight and allow it to warm slightly before shaping and baking.

What vegetables can I use in Turkish pide?

You can add zucchini, tomatoes, roasted peppers, broccoli, or other vegetables, but cook watery vegetables first to reduce excess moisture.

How do I keep pide crispy?

Cook the filling until excess moisture is gone, avoid overfilling the dough, and bake until the edges are deeply golden.

What should I serve with Turkish pide?

Serve it with Greek yogurt sauce, hummus, cucumber salad, tomatoes, olives, or a fresh Mediterranean-style salad.

Final Thoughts

Vegetarian Turkish Pide is an easy way to bring Turkish-inspired flavors to your home kitchen. The combination of crisp homemade dough, tender vegetables, spinach, mushrooms, feta, and Aleppo pepper creates a flavorful meatless meal without complicated cooking techniques.

Bake it for a family dinner, weekend lunch, or casual gathering and serve it warm with your favorite Mediterranean sides. Once you master the dough and shaping technique, you can experiment with different vegetable and cheese combinations to create your own version.

Mediterranean Baked Garlic Parmesan Shrimp

Mediterranean baked garlic Parmesan shrimp with lemon, herbs, and golden Parmesan topping served in a baking dish

Mediterranean Baked Garlic Parmesan Shrimp

Mediterranean Baked Garlic Parmesan Shrimp is a fast seafood dinner with bright lemon, fresh garlic, olive oil, herbs, and a golden Parmesan topping. The shrimp bake in one dish, so cleanup is simple and the meal is ready in about 25 minutes.

This easy shrimp recipe works well for busy weeknights, casual family dinners, or a simple appetizer when guests come over. The lemon adds freshness, while garlic, oregano, Parmesan, and paprika give the shrimp a rich savory flavor without making the dish heavy.

Mediterranean Baked Garlic Parmesan Shrimp Recipe

This baked shrimp dish uses simple ingredients that are easy to find at most U.S. grocery stores. Large or extra-large shrimp are ideal because they stay juicy while the Parmesan topping turns lightly golden.

For the best texture, use raw shrimp that have been peeled and deveined. Fresh shrimp are excellent, but frozen shrimp also work when they are fully thawed and dried before seasoning.

Prep Time

10 minutes

Bake Time

12–15 minutes

Total Time

25 minutes

Servings

4

Ingredients

  • 500 g (about 1 lb) raw shrimp, peeled and deveined
  • 2 tablespoons olive oil
  • 4 garlic cloves, finely minced
  • 2 tablespoons fresh lemon juice
  • ½ teaspoon lemon zest
  • ½ cup freshly grated Parmesan cheese
  • ¼ cup breadcrumbs or almond flour
  • 2 tablespoons fresh parsley, finely chopped
  • ½ teaspoon dried oregano
  • ½ teaspoon paprika
  • ½ teaspoon sea salt
  • ¼ teaspoon black pepper
  • Lemon wedges, for serving
  • Extra parsley, for garnish

Use freshly grated Parmesan when possible because it melts and browns more evenly than many pre-shredded varieties. Almond flour is a useful option when you want a lower-carb topping.

How to Make Mediterranean Baked Garlic Parmesan Shrimp

Start by heating your oven to 400°F (200°C). Lightly grease a baking dish with olive oil or line it with parchment paper for easier cleanup.

Pat the shrimp dry with paper towels. Removing excess moisture helps the garlic mixture cling to the shrimp and keeps the Parmesan topping from becoming watery.

Place the shrimp in the baking dish in one even layer. Avoid stacking them because crowded shrimp can cook unevenly.

In a small bowl, combine olive oil, minced garlic, lemon juice, lemon zest, oregano, paprika, salt, and black pepper. Stir until the mixture is well blended.

Pour the garlic and lemon mixture over the shrimp. Toss gently or turn the shrimp with a spoon so each piece gets an even coating.

In a separate bowl, mix Parmesan cheese, breadcrumbs or almond flour, and chopped parsley. Sprinkle the mixture evenly over the shrimp.

Bake uncovered for 12 to 15 minutes. The shrimp should become pink, opaque, and firm, while the topping should look lightly golden.

For a deeper golden crust, place the baking dish under the broiler for 1 to 2 minutes at the end. Watch closely because Parmesan can brown quickly.

Let the shrimp rest for about 2 minutes before serving. Add fresh parsley and lemon wedges for a bright finish.

Tips for the Best Baked Shrimp

Choose large or extra-large shrimp for a juicy texture and better presentation. Smaller shrimp can cook too quickly and become firm.

Do not overcook the seafood. Shrimp are ready when they are opaque and pink with a loose C-shaped curl.

Drying the shrimp before seasoning is an easy step that helps the topping stay flavorful and crisp.

Fresh garlic gives the strongest flavor, while freshly grated Parmesan creates a better crust.

Keep the shrimp in a single layer so heat reaches every piece evenly.

If you want more Mediterranean flavor, add sliced Kalamata olives, chopped cherry tomatoes, fresh basil, or a small pinch of red pepper flakes.

Use almond flour instead of breadcrumbs for a lower-carb version. Gluten-free breadcrumbs also work well if needed.

What to Serve With Garlic Parmesan Shrimp

Serve these shrimp with crusty bread to soak up the lemon-garlic juices. A simple green salad with cucumber, tomatoes, and a light vinaigrette adds freshness.

For a heartier dinner, serve the shrimp with rice, roasted potatoes, whole wheat pasta, or zucchini noodles. Roasted asparagus, green beans, or Mediterranean vegetables also make easy side dishes.

For an appetizer, arrange the baked shrimp on a serving platter with lemon wedges and fresh parsley. Serve them while warm for the best texture.

Easy Recipe Variations

Add cherry tomatoes before baking for extra color and natural sweetness.

Mix in crushed red pepper flakes if you enjoy a little heat with your seafood.

Replace Parmesan with Pecorino Romano for a sharper, saltier flavor.

Add chopped fresh basil or thyme for a different herb profile.

For extra Mediterranean character, add sliced olives or a small amount of crumbled feta after baking.

If you prefer a richer topping, add a light sprinkle of mozzarella before the final 2 minutes of baking.

Keep the shrimp tails on when serving guests for a more polished presentation.

Can You Make This Recipe Ahead?

You can prepare the shrimp and garlic-lemon mixture a few hours before cooking. Cover the prepared dish and refrigerate it until you are ready to bake.

For the best texture, add the Parmesan topping shortly before baking. Avoid leaving raw shrimp at room temperature for an extended period.

If using frozen shrimp, thaw them safely in the refrigerator and pat them completely dry before preparation.

Frequently Asked Questions

Can I use frozen shrimp for this recipe?

Yes. Thaw frozen shrimp completely, drain them well, and pat them dry before adding the garlic and Parmesan topping.

How do I know when the shrimp are fully cooked?

The shrimp should be pink, opaque, firm, and curled into a loose C shape when they are ready.

Can I make this recipe without breadcrumbs?

Yes. Replace breadcrumbs with almond flour for a lower-carb topping, or use gluten-free breadcrumbs if preferred.

Can I cook these shrimp in an air fryer?

Yes. Cook the prepared shrimp at 375°F for about 8–10 minutes, checking early because cooking time varies by shrimp size.

What size shrimp should I use?

Large or extra-large shrimp work best because they stay juicy and provide enough surface area for the Parmesan topping.

Can I use pre-cooked shrimp?

Raw shrimp are recommended because pre-cooked shrimp can become dry and rubbery when baked for a second time.

Is this baked shrimp recipe gluten-free?

It can be gluten-free when made with almond flour or certified gluten-free breadcrumbs instead of regular breadcrumbs.

What are the best side dishes for this shrimp?

Rice, pasta, crusty bread, roasted vegetables, zucchini noodles, and a fresh Mediterranean salad all pair well with the dish.

Nutrition Information

Approximate nutrition per serving:

  • Calories: 280
  • Protein: 32 g
  • Carbohydrates: 6 g
  • Fat: 14 g
  • Fiber: 1 g
  • Sugar: 1 g
  • Cholesterol: 220 mg

Nutrition values are estimates and can vary based on shrimp size, Parmesan, breadcrumbs, and serving portions.

Final Thoughts

Mediterranean Baked Garlic Parmesan Shrimp is an easy way to put a flavorful seafood dinner on the table without spending much time in the kitchen. The combination of juicy shrimp, garlic, lemon, herbs, olive oil, and Parmesan creates a balanced dish with plenty of fresh Mediterranean flavor.

Keep the preparation simple, avoid overbaking, and serve the shrimp immediately for the best texture. Add a salad, roasted vegetables, rice, or crusty bread to turn this quick recipe into a complete meal.

Mediterranean Chicken Skewers with Hummus Spread

Mediterranean chicken skewers served over creamy hummus with pita, cucumber, tomatoes, olives, and fresh herbs.

Mediterranean Chicken Skewers with Hummus Spread

Mediterranean Chicken Skewers with Hummus Spread bring juicy grilled chicken, bright lemon, garlic, herbs, and creamy hummus together in one easy meal. The chicken is marinated with olive oil, lemon juice, garlic, oregano, paprika, and cumin before it is grilled until tender with lightly charred edges. A smooth hummus spread adds a creamy, savory finish that pairs perfectly with the seasoned chicken.

This Mediterranean-inspired recipe is a great choice for a quick family dinner, weekend cookout, or casual gathering. Serve the skewers with warm pita, fresh vegetables, Greek salad, or roasted potatoes for a complete meal. The simple ingredients also make this dish easy to adjust for different tastes.

Prep Time, Cook Time, and Servings

Prep Time: 25 minutes
Marinating Time: 30 minutes to 4 hours
Cook Time: 12–15 minutes
Total Time: About 1 hour, excluding longer marinating time
Servings: 4

Why You’ll Love This Recipe

These chicken skewers are easy to prepare and full of fresh Mediterranean flavor. Lemon juice adds brightness, while garlic, oregano, paprika, and cumin give the chicken a warm, savory taste.

Chicken thighs are especially juicy on the grill, while chicken breast provides a leaner option. The hummus spread can be prepared in minutes, so there is no need for a complicated sauce.

This recipe also works well for meal prep. Cooked chicken can be added to salads, grain bowls, wraps, or pita sandwiches later in the week.

Ingredients For:

Chicken Skewers

  • 700 g boneless, skinless chicken breast or thighs, cut into even cubes
  • 3 tablespoons extra virgin olive oil
  • 2 tablespoons fresh lemon juice
  • 3 garlic cloves, minced
  • 1 teaspoon smoked paprika
  • 1 teaspoon dried oregano
  • ½ teaspoon ground cumin
  • ¾ teaspoon salt
  • ½ teaspoon black pepper
  • 1 tablespoon chopped fresh parsley or cilantro

Hummus Spread

  • 1½ cups classic hummus
  • 1 tablespoon extra virgin olive oil
  • 1 tablespoon fresh lemon juice
  • 1 small garlic clove, finely grated
  • Salt to taste

Serving

  • Warm pita bread or flatbread
  • Chopped cucumber
  • Fresh tomatoes
  • Kalamata or green olives
  • Fresh parsley
  • Extra virgin olive oil
  • Lemon wedges

How to Make Mediterranean Chicken Skewers

Start by preparing the chicken marinade. Add olive oil, lemon juice, minced garlic, smoked paprika, oregano, cumin, salt, and black pepper to a large bowl.

Add the cubed chicken and toss until every piece is evenly coated. Cover the bowl and refrigerate for at least 30 minutes. For a stronger flavor, let the chicken marinate for up to 4 hours.

If you are using wooden skewers, soak them in water for about 20 minutes. This helps reduce the chance of the wood burning during cooking.

Thread the chicken pieces onto the skewers, leaving small spaces between them. Evenly sized pieces will cook more consistently.

Preheat a grill, grill pan, or oven broiler over medium-high heat. Place the skewers on the hot cooking surface and grill for about 6–7 minutes per side. Turn them carefully so the chicken develops an even golden-brown surface.

Cook the chicken until the center reaches 165°F (74°C) on a food thermometer. Avoid relying only on color to judge doneness.

While the chicken cooks, combine the hummus, olive oil, lemon juice, grated garlic, and a small amount of salt. Stir until smooth and creamy.

Spread the hummus over a serving platter. Place the hot chicken skewers on top and finish with fresh parsley, a drizzle of olive oil, and lemon wedges.

Tips for the Best Chicken Skewers

Cut the chicken into similar-sized pieces so smaller pieces do not dry out before larger pieces are cooked.

Use chicken thighs when you want especially juicy skewers. Chicken breast is a good choice when you prefer a leaner cut.

Do not marinate the chicken for more than 4 hours when using a strongly acidic marinade. Extended exposure to lemon juice can affect the texture.

Preheat the grill before adding the chicken. A hot cooking surface helps create browned edges and attractive grill marks.

Avoid overcrowding the skewers. Small gaps allow heat to circulate around the chicken.

Use a meat thermometer to check the thickest piece before serving. The chicken should reach 165°F for food safety.

Let the cooked chicken rest for a few minutes before serving. This helps the meat stay moist and tender.

Variations

For extra tenderness, add a few tablespoons of plain Greek yogurt to the marinade.

Add sliced bell peppers and red onions between the chicken pieces for colorful vegetable skewers.

Use roasted red pepper hummus or spicy hummus when you want a different flavor.

Sprinkle the finished dish with sumac or za’atar for a bright Middle Eastern-inspired touch.

Add a pinch of red pepper flakes to the marinade for mild heat.

Replace chicken with lamb cubes for a richer variation.

Turn the leftovers into pita wraps with hummus, lettuce, tomatoes, cucumbers, and pickles.

For a lighter meal, serve the chicken over greens instead of pita bread.

Serving Suggestions

Serve these grilled chicken skewers with warm pita bread and extra hummus for an easy Mediterranean-style dinner. A fresh Greek salad with cucumber, tomato, red onion, olives, and feta makes a refreshing side.

Roasted vegetables, lemon rice, couscous, or quinoa also pair well with the seasoned chicken. For a casual party, arrange the skewers on a large platter with hummus, pita wedges, olives, sliced vegetables, and lemon wedges.

Leftover chicken can be chilled and added to lunch bowls or salads the next day. Keep cooked chicken refrigerated in an airtight container and use it within 3–4 days.

Nutrition Facts

Approximate nutrition per serving:

  • Calories: 420
  • Protein: 38 g
  • Fat: 22 g
  • Carbohydrates: 20 g
  • Fiber: 5 g
  • Iron: 15% DV

Nutrition values can vary depending on the chicken cut, hummus brand, serving size, and amount of olive oil used.

Frequently Asked Questions

Can I make these chicken skewers in the oven?

Yes. Arrange the skewers on a lined baking sheet and broil under high heat, turning once, until the chicken reaches 165°F.

How long should I marinate the chicken?

Marinate the chicken for at least 30 minutes and up to 4 hours for stronger flavor and better seasoning.

Can I use chicken breast instead of thighs?

Yes. Chicken breast works well, but cook it carefully because it can become dry if overcooked.

Can I prepare the hummus ahead of time?

Yes. Mix the hummus ingredients up to one day ahead and keep it covered in the refrigerator until serving.

How do I know when the chicken is cooked?

Check the thickest piece with a food thermometer and remove the chicken when it reaches 165°F (74°C).

Can I freeze the marinated chicken?

Yes. Freeze the seasoned raw chicken in an airtight freezer-safe container for up to 1 month and thaw it safely before cooking.

What can I serve with Mediterranean chicken skewers?

Warm pita, Greek salad, roasted vegetables, couscous, quinoa, rice, olives, and fresh cucumber all pair well with the chicken.

Is this recipe spicy?

No. The basic recipe has mild seasoning, but you can add red pepper flakes or cayenne if you prefer more heat.

Final Thoughts

Mediterranean Chicken Skewers with Hummus Spread are an easy way to bring fresh, bold flavors to the dinner table. The lemon-garlic marinade keeps the chicken flavorful, while oregano, paprika, and cumin add depth without overpowering the meat.

Creamy hummus makes a simple spread that ties the whole dish together. Add warm pita, crisp vegetables, and a fresh salad for a balanced meal that feels special without requiring much effort.

Whether you are cooking a weeknight dinner or serving guests at a backyard gathering, these grilled chicken skewers are easy to prepare, simple to customize, and packed with Mediterranean-inspired flavor.

Mediterranean Mezze Tapas Cheese & Charcuterie Table

Mediterranean mezze tapas cheese and charcuterie table with hummus, halloumi, feta, olives, pita, vegetables, and cured meats

Mediterranean Mezze Tapas Cheese & Charcuterie Table

A Mediterranean Mezze Tapas Cheese & Charcuterie Table is an easy way to turn simple ingredients into an impressive spread. It combines creamy dips, flavorful cheeses, cured meats, fresh vegetables, olives, warm pita, and sweet dried fruit on one inviting table.

This style of entertaining is perfect for weekend gatherings, holiday parties, casual dinners, game-day snacks, or a relaxed date night at home. Instead of preparing one large dish, you offer many small bites that guests can mix and match.

The best part is that most ingredients can be prepared ahead of time. You only need to grill the halloumi, warm the pita, and arrange everything before serving. The result is colorful, filling, and easy to customize for different tastes.

Why You’ll Love This Mediterranean Mezze Table

This appetizer spread works because it offers a good balance of flavors and textures. Creamy hummus and baba ghanoush pair with salty feta, chewy halloumi, savory salami, crisp cucumber, juicy tomatoes, and sweet dates.

It also gives guests plenty of choices. Some can build a pita bite with hummus and vegetables, while others can enjoy grilled halloumi with olives or cured meats.

Another benefit is flexibility. You can make the spread larger for a party or keep it simple for a family snack. Vegetarian guests can enjoy extra cheese, dips, vegetables, and falafel instead of meat.

For a beautiful presentation, use a large wooden board, serving platter, or even a clean dining table lined with parchment paper.

Mediterranean Mezze Table Ingredients

Dips & Spreads

  • Hummus: 1 cup (240 g)
  • Baba ghanoush: 1 cup (240 g)
  • Tzatziki: ¾ cup (180 g), optional

Hummus adds creamy chickpea flavor, while baba ghanoush brings a smoky eggplant taste. Tzatziki adds a cool, fresh contrast from yogurt, cucumber, garlic, and herbs.

Cheese

  • Halloumi cheese: 8 oz (225 g), sliced
  • Feta cheese: 6 oz (170 g), cubed or crumbled

Halloumi is ideal for grilling because it develops a golden crust without melting away. Feta adds a salty, tangy flavor that works well with vegetables and olives.

Charcuterie & Meats

  • Salami: 4 oz (115 g), thinly sliced
  • Cured sausage: 4 oz (115 g), sliced

Fold the salami loosely instead of laying every slice flat. This creates height and makes the board look fuller without using more food.

Vegetables, Olives & Fruit

  • Cherry tomatoes: 1½ cups (225 g)
  • Cucumber: 1 large, sliced
  • Kalamata olives: ½ cup (75 g)
  • Green olives: ½ cup (75 g)
  • Roasted red peppers: 1 cup (150 g)
  • Dates or dried fruit: ¾ cup (120 g)

Fresh vegetables bring color and crunch, while olives and roasted peppers add bold Mediterranean flavor. Dates or dried fruit provide sweetness that balances salty cheeses and cured meats.

Bread & Extras

  • Pita bread: 4 large pitas, cut into wedges
  • Falafel or halloumi patties: 8–10 small patties
  • Fresh parsley: 2 tablespoons, chopped
  • Extra-virgin olive oil: 3–4 tablespoons

Warm pita is best served soft and slightly toasted. Falafel adds a hearty plant-based option and makes the spread more substantial.

How to Make a Mediterranean Mezze Tapas Cheese & Charcuterie Table

Step 1: Prepare the Dips

Place hummus, baba ghanoush, and tzatziki in small serving bowls. If using refrigerated dips, let them sit at room temperature briefly before serving so their flavors are more noticeable.

Drizzle a small amount of extra-virgin olive oil over the hummus or baba ghanoush. A sprinkle of parsley adds fresh color.

Step 2: Grill the Halloumi

Heat a skillet or grill pan over medium-high heat. Lightly coat the halloumi with olive oil and cook for about 2–3 minutes per side, or until golden brown.

Serve it soon after grilling so the outside stays crisp and the center remains pleasantly chewy.

Step 3: Warm the Pita

Warm the pita bread for a few minutes until soft and flexible. Cut each pita into wedges and cover loosely with a clean kitchen towel.

Keeping the bread covered helps prevent it from becoming dry while you finish the table.

Step 4: Prepare Fresh Ingredients

Wash the tomatoes and cucumber before slicing. Arrange the vegetables in small groups rather than spreading them randomly across the board.

Place olives and roasted peppers in small bowls to keep their juices contained and prevent the board from becoming soggy.

Step 5: Add the Patties

If you are using falafel or halloumi patties, cook them until hot and lightly crisp. Place them near the dips so guests can easily combine them with pita and sauces.

Step 6: Build the Table

Start with the bowls of hummus, baba ghanoush, and tzatziki. Place them around the serving board or table to create several easy starting points.

Add feta and grilled halloumi next. Follow with folded salami and sliced cured sausage.

Fill the open spaces with cucumber, tomatoes, olives, roasted peppers, dates, and pita wedges. Finish with fresh parsley and a light drizzle of olive oil.

Avoid making every section perfectly symmetrical. A relaxed arrangement gives the spread a more natural and generous look.

Tips for the Best Mezze Spread

Bring the cheese closer to room temperature before serving for better flavor and texture.

Grill halloumi shortly before guests arrive so it tastes fresh and warm.

Use small bowls for juicy ingredients such as olives and roasted peppers to protect the bread and cheese.

Keep some ingredients chilled until serving, especially dairy-based dips and perishable meats.

Refill smaller portions as guests eat instead of placing all the food out at once.

Balance rich ingredients with crisp vegetables and fresh herbs.

Choose a good-quality olive oil because it will be noticeable when drizzled over dips and cheese.

Place pita near the dips so guests can easily create their own bites.

Use bowls with different shapes and heights to make the presentation more interesting.

For outdoor gatherings, follow safe food-handling practices and avoid leaving perishable foods at room temperature for extended periods.

Easy Variations

There are many ways to customize this appetizer table based on your guests and the occasion.

For a vegetarian mezze platter, skip the salami and cured sausage and add more falafel, grilled vegetables, cheese, and stuffed grape leaves.

For a more substantial spread, add grilled chicken skewers, roasted potatoes, or additional falafel.

Fresh grapes, figs, oranges, or pomegranate seeds can replace dried fruit when you want a brighter presentation.

Marinated artichoke hearts add a tangy bite, while almonds and pistachios provide crunch.

You can also add labneh, spicy harissa, roasted eggplant, or chili-infused olive oil for more variety.

For guests avoiding gluten, serve gluten-free flatbread alongside the traditional pita.

How to Serve a Mediterranean Mezze Table

For four to six people, place the table where everyone can comfortably reach the dips, bread, cheese, and vegetables.

Serve the spread as an appetizer before dinner or as a light meal for a casual gathering. If you want it to function as the main meal, increase the amount of pita, vegetables, falafel, cheese, and protein.

Sparkling water, lemonade, iced tea, and citrus-infused water are refreshing nonalcoholic choices. For adult gatherings, a chilled dry white wine can also complement the salty and fresh flavors.

A mezze-style table is especially useful for entertaining because guests can serve themselves while the host spends less time in the kitchen.

Make-Ahead Tips

Most of the preparation can be completed before guests arrive.

Prepare the dips, slice the vegetables, portion the olives, cut the cheese, and arrange the cured meats several hours ahead. Store perishable ingredients properly until you are ready to serve.

Warm the pita and grill the halloumi close to serving time. Add delicate herbs and final olive oil drizzles just before guests sit down.

If preparing the board early, keep wet ingredients in covered containers and assemble the final spread shortly before serving.

Nutrition Information

Approximate nutrition per serving will vary based on portion sizes and the specific brands used.

  • Calories: 450–550
  • Protein: 18–22 g
  • Carbohydrates: 30–35 g
  • Fat: 30–35 g
  • Fiber: 6–8 g

The nutritional values can change significantly depending on the amount of cheese, cured meat, pita, dips, and olive oil served.

Frequently Asked Questions

Can I prepare this mezze table ahead of time?

Yes. Prepare most ingredients several hours ahead and assemble the table shortly before serving.

How long can a mezze table sit out?

Perishable foods should not remain at room temperature for extended periods; keep chilled ingredients cold and follow standard food-safety guidance.

What cheese can replace halloumi?

Grilled feta or another firm grilling cheese can replace halloumi, although the texture will be different.

Can I make this table vegetarian?

Yes. Replace the cured meats with extra falafel, grilled vegetables, cheese, stuffed grape leaves, or nuts.

What bread goes best with Mediterranean dips?

Pita is the classic choice, but flatbread, naan-style bread, or gluten-free flatbread can also work well.

How do I keep the board from looking crowded?

Use small bowls, group similar ingredients together, and leave a little open space between sections.

Can this serve as a complete meal?

Yes. Add more falafel, grilled chicken, vegetables, bread, and cheese to make the spread more filling.

What can I add for extra flavor?

Marinated artichokes, labneh, harissa, fresh herbs, pistachios, roasted vegetables, and pomegranate seeds add variety.

Final Thoughts

A Mediterranean Mezze Tapas Cheese & Charcuterie Table makes entertaining feel simple without sacrificing presentation or flavor. Creamy dips, grilled cheese, cured meats, fresh vegetables, olives, warm pita, and sweet fruit create a spread with something for everyone.

The key is balance rather than perfection. Combine salty, creamy, fresh, smoky, crunchy, and sweet ingredients, then arrange them in a way that makes sharing easy.

Whether you are hosting a small weekend gathering or preparing appetizers for a holiday party, this Mediterranean-inspired spread gives guests plenty to explore while keeping the preparation manageable.

Spicy Garlic Dill Cucumber Salad

Spicy Garlic Dill Cucumber Salad

Description

This Spicy Garlic Dill Cucumber Salad is a fresh, crunchy, flavorful side dish made with crisp cucumbers, fragrant fresh dill, garlic, sesame seeds, and a tangy savory dressing. It is inspired by simple Mediterranean and Asian-style cucumber salads, combining refreshing vegetables with bold seasonings.

The cucumbers are sliced into rounds and coated in a delicious mixture of olive oil, vinegar, garlic, herbs, sesame seeds, and a little chili for gentle heat. The result is crisp, juicy, tangy, garlicky, and slightly spicy.

This recipe is perfect when you want something quick and refreshing without turning on the oven. It takes only about 10–15 minutes to prepare and can be served alongside grilled chicken, salmon, steak, rice bowls, sandwiches, wraps, or other Mediterranean-inspired meals.

The fresh dill gives the salad a bright herbal flavor, while toasted sesame seeds add a subtle nutty crunch. If you enjoy spicy food, red pepper flakes or fresh chili can be increased to make the salad more exciting.

Recipe Information

Recipe Name: Spicy Garlic Dill Cucumber Salad
Course: Salad / Side Dish
Cuisine: Mediterranean-inspired
Prep Time: 15 minutes
Cook Time: None
Total Time: 15–25 minutes
Servings: 4–6
Difficulty: Easy

 Ingredients

For the Cucumber Salad

  • 4 large Persian or small cucumbers
  • 2 tablespoons fresh dill, finely chopped
  • 2 cloves garlic, finely minced
  • 1 tablespoon toasted sesame seeds
  • ½ teaspoon red pepper flakes
  • 2 tablespoons finely sliced green onion, optional
  • 1 tablespoon fresh parsley, optional
  • ½ teaspoon salt

For the Dressing

  • 2 tablespoons extra-virgin olive oil
  • 1½ tablespoons rice vinegar or white wine vinegar
  • 1 tablespoon fresh lemon juice
  • 1 teaspoon honey or maple syrup
  • 1 teaspoon Dijon mustard
  • ½ teaspoon sesame oil
  • ¼ teaspoon black pepper
  • ¼ teaspoon salt, or to taste

Optional Additions

  • 1 teaspoon grated fresh ginger
  • 1 small fresh chili, thinly sliced
  • ½ teaspoon chili crisp
  • 1 teaspoon soy sauce
  • 1 teaspoon sesame seeds for garnish
  • Fresh lemon zest

 How to Make Spicy Garlic Dill Cucumber Salad

Step 1: Wash and Slice the Cucumbers

Wash the cucumbers thoroughly and pat them dry.

Slice them into approximately ¼-inch rounds.

You can also cut them into half-moons if you prefer.

Persian cucumbers are particularly good for this salad because they are naturally crisp, small, and have thin skins. English cucumbers are another excellent choice.

If using large regular cucumbers, you may want to remove some of the seeds if they are particularly watery.


Step 2: Lightly Salt the Cucumbers

Place the sliced cucumbers in a large bowl.

Sprinkle them with approximately ½ teaspoon salt and gently toss.

Let them sit for about 10 minutes.

This step draws out some excess moisture and helps the cucumbers remain crisp.

After 10 minutes, drain any liquid released by the cucumbers.

For an even crisper salad, gently pat the cucumber slices dry with paper towels.

Don’t squeeze them aggressively because you want to preserve their natural crunch.

 Step 3: Prepare the Garlic Dressing

In a small bowl, combine:

  • Olive oil
  • Vinegar
  • Lemon juice
  • Honey or maple syrup
  • Dijon mustard
  • Sesame oil
  • Black pepper
  • Salt

Whisk until the dressing is smooth.

Add the minced garlic and red pepper flakes.

Taste the dressing.

If you want more acidity, add another teaspoon of lemon juice.

If you prefer more sweetness, add a small amount of honey.

For extra heat, add additional red pepper flakes or finely sliced fresh chili.

 Step 4: Add the Fresh Herbs

Add the chopped dill to the cucumbers.

Dill is an important flavor in this recipe because its fresh, slightly grassy character pairs beautifully with cool, crunchy cucumbers.

Add parsley and green onion if using.

Gently toss everything together.

 Step 5: Add Sesame Seeds

Sprinkle toasted sesame seeds over the cucumber mixture.

Toasting the sesame seeds is optional but highly recommended.

To toast them, place the seeds in a dry skillet over medium-low heat and cook for approximately 2–3 minutes, stirring frequently.

Remove them immediately when they become fragrant and lightly golden.

Allow them to cool slightly before adding them to the salad.

 Step 6: Combine Everything

Pour the prepared dressing over the cucumbers.

Using salad spoons, gently toss until all of the cucumber slices are coated.

Don’t toss too aggressively because the cucumber slices can break apart.

Taste the salad and adjust the seasoning.

You may want:

  • More lemon for brightness
  • More vinegar for tang
  • More chili for heat
  • More honey for sweetness
  • More dill for freshness
  • More garlic for intensity

 Step 7: Rest Before Serving

Although you can serve the salad immediately, allowing it to rest for approximately 10–15 minutes gives the flavors time to develop.

The cucumbers absorb some of the dressing while still maintaining their refreshing crunch.

Serve chilled or at cool room temperature.

 Tips for the Best Cucumber Salad

1. Choose Crisp Cucumbers

Fresh, firm cucumbers make a huge difference.

Avoid cucumbers that feel soft or have wrinkled skin.

2. Don’t Slice Them Too Thin

Very thin slices can become soft quickly.

A thickness of approximately ¼ inch provides a nice balance of crunch and flavor.

3. Salt Carefully

Salt draws moisture from cucumbers.

Don’t oversalt them because the dressing also contains seasoning.

4. Use Fresh Dill

Fresh dill gives this salad a much brighter flavor than dried dill.

If fresh dill isn’t available, you can substitute approximately 1 teaspoon dried dill.

5. Don’t Overdress

Cucumbers naturally release moisture, so a small amount of dressing is usually enough.

You can always add more later.

6. Toast the Sesame Seeds

Toasted sesame seeds provide a deeper nutty flavor and add a pleasant crunch.

7. Add the Dressing Close to Serving

For the crunchiest salad, dress the cucumbers about 10–20 minutes before serving.

 How to Adjust the Spice Level

This salad can easily be customized.

Mild

Use just a pinch of red pepper flakes.

Medium

Use ½ teaspoon red pepper flakes.

Spicy

Add ¾–1 teaspoon red pepper flakes plus sliced fresh chili.

Extra Spicy

Add fresh chili and a little chili crisp or chili oil.

The cool cucumber helps balance the heat, making the salad refreshing even when spicy.

 Flavor Variations

Lemon Herb Cucumber Salad

Skip the sesame oil and increase the lemon juice. Add extra parsley and dill for a brighter Mediterranean flavor.

Creamy Cucumber Salad

Add ½ cup Greek yogurt to the dressing for a creamy version.

Asian-Inspired Cucumber Salad

Use soy sauce, rice vinegar, sesame oil, ginger, garlic, and chili instead of the olive oil-based dressing.

Feta Cucumber Salad

Add ½ cup crumbled feta for a salty, creamy Mediterranean variation.

Tomato Cucumber Salad

Add halved cherry tomatoes and a little red onion.

Avocado Cucumber Salad

Add diced avocado just before serving for extra creaminess.

 Add Feta for a Mediterranean Twist

If you want to make this salad more Mediterranean, add ½ cup crumbled feta cheese.

The salty feta works beautifully with cool cucumber and fresh dill.

You can also add:

  • Kalamata olives
  • Cherry tomatoes
  • Red onion
  • Parsley
  • Extra oregano

This turns the simple cucumber salad into a more substantial Mediterranean side dish.

What to Serve With It

This cucumber salad is incredibly versatile.

With Chicken

Serve alongside:

  • Grilled lemon chicken
  • Greek chicken skewers
  • Garlic herb chicken
  • Chicken gyros
  • Roasted chicken

With Fish

It pairs especially well with:

  • Baked salmon
  • Grilled salmon
  • Lemon garlic white fish
  • Grilled shrimp
  • Mediterranean cod

With Beef

Serve it alongside:

  • Steak
  • Beef kebabs
  • Beef gyros
  • Grilled burgers
  • Roasted beef

With Vegetarian Meals

Pair it with:

  • Hummus
  • Falafel
  • Lentil soup
  • Chickpea bowls
  • Grilled halloumi
  • Roasted vegetables

 Make It a Complete Meal

You can easily turn this salad into a satisfying lunch bowl.

Start with:

Cucumber Salad + Grilled Chicken + Quinoa + Hummus + Feta

Add a little pita on the side and you have a colorful Mediterranean-inspired meal.

For a vegetarian version, replace the chicken with chickpeas or grilled halloumi.

 Storage

Store the cucumber salad in an airtight container in the refrigerator.

It is best eaten within 1–2 days.

The cucumbers will gradually release more liquid as they sit, so the salad will become softer over time.

If preparing ahead, keep the dressing separate and combine it with the cucumbers shortly before serving.

 Make-Ahead Instructions

This recipe is ideal for entertaining because most of the ingredients can be prepared ahead.

Several Hours Before Serving

Wash and slice the cucumbers.

Prepare the dressing.

Chop the dill and parsley.

Toast the sesame seeds.

Store everything separately in the refrigerator.

Before Serving

Combine the cucumbers, herbs, sesame seeds, and dressing.

Allow the salad to rest for 10 minutes, then serve.

This method provides the best texture.

 Approximate Nutritional Information

Based on 6 servings and the basic recipe:

  • Calories: 100–130 kcal
  • Protein: 2–3 g
  • Carbohydrates: 7–9 g
  • Fat: 8–10 g
  • Fiber: 1–2 g
  • Sugar: 3–5 g
  • Sodium: Approximately 250–400 mg

Nutrition will vary depending on the type and amount of oil, sweetener, salt, and optional ingredients used.

Adding feta, avocado, or other toppings will increase calories and nutrients.

 Potential Benefits

 Hydrating Vegetables

Cucumbers contain a high percentage of water, making them a naturally refreshing ingredient.

 Fresh Herbs

Dill and parsley provide fresh flavor while contributing small amounts of vitamins and plant compounds.

 Unsaturated Fats

Extra-virgin olive oil provides predominantly unsaturated fat.

 Sesame Seeds

Sesame seeds contribute healthy fats, minerals, and a little plant-based protein.

 Fresh Lemon

Lemon juice adds brightness and contributes vitamin C.

 Light Side Dish

The salad is relatively light and can add vegetables and freshness to heavier meals.

These are general nutritional observations and are not medical advice.

 Frequently Asked Questions

Can I use regular cucumbers?

Yes. Regular cucumbers work perfectly. If they have large seeds or a very watery center, remove some of the seeds before slicing.

Do I have to peel the cucumbers?

No. If you’re using Persian or English cucumbers, the skin is thin and can be left on.

Why should I salt the cucumbers first?

Salting helps draw out excess moisture and can improve the final texture of the salad.

Can I skip the salting step?

Yes, especially if you’re serving the salad immediately. However, salting is helpful when you want extra-crisp cucumbers.

Can I use dried dill?

Yes. Use approximately 1 teaspoon dried dill in place of 2 tablespoons fresh dill, adjusting to taste.

Can I make this salad without sesame oil?

Absolutely. Simply omit it or replace it with another teaspoon of olive oil.

Can I use apple cider vinegar?

Yes. Apple cider vinegar gives the dressing a slightly fruity tang.

Is rice vinegar necessary?

No. White wine vinegar, apple cider vinegar, or red wine vinegar can work.

Can I make this recipe vegan?

Yes. Use maple syrup instead of honey, and avoid dairy additions such as feta or Greek yogurt.

Can I add feta?

Definitely. Feta is an excellent addition and gives the salad a delicious Mediterranean character.

How spicy is the original recipe?

The basic recipe has moderate, adjustable heat from red pepper flakes. You can reduce or increase the amount according to your preference.

Can I make it creamy?

Yes. Add Greek yogurt to the dressing for a creamy cucumber salad.

Can I add tomatoes?

Yes. Cherry tomatoes are particularly delicious with cucumber and dill.

How long can it stay at room temperature?

For food safety, don’t leave the prepared salad sitting out for extended periods, particularly in hot weather. Keep it chilled when not serving.

Can I prepare this the night before?

You can, but the cucumbers will become softer. For the best texture, prepare the dressing and vegetables separately and combine them closer to serving.

What can I use instead of honey?

Maple syrup or a small amount of sugar can be used.

Can I add onions?

Yes. Thinly sliced red onion or green onion adds a wonderful savory bite.

Baked Salmon Meatballs with Creamy Avocado Sauce

Baked Salmon Meatballs with Creamy Avocado Sauce

Description

These Baked Salmon Meatballs with Creamy Avocado Sauce are a delicious, nutritious, and easy way to enjoy salmon in a completely different form. Tender salmon is combined with fresh herbs, garlic, lemon, breadcrumbs, and simple seasonings, shaped into golden meatballs, and baked until perfectly cooked.

The real star is the creamy avocado sauce. Made with ripe avocado, Greek yogurt, fresh lemon juice, garlic, and herbs, it is smooth, tangy, fresh, and naturally creamy. It provides the perfect contrast to the warm, savory salmon meatballs.

Unlike fried salmon cakes or patties, these meatballs are oven-baked, which keeps the preparation simple and reduces the amount of added oil. They are perfect for a quick weeknight dinner, meal prep, lunch bowls, appetizers, or a Mediterranean-inspired family meal.

Serve them with a fresh salad, roasted vegetables, quinoa, rice, pita, or even inside warm flatbread. They are flavorful enough to serve on their own with a generous spoonful of avocado sauce.

Recipe Information

Recipe Name: Baked Salmon Meatballs with Creamy Avocado Sauce
Cuisine: Mediterranean-inspired
Course: Main Dish / Appetizer
Prep Time: 20 minutes
Chill Time: 15 minutes
Bake Time: 15–20 minutes
Total Time: Approximately 50–55 minutes
Servings: 4–6
Difficulty: Easy

 Ingredients

For the Salmon Meatballs

  • 1½ pounds fresh skinless salmon fillets
  • ½ cup plain breadcrumbs or panko
  • 1 large egg
  • ¼ cup finely chopped red onion
  • 2 cloves garlic, minced
  • 2 tablespoons fresh parsley, finely chopped
  • 1 tablespoon fresh dill, chopped
  • 1 teaspoon dried oregano
  • 1 teaspoon Dijon mustard
  • 1 teaspoon lemon zest
  • 1 tablespoon fresh lemon juice
  • ½ teaspoon smoked paprika
  • ½ teaspoon salt
  • ¼ teaspoon black pepper
  • 1 tablespoon extra-virgin olive oil

For the Creamy Avocado Sauce

  • 1 large ripe avocado
  • ½ cup plain Greek yogurt
  • 1 tablespoon fresh lemon juice
  • 1 small garlic clove
  • 1 tablespoon fresh dill
  • 1 tablespoon fresh parsley
  • 1–2 tablespoons water, as needed
  • ¼ teaspoon salt
  • ¼ teaspoon black pepper
  • 1 teaspoon extra-virgin olive oil

Optional Garnishes

  • Fresh dill
  • Fresh parsley
  • Lemon wedges
  • Crushed red pepper flakes
  • Sesame seeds
  • Lemon zest

 Instructions

Step 1: Prepare the Salmon

Preheat your oven to 400°F (200°C).

Line a large baking sheet with parchment paper or lightly grease it with olive oil.

Pat the salmon fillets dry using paper towels.

Cut the salmon into smaller chunks.

For the best texture, use a food processor and pulse the salmon several times until it is finely chopped but still has some texture.

Do not puree the salmon into a smooth paste. Small pieces help create tender meatballs with a pleasant texture.

If you don’t have a food processor, simply chop the salmon very finely with a sharp knife.

 Step 2: Prepare the Mixture

Place the chopped salmon in a large mixing bowl.

Add:

  • Breadcrumbs
  • Egg
  • Red onion
  • Garlic
  • Parsley
  • Dill
  • Oregano
  • Dijon mustard
  • Lemon zest
  • Lemon juice
  • Smoked paprika
  • Salt
  • Black pepper
  • Olive oil

Mix gently using a spoon or clean hands until all ingredients are evenly combined.

Avoid overmixing because this can make the meatballs dense.

 Step 3: Chill the Mixture

Cover the bowl and refrigerate for approximately 15 minutes.

This short chilling period helps the mixture firm up, making it easier to shape.

If the mixture still feels very soft, add another tablespoon or two of breadcrumbs.

 Step 4: Shape the Meatballs

Using a tablespoon or small cookie scoop, portion the mixture.

Shape each portion into a ball approximately 1½ inches in diameter.

You should get around 18–22 salmon meatballs, depending on their size.

Place the meatballs on the prepared baking sheet, leaving a little space between each one.

Lightly brush or spray the tops with olive oil.

 Step 5: Bake

Place the baking sheet in the preheated oven.

Bake for approximately 15–20 minutes, turning the meatballs gently halfway through if desired.

They should be lightly golden on the outside and completely cooked through.

For food safety, salmon should reach an internal temperature of 145°F (63°C) at the thickest point.

Avoid overbaking because salmon can become dry when cooked for too long.

 Step 6: Make the Creamy Avocado Sauce

While the meatballs are baking, prepare the sauce.

Add the following to a blender or food processor:

  • Avocado
  • Greek yogurt
  • Lemon juice
  • Garlic
  • Dill
  • Parsley
  • Salt
  • Black pepper
  • Olive oil

Blend until completely smooth and creamy.

If the sauce is too thick, add 1 tablespoon of water at a time until you reach your desired consistency.

Taste and adjust the seasoning.

For extra brightness, add another squeeze of lemon juice.

Step 7: Serve

Transfer the warm salmon meatballs to a serving plate.

Spoon the creamy avocado sauce into a bowl or drizzle it lightly over the meatballs.

Garnish with fresh dill, parsley, lemon zest, or red pepper flakes.

Serve immediately with lemon wedges.

The combination of warm, savory salmon and cool, creamy avocado sauce is absolutely delicious.

 Tips for Perfect Salmon Meatballs

1. Use Fresh Salmon

Fresh salmon provides the best flavor and texture.

Frozen salmon can also work, but thaw it completely and pat it very dry before chopping.

Excess moisture can make the meatball mixture difficult to shape.

2. Don’t Overprocess

The salmon should be finely chopped rather than completely pureed.

A little texture creates better meatballs.

3. Chill Before Shaping

Refrigerating the mixture makes it firmer and easier to handle.

4. Don’t Make Them Too Large

Smaller meatballs cook more evenly and are easier to serve.

Aim for approximately 1½ inches in diameter.

5. Avoid Overbaking

Salmon cooks relatively quickly.

Once the meatballs reach the safe internal temperature, remove them from the oven.

6. Taste Before Cooking

If you’re unsure about seasoning, cook a tiny spoonful of the mixture in a skillet before shaping all the meatballs.

Taste it and adjust the salt, herbs, lemon, or spices as needed.

7. Make the Sauce Fresh

Avocado sauce is best when freshly prepared.

The lemon juice helps slow browning, but the sauce will naturally change color over time.

 What to Serve With Salmon Meatballs

These meatballs are extremely versatile.

Mediterranean Bowl

Create a colorful bowl with:

  • Salmon meatballs
  • Quinoa
  • Cucumber
  • Cherry tomatoes
  • Red onion
  • Olives
  • Feta
  • Avocado sauce

With Rice

Serve over fluffy white, brown, or lemon-herb rice.

With Quinoa

Quinoa makes an excellent high-protein grain option and pairs beautifully with the creamy avocado sauce.

With Roasted Vegetables

Try:

  • Broccoli
  • Zucchini
  • Bell peppers
  • Carrots
  • Asparagus
  • Sweet potatoes

With Salad

Serve over a crisp green salad with cucumber, tomatoes, red onion, and lemon dressing.

In Pita

Place the salmon meatballs inside warm pita with lettuce, cucumber, tomatoes, and avocado sauce for a delicious Mediterranean-inspired wrap.

 Flavor Variations

Garlic Herb Salmon Meatballs

Increase the garlic and add extra fresh parsley, dill, and oregano.

Spicy Salmon Meatballs

Add ¼–½ teaspoon crushed red pepper flakes or cayenne pepper to the salmon mixture.

Mediterranean Salmon Meatballs

Add finely chopped Kalamata olives, feta, parsley, oregano, and a little lemon zest.

Lemon Dill Salmon Meatballs

Increase the fresh dill and lemon zest for a bright, fresh flavor.

Parmesan Salmon Meatballs

Add ¼ cup finely grated Parmesan cheese to the mixture for extra savory flavor.

 Avocado Sauce Variations

The sauce can also be customized.

Spicy Avocado Sauce

Add a little jalapeño or red pepper flakes.

Cilantro-Lime Sauce

Replace parsley and lemon with fresh cilantro and lime juice.

Garlic Yogurt Sauce

Increase the Greek yogurt and garlic for a thicker, tangier sauce.

Tahini Avocado Sauce

Add 1 tablespoon tahini for a nuttier Mediterranean-style flavor.

 Storage

Store cooked salmon meatballs in an airtight container in the refrigerator for up to 3 days.

Store the avocado sauce separately.

The sauce is best consumed within 1–2 days.

When reheating the meatballs, use the oven, air fryer, or microwave.

For best texture, reheat gently rather than cooking them at high heat for a long period.

 Can You Freeze Salmon Meatballs?

Yes.

Allow the cooked meatballs to cool completely.

Place them on a tray in a single layer and freeze until firm. Transfer them to a freezer-safe bag or container.

They can be frozen for approximately 2–3 months for best quality.

Thaw overnight in the refrigerator and reheat thoroughly.

It is better to make the avocado sauce fresh rather than freezing it because avocado can develop an altered texture after freezing and thawing.

 Make-Ahead Instructions

You can prepare the salmon mixture several hours ahead.

Shape the meatballs and place them on a covered tray in the refrigerator.

When ready to cook, simply bake them according to the recipe.

The avocado sauce can be prepared shortly before serving.

This makes the recipe convenient for busy weeknights and entertaining.

 Approximate Nutritional Information

The following estimates are based on approximately 5 servings and include the avocado sauce.

Calories: 430–470 kcal
Protein: 32–36 g
Carbohydrates: 14–18 g
Fat: 28–31 g
Fiber: 5–7 g
Sugar: 2–4 g
Sodium: Approximately 500–700 mg
Calcium: Approximately 100–150 mg

Actual nutrition will vary according to the type of salmon, breadcrumbs, Greek yogurt, avocado size, and amount of olive oil used.

 Potential Benefits

 High-Quality Protein

Salmon provides high-quality protein, which helps make these meatballs satisfying and filling.

 Omega-3 Fatty Acids

Salmon is naturally rich in long-chain omega-3 fatty acids, including EPA and DHA.

 Healthy Fats

Avocado and extra-virgin olive oil provide predominantly unsaturated fats.

 Fresh Herbs

Parsley and dill add fresh flavor while contributing small amounts of vitamins and plant compounds.

 Vitamin C

Lemon juice and fresh vegetables served alongside the meatballs can contribute vitamin C.

 Balanced Meal

When served with vegetables and a whole grain such as quinoa or brown rice, these salmon meatballs can form part of a balanced meal.

These are general nutritional benefits and are not medical advice.

Frequently Asked Questions

Can I use canned salmon?

Yes. Canned salmon can be used, although the flavor and texture will be somewhat different. Drain it extremely well before mixing.

Can I use frozen salmon?

Yes. Thaw it completely and pat it very dry before chopping.

Why are my salmon meatballs falling apart?

The mixture may contain too much moisture or may need additional breadcrumbs. Chilling the mixture before shaping also helps.

Can I make these without breadcrumbs?

Yes. You can experiment with almond flour, oat flour, crushed gluten-free crackers, or additional finely ground oats.

Can I use panko?

Absolutely. Panko creates a slightly lighter texture and works very well.

Can I air-fry the meatballs?

Yes. Air fry at approximately 375°F (190°C) for around 10–14 minutes, depending on size, turning halfway through. Check the internal temperature before serving.

Can I pan-fry them?

Yes. Heat a small amount of olive oil in a skillet and cook the meatballs gently until browned and cooked through.

How do I know when salmon meatballs are done?

The safest method is to check the center with a food thermometer. Salmon should reach 145°F (63°C).

Can I make the avocado sauce without Greek yogurt?

Yes. You can replace the yogurt with a little olive oil and water, or use a dairy-free yogurt alternative.

How can I prevent avocado sauce from turning brown?

Fresh lemon juice helps slow oxidation. Press plastic wrap directly against the surface if storing it briefly in the refrigerator.

Can children eat these meatballs?

They can be a family-friendly option, but adjust seasonings according to taste and make sure the salmon is fully cooked. Always check carefully for bones when preparing salmon.

Can I add vegetables to the meatballs?

Yes. Finely minced spinach, zucchini, bell pepper, or grated carrot can be added. Be careful not to add too much moisture.

What herbs pair best with salmon?

Dill, parsley, chives, oregano, basil, and cilantro all pair well with salmon.

Can I make these gluten-free?

Yes. Use certified gluten-free breadcrumbs or another gluten-free binder.

Can I make them dairy-free?

Yes. Replace Greek yogurt with a dairy-free yogurt or create an avocado-based sauce without yogurt.

What is the best way to reheat them?

Reheat gently in a 350°F oven until warmed through, or use an air fryer at a moderate temperature. Avoid excessive reheating because salmon can dry out.

Hot Honey Glazed Salmon Bites with Whipped Goat Cheese

Hot Honey Glazed Salmon Bites with Whipped Goat Cheese

Ingredients
Salmon Bites
1½ pounds skinless salmon fillets, cut into 1-inch cubes
1 tablespoon olive oil
1 teaspoon smoked paprika
½ teaspoon garlic powder
½ teaspoon onion powder
½ teaspoon salt
¼ teaspoon black pepper
⅓ cup hot honey
1 tablespoon fresh lemon juice
1 teaspoon Dijon mustard
Whipped Goat Cheese
6 ounces soft goat cheese
¼ cup Greek yogurt
1 tablespoon olive oil
1 tablespoon fresh lemon juice
1 teaspoon honey
Pinch of salt
For Garnish
Fresh parsley or dill
Lemon zest
Crushed red pepper flakes
Extra hot honey
 Instructions
1. Prepare the Salmon
Pat the salmon dry with paper towels and cut it into evenly sized cubes. Place the salmon in a bowl and toss with olive oil, smoked paprika, garlic powder, onion powder, salt, and black pepper.
2. Make the Glaze
In a small bowl, whisk together the hot honey, lemon juice, and Dijon mustard. Set aside.
3. Cook the Salmon
Heat a large skillet over medium-high heat. Add the seasoned salmon pieces in a single layer, leaving space between them.
Cook for about 2–3 minutes per side, turning gently until the salmon is golden and nearly cooked through.
Pour the hot honey glaze over the salmon and toss gently. Cook for another 1–2 minutes, allowing the glaze to become glossy and caramelized.
Cook salmon to a safe internal temperature of 145°F (63°C).
4. Make the Whipped Goat Cheese
Add goat cheese, Greek yogurt, olive oil, lemon juice, honey, and salt to a food processor.
Blend until completely smooth and fluffy. If it seems too thick, add a teaspoon of water or additional yogurt.
5. Serve
Spread the whipped goat cheese onto a serving platter. Arrange the hot honey salmon bites over the cheese.
Drizzle with additional hot honey and garnish with fresh parsley, lemon zest, and a small pinch of red pepper flakes.
Serve immediately while the salmon is warm.
 Tips
Pat the salmon dry before seasoning for better browning.
Cut the salmon into similar-sized pieces so everything cooks evenly.
Don’t overcrowd the skillet; cook in batches if necessary.
Add the honey glaze near the end to prevent burning.
For a milder version, use regular honey with a pinch of chili flakes.
Serve the goat cheese at room temperature for the creamiest texture.
 Serving Ideas
Serve these salmon bites with toasted sourdough, cucumber slices, roasted vegetables, a fresh green salad, or warm pita bread. They also make a beautiful appetizer for dinner parties and holiday gatherings.
Sweet, spicy, crispy, creamy, and absolutely delicious—these Hot Honey Salmon Bites are guaranteed to disappear fast!

Lemon Dijon Chicken Orzo Bowl with Garlic Whipped Feta

Lemon Dijon Chicken Orzo Bowl with Garlic Whipped Feta

Ingredients
Lemon Dijon Chicken
2 boneless, skinless chicken breasts, diced
2 tablespoons extra virgin olive oil
1 tablespoon Dijon mustard
2 tablespoons fresh lemon juice
2 cloves garlic, minced
1 teaspoon dried oregano
1/2 teaspoon paprika
1 teaspoon sea salt
1/2 teaspoon freshly ground black pepper
Orzo Bowl
1 1/2 cups orzo pasta
1 cup cucumber, diced
1 cup cherry tomatoes, halved
2 cups baby spinach
2 tablespoons chopped fresh parsley
Garlic Whipped Feta
1 cup feta cheese
1/3 cup Greek yogurt
2 cloves garlic, minced
1 tablespoon fresh lemon juice
1 tablespoon extra virgin olive oil
1/4 teaspoon freshly ground black pepper
Optional Garnish
Extra feta cheese
Fresh parsley
Lemon wedges
Cracked black pepper
Thinly sliced cucumber
Directions
Cook the orzo according to package directions until tender. Drain and set aside.
In a bowl, whisk together olive oil, Dijon mustard, lemon juice, garlic, oregano, paprika, sea salt, and black pepper.
Add the diced chicken and marinate for 15–20 minutes.
Heat a large skillet over medium-high heat and cook the chicken for 6–8 minutes until golden brown and fully cooked.
In a food processor, combine feta cheese, Greek yogurt, garlic, lemon juice, olive oil, and black pepper. Blend until smooth and creamy.
Divide the cooked orzo among serving bowls.
Top with baby spinach, cucumber, cherry tomatoes, and the cooked lemon Dijon chicken.
Add generous spoonfuls of the garlic whipped feta over each bowl.
Garnish with fresh parsley, extra feta cheese, lemon wedges, cracked black pepper, and additional cucumber if desired.
Serve immediately while fresh and flavorful.
Nutritional Information
Calories: ~540 per serving
Carbohydrates: 41g
Fat: 24g
Protein: 39g
Fiber: 4g
Sugar: 5g

CLASSIC GREEK SALAD (HORIATIKI)

CLASSIC GREEK SALAD (HORIATIKI)

Description

Classic Greek Salad, also known as Horiatiki, is one of the simplest and most refreshing dishes in Greek cuisine. Made with ripe tomatoes, crisp cucumber, green bell pepper, red onion, Kalamata olives, and creamy feta cheese, this salad celebrates fresh ingredients rather than complicated cooking techniques.

Unlike many modern versions of Greek salad, a traditional Greek salad generally does not contain lettuce. Instead, large pieces of juicy tomatoes and crunchy vegetables are combined with briny olives and a generous piece or chunks of feta. Everything is finished with extra-virgin olive oil, oregano, and a simple red wine vinegar dressing.

The result is colorful, refreshing, salty, tangy, and incredibly satisfying. It makes a wonderful side dish for grilled chicken, fish, steak, gyros, or roasted vegetables, but it can also become a light meal when served with warm pita or crusty bread.

 Recipe Information

Recipe Name: Classic Greek Salad
Greek Name: Horiatiki
Cuisine: Greek / Mediterranean
Course: Salad / Side Dish
Prep Time: 15 minutes
Cook Time: None
Total Time: 15 minutes
Servings: 6
Difficulty: Easy

 Ingredients

For the Salad

  • 4 large ripe tomatoes
  • 1 large English cucumber or 2 small cucumbers
  • 1 green bell pepper
  • ½ medium red onion
  • ¾ cup Kalamata olives
  • 6–8 oz Greek feta cheese
  • 1–2 teaspoons dried Greek oregano

For the Dressing

  • ⅓ cup extra-virgin olive oil
  • 2 tablespoons red wine vinegar
  • 1 tablespoon fresh lemon juice, optional
  • ½ teaspoon dried oregano
  • ¼ teaspoon freshly ground black pepper
  • Small pinch of salt, if needed

Optional Garnishes

  • Fresh oregano
  • Fresh parsley
  • A few extra Kalamata olives
  • Lemon wedges
  • Crusty bread or warm pita

 How to Make Classic Greek Salad

Step 1: Prepare the Tomatoes

Wash and dry the tomatoes thoroughly.

Cut them into large wedges or chunky pieces.

For an authentic rustic appearance, avoid cutting the tomatoes too small. The salad should look generous and naturally assembled rather than finely chopped.

Place the tomatoes in a large serving bowl.

Tip

Use the ripest tomatoes you can find. Since this recipe uses very few ingredients, the flavor of each ingredient really matters.

Step 2: Slice the Cucumber

Wash the cucumber and cut it into thick slices or half-moons.

If you’re using a standard cucumber with a thick or bitter skin, you can peel some or all of it. English cucumbers generally have a thin, mild skin and don’t need peeling.

Add the cucumber to the tomatoes.

Step 3: Add the Green Pepper

Remove the stem and seeds from the green bell pepper.

Cut it into thin strips or bite-sized pieces.

Add it to the bowl.

The green pepper provides a crisp texture and slightly bitter, fresh flavor that balances the sweetness of the tomatoes.

Step 4: Add Red Onion

Thinly slice the red onion.

If you prefer a milder onion flavor, place the slices in a bowl of cold water for approximately 5–10 minutes, then drain thoroughly.

Add the onion to the salad.

 Step 5: Add Kalamata Olives

Add the Kalamata olives.

You can use whole olives or pitted olives depending on your preference.

Kalamata olives provide a deep, fruity, salty flavor that is essential to the Mediterranean character of this salad.

 Step 6: Add the Feta

Cut te feta into large pieces or leave it in a thick slab on top of the vegetables.

A traditional Greek-style presentation often features a large piece of feta rather than finely crumbled feta.

This allows the creamy cheese to remain prominent in every serving.

Use authentic Greek feta made from sheep’s milk or a sheep-and-goat milk blend when available.

 Step 7: Make the Dressing

In a small bowl, whisk together:

  • Extra-virgin olive oil
  • Red wine vinegar
  • Lemon juice
  • Dried oregano
  • Black pepper

Taste before adding salt because both feta and Kalamata olives are naturally salty.

For a more traditional minimalist version, you can simply drizzle the olive oil directly over the salad and finish with vinegar and oregano.

 Step 8: Finish the Salad

Drizzle the dressing over the vegetables and feta.

Sprinkle dried oregano generously over the top.

Add a few fresh oregano leaves or parsley if desired.

Do not aggressively toss the salad. Gently mix the vegetables around the feta so the tomatoes don’t become crushed and the feta retains its texture.

Serve immediately.

 What Makes a Greek Salad Authentic?

A traditional Horiatiki is intentionally simple.

The essential ingredients are generally:

  • Tomatoes
  • Cucumber
  • Green pepper
  • Onion
  • Olives
  • Feta
  • Olive oil
  • Oregano

One of the biggest differences between traditional Greek salad and many restaurant-style versions is lettuce.

Traditional Greek Salad Usually Has No Lettuce

Modern recipes sometimes add romaine or mixed greens, but classic Horiatiki is primarily a combination of chunky vegetables, olives, and feta.

It’s also not typically overloaded with ingredients such as corn, avocado, ranch dressing, or creamy sauces.

The goal is to allow fresh vegetables, good olive oil, feta, olives, and oregano to shine.

 Tips for the Best Greek Salad

1. Choose Excellent Tomatoes

Tomatoes are arguably the most important ingredient.

Choose ripe, juicy tomatoes that smell fragrant and have good color.

If tomatoes are underripe, the salad can taste watery and bland.

2. Use Good Olive Oil

Extra-virgin olive oil is not just a dressing ingredient—it is an important part of the flavor.

A fruity, high-quality olive oil can make a huge difference.

3. Don’t Overdress

Greek salad should taste fresh rather than heavy.

Start with a moderate amount of dressing and add more if needed.

Remember that the tomatoes will release their own juices.

4. Don’t Add Too Much Salt

Feta and Kalamata olives already contain plenty of salt.

Taste the finished salad before adding additional salt.

5. Add Oregano Generously

Dried oregano gives Greek salad its distinctive Mediterranean aroma.

Rub the oregano lightly between your fingers before sprinkling it over the salad to release more fragrance.

6. Serve It Fresh

This salad is best shortly after assembling.

If it sits for too long, the tomatoes and cucumbers release liquid and the vegetables lose some of their crispness.

 Don’t Waste the Salad Juice!

One of the best parts of Greek salad is the flavorful liquid that collects at the bottom of the bowl.

The tomato juices combine with olive oil, vinegar, oregano, and feta to create an incredibly delicious dressing.

Serve the salad with warm crusty bread or pita and use it to soak up the juices.

This simple step turns an ordinary salad into a truly satisfying Mediterranean experience.

 Serving Suggestions

Classic Greek salad pairs beautifully with almost any Mediterranean meal.

With Chicken

Serve it with:

  • Greek lemon chicken
  • Grilled chicken skewers
  • Chicken gyros
  • Garlic herb chicken
  • Grilled chicken breast

With Seafood

Try it alongside:

  • Grilled salmon
  • Lemon garlic shrimp
  • Baked white fish
  • Grilled prawns
  • Mediterranean cod

With Beef

It pairs wonderfully with:

  • Beef gyros
  • Grilled steak
  • Beef kebabs
  • Lamb chops
  • Mediterranean meatballs

Vegetarian Meal

Make it a complete light meal by serving it with:

  • Warm pita
  • Hummus
  • Falafel
  • Lentil soup
  • Roasted chickpeas
  • Grilled halloumi

 Easy Variations

Although classic Horiatiki is intentionally simple, you can adapt it for different occasions.

Greek Salad with Chickpeas

Add 1 cup of drained chickpeas for additional protein and fiber.

Greek Salad with Avocado

Add sliced avocado for a creamy texture. This isn’t traditional, but it makes a delicious modern variation.

Greek Chicken Greek Salad

Add sliced grilled chicken for a filling lunch or dinner.

Greek Salad with Herbs

Add fresh dill, parsley, or mint for a more herb-forward version.

Spicy Greek Salad

Add sliced fresh chili peppers or crushed red pepper flakes.

 Storage

Greek salad is best eaten fresh, but leftovers can be refrigerated.

Store it in an airtight container for approximately 1–2 days.

For the best texture, keep the dressing separate if you are preparing the salad in advance.

If storing leftovers that have already been dressed, expect the vegetables to become softer and release more liquid.

 Make-Ahead Instructions

If you’re preparing this salad for a party or dinner:

Up to 4 hours ahead

  • Cut the tomatoes.
  • Slice the cucumber.
  • Prepare the pepper.
  • Slice the onion.
  • Measure the olives.
  • Prepare the dressing separately.

Refrigerate everything.

Just before serving

Combine the vegetables, add olives and feta, drizzle with dressing, and finish with oregano.

This gives you a fresher, crunchier salad.

 Approximate Nutritional Information

Based on approximately 6 servings:

Calories: 250–290 kcal
Protein: 7–9 g
Carbohydrates: 10–14 g
Fat: 21–24 g
Fiber: 3–4 g
Sugar: 5–7 g
Sodium: Approximately 550–750 mg
Calcium: Approximately 180–220 mg

Nutrition will vary depending on the amount of feta, olives, and olive oil used.

 Potential Benefits

 Tomatoes

Tomatoes provide vitamin C, potassium, fiber, and naturally occurring antioxidant compounds such as lycopene.

 Cucumbers

Cucumbers contribute water and a refreshing crunch while adding relatively few calories.

 Bell Peppers

Green peppers provide vitamin C and various plant compounds.

 Extra-Virgin Olive Oil

Olive oil provides predominantly monounsaturated fat and is a foundational ingredient in Mediterranean-style eating.

 Feta

Feta provides protein and calcium while contributing the characteristic salty, creamy flavor of Greek salad.

 Olives

Kalamata olives contribute unsaturated fats and flavorful plant compounds.

Overall

This salad combines vegetables, olive oil, olives, and moderate amounts of cheese into a colorful Mediterranean-inspired dish.

These are general nutritional observations and are not medical advice.

 Frequently Asked Questions

Does authentic Greek salad have lettuce?

Traditional Horiatiki generally does not contain lettuce. It is made primarily with chunky tomatoes, cucumber, green pepper, onion, olives, feta, olive oil, and oregano.

Can I use cherry tomatoes?

Yes. Cherry or grape tomatoes work well, especially when large ripe tomatoes aren’t available. Cut them in half before adding them.

What kind of feta is best?

Greek feta made from sheep’s milk or a sheep-and-goat milk blend is an excellent choice. Block feta generally provides a creamier texture than pre-crumbled feta.

Can I use black olives?

You can, but Kalamata olives are preferred for their distinctive Greek flavor.

Can I make Greek salad without feta?

Yes. The salad will still be delicious, although feta provides the classic salty and creamy element.

Can I add lettuce?

You can if you prefer. However, adding lettuce turns it into more of a modern Greek-style salad rather than traditional Horiatiki.

Can I use balsamic vinegar?

Yes, but red wine vinegar is more traditional for this style of Greek salad. Balsamic vinegar adds a sweeter, darker flavor.

Is lemon juice traditional?

Lemon juice can be used, but a very simple traditional preparation may rely primarily on olive oil, vinegar, and oregano.

How long does Greek salad last?

For the best texture, enjoy it the same day. Once dressed, the vegetables will gradually soften and release liquid.

Can I prepare it the night before?

You can prepare the vegetables and dressing separately the night before. Combine everything shortly before serving for the best result.

Why is my salad watery?

Tomatoes and cucumbers naturally contain a lot of water. Cutting them too early, adding salt too soon, or allowing the salad to sit dressed for a long time can increase the amount of liquid.

Should I peel the cucumber?

It’s optional. English cucumbers have thin skins and generally don’t need peeling.

Can I add chicken?

Absolutely. Grilled chicken makes this salad a satisfying high-protein meal.

What bread goes with Greek salad?

Warm pita, rustic sourdough, or crusty Mediterranean-style bread are all excellent choices.

Can I make it vegan?

Yes. Simply omit the feta or use a plant-based feta alternative.

Is Greek salad good for meal prep?

Yes, if you keep the dressing separate. Store chopped vegetables, olives, feta, and dressing separately and combine when ready to eat.

Roasted Root Vegetable Bake with Feta, Walnuts & Fresh Herbs

Roasted Root Vegetable Bake with Feta, Walnuts & Fresh Herbs

Description

This Roasted Root Vegetable Bake with Feta, Walnuts & Fresh Herbs is a beautiful, colorful side dish inspired by Mediterranean flavors. Thinly sliced beets, sweet potatoes, carrots, and golden root vegetables are arranged in overlapping layers, seasoned with olive oil, garlic, thyme, rosemary, salt, and black pepper, then roasted until tender and beautifully caramelized.

The finishing touches make this dish especially delicious: creamy, salty feta cheese, crunchy toasted walnuts, and fresh herbs scattered over the warm vegetables. A light drizzle of honey or maple syrup can also be added for a subtle sweet contrast.

It is an excellent choice for holiday dinners, Sunday roasts, vegetarian meals, or an elegant weeknight side. The vegetables look impressive straight from the oven, but the recipe itself is surprisingly simple.

Recipe Information

Recipe Name: Roasted Root Vegetable Bake with Feta & Walnuts
Prep Time: 20 minutes
Cook Time: 45–55 minutes
Total Time: About 1 hour 15 minutes
Servings: 6
Course: Side Dish
Cuisine: Mediterranean-inspired
Difficulty: Easy

 Ingredients

For the Vegetables

  • 2 medium sweet potatoes
  • 2 medium golden beets
  • 2 medium red beets
  • 3 large carrots
  • 1 large yellow onion
  • 2–3 tablespoons extra-virgin olive oil
  • 3 cloves garlic, finely minced
  • 1 teaspoon dried thyme
  • 1 teaspoon dried rosemary
  • ½ teaspoon dried oregano
  • ½ teaspoon smoked paprika
  • 1 teaspoon salt
  • ½ teaspoon freshly ground black pepper

For the Topping

  • ¾ cup crumbled feta cheese
  • ½ cup walnuts, roughly chopped
  • 1–2 tablespoons fresh parsley
  • 1 teaspoon fresh thyme leaves
  • 1–2 tablespoons honey or pure maple syrup, optional
  • 1 tablespoon lemon juice
  • 1 teaspoon lemon zest, optional

Optional Garnish

  • Extra virgin olive oil
  • Fresh rosemary
  • Cracked black pepper
  • Pumpkin seeds
  • Pomegranate seeds

 How to Make Roasted Root Vegetable Bake

Step 1: Prepare the Oven

Preheat your oven to 400°F (200°C).

Lightly grease a large baking dish with olive oil. A rectangular or oval baking dish works especially well.

The vegetables should fit comfortably without being packed too tightly.

Step 2: Prepare the Vegetables

Wash and peel the sweet potatoes, carrots, and beets.

Slice the vegetables into thin rounds, approximately ¼ inch thick.

Try to keep the slices relatively similar in thickness. This helps them cook evenly.

Slice the onion into thin wedges or half-moons.

Important Tip

Beets can stain your hands and cutting board. If you prefer, prepare the beets separately and wash your knife and board immediately after slicing.

 Step 3: Make the Herb-Olive Oil Mixture

Add the olive oil to a small bowl.

Stir in:

  • Minced garlic
  • Thyme
  • Rosemary
  • Oregano
  • Smoked paprika
  • Salt
  • Black pepper

Add the lemon juice and mix well.

This imple mixture gives the vegetables a wonderful savory, herby Mediterranean flavor.

 Step 4: Coat the Vegetables

Place the sliced vegetables in a large bowl.

Pour the seasoned olive oil over them.

Gently toss until all of the slices are lightly coated.

Don’t use too much oil. The vegetables should have a thin coating rather than being soaked.

 Step 5: Arrange the Vegetables

Now comes the fun part.

Arrange the vegetable slices upright in the baking dish, slightly overlapping each other.

You can create rows of:

Sweet potato → carrot → golden beet → red beet → onion

Then repeat the pattern until the dish is filled.

The different colors create a beautiful presentation.

If you don’t want to arrange them individually, simply layer the vegetables in the dish. The flavor will be just as delicious.

 Step 6: Roast

Cover the baking dish loosely with aluminum foil.

Bake for approximately 25–30 minutes.

Remove the foil and continue baking for another 20–25 minutes, or until the vegetables are tender and the edges are lightly caramelized.

For additional browning, turn the oven to broil for the final 2–3 minutes.

Watch carefully because the vegetables can brown quickly under the broiler.

 Step 7: Add the Feta

Remove the hot vegetable bake from the oven.

Sprinkle crumbled feta evenly over the top.

The warmth of the vegetables will soften the feta slightly without completely melting it.

For an extra creamy result, you can add the feta during the final 5 minutes of baking instead.

 Step 8: Add the Walnuts

Scatter the chopped walnuts over the feta.

For the best flavor, toast the walnuts beforehand.

Simply place them in a dry skillet over medium-low heat for about 3–5 minutes, stirring frequently.

Remove them as soon as they become fragrant.

Be careful not to burn them.

 Step 9: Finish the Dish

For a sweet-savory finish, drizzle 1–2 tablespoons of honey or maple syrup over the warm vegetables.

Add fresh parsley and thyme.

Finish with a little lemon zest and freshly cracked black pepper.

You can also add a very light drizzle of extra-virgin olive oil before serving.

 Why This Recipe Works

This dish combines several textures and flavors in one pan.

The root vegetables become tender and caramelized during roasting. Sweet potatoes and carrots provide natural sweetness, while beets add an earthy flavor and vibrant color.

Feta adds creamy saltiness.

Walnuts provide crunch.

Fresh herbs brighten the dish.

Lemon juice adds acidity that balances the sweetness of the roasted vegetables.

The result is a side dish that feels both rustic and elegant.

 Serving Suggestions

This roasted vegetable bake pairs beautifully with many main dishes.

With Chicken

Serve alongside:

  • Lemon herb chicken
  • Garlic roasted chicken
  • Greek chicken
  • Grilled chicken breast
  • Chicken gyros

With Beef

It works particularly well with:

  • Roast beef
  • Beef tenderloin
  • Steak
  • Slow-cooked shredded beef
  • Beef kebabs

With Fish

Try it with:

  • Baked salmon
  • Lemon garlic white fish
  • Grilled cod
  • Mediterranean baked fish

Vegetarian Meal

For a satisfying vegetarian meal, serve it with:

  • Chickpea salad
  • Lentil soup
  • Warm quinoa
  • Couscous
  • Crusty whole-grain bread
  • Greek yogurt sauce

 Expert Tips for the Best Results

1. Slice Everything Evenly

The thickness of your vegetable slices matters.

Very thick pieces may remain firm while thin pieces become overly soft.

Aim for approximately ¼-inch slices.

2. Don’t Overcrowd the Dish

Crowded vegetables tend to steam rather than roast.

If your baking dish is very full, use a second dish or roasting pan.

3. Use Good Olive Oil

Extra-virgin olive oil adds flavor as well as helping the vegetables brown beautifully.

4. Don’t Add Feta Too Early

Adding feta at the beginning can cause it to become overly dry.

For a creamy, fresh texture, add it toward the end.

5. Toast the Walnuts

Toasting takes only a few minutes but gives the walnuts a much deeper flavor.

6. Balance Sweetness

If you’re using honey or maple syrup, don’t add too much.

The vegetables already become naturally sweet during roasting.

7. Finish With Acid

A small squeeze of lemon juice at the end makes a surprisingly big difference. It keeps the dish from tasting too heavy.

 Recipe Variations

Add Butternut Squash

Replace some of the sweet potato with thinly sliced butternut squash.

Its natural sweetness works beautifully with feta and walnuts.

Add Brussels Sprouts

Halved Brussels sprouts can be roasted alongside the other vegetables.

They add a slightly nutty, savory flavor.

Add Goat Cheese

If you don’t have feta, creamy goat cheese is an excellent alternative.

Add Balsamic Glaze

Drizzle a small amount of balsamic glaze over the finished dish for a sweet and tangy finish.

Add Pomegranate

Fresh pomegranate seeds make a gorgeous topping and provide a bright burst of acidity.

Make It Spicy

Add ¼–½ teaspoon of crushed red pepper flakes to the olive oil mixture.

 Mediterranean Flavor Boost

For an even stronger Mediterranean character, add:

  • Kalamata olives
  • Fresh parsley
  • Lemon zest
  • Fresh oregano
  • A little za’atar
  • Crumbled feta
  • Toasted almonds or walnuts

You can also serve the vegetables with a spoonful of Greek yogurt mixed with lemon juice and garlic.

 Storage

Allow leftovers to cool before transferring them to an airtight container.

Refrigerate for 3–4 days.

Store the walnuts separately if possible so they remain crunchy.

To reheat, place the vegetables in a 375°F oven for approximately 10–15 minutes.

You can also microwave them, but the oven gives better texture.

 Can You Freeze It?

The roasted vegetables can technically be frozen, but the texture may become softer after thawing.

For the best result, prepare the vegetables fresh.

If you do freeze them, leave off the feta and walnuts until after reheating.

Thaw overnight in the refrigerator, then reheat in the oven and add fresh toppings.

 Approximate Nutritional Information

Per serving, based on 6 servings:

  • Calories: 300–340 kcal
  • Protein: 7–9 g
  • Carbohydrates: 40–45 g
  • Fat: 14–17 g
  • Fiber: 8–10 g
  • Sugar: 12–16 g
  • Sodium: 450–600 mg
  • Calcium: Approximately 120–160 mg

Nutrition is an estimate and will vary according to vegetable sizes, feta, olive oil, walnuts, and optional honey or maple syrup.

 Potential Nutritional Benefits

 Rich in Fiber

Root vegetables provide dietary fiber, which contributes to a satisfying and balanced meal.

 Naturally Nutrient-Rich

Sweet potatoes, carrots, and beets provide a variety of vitamins, minerals, and naturally occurring plant compounds.

 Healthy Fats

Walnuts and extra-virgin olive oil contribute unsaturated fats to the dish.

 Protein and Calcium

Feta contributes protein and calcium while adding a delicious salty flavor.

 Plenty of Plant Foods

This recipe combines several colorful vegetables in one dish, making it an easy way to add variety to your meals.

These are general nutritional observations, not medical advice.

 Frequently Asked Questions

Can I make this recipe ahead of time?

Yes. You can slice the vegetables and prepare the seasoning several hours ahead. Keep the prepared vegetables refrigerated until you’re ready to bake.

Can I use different vegetables?

Absolutely. Parsnips, turnips, rutabaga, butternut squash, Brussels sprouts, and potatoes can all work.

Do I have to peel the vegetables?

Peeling is recommended for beets and usually preferred for carrots and sweet potatoes, but well-scrubbed vegetables can sometimes be roasted with their skins.

Why are my vegetables taking longer to cook?

Vegetable size, thickness, oven temperature, and the type of baking dish can all affect cooking time. Continue roasting until a fork easily pierces the thickest pieces.

Can I use pre-cooked beets?

Yes. Pre-cooked beets can save time. Since they are already tender, add them later in the cooking process so they don’t become too soft.

Can I use another cheese?

Yes. Goat cheese, ricotta salata, or even Parmesan can be used. Feta provides the best salty Mediterranean contrast.

Can I make it vegan?

Yes. Simply leave out the feta or replace it with your favorite plant-based feta alternative. Use maple syrup instead of honey.

Is honey necessary?

No. The honey is optional. The vegetables already have plenty of natural sweetness.

Can I make this gluten-free?

Yes. The ingredients listed are naturally gluten-free, but always check packaged ingredients such as seasonings and cheese if gluten contamination is a concern.

Can I make it dairy-free?

Yes. Omit the feta or use a dairy-free feta-style cheese.

What herbs work best?

Thyme, rosemary, oregano, parsley, and fresh sage all pair beautifully with roasted root vegetables.

Can I use dried herbs?

Definitely. Dried herbs are convenient and work very well during roasting. Fresh herbs are best added toward the end for a brighter flavor.

Spinach & Feta Egg Muffins

Spinach & Feta Egg Muffins

Description

Spinach & Feta Egg Muffins are delicious, protein-rich little breakfast bites made with fluffy eggs, fresh spinach, tangy feta cheese, and simple seasonings. They’re easy to prepare, naturally portion-controlled, and perfect for busy mornings, brunch, meal prep, or a quick snack.

These savory egg muffins have a soft, tender center with slightly golden edges and little pockets of creamy, salty feta throughout. Fresh spinach adds color, flavor, and nutrients without overpowering the eggs. You can enjoy them warm straight from the oven or refrigerate them for an easy grab-and-go breakfast throughout the week.

The best thing about this recipe is how customizable it is. You can add tomatoes, bell peppers, onions, mushrooms, herbs, turkey, chicken, or other vegetables depending on what you have in your refrigerator.

 Recipe Information

Recipe Name: Spinach & Feta Egg Muffins
Prep Time: 10 minutes
Cook Time: 18–22 minutes
Total Time: About 30 minutes
Servings: 12 egg muffins
Difficulty: Easy
Cuisine: American / Mediterranean-inspired
Best For: Breakfast, brunch, meal prep, snack

 Ingredients

Egg Muffins

  • 10 large eggs
  • ½ cup milk
  • 2 cups fresh baby spinach, roughly chopped
  • ¾ cup crumbled feta cheese
  • ¼ cup finely diced red bell pepper
  • ¼ cup finely diced onion
  • 1 tablespoon chopped fresh parsley
  • ½ teaspoon garlic powder
  • ½ teaspoon dried oregano
  • ¼ teaspoon black pepper
  • ¼ teaspoon salt
  • 1 tablespoon olive oil
  • ¼ cup shredded mozzarella, optional

Optional Additions

  • Cherry tomatoes, halved
  • Sliced mushrooms
  • Chopped green onions
  • Fresh dill
  • Chopped basil
  • Cooked turkey
  • Cooked chicken
  • Diced turkey bacon
  • Red pepper flakes
  • A pinch of smoked paprika

 How to Make Spinach & Feta Egg Muffins

Step 1: Preheat the Oven

Preheat your oven to 375°F (190°C).

Lightly grease a 12-cup muffin pan with olive oil or nonstick cooking spray.

You can also use silicone muffin cups, which make removing the egg muffins particularly easy.

Greasing the pan well is important because eggs can stick as they bake.
Step 2: Prepare the Spinach

Wash the spinach if necessary and pat it completely dry.

Roughly chop the spinach into smaller pieces.

Heat 1 tablespoon of olive oil in a skillet over medium heat.

Add the spinach and cook for approximately 1–2 minutes, just until it wilts.

Remove it from the heat and allow it to cool slightly.

Why sauté the spinach?

Fresh spinach contains a lot of water. Quickly wilting it helps remove some excess moisture and prevents your egg muffins from becoming watery.

 Step 3: Whisk the Eggs

Crack the eggs into a large mixing bowl.

Add the milk, garlic powder, oregano, black pepper, and salt.

Whisk thoroughly until the eggs are smooth and evenly combined.

Don’t worry about whipping excessive air into the eggs. You simply want a consistent mixture.

If you’re using mozzarella, add it to the egg mixture now.

 Step 4: Add the Vegetables

Add the wilted spinach, diced red bell pepper, onion, and parsley to the egg mixture.

Stir gently to distribute everything evenly.

Finally, fold in about half of the feta cheese.

Reserve the remaining feta for sprinkling over the tops.

 Step 5: Fill the Muffin Pan

Carefully divide the egg mixture among the 12 muffin cups.

Fill each cup approximately ¾ full.

Don’t fill them all the way to the top because the eggs will puff as they bake.

Sprinkle the remaining feta evenly over each muffin.

For extra flavor, add a tiny pinch of oregano or black pepper to the top.

 Step 6: Bake

Place the muffin pan in the preheated oven.

Bake for approximately 18–22 minutes, or until the eggs are set in the center and lightly golden around the edges.

The muffins may puff up considerably while baking. This is completely normal.

They will naturally deflate slightly as they cool.

To check whether they’re done, gently touch the center of one muffin. It should feel firm rather than liquid or jiggly.

 Step 7: Cool and Serve

Remove the pan from the oven and allow the egg muffins to cool for about 5 minutes.

Run a small silicone spatula or butter knife around the edges if necessary.

Carefully remove the muffins from the pan.

Serve warm with fresh parsley, dill, or additional crumbled feta.

They are delicious on their own or paired with avocado, fresh fruit, toast, or a simple salad.

 Notes for Perfect Egg Muffins

Don’t Overfill the Muffin Cups

Eggs expand during baking. Keeping the cups around three-quarters full gives them enough room to rise.

Drain the Spinach

Excess moisture is one of the biggest reasons egg muffins can become watery. If using frozen spinach, thaw it completely and squeeze out as much water as possible.

Don’t Overbake

Overcooked eggs become rubbery and dry. Remove the muffins once the centers are set.

Crumble the Feta

Small pieces of feta distribute more evenly throughout the muffins, ensuring every bite gets a little salty, creamy cheese.

Season Carefully

Feta is naturally salty, so you don’t need much additional salt.

 Pro Tips

Use room-temperature eggs: They mix more evenly and can produce a more consistent texture.

Chop vegetables finely: Small pieces distribute better and make the muffins easier to eat.

Don’t add watery vegetables: If using tomatoes or zucchini, remove excess moisture first.

Use silicone liners: These make removal especially easy.

Let them cool slightly: Freshly baked egg muffins are delicate. Allowing them to rest for a few minutes helps them firm up.

Don’t overmix after adding vegetables: Gentle mixing keeps the ingredients evenly distributed without breaking everything down.

 Cheese Options

Feta is the star of this recipe, but you can customize the cheese.

Try:

  • Goat cheese
  • Cheddar
  • Monterey Jack
  • Mozzarella
  • Parmesan
  • Swiss cheese

For a stronger Mediterranean flavor, combine feta with a little Parmesan.

For a milder and creamier result, use feta with mozzarella.

 Vegetable Variations

Spinach and feta are a classic combination, but these egg muffins are an excellent way to use leftover vegetables.

Mediterranean Style

Add:

  • Cherry tomatoes
  • Kalamata olives
  • Red onion
  • Fresh oregano

Mushroom & Spinach

Sauté sliced mushrooms with the spinach before adding them to the eggs.

Pepper & Feta

Use red, yellow, and green bell peppers for a colorful version.

Broccoli & Cheddar

Replace the feta with cheddar and add finely chopped cooked broccoli.

Tomato Basil

Add chopped tomatoes and fresh basil for an Italian-inspired variation.

 Make Them Spicy

If you enjoy heat, add:

  • Crushed red pepper flakes
  • Chopped jalapeño
  • Cayenne pepper
  • Diced chili peppers
  • Hot sauce

A small amount of red pepper flakes works particularly well with feta and spinach.

 Add More Protein

For an even more substantial breakfast, add cooked and finely chopped:

  • Chicken
  • Turkey
  • Turkey sausage
  • Ham
  • Turkey bacon

Make sure any meat is fully cooked before adding it to the egg mixture.

 Serving Suggestions

Spinach & Feta Egg Muffins are incredibly versatile.

Serve them with:

  • Avocado slices
  • Fresh berries
  • Sliced melon
  • Whole-grain toast
  • Greek yogurt
  • Fresh tomatoes
  • Cucumber salad
  • Roasted potatoes
  • Fresh fruit salad
  • A simple green salad

For a Mediterranean-inspired breakfast, serve two egg muffins with sliced cucumber, tomatoes, olives, avocado, and a little whole-grain toast.

 Storage

Allow the egg muffins to cool completely before storing.

Place them in an airtight container and refrigerate for approximately 3–4 days.

For meal prep, divide them into individual portions so they’re ready to grab each morning.

 Can You Freeze Egg Muffins?

Yes!

Allow them to cool completely, then place them on a baking sheet and freeze until firm.

Transfer them to a freezer-safe bag or airtight container.

They can be stored in the freezer for approximately 2–3 months for best quality.

To reheat, thaw overnight in the refrigerator and microwave until warmed through.

You can also reheat them directly from frozen using short microwave intervals.

 Reheating Tips

Microwave

Place one or two muffins on a microwave-safe plate and heat for approximately 30–60 seconds, depending on your microwave.

Oven

Heat at 325°F (165°C) for approximately 8–10 minutes.

Air Fryer

Reheat at around 325°F (165°C) for approximately 3–5 minutes.

Avoid overheating because eggs can quickly become rubbery.

 Approximate Nutritional Information

Per egg muffin, based on 12 servings:

  • Calories: Approximately 105–125 kcal
  • Protein: 7–8 g
  • Carbohydrates: 2–3 g
  • Fat: 7–9 g
  • Fiber: Approximately 0.5–1 g
  • Sugar: 1 g
  • Calcium: Approximately 100–130 mg
  • Sodium: Approximately 200–280 mg

Nutrition varies depending on the milk, feta, mozzarella, and additional vegetables used.

 Potential Benefits

Protein

Eggs and feta provide protein, which can help make breakfast more satisfying.

Spinach

Spinach provides folate, vitamin K, vitamin A, vitamin C, and other nutrients.

Calcium

Eggs and feta contribute calcium, which is important for maintaining healthy bones and teeth.

Vegetables

Adding spinach, peppers, and onions increases the vegetable content of your breakfast.

Convenient

Because the muffins can be prepared in advance, they make an easy option for busy mornings.

Portion-Friendly

Individual muffins make it simple to portion your breakfast or snack.

These are general nutritional benefits and should not be considered medical advice.

 Frequently Asked Questions

Why are my egg muffins watery?

The most common reason is excess moisture from vegetables, particularly spinach, zucchini, and tomatoes. Sauté spinach first and drain it well. If using frozen spinach, squeeze it thoroughly after thawing.

Why did my egg muffins become rubbery?

They were probably overbaked. Eggs continue cooking from residual heat after being removed from the oven, so take them out as soon as the centers are set.

Can I use frozen spinach?

Absolutely. Thaw it completely, then squeeze out as much moisture as possible before adding it to the egg mixture.

Can I use egg whites?

Yes. You can replace some or all of the whole eggs with egg whites. Keep in mind that using only egg whites may produce a slightly different texture.

Can I make these without milk?

Yes. Milk adds tenderness, but you can replace it with unsweetened dairy-free milk or simply omit it.

Can I use Greek yogurt?

Yes. Adding a small amount of plain Greek yogurt can create a creamy texture. Whisk it thoroughly with the eggs.

Can I make these dairy-free?

Yes. Use a dairy-free milk alternative and omit the feta or replace it with a dairy-free cheese alternative.

Are these good for meal prep?

Definitely. They are one of the easiest breakfast recipes to prepare ahead. Refrigerate them and reheat individual portions as needed.

How many egg muffins should I eat?

Serving size depends on your overall meal and nutritional needs. Two or three muffins can make a satisfying breakfast when paired with fruit, vegetables, toast, or another side.

Can I add meat?

Yes. Cooked chicken, turkey sausage, ham, or turkey bacon can all be added.

Can I make mini egg muffins?

Yes. Use a mini muffin pan and reduce the cooking time. Start checking them early because smaller muffins cook much faster.

Can I prepare them the night before?

Yes. You can assemble the mixture and refrigerate it overnight, although freshly mixing and baking is generally easiest. Alternatively, bake the muffins ahead and refrigerate them.

How do I stop egg muffins from sticking?

Grease the muffin pan generously or use silicone liners. Allowing the muffins to cool for a few minutes before removing them also helps.

Can I add tomatoes?

Yes, but use them sparingly and remove excess seeds and moisture. Cherry tomatoes cut into small pieces work particularly well.

What herbs taste best with spinach and feta?

Dill, parsley, oregano, basil, chives, and mint all complement this combination beautifully.

Can I add hot sauce?

Absolutely. A few drops of hot sauce in the egg mixture or drizzled over the finished muffins adds a delicious kick.

Maryland Jumbo Lump Crab Cakes with Lemon Aioli

Maryland Jumbo Lump Crab Cakes with Lemon Aioli

Description

Maryland Jumbo Lump Crab Cakes are a classic Chesapeake Bay favorite, celebrated for their generous pieces of sweet, delicate crab meat and minimal filler. Unlike heavily breaded crab cakes, a traditional Maryland-style crab cake lets the crab take center stage. The mixture is gently seasoned with Old Bay, parsley, Dijon mustard, Worcestershire sauce, mayonnaise, and a small amount of breadcrumbs, then shaped into tender cakes and pan-seared until beautifully golden on the outside.

Served with a bright, creamy Lemon Aioli, these crab cakes make an elegant appetizer, satisfying lunch, or impressive seafood dinner. The lemon aioli adds freshness and acidity that balances the richness of the crab without overpowering its natural flavor.

The secret to excellent crab cakes is simple: handle the crab gently, use just enough binder, and don’t overcook them. Jumbo lump crab meat is particularly prized because it contains large, intact pieces that give every bite a luxurious texture.

 Recipe Information

Recipe Name: Maryland Jumbo Lump Crab Cakes with Lemon Aioli
Cuisine: Maryland / Chesapeake Bay
Prep Time: 20 minutes
Chill Time: 30 minutes
Cook Time: 10–12 minutes
Total Time: About 1 hour
Servings: 4 crab cakes
Difficulty: Easy to Moderate
Cooking Method: Pan-seared

 Ingredients

For the Maryland Jumbo Lump Crab Cakes

  • 1 pound jumbo lump crab meat
  • ½ cup mayonnaise
  • 1 large egg
  • 1 tablespoon Dijon mustard
  • 1 teaspoon Worcestershire sauce
  • 1 teaspoon Old Bay seasoning
  • 1 tablespoon fresh lemon juice
  • 1 tablespoon finely chopped fresh parsley
  • 2 tablespoons finely minced red bell pepper, optional
  • 2 tablespoons finely minced celery, optional
  • ½ teaspoon garlic powder
  • ¼ teaspoon black pepper
  • ½ cup plain breadcrumbs or cracker crumbs
  • 2 tablespoons butter
  • 1 tablespoon olive oil
  • Lemon wedges, for serving
  • Fresh parsley, for garnish

For the Lemon Aioli

  • ½ cup mayonnaise
  • 1 small garlic clove, finely grated or minced
  • 1 tablespoon fresh lemon juice
  • 1 teaspoon finely grated lemon zest
  • 1 teaspoon Dijon mustard
  • 1 teaspoon extra-virgin olive oil
  • ⅛ teaspoon salt
  • ¼ teaspoon black pepper
  • 1 teaspoon chopped fresh parsley, optional

How to Make Maryland Jumbo Lump Crab Cakes

Step 1: Prepare the Crab

Place the jumbo lump crab meat in a large bowl.

Carefully inspect it for any remaining shell pieces. Pick them out gently.

Avoid squeezing or breaking up the crab too much. The large pieces are one of the defining characteristics of a good jumbo lump crab cake.

If the crab appears very wet, gently place it in a fine-mesh strainer and allow excess liquid to drain for a few minutes.

Do not mash the crab. You want recognizable pieces throughout the finished cakes.

Step 2: Make the Crab Cake Mixture

In a separate bowl, whisk together the mayonnaise, egg, Dijon mustard, Worcestershire sauce, Old Bay seasoning, lemon juice, parsley, garlic powder, and black pepper.

If using finely minced celery and red bell pepper, stir them in now.

Add the mixture to the crab meat.

Gently fold everything together with a spatula.

The goal is to coat the crab without breaking apart the jumbo lumps.

Step 3: Add the Breadcrumbs

Add approximately ½ cup breadcrumbs or cracker crumbs.

Fold gently until the mixture holds together.

Don’t add too many breadcrumbs. A Maryland-style crab cake should taste primarily like crab rather than breading.

If the mixture seems too loose to shape, add another tablespoon of breadcrumbs at a time until it becomes manageable.

Step 4: Shape the Crab Cakes

Divide the mixture into four portions.

Gently shape each portion into a thick round patty approximately 1 inch thick.

Don’t compact them too tightly.

A loosely packed crab cake will have a delicate, tender interior, while aggressively compressed cakes can become dense.

Place the formed crab cakes on a parchment-lined plate or tray.

 Step 5: Chill the Crab Cakes

Cover the crab cakes and refrigerate them for at least 30 minutes.

Chilling allows the binder to firm up and makes the crab cakes easier to cook without falling apart.

For even better preparation, you can refrigerate them for several hours before cooking.

 Step 6: Prepare the Lemon Aioli

While the crab cakes chill, make the sauce.

In a small bowl, combine:

  • Mayonnaise
  • Garlic
  • Lemon juice
  • Lemon zest
  • Dijon mustard
  • Olive oil
  • Salt
  • Black pepper

Whisk until smooth.

Stir in fresh parsley if desired.

Taste and adjust the lemon juice, salt, or pepper according to preference.

Cover and refrigerate until ready to serve.

The sauce can be prepared several hours ahead.

 Step 7: Cook the Crab Cakes

Heat a large nonstick or cast-iron skillet over medium heat.

Add the butter and olive oil.

Once the butter is melted and lightly foaming, carefully place the crab cakes into the skillet.

Leave enough space between each cake so they brown rather than steam.

Cook for approximately 4–5 minutes on the first side, or until deeply golden brown.

Carefully flip each crab cake using a wide spatula.

Cook the second side for another 4–5 minutes, until golden and heated through.

Because crab cakes are delicate, avoid flipping them repeatedly.

 Oven-Baked Option

If you prefer not to pan-fry the crab cakes, you can bake them.

Preheat the oven to 425°F (220°C).

Place the chilled crab cakes on a parchment-lined baking sheet.

Lightly brush the tops with melted butter or olive oil.

Bake for approximately 12–16 minutes, carefully turning them halfway through if desired.

For a more golden exterior, place them under the broiler for the final 1–2 minutes, watching closely.

 How to Serve

Serve the Maryland crab cakes immediately while they’re hot and crisp.

Place a generous spoonful of lemon aioli alongside each crab cake.

Garnish with fresh parsley and lemon wedges.

A squeeze of fresh lemon just before eating makes the flavors pop.

For a complete meal, serve with:

  • Coleslaw
  • Roasted potatoes
  • French fries
  • Corn on the cob
  • Green salad
  • Steamed vegetables
  • Cucumber salad
  • Rice pilaf
  • Roasted asparagus

For an elegant presentation, serve one large crab cake over mixed greens with lemon aioli drizzled lightly around the plate.

 Important Notes

Use High-Quality Crab

Jumbo lump crab meat is the star of this recipe. Fresh crab is wonderful, but high-quality refrigerated or pasteurized crab meat can also produce excellent results.

Don’t Overmix

Overmixing breaks the crab lumps into tiny pieces and creates a dense texture.

Keep the Filler Minimal

The breadcrumbs should help the crab cakes hold together, not dominate the recipe.

Chill Before Cooking

This is one of the easiest ways to reduce the chance of the crab cakes breaking apart.

Don’t Cook Over Excessively High Heat

Very high heat can brown the outside too quickly while leaving the center cold. Medium to medium-high heat is ideal.

 Pro Tips for Perfect Crab Cakes

Tip 1: Drain Wet Crab

Excess moisture can make the mixture difficult to shape.

Tip 2: Use a Light Touch

Fold the ingredients rather than aggressively stirring them.

Tip 3: Make Thick Cakes

Thicker crab cakes remain moist and tender in the center.

Tip 4: Chill Thoroughly

Cold crab cakes are easier to handle and maintain their shape better in the skillet.

Tip 5: Use a Wide Spatula

A broad spatula provides better support when flipping.

Tip 6: Don’t Crowd the Pan

Crowding lowers the pan temperature and can prevent proper browning.

Tip 7: Serve Immediately

Crab cakes are at their best when the exterior is crisp and the center is tender.

 Why Jumbo Lump Crab Meat?

Jumbo lump crab meat comes from large pieces of crab muscle and is prized for its sweet flavor and impressive texture.

For crab cakes, jumbo lump meat allows you to enjoy substantial pieces of crab in every bite.

If jumbo lump crab is expensive or unavailable, you can use lump crab meat. Just avoid crab meat that is excessively shredded if your goal is a traditional Maryland-style crab cake.

 Easy Variations

Spicy Maryland Crab Cakes

Add ¼–½ teaspoon cayenne pepper or a few dashes of hot sauce to the mixture.

Herb Crab Cakes

Add chopped fresh parsley, chives, dill, or tarragon.

Old Bay Extra-Crispy Crab Cakes

Sprinkle a very small amount of Old Bay over the cakes immediately before cooking.

Panko Crab Cakes

Replace traditional breadcrumbs with panko for a slightly crunchier exterior.

Mini Crab Cakes

Divide the mixture into 8–12 small cakes. They make an excellent party appetizer.

Crab Cake Sandwich

Place a hot crab cake on a toasted brioche bun with lettuce, tomato, pickles, and lemon aioli.

Gluten-Free Crab Cakes

Use certified gluten-free breadcrumbs or crushed gluten-free crackers, and verify that all other packaged ingredients are gluten-free.

 Why Lemon Aioli Works So Well

Crab has a naturally sweet, delicate flavor. Rich sauces can sometimes overwhelm it, but lemon aioli provides the perfect contrast.

The mayonnaise creates creaminess, garlic adds savory intensity, Dijon contributes gentle sharpness, and lemon juice and zest provide acidity and freshness.

If you want a lighter sauce, replace part of the mayonnaise with Greek yogurt.

You can also add chopped dill, parsley, chives, or a small amount of hot sauce.

 Storage

Cooked crab cakes can be refrigerated in an airtight container for approximately 2–3 days.

Store the lemon aioli separately.

For the best texture, reheat crab cakes in a skillet or oven rather than microwaving them.

To reheat in the oven, place them on a baking sheet and warm at approximately 350°F (175°C) until heated through.

 Can You Freeze Crab Cakes?

Yes.

For best results, freeze uncooked formed crab cakes.

Place them on a parchment-lined tray and freeze until firm. Transfer them to a freezer-safe container or bag with parchment between the layers.

They can generally be frozen for up to 2–3 months for best quality.

Thaw them overnight in the refrigerator before cooking.

You can also freeze cooked crab cakes, although the texture may be slightly less delicate after thawing.

 Approximate Nutritional Information

Per crab cake, without additional sauce:

  • Calories: Approximately 330–380 kcal
  • Protein: 25–29 g
  • Carbohydrates: 10–14 g
  • Fat: 20–24 g
  • Fiber: 1 g
  • Sugar: 1–2 g
  • Sodium: Approximately 700–950 mg

Lemon aioli: Approximately 90–110 calories per 2 tablespoons.

Nutrition varies depending on the crab meat, mayonnaise, breadcrumbs, butter, and amount of Old Bay seasoning used.

 Potential Benefits

Excellent Source of Protein

Crab meat provides high-quality protein, making these crab cakes satisfying and suitable as the centerpiece of a meal.

Provides Vitamin B12

Crab is naturally rich in vitamin B12, an important nutrient involved in normal red blood cell formation and nervous-system function.

Provides Minerals

Crab meat contains minerals such as selenium, zinc, and copper.

Seafood-Based Meal

Replacing some heavier meat-based meals with seafood can add variety to your overall eating pattern.

Lemon Adds Freshness

Fresh lemon contributes vitamin C and bright flavor while allowing the dish to taste balanced without requiring a heavy sauce.

Flexible Meal

The crab cakes can be served with vegetables and salad for a lighter meal or with potatoes and bread for a more substantial dinner.

Nutrition and potential benefits vary by ingredients and portion size.

 Frequently Asked Questions

What makes a crab cake Maryland-style?

A Maryland-style crab cake generally emphasizes the crab itself, uses relatively little filler, and commonly includes Chesapeake-inspired seasoning such as Old Bay. The exact recipe varies between families, restaurants, and regions.

Why are my crab cakes falling apart?

The mixture may contain too much moisture, too little binder, or the cakes may not have been chilled long enough. Handle them gently and refrigerate them before cooking.

Can I use canned crab meat?

You can, but choose a good-quality canned or pasteurized crab product. Drain it thoroughly before using.

Should I rinse crab meat?

Usually, no. Rinsing can remove flavor. Instead, inspect it carefully for shell fragments and drain excess liquid.

Can I make the crab cakes ahead?

Yes. Shape them several hours before cooking and keep them covered in the refrigerator.

Can I use panko instead of breadcrumbs?

Absolutely. Panko creates a slightly lighter and crispier exterior.

Can I cook crab cakes in an air fryer?

Yes. Lightly spray or brush the crab cakes with oil and air fry around 375°F (190°C) until golden and heated through, generally around 8–12 minutes depending on thickness and appliance.

What should the inside of a crab cake be like?

The center should be moist, tender, and packed with visible crab pieces. It should not be dry or heavily breaded.

Can I make the lemon aioli ahead?

Yes. Prepare it several hours or even a day ahead and refrigerate it in an airtight container.

How long does homemade lemon aioli last?

Because it contains mayonnaise and fresh ingredients, keep it refrigerated and use it promptly. Follow the storage guidance for the mayonnaise used and discard it if it develops an unusual smell, appearance, or flavor.

What can I serve with crab cakes?

Crab cakes pair beautifully with coleslaw, green salad, roasted potatoes, asparagus, corn, rice pilaf, or steamed vegetables.

Is Old Bay necessary?

It isn’t absolutely necessary, but it gives the crab cakes a classic Chesapeake-style flavor. If you don’t have Old Bay, use a combination of paprika, celery salt, black pepper, and a small amount of cayenne.

Can I make mini crab cakes?

Yes. Mini crab cakes are perfect for parties and appetizers. Reduce the cooking time because smaller cakes brown faster.

How do I get the outside extra crispy?

Use a well-heated skillet, avoid overcrowding the pan, and allow the crab cakes to develop a golden crust before flipping them.

Greek-Style Feta & Olive Flatbread

Greek-Style Feta & Olive Flatbread

Ingredients
For the Flatbread:
2 naan breads or flatbreads
2 tbsp olive oil
2 cloves garlic, minced
½ tsp dried oregano
½ tsp dried thyme
¼ tsp black pepper
For the Topping:
1 cup crumbled feta cheese
½ cup Kalamata olives, pitted
½ cup Greek yogurt
1 tbsp fresh lemon juice
1 tbsp fresh parsley, chopped
1 tbsp fresh dill, chopped
½ tsp dried oregano
¼ tsp black pepper
1 tbsp extra-virgin olive oil
Lemon wedges, for serving
Instructions
1. Prepare the oven:
Preheat your oven to 425°F (220°C). Place the flatbreads on a baking sheet lined with parchment paper.
2. Make the herb oil:
Combine olive oil, minced garlic, oregano, thyme, and black pepper in a small bowl. Brush the mixture generously over both flatbreads, especially around the edges.
3. Prepare the creamy topping:
In another bowl, mix Greek yogurt with lemon juice, half of the parsley, dill, and a pinch of black pepper. Stir until smooth and creamy.
4. Bake the flatbreads:
Place the flatbreads in the oven and bake for 7–10 minutes, until the edges become golden and crisp.
5. Add the toppings:
Remove the flatbreads from the oven. Spread the creamy yogurt mixture over the warm surface. Generously sprinkle with crumbled feta and arrange the Kalamata olives on top.
6. Finish:
Drizzle with extra-virgin olive oil and sprinkle with remaining fresh parsley, dill, and a little dried oregano.
7. Serve:
Return the flatbreads to the oven for another 2–3 minutes, just until the feta is warmed through. Remove, slice into wedges, and serve immediately with fresh lemon wedges.

Stuffed Pepper Soup

Stuffed Pepper Soup

Description

Stuffed Pepper Soup is the ultimate cozy one-pot meal when you want all the comforting flavors of classic stuffed peppers without the extra work of stuffing individual peppers. It combines savory ground beef, colorful bell peppers, onions, garlic, tomatoes, tender rice, and Italian-inspired seasonings in a rich, flavorful tomato broth.

Every spoonful delivers the familiar taste of stuffed peppers in an easy soup form. The ground beef adds hearty protein, while the peppers bring sweetness and freshness. Rice makes the soup filling and satisfying, and tomatoes create a beautifully rich base.

This recipe is perfect for busy weeknights, chilly evenings, meal prep, or feeding the whole family. It is inexpensive, easy to customize, and made mostly with pantry staples. You can prepare it on the stovetop in one pot, and the leftovers often taste even better the next day as the flavors continue to develop.

For an extra comforting finish, serve each bowl with shredded mozzarella or cheddar cheese and a sprinkle of fresh parsley. Pair it with crusty bread, garlic toast, or a simple green salad for a complete meal.

 Recipe Information

Recipe Name: Stuffed Pepper Soup
Cuisine: American Comfort Food
Preparation Time: 15 minutes
Cooking Time: 35–40 minutes
Total Time: About 50–55 minutes
Servings: 6
Difficulty: Easy
Method: One-pot stovetop recipe

 Ingredients

For the Soup

  • 1 tablespoon olive oil
  • 1 pound ground beef
  • 1 medium yellow onion, diced
  • 3 cloves garlic, minced
  • 1 green bell pepper, diced
  • 1 red bell pepper, diced
  • 1 yellow or orange bell pepper, diced
  • 1 can (14.5 ounces) diced tomatoes
  • 1 can (15 ounces) tomato sauce
  • 4 cups beef broth
  • 1 tablespoon tomato paste
  • 1 teaspoon Italian seasoning
  • 1 teaspoon smoked paprika
  • 1 teaspoon dried oregano
  • ½ teaspoon garlic powder
  • ½ teaspoon onion powder
  • ½ teaspoon salt, or to taste
  • ¼ teaspoon black pepper
  • 1 teaspoon Worcestershire sauce
  • ¾ cup uncooked long-grain white rice
  • 1 bay leaf
  • 1 teaspoon sugar, optional
  • 1–2 tablespoons chopped fresh parsley

Optional Toppings

  • Shredded mozzarella
  • Shredded cheddar cheese
  • Parmesan cheese
  • Fresh parsley
  • Fresh basil
  • Cracked black pepper
  • Red pepper flakes
  • A spoonful of sour cream

 How to Make Stuffed Pepper Soup

Step 1: Prepare the Vegetables

Start by washing the bell peppers thoroughly. Remove the stems, seeds, and white membranes, then dice the peppers into small, bite-sized pieces.

Dice the onion and mince the garlic.

Using a combination of red, yellow, orange, and green peppers makes the soup especially colorful and gives it a balance of sweet and slightly earthy flavors. However, you can use whatever bell peppers you have available.

Step 2: Brown the Ground Beef

Heat a large heavy-bottomed pot or Dutch oven over medium-high heat.

Add the olive oil followed by the ground beef. Break the beef apart with a wooden spoon and cook for approximately 6–8 minutes, stirring occasionally, until it is browned and cooked through.

If there is a large amount of excess grease in the pot, carefully drain some of it. Leave a small amount behind because it adds flavor to the soup.

For a lighter soup, you can use lean ground beef, ground turkey, or ground chicken.

Step 3: Add Onion and Peppers

Add the diced onion and bell peppers to the browned beef.

Cook for approximately 5–6 minutes, stirring occasionally, until the vegetables begin to soften.

Add the minced garlic and cook for another 30–60 seconds.

Be careful not to burn the garlic. You want it fragrant and lightly cooked.

Step 4: Add Tomato Paste and Seasonings

Stir in the tomato paste.

Cook it with the beef and vegetables for about 1 minute. This small step helps deepen the tomato flavor.

Add:

  • Italian seasoning
  • Smoked paprika
  • Oregano
  • Garlic powder
  • Onion powder
  • Salt
  • Black pepper

Stir everything together until the beef and vegetables are evenly coated.

Step 5: Add the Tomatoes and Broth

Pour in the diced tomatoes and tomato sauce.

Then add the beef broth and Worcestershire sauce.

Stir well, scraping the bottom of the pot to loosen any flavorful browned bits.

Add the bay leaf.

If your tomatoes are particularly acidic, you can add about 1 teaspoon of sugar. This is optional and should not make the soup taste sweet. It simply helps balance the acidity.

Step 6: Simmer the Soup

Bring the soup to a gentle boil.

Once it begins boiling, reduce the heat to medium-low and cover the pot partially with a lid.

Allow the soup to simmer for about 15 minutes.

Stir occasionally so nothing sticks to the bottom.

Step 7: Add the Rice

Stir in the uncooked rice.

Continue cooking for approximately 15–20 minutes, or until the rice is tender.

Keep the soup at a gentle simmer rather than a rapid boil. The rice will absorb some of the broth as it cooks and will naturally make the soup thicker.

Remove the bay leaf once cooking is finished.

Taste the soup and adjust the seasoning with additional salt, pepper, Italian seasoning, or Worcestershire sauce if needed.

 Choosing the Right Rice

Long-grain white rice works beautifully because it cooks relatively quickly and maintains a pleasant texture.

You can also use:

  • Brown rice
  • Basmati rice
  • Jasmine rice
  • Wild rice blend
  • Cauliflower rice
  • Cooked rice

If using cooked rice, add it near the end of cooking and simmer for only about 5 minutes.

If using brown rice, expect a longer cooking time and check the package instructions.

For meal prep, you may prefer cooking the rice separately and adding it to individual bowls. This prevents the rice from absorbing too much broth while the soup sits in the refrigerator.

 The Best Way to Serve It

Ladle the hot soup into bowls and top with shredded mozzarella, cheddar, or Parmesan cheese.

The heat of the soup will gently melt the cheese, creating a creamy, comforting finish.

Garnish with fresh parsley or basil and add a little freshly cracked black pepper.

For an extra indulgent meal, serve it with warm garlic bread or toasted sourdough.

A simple side salad with lettuce, cucumber, tomatoes, and a light vinaigrette also pairs beautifully with the rich soup.

 Helpful Notes

1. Don’t Overcook the Peppers

You want the peppers tender but not completely mushy. They should retain a little texture.

2. Adjust the Soup Consistency

Rice absorbs liquid as it cooks. If the soup becomes too thick, simply add additional beef broth or water.

3. Taste Before Adding More Salt

Different brands of broth and canned tomatoes contain different amounts of sodium, so taste the soup near the end before adding additional salt.

4. Use Different Meat

Ground beef gives this recipe its classic stuffed-pepper flavor, but ground turkey, chicken, pork, or a combination can also work.

5. Add Cheese at the End

Cheese is best used as a topping rather than cooked into the entire pot. This allows everyone to customize their bowl.

 Pro Tips for the Best Stuffed Pepper Soup

Brown the beef properly: Don’t rush this step. Browning creates deeper flavor.

Sauté the vegetables: Cooking the peppers and onions before adding the liquid brings out their natural sweetness.

Toast the tomato paste: Even 60 seconds of cooking tomato paste helps create a richer tomato flavor.

Use good broth: Since broth makes up much of the soup base, a flavorful broth makes a noticeable difference.

Don’t boil aggressively: A gentle simmer gives the rice and vegetables time to cook evenly.

Adjust before serving: Add salt, pepper, Worcestershire sauce, or herbs at the end according to your taste.

Make it cheesy: Mozzarella, cheddar, and Parmesan are all delicious with this soup.

 Easy Variations

Spicy Stuffed Pepper Soup

Add ½ teaspoon crushed red pepper flakes or a pinch of cayenne. You can also add diced jalapeño with the bell peppers.

Turkey Stuffed Pepper Soup

Replace the ground beef with lean ground turkey. Use chicken broth instead of beef broth if preferred.

Cheesy Stuffed Pepper Soup

Stir a small amount of shredded cheddar into individual bowls and top with additional cheese.

Low-Carb Version

Replace the rice with cauliflower rice. Add it during the final 5–7 minutes of cooking.

Italian-Style Version

Increase the Italian seasoning and oregano and add a little Parmesan cheese before serving.

Extra Vegetable Version

Add diced zucchini, carrots, celery, mushrooms, or spinach for more vegetables.

Bean Version

Add one drained and rinsed can of kidney beans, cannellini beans, or black beans for additional fiber and protein.

 Make It in a Slow Cooker

Stuffed Pepper Soup can also be adapted for a slow cooker.

Brown the ground beef with the onion and garlic first. Drain excess grease, then transfer the mixture to the slow cooker.

Add the bell peppers, tomatoes, tomato sauce, broth, tomato paste, Worcestershire sauce, and seasonings.

Cook on LOW for 6–7 hours or HIGH for 3–4 hours.

For the best texture, add cooked rice during the final 20–30 minutes, or prepare the rice separately and spoon it into bowls.

This method is especially convenient when you want dinner ready after a busy day.

 Storage

Allow leftover soup to cool before transferring it to airtight containers.

Store in the refrigerator for approximately 3–4 days.

Because rice continues absorbing liquid, the soup may become thicker after refrigeration. Add a splash of broth or water when reheating.

Reheat gently on the stovetop over medium-low heat or in the microwave until piping hot.

 Can You Freeze Stuffed Pepper Soup?

Yes, but rice can change texture after freezing and thawing.

For the best freezer-friendly version, prepare the soup without the rice. Cool it completely, transfer it to freezer-safe containers, and freeze for up to approximately 3 months.

When ready to eat, thaw it in the refrigerator overnight, reheat on the stovetop, and add freshly cooked rice.

If freezing the finished soup with rice, leave a little space at the top of the container because liquids expand when frozen.

 Serving Suggestions

Stuffed Pepper Soup is satisfying on its own, but these sides make it even better:

  • Garlic bread
  • Crusty French bread
  • Sourdough toast
  • Dinner rolls
  • Simple green salad
  • Caesar salad
  • Roasted vegetables
  • Steamed broccoli
  • Cornbread

For a cozy family dinner, serve a big pot of soup with warm bread and a bowl of shredded cheese so everyone can customize their serving.

 Approximate Nutritional Information

Per serving, based on 6 servings and without cheese toppings:

  • Calories: 350–390 kcal
  • Protein: 23–27 g
  • Carbohydrates: 38–43 g
  • Fat: 12–15 g
  • Fiber: 5–7 g
  • Sugar: 8–11 g
  • Sodium: Approximately 700–950 mg

Nutrition will vary depending on the type of ground beef, broth, canned tomatoes, rice, and toppings used.

 Potential Benefits

Protein

Ground beef provides high-quality protein, which helps make this soup satisfying and filling.

Bell Peppers

Bell peppers provide vitamin C and a variety of plant compounds. Using several colors gives you a wider range of naturally occurring nutrients and antioxidants.

Tomatoes

Tomatoes provide lycopene and other beneficial plant compounds. Cooking tomatoes also creates the rich savory flavor that makes this soup so comforting.

Fiber

The peppers, tomatoes, onions, and rice contribute to the soup’s overall fiber content. Adding beans or extra vegetables can increase the fiber even further.

Hydration

Because soup contains a substantial amount of broth, it can contribute to daily fluid intake while providing a satisfying meal.

Balanced Meal

With protein, carbohydrates, vegetables, and optional dairy toppings, Stuffed Pepper Soup can be turned into a well-rounded meal without complicated preparation.

 Frequently Asked Questions

Can I use ground turkey instead of beef?

Absolutely. Ground turkey is an excellent substitute. Because turkey is leaner, you may want to add a little extra olive oil or use a flavorful broth to maintain richness.

Why did my soup become too thick?

The rice absorbs broth as it cooks and continues absorbing liquid during storage. Simply add more broth or water until you reach your preferred consistency.

Can I use cooked rice?

Yes. Add cooked rice during the final few minutes of cooking so it warms through without becoming overly soft.

Can I make this soup vegetarian?

Yes. Replace the ground beef with beans, lentils, plant-based ground meat, or additional vegetables. Use vegetable broth instead of beef broth.

What cheese tastes best with Stuffed Pepper Soup?

Mozzarella, cheddar, Monterey Jack, and Parmesan are all excellent choices. Cheddar gives a stronger flavor, while mozzarella creates a mild, stretchy topping.

Can I make this recipe spicy?

Yes. Add red pepper flakes, cayenne pepper, diced jalapeño, or your favorite hot sauce.

Can I use frozen bell peppers?

Yes. Frozen peppers are convenient and work well in soup. They may have a slightly softer texture than fresh peppers, but the flavor will still be delicious.

How do I make it lower in carbohydrates?

Use cauliflower rice instead of regular rice and choose lean ground beef or turkey. You can also increase the amount of peppers and other low-carbohydrate vegetables.

Can I prepare it ahead of time?

Definitely. In fact, the flavor often improves after the soup sits for several hours. If preparing it a day ahead, consider keeping the rice separate to prevent it from absorbing too much broth.

Can I add beans?

Yes. Kidney beans, black beans, cannellini beans, or chickpeas can all work. Add drained canned beans during the final 10 minutes of cooking.

How do I make the soup richer?

Use a flavorful beef broth, brown the meat well, toast the tomato paste, and add Worcestershire sauce. A little Parmesan on top also adds savory depth.

Is Stuffed Pepper Soup gluten-free?

The basic ingredients can be gluten-free, but always check the labels on your broth, Worcestershire sauce, tomato products, and seasonings if gluten avoidance is important.

Can I make it dairy-free?

Yes. Simply leave off the cheese and sour cream. The soup itself does not require dairy.

Vanilla Chia Seed Pudding

Vanilla Chia Seed Pudding

Description

Vanilla Chia Seed Pudding is a simple, creamy, and nutritious make-ahead recipe made with just a handful of everyday ingredients. Chia seeds are combined with milk, vanilla, and a natural sweetener, then refrigerated until the seeds absorb the liquid and create a thick, pudding-like texture.

This recipe is perfect for breakfast, a light dessert, an afternoon snack, or meal prep. It requires no cooking, takes only a few minutes to prepare, and can be customized with fresh berries, bananas, nuts, coconut, cinnamon, granola, or nut butter.

The subtle vanilla flavor makes this pudding especially versatile. You can prepare it the night before and have breakfast ready when you wake up.

Recipe Information

Recipe Name: Vanilla Chia Seed Pudding
Category: Breakfast / Snack / Healthy Dessert
Cuisine: Modern / Healthy
Preparation Time: 5 minutes
Chilling Time: 4 hours or overnight
Total Active Time: Approximately 5 minutes
Servings: 4
Difficulty: Very Easy
Cooking Required: No

 Ingredients

Basic Vanilla Chia Pudding

  • ½ cup chia seeds
  • 2 cups milk of choice
  • 2–3 tablespoons pure maple syrup or honey
  • 1 teaspoon pure vanilla extract
  • ¼ teaspoon ground cinnamon, optional
  • Tiny pinch of salt

Optional Toppings

  • Fresh strawberries
  • Blueberries
  • Raspberries
  • Banana slices
  • Mango
  • Kiwi
  • Chopped almonds
  • Walnuts
  • Pecans
  • Coconut flakes
  • Pumpkin seeds
  • Granola
  • Peanut butter
  • Almond butter
  • Greek yogurt
  • A drizzle of honey or maple syrup

 Step-by-Step Instructions

Step 1: Choose Your Milk

You can use almost any milk for this recipe.

Good options include:

  • Whole milk
  • 2% milk
  • Skim milk
  • Almond milk
  • Oat milk
  • Soy milk
  • Coconut milk
  • Cashew milk

For a richer pudding, full-fat dairy milk or canned coconut milk can be used.

For a lighter version, unsweetened almond or other plant-based milk works beautifully.

Step 2: Combine the Liquid Ingredients

Add the milk to a medium mixing bowl or large measuring jug.

Add:

  • Maple syrup or honey
  • Vanilla extract
  • Cinnamon
  • A tiny pinch of salt

Whisk thoroughly until combined.

The small amount of salt helps enhance the vanilla flavor and balances the sweetness.

 Step 3: Add the Chia Seeds

Add the chia seeds to the milk mixture.

Whisk immediately.

Make sure the seeds are evenly distributed throughout the liquid.

Don’t simply sprinkle the seeds on top and leave them untouched because they can clump together.

 Step 4: Wait and Whisk Again

Let the mixture sit for approximately 5–10 minutes.

Then whisk it again.

This second mixing step is important because chia seeds naturally settle as they begin absorbing the liquid.

Breaking up the clusters now gives you a much smoother pudding.

 Step 5: Refrigerate

Covr the bowl or transfer the mixture into individual jars or containers.

Refrigerate for at least 4 hours.

For the best texture, let it chill overnight.

During refrigeration, the chia seeds absorb the liquid and develop a thick, creamy consistency.

 Step 6: Check the Texture

After chilling, stir the pudding thoroughly.

It should be thick enough to hold its shape on a spoon but still creamy.

If it is too thick, add a splash of milk and stir.

If it is too thin, add another tablespoon of chia seeds, stir well, and refrigerate for another hour or two.

 Step 7: Add Toppings

Spoon the pudding into serving glasses or jars.

Top with your favorite ingredients.

A simple combination of:

fresh berries + sliced banana + chopped almonds

works beautifully.

For a dessert-style version, add a little peanut butter and shaved dark chocolate.

 Step 8: Serve

Serve chilled.

This pudding can be enjoyed straight from the refrigerator.

For breakfast, pair it with fruit and nuts.

For dessert, add berries, coconut, or a small drizzle of melted chocolate.

 Why You’ll Love This Recipe

No Cooking Required

Everything is mixed together and refrigerated.

Easy Meal Prep

Prepare several servings at once for busy mornings.

Customizable

Change the milk, sweetener, toppings, and flavors.

Creamy Texture

Chia seeds naturally create a thick pudding-like consistency.

Simple Ingredients

You only need a few basic ingredients.

Great for Breakfast or Dessert

The recipe can easily be made more nutritious or more indulgent depending on your toppings.

 Understanding Chia Seeds

Chia seeds are tiny seeds that absorb liquid and form a gel-like coating.

This unique characteristic makes them ideal for puddings.

When soaked, chia seeds become soft and create the thick texture that makes this recipe work without cooking.

They also provide dietary fiber, plant-based protein, and fats, including omega-3 fatty acids.

Because chia seeds absorb a significant amount of liquid, it’s important to give them enough milk and enough time to hydrate.

 Choosing the Sweetener

The recipe works with several sweeteners.

Maple Syrup

Provides a smooth, caramel-like sweetness.

Honey

Adds floral sweetness and works particularly well with vanilla.

Date Syrup

Creates a deeper, fruitier flavor.

Coconut Sugar

Can be used, although it may take slightly longer to dissolve.

No Added Sweetener

You can leave out the sweetener and rely on naturally sweet toppings such as bananas or berries.

 How to Get Strong Vanilla Flavor

For the best vanilla flavor, use good-quality pure vanilla extract.

You can also use vanilla bean paste.

If you have a vanilla bean, scrape the seeds directly into the milk mixture.

For an especially dessert-like pudding, add a small amount of vanilla bean paste along with the extract.

 Coconut Vanilla Chia Pudding

For a tropical variation, use coconut milk.

Add:

  • Unsweetened coconut milk
  • Vanilla
  • Maple syrup
  • Chia seeds

Top with:

  • Mango
  • Pineapple
  • Coconut flakes
  • Toasted almonds

This creates a creamy tropical breakfast.

 Chocolate Vanilla Chia Pudding

Add 1–2 tablespoons unsweetened cocoa powder to the basic recipe.

Whisk very thoroughly so the cocoa doesn’t form lumps.

You can also add a few dark chocolate shavings on top.

For extra richness, stir in a small spoonful of peanut butter.

 Strawberry Vanilla Chia Pudding

Add chopped strawberries to the bottom of the serving jars.

Pour the vanilla chia mixture over the berries.

Refrigerate overnight.

Before serving, add additional strawberries and a little Greek yogurt.

 Blueberry Vanilla Version

Top the pudding with fresh blueberries.

You can also mash a handful of blueberries and swirl them into the pudding before refrigeration.

Add almonds or granola before serving for extra crunch.

 Banana Bread Chia Pudding

For a cozy flavor, add:

  • Mashed banana
  • Cinnamon
  • Vanilla
  • Chopped walnuts
  • A tiny pinch of nutmeg

Top with banana slices and walnuts.

This combination gives the pudding a flavor reminiscent of banana bread.

 Peanut Butter Vanilla Chia Pudding

Add 1–2 tablespoons creamy peanut butter to the milk mixture.

Whisk until smooth before adding the chia seeds.

Top with sliced banana and crushed peanuts.

This is a particularly satisfying combination of creamy, nutty, sweet, and vanilla flavors.

 Apple Cinnamon Chia Pudding

Top vanilla chia pudding with cooked cinnamon apples.

To prepare them, sauté diced apple with cinnamon until tender.

Allow the apples to cool before placing them on the pudding.

Add chopped walnuts for extra crunch.

 Mango Vanilla Chia Pudding

Add diced ripe mango to the chilled pudding.

You can also blend mango into a smooth puree and layer it with the chia pudding.

This creates a beautiful layered dessert.

 Expert Tips

1. Whisk Twice

Whisk once immediately after adding the chia seeds and again after 5–10 minutes.

This helps prevent clumps.

2. Use the Right Ratio

A good starting point is approximately ¼ cup chia seeds to 1 cup liquid.

You can adjust depending on how thick you like your pudding.

3. Don’t Rush the Chilling

Give the chia seeds enough time to fully hydrate.

Overnight refrigeration generally produces the best texture.

4. Adjust After Chilling

If the pudding becomes too thick, add milk.

If it’s too thin, add a little more chia.

5. Add Crunchy Toppings at the Last Minute

Granola, nuts, and seeds are best added just before serving so they stay crunchy.

 Common Mistakes

Not Mixing the Seeds

If you don’t whisk well, chia seeds can form dense clumps.

Using Too Little Liquid

This produces an overly thick pudding.

Adding Too Much Liquid

The pudding may remain runny.

Not Waiting Long Enough

Chia seeds need time to absorb the liquid.

Adding Too Much Sweetener

Start with a small amount and adjust after chilling.

Forgetting the Salt

A tiny pinch can make the vanilla flavor taste much more pronounced.

 Smooth Chia Pudding Option

If you don’t enjoy the natural texture of whole chia seeds, you can blend the finished pudding.

After the chia seeds have fully hydrated, transfer the mixture to a blender.

Blend until smooth and creamy.

This creates a texture closer to traditional pudding.

You can also blend the chia seeds briefly before refrigerating if you prefer an ultra-smooth result.

 Meal Prep Instructions

Vanilla chia pudding is excellent for meal preparation.

Divide the mixture into four small jars or containers.

Cover and refrigerate.

Prepare toppings separately.

Each morning, grab one jar and add fresh fruit, nuts, or granola.

This makes breakfast especially convenient on busy mornings.

 How Long Does Chia Pudding Last?

Properly refrigerated chia pudding generally keeps for approximately 4–5 days when stored in a clean airtight container.

For best flavor and texture, add fresh fruit and crunchy toppings immediately before serving.

If you notice an unusual smell, flavor, appearance, or texture, discard it.

 Can You Freeze Chia Pudding?

Yes, although freezing can slightly change the texture.

For best results, freeze the plain chia pudding without delicate toppings.

Thaw it in the refrigerator overnight.

Stir thoroughly before serving.

Fresh fruit and crunchy toppings should be added after thawing.

 Serving Ideas

Simple Breakfast

Chia pudding + blueberries + almonds.

Tropical Breakfast

Chia pudding + mango + coconut + cashews.

Protein-Focused Bowl

Chia pudding + Greek yogurt + berries + nuts.

Dessert

Chia pudding + strawberries + dark chocolate + coconut.

Cozy Fall Version

Chia pudding + cinnamon apples + walnuts + maple syrup.

 Approximate Nutritional Information

Per serving, based on 4 servings and using unsweetened almond milk:

  • Calories: Approximately 190–220 kcal
  • Protein: Approximately 6–7 g
  • Carbohydrates: Approximately 18–22 g
  • Fat: Approximately 10–12 g
  • Fiber: Approximately 9–10 g
  • Sugar: Approximately 7–10 g
  • Calcium: Varies depending on the milk used
  • Sodium: Approximately 80–150 mg

Toppings will increase the calories and other nutritional values.

For example, adding nuts, granola, nut butter, or sweetened coconut will significantly change the nutrition profile.

These figures are estimates and can vary based on ingredients and brands.

 Potential Benefits

Fiber

Chia seeds are an excellent source of dietary fiber. Fiber can contribute to digestive health and help make meals more satisfying.

Plant-Based Omega-3 Fats

Chia seeds contain alpha-linolenic acid, an omega-3 fatty acid.

Protein

Chia seeds contribute plant-based protein, while dairy or soy milk can increase the protein content further.

Calcium

Depending on your choice of milk, chia pudding can provide calcium.

Convenient Nutrition

Because the recipe requires little preparation, it can be an easy way to include nutrient-dense ingredients in your routine.

Fruit Adds Variety

Adding berries, bananas, mango, or other fruits contributes additional vitamins, minerals, fiber, and naturally occurring plant compounds.

This recipe can be part of a balanced eating pattern, but individual nutritional needs vary.

 Frequently Asked Questions

1. Why is my chia pudding not thick?

It may need more time to hydrate or may contain too much liquid.

Let it chill longer first.

If necessary, add another tablespoon of chia seeds and refrigerate again.

2. Can I use dairy-free milk?

Absolutely.

Almond, soy, oat, coconut, and cashew milk all work.

3. Can I use regular milk?

Yes.

Whole, reduced-fat, or skim milk can all be used.

4. Can I make it without honey?

Yes.

Use maple syrup, date syrup, another preferred sweetener, or leave it unsweetened.

5. Can I make this recipe vegan?

Yes.

Use plant-based milk and maple syrup instead of honey.

6. Can I make it the night before?

Yes. Overnight preparation is one of the easiest ways to make chia pudding.

7. How long should chia seeds soak?

At least about 4 hours is recommended for a thick texture, although overnight is convenient.

8. Can I eat chia seeds dry?

For this recipe, no. The seeds should be properly hydrated in liquid before eating.

9. Can I use white chia seeds?

Yes. White and black chia seeds work similarly.

10. Can I add protein powder?

Yes. Add a small amount of protein powder and increase the liquid if necessary to maintain the desired consistency.

11. Can I add Greek yogurt?

Definitely. Stir some Greek yogurt into the finished pudding for additional creaminess and protein.

12. Can children eat chia pudding?

It can be suitable depending on the child’s age and individual dietary needs. Chia seeds should be fully hydrated, and appropriate serving sizes and choking-safety guidance should be considered for young children.

13. Can I use a blender?

Yes. Blend the finished pudding for a smooth, mousse-like consistency.

14. Why does my pudding have clumps?

The chia seeds probably weren’t distributed evenly.

Whisk thoroughly and whisk again after several minutes.

15. Can I add fruit before refrigerating?

Yes, but delicate fruit may soften. For the freshest result, add most fruit immediately before serving.

Fluffy Cottage Cheese and Spinach Frittata

Fluffy Cottage Cheese and Spinach Frittata

Description

This Fluffy Cottage Cheese and Spinach Frittata is a delicious, protein-rich breakfast or brunch recipe that’s light, creamy, satisfying, and incredibly easy to prepare. Cottage cheese gives the eggs a wonderfully soft and fluffy texture while adding extra protein, and fresh spinach brings beautiful color, freshness, and nutrients.

Unlike a traditional omelet that needs to be folded or carefully flipped, a frittata is simple and forgiving. The ingredients are mixed together, poured into a skillet or baking dish, and cooked until the center is set and the top is lightly golden.

The combination of eggs, creamy cottage cheese, spinach, herbs, and cheese creates a savory dish that works for breakfast, lunch, dinner, meal prep, or a quick snack.

This frittata is also highly customizable. You can add mushrooms, tomatoes, bell peppers, onions, zucchini, herbs, or your favorite cheese. Serve it warm with avocado and fresh fruit, or pair it with a crisp salad for a complete light meal.

 Recipe Information

Recipe Name: Fluffy Cottage Cheese and Spinach Frittata
Category: Breakfast / Brunch / Light Dinner
Cuisine: Mediterranean-inspired
Prep Time: 10 minutes
Cook Time: 25–30 minutes
Total Time: Approximately 40 minutes
Servings: 6
Difficulty: Easy
Best Served: Warm or at room temperature

 Ingredients

For the Frittata

  • 8 large eggs
  • 1 cup cottage cheese
  • 3 cups fresh baby spinach
  • ½ cup shredded mozzarella cheese
  • ¼ cup grated Parmesan cheese
  • ¼ cup finely chopped onion
  • 1 tablespoon olive oil
  • 1 clove garlic, minced
  • ½ teaspoon salt
  • ¼ teaspoon black pepper
  • ½ teaspoon dried oregano
  • ½ teaspoon dried Italian herbs
  • ¼ teaspoon red pepper flakes, optional
  • 2 tablespoons fresh parsley, chopped

Optional Additions

  • ½ cup chopped cherry tomatoes
  • ½ cup sliced mushrooms
  • ½ cup diced bell pepper
  • ¼ cup crumbled feta
  • ¼ cup chopped green onions
  • ¼ teaspoon smoked paprika

 Step-by-Step Instructions

Step 1: Preheat the Oven

Preheat your oven to 375°F (190°C).

If you’re using an oven-safe skillet, you can prepare the entire recipe in one pan.

A 9- or 10-inch oven-safe skillet works particularly well.

Alternatively, use an 8- or 9-inch baking dish.

Lightly grease the cooking surface with olive oil or nonstick cooking spray.
Step 2: Prepare the Spinach

Wash the spinach thoroughly if necessary and pat it dry.

Heat the olive oil in a skillet over medium heat.

Add the chopped onion and cook for approximately 2–3 minutes, until it begins to soften.

Add the minced garlic and cook for about 30 seconds.

Add the spinach.

Cook for approximately 1–2 minutes, stirring gently, until the spinach wilts.

Don’t overcook it.

Once wilted, remove the skillet from the heat and allow the mixture to cool slightly.

Important Tip

Excess water is one of the biggest enemies of a fluffy frittata.

If your spinach releases a lot of moisture, gently press or drain it before adding it to the egg mixture.

 Step 3: Whisk the Eggs

Crack the eggs into a large mixing bowl.

Add:

  • Cottage cheese
  • Salt
  • Black pepper
  • Oregano
  • Italian herbs
  • Red pepper flakes, if using

Whisk until the eggs are well combined.

You don’t need to completely eliminate every small piece of cottage cheese.

In fact, little pockets of cottage cheese create a lovely creamy texture throughout the finished frittata.

 Step 4: Add the Cheese

Add the shredded mozzarella and Parmesan to the egg mixture.

Stir gently.

If you’re using feta, you can add it at this stage as well.

The mozzarella provides a mild, melty texture while Parmesan adds a salty, nutty flavor.

 Step 5: Add the Spinach Mixture

Add the slightly cooled spinach and onion mixture to the eggs.

Add the chopped parsley.

Fold everything together gently.

If you’re adding mushrooms, tomatoes, peppers, or green onions, add them now.

Avoid adding vegetables that contain excessive water unless they’ve been cooked or drained first.

 Step 6: Transfer to the Skillet

Pour the mixture into your prepared oven-safe skillet or baking dish.

Gently spread the ingredients so the spinach and cheese are distributed evenly.

Don’t press the mixture down.

You want the egg mixture to remain light and airy.

 Step 7: Bake

Place the skillet or baking dish in the preheated oven.

Bake for approximately 25–30 minutes.

The frittata should:

  • Look puffed around the edges.
  • Be lightly golden on top.
  • Feel set around the edges.
  • Have a center that is just firm and no longer liquid.

Avoid overbaking.

The eggs continue cooking from residual heat after being removed from the oven.

 Step 8: Rest Before Slicing

Remove the frittata from the oven.

Let it rest for approximately 5–10 minutes.

This makes it easier to slice and allows the texture to settle.

Garnish with additional fresh parsley, black pepper, or a little Parmesan.

 Step 9: Serve

Slice the frittata into wedges.

Serve warm with:

  • Fresh avocado
  • Sliced tomatoes
  • Fresh fruit
  • Toast
  • Roasted potatoes
  • Cucumber salad
  • Mixed greens
  • Greek yogurt

For a Mediterranean-inspired breakfast, serve a slice alongside tomatoes, cucumber, olives, avocado, and a small salad.

 Why You’ll Love This Frittata

Light and Fluffy

Cottage cheese helps create a creamy, tender texture.

High in Protein

Eggs and cottage cheese provide substantial protein.

Easy

There is no complicated folding or flipping.

Meal-Prep Friendly

It stores well and can be reheated for quick breakfasts.

Customizable

Use your favorite vegetables and cheese.

Naturally Filling

The combination of protein, eggs, cheese, and vegetables makes it satisfying.

Family Friendly

It’s mild enough for most family breakfasts and can easily be adjusted for different preferences.

 Choosing the Best Spinach

Fresh baby spinach is ideal because it cooks quickly and has a tender texture.

However, frozen spinach can also be used.

If using frozen spinach:

  1. Thaw completely.
  2. Drain thoroughly.
  3. Squeeze out excess water.
  4. Break apart large pieces.
  5. Add it directly to the egg mixture.

Properly draining frozen spinach is especially important.

Too much moisture can make the frittata watery and prevent it from setting properly.

 Cottage Cheese Tips

Cottage cheese is the secret ingredient that makes this frittata particularly creamy and fluffy.

You can use:

  • Full-fat cottage cheese
  • Reduced-fat cottage cheese
  • Low-fat cottage cheese

For an especially smooth texture, blend the cottage cheese briefly before adding it to the eggs.

This creates a smoother, almost custard-like consistency.

If you prefer texture, simply stir it directly into the eggs

 Delicious Variations

Spinach, Feta & Tomato

Add:

  • Cherry tomatoes
  • Feta
  • Fresh oregano

This creates a bright Mediterranean-inspired version.

Mushroom & Spinach

Sauté sliced mushrooms with the onions before adding the spinach.

The mushrooms add savory flavor and a hearty texture.

Spinach & Roasted Red Pepper

Add chopped roasted red peppers and feta.

This version has a wonderful sweet and savory combination.

Mediterranean Frittata

Add:

  • Spinach
  • Feta
  • Cherry tomatoes
  • Olives
  • Oregano
  • Parsley

Serve with cucumber and tomato salad.

Cheesy Version

Increase the mozzarella and Parmesan for an extra-rich result.

You can also add cheddar for a stronger cheese flavor.

 Make It Spicy

If you enjoy heat, add:

  • Red pepper flakes
  • Diced jalapeño
  • Cayenne pepper
  • Chopped chili peppers
  • A little hot sauce

Start with a small amount and adjust according to taste.

 Adding Tomatoes

Fresh tomatoes are delicious in a frittata, but they contain a lot of water.

To prevent a watery dish, use cherry tomatoes and either:

  • Pat them dry.
  • Remove some seeds.
  • Sauté them briefly before adding.

Roasted tomatoes are another excellent option because their moisture has already been reduced.
Adding Mushrooms

Mushrooms should be cooked before adding them.

Slice them thinly and sauté until they release their moisture and begin to brown.

This intensifies their flavor and prevents excess liquid from entering the frittata.

 Expert Tips for a Fluffy Frittata

1. Don’t Overbeat the Eggs

Whisk until combined and slightly frothy, but don’t aggressively beat them for a long time.

2. Use Cottage Cheese

It adds moisture, protein, and creaminess.

3. Don’t Add Watery Vegetables Raw

Cook or drain them first.

4. Don’t Overbake

Overcooked eggs become rubbery.

5. Let It Rest

A short resting period improves the final texture.

6. Don’t Cut Immediately

Allow the frittata to cool for several minutes before slicing.

7. Season Properly

Eggs need enough seasoning, especially when using mild cottage cheese.

 What to Serve With It

This frittata is versatile enough to accompany almost anything.

For Breakfast

Serve with:

  • Whole-grain toast
  • Avocado
  • Fresh berries
  • Orange slices
  • Greek yogurt

For Lunch

Serve with:

  • Green salad
  • Cucumber and tomato salad
  • Roasted vegetables
  • Lentil salad

For Dinner

Serve with:

  • Roasted potatoes
  • Grilled vegetables
  • Quinoa
  • Brown rice
  • Fresh garden salad

 Frittata Sandwich

Leftover slices can be used to make a delicious breakfast sandwich.

Place a slice of cold or reheated frittata inside toasted bread or an English muffin.

Add:

  • Avocado
  • Tomato
  • Spinach
  • A little feta
  • Hot sauce

This makes an easy grab-and-go breakfast.

 Storage Instructions

Allow the frittata to cool completely.

Place slices into an airtight container.

Refrigerate for approximately 3–4 days.

You can store individual slices separately for convenient meal preparation.

 Reheating Instructions

Microwave

Place one slice on a microwave-safe plate.

Heat for approximately 30–60 seconds, checking frequently.

Avoid overheating because eggs can become rubbery.

Oven

Place the frittata in an oven-safe dish.

Heat at approximately 325°F (165°C) until warmed through.

Air Fryer

Heat at approximately 325°F (165°C) for several minutes until warm.

 Freezing Instructions

Frittata can be frozen.

Allow it to cool completely before slicing.

Wrap individual pieces tightly and place them in a freezer-safe container.

For best quality, use within approximately 1–2 months.

Thaw overnight in the refrigerator and reheat gently.

The texture may be slightly softer after freezing, but it can still be delicious.

 Approximate Nutritional Information

Per serving, assuming 6 servings:

  • Calories: Approximately 230–270 kcal
  • Protein: 18–21 g
  • Carbohydrates: 5–7 g
  • Fat: 14–17 g
  • Saturated Fat: Approximately 5–7 g
  • Fiber: 1–2 g
  • Sugar: 2–3 g
  • Sodium: Approximately 450–650 mg
  • Calcium: Approximately 180–240 mg

These values are estimates and will vary depending on the cottage cheese, cheese, egg size, and additional vegetables used.

 Potential Benefits

Protein

Eggs and cottage cheese provide high-quality protein, making this frittata a satisfying choice for breakfast or lunch.

Spinach

Spinach contributes fiber and several vitamins and minerals, including folate and vitamin K.

Eggs

Eggs provide protein and several important micronutrients.

Cottage Cheese

Cottage cheese contributes protein and calcium.

Olive Oil

Extra-virgin olive oil provides primarily unsaturated fat and adds flavor.

Vegetables

Adding tomatoes, mushrooms, peppers, or other vegetables increases the variety of nutrients and fiber.

For an overall balanced meal, combine the frittata with additional vegetables, fruit, or whole grains according to your dietary needs.

These are general nutrition benefits, not medical claims or medical advice.

 Frequently Asked Questions

1. Can I make this frittata without cottage cheese?

Yes. You can substitute ricotta, Greek yogurt, or additional cheese, although the texture will be slightly different.

2. Can I use frozen spinach?

Yes. Thaw and squeeze it extremely well before using.

3. Can I make this recipe ahead of time?

Absolutely. Frittata is excellent for meal prep and can be refrigerated for several days.

4. Why is my frittata watery?

Excess moisture usually comes from spinach, tomatoes, mushrooms, or other vegetables.

Cook and drain watery vegetables before adding them.

5. Why did my frittata become rubbery?

It was probably baked too long or at too high a temperature.

Remove it from the oven as soon as the center is set.

6. Can I blend the cottage cheese?

Yes. Blending creates an exceptionally smooth and creamy texture.

7. Can I use egg whites?

Yes, although using some whole eggs generally produces a richer flavor and softer texture.

8. Can I add meat?

Yes. Cooked turkey, chicken, ham, bacon, or sausage can be added.

Make sure any meat is fully cooked before adding it.

9. Can I make it vegetarian?

Yes. The base recipe is vegetarian.

10. Can I make it gluten-free?

Yes. The basic recipe is naturally gluten-free, but always check ingredient labels if using packaged products.

11. Can I make it dairy-free?

Yes. Use a suitable dairy-free cottage cheese or creamy alternative and dairy-free cheese.

12. Can I add feta?

Definitely. Feta pairs beautifully with spinach.

13. What size pan should I use?

A 9- or 10-inch oven-safe skillet is ideal. An 8- or 9-inch baking dish also works.

14. Can I make mini frittatas?

Yes. Divide the mixture into greased muffin tins and reduce the cooking time. Check frequently because smaller portions cook much faster.

15. Can I eat it cold?

Yes. Frittata is delicious warm, at room temperature, or chilled.

Crispy Honey-Roasted Butternut with Cranberries, Feta & Pumpkin Seeds

Crispy Honey-Roasted Butternut with Cranberries, Feta & Pumpkin Seeds

Full Recipe

Description

Crispy Honey-Roasted Butternut with Cranberries, Feta & Pumpkin Seeds is a colorful, cozy, and flavorful side dish that combines sweet roasted butternut squash with tangy feta, tart dried cranberries, crunchy pumpkin seeds, and a glossy honey glaze.

The butternut squash becomes beautifully caramelized around the edges while staying tender and creamy inside. Honey enhances the natural sweetness of the squash, while savory spices and olive oil keep the dish balanced rather than overly sweet. Crumbled feta adds a salty, creamy contrast, dried cranberries provide little bursts of tartness, and toasted pumpkin seeds finish everything with a satisfying crunch.

This recipe is ideal for fall and winter dinners, holiday tables, Thanksgiving-inspired menus, Mediterranean-style meals, or simply as a delicious vegetable side for an ordinary weeknight.

It is also incredibly easy to customize. You can add fresh herbs, walnuts, pecans, goat cheese, chili flakes, or a splash of lemon juice depending on the flavor profile you prefer.

 Recipe Information

Recipe Name: Crispy Honey-Roasted Butternut with Cranberries, Feta & Pumpkin Seeds
Category: Side Dish
Cuisine: Mediterranean-inspired / American
Preparation Time: 15 minutes
Roasting Time: 30–40 minutes
Total Time: Approximately 50–55 minutes
Servings: 6
Difficulty: Easy
Best Served: Warm or slightly warm

 Ingredients

For the Roasted Butternut Squash

  • 1 large butternut squash, approximately 2½–3 pounds
  • 2 tablespoons extra-virgin olive oil
  • 2 tablespoons honey
  • 1 teaspoon garlic powder
  • 1 teaspoon smoked paprika
  • ½ teaspoon ground cinnamon
  • ½ teaspoon dried thyme
  • ½ teaspoon salt
  • ¼ teaspoon freshly ground black pepper
  • ¼ teaspoon chili flakes, optional

For the Toppings

  • ½ cup dried cranberries
  • ¾ cup crumbled feta cheese
  • ⅓ cup pumpkin seeds
  • 2 tablespoons chopped fresh parsley
  • 1 tablespoon fresh thyme leaves, optional

Optional Finishing Glaze

  • 1 tablespoon honey
  • 1 teaspoon lemon juice
  • 1 teaspoon olive oil

 Step-by-Step Instructions

Step 1: Prepare the Oven

Preheat your oven to 425°F (220°C).

A hot oven is important because the squash needs enough heat to caramelize instead of simply steaming.

For particularly crispy edges, place your baking sheet in the oven while it preheats.

Step 2: Prepare the Butternut Squash

Peel the butternut squash using a sturdy vegetable peeler.

Cut it in half lengthwise and scoop out the seeds and stringy interior.

Cut the squash into approximately 1-inch cubes.

Try to keep the pieces relatively similar in size.

Uniform pieces cook at approximately the same rate, preventing some pieces from becoming mushy while others remain undercooked.

Time-Saving Option

You can purchase pre-cut butternut squash from the grocery store.

Just make sure the pieces are relatively dry before seasoning.

 Step 3: Make the Honey Seasoning

In a small bowl, whisk together:

  • Olive oil
  • Honey
  • Garlic powder
  • Smoked paprika
  • Cinnamon
  • Thyme
  • Salt
  • Black pepper
  • Chili flakes, if using

The combination of honey and spices creates a flavorful coating that caramelizes beautifully in the oven.

 Step 4: Coat the Squash

Place the cubed butternut squash into a large mixing bowl.

Pour the honey mixture over the squash.

Toss thoroughly until every piece is lightly coated.

Avoid adding too much oil or honey because excessive moisture can prevent the squash from becoming crispy.

 Step 5: Arrange on the Baking Sheet

Spread the squash pieces across a large baking sheet.

Arrange them in one single layer.

Leave a little space between the pieces whenever possible.

This is one of the most important steps for achieving caramelized edges.

If the squash is packed tightly together, moisture gets trapped between the pieces and the squash will steam instead of roast.

 Step 6: Roast

Place the baking sheet in the preheated oven.

Roast for approximately 30–40 minutes.

After about 20 minutes, carefully flip or turn the squash pieces.

Continue roasting until:

  • The centers are fork-tender.
  • The edges are golden brown.
  • Some pieces have deep caramelized spots.
  • The surface looks slightly crisp.

Cooking time will vary depending on the size of your cubes.

 Step 7: Toast the Pumpkin Seeds

While the squash is roasting, prepare the pumpkin seeds.

Place them in a dry skillet over medium heat.

Toast for approximately 3–5 minutes, stirring frequently.

They should become fragrant and lightly golden.

Watch carefully because pumpkin seeds can burn quickly.

Remove from the heat and set aside.

You can also roast the pumpkin seeds in the oven for a few minutes, but skillet-toasting gives you more control.

 Step 8: Add the Cranberries

Once the squash has finished roasting, remove it from the oven.

Immediately sprinkle the dried cranberries over the warm squash.

The heat will slightly soften the cranberries, making them pleasantly chewy.

If your cranberries are very dry, you can soak them in warm water for approximately 5 minutes, then drain and pat them dry before adding them.

Step 9: Add the Feta

Sprinkle crumbled feta generously over the roasted squash.

Don’t mix too aggressively.

You want visible pieces of white feta throughout the dish.

The salty feta creates an excellent contrast with the naturally sweet squash and honey.

 Step 10: Add Pumpkin Seeds

Scatter the toasted pumpkin seeds over everything.

The seeds add a delicious crunch and make the dish more visually appealing.

Finish with chopped fresh parsley and thyme.

 Step 11: Add the Finishing Glaze

For an extra-bright finish, whisk together:

  • 1 tablespoon honey
  • 1 teaspoon lemon juice
  • 1 teaspoon olive oil

Drizzle a small amount over the finished squash.

You don’t need much.

The purpose is to add a fresh final layer of flavor rather than make the dish overly sweet.

 Step 12: Serve

Serve the dish warm or slightly warm.

It works beautifully as a side dish alongside roasted chicken, grilled fish, turkey, steak, or a vegetarian main course.

For a Mediterranean-inspired presentation, transfer the squash to a large serving platter and garnish with additional feta, parsley, pumpkin seeds, and a few dried cranberries.

 Why You’ll Love This Recipe

Crispy and Caramelized

Roasting at high heat gives the squash delicious browned edges.

Sweet and Savory

Honey and squash provide natural sweetness while feta and spices add savory depth.

Great Texture

The dish combines tender squash, creamy feta, chewy cranberries, and crunchy pumpkin seeds.

Beautiful Presentation

The orange squash, white feta, red cranberries, and green herbs create a colorful holiday-worthy dish.

Easy to Prepare

Most of the cooking is hands-off while the squash roasts.

Versatile

It can be served with everyday dinners or special holiday meals.

 Important Recipe Notes

Choose a Firm Squash

Select a butternut squash that feels firm and heavy for its size.

Cut Evenly

Consistent cubes roast more evenly.

Don’t Overcrowd the Pan

Give the squash room to brown.

Use a Large Baking Sheet

A larger surface area makes it easier to spread the squash into a single layer.

Watch the Honey

Honey caramelizes quickly. If your squash begins browning too rapidly before becoming tender, reduce the oven temperature slightly or loosely cover it near the end.

Add Feta After Roasting

Adding feta at the end preserves its fresh, creamy texture.

Toast Pumpkin Seeds Separately

This keeps them crunchy rather than soft.

 Tips for Extra Crispy Butternut Squash

1. Dry the Squash

If you wash freshly cut squash, pat it very dry before seasoning.

2. Don’t Use Too Much Honey

A heavy coating can make the surface sticky rather than crisp.

3. Roast at High Heat

A hot oven encourages browning and caramelization.

4. Don’t Stir Constantly

Let the squash remain against the hot baking surface long enough to develop color.

5. Use a Metal Baking Sheet

Metal conducts heat effectively and is excellent for roasting vegetables.

6. Roast in Batches if Necessary

If you have a huge amount of squash, use two baking sheets rather than overcrowding one.

 How to Customize the Flavor

Make It Spicy

Add ½–1 teaspoon chili flakes or a pinch of cayenne.

Make It More Mediterranean

Add oregano, parsley, lemon zest, and extra-virgin olive oil.

Make It More Festive

Add toasted pecans or walnuts along with the cranberries.

Make It Creamier

Replace half of the feta with soft goat cheese.

Make It Citrus-Forward

Add orange zest and a small splash of fresh orange juice.

Make It More Savory

Reduce the honey slightly and add minced garlic and rosemary.

 Serving Suggestions

This roasted butternut dish pairs especially well with:

  • Herb-roasted chicken
  • Grilled chicken breast
  • Roasted turkey
  • Baked salmon
  • Lemon garlic fish
  • Grilled steak
  • Lentil patties
  • Chickpea bowls
  • Quinoa
  • Couscous
  • Orzo
  • Wild rice
  • Green salads

For a complete vegetarian meal, serve it over quinoa or farro with chickpeas, greens, feta, and a lemon dressing.

 Perfect Holiday Side Dish

This recipe is particularly beautiful on a holiday table.

Instead of serving plain roasted squash, the combination of honey, cranberries, feta, and pumpkin seeds creates multiple layers of flavor and texture.

It can be prepared alongside turkey, roasted chicken, mashed potatoes, green beans, or stuffing.

For entertaining, transfer it to a large platter and garnish immediately before serving.

 Make It a Mediterranean Bowl

Turn leftovers into a complete lunch bowl.

Add:

  • Roasted butternut squash
  • Chickpeas
  • Baby spinach
  • Cucumber
  • Cherry tomatoes
  • Feta
  • Pumpkin seeds

Finish with lemon juice and olive oil.

You can also add cooked quinoa, couscous, or brown rice to make the bowl more filling.

 Cheese Substitutions

If you don’t have feta, try:

Goat Cheese

Creamier and slightly tangier.

Ricotta Salata

Firm and salty with a mild flavor.

Parmesan

Adds a nutty savory note.

Blue Cheese

For a stronger flavor.

Cotija

Works well if you want a salty, crumbly texture.

 Nut and Seed Alternatives

Pumpkin seeds can be replaced with:

  • Chopped walnuts
  • Pecans
  • Almonds
  • Sunflower seeds
  • Hazelnuts
  • Pistachios

Toast whichever option you choose before serving for the best flavor.

 Cranberry Alternatives

If you don’t have dried cranberries, try:

  • Dried cherries
  • Golden raisins
  • Raisins
  • Chopped dates
  • Dried apricots

Each option changes the flavor slightly but works beautifully with roasted squash.

 Storage Instructions

Allow leftovers to cool before transferring them to an airtight container.

Refrigerate for approximately 3–4 days.

Keep the pumpkin seeds separate if possible so they remain crunchy.

The feta can remain mixed into the squash, although adding fresh feta after reheating gives the best texture.

 Reheating Instructions

For the best texture, reheat the squash in an oven or air fryer.

Oven

Heat at approximately 400°F (200°C) for 8–12 minutes.

Air Fryer

Heat at approximately 375°F (190°C) for 4–7 minutes.

Add fresh pumpkin seeds and feta after reheating.

Avoid microwaving if you want to preserve the crispy edges.

 Can You Freeze It?

Roasted butternut squash can be frozen, although the texture may become softer after thawing.

For best results, freeze the roasted squash separately without the feta, cranberries, and pumpkin seeds.

When ready to serve, reheat the squash in the oven and add fresh toppings.

 Approximate Nutritional Information

Per serving, based on 6 servings:

  • Calories: Approximately 280–330 kcal
  • Protein: 6–7 g
  • Carbohydrates: 40–45 g
  • Fat: 12–15 g
  • Fiber: 6–7 g
  • Sugar: 17–21 g
  • Sodium: Approximately 350–500 mg
  • Calcium: Approximately 120–160 mg

These values are estimates and will vary depending on the size of the squash, amount of honey, feta, pumpkin seeds, and specific brands used.

 Potential Benefits

Butternut Squash

Butternut squash provides dietary fiber and naturally occurring carotenoids, as well as several vitamins and minerals.

Pumpkin Seeds

Pumpkin seeds contribute protein, healthy fats, magnesium, zinc, and other nutrients.

Feta

Feta contributes protein and calcium while providing a salty flavor that allows you to use a relatively small amount for a noticeable taste.

Cranberries

Dried cranberries add fruit flavor and carbohydrates. Keep in mind that many commercial dried cranberries contain added sugar.

Olive Oil

Extra-virgin olive oil provides monounsaturated fat and plant compounds.

Herbs and Spices

Parsley, thyme, paprika, cinnamon, and garlic powder provide flavor without requiring large quantities of additional ingredients.

For a balanced meal, pair this dish with a protein source and additional vegetables.

 Frequently Asked Questions

1. Can I use frozen butternut squash?

Yes. Frozen squash works, although it may not become quite as crispy as fresh squash because of its higher moisture content.

Roast it from frozen and avoid overcrowding the baking sheet.

2. Can I prepare the squash ahead of time?

Yes. You can peel and cube the squash up to a day ahead and store it covered in the refrigerator.

3. Can I use maple syrup instead of honey?

Absolutely. Maple syrup makes an excellent substitute and gives the dish a slightly deeper flavor.

4. Is this recipe vegetarian?

Yes, provided the feta you use is suitable for your dietary requirements.

5. Can I make it vegan?

Yes. Replace honey with maple syrup and use a plant-based feta alternative.

6. Can I use pre-cut squash?

Definitely. Pre-cut squash is a convenient time-saving option.

7. Why did my squash become soggy?

The most common causes are overcrowding, excessive moisture, or too much oil.

8. Can I add onions?

Yes. Red onion or shallots are excellent additions.

9. Can I add garlic?

Absolutely. Fresh minced garlic can be added, but watch it carefully because garlic can brown quickly at high temperatures.

10. Can I use goat cheese instead of feta?

Yes. Goat cheese creates a creamier and slightly tangier result.

11. Can I make this less sweet?

Yes. Reduce the honey to 1 tablespoon and let the natural sweetness of the squash shine.

12. Can children eat this?

Yes, provided the ingredients fit their dietary needs. Omit chili flakes if you prefer a mild version.

13. Can I serve it cold?

Yes. It can be served warm, room temperature, or chilled and makes a delicious salad topping.

14. What herbs work best?

Parsley, thyme, rosemary, and sage all pair beautifully with butternut squash.

15. Can I turn this into a main course?

Yes. Add chickpeas, lentils, quinoa, farro, or another protein source to make it more substantial.