Classic Chicken Marsala

Classic Chicken Marsala

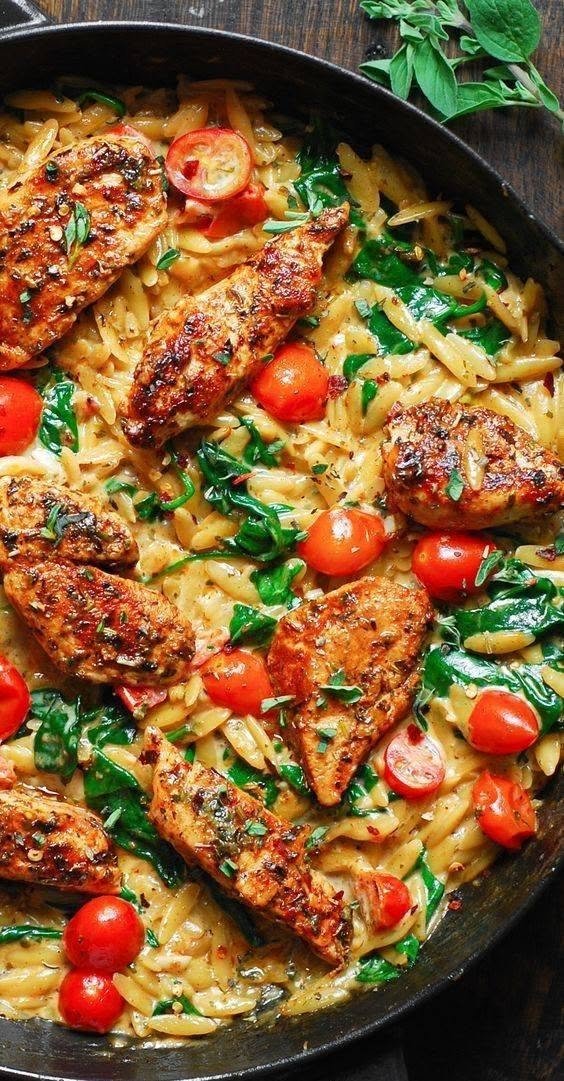
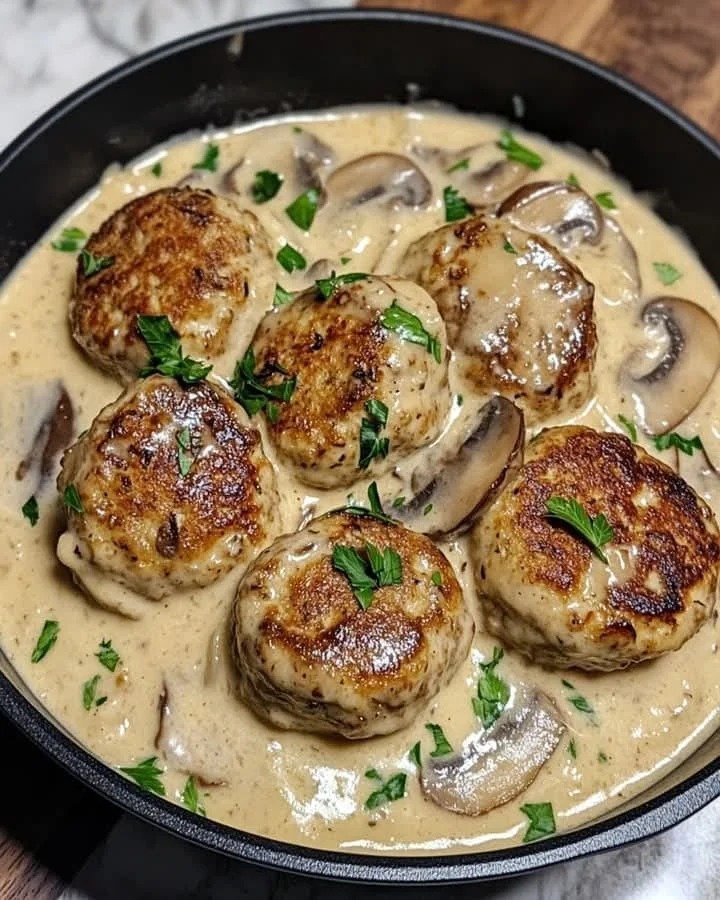
Few skillet dinners are as comforting and satisfying as Classic Chicken Marsala. Thin chicken cutlets are lightly floured and pan-seared until golden, then nestled into a savory mushroom sauce enriched with dry Marsala, chicken broth, cream, and butter. Fresh parsley brings a pop of color and freshness to this cozy dish, which is perfect for both family dinners and special occasions.

Prep Time: 20 minutes
Cook Time: 30 minutes
Total Time: 50 minutes
Servings: 4–6

Ingredients

The Chicken & Dredge

Chicken breasts: 1½ lbs, boneless and skinless, sliced horizontally into thin cutlets and pounded to even thickness

All-purpose flour: ½ cup, for dredging

Salt and freshly ground black pepper: to taste

Garlic powder: ½ teaspoon, optional

The Pan & Sear

Olive oil: 2 tablespoons

Unsalted butter: 4–6 tablespoons, divided

The Mushroom Marsala Sauce

Mushrooms: 8–12 oz, cremini or baby bella, thickly sliced or quartered

Shallot: 1 medium, finely minced or diced

Garlic: 2–3 cloves, minced

Dry Marsala wine: ¾ cup

Chicken broth or stock: 1 cup, preferably low-sodium

Heavy cream: ½ cup

Fresh flat-leaf parsley: 2 tablespoons, finely chopped

Instructions

Prepare the Chicken

Place the chicken breasts on a cutting board and slice them horizontally into thin cutlets. If the pieces are still uneven, place them between sheets of plastic wrap or parchment and gently pound them until they are approximately the same thickness.

Even thickness is important because it allows the chicken to cook quickly and evenly without thinner sections becoming dry while thicker sections are still undercooked.

Pat the chicken dry with paper towels. Season both sides generously with salt and freshly ground black pepper.

Prepare the Dredge

In a shallow dish, combine the all-purpose flour with a little salt, black pepper, and the optional garlic powder.

Coat each chicken cutlet lightly in the seasoned flour. Shake off the excess flour so the chicken has a thin, even coating rather than a thick layer.

The flour helps create the golden exterior and also contributes to the body of the sauce later.

Sear the Chicken

Heat a large skillet over medium-high heat. Add the olive oil and about 2 tablespoons of butter.

Once the butter is melted and the pan is hot, carefully place the chicken cutlets into the skillet. Work in batches if necessary so the pan does not become overcrowded.

Sear the chicken for approximately 3–4 minutes on the first side, then turn and cook for another 2–3 minutes, or until golden brown and cooked through.

Transfer the chicken to a clean plate and loosely cover it while you prepare the sauce.

Do not worry if there are browned bits left on the bottom of the pan. Those flavorful bits are an important part of the Marsala sauce.

Cook the Mushrooms

Reduce the heat to medium and add another tablespoon or two of butter to the same skillet.

Add the sliced mushrooms in a fairly even layer. Cook for about 5–7 minutes, stirring occasionally, until they soften and develop golden-brown edges.

Avoid stirring constantly. Giving the mushrooms time to sit against the hot pan helps them brown rather than simply steam.

Add the Shallot and Garlic

Add the minced shallot and cook for approximately 2 minutes, stirring occasionally, until softened.

Add the minced garlic and cook for about 30–60 seconds, just until fragrant.

Be careful not to brown the garlic too aggressively, as burnt garlic can make the sauce bitter.

Deglaze with Marsala

Pour the dry Marsala wine into the skillet.

As the wine bubbles, use a wooden spoon or spatula to scrape the browned bits from the bottom of the pan. These caramelized pieces add tremendous depth to the finished sauce.

Allow the Marsala to simmer for approximately 3–5 minutes, or until it has reduced noticeably.

The sauce should become more concentrated and aromatic before the broth is added.

Build the Sauce

Pour in the chicken broth and stir to combine.

Bring the mixture to a gentle simmer and cook for approximately 5 minutes. The flour residue from the chicken and the reduction will help the sauce begin to thicken.

Pour in the heavy cream and stir gently.

Continue simmering for another 3–5 minutes, keeping the heat moderate. The sauce should become creamy and slightly thickened without boiling aggressively.

Return the Chicken

Place the seared chicken cutlets back into the skillet along with any juices that accumulated on the plate.

Spoon the mushroom Marsala sauce over the chicken.

Allow everything to simmer gently for another 2–4 minutes, giving the chicken time to warm through and absorb some of the sauce.

Avoid prolonged cooking at this stage because thin chicken cutlets can become dry if simmered too long.

Finish with Butter and Parsley

Turn the heat to low or remove the skillet from the burner.

Add the remaining cold butter and gently swirl the skillet until the butter melts into the sauce. This final step gives the sauce a smooth, glossy texture.

Taste and adjust the salt and black pepper as needed.

Scatter the freshly chopped parsley over the top.

Serve immediately with your favorite side dishes.

Tips

Pound the Chicken Evenly

Evenly sized chicken cutlets cook much more consistently. If one end is significantly thicker than another, it can remain undercooked while the thinner portion becomes dry.

Do Not Over-Flour the Chicken

A light coating is all you need. Too much flour can create a heavy crust and may cause the sauce to become overly thick or pasty.

Use a Large Skillet

A wide skillet gives the chicken and mushrooms enough room to brown properly. If necessary, sear the chicken in batches rather than crowding the pan.

Brown the Mushrooms Properly

Mushrooms release moisture as they cook. Allow that moisture to evaporate before expecting deep browning. Cooking them patiently creates a much richer sauce.

Use Dry Marsala

Dry Marsala is generally the better choice for a savory chicken dish because it provides the characteristic nutty wine flavor without making the sauce excessively sweet.

Choose Drinking-Quality Marsala

A quality Marsala wine can make a noticeable difference in the final sauce. Avoid heavily salted cooking wine when possible because it can make controlling the seasoning more difficult.

Deglaze Thoroughly

Those brown bits on the bottom of the skillet are packed with flavor. Scrape the pan thoroughly when adding the Marsala so they dissolve into the sauce.

Control the Heat

Once the cream is added, keep the sauce at a gentle simmer. Aggressive boiling can cause the sauce to reduce too quickly or make the cream behave poorly.

Finish with Cold Butter

Swirling in cold butter at the end creates a smooth, glossy finish. Remove the pan from high heat before adding it.

Serve Immediately

Chicken Marsala is at its best while the chicken is tender and the sauce is warm and silky. If the sauce thickens while standing, loosen it with a small splash of warm chicken broth.

Variations

Classic Non-Creamy Marsala

For a more traditional-style sauce, omit the heavy cream. Increase the chicken broth slightly if needed and allow the Marsala and broth to reduce until the sauce reaches your preferred consistency.

Chicken Marsala with Prosciutto

Add a few thin slices of chopped prosciutto when cooking the mushrooms. The salty cured meat adds another savory layer that pairs particularly well with Marsala.

Spinach Mushroom Marsala

Add a couple of handfuls of fresh baby spinach during the final few minutes. Allow it to wilt into the sauce before returning the chicken.

Extra Mushroom Version

Increase the mushrooms to about 16 ounces if you love a mushroom-forward sauce. Brown them in batches so they have enough space to caramelize.

Herb-Enhanced Marsala

Add a small amount of fresh thyme or rosemary while the sauce simmers. Remove woody herb stems before serving.

Lemon Finish

Add a small squeeze of fresh lemon juice immediately before serving. The acidity can brighten the rich butter, cream, and Marsala flavors.

Gluten-Free Version

Use a suitable gluten-free all-purpose flour blend for dredging. Make sure the chicken broth and Marsala wine you choose are also appropriate for your dietary requirements.

Dairy-Free Version

Use dairy-free butter and replace the heavy cream with an unsweetened plant-based cooking cream. The flavor will differ slightly but can still produce a creamy sauce.

Q&A

What kind of Marsala wine should I use?

Dry Marsala is the preferred choice for a savory Chicken Marsala. Look for a quality bottle intended for drinking rather than heavily salted cooking wine.

Can I use chicken thighs instead of breasts?

Yes. Boneless, skinless chicken thighs can be used, although they may require a little more cooking time because they are generally thicker and more forgiving than breast meat.

Can I make Chicken Marsala without cream?

Absolutely. Cream is common in modern versions, but it is not essential. The Marsala, broth, mushrooms, and butter can create a flavorful sauce on their own.

Why is my Marsala sauce too thin?

Continue simmering gently for a few minutes to reduce it. The flour from the chicken dredge also helps thicken the sauce naturally.

Why did my sauce become too thick?

Add a small splash of chicken broth and stir over low heat until the sauce loosens to your preferred consistency.

Can I prepare Chicken Marsala ahead of time?

Yes. The chicken and sauce can be prepared ahead and refrigerated in an airtight container. Reheat gently on the stovetop with a splash of broth to prevent the sauce from becoming too thick.

What should I serve with Chicken Marsala?

Mashed potatoes, pasta, rice, polenta, roasted vegetables, or crusty bread are all excellent choices because they provide something to absorb the flavorful sauce.

How long do leftovers keep?

Refrigerate leftovers promptly in an airtight container and use them within about 3–4 days. Reheat gently until thoroughly warmed.

Nutrition

Approximate nutrition per serving, based on 6 servings: 480 calories, 42g protein, 17g carbohydrates, 27g fat, 13g saturated fat, 1g fiber, and 3g sugar.

Nutrition values are estimates and can vary according to the exact amount of butter, cream, flour, chicken, wine, and other ingredients used.

Conclusion

This one-pan Chicken Marsala delivers a wonderful balance of golden chicken, earthy mushrooms, aromatic shallots, and a deeply flavorful Marsala sauce. The cream makes the sauce silky and rich, while the final touch of butter gives it a beautiful restaurant-style finish. Pair it with something that can soak up the sauce, and you have an elegant comfort-food dinner that is easy enough to make at home.

Vegan Raspberry Chia Pudding

Vegan Raspberry Chia Pudding

Bright, creamy, and wonderfully easy to prepare, this Vegan Raspberry Chia Pudding makes a beautiful addition to any breakfast or dessert table. The naturally thick chia base is layered with a vibrant raspberry compote, creamy vegan yogurt, and crunchy granola. Fresh raspberries add the finishing touch, making each serving as attractive as it is delicious.

Prep Time: 10 minutes
Cook Time: 5 minutes
Chilling Time: 4 hours
Total Time: About 4 hours 15 minutes
Servings: 2

Ingredients

For the Chia Pudding Base

Chia seeds: ¼ cup

Plant-based milk: 1 cup, such as unsweetened almond, oat, or light coconut milk

Pure maple syrup or agave nectar: 1–2 tablespoons

Vanilla extract: ½ teaspoon

For the Raspberry Compote Layer

Raspberries: 1 cup, fresh or thawed frozen raspberries

Pure maple syrup: 1 teaspoon, optional and adjusted according to berry sweetness

Lemon juice: a tiny squeeze, optional

For the Toppings

Vegan yogurt: 2–3 tablespoons, vanilla or plain coconut/almond-based yogurt

Granola: 2 tablespoons

Fresh raspberries: a handful for garnish

Instructions

Prepare the Chia Pudding

Add the chia seeds, plant-based milk, maple syrup or agave, and vanilla extract to a medium bowl or jar.

Whisk thoroughly for about 30–60 seconds, making sure the chia seeds are evenly dispersed throughout the milk. Let the mixture sit for about 5 minutes, then whisk again. This second stir helps prevent the seeds from settling together and forming clumps.

Cover the bowl or jar and refrigerate for at least 4 hours. For the best texture, you can leave it in the refrigerator overnight.

The chia pudding should become thick and spoonable, similar to a soft pudding.

Make the Raspberry Compote

Place the raspberries in a small saucepan over medium-low heat.

Cook for approximately 3–5 minutes, stirring gently as the berries soften and release their juices.

Use the back of a spoon or spatula to lightly crush some of the raspberries. You do not need to turn them into a completely smooth sauce; leaving some small pieces creates a more interesting texture.

Taste the mixture. If the berries are particularly tart, stir in 1 teaspoon of maple syrup. Add a tiny squeeze of lemon juice if you want a brighter berry flavor.

Remove from the heat and allow the compote to cool completely.

Chill the Compote

Transfer the raspberry compote to a small container and refrigerate it until cold.

Cooling the compote before assembling the pudding helps maintain distinct layers and prevents the yogurt or chia mixture from becoming warm.

Prepare the Serving Glasses

Choose two small glasses, jars, or dessert cups.

Give the chilled chia pudding a quick stir. If it has become extremely thick, add a small splash of plant-based milk and stir until it reaches a creamy, spoonable consistency.

Create the Layers

Spoon a layer of chia pudding into the bottom of each glass.

Add a layer of cooled raspberry compote over the pudding.

Add another layer of chia pudding if you have enough remaining.

Finish with a spoonful of vegan yogurt.

For a beautiful presentation, allow some of the raspberry layer to remain visible against the sides of the glass.

Add the Toppings

Just before serving, sprinkle granola over the yogurt.

Add fresh raspberries around the top and finish with a few additional berries for a colorful presentation.

Serve chilled.

Tips

Stir the Chia Seeds Twice

The first whisk distributes the chia seeds through the milk, while the second stir after a few minutes prevents clumping. This simple step makes a noticeable difference in the final texture.

Choose the Right Milk

Unsweetened almond milk gives a light, neutral flavor. Oat milk creates a naturally creamier result, while light coconut milk adds a subtle tropical note.

Adjust the Sweetness

Start with 1 tablespoon of maple syrup and taste the mixture before adding more. The raspberry compote, yogurt, and granola may also contribute sweetness, so the pudding itself does not need to be overly sweet.

Use Ripe Raspberries

Naturally sweet, ripe raspberries require very little additional sweetener. If your berries are especially tart, add the optional teaspoon of maple syrup to the compote.

Do Not Overcook the Berries

The goal is to soften the raspberries and create a spoonable compote. Cooking them for too long can make the mixture unnecessarily thick and reduce the fresh berry character.

Cool the Compote Completely

Warm raspberry compote can loosen the chia pudding and disturb the layers. Allow it to cool before assembling.

Give the Chia Pudding Enough Time

Four hours is a good minimum chilling period, but overnight refrigeration often produces an even thicker and more cohesive texture.

Add Granola at the Last Moment

Granola becomes soft when exposed to moisture. Add it immediately before serving so it retains its crunch.

Make the Layers Neat

For clean layers, use the back of a small spoon to gently spread each component. You can also use a piping bag or squeeze bottle for the yogurt if you want a more polished presentation.

Variations

Chocolate Raspberry Chia Pudding

Add 1 tablespoon of unsweetened cocoa powder to the chia pudding base. Whisk thoroughly with the plant-based milk before adding the chia seeds.

Coconut Raspberry Version

Use light coconut milk for the pudding and coconut-based vegan yogurt for the topping. Finish with a sprinkle of unsweetened shredded coconut.

Lemon Raspberry Pudding

Add ½ teaspoon of finely grated lemon zest to the raspberry compote. The citrus flavor pairs beautifully with tart raspberries.

Mixed Berry Version

Replace part of the raspberries with blueberries, strawberries, or blackberries. Cook the berries together until softened, then adjust the sweetness to taste.

Peanut Butter Raspberry Version

Add a thin layer of natural peanut butter between the chia pudding and raspberry compote. The creamy nutty flavor creates a delicious contrast with the berries.

Almond Crunch Version

Use almond-based yogurt and top the pudding with toasted sliced almonds instead of, or alongside, granola.

Breakfast Bowl Style

Instead of layering the ingredients in glasses, spoon the chia pudding into bowls and add raspberry compote, yogurt, granola, and fresh berries on top.

Dessert-Style Version

Serve the pudding in elegant small dessert glasses and add a little extra vegan yogurt, fresh raspberries, and finely chopped dark chocolate for a more indulgent presentation.

Q&A

How long does chia pudding need to chill?

Chia pudding should generally chill for at least 4 hours so the seeds have enough time to absorb the liquid and create a thick texture. Overnight refrigeration works particularly well.

Can I make this recipe the night before?

Yes. This is an excellent make-ahead recipe. Prepare the chia pudding and raspberry compote the night before, then assemble the layers and add the granola shortly before serving.

Why is my chia pudding too runny?

It may need more chilling time, or the ratio of liquid to chia seeds may be too high. Let it chill longer first. If it remains thin, you can stir in a small amount of additional chia seeds and refrigerate again.

Why is my chia pudding too thick?

Simply stir in a small splash of plant-based milk until the desired consistency is reached. Add the milk gradually so you do not accidentally make it too thin.

Can I use frozen raspberries?

Yes. Frozen raspberries work very well for the compote. Thaw them first if needed, then cook them gently until softened and juicy.

Can I skip cooking the raspberries?

Yes. For a completely fresh version, mash fresh raspberries with the maple syrup and lemon juice. The texture will be more like a fresh raspberry sauce rather than a cooked compote.

Can I use another sweetener?

Yes. Agave nectar can replace maple syrup. You can also adjust the sweetness according to the plant-based milk and yogurt you choose.

How long does raspberry chia pudding last?

The prepared chia pudding can generally be refrigerated in an airtight container for several days. For the best texture, keep crunchy toppings such as granola separate until serving.

Can I freeze chia pudding?

Chia pudding can be frozen, although the texture may change slightly after thawing. For the best results, refrigerating it is preferable.

Nutrition

Approximate nutrition per serving, including the listed yogurt and granola: 280 calories, 7g protein, 35g carbohydrates, 13g fat, 7g fiber, and 18g sugar.

Nutrition values are estimates and can vary depending on the plant-based milk, vegan yogurt, granola, sweetener, and portion sizes used.

Conclusion

A few minutes of preparation is all it takes to create this gorgeous Vegan Raspberry Chia Pudding. The creamy base contrasts with tangy raspberry compote, while vegan yogurt and crisp granola add extra richness and texture. It is easy to prepare ahead and customize with your favorite plant-based ingredients, making it a versatile recipe for mornings, snacks, or a simple naturally fruity dessert.

Maple-Roasted Parsnips with Blue Cheese Crumble & Candied Pecans

Maple-Roasted Parsnips with Blue Cheese Crumble & Candied Pecans

If you are looking for a side dish with restaurant-style flavor, these Maple-Roasted Parsnips with Blue Cheese Crumble and Candied Pecans are an excellent choice. Roasting brings out the natural sweetness of the parsnips while maple syrup creates a glossy caramelized coating. Sharp blue cheese cuts through the sweetness, and crunchy pecans add a buttery finish. It is a delicious combination for entertaining, family dinners, and festive gatherings.

Prep Time: 15 minutes
Cook Time: 35–40 minutes
Total Time: About 55 minutes
Servings: 4–6

Ingredients

Roasted Parsnips

1 lb (450 g) parsnips, peeled and cut into sticks

2 tablespoons olive oil

2 tablespoons pure maple syrup

1 teaspoon salt

½ teaspoon black pepper

1 teaspoon smoked paprika, optional

Candied Pecans

⅓ to ½ cup pecans

2 tablespoons brown sugar

1 tablespoon unsalted butter

Toppings & Garnish

¼ to ⅓ cup blue cheese, crumbled

Fresh thyme sprigs or fresh parsley, chopped

Instructions

Prepare the Parsnips

Preheat the oven to 425°F (220°C). Line a large baking sheet with parchment paper for easier cleanup.

Peel the parsnips and trim both ends. Cut them into evenly sized sticks, aiming for pieces that are similar in thickness. This helps them roast at the same rate.

If the parsnips are particularly large, you may notice a woody center. Simply cut the parsnip lengthwise and remove the tough core before slicing it into sticks.

Season the Parsnips

Place the prepared parsnips in a large bowl. Add the olive oil, maple syrup, salt, black pepper, and smoked paprika if using.

Toss thoroughly until every piece is lightly coated. The maple syrup should cling to the parsnips without pooling heavily at the bottom of the bowl.

Arrange for Roasting

Spread the parsnips across the prepared baking sheet in a single layer.

Try not to overcrowd the pan. If the pieces are packed too closely together, they will release steam and become softer rather than developing deeply caramelized edges.

Leave a little space between the pieces whenever possible.

Roast Until Caramelized

Roast the parsnips for about 30–35 minutes, turning them once halfway through cooking.

They should become tender in the center with golden-brown, caramelized edges. Keep an eye on them during the final minutes because maple syrup can darken quickly.

If the parsnips are tender but need more color, increase the oven temperature slightly or give them another few minutes of roasting.

Prepare the Candied Pecans

While the parsnips roast, place the butter and brown sugar in a small skillet over medium-low heat.

Once the butter melts, stir until the sugar begins to dissolve and the mixture becomes glossy.

Add the pecans and stir continuously for about 2–4 minutes, making sure they are coated in the buttery sugar mixture.

Do not walk away from the skillet, as the sugar can burn quickly.

Transfer the coated pecans to a sheet of parchment paper or a lightly greased plate. Spread them apart and allow them to cool.

Once cooled enough to handle, roughly chop them into smaller pieces.

Assemble the Dish

Transfer the roasted parsnips to a serving platter or shallow serving bowl.

Scatter the crumbled blue cheese over the warm parsnips. The residual heat will soften the cheese slightly without completely melting it.

Add the chopped candied pecans and finish with fresh thyme leaves or chopped parsley.

Serve immediately while the parsnips are warm and the contrast between the tender vegetables, creamy cheese, and crunchy pecans is at its best.

Tips

Choose Fresh Parsnips

Look for firm parsnips with smooth skin and no soft spots. Smaller to medium-sized parsnips are often sweeter and more tender. Very large parsnips can have a tougher central core.

Cut the Parsnips Evenly

Uniform pieces are important for even roasting. If some pieces are very thin and others are thick, the thin ones may become overly browned before the larger pieces are tender.

Do Not Overcrowd the Pan

Give the parsnips room to roast. A crowded baking sheet traps moisture and makes it harder to achieve the caramelized edges that make this recipe special.

Use Pure Maple Syrup

Pure maple syrup provides a cleaner, more natural maple flavor than pancake syrup. It also works beautifully with the earthy sweetness of roasted parsnips.

Watch the Final Minutes

The combination of maple syrup and high oven heat creates beautiful caramelization, but it can also burn if left unattended. Start checking the parsnips during the final 5–7 minutes.

Keep the Pecans Moving

When making the candied pecans, stir frequently. The butter and brown sugar mixture can go from perfectly caramelized to burnt very quickly.

Add the Cheese After Roasting

Blue cheese does not need to be baked with the parsnips. Adding it after roasting preserves its distinct tangy flavor while allowing it to soften gently from the heat of the vegetables.

Serve Warm

This dish is especially enjoyable shortly after assembly. The warm parsnips slightly soften the cheese while the pecans retain their satisfying crunch.

Variations

Milder Cheese Version

If traditional blue cheese is too strong, use a milder variety such as Gorgonzola dolce. It provides creamy richness while keeping the characteristic blue-cheese flavor more delicate.

Goat Cheese Variation

Replace the blue cheese with crumbled goat cheese. Its creamy, tangy flavor works beautifully with maple-roasted vegetables.

Walnut Topping

Use chopped walnuts instead of pecans. Toast them lightly before adding them to the dish, or prepare them with the same buttery brown-sugar coating.

Spiced Parsnips

Add smoked paprika as suggested in the ingredient list, or use a small pinch of ground cinnamon for a warmer flavor profile.

Herb Variation

Fresh rosemary or sage can be used instead of thyme. Both herbs pair particularly well with roasted root vegetables.

Extra Citrus

Add a little finely grated orange zest immediately before serving. Orange provides a bright contrast to the maple, blue cheese, and earthy parsnips.

Holiday Version

Add a small handful of dried cranberries when assembling the platter. Their tart sweetness creates another layer of flavor and gives the finished dish a festive appearance.

Q&A

Can I prepare the parsnips ahead of time?

Yes. You can peel and cut the parsnips several hours ahead and keep them refrigerated in an airtight container. Toss them with the oil and seasonings shortly before roasting for the best texture.

Can I make the candied pecans ahead of time?

Absolutely. The pecans can be prepared several days ahead and stored in an airtight container at room temperature once completely cool.

Can I use frozen parsnips?

Fresh parsnips are strongly preferred for this recipe. Frozen parsnips can contain additional moisture and may not caramelize as effectively.

What can I use instead of blue cheese?

Goat cheese, feta, or a mild creamy cheese can work well. Choose a cheese with enough tanginess to balance the sweetness of the maple syrup.

Why aren’t my parsnips caramelizing?

The most common reasons are an overcrowded pan, insufficient oven heat, or excess moisture. Spread the parsnips into a single layer and make sure the oven is fully preheated.

Can I make this recipe less sweet?

Yes. Reduce the maple syrup to 1 tablespoon and use the natural sweetness of the roasted parsnips and brown-sugar pecans to provide balance.

How should leftovers be stored?

Place leftovers in an airtight container and refrigerate for up to 3 days. Store the pecans separately when possible so they remain crunchy.

How do I reheat leftovers?

Reheat the parsnips in a 375°F (190°C) oven until warmed through. Add fresh blue cheese and pecans after reheating for the best texture.

Nutrition

Approximate nutrition per serving, based on 6 servings: 240 calories, 5g protein, 29g carbohydrates, 13g fat, 4g saturated fat, 5g fiber, and 14g sugar.

Nutrition information is an estimate and can vary depending on the exact amounts of maple syrup, cheese, pecans, and other ingredients used.

Conclusion

With caramelized edges, a naturally sweet maple glaze, creamy blue cheese, and crisp candied pecans, this roasted parsnip recipe offers a wonderful balance of textures and flavors. It is an easy way to make a simple vegetable feel elegant and festive. The fresh herbs bring everything together, making this side dish especially delicious next to roasted meats, poultry, or a comforting vegetarian entrée.

Blueberry Almond Cake

Blueberry Almond Cake

There is something especially inviting about a homemade Blueberry Almond Cake fresh from the oven. The tender buttery crumb is packed with sweet blueberries, complemented by a subtle almond aroma and a golden topping of sliced almonds. It makes a beautiful centerpiece for brunch, an afternoon treat with tea, or a simple dessert when you want a fruit-filled cake that feels special.

Prep Time: 20 minutes
Cook Time: 45–55 minutes
Total Time: About 1 hour 15 minutes
Servings: 8–10 slices
Yield: One 9-inch cake

Ingredients

Wet Ingredients

3 large eggs, at room temperature

6 oz (175g) unsalted butter, softened at room temperature

1 tsp vanilla extract

½ tsp pure almond extract

Dry Ingredients

1 cup (200g) granulated sugar

1½ cups (185g) all-purpose flour

½ cup (55g) almond flour

2 tsp baking powder

1 pinch of salt

Fruit & Nuts

2 cups (300g) fresh blueberries, divided

¾ cup (100g) sliced almonds

Instructions

Prepare the Pan

Preheat the oven to 350°F (175°C). Grease a 9-inch round cake pan and line the bottom with parchment paper. Lightly grease the parchment as well. The parchment makes it much easier to remove the cake after baking, especially because the blueberries can release some juice as they cook.

Prepare the Dry Ingredients

In a medium bowl, whisk together the all-purpose flour, almond flour, baking powder, and salt. Mixing these ingredients separately helps distribute the baking powder evenly throughout the flour and prevents pockets of leavening in the finished cake.

Set the bowl aside while you prepare the butter mixture.

Cream the Butter and Sugar

Place the softened butter and granulated sugar in a large mixing bowl. Beat with an electric mixer for about 3–5 minutes, or until the mixture becomes pale, light, and fluffy.

This step is important because incorporating air into the butter helps create a lighter cake texture. Scrape down the sides of the bowl as needed so everything mixes evenly.

Add the Eggs and Extracts

Add the eggs one at a time, beating well after each addition. Make sure the first egg is incorporated before adding the next.

Add the vanilla extract and almond extract and mix briefly until combined.

The mixture may look slightly curdled at this stage, especially if the ingredients were not all at the same temperature. This is generally fine; the dry ingredients will bring the batter together.

Combine the Batter

Gradually add the dry ingredients to the butter mixture. Mix on low speed just until the flour disappears.

Avoid overmixing the batter. Once the ingredients are combined, stop mixing. Overmixing can develop excess gluten and make the cake less tender.

Fold in the Blueberries

Reserve a portion of the blueberries for the top of the cake. Gently fold most of the remaining blueberries into the batter using a spatula.

Work carefully so you do not crush too many berries. Fresh blueberries can stain the batter, but a few streaks of purple are completely natural and give the cake a beautiful homemade appearance.

Fill and Top the Cake

Transfer the batter to the prepared cake pan and spread it evenly with a spatula.

Scatter the reserved blueberries over the surface. Gently press a few into the batter without pushing them all the way down.

Sprinkle the sliced almonds evenly over the top.

Bake

Place the cake in the preheated oven and bake for approximately 45–55 minutes.

The exact baking time can vary depending on your oven and the moisture in the blueberries. Begin checking around the 45-minute mark.

The cake is ready when the top is golden, the center feels set, and a toothpick inserted into the center comes out clean or with a few moist crumbs. If the toothpick hits a blueberry, test another spot.

Cool and Serve

Allow the cake to cool in the pan for about 10–15 minutes. Carefully run a thin knife around the edge if necessary, then transfer the cake to a wire rack to cool further.

For the cleanest slices, allow the cake to cool substantially before cutting. Serve at room temperature with coffee, tea, or a light dusting of powdered sugar if desired.

Tips

Use Room-Temperature Ingredients

Room-temperature eggs and softened butter blend together more smoothly and help create a consistent batter. Take the butter and eggs out of the refrigerator ahead of time rather than trying to soften them with excessive heat.

Do Not Melt the Butter

The recipe calls for softened butter, not melted butter. Soft butter can be creamed with sugar to incorporate air, while melted butter produces a different cake texture.

Measure Flour Carefully

Too much flour can make this cake dense and dry. For the most consistent result, weigh the flour when possible. If measuring by cups, gently spoon the flour into the measuring cup and level the top rather than scooping directly from a packed container.

Use Fresh Blueberries

Fresh blueberries work especially well because they hold their shape and create juicy pockets throughout the cake. Choose berries that are firm, plump, and free from visible mold.

Avoid Overmixing

Once the flour is incorporated, mix only until combined. Gentle mixing keeps the crumb tender and prevents the cake from becoming unnecessarily dense.

Check the Center

Because blueberries add moisture, the cake may need a little more time than a plain butter cake. If the top looks golden but the center is still wet, continue baking and check again every few minutes.

Protect the Almond Topping

If the sliced almonds become deeply golden before the cake is finished, loosely cover the top with aluminum foil for the remaining baking time.

Cool Before Cutting

The crumb continues to set as the cake cools. Cutting it while very hot can make the center appear softer or cause slices to break apart.

Variations

Lemon Blueberry Almond Cake

Add 1–2 teaspoons of finely grated lemon zest to the butter and sugar mixture. Lemon brightens the blueberries and pairs naturally with almond.

Orange Almond Cake

Replace the lemon zest with finely grated orange zest. The combination of orange, almond, and blueberries gives the cake a warm, fragrant flavor.

Frozen Blueberry Version

Frozen blueberries can be used when fresh berries are unavailable. Add them while still frozen and fold them into the batter gently. Avoid thawing them first because thawed berries can release excess liquid.

Berry Combination

Replace part of the blueberries with raspberries or blackberries. Keep the total quantity of fruit close to the amount specified so the batter maintains the proper balance.

Vanilla-Only Version

For a milder flavor, omit the almond extract and use an additional ½ teaspoon of vanilla extract. The almond flour and sliced almonds will still provide a gentle nutty character.

Glazed Finish

Once the cake has cooled completely, drizzle it with a simple glaze made from powdered sugar and a small amount of lemon juice or milk.

Q&A

Can I use frozen blueberries?

Yes. Frozen blueberries can be used directly from frozen. Do not thaw them first, as thawing can introduce extra moisture and make the batter more difficult to bake evenly.

Can I make this cake without almond flour?

Yes, although the texture and flavor will change. You can replace the almond flour with additional all-purpose flour, but the cake will lose some of its characteristic nutty richness.

Can I use a different cake pan?

Yes. A similar-sized round or square pan can work, but baking time may change. A larger, shallower pan will generally bake faster, while a smaller or deeper pan may require additional time.

Why did my blueberries sink?

Blueberries can naturally move downward as the cake batter expands. Keeping some berries on top and folding the rest in gently helps distribute the fruit more attractively.

How do I know when the cake is done?

Look for a golden surface, a set center, and a toothpick that comes out clean or with a few moist crumbs. Avoid testing directly through a blueberry.

How should I store the cake?

Store the cooled cake in an airtight container at room temperature for about 1–2 days. For longer storage, refrigerate it and bring slices toward room temperature before serving.

Can I freeze Blueberry Almond Cake?

Yes. Cool the cake completely, wrap it tightly, and freeze it in an airtight container or freezer-safe wrapping. Thaw it at room temperature before serving.

Nutrition

Approximate nutrition per serving, based on 10 servings: 390 calories, 6g protein, 47g carbohydrates, 20g fat, 10g saturated fat, 2g fiber, and 27g sugar.

Nutrition values are estimates and can vary depending on the exact brands, portion sizes, and ingredients used.

Conclusion

From its golden almond-studded top to the soft center bursting with blueberries, this cake brings together simple ingredients in a particularly delicious way. The almond flour adds richness, the berries provide juicy sweetness, and the sliced almonds give every slice a satisfying little crunch. Bake it for a weekend gathering or keep it on hand for an inviting homemade treat with your next cup of tea.

Mini Flatbread Bites with Brie, Cranberries & Pistachio Honey

Mini Flatbread Bites with Brie, Cranberries & Pistachio Honey

When you need a quick appetizer with a festive presentation, these Mini Flatbread Bites deliver. Golden crisp flatbread is topped with creamy Brie, tart-sweet dried cranberries, crunchy pistachios, and a delicate honey drizzle. Fresh rosemary completes the bites with a fragrant herbal note. They are easy to assemble, quick to bake, and perfect for sharing at gatherings.

Prep Time: 15 minutes
Cook Time: 8–10 minutes
Total Time: 23–25 minutes
Servings: 24–30 mini bites

Ingredients

For the Flatbread Base

2 large flatbreads, about 240 grams total, cut into small bite-sized squares

1 tablespoon olive oil, for brushing the base

For the Toppings

4 oz Brie cheese, sliced into small strips or pieces to fit the squares

⅓ cup dried cranberries

¼ cup pistachios, finely chopped

2 tablespoons honey, for drizzling

Fresh rosemary sprigs, for garnish

Instructions

Prepare the Oven

Preheat the oven to 400°F (200°C). Line a baking sheet with parchment paper.

Cut the flatbreads into small, approximately 1½–2-inch squares or rectangles and arrange them in a single layer.

Brush the Flatbread

Lightly brush the surface of each piece with olive oil. Avoid soaking the bread, as too much oil can prevent it from becoming crisp.

Add the Brie

Slice the Brie into small pieces that fit comfortably on the flatbread squares.

Place a piece of Brie on each base, leaving a little space around the edges.

Add the Cranberries and Pistachios

Scatter a few dried cranberries over each piece of Brie.

Sprinkle finely chopped pistachios over the top, reserving a small amount for garnish if desired.

Bake Until Golden

Bake for approximately 8–10 minutes, or until the flatbread edges are golden and crisp and the Brie has softened.

Begin checking the bites after about 7 minutes because smaller flatbread pieces can brown rapidly.

Drizzle with Honey

Remove the baking sheet from the oven and let the bites cool for 1–2 minutes.

Drizzle honey over the warm Brie, cranberries, and pistachios.

Garnish and Serve

Finish with finely chopped pistachios and small rosemary leaves or tiny rosemary sprigs.

Arrange the bites on a serving platter and serve warm while the flatbread is crisp and the Brie is creamy.

Tips

Use Thin Flatbread

A thin flatbread will crisp more quickly and provide a pleasant contrast to the soft Brie. Thicker varieties can be used but may need extra baking time.

Keep Everything Bite-Sized

The appetizer is most enjoyable when each piece can be picked up easily. Avoid using oversized pieces of cheese or excessive toppings.

Chill the Brie Before Cutting

Cold Brie is easier to cut neatly. Once portioned, it can soften naturally as the oven heats.

Leave Space Around the Cheese

Brie melts as it heats. Leaving a small border helps keep the melted cheese on the flatbread instead of allowing it to run onto the baking sheet.

Use Fresh Rosemary

Fresh rosemary provides much more fragrance than dried rosemary. Use only a small amount because its flavor is naturally strong.

Toast the Pistachios

For an even deeper nutty flavor, lightly toast the pistachios before chopping them. Allow them to cool before sprinkling them over the flatbreads.

Add Honey at the End

Drizzling the honey after baking keeps its flavor bright and avoids unnecessary browning.

Do Not Overbake

The goal is crisp flatbread and softened Brie. If the flatbread becomes very dark, the delicate balance of textures can be lost.

Serve Shortly After Baking

These bites are at their best while warm. If they sit for too long, the flatbread may gradually soften.

Make a Balanced Platter

Arrange the bites in rows or a circular pattern and decorate the serving platter with rosemary sprigs and a few extra cranberries for a festive appearance.

Variations

Hot Honey Brie

Use hot honey instead of regular honey for a spicy-sweet finish. The heat is excellent with creamy Brie.

Pear, Brie & Pistachio

Add thin slices of fresh pear under the cranberries. The pear brings fresh fruitiness and a delicate texture.

Fig & Brie

Replace dried cranberries with chopped dried figs or a small amount of fig spread. Finish with pistachios and honey.

Apple Cranberry Bites

Add thin apple slices and dried cranberries before baking. A tiny pinch of cinnamon can make this variation especially festive.

Orange Honey Brie

Mix fresh orange zest into the honey before drizzling. The citrus aroma complements the cranberries and rosemary beautifully.

Walnut Cranberry Bites

Replace pistachios with finely chopped toasted walnuts. Add a little black pepper for a savory contrast.

Pecan Maple Version

Use toasted pecans and maple syrup instead of pistachios and honey. This gives the bites a deeper, autumn-inspired flavor.

Goat Cheese Flatbreads

Replace the Brie with soft goat cheese for a tangier appetizer. Cranberries and honey help balance the cheese beautifully.

Balsamic Honey Finish

Drizzle a very small amount of balsamic glaze over the baked bites along with the honey for a sweet-tart contrast.

Prosciutto Brie Bites

Add a small piece of prosciutto after baking. The salty cured meat balances the sweetness of the cranberries and honey.

Savory Herb Version

Use thyme or parsley instead of rosemary and reduce the honey for a more savory appetizer.

Festive Citrus Version

Add orange zest, cranberries, pistachios, Brie, and rosemary for a colorful holiday-inspired combination.

Q&A

Can I use pita bread instead of flatbread?

Yes. Thin pita can be cut into small squares and baked until crisp. Very thick pita may require a slightly longer baking time.

Can I use Camembert instead of Brie?

Yes. Camembert is a close substitute and melts beautifully. Its flavor is slightly different but works well with the same toppings.

Can I remove the Brie rind?

Yes, if you prefer. It is completely optional because the rind is edible.

Can I use hot honey?

Absolutely. Hot honey is one of the easiest ways to add a spicy contrast to the creamy Brie.

Can I prepare the ingredients earlier in the day?

Yes. Cut the flatbread and Brie, chop the pistachios, and measure the cranberries ahead of time. Store the components separately until assembly.

Can I freeze these appetizer bites?

Freezing is not recommended because the Brie and flatbread may lose their ideal texture after thawing. They are best prepared fresh.

How can I make the flatbread extra crisp?

Use a thin base, brush it lightly with oil, avoid wet toppings, and bake until the edges are golden. A preheated baking sheet can also help the base crisp more quickly.

Can I use dried cherries instead of cranberries?

Yes. Dried cherries provide a slightly richer, tangier fruit flavor and make an excellent substitute.

Can I replace honey with maple syrup?

Yes. Maple syrup works particularly well with pistachios, walnuts, pecans, Brie, and dried fruit.

What herbs work besides rosemary?

Fresh thyme is an excellent alternative. Parsley can also be used for a milder herbal finish.

Can I add fresh fruit?

Yes. Thinly sliced pear or apple works especially well. Keep the slices thin so they soften properly during baking.

Are these suitable for a holiday appetizer table?

Yes. Their colors and flavors make them especially suitable for Thanksgiving, Christmas, New Year’s gatherings, brunches, and dinner parties.

How should I reheat leftovers?

Reheat them briefly in a 350–375°F (175–190°C) oven or air fryer until warm and crisp. Avoid microwaving when possible because it can soften the flatbread.

Nutrition

Approximate nutrition per serving, assuming 6 servings and excluding additional decorative rosemary:

Calories: 250–290 kcal

Protein: 8–10 g

Carbohydrates: 27–32 g

Fat: 12–15 g

Saturated Fat: 5–6 g

Fiber: 2–3 g

Sugar: 10–14 g

Sodium: 350–500 mg

These figures are estimates and may change depending on the brands, quantities, and serving sizes used.

Conclusion

Crispy, creamy, sweet, salty, and nutty, these Mini Flatbread Bites make entertaining wonderfully easy. Brie melts into the crisp base while cranberries provide a chewy fruity bite, pistachios add crunch, and honey creates a glossy sweet finish. A touch of rosemary makes the presentation feel extra special. Whether served at a festive celebration or a casual gathering, these little bites are guaranteed to bring plenty of flavor to the appetizer table.

Honey Lime Chicken and Mango Avocado Rice Bowl

Honey Lime Chicken and Mango Avocado Rice Bowl

Bright, juicy, and bursting with fresh flavor, this Honey Lime Chicken and Mango Avocado Rice Bowl is an easy meal that looks as good as it tastes. Tender chicken is caramelized with honey and lime, then layered over fragrant rice with juicy mango, buttery avocado, crunchy carrots, colorful cabbage, and fresh chili. The smooth mango-lime sauce adds a final burst of sweetness and citrus to every bite.

Prep Time: 20 minutes
Cook Time: 15 minutes
Total Time: 35 minutes
Servings: 3–4

Ingredients

For the Honey Lime Chicken

400 g chicken breast, cubed or sliced lengthwise

1 tablespoon olive oil

1½ tablespoons honey

Zest and juice of 1 lime

½ teaspoon garlic powder

½ teaspoon dried oregano

Salt and black pepper, to taste

For the Rice & Toppings Base

1–1½ cups jasmine or basmati rice, cooked

1 ripe mango, diced

1 large avocado, sliced

½ cup shredded carrots

½ cup shredded red or purple cabbage

¼ cup red bell pepper or red chili, finely diced

Fresh cilantro leaves, chopped for garnish

Lime wedges, for serving

For the Mango-Lime Drizzle Sauce

¼ cup mango puree

1–2 teaspoons fresh lime juice, to taste

1 teaspoon honey, optional

1–2 teaspoons water, as needed for consistency

Instructions

Prepare the Chicken

Add the chicken pieces to a bowl and combine with olive oil, honey, lime zest, lime juice, garlic powder, oregano, salt, and black pepper.

Toss well until the chicken is evenly coated. Allow it to marinate for at least 10 minutes while preparing the remaining ingredients.

Make the Mango-Lime Sauce

Combine the mango puree and fresh lime juice in a small bowl. Add honey if the mango needs additional sweetness.

Stir until smooth and taste the sauce. Add a teaspoon of water at a time until it becomes easy to drizzle.

Set aside until the bowls are ready to assemble.

Prepare the Rice and Toppings

Cook the jasmine or basmati rice according to package instructions. Fluff with a fork and keep warm.

Dice the mango, slice the avocado, shred the carrots and cabbage, and finely dice the red bell pepper or chili.

Prepare the cilantro and lime wedges for the final garnish.

Cook the Chicken

Heat a large skillet over medium-high heat. Add the marinated chicken in a single layer.

Cook for approximately 4–5 minutes, then turn the pieces and continue cooking until golden brown and completely cooked through.

The honey will help the chicken develop caramelized edges, while the lime adds a bright flavor. Lower the heat slightly if the honey begins browning too quickly.

Build the Bowls

Divide the cooked rice between serving bowls.

Arrange the chicken, mango, avocado, carrots, cabbage, and red pepper or chili in separate sections over the rice.

Keep the ingredients visually distinct for a colorful presentation.

Finish the Bowls

Drizzle the mango-lime sauce over the center of each bowl and lightly over the chicken.

Garnish with chopped cilantro and serve with fresh lime wedges.

Serve while the chicken and rice are warm and the fresh toppings are crisp.

Tips

Use Good-Quality Chicken

Fresh chicken breast works particularly well because it cooks quickly when cut into small pieces. Chicken thighs can also be used if you prefer a richer texture.

Keep the Chicken Pieces Similar

Uniform pieces cook more evenly and help prevent some pieces from drying out while others finish cooking.

Use Fresh Lime

Fresh lime juice and zest provide a much brighter flavor than bottled juice. Zesting the lime before squeezing it is the easiest approach.

Prevent the Honey From Burning

Honey caramelizes quickly. Use medium-high heat to brown the chicken, but reduce the heat if the glaze becomes too dark before the chicken is fully cooked.

Use Firm-Ripe Mango

A mango that is ripe but still slightly firm is easiest to dice and gives the bowl a pleasant juicy texture without becoming mushy.

Add Avocado Last

Avocado is best sliced shortly before serving. A little lime juice can help maintain its fresh appearance.

Keep the Cabbage Raw

Raw cabbage gives this bowl an important crunchy element. Thinly slice it so it is easy to eat with the chicken and rice.

Adjust the Mango Sauce

The sweetness of mango varies naturally. Taste the sauce before serving and adjust with lime juice or honey as needed.

Do Not Overload the Bowl

Arrange moderate portions of each topping so the rice remains the foundation of the dish and every bite contains a balance of flavors.

Serve With Extra Lime

A final squeeze of lime immediately before eating brings all the flavors together and keeps the bowl tasting fresh.

Variations

Spicy Mango Chicken Bowl

Add chili flakes or cayenne to the chicken marinade and use fresh red chili as a topping. This creates a delicious sweet-and-spicy contrast.

Garlic Ginger Chicken

Add 1 teaspoon freshly grated ginger and 1 minced garlic clove to the chicken marinade for a stronger aromatic flavor.

Coconut Mango Bowl

Serve the chicken and toppings over coconut rice and add toasted coconut flakes for a tropical twist.

Black Bean Addition

Add black beans to the rice base for extra texture and a heartier bowl. Season them lightly with lime and cumin if desired.

Mango Avocado Salsa

Combine the diced mango and avocado with cilantro, lime juice, finely diced red onion, and chili to create a fresh salsa-style topping.

Shrimp Bowl

Replace the chicken with peeled and deveined shrimp. Cook the shrimp quickly in the same honey-lime flavor mixture until opaque and cooked through.

Salmon Bowl

Use bite-sized salmon pieces instead of chicken. A sweet chili or honey-lime glaze pairs especially well with mango and avocado.

Crispy Tofu Bowl

For a vegetarian option, season cubes of firm tofu and pan-sear until golden and crisp before adding the mango-lime sauce.

Fresh Green Bowl

Add cucumber, baby spinach, edamame, or lettuce for even more fresh vegetables and texture.

Nutty Finish

Sprinkle chopped cashews, peanuts, or almonds over the finished bowl for a crunchy contrast to the soft mango and avocado.

Q&A

Can I use brown rice?

Yes. Brown rice gives the bowl a nuttier flavor and firmer texture. Cook it according to its package directions before assembling.

Can I substitute chicken thighs?

Yes. Boneless, skinless chicken thighs are a great substitute. They may take slightly longer to cook depending on the size of the pieces.

Can I make this bowl ahead of time?

Yes. Cook the chicken and rice and prepare the vegetables in advance. Store the components separately and assemble when ready to eat.

Can I use frozen mango?

Yes. Frozen mango works well for the puree. For diced mango, thaw it thoroughly and drain excess liquid before adding it to the bowl.

How can I make the sauce more tangy?

Add additional fresh lime juice. Taste after each addition because the acidity can become strong quickly.

How can I make it sweeter?

Add a small amount of honey to the mango puree. Very ripe mango may already provide enough sweetness.

What can replace the avocado?

Cucumber, edamame, or additional mango can be used if you do not have avocado. A creamy yogurt-based sauce can also add richness.

Can I make this bowl dairy-free?

Yes. The base recipe does not require dairy. Keep any optional yogurt-based sauces out if you need a completely dairy-free meal.

What can I use instead of cilantro?

Fresh parsley, mint, or green onions can be used. Choose whichever herb best suits your taste.

Can I make it gluten-free?

Yes, but check the labels of any packaged ingredients you use. The basic ingredients are naturally gluten-free, provided cross-contamination is not an issue.

How long will the assembled bowl keep?

For the best texture, keep the components separate. Rice and cooked chicken can be refrigerated, while avocado and fresh toppings are best added shortly before serving.

Can I freeze the bowl?

The cooked chicken and rice can be frozen, but fresh avocado, cabbage, carrots, and mango are better prepared fresh after thawing.

Nutrition

Approximate nutrition per serving, based on 4 servings and excluding optional toppings:

Calories: 500–550 kcal

Protein: 31–35 g

Carbohydrates: 58–65 g

Fat: 17–21 g

Saturated Fat: 3–4 g

Fiber: 7–9 g

Sugar: 18–24 g

Sodium: 350–550 mg

Nutrition information is an estimate and may vary based on ingredient brands, exact quantities, portion sizes, and substitutions.

Conclusion

With its colorful toppings, juicy honey-lime chicken, creamy avocado, sweet mango, and bright citrus drizzle, this rice bowl is an easy way to bring fresh tropical flavor to the dinner table. Every component contributes something different, from the crunch of cabbage and carrots to the sweetness of mango and the savory caramelized chicken. Whether prepared for lunch, dinner, or meal prep, this bowl is versatile, vibrant, and easy to make your own.

Southwest Sweet Potato & Chicken Chili Bake

Southwest Sweet Potato & Chicken Chili Bake

Warm, creamy, cheesy, and full of Southwest-inspired flavor, this Sweet Potato & Chicken Chili Bake is a simple comfort-food favorite. Small cubes of sweet potato bake alongside tender shredded chicken and black beans in a creamy cottage cheese and enchilada sauce mixture, while pepper jack cheese melts over the top. Every serving has a delicious balance of sweet, savory, smoky, and gently spicy flavors.

Prep Time: 15 minutes
Cook Time: 35–40 minutes
Total Time: 50–55 minutes
Servings: 4–6

Ingredients

Base Ingredients

1 large sweet potato, peeled and diced very small

2 cups cooked shredded chicken

½ cup black beans, rinsed and drained

The Sauce & Topping

1 cup cottage cheese, blended smooth

½ cup red enchilada sauce or chunky salsa

1 large egg

1 teaspoon cumin

1 teaspoon chili powder

1 cup pepper jack cheese, divided

Instructions

Prepare the Oven and Baking Dish

Preheat your oven to 375°F (190°C). Lightly grease an 8-inch baking dish or another similar-sized casserole dish.

Peel the sweet potato and dice it into very small cubes. Try to keep the pieces uniform so they soften at the same rate.

Mix the Creamy Sauce

Place the smooth blended cottage cheese in a mixing bowl. Add the red enchilada sauce or chunky salsa, egg, cumin, and chili powder.

Whisk until the ingredients are thoroughly combined and the mixture looks creamy and evenly seasoned.

Add about ½ cup of the pepper jack cheese to the sauce mixture and stir gently. Keep the remaining cheese for the casserole topping.

Combine the Main Ingredients

Add the diced sweet potato, shredded chicken, and drained black beans to a large mixing bowl.

Pour the creamy sauce over everything and stir carefully until all the ingredients are coated.

Take a moment to distribute the sweet potato evenly throughout the mixture. This helps prevent some areas from cooking faster than others.

Fill the Baking Dish

Transfer the mixture to the prepared baking dish. Spread it evenly and gently smooth the surface.

Sprinkle the remaining pepper jack cheese over the top, making sure it reaches the edges for a delicious melted-cheese finish.

Bake

Cover the dish with aluminum foil and place it in the preheated oven.

Bake for about 25 minutes. Then carefully remove the foil and continue baking for 10–15 minutes.

The casserole is ready when the sweet potatoes are tender, the center is hot, the sauce is bubbling, and the cheese has completely melted.

For a more golden and lightly browned cheese topping, broil for 1–2 minutes at the end. Stay close to the oven during broiling.

Rest and Garnish

Remove the casserole from the oven and allow it to rest for 5–10 minutes.

Garnish with fresh cilantro, sliced green onions, diced avocado, fresh lime juice, or your favorite salsa before serving.

Serve warm and spoon directly from the baking dish.

Tips

Make the Sweet Potato Small

Small sweet potato cubes are essential for this recipe. They cook faster and blend naturally into the creamy casserole. Large pieces can remain firm while the sauce and cheese are already finished.

Use Shredded Chicken

Shredded chicken distributes more evenly than large pieces. It also absorbs the enchilada sauce, allowing the Southwest flavors to reach every bite.

Drain Ingredients Thoroughly

Drain and rinse the black beans before adding them. If using chunky salsa, choose one that is not excessively watery to prevent the casserole from becoming loose.

Blend the Cottage Cheese

For the smoothest texture, blend the cottage cheese until creamy before mixing it with the other sauce ingredients. This makes the finished casserole feel rich and cohesive.

Taste Your Enchilada Sauce

Different enchilada sauces vary significantly in saltiness and heat. Choose one that matches your preferred spice level and adjust the seasoning accordingly.

Do Not Overbake

Once the sweet potato is tender and the cheese is melted, the casserole is ready. Excessive baking can cause the chicken to become dry and the creamy sauce to lose some of its smooth texture.

Rest Before Serving

The casserole will be quite hot and soft immediately after leaving the oven. A short resting period helps it firm slightly while keeping the inside creamy.

Customize the Toppings

Fresh toppings are a great way to brighten the rich casserole. Cilantro, avocado, lime, tomato, green onion, jalapeño, and salsa all work well.

Watch the Broiler

If you choose to brown the cheese under the broiler, do not walk away. The topping can go from golden to burnt very quickly.

Variations

Southwest Veggie Version

Omit the chicken and add more black beans along with corn, bell peppers, and diced zucchini. This creates a colorful vegetarian casserole.

Chicken and Corn Version

Add ½–1 cup of corn to the chicken mixture. Sweet corn complements the sweet potato and gives the casserole an extra pop of texture.

Jalapeño Pepper Jack

Add finely chopped fresh jalapeño to the mixture and use pepper jack generously on top for a more pronounced spicy flavor.

Smoky Chipotle Version

Mix a small amount of minced chipotle peppers in adobo sauce into the creamy base. The smoky chili flavor pairs particularly well with sweet potato.

Cheddar Southwest Bake

Use a combination of pepper jack and sharp cheddar. The cheddar brings a deeper savory flavor while pepper jack contributes mild heat.

Turkey Chili Bake

Replace the shredded chicken with cooked shredded turkey. This works especially well with leftover holiday turkey.

Bean-Loaded Bake

Increase the black beans and add pinto beans for a heartier version. Make sure all canned beans are rinsed and drained thoroughly.

Green Chile Chicken Bake

Stir diced green chiles into the sauce before baking. They add a mild pepper flavor without overwhelming the other ingredients.

Fresh Taco Topping

After baking, add diced avocado, chopped tomato, cilantro, green onions, shredded lettuce, and a squeeze of lime for a fresh taco-inspired finish.

Crunchy Tortilla Topping

For extra texture, sprinkle crushed tortilla chips over the casserole during the final few minutes of baking. Add them late so they remain crisp.

Q&A

Can I use rotisserie chicken?

Yes. Rotisserie chicken is one of the easiest options for this recipe. Remove the skin and bones, then shred approximately 2 cups of the meat.

Can I use frozen sweet potato?

You can, although the texture may be softer because frozen sweet potatoes contain additional moisture. If using frozen diced sweet potato, avoid thawing it completely unless the package instructions recommend it.

Can I substitute the black beans?

Yes. Pinto beans, kidney beans, or a combination of beans can be used. Always drain and rinse canned beans well.

What type of salsa works best?

A thick chunky salsa works well. Choose mild, medium, or hot depending on your preference. Avoid very watery salsa because it can make the casserole loose.

Can I make this without eggs?

The egg helps bind the creamy sauce. You can experiment with an egg-free version using a thicker dairy base, although the finished texture may be softer.

Can I use Greek yogurt instead of cottage cheese?

Yes. Plain Greek yogurt can provide a creamy texture and tangy flavor. Use an unsweetened variety.

Can I assemble it the night before?

Yes. Cover the assembled casserole and refrigerate it. Before baking, allow the dish to sit briefly while the oven preheats. Because it starts cold, expect the baking time to increase slightly.

Can I double the recipe?

Yes. Double all ingredients and use a larger baking dish. Make sure the casserole is not excessively deep so the center can cook evenly.

How do I make it milder?

Use mild enchilada sauce or salsa and choose a mild cheese instead of pepper jack. You can also reduce the chili powder.

How do I make it more filling?

Increase the chicken and black beans or add corn. Serving it with rice or warm tortillas can also turn it into a larger meal.

What are the best toppings?

Cilantro, avocado, lime, green onions, diced tomatoes, jalapeños, salsa, sour cream, or plain Greek yogurt are all excellent choices.

How long do leftovers last?

Store the cooled casserole in an airtight container in the refrigerator and consume within a few days. Reheat until thoroughly warmed.

Nutrition

Approximate nutrition per serving, based on 6 servings:

Calories: 360–420 kcal

Protein: 31–36 g

Carbohydrates: 27–33 g

Fat: 15–19 g

Saturated Fat: 6–8 g

Fiber: 5–7 g

Sugar: 6–9 g

Sodium: 650–900 mg

Nutrition information is an estimate and will vary according to the exact brands, ingredients, toppings, and serving sizes used.

Conclusion

This casserole is a wonderful way to turn everyday ingredients into a warm and satisfying Southwest-inspired dinner. The tender sweet potato brings a subtle sweetness, while chicken and black beans add substance and the creamy enchilada mixture ties everything together. A generous layer of melted pepper jack makes the top especially inviting. Serve it with bright, fresh toppings and a squeeze of lime for an easy meal that feels both comforting and flavorful.

Sweet Chili Salmon Bites with Lime Yogurt Dip

Sweet Chili Salmon Bites with Lime Yogurt Dip

If you love bold flavors with a fresh, creamy contrast, these Sweet Chili Salmon Bites are an irresistible choice. Cubes of salmon are quickly seared until golden, coated in a sticky sweet chili glaze, and served with a zesty lime yogurt dip. The combination of caramelized salmon, gentle heat, citrus, and cool Greek yogurt makes this recipe perfect for entertaining, casual dinners, or an impressive appetizer that comes together quickly.

Prep Time: 15 minutes
Cook Time: 10–12 minutes
Total Time: 25–27 minutes
Servings: 4–6

Ingredients

For the Salmon Bites

1½ lbs salmon fillets, skin removed and cut into 1-inch cubes

2 tablespoons olive oil

¼–½ cup sweet chili sauce

1 tablespoon soy sauce

1 tablespoon honey

½ teaspoon paprika

1 teaspoon garlic powder

½ teaspoon salt

½ teaspoon black pepper

1 teaspoon sriracha, optional

For the Lime Yogurt Dip

1 cup plain Greek yogurt

Zest from 1 fresh lime

1 tablespoon fresh lime juice, or juice of 1 lime

1 small garlic clove, finely grated or minced

A pinch of salt, or to taste

Optional Garnish

1 tablespoon fresh cilantro or parsley, finely chopped

Lime wedges for serving

Instructions

Prepare the Salmon

Pat the salmon dry with paper towels, then remove any remaining skin or bones. Cut the fillets into uniform 1-inch cubes.

Place the salmon in a mixing bowl. Add olive oil, paprika, garlic powder, salt, and black pepper. Toss gently until the seasoning coats all sides.

Prepare the Glaze

Whisk the sweet chili sauce, soy sauce, honey, and optional sriracha together in a small bowl.

Use ¼ cup sweet chili sauce for a lighter coating or up to ½ cup for a saucier, more intensely glazed result.

Sear the Salmon

Place a large skillet over medium-high heat and allow it to become hot. Add the seasoned salmon pieces in a single layer.

Sear for about 2–3 minutes, then carefully turn the pieces. Continue cooking for another 2–3 minutes, turning occasionally until the salmon has developed golden edges and is nearly cooked through.

If the skillet is small, work in batches rather than piling the salmon together.

Add the Sweet Chili Sauce

Lower the heat to medium. Pour the prepared glaze into the skillet and gently toss the salmon until coated.

Cook for approximately 1–2 minutes, allowing the sauce to bubble gently and cling to the salmon. Remove the skillet from the heat once the glaze becomes glossy and the salmon is cooked through.

Prepare the Lime Yogurt Dip

Add Greek yogurt to a small bowl along with lime zest, lime juice, grated garlic, and salt.

Stir thoroughly until smooth. Taste and adjust the seasoning. Add a small splash of water if you prefer a thinner consistency for dipping.

Finish and Serve

Transfer the salmon bites to a serving platter. Spoon the lime yogurt dip into a small bowl or spread it onto the platter.

Scatter chopped cilantro or parsley over the salmon and dip. Add fresh lime wedges and serve immediately.

Tips

Use Firm, Fresh Salmon

Fresh salmon with firm flesh is easiest to cut into neat cubes. Skinless fillets save preparation time, while center-cut pieces tend to produce uniform bites.

Pat the Fish Dry

Dry salmon sears much better than wet salmon. Before adding the seasonings, use paper towels to remove surface moisture from all sides.

Keep the Pieces Uniform

Try to cut each salmon cube to approximately the same size. This ensures that smaller pieces do not overcook while larger pieces are still finishing.

Get the Pan Hot

A properly heated skillet helps create browned edges quickly. Once the salmon is added, avoid constantly moving the pieces so they have time to develop color.

Leave Room Between Pieces

Crowding traps steam and can prevent browning. Cook in batches if needed, especially when doubling the recipe.

Glaze at the End

Because sweet chili sauce and honey contain sugar, adding the glaze too early can cause it to burn. Wait until the salmon is nearly cooked before adding the sauce.

Control the Heat

Once the glaze is added, reduce the heat. You want the sauce to become sticky and glossy rather than darken too quickly.

Make the Dip Fresh

The lime yogurt dip takes only a few minutes to prepare. Fresh lime zest makes a noticeable difference because it adds fragrant citrus flavor without making the dip overly acidic.

Do Not Overcook Salmon

Salmon bites continue cooking briefly after leaving the skillet. Remove them from the heat as soon as they are cooked through and coated in the glaze.

Variations

Hot Honey-Style Salmon

Add extra sriracha and a pinch of crushed red pepper to the glaze for a sweeter, hotter finish.

Lemon Herb Salmon

Replace the lime in the dip with lemon and add chopped fresh parsley or dill. This creates a milder citrus-herb variation.

Ginger Garlic Glaze

Add fresh grated ginger and minced garlic to the sweet chili mixture. Allow the flavors to cook briefly in the sauce without letting the garlic burn.

Sesame Crunch

Finish the salmon with toasted sesame seeds and sliced green onions. Add shredded cabbage underneath for extra crunch.

Avocado Lime Dip

Mash ½ ripe avocado into the lime yogurt dip. Add additional lime juice and salt to create a thicker, creamy avocado-yogurt sauce.

Crispy Air Fryer Salmon

Cook the seasoned salmon cubes in an air fryer until browned and cooked through, then toss with warm sweet chili sauce. This gives the edges an especially appealing roasted texture.

Sheet-Pan Dinner

Arrange the salmon on a baking sheet with broccoli, bell peppers, zucchini, or asparagus. Roast everything together, then drizzle the cooked salmon with sweet chili sauce before serving.

Salmon Rice Bowls

Serve the bites over warm rice with cucumber, avocado, carrots, edamame, cabbage, and the lime yogurt dip. Add sesame seeds for extra texture.

Fresh Herb Finish

For a Mediterranean-inspired variation, use parsley instead of cilantro and add a little extra lemon or lime zest just before serving.

Q&A

Can I use salmon with the skin on?

Yes, but remove the skin before cutting the fillet into cubes. Skinless salmon is much easier to portion into bite-sized pieces.

Can I use canned salmon?

This recipe is designed for fresh or thawed salmon fillets. Canned salmon has a different texture and is not ideal for this particular cooking method.

Is sriracha necessary?

No. The sweet chili sauce provides plenty of flavor on its own. Leave out the sriracha for a milder version.

How can I make the dish less sweet?

Use the smaller amount of sweet chili sauce and reduce or omit the honey. Extra lime juice in the dip also helps create a sharper contrast.

Can I make the dip dairy-free?

Yes. Use a thick unsweetened dairy-free yogurt alternative instead of Greek yogurt. Adjust the lime and salt to taste.

Can I prepare this recipe for a party?

Yes. Prepare the dip and glaze ahead of time, then cook the salmon shortly before serving. For larger gatherings, keep the cooked salmon warm rather than allowing it to sit at room temperature for an extended period.

What vegetables go well with the salmon?

Cucumber, cabbage, broccoli, bell peppers, carrots, asparagus, snap peas, and roasted zucchini all work well with the sweet chili flavor.

Can I use chicken instead of salmon?

The glaze works well with chicken, but chicken requires a different cooking time and should be cooked thoroughly before serving.

Can I reheat leftovers?

Yes. Reheat gently in a skillet over medium-low heat or in the microwave in short intervals. Avoid excessive heat because salmon can dry out quickly.

Can I make the glaze spicier without adding sriracha?

Yes. Add crushed red pepper flakes or a small amount of another hot chili sauce according to your preferred heat level.

Nutrition

Approximate nutrition per serving, based on 6 servings and without optional garnishes:

Calories: 390–430 kcal

Protein: 35–38 g

Carbohydrates: 18–25 g

Fat: 19–22 g

Saturated Fat: 3–4 g

Fiber: 0–1 g

Sugar: 13–18 g

Sodium: 700–900 mg

These values are estimates and will vary depending on the exact brands and quantities of salmon, yogurt, sweet chili sauce, soy sauce, and honey used.

Conclusion

There is something especially satisfying about these Sweet Chili Salmon Bites: the salmon cooks quickly, the glaze turns wonderfully glossy, and the cool lime yogurt dip gives every bite a bright, creamy finish. They are simple enough for a weeknight dinner but attractive enough for a party platter. Add fresh herbs and lime wedges at the end, and you have a colorful dish with plenty of texture and flavor that is easy to serve and enjoy.

Creamy Cajun Shrimp Pasta Bake

Creamy Cajun Shrimp Pasta Bake

Bring bold Cajun flavor to the dinner table with this irresistibly creamy shrimp pasta bake. Tender shrimp are seasoned with Cajun spices and combined with hearty pasta, juicy cherry tomatoes, garlic, onion, Parmesan, and a luxurious cream sauce. Everything is finished with a generous layer of melted mozzarella and baked until bubbling and golden. It is warm, satisfying, and packed with comforting flavor in every bite.

Prep Time 20 minutes

Cook Time 30 minutes

Total Time 50 minutes

Servings 6 servings

Ingredients

The Main Ingredients

14 oz (400g) penne or rigatoni pasta

1 lb (450g) large shrimp, peeled and deveined

1 cup whole cherry tomatoes

The Cajun Cream Sauce & Cheeses

2 tablespoons butter

2 tablespoons olive oil

3–4 cloves garlic, finely minced

1 small yellow or white onion, diced

1 cup heavy cream

¾ cup milk or chicken broth

1½ cups shredded mozzarella cheese, divided

½ cup finely grated Parmesan cheese

The Seasonings & Garnish

2 tablespoons Cajun seasoning, divided

1 teaspoon smoked paprika

Salt and black pepper, to taste

Fresh parsley, finely chopped

Instructions

Cook the Pasta

Cook the penne or rigatoni in salted boiling water until just al dente. Reserve approximately ½ cup pasta water, then drain.

Season the Shrimp

Pat the shrimp dry and toss with 1 tablespoon Cajun seasoning, a little black pepper, and smoked paprika.

Sear the Shrimp

Heat olive oil in a large skillet over medium-high heat. Cook shrimp for approximately 1–2 minutes per side, just until they begin turning pink. Transfer to a plate.

Sauté the Onion and Garlic

Add butter to the skillet. Sauté the diced onion until softened, then add garlic and cook for 30–60 seconds until fragrant.

Make the Cajun Sauce

Add heavy cream, milk or chicken broth, remaining Cajun seasoning, and smoked paprika. Stir while scraping the flavorful browned bits from the bottom of the skillet.

Simmer gently for 3–5 minutes.

Add the Cheese

Lower the heat and stir in Parmesan and half of the mozzarella. Continue stirring until smooth and creamy. Adjust seasoning carefully.

Combine the Pasta

Add the cooked pasta and cherry tomatoes to the sauce. Toss gently until thoroughly coated.

Add the Shrimp

Return the seared shrimp to the skillet and fold them gently into the pasta mixture.

Top with Cheese

Sprinkle the remaining mozzarella evenly over the top.

Bake

Bake at 375°F (190°C) for approximately 15–20 minutes, until bubbling and golden. Broil briefly at the end if you want a deeper golden cheese crust.

Rest and Serve

Allow the pasta bake to rest for 5 minutes. Garnish with fresh parsley and serve warm.

Tips

Cook Pasta Al Dente

The pasta continues cooking in the oven, so slightly firm pasta gives the best final texture.

Dry the Shrimp

Dry shrimp develop better color and prevent unnecessary liquid from diluting the sauce.

Don’t Overcook Shrimp

A quick sear is enough because the shrimp continue cooking during the bake.

Taste Before Salting

Cajun seasoning and Parmesan may already contain considerable salt, so season the sauce gradually.

Keep Extra Pasta Water

A splash of reserved pasta water can quickly restore a creamy consistency if the sauce becomes too thick.

Use Fresh Cheese

Freshly grated Parmesan melts nicely into the sauce and provides a richer flavor.

Don’t Crowd the Skillet

Cook shrimp in batches if necessary to achieve better browning.

Rest Before Serving

A short resting period allows the sauce to settle and makes the pasta easier to portion.

Variations

Spicy Cajun Version

Add cayenne or red pepper flakes for extra heat.

Spinach Version

Wilt fresh baby spinach into the cream sauce before adding the pasta.

Bell Pepper Version

Sauté colorful bell peppers with the onion for additional sweetness and texture.

Chicken and Shrimp

Add cooked diced chicken alongside the shrimp for a heartier meal.

Sausage Cajun Bake

Brown sliced smoked sausage before preparing the sauce for an extra smoky flavor.

Extra Cheesy

Add Monterey Jack or provolone with the mozzarella for an especially creamy topping.

Garlic Lovers’ Version

Increase the garlic for a more pronounced garlic flavor.

Tomato Cajun Bake

Add a little tomato paste to the sauce for deeper color and extra savory richness.

Lighter Bake

Substitute half-and-half for heavy cream and slightly reduce the cheese.

Q&A

Can I use frozen shrimp?

Yes. Thaw them completely and pat them dry before seasoning.

What pasta works best?

Penne and rigatoni are excellent choices, but ziti, shells, or fusilli also work well.

Can I replace heavy cream?

Yes. Half-and-half can be used for a lighter result.

Can I use cooked shrimp?

Yes, but add them near the end so they only warm through and do not become overcooked.

Why did my pasta bake become dry?

Too much sauce reduction or pasta absorption can cause dryness. Add a splash of reserved pasta water or broth before baking.

Can I make it ahead?

Yes. Assemble and refrigerate before baking. Allow additional baking time if it goes into the oven cold.

Can I freeze leftovers?

Yes, although the creamy sauce may change slightly in texture after freezing and thawing.

What sides go with this?

Green salad, garlic bread, roasted vegetables, and steamed broccoli are excellent options.

How can I reduce the heat?

Use a mild Cajun seasoning and reduce the quantity slightly. Additional cream and cheese can also soften the heat.

Nutrition

Approximate nutrition per serving:

Calories: approximately 650–720

Protein: approximately 35–40g

Carbohydrates: approximately 55–65g

Fat: approximately 32–38g

Saturated Fat: approximately 16–20g

Fiber: approximately 3–4g

Sugar: approximately 5–7g

Sodium: approximately 850–1,100mg

Nutrition values are estimates and vary according to ingredient brands, serving size, and exact amounts used.

Conclusion

There is something incredibly satisfying about pulling a bubbling, golden pasta bake from the oven, and this Cajun shrimp version takes that comfort to another level. Creamy sauce, bold Cajun seasoning, tender shrimp, juicy tomatoes, and plenty of melted cheese make this a dinner everyone will want seconds of. Serve it straight from the oven with a simple salad or crusty bread for a complete and comforting meal.

Chicken and Mushroom Skillet in a Creamy Asiago and Mustard Sauce

Chicken and Mushroom Skillet in a Creamy Asiago and Mustard Sauce

Tender golden chicken, beautifully browned mushrooms, and a velvety Asiago mustard sauce come together in this comforting skillet dinner. The combination of creamy cheese, two kinds of mustard, fresh thyme, garlic, and a touch of white wine creates a sauce that is wonderfully savory with just enough tang. Everything cooks in one skillet, making this an easy yet elegant meal for a family dinner or a cozy weekend gathering.

Prep Time 15 minutes

Cook Time 25 minutes

Total Time 40 minutes

Servings 4 servings

Ingredients

For the Chicken & Skillet Base

4 boneless, skinless chicken breasts, approximately 6 ounces each, pounded thin

2 tablespoons oil or butter, for searing

8 ounces mushrooms, sliced

1 small onion, diced

2 cloves garlic, chopped

Salt and black pepper, to taste

For the Creamy Asiago & Mustard Sauce

½ cup chicken broth

½ cup heavy cream or whipping cream

½ cup Asiago cheese, grated

1 tablespoon Dijon mustard

1 tablespoon whole-grain or grainy mustard

¼ cup dry white wine, optional, for deglazing

1 teaspoon fresh thyme, chopped

For Garnish

Fresh parsley, chopped

Lemon slices

Instructions

Prepare the Chicken

Pat the chicken dry and pound it to an even thickness if needed. Season both sides with salt and black pepper.

Sear the Chicken

Heat oil or butter in a large skillet over medium-high heat. Sear the chicken for approximately 3–5 minutes per side until golden. Transfer it to a plate; it will finish cooking later in the sauce.

Brown the Mushrooms

Add the sliced mushrooms to the same skillet and cook until their moisture evaporates and the mushrooms develop golden edges.

Add Onion and Garlic

Add diced onion and cook until softened. Stir in the chopped garlic and cook for 30–60 seconds, taking care not to let it burn.

Deglaze the Pan

Pour in the white wine if using. Scrape the browned bits from the bottom of the skillet and simmer for 1–2 minutes. For a wine-free version, use an additional ¼ cup chicken broth.

Make the Sauce

Add chicken broth and heavy cream. Stir in Dijon mustard, whole-grain mustard, and fresh thyme. Bring everything to a gentle simmer.

Melt in the Asiago

Reduce the heat and gradually stir in the grated Asiago cheese. Continue stirring until the cheese melts into a smooth, creamy sauce.

Taste and adjust the seasoning carefully.

Finish the Chicken

Return the chicken to the skillet and spoon sauce over the top. Simmer gently for approximately 5–8 minutes, or until the chicken reaches 165°F (74°C) internally.

Garnish and Serve

Remove from the heat and garnish with fresh parsley. Add lemon slices if desired and serve immediately with mashed potatoes, rice, pasta, vegetables, or crusty bread.

Tips

Get a Good Sear

Dry chicken and a properly heated skillet are essential for creating a flavorful golden crust.

Brown the Mushrooms

Allow the mushrooms to cook undisturbed for periods of time so they can develop rich golden color instead of simply steaming.

Use Freshly Grated Cheese

Freshly grated Asiago melts more evenly and creates a smoother sauce.

Control the Heat

Keep the sauce at a gentle simmer. High heat can cause dairy-based sauces to separate, particularly after cheese is added.

Check Chicken Temperature

An instant-read thermometer is the easiest way to ensure the chicken reaches 165°F (74°C) without overcooking.

Adjust the Sauce

If the sauce becomes too thick, add a splash of chicken broth. If it seems too thin, allow it to simmer gently for a few additional minutes.

Don’t Over-Salt

Asiago cheese, broth, mustard, and seasoned chicken all contribute flavor. Taste first and add salt only when needed.

Variations

Spinach and Mushroom

Stir fresh spinach into the finished sauce and allow it to wilt for a simple vegetable addition.

Sun-Dried Tomato

Add chopped sun-dried tomatoes with the mushrooms for a sweet and tangy flavor contrast.

Bacon-Topped Chicken

Crisp bacon separately, crumble it, and sprinkle it over the finished chicken for extra smoky flavor.

Herb-Loaded Version

Add fresh rosemary, parsley, or extra thyme for a more pronounced herb flavor.

Peppery Mustard Version

Add freshly cracked black pepper and a little extra whole-grain mustard for a sharper, more robust sauce.

Chicken Thigh Version

Substitute boneless, skinless chicken thighs for the breasts and adjust cooking time based on thickness.

Mixed Mushroom Version

Combine cremini, button, and baby bella mushrooms for a more complex mushroom flavor.

Wine-Free Version

Replace the wine completely with chicken broth. The browned bits from the skillet will still provide plenty of depth.

Q&A

Can I use another cheese?

Yes. Parmesan is the closest easy substitute, while Pecorino Romano gives the sauce a stronger and saltier flavor.

Can I substitute chicken thighs?

Yes. Boneless, skinless thighs are excellent in this recipe and can be especially juicy.

Is the wine necessary?

No. It adds depth but is completely optional. Extra chicken broth works well.

Can I use half-and-half?

Yes. Half-and-half produces a lighter sauce while maintaining a creamy texture.

Can I use milk?

Milk can be used, although the resulting sauce will be thinner and less rich than the original.

What is the best side dish?

Mashed potatoes, pasta, rice, roasted vegetables, or crusty bread are excellent choices because they complement the creamy sauce.

How can I prevent the cheese from becoming grainy?

Lower the heat before adding the Asiago and stir it in gradually rather than adding it all at once.

Can I reheat leftovers?

Yes. Reheat gently over low to medium-low heat. Add a splash of broth or cream if the sauce has thickened considerably.

How long will leftovers keep?

Store them refrigerated in an airtight container and consume them within a few days for the best quality.

Nutrition

Approximate nutrition per serving, excluding side dishes:

Calories: approximately 560–620

Protein: approximately 50–55g

Carbohydrates: approximately 10–13g

Fat: approximately 34–39g

Saturated Fat: approximately 17–20g

Fiber: approximately 1–2g

Sugar: approximately 3–4g

Sodium: approximately 700–900mg

Values are estimates and can vary according to ingredient brands, chicken size, cheese quantity, and the amount of oil or butter used.

Conclusion

With juicy chicken, deeply browned mushrooms, and a creamy sauce infused with Asiago, Dijon, whole-grain mustard, garlic, and thyme, this skillet meal delivers plenty of comforting flavor in every bite. It is simple enough for a weeknight but elegant enough to serve when guests arrive. Pair it with your favorite hearty side, spoon the sauce generously over everything, and enjoy a warm, satisfying dinner made almost entirely in one pan.

Golden Crunch Nut & Seed Energy Cookies

Golden Crunch Nut & Seed Energy Cookies

Looking for a simple cookie that delivers big flavor and irresistible texture? These Golden Crunch Nut & Seed Energy Cookies are loaded with creamy nut butter, hearty oats, crunchy almonds and walnuts, and a colorful mix of nutritious seeds. Honey or maple syrup gives them a naturally sweet finish, while optional dark chocolate chips or dried cranberries make every bite even more tempting. They are wonderfully golden around the edges, soft in the middle, and perfect for an anytime snack.

Prep Time 15 minutes

Cook Time 12–15 minutes

Total Time 30 minutes

Servings 14–16 cookies

Ingredients

Cookie Base

1 cup natural peanut butter or almond butter

½ cup honey or maple syrup

1 large egg

1 teaspoon vanilla extract

1 cup rolled oats

½ cup almond flour

½ teaspoon baking soda

¼ teaspoon salt

Nut & Seed Crunch

¼ cup chopped almonds

¼ cup chopped walnuts

2 tablespoons sunflower seeds

2 tablespoons pumpkin seeds

1 tablespoon chia seeds

1 tablespoon flaxseeds

2 tablespoons dark chocolate chips or dried cranberries, optional

Coarse sea salt, optional, for sprinkling

Instructions

Prepare the Oven

Preheat the oven to 350°F (175°C). Line a baking sheet with parchment paper and set it aside.

Mix the Wet Ingredients

In a large bowl, stir together the peanut butter or almond butter, honey or maple syrup, egg, and vanilla extract until smooth and creamy.

Mix the Dry Ingredients

In another bowl, combine rolled oats, almond flour, baking soda, and salt. Stir until evenly blended.

Make the Dough

Add the dry mixture to the wet mixture and stir until a thick dough forms. Fold in the almonds, walnuts, sunflower seeds, pumpkin seeds, chia seeds, flaxseeds, and optional chocolate chips or dried cranberries.

Let the mixture stand for about 5 minutes if it seems slightly loose.

Shape the Cookies

Scoop approximately 1½ tablespoons of dough per cookie and place on the lined baking sheet. Leave space between portions and gently flatten each one.

Press a few extra nuts or seeds onto the tops if desired, then sprinkle lightly with coarse sea salt.

Bake

Bake for 12–15 minutes, watching carefully toward the end. The edges should become lightly golden while the centers remain set but soft.

Cool

Allow the cookies to cool on the baking sheet for approximately 5 minutes before transferring them to a wire rack. Let them cool completely before storing.

Tips

Measure Nut Butter Correctly

Stir natural nut butter thoroughly before measuring to ensure the oils and solids are properly combined.

Use Fresh Nuts and Seeds

Fresh nuts and seeds provide the best flavor and crunch. If they smell stale or bitter, replace them before baking.

Do Not Overbake

These cookies are meant to have a soft, chewy texture. Remove them when the edges are lightly golden rather than waiting for the centers to become dark.

Flatten the Dough

Since the dough does not spread dramatically, gently flatten each portion before placing the tray in the oven.

Give Them Time to Set

The cookies continue to firm as they cool. Moving them immediately after baking can cause them to break apart.

Toast for Extra Flavor

Lightly toasted almonds and walnuts add an especially deep, roasted flavor. Cool them completely before incorporating them into the dough.

Adjust Dough Consistency Carefully

If the mixture feels slightly loose, let it rest first. The oats, chia seeds, and flaxseeds naturally absorb moisture. Only add additional dry ingredients if the dough remains too wet.

Variations

Dark Chocolate & Sea Salt

Add dark chocolate chips and finish each cookie with a tiny pinch of coarse sea salt for a rich sweet-and-salty flavor.

Cranberry Almond

Use dried cranberries instead of chocolate chips and add extra chopped almonds for a festive combination of chewy fruit and crunchy nuts.

Coconut Crunch

Mix unsweetened shredded coconut into the dough and pair it with extra sunflower and pumpkin seeds.

Warm Cinnamon

Add ground cinnamon and a tiny pinch of nutmeg to create a cozy, warmly spiced cookie.

Pecan Maple

Use maple syrup as the sweetener and replace the walnuts with chopped pecans for a rich maple-nut flavor.

Peanut Butter Power Cookies

Use peanut butter as the base and add chopped roasted peanuts along with the existing nut and seed mixture.

Chocolate Cranberry

Combine dark chocolate chips and dried cranberries for a sweet-tart flavor combination that works beautifully with the nutty dough.

Airier Cookies

For a slightly lighter texture, avoid packing the dough too tightly when shaping. Gently flatten the portions rather than compressing them heavily.

Q&A

Can I use almond butter instead of peanut butter?

Absolutely. Almond butter creates a slightly milder and more delicate nutty flavor, while peanut butter produces a stronger roasted flavor.

Can I replace honey with maple syrup?

Yes. Maple syrup is an excellent alternative and gives the cookies a subtle maple flavor.

Do I have to add all the nuts and seeds?

No. The mixture is flexible. You can substitute similar nuts or seeds based on what you have available while keeping the overall quantity reasonably similar.

Can I leave out the chocolate or dried fruit?

Yes. They are completely optional. The cookies remain flavorful and crunchy without them.

How do I make the cookies softer?

Avoid overbaking and remove them when the edges are just lightly golden. They will become firmer as they cool while retaining a soft center.

How do I make them crunchier?

Bake them toward the upper end of the recommended time, but watch closely so the nuts and seeds do not become overly browned.

Can I make smaller cookies?

Yes. Use a smaller scoop and reduce the baking time accordingly. Start checking them several minutes earlier than the standard batch.

What is the best way to store them?

Keep fully cooled cookies in an airtight container. Room-temperature storage works well for short-term enjoyment, while refrigeration can extend freshness.

Can I freeze them?

Yes. Freeze completely cooled cookies in an airtight freezer-safe container, separating layers with parchment paper. Thaw at room temperature when ready to eat.

Nutrition

Approximate nutrition per cookie, assuming 16 cookies and no optional chocolate chips or dried cranberries:

Calories: approximately 150–175

Protein: approximately 5–6g

Carbohydrates: approximately 12–15g

Fat: approximately 9–11g

Saturated Fat: approximately 1–2g

Fiber: approximately 2–3g

Sugar: approximately 6–8g

Sodium: approximately 90–130mg

Nutrition will vary depending on the specific ingredients and brands used, especially the nut butter and optional additions.

Conclusion

With their golden edges, chewy centers, and generous mix of nuts and seeds, these cookies are a delicious way to make snack time more exciting. Every bite combines creamy nut butter, hearty oats, crunchy almonds and walnuts, and the subtle texture of chia, flax, pumpkin, and sunflower seeds. Add chocolate or cranberries for an extra special finish, or keep them simple for an everyday homemade cookie you will want to bake again and again.

Jalapeño Popper Stuffed Onion Rings

Jalapeño Popper Stuffed Onion Rings

If you love crispy onion rings and creamy jalapeño poppers, this recipe brings both favorites together in one seriously indulgent appetizer. Thick sweet onion rings are packed with cream cheese, cheddar, fresh jalapeños, and smoky bacon, then coated in seasoned Panko breadcrumbs and fried until crisp and golden. Every bite delivers a crunchy exterior followed by a warm, creamy, cheesy center with just the right amount of heat.

Prep Time 25 minutes

Chill Time 30 minutes

Cook Time 10–15 minutes

Total Time About 1 hour 10 minutes

Servings 6–8 servings

Ingredients

The Filling*

2 large sweet onions, such as Vidalia

1 cup cream cheese, softened

1 cup shredded cheddar cheese

2 to 4 jalapeños, seeded and finely chopped

½ cup cooked bacon bits, crumbled

The Breading & Coating*

1 cup all-purpose flour

2 large eggs, beaten

1½ cups Panko breadcrumbs

Seasonings & Frying*

1 teaspoon garlic powder

1 teaspoon smoked paprika

Salt and black pepper, to taste

Vegetable or canola oil, for deep frying

Instructions

Prepare the Onion Rings

Peel and slice the onions into thick rounds about ½ to ¾ inch thick. Separate the layers carefully and select the largest, strongest rings for stuffing. Save the smaller onion pieces for another meal.

Make the Filling

Combine softened cream cheese, shredded cheddar, chopped jalapeños, and cooked bacon in a bowl. Season with salt and black pepper, then mix until everything is evenly incorporated and creamy.

Fill the Rings

Spoon the filling into the center of each large onion ring, pressing it gently around the inside edge. Do not overfill, as the cheese will expand and melt during cooking.

Chill

Place the filled rings on a lined tray and refrigerate for about 30 minutes. This helps firm up the cheese mixture and makes the rings much easier to coat.

Set Up the Coating Station

Place flour in one shallow bowl and beaten eggs in another. In a third bowl, combine Panko breadcrumbs with garlic powder, smoked paprika, salt, and black pepper.

Bread the Rings

Coat each stuffed onion ring in flour, shaking away excess. Dip it into the beaten egg, then transfer it to the seasoned Panko. Turn carefully and press the breadcrumbs onto all sides.

For an extra-crunchy crust, repeat the egg and Panko coating one more time.

Fry

Heat vegetable or canola oil to approximately 350°F (175°C). Fry the stuffed onion rings in small batches for about 2–4 minutes per side, or until deeply golden and crisp.

Do not overcrowd the pot because the oil temperature can drop quickly.

Drain and Serve

Transfer the fried rings to a wire rack or paper towel-lined plate. Allow them to cool for a few minutes before serving. Pair them with ranch, garlic aioli, spicy mayo, sour cream, or another favorite dipping sauce.

Tips

Use Strong Onion Rings

Select thick, intact onion layers that will not split when filled. Larger sweet onions generally provide the best shape and mild flavor.

Chill Before Breading

Cold filling is easier to handle and stays inside the onion more effectively. If the cheese mixture feels soft, refrigerate the rings for an additional 10–15 minutes.

Double-Coat for More Crunch

A second layer of egg and Panko creates a thicker, crunchier crust and helps seal the creamy filling inside.

Keep the Oil at the Right Temperature

Aim for approximately 350°F (175°C). If the oil is too cool, the coating can absorb excess oil. If it is too hot, the outside can burn before the center is warmed through.

Fry in Small Batches

Give each ring enough room to cook evenly. Small batches also make it easier to control the oil temperature.

Serve Fresh

These onion rings are at their best immediately after frying, when the Panko is at peak crispiness and the filling is warm and creamy.

Variations

Pepper Jack Version

Swap some or all of the cheddar for pepper Jack to add extra creaminess and a gentle chili kick.

Mild Family-Friendly Version

Use one seeded jalapeño or substitute diced green bell pepper for part of the jalapeño. You will still get the popper-style flavor without as much heat.

Loaded Bacon Version

Increase the bacon slightly and use freshly cooked, crisp bacon for maximum smoky flavor and texture.

Garlic Herb Version

Add dried Italian herbs, fresh parsley, or a small amount of finely chopped chives to the cream cheese mixture.

Spicy Smoked Version

Add a pinch of cayenne or crushed red pepper to the filling and increase the smoked paprika in the Panko coating.

Air Fryer Version

Lightly spray the breaded rings with oil and arrange them in a single layer in an air fryer basket. Cook at approximately 375°F (190°C), turning halfway through, until crisp and golden.

Q&A

Can I prepare these before a party?

Yes. Stuff the onion rings ahead of time and refrigerate them. Bread them shortly before cooking for the crispiest results.

Can I use pre-shredded cheddar?

Yes, although freshly shredded cheddar often melts more smoothly. Either option will work in this recipe.

What type of onion works best?

Large sweet onions are ideal because they have sturdy layers and a naturally mild flavor that balances the spicy filling.

Can I make these without bacon?

Yes. Simply omit the bacon for a vegetarian-friendly version. You can add finely chopped mushrooms, green onions, or extra cheese for additional flavor.

Why should I use Panko instead of regular breadcrumbs?

Panko breadcrumbs create a lighter, airier, and noticeably crunchier coating, making them especially well suited to fried onion rings.

Can I reheat leftovers?

Yes. Reheat them in an air fryer or oven rather than a microwave. This helps restore some of the crisp texture.

What should I serve with them?

They pair especially well with ranch dressing, garlic aioli, spicy dipping sauce, sour cream, or a cool herb-based dip.

Nutrition

Nutrition is approximate and will depend on portion size, the amount of oil absorbed during frying, and the specific brands of cheese, cream cheese, bacon, and breadcrumbs used.

Calories: approximately 350–450 per serving

Protein: approximately 10–14g

Carbohydrates: approximately 25–32g

Fat: approximately 24–30g

Saturated Fat: approximately 9–12g

Fiber: approximately 2–3g

Sodium: approximately 500–750mg

Conclusion

These Jalapeño Popper Stuffed Onion Rings turn two classic comfort-food favorites into one spectacular appetizer. The crisp Panko coating gives way to tender sweet onion and a rich center filled with melted cheddar, creamy cheese, spicy jalapeños, and smoky bacon. Whether you are serving them at a party, game-day gathering, cookout, or casual family dinner, they are the kind of snack that disappears quickly. Serve them hot with a cool dipping sauce and enjoy the perfect contrast of crunchy, creamy, savory, and spicy flavors.

Greek Chicken Mezze Platter

Greek Chicken Mezze Platter

Description

The Greek Chicken Mezze Platter is a colorful, generous Mediterranean-style meal designed for sharing. It brings together juicy lemon-herb chicken, creamy hummus, refreshing tzatziki, salty feta, crisp cucumber, sweet cherry tomatoes, Kalamata olives, warm pita, and fresh herbs on one beautiful platter.

This recipe is perfect when you want something that feels special but is actually simple to prepare. Instead of making one complicated dish, you prepare several flavorful components and arrange them together. The result is a restaurant-style Greek spread that works beautifully for family dinners, parties, weekend lunches, gatherings, or casual entertaining.

The chicken is marinated with olive oil, lemon, garlic, oregano, paprika, salt, and pepper before being cooked until golden and juicy. The creamy tzatziki provides coolness, while hummus adds richness and body. Fresh vegetables bring crunch and freshness, feta adds a salty tang, and warm pita makes everything easy to scoop and enjoy.

One of the best things about this platter is its flexibility. You can add roasted vegetables, grilled peppers, pickled onions, stuffed grape leaves, or extra dips depending on what you have available. It can also be prepared ahead of time, making it an excellent option for entertaining.

 Ingredients

For the Greek Chicken

  • 1½ lb (680 g) boneless, skinless chicken breasts or thighs
  • 3 tablespoons extra-virgin olive oil
  • 2 tablespoons fresh lemon juice
  • 1 tablespoon lemon zest
  • 3 garlic cloves, finely minced
  • 1½ teaspoons dried oregano
  • 1 teaspoon paprika
  • ½ teaspoon ground cumin
  • ½ teaspoon dried thyme
  • 1 teaspoon salt
  • ½ teaspoon freshly ground black pepper
  • ¼ teaspoon red pepper flakes, optional

For the Tzatziki

  • 1 cup Greek yogurt
  • ½ English cucumber
  • 1 tablespoon fresh lemon juice
  • 1 tablespoon extra-virgin olive oil
  • 1 garlic clove, finely minced
  • 1 tablespoon fresh dill, chopped
  • 1 tablespoon fresh parsley, chopped
  • ¼ teaspoon salt
  • ⅛ teaspoon black pepper

For the Hummus

You can use approximately 1 cup prepared hummus, or make your own with:

  • 1 can chickpeas, drained and rinsed
  • ¼ cup tahini
  • 2 tablespoons lemon juice
  • 1 small garlic clove
  • 2 tablespoons olive oil
  • 2–4 tablespoons cold water
  • ¼ teaspoon cumin
  • ¼ teaspoon salt

For the Platter

  • 1 cucumber, sliced
  • 1 cup cherry tomatoes, halved
  • ½ red onion, thinly sliced
  • ½ cup Kalamata olives
  • ½ cup crumbled feta cheese
  • 3–4 pita breads
  • Fresh parsley
  • Fresh dill
  • Lemon wedges
  • Extra virgin olive oil
  • Optional: roasted red peppers, banana peppers, or pickled onions

 Step-by-Step Instructions

1. Prepare the Chicken

Start by preparing the chicken marinade. In a large bowl, combine olive oil, lemon juice, lemon zest, minced garlic, oregano, paprika, cumin, thyme, salt, black pepper, and optional red pepper flakes.

Cut the chicken into medium-sized pieces. Cutting the chicken into chunks allows the marinade to cover more surface area and helps the chicken cook quickly while developing beautiful browned edges.

Add the chicken to the marinade and toss thoroughly until every piece is coated.

Cover and refrigerate for at least 30 minutes. For deeper flavor, you can marinate it for several hours. Avoid leaving chicken in a highly acidic marinade for an excessively long time because the texture can become unpleasant.

2. Prepare the Tzatziki

While the chicken marinates, make the tzatziki.

Grate the cucumber using the large holes of a box grater. Place the grated cucumber into a clean kitchen towel or paper towel and squeeze firmly to remove as much liquid as possible.

This step is important because excess cucumber water can make your tzatziki thin.

Add Greek yogurt to a bowl and stir in the squeezed cucumber, lemon juice, olive oil, garlic, dill, parsley, salt, and black pepper.

Mix until creamy and well combined.

Taste the tzatziki and adjust the seasoning. Add a little more lemon juice for brightness, more dill for freshness, or another small pinch of salt if needed.

Cover and refrigerate until serving.

3. Make the Hummus

For homemade hummus, add chickpeas, tahini, lemon juice, garlic, olive oil, cumin, and salt to a food processor.

Blend until smooth.

Add cold water, one tablespoon at a time, until the hummus reaches a creamy consistency. Continue blending for another minute or two to make it extra smooth.

Taste and adjust the lemon juice, salt, or tahini according to your preference.

If you’re using prepared hummus, simply transfer it to a serving bowl.

For a beautiful presentation, spread the hummus into a shallow bowl and use the back of a spoon to create a small swirl. Drizzle with olive oil before placing it on the platter.

4. Cook the Chicken

Heat a large skillet, grill pan, or outdoor grill over medium-high heat.

Add the marinated chicken in a single layer. Avoid overcrowding the pan because too much chicken at once can cause steaming instead of browning.

Cook the chicken for approximately 5–8 minutes, turning occasionally, until golden brown on the outside and completely cooked through.

The exact cooking time will depend on the size of your chicken pieces.

The chicken should reach an internal temperature of 165°F (74°C).

Once cooked, transfer the chicken to a clean plate and allow it to rest for approximately 5 minutes.

Resting allows the juices to redistribute, helping keep the chicken tender and juicy.

For extra Mediterranean flavor, squeeze a little fresh lemon juice over the warm chicken before serving.

5. Prepare the Fresh Vegetables

While the chicken rests, prepare the vegetables.

Slice the cucumber into rounds or half-moons. Halve the cherry tomatoes. Thinly slice the red onion.

If you prefer a milder onion flavor, soak the sliced onion in cold water for approximately 5–10 minutes, then drain thoroughly.

Arrange the vegetables separately rather than mixing them together. This makes the platter look more colorful and allows everyone to choose exactly what they like.

6. Warm the Pita

Warm the pita bread shortly before assembling the platter.

You can heat it in a dry skillet for approximately 20–30 seconds per side, warm it in the oven, or lightly grill it for a slightly smoky flavor.

Do not overheat the pita because you want it soft and flexible.

Cut the pita into triangles or wedges for easy serving.

 7. Assemble the Greek Chicken Mezze Platter

Now comes the fun part.

Choose a large wooden board, ceramic platter, or wide serving plate.

Start by placing the hummus and tzatziki in small bowls or directly onto opposite areas of the platter.

Arrange the warm grilled chicken in the center or in a large section of the board.

Add cucumber slices, cherry tomatoes, red onion, and Kalamata olives around the chicken.

Scatter crumbled feta over the chicken and vegetables.

Add warm pita wedges around the edges.

Finish everything with chopped parsley, fresh dill, lemon wedges, and a light drizzle of extra virgin olive oil.

For an especially attractive presentation, keep contrasting colors together. Place green cucumber beside red tomatoes, white feta beside dark olives, and golden chicken beside creamy dips.

 Serving Suggestions

Serve the platter immediately while the chicken and pita are warm.

Guests can build their own pita wraps, dip vegetables into hummus and tzatziki, or simply enjoy the components individually.

For a larger Mediterranean feast, serve this platter with:

  • Greek salad
  • Roasted potatoes
  • Grilled vegetables
  • Lemon rice
  • Couscous
  • Stuffed grape leaves
  • Marinated artichokes
  • Roasted red peppers
  • Extra pita
  • Pickled onions

You can also turn leftovers into delicious lunch bowls. Simply layer hummus, chicken, vegetables, feta, olives, and grains in a container and add tzatziki just before eating.

 Recipe Notes

Choose Chicken Thighs for Extra Juiciness

Boneless chicken thighs are particularly forgiving and remain juicy during cooking. Chicken breast works wonderfully too, but be careful not to overcook it.

Don’t Skip the Lemon

Fresh lemon gives the chicken its characteristic Mediterranean brightness. Lemon juice also balances the richness of hummus, feta, and olive oil.

Dry Your Cucumber

Removing excess moisture from the cucumber is one of the most important steps when making tzatziki. It keeps the sauce thick and creamy.

Use Fresh Herbs

Fresh parsley and dill make a noticeable difference. They provide freshness that dried herbs cannot completely replicate.

Prepare Components Ahead

The chicken marinade, hummus, tzatziki, and chopped vegetables can all be prepared ahead of time. Assemble the platter shortly before serving.

 Tips for the Best Greek Chicken Mezze Platter

  1. Marinate the chicken: Give it at least 30 minutes for better flavor.
  2. Use high heat: A hot skillet helps create those delicious golden, slightly charred edges.
  3. Don’t overcrowd the pan: Cook in batches if necessary.
  4. Rest the chicken: Allow it to rest before serving.
  5. Use thick Greek yogurt: It creates a creamier tzatziki.
  6. Drain cucumber thoroughly: This prevents watery tzatziki.
  7. Warm the pita: Warm pita makes the entire platter feel more freshly prepared.
  8. Use good-quality feta: A creamy, tangy feta adds excellent flavor.
  9. Add lemon at the end: Fresh lemon brightens the entire platter.
  10. Serve family-style: The beauty of mezze is that everyone can build their own plate.

 Servings

Serves: 4–6 people

Prep Time: 25 minutes
Marinating Time: 30 minutes minimum
Cook Time: 15–20 minutes
Total Time: Approximately 1 hour

If serving the platter as a main meal, it comfortably feeds about 4 people. As part of a larger spread with several other dishes, it can serve 6 or more.

Approximate Nutritional Information

Nutrition will vary depending on the amount of pita, hummus, feta, yogurt, and olive oil used.

Estimated per serving:

  • Calories: 550–650
  • Protein: 42–48 g
  • Carbohydrates: 45–55 g
  • Fat: 24–30 g
  • Fiber: 6–8 g
  • Sugar: 6–9 g
  • Sodium: 900–1,200 mg

For a lighter version, use less feta and hummus, choose whole-grain pita, and increase the amount of fresh vegetables.

 Benefits

This Mediterranean-inspired platter provides a combination of protein, vegetables, legumes, dairy, and healthy fats.

Chicken supplies high-quality protein, while chickpeas in hummus provide plant-based protein and fiber. Greek yogurt and feta contribute protein and calcium. Cucumbers, tomatoes, onions, herbs, and lemon add freshness along with various vitamins and antioxidants.

Olive oil provides a source of unsaturated fat and contributes rich Mediterranean flavor.

Because the platter contains several different components, it’s also easy to customize according to your dietary preferences and portion needs.

 Q&A

Can I use chicken thighs instead of chicken breast?

Absolutely. Boneless, skinless chicken thighs are excellent for this recipe because they remain particularly juicy and flavorful.

Can I make the chicken ahead of time?

Yes. Cooked chicken can be refrigerated and reheated gently before serving. For the best texture, don’t overheat it.

Can I make tzatziki the night before?

Yes. In fact, making tzatziki ahead allows the garlic and herbs to develop more flavor.

Can I use store-bought hummus?

Definitely. A good-quality prepared hummus makes this recipe much faster.

Can I make this platter vegetarian?

Yes. Simply leave out the chicken and add grilled halloumi, roasted chickpeas, falafel, or extra vegetables.

Can I use another type of bread?

Yes. Flatbread, naan-style bread, or whole-wheat pita can all work well.

What vegetables can I add?

Try roasted peppers, carrots, radishes, lettuce, artichokes, or grilled zucchini.

Can I make this gluten-free?

Yes. Use certified gluten-free pita or serve the chicken and toppings over a gluten-free grain such as quinoa or rice.

How should leftovers be stored?

Store chicken, vegetables, dips, feta, and pita separately in airtight containers in the refrigerator. Assemble individual portions when ready to eat.

How long will leftovers last?

For best quality, enjoy the prepared components within 3–4 days, following proper refrigeration.

Mediterranean 5 Min Easy Stuffed Zucchini Boats

Mediterranean 5-Min Easy Stuffed Zucchini Boats

Looking for a quick way to turn everyday zucchini into a delicious and satisfying dish? These Mediterranean 5-Min Easy Stuffed Zucchini Boats are packed with creamy ricotta, earthy mushrooms, fresh spinach, garlic, herbs, and melted mozzarella. Everything comes together inside tender roasted zucchini for a simple recipe that looks beautiful and tastes even better.

The filling is creamy without being overly heavy, while oregano, fresh basil or parsley, extra virgin olive oil, and optional chili flakes give the dish a fresh Mediterranean character. Parmesan creates a golden, savory finish that makes every bite comforting and flavorful.

These zucchini boats are ideal for a quick family dinner, healthy lunch, weekend brunch, or an easy side dish. They also make a wonderful option when you have extra zucchini and want a recipe that feels special without requiring complicated preparation.

Prep Time: 5 minutes
Cook Time: 15 minutes
Total Time: 20 minutes
Servings: 4
Cuisine: Mediterranean-Inspired
Course: Main Dish, Side Dish, Lunch
Calories: Approximately 220 calories per serving

Ingredients

Base & Produce

4 medium zucchinis, halved lengthwise with centers hollowed out

8 ounces mushrooms, diced or sliced

2 cups fresh baby spinach, chopped

1 teaspoon minced garlic, approximately 2 cloves

Dairy & Fillings

½ cup to 1 cup ricotta cheese, part-skim or whole milk

¼ cup shredded mozzarella cheese, for melting on top

¼ cup grated Parmesan cheese, optional, for topping

Pantry & Seasonings

2 tablespoons extra virgin olive oil, divided for sautéing and brushing

½ teaspoon dried oregano or Italian seasoning

1 tablespoon fresh chopped basil or parsley, for garnish

¼ teaspoon kosher salt, plus more to taste

A pinch of freshly cracked black pepper

Optional: a pinch of red chili flakes or a tiny grating of nutmeg

Instructions

Prepare the Zucchini

Preheat the oven to 425°F (220°C). Lightly grease a baking dish or line a baking sheet with parchment paper.

Wash and dry the zucchinis. Slice each zucchini in half lengthwise. Using a small spoon, carefully scoop out the soft center, leaving a sturdy border around the edges so the zucchini maintains its shape while baking.

Roughly chop the scooped zucchini flesh and reserve it for the filling. Avoid removing too much of the outer flesh because the zucchini boats need enough structure to hold the creamy filling.

Place the zucchini halves cut-side up on the prepared baking sheet. Brush them lightly with some of the olive oil and season with a small pinch of salt and black pepper.

Prepare the Vegetable Filling

Heat the remaining olive oil in a skillet over medium-high heat.

Add the mushrooms and cook for approximately 3–4 minutes, stirring occasionally, until they soften and begin to release their moisture.

Add the chopped zucchini flesh and cook for another 1–2 minutes. Stir in the minced garlic and cook briefly until fragrant.

Add the chopped baby spinach and cook until it wilts, which should take about 1–2 minutes.

Remove the skillet from the heat. Allow the vegetables to cool slightly so they are easier to combine with the ricotta.

Make the Ricotta Filling

Transfer the sautéed vegetables to a mixing bowl.

Add ½ to 1 cup ricotta cheese, depending on how creamy you want the filling to be. Stir in the dried oregano, kosher salt, black pepper, and optional red chili flakes or nutmeg.

Mix until the vegetables and ricotta are evenly combined.

Taste the filling and adjust the seasoning as needed. If using Parmesan inside the filling, you can add a small amount at this stage, although it can also be reserved entirely for the topping.

Fill the Zucchini Boats

Spoon the ricotta and vegetable mixture generously into each hollowed zucchini half.

Do not pack the filling down too firmly. A light, generous mound creates a more attractive finished dish and allows the cheese to melt beautifully across the top.

Sprinkle the shredded mozzarella evenly over the filled zucchini boats.

Add the grated Parmesan if using.

Bake Until Golden

Place the zucchini boats in the preheated oven and bake for approximately 12–15 minutes, or until the zucchini is tender and the cheese is melted and lightly golden.

For a more deeply browned cheese topping, switch the oven to broil for the final 1–2 minutes. Watch carefully because the cheese can brown very quickly under the broiler.

Remove the zucchini boats from the oven and allow them to rest for a couple of minutes.

Garnish and Serve

Finish with freshly chopped basil or parsley.

Add another small drizzle of extra virgin olive oil if desired, along with a light sprinkle of black pepper or red chili flakes.

Serve warm as a light main course, side dish, lunch, or appetizer.

Tips

Choose Medium-Sized Zucchini

Medium zucchini are ideal because they are large enough to hold a generous amount of filling without becoming watery or difficult to cook. Very large zucchini can have larger seeds and a softer center.

Do Not Hollow Them Too Deeply

Leave a reasonable layer of zucchini around the edges and underneath the filling. This keeps the boats sturdy and prevents them from becoming floppy during baking.

Cook the Mushrooms Properly

Mushrooms naturally release moisture while cooking. Give them enough time to soften and allow excess moisture to evaporate before adding the spinach and ricotta. This helps prevent a watery filling.

Do Not Overcook the Spinach

Spinach only needs a short time in the skillet. Once wilted, remove it from the heat. Overcooking can make it lose its fresh flavor and release additional moisture.

Use the Right Amount of Ricotta

For a lighter filling, use around ½ cup ricotta. If you prefer an especially creamy, rich filling, increase it toward 1 cup.

Season in Layers

A small amount of salt on the zucchini, vegetables, and ricotta filling creates a more balanced flavor than adding all the seasoning at the end.

Drain Watery Ricotta

If your ricotta looks particularly wet, let it drain briefly before mixing it with the vegetables. This keeps the filling thick and creamy.

Avoid Overfilling

Although it is tempting to pile the filling high, too much can spill over during baking. Fill each zucchini boat generously but keep the mixture relatively stable.

Watch the Broiler

If you use the broiler to brown the mozzarella and Parmesan, stay close to the oven. The topping can go from golden to burnt very quickly.

Rest Before Serving

Allowing the zucchini boats to rest for a couple of minutes after baking helps the filling settle and makes them easier to serve.

Variations

Mediterranean Feta Version

Replace part of the ricotta with crumbled feta cheese. Add chopped Kalamata olives and a little fresh oregano for a stronger Mediterranean flavor.

Tomato and Basil Version

Add finely diced sun-dried tomatoes to the filling and use fresh basil instead of parsley. The tomatoes add concentrated sweetness and a pleasant chewy texture.

Spicy Zucchini Boats

Increase the red chili flakes or add finely diced fresh chili pepper to the mushroom and spinach mixture for extra heat.

Protein-Rich Version

Add cooked shredded chicken, turkey, or lentils to the filling. Make sure any meat is fully cooked before mixing it into the ricotta mixture.

Vegan Version

Use a plant-based ricotta alternative and dairy-free mozzarella and Parmesan substitutes. Keep the vegetable filling the same for a completely dairy-free option.

Garlic Herb Version

Increase the garlic slightly and add fresh thyme, oregano, basil, or parsley. This creates a particularly fragrant filling.

Mushroom Lover’s Version

Use a combination of cremini, button, shiitake, or oyster mushrooms. Different mushrooms add extra depth and texture.

Crunchy Topping Version

Add a tablespoon or two of seasoned breadcrumbs over the cheese before baking. The breadcrumbs become golden and crisp while the filling remains creamy.

Q&A

Can I make these zucchini boats ahead of time?

Yes. Prepare and fill the zucchini boats several hours ahead, cover them, and refrigerate. Bake when ready to serve, adding a few extra minutes if they are going directly from the refrigerator into the oven.

Can I use frozen spinach?

Yes. Thaw it completely and squeeze out as much excess water as possible before adding it to the filling. Fresh spinach is preferred for texture, but frozen spinach works well.

Can I use cottage cheese instead of ricotta?

Yes. Cottage cheese can replace ricotta, although the texture will be slightly different. For a smoother filling, blend the cottage cheese briefly before using it.

How do I prevent watery zucchini boats?

Avoid overcooking the zucchini before filling, cook the mushrooms until excess moisture evaporates, drain wet ricotta, and avoid adding watery vegetables to the filling.

Can I make this recipe without mushrooms?

Absolutely. You can replace the mushrooms with finely chopped bell peppers, tomatoes, corn, artichokes, or additional spinach.

What cheese can replace mozzarella?

Provolone, Monterey Jack, fontina, mild cheddar, or a Mediterranean cheese blend can work well. Mozzarella provides the best classic melting texture.

Can I freeze stuffed zucchini boats?

They can be frozen, although the zucchini may become softer after thawing. For the best texture, freeze them after baking, cool completely, and reheat in the oven.

What should I serve with stuffed zucchini boats?

They pair well with grilled chicken, baked fish, roasted potatoes, quinoa, couscous, rice, or a simple Mediterranean salad.

Can I make them more filling?

Yes. Add cooked chicken, lentils, chickpeas, quinoa, or another protein-rich ingredient to the ricotta filling.

Why is my filling watery?

The most common causes are excess moisture from mushrooms, spinach, zucchini, or ricotta. Cook the vegetables well and drain wet ingredients before combining them.

Nutrition

Approximate nutrition per serving:

Calories: 220 kcal
Protein: 12 g
Carbohydrates: 14 g
Fat: 14 g
Saturated Fat: 5 g
Fiber: 4 g
Sugar: 7 g
Sodium: 430 mg

Nutrition values are estimates and can vary depending on the amount and type of ricotta, mozzarella, Parmesan, olive oil, and other ingredients used.

Conclusion

If you love easy recipes that combine fresh vegetables with creamy, comforting flavors, these Mediterranean Stuffed Zucchini Boats deserve a place on your menu. The tender zucchini provides a naturally mild base for a flavorful mixture of mushrooms, spinach, garlic, ricotta, and herbs, while melted mozzarella and Parmesan create a delicious golden topping.

The recipe is flexible enough to customize with your favorite vegetables, cheeses, herbs, or spices. Serve the boats as a simple vegetarian main course or make them part of a larger Mediterranean-inspired spread with salad, grains, grilled vegetables, or your favorite protein.

Fresh, colorful, creamy, and wonderfully easy to prepare, these zucchini boats are a delicious way to make vegetables the centerpiece of the meal.

#StuffedZucchini #MediterraneanRecipes #HealthyDinner #EasyVegetarianRecipes #ZucchiniBoats

Charred Peach & Burrata Flatbread with Black Lava Salt & Hot Honey

Charred Peach & Burrata Flatbread with Black Lava Salt & Hot Honey

There is something irresistible about the combination of juicy summer peaches, creamy burrata, crisp flatbread, and a touch of chili heat. This Charred Peach & Burrata Flatbread brings all of those flavors together in one beautiful dish, finished with homemade hot honey, fresh herbs, toasted nuts, and striking black lava salt.

The peaches are quickly grilled until their natural sugars caramelize and their edges develop a delicious smoky char. They are then layered over a golden toasted flatbread and generous pieces of burrata. The warm fruit gently contrasts with the cool, creamy cheese, while spicy honey adds a sweet and slightly fiery finish.

This recipe is perfect when you want something impressive without spending hours in the kitchen. It works beautifully for summer parties, casual entertaining, brunch, date-night dinners, or an easy appetizer served with chilled drinks. The colors and textures also make it especially attractive for a food table or recipe photo.

Fresh mint or basil adds a refreshing herbal note, while pistachios or walnuts provide crunch. A final sprinkle of black lava salt completes the dish with a sophisticated salty finish.

Prep Time: 15 minutes
Cook Time: 12 minutes
Total Time: 27 minutes
Servings: 4
Cuisine: Mediterranean-Inspired / Italian-Inspired
Course: Appetizer, Brunch, Lunch
Calories: Approximately 430 calories per serving

Ingredients

For the Flatbread

2 large naan or flatbreads, or 8–10 oz fresh pizza dough rolled out thin

1 tablespoon olive oil, for brushing and toasting the crust

For the Charred Peaches

2 ripe peaches, cut into even slices or wedges

1 teaspoon olive oil, for coating the peaches

½ teaspoon cinnamon, optional

For the Homemade Hot Honey

¼ cup honey

½ to 1 teaspoon red chili flakes, adjusted to taste

For the Toppings & Garnish

8 oz burrata cheese, torn apart and spread across the base

1–2 teaspoons black lava salt

Fresh mint or basil leaves, roughly torn or left whole

2 tablespoons toasted pistachios or walnuts, optional

Instructions

Prepare the Hot Honey

Add the honey and red chili flakes to a small saucepan. Warm the mixture gently over low heat for 2–3 minutes. Stir occasionally and make sure the honey does not boil.

Remove it from the heat and let it rest for several minutes. This gives the chili flakes time to infuse the honey with their spicy flavor.

Taste the honey once infused. Add more chili flakes if you prefer additional heat, then set aside.

Char the Peaches

Wash and dry the peaches. Slice them into evenly sized wedges or slices. Keeping the pieces relatively thick helps them remain intact while grilling.

Place the peaches into a bowl and toss gently with 1 teaspoon olive oil. Add the optional cinnamon and toss again until the slices are lightly coated.

Heat a grill pan, outdoor grill, or heavy skillet over medium-high heat. Once hot, arrange the peach slices in a single layer.

Cook for approximately 2–3 minutes on each side. The peaches should develop dark grill marks, caramelized edges, and a slightly softened center.

Transfer the charred peaches to a plate and keep them aside while preparing the flatbread.

Toast the Flatbread

Preheat the oven to 425°F or 220°C.

Place the naan or flatbreads on a baking sheet and lightly brush them with olive oil.

Bake for 5–7 minutes, until the edges are crisp and golden. Fresh pizza dough can also be used. Roll it thin before baking and cook until the crust is golden and crisp around the edges.

Keep an eye on the flatbread during the final minutes because thin dough can brown quickly.

Build the Flatbread

Remove the toasted flatbread from the oven and let it rest briefly.

Tear the burrata into pieces and distribute it generously over the warm crust. Avoid spreading it too thin because larger pockets of burrata make the finished flatbread especially creamy.

Arrange the charred peach slices over the cheese.

Scatter toasted pistachios or walnuts over the peaches if using.

Add fresh mint or basil leaves for a bright, fragrant finish.

Drizzle the homemade hot honey over the entire flatbread, concentrating on the peaches and burrata.

Finish with a light sprinkling of black lava salt.

Slice into wedges and serve immediately.

Tips

Pick Firm-Ripe Peaches

The ideal peaches should smell fragrant and feel slightly soft when gently pressed. They should not be overly soft. Firm-ripe peaches hold their shape better and create better grill marks.

Preheat Your Cooking Surface

A properly heated grill or skillet is essential for achieving caramelization. If the surface is not hot enough, the peaches may release moisture and become soft before developing char.

Avoid Moving the Peaches Too Much

Place the peaches on the hot surface and let them cook undisturbed for a couple of minutes. This allows the sugars to caramelize and creates more defined grill marks.

Do Not Bake the Burrata

Burrata is best added after the flatbread has finished baking. Excessive heat can cause it to lose the fresh, creamy texture that makes it special.

Make the Crust Crisp

The flatbread should have enough structure to support the burrata and peaches. A crisp crust also provides a pleasant contrast to the soft toppings.

Control the Heat

Hot honey becomes more intense as the chili flakes infuse. Start conservatively, taste, and add more chili if necessary.

Toast Nuts for Better Flavor

A few minutes in a dry skillet can transform the flavor of pistachios or walnuts. Remove them from the heat as soon as they become fragrant.

Do Not Over-Salt

Burrata already has a delicate salty character, and the hot honey adds sweetness. Use black lava salt as a finishing ingredient rather than heavily seasoning the dish.

Serve Fresh

For the best combination of crisp crust and creamy toppings, assemble the flatbread just before serving.

Variations

Peach and Prosciutto

Add thin ribbons of prosciutto for a salty, savory component. The combination of prosciutto and peaches is especially delicious with hot honey.

Fresh Arugula Topping

Add fresh arugula after the flatbread has been assembled. Its peppery flavor cuts through the richness of the burrata.

Balsamic Finish

A small drizzle of balsamic glaze can be added with the hot honey for a sweet-tart flavor. Keep the amount modest to avoid overwhelming the peaches.

Goat Cheese Flatbread

Use creamy goat cheese instead of burrata for a tangier version. Goat cheese pairs particularly well with caramelized fruit.

Jalapeño Peach Flatbread

Add finely sliced jalapeño peppers for a fresh, vibrant heat. This variation is ideal for people who enjoy a stronger spicy flavor.

Summer Herb Version

Combine basil and mint with a little fresh thyme. The mixture creates a fragrant finish that works beautifully with grilled peaches.

Peach and Fig Combination

Add thinly sliced fresh figs to the charred peaches. The figs provide a naturally sweet, jam-like texture and make the flatbread even more seasonal.

Q&A

What type of peaches are best for this recipe?

Fresh, ripe but firm peaches are ideal. They should be juicy and fragrant while still firm enough to hold their shape during grilling.

Can nectarines be used instead of peaches?

Yes. Nectarines are an excellent substitute and do not need to be peeled. They also grill beautifully and offer a slightly firmer texture.

Can I prepare the hot honey ahead of time?

Yes. Prepare it in advance and store it in an airtight container. Gently warm it before drizzling if it becomes thick.

What if I cannot find burrata?

Fresh mozzarella, ricotta, goat cheese, or whipped feta can be substituted. Each will give the recipe a slightly different character.

Can I use store-bought hot honey?

Absolutely. Homemade hot honey is quick to make, but a good-quality prepared hot honey works perfectly when you want to save time.

Can I skip the black lava salt?

Yes. Use flaky sea salt instead. The black lava salt is primarily used for its striking appearance and distinctive finishing flavor.

Can I grill the flatbread instead of baking it?

Yes. A sturdy naan or pizza dough can be grilled carefully until crisp. Watch the heat closely because flatbread can char quickly.

How far ahead can I make this dish?

The hot honey and grilled peaches can be prepared ahead, but the flatbread should ideally be toasted and assembled shortly before serving.

Can I make it nut-free?

Yes. Simply omit the pistachios or walnuts. The flatbread will still have plenty of flavor and texture from the peaches, burrata, herbs, and crisp crust.

Is cinnamon necessary?

No. Cinnamon is completely optional. It adds warmth and encourages a deeper caramelized flavor but is not essential.

Nutrition

Approximate nutrition per serving, assuming the recipe serves four and includes the optional nuts:

Calories: 430 kcal
Protein: 14 g
Carbohydrates: 45 g
Fat: 22 g
Saturated Fat: 9 g
Fiber: 3 g
Sugar: 18 g
Sodium: 600 mg

These values are estimates. Actual nutrition will vary depending on the type of flatbread, amount of burrata, honey, olive oil, nuts, and salt used.

Conclusion

This Charred Peach & Burrata Flatbread is the kind of recipe that makes simple ingredients feel extraordinary. Juicy peaches become smoky and caramelized on the grill, while creamy burrata adds richness and a luxurious texture. The homemade hot honey ties everything together with a beautiful sweet-spicy contrast.

Fresh herbs brighten each bite, toasted pistachios or walnuts provide crunch, and black lava salt gives the finished flatbread an elegant final touch. It is quick enough for a weeknight meal but beautiful enough to serve at a summer gathering.

Serve it fresh from the oven, slice it into wedges, and let everyone enjoy the combination of creamy, crisp, sweet, savory, smoky, and spicy flavors in every bite. This is an easy seasonal recipe that truly celebrates the best of summer produce.

#CharredPeaches #BurrataFlatbread #HotHoney #SummerAppetizer #EasyEntertaining

Roasted Beet, Avocado and Feta Salad

Roasted Beet, Avocado and Feta Salad

Bright, colorful, and packed with contrasting flavors, this Roasted Beet, Avocado and Feta Salad is a simple dish that can make any meal feel special. Tender roasted beets bring natural sweetness, creamy avocado adds richness, feta contributes a salty tang, and toasted walnuts provide the perfect crunch.

Everything is finished with a quick balsamic vinaigrette made with olive oil, balsamic vinegar, and a touch of honey or maple syrup. The dressing is light but flavorful enough to complement every ingredient without overpowering the fresh greens.

Prep Time: 15 minutes
Cook Time: 40–50 minutes
Total Time: 55–65 minutes
Servings: 4–6
Cuisine: Mediterranean-inspired
Calories: Approximately 320 calories per serving

Ingredients

Base & Salad Ingredients

3–4 medium red beets, scrubbed, roasted, peeled, and cubed

1–2 ripe avocados, peeled and sliced or diced

¼–½ cup crumbled feta cheese

3–4 cups mixed baby greens or peppery arugula

¼–½ cup raw or toasted walnuts or pecans

Balsamic Vinaigrette Dressing

2–3 tablespoons extra-virgin olive oil

1–2 tablespoons balsamic vinegar

1 teaspoon honey or maple syrup

Salt, to taste

Freshly cracked black pepper, to taste

Instructions

Roast the Beets

Preheat the oven to 400°F (200°C).

Wash and scrub the beets thoroughly. Dry them and place them in foil or a baking dish.

Wrap the beets individually in foil or cover the baking dish. Roast for approximately 40–50 minutes, depending on their size.

Test them with a knife or fork. They should be tender all the way through.

Remove from the oven and allow them to cool until they are comfortable to handle.

Peel and Cube the Beets

Gently remove the beet skins using your fingers or a small knife.

Cut the beets into bite-sized cubes or wedges.

Allow them to cool completely before assembling the salad.

Toast the Walnuts

Place raw walnuts in a dry skillet over medium-low heat.

Toast for three to five minutes, tossing frequently, until fragrant and lightly golden.

Transfer them to a plate immediately so they do not continue cooking in the hot pan.

Make the Balsamic Dressing

Combine the extra-virgin olive oil, balsamic vinegar, honey or maple syrup, salt, and black pepper in a small bowl or jar.

Whisk or shake until emulsified.

Taste the dressing and adjust the seasoning or sweetness as needed.

Prepare the Greens

Add the mixed baby greens or arugula to a large serving bowl.

Make sure the greens are thoroughly dry before dressing them.

Build the Salad

Arrange the roasted beets over the greens.

Add the avocado slices or cubes.

Sprinkle the feta and toasted walnuts over the top.

Keep the ingredients in distinct sections if you want a colorful presentation.

Add the Dressing

Drizzle the balsamic vinaigrette over the salad immediately before serving.

Gently toss everything together or serve the dressing separately.

Add extra feta, walnuts, or black pepper if desired and serve fresh.

Tips

Select Good Beets

Choose firm, medium-sized beets without soft spots or damaged areas. Similar-sized beets will roast more evenly.

Let the Beets Cool

Allow roasted beets to cool before adding them to the greens. This prevents the greens from wilting and helps maintain the salad’s fresh texture.

Prepare Beets in Advance

Roasted beets can easily be prepared a day ahead. Store them covered in the refrigerator until ready to use.

Protect the Other Ingredients from Beet Juice

For a colorful presentation, add the beets last and gently fold them through the salad. This helps prevent the entire salad from turning pink.

Pick the Right Avocado

Use an avocado that is ripe enough to be creamy but firm enough to hold its shape. Very soft avocado can become mushy when tossed.

Keep the Greens Dry

Water left on the greens can dilute the vinaigrette and make the salad limp. Use a salad spinner or clean kitchen towel to dry them thoroughly.

Toast the Nuts Freshly

Freshly toasted walnuts have better aroma and crunch. Keep the heat moderate and watch them closely.

Dress at the Last Moment

For the best texture, add the balsamic vinaigrette immediately before eating.

Variations

Beet and Goat Cheese Salad

Swap feta for goat cheese for an especially creamy and tangy combination.

Citrus Beet Salad

Add orange or grapefruit segments for a refreshing citrus twist.

Apple and Beet Salad

Add thin slices of crisp apple. The combination of sweet beet, tart apple, salty feta, and balsamic dressing is delicious.

Fresh Herb Variation

Add chopped parsley, mint, basil, or dill for extra freshness.

Protein-Rich Version

Add chickpeas, cooked lentils, quinoa, or grilled chicken to turn the salad into a more complete meal.

Mediterranean Variation

Add Kalamata olives, cucumber, cherry tomatoes, and thinly sliced red onion.

Crunchy Seed Version

Replace some or all of the walnuts with pumpkin seeds, sunflower seeds, or pistachios.

Fully Vegan Version

Use maple syrup instead of honey and omit the feta or replace it with a plant-based feta alternative.

Q&A

Can I make the roasted beets ahead of time?

Yes. Roast, cool, peel, and refrigerate the beets in an airtight container until needed.

Can I use store-bought cooked beets?

Yes. Plain cooked beets are a convenient shortcut and work very well in this salad.

What other type of beet can I use?

Golden beets and candy-striped beets are both excellent alternatives to red beets.

Can I prepare the entire salad ahead?

It is best to prepare the individual components ahead and assemble the salad shortly before serving. Keep the avocado and dressing separate until the last moment.

How can I keep avocado fresh?

Add avocado immediately before serving. A small amount of lemon juice can also help slow browning.

Can I replace arugula?

Yes. Baby spinach, spring greens, mixed lettuce, or finely shredded kale are good alternatives.

Which nuts work best?

Walnuts and pecans are classic choices, but almonds, pistachios, and hazelnuts can also be used.

What main dishes pair well with this salad?

Serve it alongside grilled chicken, roasted fish, salmon, grilled vegetables, quinoa, couscous, or crusty bread.

Nutrition

Approximate nutrition per serving:

Calories: 320 kcal
Protein: 7 g
Fat: 24 g
Saturated Fat: 5 g
Carbohydrates: 22 g
Fiber: 7 g
Sugar: 11 g
Sodium: 390 mg

Nutrition information is an estimate and may vary according to the exact quantities and brands of ingredients used.

Conclusion

A beautiful salad does not need complicated ingredients, and this roasted beet combination is a perfect example. The earthy sweetness of roasted beets, buttery avocado, salty feta, peppery greens, and crunchy walnuts create a wonderful mix of flavors and textures in every bite.

The balsamic vinaigrette adds a bright finishing touch that brings the sweet and savory elements together. Whether you serve it as a light lunch, a side for a family dinner, or part of a larger spread, this salad is fresh, colorful, satisfying, and easy to customize.

#RoastedBeets #BeetFetaSalad #HealthyRecipes #FreshSalad #EasySalad

Ultimate Vegan Omelette Made with Just 6 Basic Ingredients

Ultimate Vegan Omelette Made with Just 6 Basic Ingredients

Looking for a simple plant-based breakfast that is hearty, flavorful, and easy to prepare? This Ultimate Vegan Omelette uses just six basic ingredients to create a delicious egg-free alternative. Chickpea flour gives the omelette its satisfying structure, while Kala Namak adds the distinctive savory flavor that makes it taste surprisingly similar to an egg-based omelette.

The filling is made with tender sautéed mushrooms and sweet white onion, but the recipe is easy to customize. Add fresh spinach for color, vegan cheese for extra richness, or fresh herbs for a bright finish. Whether served for breakfast, brunch, or a quick light meal, this simple recipe is a delicious way to add more plant-based meals to your menu.

Prep Time: 5 minutes
Cook Time: 15 minutes
Total Time: 20 minutes
Servings: 1 large omelette
Cuisine: Vegan / Plant-Based
Calories: Approximately 300 calories per serving

Ingredients

For the Batter Base

¼ cup (40g) chickpea flour, also called gram flour or besan

¼ teaspoon black salt (Kala Namak)

⅓ cup (85ml) water

For the Sautéed Filling

80g mushrooms, sliced

½ white onion (40g), diced or thinly sliced

½ tablespoon olive oil, for the vegetables

1 tablespoon olive oil, for cooking the omelette

Optional Additions

Fresh spinach, sautéed with the mushrooms

Approximately 30g vegan Cheddar or shredded vegan cheese

Fresh chives or parsley, finely chopped

Instructions

Make the Chickpea Batter

Add the chickpea flour and black salt to a mixing bowl.

Slowly add the water while whisking until the mixture becomes completely smooth.

The consistency should be thin and pourable, similar to crepe batter. Allow it to rest for about five minutes before cooking.

Prepare the Mushroom Filling

Heat ½ tablespoon olive oil in a non-stick skillet over medium heat.

Add the mushrooms and onion and sauté for five to seven minutes.

Continue cooking until the mushrooms are tender and the onion has softened.

If using spinach, add it near the end and cook until wilted.

Transfer the cooked vegetables to a plate.

Cook the Omelette

Return the skillet to medium-low heat and add 1 tablespoon olive oil.

Whisk the chickpea batter once more, then pour it into the skillet.

Gently rotate the pan to spread the batter into an even round.

Cook for approximately three to five minutes until the edges begin to firm up and the surface looks mostly set.

Fill the Omelette

Place the sautéed mushroom and onion mixture over one half of the omelette.

Add the vegan cheese if using.

Continue cooking for another minute or two, allowing the bottom to become lightly golden and the cheese to soften.

Fold and Serve

Carefully fold the empty half over the filling.

Cook for another 30 seconds to one minute, then transfer to a serving plate.

Garnish with fresh parsley or chives and serve immediately.

Tips

Make a Smooth Batter

Whisk the chickpea flour and water gradually rather than adding all the liquid at once. This helps prevent lumps.

Use the Right Pan

A non-stick skillet is the easiest option for this recipe. Make sure the cooking surface is lightly coated with olive oil before adding the batter.

Keep the Heat Moderate

High heat can cause the omelette to brown too quickly. Medium-low to medium heat allows the inside to cook while the outside develops a pleasant golden finish.

Rest the Batter

Even a short resting period allows the chickpea flour to absorb the water and creates a more consistent texture.

Keep the Omelette Relatively Thin

A thin layer cooks more evenly and folds more easily. Add a small amount of water if the batter becomes noticeably thick after resting.

Use Kala Namak Sparingly

Black salt has a powerful sulfurous flavor. The recommended amount is enough to provide an egg-like character without overwhelming the other ingredients.

Remove Moisture from the Mushrooms

Cook the mushrooms until their moisture evaporates before using them as a filling. This keeps the omelette from becoming watery.

Variations

Spinach and Mushroom

Sauté fresh spinach together with the mushrooms and onion for a colorful and nutrient-rich filling.

Vegan Cheesy Omelette

Add approximately 30g vegan Cheddar or another melting vegan cheese before folding.

Fresh Herb Omelette

Mix chopped parsley, chives, dill, or basil into the filling or sprinkle them over the finished omelette.

Spicy Version

Add chili flakes, cayenne, hot sauce, or fresh chopped chili to the mushroom mixture.

Mediterranean Style

Use mushrooms, spinach, chopped tomatoes, olives, parsley, and oregano for a Mediterranean-inspired filling.

Garden Vegetable Omelette

Add finely diced bell peppers, zucchini, green onions, or tomatoes. Cook the vegetables first to remove excess moisture.

Omelette Breakfast Wrap

Cook the chickpea batter as a thinner round and use it as a wrap. Fill with sautéed vegetables, avocado, fresh greens, and vegan cheese.

Q&A

Is this vegan omelette completely egg-free?

Yes. The base contains no eggs or dairy. Chickpea flour provides the structure, while Kala Namak creates an egg-like flavor.

Why does black salt taste like eggs?

Kala Namak contains sulfur compounds that give it a distinctive aroma and flavor similar to cooked eggs.

Can regular salt be used?

Yes, but regular salt will not provide the same egg-like flavor.

Can I prepare the batter the night before?

Yes. Store the prepared batter in a covered container in the refrigerator. Stir or whisk it thoroughly before cooking.

How can I stop the omelette from sticking?

Use a quality non-stick skillet, make sure there is enough olive oil, and cook over moderate heat rather than high heat.

Can I add vegan cheese?

Yes. About 30g of shredded vegan cheese works well. Add it over the vegetables shortly before folding.

What other fillings can I use?

Spinach, bell peppers, zucchini, tomatoes, green onions, herbs, olives, and vegan cheese are all excellent options.

Is chickpea flour naturally gluten-free?

Yes. Pure chickpea flour is naturally gluten-free, although packaged products and optional additions should be checked for cross-contamination or added ingredients if this is important to you.

Nutrition

Approximate nutrition per serving without optional additions:

Calories: 300 kcal
Protein: 11 g
Fat: 18 g
Saturated Fat: 3 g
Carbohydrates: 25 g
Fiber: 5 g
Sugar: 6 g
Sodium: 650 mg

Nutrition information is approximate and can change based on the specific ingredients and optional additions used.

Conclusion

With only a handful of everyday ingredients, this vegan omelette delivers plenty of flavor and texture without relying on eggs. The chickpea flour creates a tender, satisfying base, Kala Namak provides its signature savory egg-like note, and the mushroom and onion filling makes every bite hearty and flavorful.

It is a flexible recipe that can easily change depending on what you have in the refrigerator. Add spinach, vegan cheese, herbs, or colorful vegetables, or keep it simple with the original six-ingredient combination. This is an easy plant-based breakfast that is quick, affordable, and satisfying enough to enjoy any day of the week.

#VeganBreakfast #VeganOmelette #PlantBasedBreakfast #EasyVeganRecipes #HealthyRecipes

Oven Baked Chicken Mushroom Cheese Casserole Oven Baked Chicken Mushroom Cheese Casserole

Oven Baked Chicken Mushroom Cheese Casserole

When you need a warm, hearty dinner that everyone around the table will enjoy, this Oven Baked Chicken Mushroom Cheese Casserole is an excellent choice. Tender pieces of chicken are combined with golden mushrooms, sweet onion, fresh garlic, and a silky cream sauce before being covered with Parmesan and plenty of melted cheese.

As it bakes, the sauce becomes rich and creamy while the cheese melts into a golden, bubbling layer across the top. Every spoonful has tender chicken, flavorful mushrooms, creamy sauce, and gooey cheese. It is the perfect comfort food for a cozy evening and pairs wonderfully with simple sides.

Prep Time: 15 minutes
Cook Time: 35 minutes
Total Time: 50 minutes
Servings: 6
Cuisine: American / Comfort Food
Calories: Approximately 570 calories per serving

Ingredients

Main Ingredients

1.5 lbs boneless, skinless chicken breasts or thighs, cubed

8 oz fresh white button or cremini mushrooms, sliced

1 medium onion, diced

4 cloves garlic, minced

The Creamy Sauce Base

2 tablespoons butter

2 tablespoons olive oil, for searing

2 tablespoons all-purpose flour

1 cup chicken broth

1 cup heavy cream

The Cheeses & Garnish

1½ cups shredded Cheddar or Mozzarella cheese

½ cup grated Parmesan cheese

A small handful fresh parsley, finely chopped

Seasonings

1 teaspoon salt

½ teaspoon black pepper

1 teaspoon Italian seasoning, or a pinch of dried thyme

Instructions

Prepare the Chicken

Preheat the oven to 375°F (190°C).

Pat the cubed chicken dry with paper towels. Season with half of the salt and black pepper.

Heat the olive oil in a large oven-safe skillet over medium-high heat. Add the chicken and sear for several minutes, turning occasionally, until lightly golden on the outside.

The chicken does not have to be fully cooked because it will continue cooking in the oven. Transfer it to a plate and set aside.

Cook the Mushrooms and Aromatics

Add the butter to the same skillet and reduce the heat to medium.

Add the diced onion and cook for three to four minutes until softened.

Add the sliced mushrooms and cook for five to seven minutes. Let them release their moisture and develop some golden color.

Stir in the minced garlic and cook for approximately 30 seconds, until fragrant.

Make the Creamy Sauce

Sprinkle the flour over the mushroom mixture and stir continuously for about one minute.

Slowly add the chicken broth while stirring constantly. Continue stirring as the liquid is incorporated.

Pour in the heavy cream and stir until the sauce becomes smooth.

Add the remaining salt, black pepper, and Italian seasoning.

Allow the sauce to gently simmer for a few minutes until slightly thickened. Do not let it boil vigorously.

Combine Everything

Return the seared chicken and any juices from the plate to the skillet.

Stir gently until the chicken and mushrooms are evenly coated in the creamy sauce.

If you are not using an oven-safe skillet, transfer the mixture to a lightly greased casserole dish.

Spread everything into an even layer.

Add the Cheese

Sprinkle Parmesan evenly over the chicken mixture.

Cover the top with shredded Cheddar or Mozzarella.

Make sure the cheese reaches across most of the surface so it creates a rich, golden topping during baking.

Bake

Place the casserole in the preheated oven and bake uncovered for 20–25 minutes.

The casserole is ready when the chicken is cooked through and the cheese is melted, bubbling, and lightly golden.

For a deeper golden finish, broil for one to two minutes at the end, keeping a close eye on it.

Rest and Garnish

Remove the casserole from the oven and allow it to rest for approximately five minutes.

Scatter freshly chopped parsley over the top.

Serve warm with your favorite side dishes.

Tips

Sear the Chicken Properly

Patting the chicken dry before cooking helps it brown instead of steaming. Avoid overcrowding the skillet, as this can prevent the chicken from developing a flavorful golden exterior.

Take Your Time with the Mushrooms

Well-browned mushrooms add wonderful depth to the casserole. Cook them until their excess moisture has evaporated and their edges begin to turn golden.

Keep the Sauce Smooth

Add the broth gradually and stir continuously after adding the flour. This simple step helps prevent lumps and produces a smoother creamy sauce.

Do Not Boil the Cream Sauce Aggressively

A gentle simmer is enough to thicken the sauce. High heat can cause cream-based sauces to separate.

Grate Cheese Freshly When Possible

Freshly grated cheese usually melts more evenly. Mozzarella provides a mild, stretchy topping, while Cheddar adds more pronounced flavor.

Check the Chicken

Because chicken pieces vary in size, cooking time can vary slightly. The chicken should reach a safe internal temperature of 165°F (74°C).

Rest Before Serving

A short resting period allows the sauce to settle and makes the casserole easier to portion without the sauce immediately running across the plate.

Variations

Creamy Spinach Chicken

Add fresh spinach to the mushroom sauce and cook until wilted before returning the chicken to the skillet.

Chicken Mushroom Broccoli Casserole

Add cooked or lightly steamed broccoli florets to the casserole before adding the cheese. Cheddar works particularly well with this variation.

Italian-Style Chicken Casserole

Use Italian seasoning, Parmesan, mozzarella, and a little extra garlic. Fresh basil or parsley can be added after baking.

Spicy Chicken Mushroom Casserole

Add red pepper flakes, cayenne, or your favorite chili seasoning to the sauce for a spicy version.

Vegetable Loaded Version

Add sliced bell peppers, zucchini, spinach, or broccoli to increase the vegetable content and create an even heartier casserole.

Chicken Thigh Version

Use boneless, skinless chicken thighs for a richer and juicier result. Cut them into evenly sized pieces so they cook consistently.

Lighter Version

Replace some of the heavy cream with whole milk and use olive oil instead of some of the butter. The result will be lighter while remaining creamy.

Q&A

Can I use chicken breasts or thighs?

Both work well. Chicken breasts offer a leaner option, while boneless chicken thighs tend to stay particularly juicy and tender.

Can I use pre-cooked chicken?

Yes. If using cooked chicken, reduce the initial searing step and add the chicken when combining the sauce. Avoid baking it for too long so it does not become dry.

What mushrooms should I use?

White button and cremini mushrooms are excellent choices. Baby bella, shiitake, or mixed mushrooms can also be used.

Can I use half-and-half instead of heavy cream?

Yes. Half-and-half will create a lighter sauce. The finished casserole may be slightly less rich and thick.

Can I make this without flour?

You can use cornstarch as an alternative thickener. Mix a small amount with cold broth or water first to create a slurry before adding it to the sauce.

What should I serve with chicken mushroom casserole?

Crusty bread, mashed potatoes, roasted potatoes, rice, pasta, steamed vegetables, or a fresh green salad are all delicious options.

How long will leftovers last?

Keep leftovers refrigerated in an airtight container and consume within about three days.

Can I freeze the casserole?

Yes, although the texture of the cream sauce may change slightly after freezing and thawing. Cool completely before freezing and thaw overnight in the refrigerator before reheating.

Nutrition

Approximate nutrition per serving:

Calories: 570 kcal
Protein: 42 g
Fat: 38 g
Saturated Fat: 19 g
Carbohydrates: 12 g
Fiber: 1 g
Sugar: 4 g
Sodium: 850 mg

Nutrition information is estimated and may change depending on the exact ingredients, brands, cheese, cream, and portion sizes used.

Conclusion

Few things are more comforting than a bubbling casserole fresh from the oven, and this chicken and mushroom version delivers plenty of cozy flavor. The creamy sauce brings the chicken and mushrooms together, while Parmesan and melted Cheddar or Mozzarella create a deliciously cheesy finish.

Whether you are cooking for your family, preparing a satisfying Sunday dinner, or simply craving something creamy and hearty, this casserole is an easy recipe to keep in your rotation. Serve it with warm bread or your favorite side dish and enjoy a comforting homemade meal straight from the oven.

#ChickenCasserole #MushroomChicken #CheesyCasserole #FamilyDinner #EasyChickenRecipes

Peach Yogurt Parfait

Peach yogurt parfait layered with fresh sliced peaches, creamy Greek yogurt, and crunchy granola in a clear glass

Peach Yogurt Parfait

A Peach Yogurt Parfait is a quick, fresh, and creamy breakfast or dessert made with ripe peaches, yogurt, and crunchy granola. Each spoonful combines juicy fruit, smooth yogurt, and a satisfying crunch.

This easy peach parfait takes about 15 minutes to assemble and needs no cooking. It works well for busy mornings, afternoon snacks, or a light summer dessert.

Using Greek yogurt gives the parfait a thick texture and adds protein, while fresh peaches provide natural sweetness and a juicy bite. A small drizzle of honey or maple syrup can add extra sweetness when needed.

The layers also make this recipe easy to serve for brunch, family breakfasts, or casual gatherings. Prepare the ingredients ahead of time and assemble the glasses shortly before serving for the best texture.

Why You’ll Love This Peach Yogurt Parfait

This recipe uses simple ingredients that are easy to find at most U.S. grocery stores. You can also adjust the layers based on the fruit, yogurt, or toppings you have available.

Fresh peaches bring a naturally sweet flavor without needing much added sugar. Greek yogurt adds creaminess and helps make each serving more filling.

Granola adds texture and turns a simple bowl of yogurt and fruit into a more satisfying meal. Honey or maple syrup can be added according to the sweetness of the peaches.

The recipe is also flexible enough for different diets. Use dairy-free yogurt for a plant-based version or choose a lower-sugar granola if you want to reduce added sugar.

Ingredients

For 2–3 servings, you will need:

  • 2 large ripe peaches, diced or thinly sliced
  • 2 cups plain or Greek yogurt
  • 1 cup granola
  • 2–3 tablespoons honey or maple syrup
  • Fresh mint leaves, for garnish

Optional Add-Ins

  • 1 tablespoon chia seeds for extra fiber
  • 2 tablespoons chopped pistachios or nuts for additional crunch
  • ¼ teaspoon ground cinnamon for warm flavor
  • 1 tablespoon sweetened condensed milk for a richer dessert-style parfait
  • A little lemon zest for a bright citrus note

Choose peaches that feel slightly soft when gently pressed. Very firm peaches may not provide the same juicy texture.

How to Make Peach Yogurt Parfait

Prepare the Peaches

Wash the peaches under cool running water and pat them dry. Cut each peach in half, remove the pit, and dice or thinly slice the fruit.

Keep the pieces fairly even so the layers are easy to build and each spoonful contains a good mix of ingredients.

Sweeten the Yogurt

Taste the yogurt before adding sweetener. If it tastes too tart, stir in about 1 tablespoon of honey or maple syrup.

Plain Greek yogurt works especially well because its thick consistency holds the layers together without becoming watery.

Build the First Layer

Place about 2–3 tablespoons of yogurt into the bottom of each clear glass, jar, or dessert cup.

Spread it gently into an even layer so the next ingredients remain visible from the outside.

Add Peaches and Granola

Add a layer of diced peaches over the yogurt. Follow with a small handful of granola.

Avoid adding too much granola at once because thick layers can make the parfait difficult to eat with a spoon.

Repeat the Layers

Continue with another layer of yogurt, peaches, and granola until the glasses are almost full.

Finish with peaches and a light sprinkle of granola for an attractive presentation.

Add Toppings and Serve

Drizzle a small amount of honey or maple syrup over the top. Add chopped pistachios, chia seeds, cinnamon, or a fresh mint leaf if desired.

Serve immediately for crisp granola and fresh peaches.

Tips for the Best Peach Parfait

Choose ripe peaches: Ripe fruit provides more flavor, moisture, and natural sweetness than underripe peaches.

Use thick yogurt: Greek yogurt creates sturdy layers and gives the parfait a rich, creamy texture.

Add granola at the right time: Layer granola immediately before serving if you want it to stay crunchy.

Taste before sweetening: Very ripe peaches may provide enough sweetness that you need little or no honey.

Keep the layers moderate: Thin layers make it easier to get yogurt, fruit, and granola in every bite.

Chill the ingredients: Cold yogurt and peaches make the finished parfait especially refreshing.

Use clear serving glasses: Transparent cups highlight the colorful layers and make the parfait look more appealing.

Prepare toppings separately: Keep nuts, granola, and other crunchy toppings dry until assembly.

Easy Variations

Berry Peach Parfait

Add fresh blueberries or sliced strawberries between the peach layers. The berries provide extra color and a mild tart flavor.

Peach Almond Parfait

Use almond granola or sprinkle toasted sliced almonds between the layers for a nutty finish.

Tropical Peach Parfait

Add diced mango and unsweetened coconut flakes for a tropical combination that works especially well in warm weather.

Peach Chia Parfait

Sprinkle chia seeds over the yogurt or stir them into the yogurt before assembling the glasses.

Protein Peach Parfait

Mix a serving of your preferred protein powder into the yogurt before layering. Choose a plain or vanilla variety that complements the peaches.

Dairy-Free Peach Parfait

Replace regular yogurt with coconut, almond, soy, or another dairy-free yogurt. Use maple syrup instead of honey for a fully plant-based option.

Peach Cinnamon Parfait

Add a light sprinkle of cinnamon between the yogurt and peach layers for a warm, lightly spiced flavor.

Dessert-Style Peach Parfait

Top the parfait with a small amount of whipped cream and crushed cookies when you want a sweeter after-dinner treat.

How to Store Peach Yogurt Parfait

A prepared parfait can be refrigerated in a covered container for up to 24 hours. However, the granola will soften as it sits in the yogurt and fruit.

For the best texture, store the yogurt and peaches separately from the granola. Assemble the parfait shortly before eating.

If you are preparing parfaits for breakfast, portion the yogurt and peaches into containers the night before and keep the granola in a separate small container.

Can You Make Peach Parfait Ahead of Time?

Yes, you can prepare most of the ingredients ahead of time. Wash and cut the peaches, portion the yogurt, and measure the granola separately.

For the freshest texture, assemble the layers shortly before serving. This keeps the granola crisp and prevents excess moisture from softening it.

For meal prep, mason jars with separate dry toppings are a convenient option for taking breakfast to work or school.

Serving Ideas

Serve this peach parfait for breakfast with scrambled eggs, whole-grain toast, or a cup of coffee. It also fits well on a brunch table alongside fresh fruit and other light breakfast dishes.

For dessert, use smaller glasses and add cinnamon, pistachios, or a small spoonful of whipped cream.

This recipe is also easy to scale for guests. Simply multiply the ingredients based on the number of servings and prepare the components in advance.

Frequently Asked Questions

Can I use canned peaches for this parfait?

Yes. Drain canned peaches thoroughly and choose peaches packed in juice rather than heavy syrup for a fresher flavor.

What yogurt is best for a peach parfait?

Plain or vanilla Greek yogurt works well because it is thick, creamy, and rich in protein.

Can I make this recipe without honey?

Yes. Skip the honey if your peaches and yogurt are sweet enough, or use maple syrup as an alternative.

How long does a yogurt parfait last in the refrigerator?

A prepared parfait can be refrigerated for up to 24 hours, but the granola will become softer over time.

Can I use frozen peaches?

Yes. Thaw frozen peaches completely and drain excess liquid before adding them to the parfait.

How can I keep the granola crunchy?

Add the granola immediately before serving, or store it separately and sprinkle it over the parfait when ready to eat.

Can I make this parfait dairy-free?

Yes. Use coconut, almond, soy, or another dairy-free yogurt and replace honey with maple syrup if needed.

What fruit goes well with peaches?

Blueberries, strawberries, mango, pineapple, and bananas all pair well with the sweet flavor of peaches.

Nutrition Information

Approximate nutrition per serving:

  • Calories: 280
  • Protein: 12 g
  • Carbohydrates: 40 g
  • Fiber: 4 g
  • Fat: 8 g
  • Sugar: 22 g

Nutrition values vary based on the type of yogurt, granola, fruit, and sweetener used. Check individual product labels for more precise information.

Final Thoughts

Peach Yogurt Parfait is a simple way to turn fresh summer peaches into a creamy, colorful, and satisfying breakfast or dessert. The combination of thick yogurt, juicy fruit, and crunchy granola gives every layer a different texture.

The recipe takes only a few minutes to assemble and can be adjusted with berries, nuts, chia seeds, cinnamon, or dairy-free yogurt. For the best results, use ripe peaches and add the granola just before serving.

Whether you need a quick weekday breakfast, a refreshing snack, or an easy dessert for guests, this layered peach treat is a practical recipe to keep on hand.

Baked Salmon in Foil with Asparagus and Lemon Garlic Sauce

Bilkul. Numbers aur bullet dots remove karke, end mein Top 5 Hashtags add kar raha hoon.

Baked Salmon in Foil with Asparagus and Lemon Garlic Sauce

This Baked Salmon in Foil with Asparagus and Lemon Garlic Sauce is an easy, flavorful dinner that brings together tender salmon, crisp-tender asparagus, buttery garlic, fresh lemon, and a touch of hot sauce. Everything cooks together in a foil packet, allowing the salmon to stay moist while the asparagus absorbs all those delicious lemon-garlic flavors.

It is perfect for busy weeknights because there is very little preparation and almost no cleanup. Simply assemble the foil packets, bake, and open them at the table for a fresh, restaurant-style meal. Serve it with rice, roasted potatoes, quinoa, or crusty bread for a complete dinner.

Prep Time: 10 minutes
Cook Time: 15–20 minutes
Total Time: 25–30 minutes
Servings: 4
Cuisine: American-inspired / Mediterranean-style
Calories: Approximately 430 calories per serving

Ingredients

Main Components

1 pound (450g) salmon fillets, divided into 4 portions
1 pound (450g) medium-thick asparagus, woody ends trimmed

Lemon Garlic Sauce & Seasonings

4 teaspoons minced garlic, about 4 cloves
3–4 tablespoons butter, diced into small cubes, or ghee
2 tablespoons vegetable broth or chicken broth
1½ tablespoons fresh lemon juice
Extra lemon slices, for garnish
1 tablespoon hot sauce, such as Sriracha
2 tablespoons fresh parsley or cilantro, finely chopped
Salt, to taste
Freshly ground black pepper, to taste

Instructions

Prepare the Oven

Preheat your oven to 400°F (200°C). Prepare four large sheets of aluminum foil, making sure each piece is large enough to completely enclose one portion of salmon and asparagus.

For easier cleanup, you can place a sheet of parchment paper inside each piece of foil before adding the ingredients.

Prepare the Asparagus

Wash the asparagus thoroughly and pat it dry. Trim or snap off the woody ends.

Divide the asparagus evenly among the four foil sheets and arrange it in the center of each sheet. Season lightly with salt and freshly ground black pepper.

If your asparagus is especially thick, slice the spears lengthwise or blanch them briefly so they cook at the same rate as the salmon.

Make the Lemon Garlic Sauce

Add the minced garlic, vegetable broth or chicken broth, fresh lemon juice, and hot sauce to a small bowl.

Stir until well combined. The butter will be divided directly among the packets, allowing it to melt over the salmon and asparagus as they cook.

Assemble the Packets

Place one salmon fillet over each portion of asparagus.

Season the salmon with salt and freshly ground black pepper.

Spoon the lemon-garlic mixture over the salmon and asparagus. Divide the diced butter between the packets, placing the cubes directly over each salmon fillet.

Sprinkle the chopped parsley or cilantro over the top and add a couple of lemon slices to each packet.

Seal the Foil

Bring the long sides of the foil together over the salmon and fold them down securely. Fold the shorter sides inward to create a sealed packet.

Do not wrap the foil directly against the salmon. Leave some room inside so steam can circulate properly.

Bake the Salmon

Place the sealed packets on a baking sheet and transfer them to the preheated oven.

Bake for approximately 15–20 minutes, depending on the thickness of the salmon.

Thinner fillets may cook in around 12–15 minutes, while thicker portions may require closer to 20 minutes.

Check for Doneness

Carefully open one packet because hot steam will escape.

The salmon should be opaque and should flake easily with a fork. For the most accurate result, check the thickest part with an instant-read thermometer.

The FDA recommends cooking salmon and other finfish to an internal temperature of 145°F (63°C).

Serve

Transfer each salmon portion and asparagus to a serving plate.

Spoon the buttery lemon-garlic sauce from the bottom of the packet over the salmon.

Garnish with additional fresh herbs and lemon slices and serve immediately.

Tips

Choose Good Quality Salmon

Fresh salmon fillets with an even thickness are best because they cook more consistently. Atlantic salmon, sockeye, and coho are all suitable choices.

If using frozen salmon, thaw it completely in the refrigerator and pat it very dry before seasoning.

Avoid Overcooking

Salmon can become dry when cooked too long. Start checking the fish toward the lower end of the suggested cooking time, particularly when using thin fillets.

Cooking time is determined mostly by the thickness of the salmon rather than its total weight.

Use Fresh Lemon

Freshly squeezed lemon juice gives the sauce a much brighter flavor than bottled lemon juice. Adding a little lemon zest can make the citrus flavor even more noticeable.

Trim Asparagus Properly

The bottom ends of asparagus can be tough and fibrous. Snap off the woody ends naturally or trim approximately one to two inches from the bottom.

Try to choose asparagus spears of similar thickness so they cook evenly.

Seal the Packets Properly

A good seal traps the steam and keeps the salmon juicy. Make sure there are no large gaps around the edges.

At the same time, leave enough space inside the packet for steam to move around the ingredients.

Be Careful with Steam

Always open the packets carefully and away from your face. The steam trapped inside can be extremely hot.

Allowing the packets to rest for a minute before opening them can also make them easier to handle.

Adjust the Spice Level

Sriracha adds a pleasant spicy kick. For a milder dish, reduce the amount or leave it out completely.

For more heat, add a pinch of red pepper flakes or a little extra hot sauce.

Variations

Mediterranean Salmon Foil Packets

Add halved cherry tomatoes, Kalamata olives, and crumbled feta before sealing the packets. Finish with fresh oregano or dill for a delicious Mediterranean-inspired version.

Honey Garlic Salmon

Add one tablespoon of honey to the lemon-garlic sauce. The sweetness balances the lemon and spicy Sriracha beautifully.

Herb Butter Salmon

Combine softened butter with minced garlic, parsley, dill, lemon zest, salt, and pepper. Place the herb butter over the salmon before sealing the packets.

Creamy Lemon Salmon

After baking, serve the salmon with a simple sauce made from Greek yogurt, lemon juice, garlic, salt, and fresh herbs.

Salmon with Extra Vegetables

Add thinly sliced zucchini, bell peppers, green beans, broccoli florets, or cherry tomatoes. Choose vegetables that cook relatively quickly so everything finishes at approximately the same time.

Dairy-Free Salmon

Replace the butter with extra-virgin olive oil or a plant-based butter alternative. Olive oil gives the dish a lighter Mediterranean flavor.

Parchment Salmon Packets

If you prefer not to cook with aluminum foil, use parchment paper instead. Fold the parchment securely around the salmon and vegetables to create a sealed cooking packet.

Q&A

Can I use frozen salmon?

Yes. Thaw the salmon completely in the refrigerator before cooking and pat it dry with paper towels to remove excess moisture.

How do I know when the salmon is done?

The salmon should be opaque and flake easily with a fork. For the safest and most accurate measurement, cook it to an internal temperature of 145°F (63°C).

Can I prepare the packets ahead of time?

Yes. You can assemble them several hours ahead and keep them refrigerated until ready to bake. Keep the uncooked salmon properly refrigerated and bake it the same day.

Can I use olive oil instead of butter?

Yes. Extra-virgin olive oil is an excellent substitute and pairs especially well with the lemon, garlic, herbs, and salmon.

What should I serve with this salmon?

Rice, quinoa, couscous, roasted potatoes, mashed potatoes, crusty bread, or a simple green salad are all excellent choices.

Can I leave out the Sriracha?

Absolutely. The recipe is delicious without it. You can also replace it with a small pinch of red pepper flakes for a gentler spicy flavor.

Why is my asparagus still firm?

Very thick asparagus can require more time to become tender. Choose medium-thick spears or cut very thick stalks lengthwise before cooking.

Which herbs work best?

Parsley, dill, basil, oregano, thyme, cilantro, and chives all work well. Dill and parsley are especially delicious with lemon and salmon.

Nutrition

Approximate nutrition per serving:

Calories: 430 kcal
Protein: 36 g
Fat: 29 g
Saturated Fat: 8 g
Carbohydrates: 8 g
Fiber: 4 g
Sugar: 3 g
Sodium: 500–650 mg

Nutrition information is an estimate and can vary depending on the salmon variety, butter quantity, broth, hot sauce, and seasonings used.

Conclusion

Baked Salmon in Foil with Asparagus and Lemon Garlic Sauce is a simple way to prepare a flavorful, tender, and satisfying dinner with minimal effort. The salmon cooks gently inside the foil while the asparagus absorbs the buttery lemon-garlic sauce, creating a delicious combination in every bite.

With just a few basic ingredients and around 30 minutes, you can have a wholesome meal that feels special enough for guests but is easy enough for a busy weeknight. Serve it with your favorite grain, potatoes, or fresh salad, spoon the flavorful sauce over the salmon, and finish with fresh lemon and herbs.

#BakedSalmon #SalmonRecipe #HealthyDinner #EasyDinner #MediterraneanRecipes

Creamy Chicken & Mushroom Dish

Creamy Chicken & Mushroom Dish

Tender chicken, earthy mushrooms, and colorful bell peppers come together in this delicious skillet dish coated in a savory, glossy black pepper sauce. With garlic, ginger, soy sauce, and oyster sauce adding layers of flavor, this easy chicken recipe is perfect when you want a quick homemade dinner that feels special and satisfying.

Prep Time: 20 minutes
Marinating Time: 15 minutes
Cook Time: 15 minutes
Total Time: 50 minutes
Servings: 4
Cuisine: Asian-Inspired
Category: Main Course, Chicken, Stir-Fry

Ingredients

Main Stir-Fry Ingredients

1 to 1½ pounds boneless, skinless chicken breasts or thighs, cut into bite-sized cubes

8 ounces white button or cremini mushrooms, thickly sliced

1 red bell pepper, cut into chunks or thick strips

1 green bell pepper, cut into chunks or thick strips

3 to 4 cloves garlic, minced

1 teaspoon fresh ginger, minced

2 tablespoons vegetable oil or avocado oil

Chicken Marinade

1 tablespoon soy sauce

1 tablespoon cornstarch

½ teaspoon ground black pepper

½ teaspoon salt

1 egg white, optional

Glossy Black Pepper Sauce

1 to 2 teaspoons freshly cracked or coarsely crushed black peppercorns

2 tablespoons soy sauce

1 tablespoon oyster sauce

1 teaspoon brown sugar or honey

1 teaspoon cornstarch

¼ cup water or chicken broth

Instructions

Begin by preparing the chicken. Cut the chicken breasts or thighs into evenly sized bite-sized cubes and place them in a medium bowl.

Add the soy sauce, cornstarch, ground black pepper, salt, and optional egg white. Mix gently until every piece of chicken is coated. Cover the bowl and allow the chicken to marinate for about 15 minutes.

While the chicken marinates, prepare the vegetables. Thickly slice the mushrooms, cut both bell peppers into chunks or strips, mince the garlic, and finely mince the fresh ginger.

Next, prepare the black pepper sauce. In a small bowl, combine the freshly cracked black pepper, soy sauce, oyster sauce, brown sugar or honey, cornstarch, and water or chicken broth. Whisk until the cornstarch dissolves completely. Set the sauce aside.

Heat 1 tablespoon of oil in a large skillet or wok over medium-high heat. Once the pan is hot, add the marinated chicken in a single layer.

Cook the chicken for approximately 5 to 7 minutes, turning occasionally, until the outside becomes golden and the chicken is almost fully cooked. Avoid overcrowding the pan. If your skillet is small, cook the chicken in batches.

Transfer the chicken to a clean plate and set it aside.

Add the remaining tablespoon of oil to the same skillet. Add the mushrooms and cook for approximately 3 to 4 minutes. The mushrooms will initially release moisture before becoming golden and tender.

Add the red and green bell peppers and continue stir-frying for another 2 to 3 minutes. The peppers should soften slightly while maintaining a pleasant crisp texture.

Add the minced garlic and ginger. Stir continuously for approximately 30 seconds until fragrant. Be careful because garlic can burn quickly.

Return the chicken to the skillet with the vegetables. Give the prepared sauce another quick whisk because the cornstarch may settle at the bottom.

Pour the black pepper sauce over the chicken and vegetables. Stir everything together over medium heat for approximately 2 to 3 minutes.

As the sauce heats, it will become glossy and slightly thick. Continue stirring until every piece of chicken and every vegetable is coated.

Check that the chicken is fully cooked and reaches an internal temperature of 165°F (74°C). If the sauce becomes too thick, add a small splash of water or chicken broth.

Remove the skillet from the heat and serve immediately. This dish is delicious with steamed jasmine rice, brown rice, noodles, fried rice, or roasted vegetables.

Tips

Cut the chicken evenly: Similar-sized chicken pieces cook more evenly and prevent smaller pieces from becoming dry before larger pieces are fully cooked.

Do not skip the marinade: The soy sauce adds flavor, while cornstarch helps create a light coating that keeps the chicken tender and helps the sauce stick.

Use a hot skillet: Stir-frying works best when the pan is properly heated before adding the chicken. A hot skillet helps create a golden exterior.

Avoid overcrowding: Too much chicken in the skillet at one time will lower the temperature and cause the chicken to steam instead of brown.

Use freshly cracked black pepper: Freshly cracked pepper has a much stronger aroma and flavor than finely ground pepper. Adjust the amount according to your preferred level of heat.

Cook mushrooms properly: Allow mushrooms enough time in the pan to release their moisture. Once the excess liquid evaporates, they can begin developing a deeper golden flavor.

Add garlic and ginger near the end: These ingredients cook quickly and can become bitter if burned. Adding them after the vegetables helps preserve their fresh flavor.

Whisk the sauce before adding: Cornstarch settles quickly, so always stir or whisk the sauce immediately before pouring it into the skillet.

Control the sauce thickness: If the sauce becomes too thick, add broth one tablespoon at a time. If it is too thin, allow it to simmer for an additional minute.

Taste before adding extra salt: Soy sauce and oyster sauce contain salt, so taste the finished dish before adding more.

Variations

Spicy Black Pepper Chicken: Add sliced chili peppers, crushed red pepper flakes, or chili garlic sauce for additional heat.

Creamy Mushroom Version: Stir a small amount of heavy cream into the finished sauce for a richer and creamier dish.

Extra Vegetable Version: Add broccoli, snow peas, snap peas, zucchini, carrots, or baby corn for additional color and nutrition.

Chicken and Noodle Version: Toss the finished chicken and sauce with cooked noodles for an easy one-pan noodle dinner.

Honey Garlic Version: Increase the honey slightly and add an additional clove of garlic for a sweeter garlic-forward flavor.

Ginger Chicken Version: Double the amount of fresh ginger for a stronger, fresh, aromatic taste.

Low-Carb Version: Serve the chicken and vegetables with cauliflower rice or steamed greens instead of regular rice.

Tofu Version: Replace chicken with firm tofu. Press it well before cutting and pan-frying until golden.

Shrimp Version: Use peeled and deveined shrimp instead of chicken. Cook shrimp quickly and return them to the sauce just before serving.

Q&A

Can I use chicken thighs instead of chicken breasts?

Yes. Boneless, skinless chicken thighs are an excellent choice because they remain juicy and have a rich flavor.

Is the egg white necessary?

No. It is optional, but it can help create a softer and more tender texture.

Can I make this recipe ahead of time?

Yes. You can chop the vegetables, prepare the sauce, and marinate the chicken ahead of time. Cook the dish fresh for the best texture.

How do I know when the chicken is fully cooked?

Chicken should reach an internal temperature of 165°F (74°C).

Can I use regular black pepper?

Yes, but freshly cracked or coarsely crushed black pepper provides a stronger and more distinctive flavor.

What can I serve with this dish?

Steamed rice, brown rice, noodles, fried rice, quinoa, or cauliflower rice are all excellent choices.

Can I make this gluten-free?

Yes. Use gluten-free soy sauce or tamari and make sure your oyster sauce is certified gluten-free.

How do I store leftovers?

Store cooled leftovers in an airtight container in the refrigerator for up to 3 days. Reheat gently in a skillet or microwave.

Nutrition

Approximate nutrition per serving, based on 4 servings:

Calories: 380 kcal
Protein: 39g
Carbohydrates: 18g
Fat: 17g
Saturated Fat: 3g
Fiber: 3g
Sugar: 6g
Sodium: 850mg
Cholesterol: 105mg

Nutrition values are approximate and may vary depending on the type of chicken and exact ingredients used.

Conclusion

With its juicy chicken, tender mushrooms, crisp peppers, and glossy black pepper sauce, this recipe delivers plenty of flavor with simple everyday ingredients. The combination of garlic, ginger, soy sauce, and oyster sauce creates a delicious balance that makes every bite satisfying.

It is also a versatile dish that can be served with different grains, noodles, or vegetables and easily adjusted to suit your preferred spice level. Whether prepared for a quick weeknight meal or included in your weekly meal plan, this flavorful chicken and mushroom dish is a comforting recipe worth making again.

#MushroomChickenRecipe
#EasyStirFry
#ChickenDinnerIdeas
#QuickHomemadeMeals
#FlavorfulFood

Garlic Soy Chicken & Green Veggie Brown Rice Bowl Garlic Soy Chicken & Green Veggie Brown Rice Bowl

Garlic Soy Chicken & Green Veggie Brown Rice Bowl

Tender chicken and vibrant vegetables are tossed in a rich garlic soy glaze and served over fluffy brown rice in this easy homemade bowl. It is a fresh, flavorful, and satisfying recipe that works beautifully for healthy dinners and make-ahead lunches.

If you enjoy simple stir-fry meals packed with vegetables, this bowl is a delicious choice. Broccoli, asparagus, snap peas, colorful bell peppers, and juicy chicken are quickly cooked to preserve their texture before being coated in a savory sauce with a hint of sweetness from honey.

Prep Time: 20 minutes
Cook Time: 35 minutes
Total Time: 55 minutes
Servings: 4 to 6
Cuisine: Asian-Inspired
Category: Main Course, Rice Bowl, Meal Prep

Ingredients

Brown Rice Base

1½ cups brown rice

3 cups water

½ teaspoon salt

Chicken & Vegetables

2 boneless chicken breasts, cut into bite-sized cubes

2 cups broccoli florets

1 bunch asparagus, trimmed and cut into bite-sized pieces

1 cup snap peas or green beans

½ red bell pepper, thinly sliced

½ yellow bell pepper, thinly sliced

½ cup onion, chopped

3 cloves garlic, minced

2 tablespoons vegetable oil or olive oil

Black sesame seeds, optional, for garnish

Garlic Soy Sauce

3 tablespoons soy sauce

1 tablespoon honey

1 tablespoon oyster sauce

1 teaspoon cornstarch

½ cup chicken broth

¼ teaspoon black pepper

Instructions

Start by cooking the brown rice because it takes longer than the chicken and vegetables. Rinse the brown rice under cold water until the water runs mostly clear. This helps remove excess surface starch.

Add the rinsed brown rice, water, and salt to a medium saucepan. Bring the mixture to a boil over medium-high heat. Once boiling, reduce the heat to low, cover the pan with a tight-fitting lid, and allow the rice to simmer.

Cook the rice for approximately 35 to 40 minutes, or according to the package instructions. Once the rice is tender and the liquid has been absorbed, remove the saucepan from the heat and allow it to rest, covered, for 10 minutes. Fluff the rice gently with a fork before serving.

While the rice is cooking, prepare all the chicken, vegetables, and sauce ingredients. Cut the chicken breasts into evenly sized cubes so they cook at approximately the same rate. Chop the vegetables and mince the garlic.

In a small bowl, prepare the garlic soy sauce. Combine the soy sauce, honey, oyster sauce, cornstarch, chicken broth, and black pepper. Whisk well until the cornstarch is completely dissolved. Set the sauce aside.

Heat 1 tablespoon of oil in a large skillet or wok over medium-high heat. Add the chicken cubes in a single layer. Avoid overcrowding the pan. If necessary, cook the chicken in batches.

Cook the chicken for approximately 5 to 7 minutes, turning occasionally, until it becomes golden on the outside and is fully cooked. The internal temperature should reach 165°F (74°C). Transfer the cooked chicken to a plate and set it aside.

Add the remaining tablespoon of oil to the same skillet. Add the chopped onion and cook for about 2 minutes until it begins to soften.

Add the broccoli and asparagus. Stir-fry for approximately 3 to 4 minutes. These vegetables should become bright and slightly tender while maintaining some crispness.

Add the snap peas or green beans and continue cooking for another 2 minutes. Add the red and yellow bell peppers and stir-fry for another 1 to 2 minutes.

Add the minced garlic during the final minute of cooking. Stir constantly so the garlic becomes fragrant without burning.

Return the cooked chicken to the skillet with the vegetables. Give the prepared garlic soy sauce another quick whisk because the cornstarch may settle at the bottom of the bowl.

Pour the sauce into the skillet and toss everything together. Reduce the heat slightly and cook for approximately 2 to 3 minutes. The sauce will begin to bubble and thicken as the cornstarch activates.

Continue stirring until the chicken and vegetables are evenly coated in the glossy sauce. If the sauce becomes thicker than desired, add a small splash of chicken broth or water.

To assemble the bowls, divide the warm brown rice among four to six serving bowls. Spoon the garlic soy chicken and colorful vegetables over the rice.

Drizzle any remaining sauce from the skillet over the top. Finish with a light sprinkle of black sesame seeds if desired.

Serve immediately while warm. This bowl is also excellent for meal prep and can be divided into individual containers for convenient lunches and dinners.

Tips

Cook the brown rice first: Brown rice usually requires more cooking time than white rice, so starting it first allows the rest of the meal to come together easily.

Cut the chicken evenly: Similar-sized pieces cook more evenly and give the finished bowl a better texture. Bite-sized cubes are ideal because they are easy to eat and cook quickly.

Use a hot skillet: A properly heated skillet helps the chicken develop a golden surface. If the pan is not hot enough, the chicken may release moisture and steam rather than brown.

Do not overcrowd the pan: Too much food in the skillet lowers the temperature. Cook the chicken in batches if your skillet is small.

Keep the vegetables slightly crisp: Stir-frying vegetables quickly over medium-high heat preserves their bright color and natural texture. Overcooked vegetables can become soft and lose their fresh appearance.

Add garlic near the end: Garlic burns quickly, especially in a hot skillet. Adding it during the final stage gives you plenty of fresh garlic flavor without bitterness.

Whisk the sauce before adding: Cornstarch naturally settles to the bottom of the bowl. Give the sauce another whisk immediately before pouring it into the skillet.

Control the sauce thickness: Cornstarch thickens quickly. If your sauce becomes too thick, add chicken broth one tablespoon at a time until you achieve a smooth consistency.

Adjust the sweetness: The honey balances the salty soy sauce and savory oyster sauce. If you prefer a less sweet flavor, reduce the honey slightly.

Use low-sodium soy sauce if preferred: Regular soy sauce can make the finished dish quite salty. Low-sodium soy sauce is a useful option if you want greater control over the seasoning.

Keep meal-prep vegetables crisp: If making this recipe for several days of meals, avoid overcooking the vegetables. They will soften slightly again when reheated.

Variations

Spicy Garlic Soy Chicken Bowl: Add red pepper flakes, sliced fresh chili, chili garlic sauce, or a small amount of sriracha to the sauce. Start with a small amount and adjust according to your preferred level of heat.

Teriyaki-Style Bowl: Replace part of the soy sauce with teriyaki sauce and add a little fresh ginger. This creates a sweeter, more familiar teriyaki-style flavor.

Ginger Garlic Chicken Bowl: Add 1 teaspoon of freshly grated ginger along with the garlic. Ginger brings a bright and aromatic flavor that pairs perfectly with soy sauce.

Extra Green Vegetable Bowl: Add spinach, bok choy, edamame, zucchini, or Brussels sprouts. Use a combination of vegetables for more color, texture, and nutrients.

Chicken-Free Version: Replace the chicken with firm tofu. Press the tofu well, cut it into cubes, and cook until golden before combining it with the vegetables and sauce.

Shrimp Version: Use peeled and deveined shrimp instead of chicken. Shrimp cooks quickly, so cook it for only a few minutes until pink and opaque before adding it back to the sauce.

Low-Carb Version: Replace the brown rice with cauliflower rice. This significantly reduces the carbohydrate content while keeping the chicken and vegetable mixture flavorful and filling.

Whole-Grain Alternative: Use quinoa, farro, or wild rice instead of brown rice for a different texture and nutritional profile.

Peanut Garlic Version: Stir 1 tablespoon of natural peanut butter into the sauce and add a little extra chicken broth. The result is a richer, nutty sauce that pairs beautifully with vegetables and rice.

Meal-Prep Version: Divide the brown rice, chicken, and vegetables into individual containers. Store them in the refrigerator and reheat when needed. Add sesame seeds after reheating for the best texture.

Q&A

Can I use chicken thighs instead of chicken breasts?

Yes. Boneless, skinless chicken thighs are an excellent substitute. They are naturally juicy and have a richer flavor than chicken breasts.

Can I use white rice instead of brown rice?

Absolutely. White rice cooks faster and works perfectly with the garlic soy chicken and vegetables. Jasmine rice is especially delicious for an Asian-inspired bowl.

How do I know when the chicken is cooked?

The safest method is to check the thickest piece with a food thermometer. Chicken should reach an internal temperature of 165°F (74°C).

Can I make this recipe ahead of time?

Yes. This is an excellent meal-prep recipe. Prepare the rice, chicken, vegetables, and sauce, then divide everything into airtight containers.

How long do leftovers last?

Store leftovers in airtight containers in the refrigerator for up to 3 to 4 days. Reheat until hot before serving.

Can I freeze this recipe?

The cooked chicken and rice freeze well. However, vegetables such as asparagus and snap peas may become softer after freezing and reheating. For the best texture, prepare fresh vegetables when possible.

What can I use instead of oyster sauce?

Hoisin sauce can provide a sweeter alternative, while a combination of soy sauce and a small amount of honey can also work. The final flavor will be slightly different.

Is this recipe gluten-free?

It can be made gluten-free by using certified gluten-free soy sauce or tamari and checking that the oyster sauce and other packaged ingredients are also gluten-free.

Why is my sauce too thick?

Cornstarch thickens quickly when heated. Simply add a little chicken broth or water while stirring until the sauce reaches your preferred consistency.

Can I add more vegetables?

Yes. This recipe is very flexible. Bok choy, mushrooms, zucchini, edamame, spinach, and carrots are all excellent additions.

Nutrition

Approximate nutrition per serving, based on 6 servings:

Calories: 410 kcal

Protein: 27g

Carbohydrates: 51g

Fat: 12g

Saturated Fat: 2g

Fiber: 6g

Sugar: 7g

Sodium: 720mg

Cholesterol: 55mg

Nutrition values are approximate and can vary depending on the type of chicken, soy sauce, oyster sauce, rice, vegetables, and serving sizes used.

Conclusion

Garlic Soy Chicken & Green Veggie Brown Rice Bowl is a practical, flavorful recipe that turns simple ingredients into a colorful and satisfying meal. The savory garlic sauce gives the chicken and vegetables plenty of flavor, while the brown rice makes the bowl hearty and filling.

It is easy to customize with different vegetables, proteins, or grains, and it is especially useful for meal preparation. Whether you serve it fresh for dinner or pack it for lunch, this bowl offers a delicious combination of tender chicken, crisp vegetables, and wholesome brown rice.

#HealthyBowlRecipe
#ChickenAndVeggies
#BrownRiceRecipes
#HomemadeHealthyFood
#QuickDinnerIdeas

Healthy Zucchini Pizza Casserole

Healthy Zucchini Pizza Casserole

Healthy Zucchini Pizza Casserole is a delicious pizza-inspired meal made with a flavorful zucchini crust instead of traditional dough. The combination of fresh zucchini, seasoned meat, rich marinara sauce, and melted cheese creates a comforting casserole that is both satisfying and packed with wholesome ingredients. It is a great option for family dinners, meal prep, or anyone who wants to enjoy pizza flavors in a lighter way.

Prep Time: 25 minutes
Cook Time: 40 minutes
Resting Time: 10 minutes
Total Time: 1 hour 15 minutes
Servings: 8
Cuisine: Italian-American
Category: Main Course, Casserole, Low-Carb

Ingredients

Zucchini Crust Base

4 cups shredded zucchini, about 2 to 3 medium zucchinis, unpeeled

½ teaspoon salt

2 large eggs, beaten

½ cup grated Parmesan cheese

½ cup shredded mozzarella cheese

Savory Pizza Meat Filling

1 pound lean ground meat, such as lean ground beef, Italian sausage, or ground turkey

½ cup finely chopped onion

2 cloves garlic, minced

2 cups sugar-free marinara or pizza sauce

1 teaspoon Italian seasoning

½ teaspoon dried oregano

¼ teaspoon black pepper

Salt, to taste

½ cup chopped green or red bell peppers, optional

½ cup sliced mushrooms, optional

Cheese Topping & Garnish

1½ cups shredded mozzarella cheese, divided

1 cup shredded cheddar cheese

Fresh basil or parsley, chopped for garnish

Instructions

Preheat your oven to 400°F (200°C). Lightly grease a 9 × 13-inch baking dish with olive oil or cooking spray.

The most important step in making a successful zucchini pizza casserole is removing excess moisture from the zucchini. Place the shredded zucchini in a large bowl and sprinkle it with ½ teaspoon of salt. Mix gently and allow it to sit for approximately 10 to 15 minutes. The salt will draw moisture from the zucchini.

After resting, place the zucchini in a clean kitchen towel, cheesecloth, or several layers of paper towels. Squeeze firmly over the sink until as much liquid as possible has been removed. This step is essential because excess moisture can make the casserole soft and watery.

Return the squeezed zucchini to a clean bowl. Add the beaten eggs, grated Parmesan, and ½ cup shredded mozzarella. Mix until everything is evenly combined.

Transfer the zucchini mixture to the prepared baking dish and press it firmly into an even layer. Bake for approximately 18 to 20 minutes, or until the zucchini base is set and lightly golden around the edges.

While the zucchini crust is baking, prepare the savory pizza filling. Heat a large skillet over medium-high heat and add the ground meat. Cook while breaking it into small pieces.

When the meat is mostly cooked, add the chopped onion. Continue cooking for 3 to 4 minutes until the onion becomes soft. Add the minced garlic and cook for about 30 seconds until fragrant.

If you are using bell peppers or mushrooms, add them to the skillet and cook for several minutes until slightly softened. Drain any excess fat or liquid from the skillet if necessary.

Add the marinara or pizza sauce, Italian seasoning, dried oregano, black pepper, and salt to taste. Stir everything together and allow the mixture to simmer gently for approximately 5 minutes. The filling should be thick and flavorful rather than watery.

Remove the zucchini crust from the oven. Spread approximately ½ cup of shredded mozzarella over the baked zucchini base. Spoon the meat and sauce mixture evenly over the cheese.

Sprinkle the remaining mozzarella and all of the shredded cheddar cheese evenly over the top.

Return the casserole to the oven and bake at 400°F (200°C) for approximately 18 to 22 minutes, or until the cheese has completely melted and the casserole is bubbling around the edges.

For a beautifully golden pizza-like topping, switch the oven to broil for the final 1 to 2 minutes. Watch carefully because cheese can brown very quickly under the broiler.

Remove the casserole from the oven and allow it to rest for about 10 minutes before cutting. This gives the layers time to settle and makes serving much easier.

Garnish with freshly chopped basil or parsley and serve warm. Enjoy this casserole on its own or pair it with a fresh green salad for a complete meal.

Tips

Remove as much zucchini moisture as possible: This is the single most important tip. Zucchini naturally contains a lot of water, and squeezing it thoroughly helps create a firm and sliceable base.

Do not skip the pre-bake: Baking the zucchini mixture before adding the filling helps set the crust. If you add the sauce directly onto uncooked zucchini, the base may become too soft.

Use freshly shredded zucchini: Fresh zucchini has the best texture. Frozen shredded zucchini can also work, but it must be completely thawed and squeezed extremely well.

Press the crust evenly: Use the back of a spoon or clean hands to press the zucchini mixture into an even layer. A consistent thickness helps it bake evenly.

Choose lean ground meat: Lean ground beef, ground turkey, or chicken helps keep the casserole lighter. If you use sausage, drain excess fat after cooking.

Keep the filling thick: Watery sauce can make the zucchini base soggy. Simmer the meat sauce briefly to reduce excess liquid before layering it over the crust.

Shred your own cheese when possible: Freshly shredded mozzarella and cheddar usually melt more smoothly than pre-shredded cheese.

Let the casserole rest: Allowing the casserole to sit for about 10 minutes after baking makes it easier to cut clean portions.

Use a large enough baking dish: A 9 × 13-inch dish provides enough space for a thin, evenly cooked zucchini crust and generous layers of filling.

Season the meat properly: The zucchini base has a mild flavor, so the Italian seasoning, oregano, garlic, onion, and sauce help create the familiar flavor of a pizza.

Add toppings carefully: If adding vegetables with high water content, such as fresh tomatoes, cook or drain them first to avoid adding excess moisture.

Variations

Vegetarian Zucchini Pizza Casserole: Omit the ground meat and use mushrooms, bell peppers, onions, spinach, olives, and zucchini for a vegetable-packed version. Cook the vegetables first to remove excess moisture.

Pepperoni Pizza Casserole: Add sliced turkey pepperoni or regular pepperoni over the meat layer before adding the final cheese topping.

Chicken Pizza Casserole: Replace the ground meat with cooked shredded chicken. Mix the chicken with marinara sauce and Italian seasoning before layering.

Spicy Pizza Casserole: Add crushed red pepper flakes, sliced jalapeños, or spicy Italian sausage for extra heat.

Mediterranean Version: Use ground chicken or turkey and add olives, roasted red peppers, spinach, feta cheese, and oregano. Replace some of the mozzarella with crumbled feta.

Mushroom Lovers Version: Add extra sautéed mushrooms to the filling. Mushrooms provide a rich, savory flavor that works especially well with mozzarella and Parmesan.

Extra Veggie Version: Add finely chopped spinach, cooked broccoli, bell peppers, mushrooms, onions, or roasted eggplant. Always cook and drain vegetables that contain a lot of water.

Four Cheese Version: Add provolone, fontina, or Monterey Jack along with mozzarella, cheddar, and Parmesan for an extra-rich casserole.

Low-Fat Version: Use lean ground turkey, reduced-fat mozzarella, and a lighter marinara sauce. The casserole will still be flavorful while containing less saturated fat.

Meat Lovers Version: Combine lean ground beef with cooked sausage or turkey pepperoni for a more indulgent pizza-style casserole.

Q&A

Can I make this casserole ahead of time?

Yes. You can prepare and bake the zucchini crust and make the meat filling ahead. Store them separately in the refrigerator, then assemble and bake when ready. You can also assemble the entire casserole several hours ahead and refrigerate it before baking.

Why is my zucchini casserole watery?

The most common reason is not squeezing enough moisture from the shredded zucchini. Salt the zucchini, let it sit, and squeeze it very thoroughly before mixing it with the eggs and cheese.

Can I use frozen zucchini?

Yes, but thaw it completely first. Frozen zucchini releases even more water than fresh zucchini, so squeeze it very thoroughly.

Can I make this recipe without meat?

Absolutely. Use sautéed mushrooms, bell peppers, spinach, onions, olives, or other pizza vegetables instead.

Can I freeze Zucchini Pizza Casserole?

Yes. Allow the casserole to cool completely, divide it into portions, and store it in freezer-safe containers. Freeze for up to 2 months for the best quality.

How do I reheat leftovers?

Reheat individual portions in the microwave or warm larger portions in the oven at 350°F (175°C) until heated through.

Can I use another cheese instead of cheddar?

Yes. Provolone, Monterey Jack, fontina, or additional mozzarella can be used. Choose cheeses that melt well.

Is this casserole keto-friendly?

It can fit into a low-carb eating pattern because the zucchini base replaces a traditional flour crust. However, check the nutrition label on the marinara sauce and choose one without added sugar if you want to keep carbohydrates lower.

What should I serve with it?

A crisp green salad, roasted vegetables, garlic green beans, or a simple cucumber salad are excellent choices.

Can I add traditional pizza toppings?

Yes. Cooked sausage, pepperoni, olives, peppers, mushrooms, and onions all work well. Avoid adding large amounts of watery ingredients.

Nutrition

Approximate nutrition per serving, based on 8 servings:

Calories: 390 kcal
Protein: 28g
Carbohydrates: 11g
Fat: 26g
Saturated Fat: 12g
Fiber: 2g
Sugar: 6g
Sodium: 670mg
Cholesterol: 130mg

Nutrition values are estimates and can vary depending on the type of meat, marinara sauce, cheese, and serving size used.

Conclusion

This Healthy Zucchini Pizza Casserole proves that a vegetable-based meal can still be cheesy, hearty, and full of delicious flavor. By removing excess moisture from the zucchini and baking the base before adding the toppings, you can create a casserole with a tender but satisfying texture. Customize it with your favorite meats, vegetables, or pizza toppings and enjoy a comforting homemade meal that is perfect for any day of the week.

#ZucchiniRecipes
#HealthyCasserole
#PizzaInspired
#LowCarbRecipes
#FamilyDinner

Lemon & Garlic Chicken Bites Delicious

Lemon & Garlic Chicken Bites

If you’re looking for an easy chicken recipe that delivers plenty of flavor without requiring complicated ingredients, these Lemon & Garlic Chicken Bites are an excellent choice. Small pieces of chicken cook quickly in a hot skillet, creating a golden exterior while staying tender and juicy inside.

Fresh lemon adds a bright and refreshing flavor that balances the richness of the garlic butter beautifully. With simple herbs and seasonings, this dish comes together in very little time and can be paired with almost any side dish. Serve it with steamed rice, roasted potatoes, fresh vegetables, pasta, or a crisp salad for a delicious and satisfying homemade meal.

Prep Time: 15 minutes
Cook Time: 15 minutes
Total Time: 30 minutes
Servings: 4 to 6
Cuisine: American / Mediterranean-Inspired
Category: Main Course, Chicken

Ingredients

Main Ingredients

1½ lbs (700g) boneless, skinless chicken breasts or thighs, cut into 1-inch cubes

2 tablespoons olive oil or vegetable oil

2 tablespoons butter, unsalted or salted

4 to 6 cloves garlic, finely minced

1 medium lemon, using both the juice and zest

Seasoning Blend

1 teaspoon Italian seasoning

¾ teaspoon salt, or to taste

½ teaspoon black pepper

½ teaspoon paprika, optional

Garnish

1 tablespoon fresh flat-leaf parsley, finely chopped

Instructions

Start by preparing the chicken. Pat the chicken dry with paper towels before cutting it into approximately 1-inch cubes. Dry chicken browns much better in the skillet and develops a beautiful golden exterior.

Place the chicken pieces in a large bowl. Add the Italian seasoning, salt, black pepper, and paprika. Toss everything together until all the chicken pieces are evenly coated with the seasoning.

Heat the olive oil in a large skillet over medium-high heat. Allow the skillet to become properly hot before adding the chicken. A hot pan helps create a golden crust instead of steaming the chicken.

Add the chicken bites to the skillet in a single layer. Avoid overcrowding the pan because too many pieces will release moisture and prevent proper browning. If necessary, cook the chicken in two batches.

Cook the chicken for approximately 6 to 8 minutes, turning the pieces occasionally so they brown on several sides. The exact cooking time will depend on the size of the chicken pieces. The chicken should be golden on the outside and cooked through, reaching an internal temperature of 165°F (74°C).

Once the chicken is cooked, reduce the heat to medium-low. Add the butter to the skillet and allow it to melt around the chicken.

Add the finely minced garlic and stir continuously for about 30 to 60 seconds. Garlic can burn quickly, so keep the heat moderate and do not leave it unattended. The garlic should become fragrant without turning dark brown.

Add the fresh lemon juice and lemon zest. Toss the chicken bites well so every piece becomes coated in the buttery lemon-garlic sauce. Allow the mixture to cook for another 1 to 2 minutes, letting the sauce lightly coat the chicken.

Taste and adjust the seasoning if necessary. Add a little more salt, black pepper, or lemon juice according to your preference.

Remove the skillet from the heat and sprinkle the chicken with freshly chopped parsley. Serve immediately while the chicken is warm and the lemon garlic butter sauce is fresh and glossy.

These chicken bites are delicious served over fluffy rice, creamy mashed potatoes, buttered pasta, couscous, or quinoa. They also make a fantastic filling for wraps, sandwiches, and grain bowls.

Tips

Pat the chicken dry first: Moisture is one of the biggest reasons chicken fails to brown properly. Use paper towels to remove excess moisture before seasoning the chicken. This simple step helps create beautifully golden chicken bites.

Cut the chicken evenly: Try to cut all the chicken pieces into similar sizes. Even pieces cook at approximately the same rate, helping you avoid some pieces becoming dry while others remain undercooked.

Do not overcrowd the skillet: Give the chicken enough room to cook. Overcrowding causes the temperature of the skillet to drop and the chicken will steam in its own juices rather than develop a flavorful golden crust.

Use medium-high heat for browning: High enough heat creates color and flavor, but extremely high heat can burn the spices or dry out the chicken. Medium-high heat usually provides the best balance.

Add garlic after cooking the chicken: Garlic cooks very quickly. Adding it at the beginning may cause it to burn before the chicken finishes cooking. Adding it near the end gives you fresh, aromatic garlic flavor.

Use fresh lemon whenever possible: Fresh lemon juice and zest give this recipe its bright, natural flavor. Bottled lemon juice can work in an emergency, but fresh lemon provides a much better result.

Zest the lemon before juicing: It is much easier to zest a whole lemon than one that has already been squeezed. Use only the bright yellow outer layer and avoid the bitter white pith underneath.

Do not overcook the chicken: Chicken breasts are lean and can become dry if cooked for too long. Check the internal temperature and remove the chicken once it reaches 165°F (74°C).

Choose chicken thighs for extra juiciness: Boneless chicken thighs contain slightly more fat and remain very tender. They are an excellent choice if you prefer richer, juicier chicken bites.

Adjust the lemon flavor: Start with the juice of one medium lemon. If you love a stronger citrus flavor, add a little extra juice at the end. For a milder flavor, use only half the lemon juice and keep the zest.

Serve immediately: The buttery sauce is at its best when freshly made. If it thickens while sitting, gently reheat the chicken with a small splash of water or chicken broth.

Variations

Spicy Lemon Garlic Chicken Bites: Add ½ teaspoon of crushed red pepper flakes, cayenne pepper, or your favorite chili seasoning. The combination of spicy heat and bright lemon creates a delicious contrast.

Creamy Lemon Garlic Chicken: After adding the lemon juice, stir in ½ cup of heavy cream and simmer gently for a few minutes. This creates a rich, creamy sauce that is excellent with pasta or mashed potatoes.

Honey Lemon Garlic Chicken: Add 1 to 2 tablespoons of honey along with the lemon juice. The honey balances the acidity and creates a sweet and savory glaze around the chicken.

Air Fryer Version: Season the chicken as directed and lightly coat the air fryer basket with oil. Air fry at 400°F (200°C) for approximately 10 to 12 minutes, shaking the basket halfway through. Prepare the garlic, butter, and lemon sauce in a skillet and toss the cooked chicken in the sauce before serving.

Dairy-Free Version: Replace the butter with additional olive oil or a plant-based butter alternative. The chicken will still have plenty of garlic and lemon flavor.

Herb Lemon Chicken: Add fresh thyme, oregano, rosemary, or basil along with the parsley. Fresh herbs give the dish a more Mediterranean-style flavor.

Lemon Garlic Chicken and Vegetables: Add zucchini, asparagus, broccoli, bell peppers, or green beans to the skillet. Cook the vegetables separately or remove the chicken temporarily to ensure everything cooks evenly.

Parmesan Lemon Chicken: Sprinkle freshly grated Parmesan over the finished chicken just before serving. Parmesan adds a salty, savory flavor that pairs beautifully with garlic and lemon.

Lemon Garlic Chicken Pasta: Toss the finished chicken bites with cooked spaghetti, linguine, penne, or fettuccine. Add a little pasta water if needed to help the lemon butter sauce coat the pasta.

Low-Carb Version: Serve the chicken with cauliflower rice, zucchini noodles, roasted broccoli, or a large green salad instead of traditional pasta or rice.

Q&A

Can I use chicken thighs instead of chicken breasts?

Yes. Boneless, skinless chicken thighs work wonderfully in this recipe. They are naturally juicy and flavorful and are less likely to dry out during cooking.

How do I know when the chicken bites are fully cooked?

The safest method is to use a meat thermometer. The thickest part of the chicken should reach 165°F (74°C).

Can I prepare Lemon & Garlic Chicken Bites ahead of time?

Yes. You can cut and season the chicken several hours ahead and keep it covered in the refrigerator. Cook it fresh when you are ready to serve for the best texture.

Can I store leftovers?

Yes. Store cooled leftovers in an airtight container in the refrigerator for up to 3 days. Reheat gently in a skillet or microwave until hot.

Can I freeze the cooked chicken?

Yes. Allow the chicken to cool completely, then store it in a freezer-safe container. Freeze for up to 2 months for the best quality. Thaw overnight in the refrigerator before reheating.

Why did my chicken release so much water?

This usually happens when the skillet is overcrowded, the chicken was not dried properly, or the pan was not hot enough. Cook in batches if necessary.

Can I make this recipe without butter?

Absolutely. Use olive oil or a dairy-free butter substitute. The recipe will still have delicious lemon and garlic flavor.

What should I serve with Lemon Garlic Chicken Bites?

Rice, roasted potatoes, mashed potatoes, pasta, couscous, quinoa, steamed vegetables, roasted broccoli, asparagus, or a fresh salad all work beautifully.

Can I use bottled lemon juice?

Fresh lemon juice is recommended for the best flavor, especially because this recipe also uses lemon zest. However, bottled lemon juice can be used if fresh lemons are unavailable.

Nutrition

Approximate nutrition per serving, based on 6 servings:

Calories: 290 kcal
Protein: 33g
Carbohydrates: 3g
Fat: 16g
Saturated Fat: 5g
Fiber: 1g
Sugar: 1g
Sodium: 430mg
Cholesterol: 110mg

These nutrition values are approximate and may vary depending on the type of chicken used, the amount of butter and oil, and the exact serving size.

Conclusion

Lemon & Garlic Chicken Bites are proof that a simple combination of fresh ingredients can create an incredibly delicious meal. The golden chicken, aromatic garlic, buttery sauce, and fresh citrus come together to create a dish that is both comforting and refreshing.

This recipe is easy enough for a busy weekday but flavorful enough to serve when you want something special. You can also customize it by adding chili for heat, vegetables for extra nutrition, or your favorite herbs for a different flavor. Serve the chicken fresh from the skillet and enjoy every bite with your favorite side dish.

#LemonChickenRecipe
#GarlicChicken
#EasyChickenDinner
#QuickDinnerIdeas
#HomemadeMeals

Cottage Cheese Chicken, Mushroom & Spinach Casserole

Cottage Cheese Chicken, Mushroom & Spinach Casserole

Description

This hearty baked casserole combines juicy chicken, sautéed mushrooms, and nutritious spinach in a creamy cottage cheese sauce, topped with melted cheese for a golden finish. It’s high in protein, low in carbs, and perfect for a comforting yet balanced meal.

Time Required

Prep time: 15 minutes

Cook time: 30–35 minutes

Total time: 45–50 minutes

Servings: 4–6

Ingredients

2 cups cooked chicken (shredded or diced)

1 cup cottage cheese (full-fat or low-fat)

1½ cups mushrooms (sliced)

2 cups fresh spinach (or 1 cup frozen, thawed & drained)

1 cup shredded mozzarella or cheddar cheese

½ cup grated Parmesan cheese

Flavor Base

1 small onion (finely chopped)

2 cloves garlic (minced)

1 tbsp olive oil or butter

Creamy Mixture

½ cup milk or cream

1 egg (optional, for structure)

½ tsp salt

½ tsp black pepper

½ tsp dried oregano or Italian seasoning

½ tsp paprika (optional)

Instructions

Prepare oven

Preheat oven to 180°C (350°F).

Lightly grease a baking dish.

Cook vegetables

Heat oil in a pan over medium heat.

Sauté onion until soft (3–4 minutes).

Add mushrooms and cook until browned.

Stir in garlic and spinach and cook until wilted.

Remove from heat.

Make creamy mixture

In a large bowl, combine:

Cottage cheese

Milk or cream

Egg (if using)

Salt, pepper, paprika, oregano

Mix until smooth.

Assemble casserole

Add cooked chicken and sautéed vegetables to the bowl.

Mix well.

Transfer to baking dish.

Top with mozzarella and Parmesan.

Bake

Bake uncovered for 30–35 minutes until bubbly and golden.

Rest 5–10 minutes before serving.

Serving Suggestions

Serve with garlic bread or toasted flatbread.

Pair with a fresh cucumber or green salad.

Great with brown rice or quinoa if you want a fuller meal.

Tips & Variations

Add cooked pasta or rice for a heartier casserole.

Use rotisserie chicken for quick prep.

Add chili flakes for heat.

Swap mushrooms for broccoli or zucchini.

Use Greek yogurt instead of some cottage cheese for extra creaminess.

Frequently Asked Questions

Can I make this ahead of time?

Yes — assemble, cover, and refrigerate up to 24 hours before baking.

Can I freeze this casserole?

Yes. Freeze before or after baking for up to 2 months. Thaw overnight before reheating.

Can I skip the egg?

Yes. The casserole will be slightly softer but still delicious.

How do I reduce moisture?

Drain spinach well and cook mushrooms until water evaporates.

Nutritional Information (Approx. per serving)

Calories: 320–380 kcal

Protein: 35–40 g

Carbohydrates: 8–12 g

Fat: 16–20 g

Fiber: 2–3 g