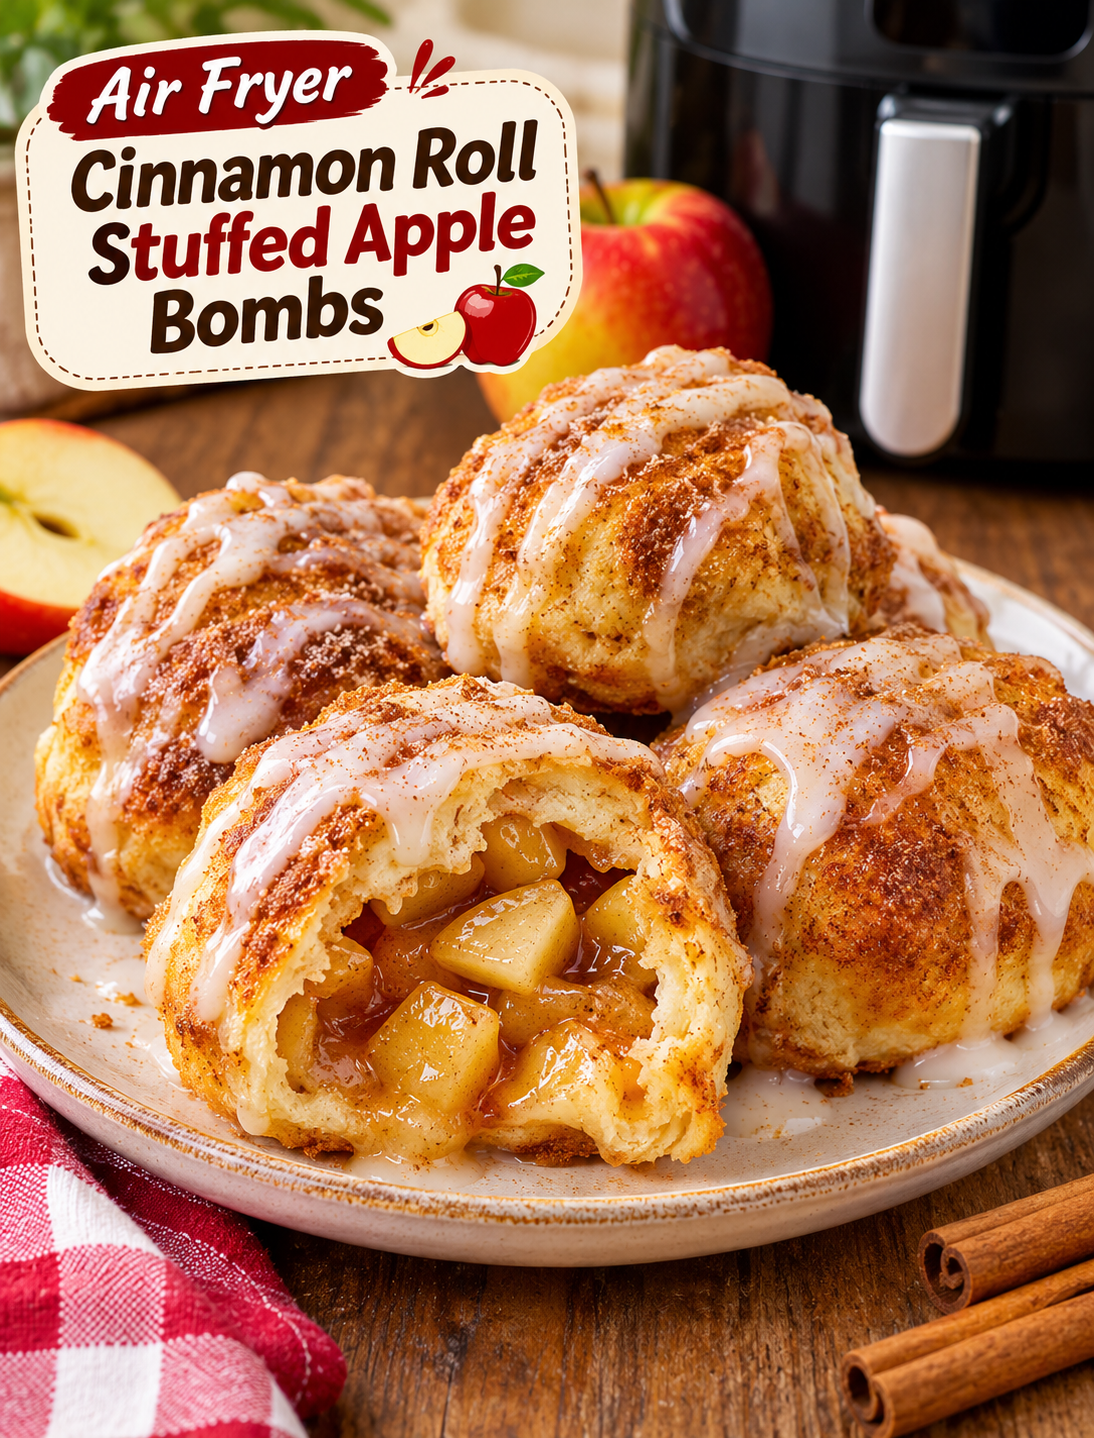
Air Fryer Cinnamon Roll Stuffed Apple Bombs

Air Fryer Cinnamon Roll Stuffed Apple Bombs

Looking for a sweet treat that combines the cozy flavor of apple pie with soft, fluffy cinnamon rolls? These Air Fryer Cinnamon Roll Stuffed Apple Bombs are just what you need!

Each bite features tender cinnamon-spiced apples wrapped in soft cinnamon roll dough, cooked until golden, and finished with melted butter, cinnamon sugar, and sweet vanilla icing. They taste like little homemade apple pies without the extra work of preparing pastry from scratch.

The best part is that this recipe uses refrigerated cinnamon roll dough and simple kitchen ingredients. Your air fryer does most of the work, making these apple-filled treats perfect for busy mornings, weekend desserts, fall gatherings, and holiday celebrations.

Serve them warm with caramel sauce or a scoop of vanilla ice cream for a dessert everyone will love.

Recipe Details

  • Preparation Time: 15 minutes
  • Apple Filling Time: 7 minutes
  • Cooking Time: 8–11 minutes per batch
  • Total Time: Approximately 35 minutes
  • Servings: 8 apple bombs
  • Course: Dessert
  • Cuisine: American
  • Cooking Method: Air Frying
  • Temperature: 320°F

Ingredients

For the Apple Filling

  • 2 medium apples, peeled, cored, and diced
  • 2 tablespoons brown sugar
  • 1 teaspoon ground cinnamon
  • ½ teaspoon vanilla extract
  • 1 teaspoon cornstarch
  • 1 tablespoon water
  • 1 teaspoon cold water for mixing the cornstarch

For the Apple Bombs

  • 1 can refrigerated cinnamon roll dough (8 rolls)
  • 2 tablespoons unsalted butter, melted
  • 2 tablespoons granulated sugar
  • ¼ teaspoon ground cinnamon
  • 1 packet of included cinnamon roll icing

Equipment Needed

  • Air fryer
  • Small saucepan
  • Mixing bowls
  • Measuring spoons
  • Sharp knife
  • Cutting board
  • Pastry brush
  • Air fryer-safe perforated parchment paper (optional)

Instructions

Step 1: Prepare the Apples

Peel both apples and remove their cores. Cut them into small, evenly sized cubes so they fit easily inside the cinnamon roll dough. Honeycrisp and Granny Smith apples are excellent choices because they hold their shape during cooking.

Step 2: Cook the Cinnamon Apple Filling

Add the diced apples, brown sugar, cinnamon, vanilla extract, and 1 tablespoon of water to a small saucepan. Cook over medium-low heat for 4–5 minutes, stirring occasionally, until the apples begin to soften.

Step 3: Thicken the Filling

Mix 1 teaspoon of cornstarch with 1 teaspoon of cold water in a small bowl. Pour this mixture into the saucepan and stir for 1–2 minutes until the apple juices become slightly thick. Remove from heat and allow the filling to cool completely.

Step 4: Prepare the Cinnamon Roll Dough

Open the refrigerated cinnamon roll package and separate all eight rolls. Place each roll on a clean surface and gently flatten it into a small round disc using your fingers. Keep the center slightly thicker to support the filling.

Step 5: Fill the Cinnamon Roll Dough

Place approximately 1 tablespoon of cooled cinnamon apple filling in the center of each dough disc. Keep the filling away from the edges to make sealing easier. Avoid overfilling because excess filling can leak during cooking.

Step 6: Shape and Seal the Apple Bombs

Bring the edges of each dough disc together over the apple filling. Pinch the edges firmly to seal the opening. Gently roll each piece between your palms to form a smooth ball. Place each ball seam-side down.

Step 7: Preheat the Air Fryer

Preheat your air fryer to 320°F for approximately 3 minutes. Lightly grease the basket if needed or use perforated air fryer parchment paper. Make sure the paper does not block the airflow.

Step 8: Arrange the Apple Bombs

Place the stuffed cinnamon roll balls in the air fryer basket in a single layer. Leave enough space between them for hot air to circulate. Cook in batches if necessary to prevent overcrowding.

Step 9: Air Fry Until Golden

Cook at 320°F for 8–11 minutes. Start checking after 7–8 minutes because cooking times vary between air fryer models. The outside should become golden brown, and the dough should be fully cooked in the center.

Step 10: Prepare the Cinnamon Sugar Coating

Combine the granulated sugar and ¼ teaspoon of ground cinnamon in a small bowl. Brush the warm apple bombs lightly with melted butter, then roll or sprinkle them with the cinnamon sugar mixture.

Step 11: Add the Vanilla Icing

Allow the apple bombs to cool for 2–3 minutes. Warm the included cinnamon roll icing slightly if needed. Drizzle it over the tops of the pastries for a sweet finishing touch.

Step 12: Serve and Enjoy

Transfer the finished apple bombs to a serving plate. Serve warm with caramel sauce, whipped cream, or vanilla ice cream. Enjoy them fresh while the dough is soft and the apple filling is tender.

Nutrition Information

Estimated nutrition per serving (1 apple bomb):

  • Calories: 220 kcal
  • Carbohydrates: 35g
  • Protein: 3g
  • Fat: 8g
  • Saturated Fat: 4g
  • Fiber: 2g
  • Sugar: 18g
  • Sodium: 230mg

Nutrition values are estimates and may vary depending on the cinnamon roll brand, apple variety, and amount of icing used.

Recipe Notes and Tips

  • Use firm apples: Honeycrisp and Granny Smith provide excellent flavor and texture.
  • Cool the filling completely: Warm filling can make the dough sticky and difficult to seal.
  • Keep apple pieces small: Smaller pieces fit better and cook more evenly.
  • Don’t overfill: Approximately 1 tablespoon of filling per roll is enough.
  • Seal the dough carefully: Pinch all edges firmly to prevent leaks.
  • Avoid overcrowding: Cook in batches to allow proper air circulation.
  • Check the center: Golden pastry does not always mean the dough is fully cooked.
  • Adjust cooking time: Different air fryer models may require slightly more or less time.

Storage and Reheating

Refrigerator: Allow leftover apple bombs to cool completely. Store them in an airtight container in the refrigerator for up to 3 days.

Freezer: Freeze the cooled apple bombs in a single layer before transferring them to a freezer-safe container. For the best quality, use within 2 months.

Reheating: Place refrigerated apple bombs in the air fryer at 300°F for 2–4 minutes until warmed through. Avoid overheating because the dough can become dry.

Frequently Asked Questions

1. Can I use canned apple pie filling?

Yes. Chop the apple pieces into smaller chunks and drain excess syrup before filling the cinnamon roll dough.

2. What apples work best for this recipe?

Honeycrisp, Granny Smith, Gala, and Fuji apples are excellent choices for their flavor and texture.

3. Can I prepare these apple bombs ahead of time?

Yes. Assemble them a few hours ahead, cover, and refrigerate until you’re ready to air fry.

4. Why is my cinnamon roll dough leaking?

Overfilling or poorly sealed edges can cause leaks. Use cooled filling and pinch the dough firmly.

5. Can I make these without icing?

Absolutely! Cinnamon sugar, caramel sauce, or powdered sugar makes a delicious alternative.

6. How do I know when the apple bombs are done?

The outside should be golden brown, and the dough should be fully baked in the center without raw or sticky spots.

7. Can I reheat leftover apple bombs?

Yes. Reheat them in an air fryer at 300°F for 2–4 minutes until warm.

8. Can I use homemade cinnamon roll dough?

Yes. Homemade dough works well, but cooking time may vary depending on its thickness and ingredients.

Final Thoughts

These Air Fryer Cinnamon Roll Stuffed Apple Bombs bring together everything you love about cinnamon rolls and homemade apple pie in one easy dessert. The sweet apple filling, warm cinnamon flavor, golden dough, and vanilla icing make them a wonderful treat for any occasion.

Make a batch for your next family gathering, fall celebration, or weekend dessert. Serve them warm with your favorite topping and enjoy every delicious bite!

Have you tried making apple-filled cinnamon rolls in your air fryer? Leave a comment and tell us whether you prefer caramel sauce or vanilla icing. Don’t forget to share this recipe with your friends and family!
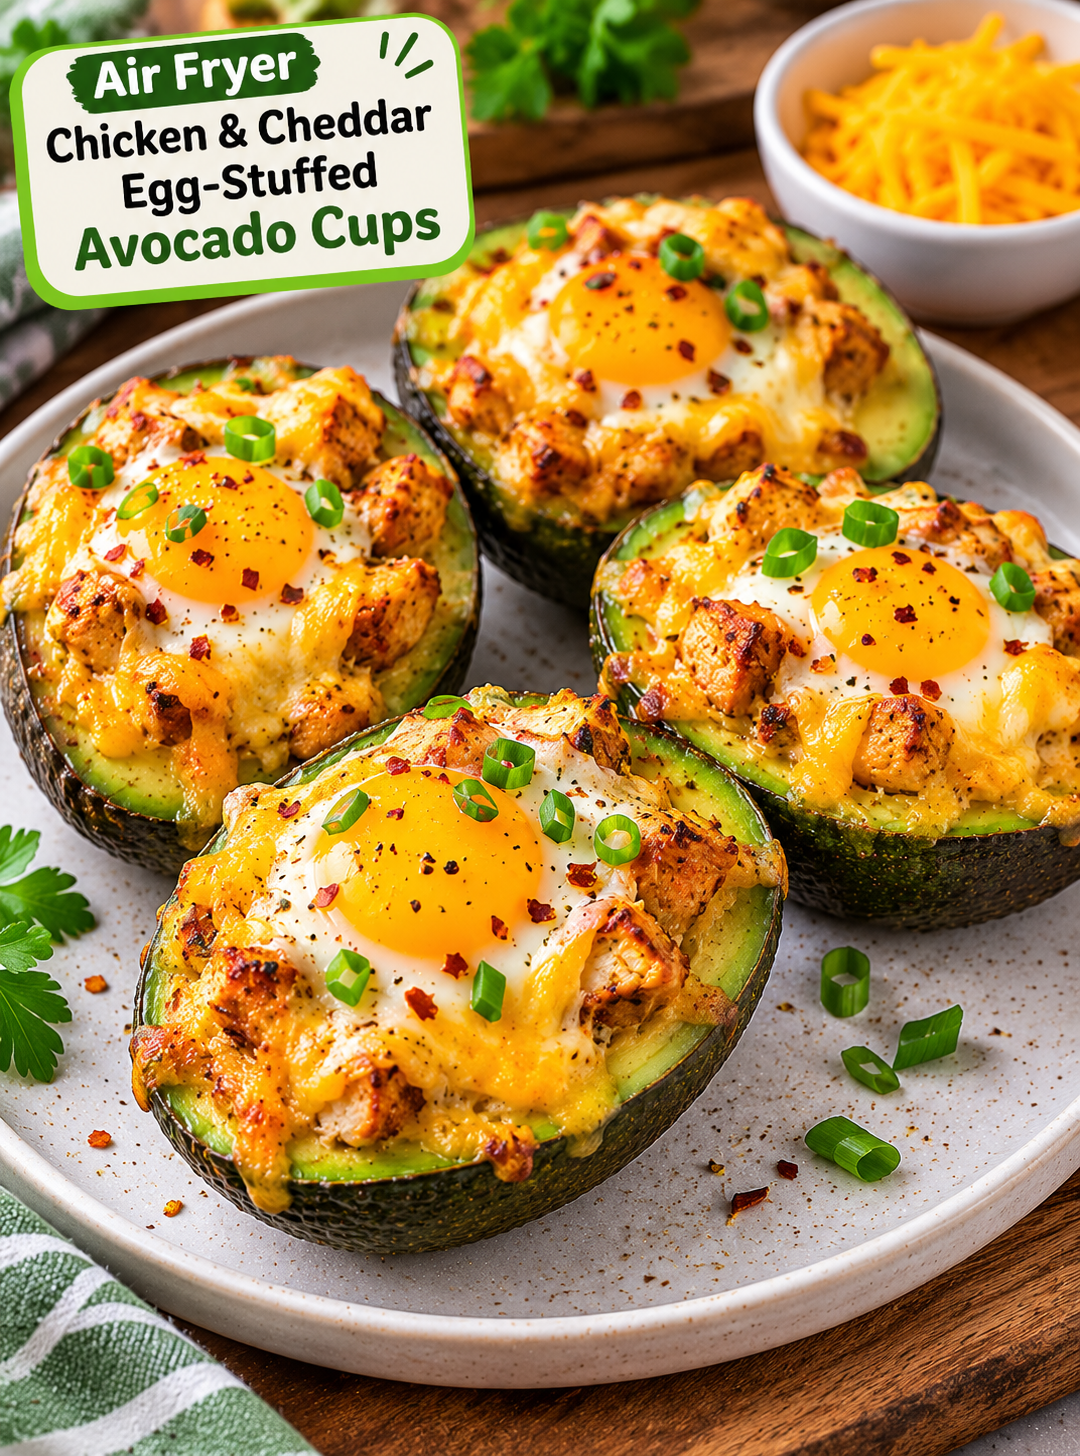
 

Air Fryer Crispy Chicken & Cheddar Egg-Stuffed Avocado Cups

Air Fryer Crispy Chicken & Cheddar Egg-Stuffed Avocado Cups

If you love crispy chicken, melted cheese, and creamy avocado, these Air Fryer Crispy Chicken & Cheddar Egg-Stuffed Avocado Cups are worth trying. Each avocado half holds a savory filling of crispy chicken, a perfectly cooked egg, and sharp cheddar cheese. The air fryer brings everything together with less mess and no need to heat up your oven.

This recipe is a delicious choice for breakfast, brunch, or a quick lunch. It combines protein-rich ingredients with healthy fats from fresh avocado, creating a satisfying meal in a small serving.

You can also use leftover cooked chicken to save time. Add your favorite seasonings, prepare the avocado halves, and let the air fryer handle the cooking. The result is a warm, cheesy dish with creamy avocado and flavorful chicken in every bite.

Why You’ll Love These Crispy Chicken Avocado Cups

These stuffed avocado cups are easy to prepare and simple to customize.

  • Quick air fryer cooking: The air fryer cooks the filling without requiring a full-size oven.
  • Crispy chicken flavor: Seasoned chicken adds a savory bite that pairs well with creamy avocado.
  • Melted cheddar cheese: Sharp cheddar gives the filling a rich, cheesy finish.
  • Protein-packed ingredients: Chicken, egg, and cheese contribute protein to the meal.
  • Naturally low in carbohydrates: Avocado and chicken make a filling combination without bread or tortillas.
  • Easy to customize: Add jalapeños, green onions, or your favorite spices.
  • Great for breakfast or lunch: Serve these cups on their own or with a fresh side salad.

Fresh Ingredients You’ll Need

Choose ripe but firm avocados so they hold their shape during air frying. Prepare all the ingredients before assembling the cups.

For the Avocado Cups

  • 2 medium avocados: Choose ripe avocados that are slightly soft but not mushy.
  • 4 small eggs: Small eggs fit more easily inside avocado halves. You may not need all the egg white if the cavities are small.
  • 1 cup cooked crispy chicken: Use finely chopped air-fried or baked chicken pieces.
  • 1/2 cup shredded sharp cheddar cheese: Cheddar melts well and adds a bold flavor.
  • 1 tablespoon olive oil: A light coating helps prevent sticking.
  • 2 tablespoons chopped green onions: These add a fresh, mild onion flavor.
  • 1/4 teaspoon garlic powder: Adds savory flavor to the filling.
  • 1/4 teaspoon smoked paprika: Gives the chicken a warm, smoky taste.
  • Salt and black pepper: Season to taste.

Optional Toppings

  • Chopped fresh parsley
  • A pinch of red pepper flakes
  • Diced jalapeños
  • A little hot sauce
  • Extra shredded cheddar

Ingredient Tip: If using leftover chicken, make sure it is fully cooked and has been stored safely. Chop it into small pieces so it fits neatly inside the avocado halves.

How to Make Air Fryer Crispy Chicken & Cheddar Egg-Stuffed Avocado Cups Step by Step

Follow these simple steps to prepare evenly filled avocado cups with melted cheese and properly cooked eggs.

Step 1: Prepare the Air Fryer

Preheat your air fryer to 325°F for about 3 minutes, following your appliance instructions.

Lightly grease a small air fryer-safe dish or line the basket with an approved perforated parchment liner. Make sure the liner does not block airflow or touch the heating element.

Step 2: Prepare the Avocados

Wash and dry the avocados. Slice each avocado lengthwise and carefully remove the pit.

Use a spoon to scoop out a little flesh from the center of each half. Make enough room for the chicken, egg, and cheese without breaking the avocado skin.

Brush the cut surfaces lightly with olive oil. Season with a small amount of salt and black pepper.

Step 3: Season the Crispy Chicken

Place the cooked chicken pieces in a small bowl.

Add garlic powder, smoked paprika, black pepper, and a little salt. Toss until the chicken is evenly coated.

If your chicken is already seasoned, adjust the extra salt to avoid making the filling too salty.

Step 4: Fill the Avocado Halves with Chicken

Arrange the avocado halves in a small air fryer-safe dish so they sit upright.

Divide the seasoned chicken evenly between the four avocado halves. Press the pieces gently into the center, leaving enough room for the egg.

Avoid overfilling the avocado cups because the egg needs space to cook.

Step 5: Add the Eggs

Carefully crack one small egg into each avocado half.

If the avocado cavity is too small, separate the egg and add only enough egg white to fit, followed by the yolk. Save any extra egg for another recipe.

Keep the eggs inside the avocado cavities to reduce spilling during cooking.

Step 6: Add Cheddar Cheese

Sprinkle shredded cheddar around the chicken and egg filling.

Keep most of the cheese near the edges so the egg yolk remains visible. Add a little extra cheese if you prefer a richer, cheesier topping.

Finish with a light sprinkle of smoked paprika or black pepper.

Step 7: Air Fry Until the Eggs Are Set

Carefully place the dish in the air fryer basket.

Air fry at 325°F for approximately 8–12 minutes. Cooking time depends on the size of the eggs, avocado halves, and your air fryer model.

Check the cups near the end of cooking. The egg whites should be fully set, and the cheese should be melted.

For food safety, cook the eggs until both the whites and yolks are firm. Use a food thermometer if needed; egg dishes should reach 160°F in the center.

Step 8: Garnish and Serve

Carefully remove the dish from the air fryer and let the avocado cups rest for 2 minutes.

Sprinkle chopped green onions or fresh parsley over the top. Add red pepper flakes or hot sauce if you enjoy a little heat.

Serve warm while the cheddar is melted and the avocado is creamy.

Helpful Tips for Perfect Stuffed Avocado Cups

A few simple adjustments can help you get better results every time.

  • Choose firm-ripe avocados: Very soft avocados may collapse during cooking.
  • Use small eggs: They fit better inside avocado halves and are less likely to overflow.
  • Chop chicken finely: Smaller pieces are easier to arrange around the egg.
  • Secure the avocado halves: Place them in a small oven-safe dish or suitable ramekins so they stay upright.
  • Avoid overfilling: Leave enough room for the egg to cook without spilling.
  • Check your air fryer early: Some models cook faster than others.
  • Use freshly shredded cheese: It melts smoothly and gives the cups a better texture.
  • Serve immediately: Avocado tastes best fresh and may darken after cutting.

Delicious Ways to Serve Chicken and Egg Avocado Cups

These savory avocado cups can be served in several ways depending on the meal.

  • For breakfast: Pair one or two cups with fresh berries and black coffee.
  • For brunch: Serve with roasted tomatoes, cucumber slices, or a simple green salad.
  • For lunch: Add a side of grilled vegetables or a light chicken soup.
  • For a low-carb meal: Enjoy the cups with leafy greens and a lemon dressing.
  • For extra flavor: Add salsa, hot sauce, or a spoonful of plain Greek yogurt.
  • For a filling plate: Serve with roasted sweet potato wedges or whole-grain toast.

Easy Storage and Reheating Instructions

These avocado cups are best enjoyed fresh because avocado can change color and texture after storage. If you have leftovers, follow these guidelines.

Refrigerator: Let the cups cool, then place them in an airtight container. Refrigerate within 2 hours and eat within 1–2 days for best quality.

Reheating: Reheat in an air fryer at 300°F for a few minutes until warmed through. Check the center before serving. The avocado may become softer after reheating.

Freezing: Freezing is not recommended. Avocado can become watery and mushy after thawing, while cooked eggs may develop a rubbery texture.

Meal Prep Tip: Cook and season the chicken ahead of time. Store it in the refrigerator, then prepare and fill the avocados just before cooking for the freshest result.

Nutrition Information

The following values are estimates for one avocado half, assuming the recipe makes four cups. Actual nutrition depends on the chicken, cheese, egg size, and avocado used.

  • Serving Size: 1 stuffed avocado half
  • Calories: Approximately 250–300
  • Protein: Approximately 16–20g
  • Carbohydrates: Approximately 8–10g
  • Fat: Approximately 17–21g
  • Fiber: Approximately 5–7g

For accurate nutrition information, calculate the recipe using the exact brands and ingredient quantities you use.

Frequently Asked Questions

1. Can I use leftover chicken for this recipe?

Yes. Fully cooked leftover chicken works well when chopped into small pieces and seasoned before filling.

2. What temperature should I use in the air fryer?

Start at 325°F and adjust the cooking time based on your air fryer and egg size.

3. How do I stop the eggs from spilling out?

Use small eggs, scoop enough space in each avocado, and keep the halves upright in an air fryer-safe dish.

4. Can I use a different cheese?

Yes. Monterey Jack, mozzarella, or pepper jack are good alternatives to cheddar.

5. How do I know when the eggs are cooked?

The egg whites and yolks should be firm. For food safety, the center should reach 160°F.

6. Can I make these avocado cups spicy?

Yes. Add diced jalapeños, cayenne pepper, red pepper flakes, or your favorite hot sauce.

7. Are these avocado cups good for meal prep?

They are best prepared fresh, but you can cook and season the chicken ahead of time to make assembly quicker.

8. Can I make this recipe without an air fryer?

Yes. Arrange the filled avocado halves in a small oven-safe dish and bake at 350°F until the eggs are fully set.

Final Thoughts

Air Fryer Crispy Chicken & Cheddar Egg-Stuffed Avocado Cups bring together creamy avocado, savory chicken, and melted cheddar in one easy meal. They are simple enough for a weekday breakfast and tasty enough to serve at weekend brunch.

Prepare the chicken ahead of time, use small eggs, and keep the avocado halves steady while cooking. Serve them warm with your favorite toppings for a satisfying homemade meal.

Important recipe note: Article mein cooking time ko approximate rakha gaya hai kyun ke air fryer models aur egg sizes different hote hain. Publish karne se pehle test batch bana kar timing aur nutrition values verify kar lena.

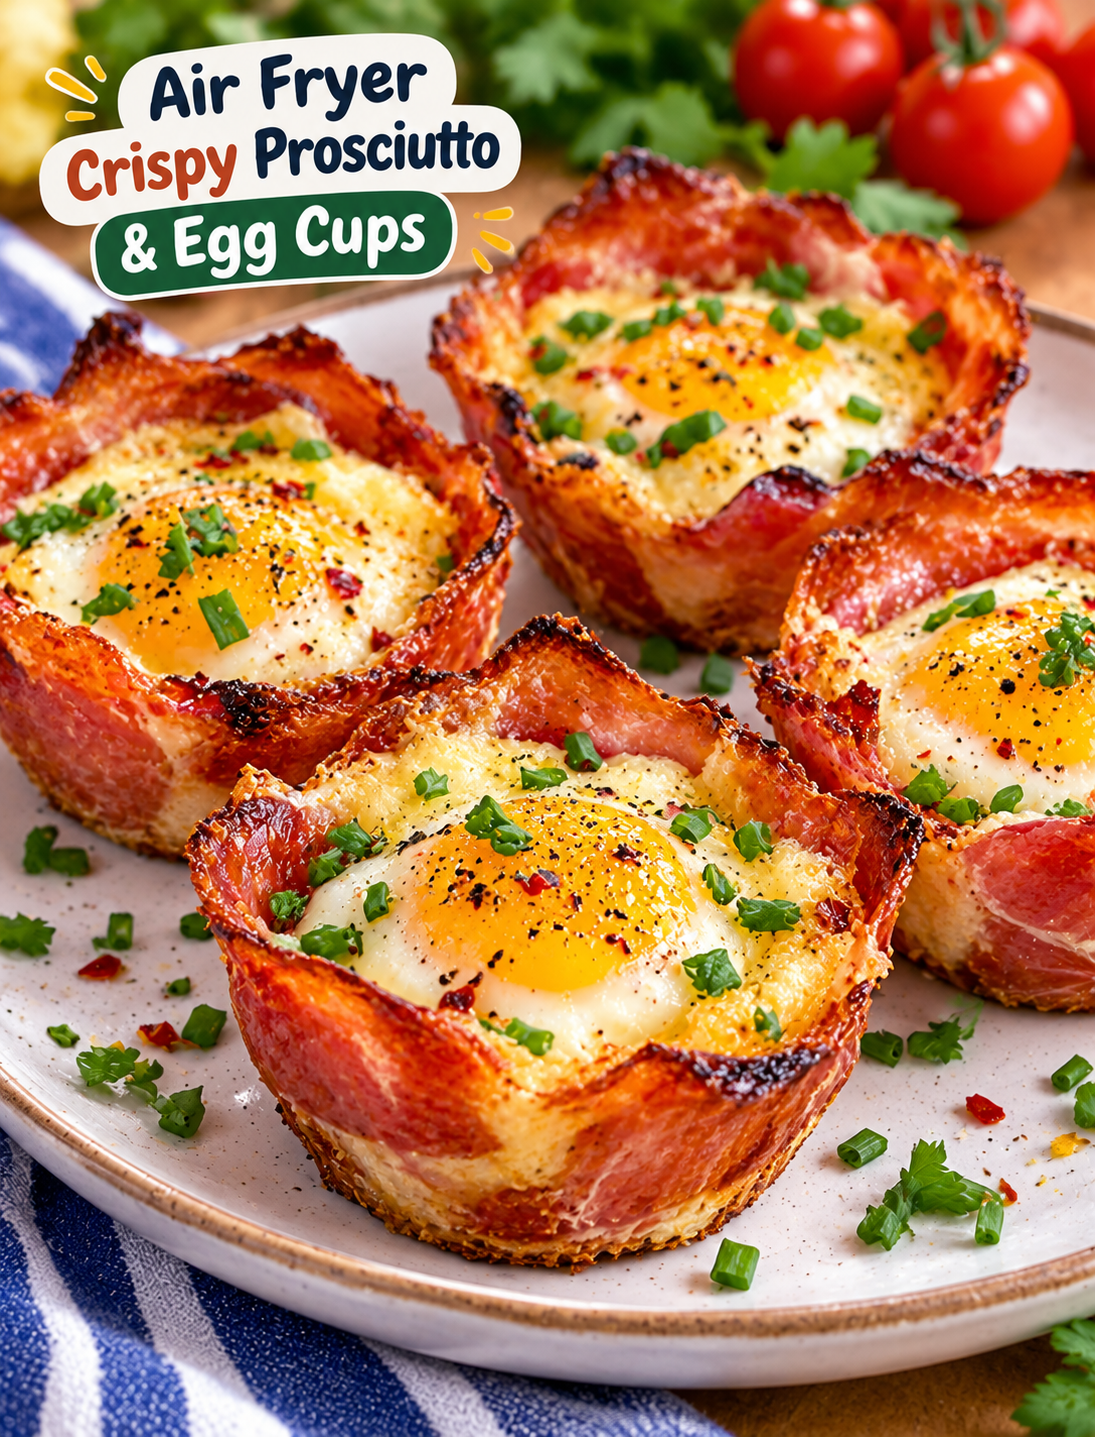
Air Fryer Crispy Prosciutto & Egg Cups

Air Fryer Crispy Prosciutto & Egg Cups

Start your morning with something crispy, savory, and satisfying! These Air Fryer Crispy Prosciutto & Egg Cups turn simple breakfast ingredients into delicious little bites. Each cup features thin, salty prosciutto wrapped around a perfectly cooked egg, with optional melted cheese and fresh herbs for extra flavor.

The air fryer makes this breakfast easy without needing a large oven or complicated cooking steps. The prosciutto becomes golden and crisp around the edges while the egg cooks inside its little meat cup.

These breakfast cups are perfect for busy weekday mornings, weekend brunch, or a quick protein-rich breakfast. You can prepare several at once and customize each cup with your favorite cheese, vegetables, or seasonings.

Whether you enjoy a simple egg breakfast or want something different for your morning routine, these crispy prosciutto cups are worth adding to your breakfast menu.

Why You Will Love This Recipe

  • Quick breakfast: Prepare these individual egg cups with simple ingredients and minimal preparation.
  • Crispy texture: Thin prosciutto becomes deliciously crisp around the edges during air frying.
  • Savory flavor: Prosciutto adds a rich, salty taste that pairs beautifully with eggs.
  • Easy portions: Each cup is individually prepared, making serving simple.
  • Customizable: Add shredded cheese, spinach, tomatoes, or fresh herbs to change the flavor.
  • Perfect for brunch: These little cups look attractive on a breakfast platter and are easy to serve.
  • Less cleanup: Cooking in small air fryer-safe ramekins keeps the preparation simple.

Ingredients You Will Need

You only need a few everyday ingredients to make these crispy breakfast cups. Choose good-quality prosciutto and fresh eggs for the best flavor.

Main Ingredients

  1. Prosciutto – 6 thin slices: Prosciutto creates the crispy outer layer and adds a savory, slightly salty flavor.
  2. Large eggs – 6: Use one fresh egg for each breakfast cup.
  3. Shredded mozzarella cheese – ¼ cup: Mozzarella adds a mild flavor and melts beautifully around the egg.
  4. Olive oil – 1 teaspoon: A light coating helps prevent sticking inside the ramekins.
  5. Black pepper – ¼ teaspoon: Adds a gentle peppery flavor to balance the salty prosciutto.
  6. Garlic powder – ¼ teaspoon: Gives the eggs a little extra savory flavor.
  7. Fresh chives – 1 tablespoon: Chopped chives add a fresh onion-like flavor and colorful garnish.

Optional Ingredients

  • ¼ cup chopped baby spinach
  • 2 tablespoons finely diced red bell pepper
  • 1 tablespoon grated Parmesan cheese
  • A pinch of smoked paprika
  • Fresh parsley for garnish
  • A small pinch of red pepper flakes

Ingredient tip: Prosciutto is naturally salty, so taste before adding extra salt. You may not need any additional salt in this recipe.

Kitchen Tools You Need

Prepare these kitchen tools before starting:

  • Air fryer
  • Six small air fryer-safe silicone muffin cups or ramekins
  • Small mixing bowl
  • Measuring spoons
  • Pastry brush
  • Small spoon
  • Oven mitts or heat-resistant tongs

Make sure your ramekins or silicone cups are approved for air fryer use and fit comfortably inside the basket.

How to Make Air Fryer Crispy Prosciutto & Egg Cups

Follow these easy steps to make crispy breakfast cups with soft, flavorful eggs.

Step 1: Prepare the Air Fryer

Preheat your air fryer to 325°F (163°C) for approximately 3 minutes if your model recommends preheating.

Lightly brush the inside of six small ramekins or silicone muffin cups with olive oil.

Arrange the cups inside the air fryer basket, leaving enough space for hot air to circulate.

Step 2: Shape the Prosciutto Cups

Take one slice of prosciutto and gently press it into a prepared ramekin.

Arrange the slice around the bottom and sides so it forms a small cup. Let the edges extend slightly above the rim because they will shrink as they cook.

Repeat with the remaining prosciutto slices.

If a slice tears, overlap another small piece to cover the opening. This helps keep the egg from leaking through the bottom.

Step 3: Add Cheese and Seasoning

Sprinkle a small amount of shredded mozzarella into the bottom of each prosciutto cup.

Add a light pinch of garlic powder and black pepper.

If you want extra flavor, add a few chopped spinach leaves or finely diced red bell pepper. Keep the vegetable pieces small so they cook evenly.

Do not add too much cheese because excess filling can make the cups difficult to handle.

Step 4: Add the Eggs

Carefully crack one large egg into each prepared prosciutto cup.

Try to keep the yolk centered and avoid breaking it during preparation.

If your eggs are very large, remove a little egg white before adding them to the cups. This helps prevent overflow.

Sprinkle a little more black pepper over the top.

Step 5: Air Fry Until the Eggs Are Cooked

Place the filled ramekins carefully inside the air fryer basket.

Air fry at 325°F (163°C) for approximately 8–12 minutes.

Check the eggs around the 8-minute mark. The prosciutto should look crisp around the edges, and the egg whites should become firm.

For fully cooked eggs, continue cooking until both the whites and yolks are firm. Cooking time depends on the size of your ramekins, eggs, and air fryer model.

Use a food thermometer to check that egg dishes reach 160°F for food safety.

Step 6: Remove and Cool Slightly

Turn off the air fryer and carefully remove the ramekins using oven mitts or heat-resistant tongs.

Allow the breakfast cups to rest for about 2–3 minutes. This makes them easier to remove and helps the cheese settle.

Run a small spoon or silicone spatula around the edges if needed.

Step 7: Garnish and Serve

Transfer the cooked prosciutto and egg cups to a serving plate.

Sprinkle chopped fresh chives or parsley over the top.

Add a little Parmesan cheese or smoked paprika if desired.

Serve warm with fresh fruit, avocado slices, or toasted bread for a delicious breakfast.

Air Fryer Cooking Time and Temperature

Use this guide as a starting point when preparing your breakfast cups.

Cooking Detail Recommendation
Temperature 325°F (163°C)
Preparation Time 8–10 minutes
Cooking Time 8–12 minutes
Resting Time 2–3 minutes
Total Time 18–25 minutes
Serving Size 6 cups

Important: Air fryer models can cook differently. Check the eggs early and adjust the cooking time until the whites and yolks reach your preferred texture, keeping food safety in mind.

Expert Tips for the Best Results

A few simple techniques can help you achieve crisp prosciutto and evenly cooked eggs.

  • Choose thin prosciutto: Thin slices are easier to shape around the ramekins and become crisp more easily.
  • Avoid overfilling: Leave enough room for the egg so it does not spill over during cooking.
  • Use small ramekins: The right size helps hold the prosciutto in place and supports the egg.
  • Do not add too much salt: Prosciutto already has a naturally salty flavor.
  • Cut vegetables finely: Small pieces cook more evenly and fit better inside the cups.
  • Check cooking early: Thin prosciutto can become crisp quickly, so watch the edges.
  • Let the cups rest: A short resting period makes them easier to remove from their molds.
  • Use fresh eggs: Fresh eggs generally hold their shape better during preparation.

Variations and Substitutions

These breakfast cups are easy to customize. Try one of these simple variations to create a different flavor.

1. Cheesy Prosciutto Egg Cups

Add extra mozzarella or shredded cheddar before air frying. The melted cheese creates a creamy layer that pairs well with crispy prosciutto.

2. Spinach and Prosciutto Cups

Add a small amount of chopped baby spinach to each cup before cracking in the egg. Spinach brings a fresh vegetable flavor to the savory filling.

3. Tomato and Parmesan Cups

Add finely diced cherry tomatoes and grated Parmesan. This combination gives the breakfast cups a fresh, slightly tangy flavor.

4. Spicy Breakfast Cups

Sprinkle red pepper flakes or a little smoked paprika over each egg before cooking. This creates a warmer flavor without changing the basic recipe.

5. Mushroom and Cheese Cups

Add finely chopped, lightly cooked mushrooms with mozzarella. Cooking the mushrooms first helps remove excess moisture.

6. Herb and Garlic Cups

Use fresh parsley, chives, and a small amount of garlic powder for a fragrant breakfast variation.

What to Serve with Crispy Prosciutto & Egg Cups

These savory egg cups work well with many breakfast sides. Pair them with fresh ingredients for a balanced and satisfying meal.

  • Avocado slices: Creamy avocado complements the crispy prosciutto.
  • Fresh fruit: Strawberries, blueberries, melon, and orange slices add natural sweetness.
  • Greek yogurt: Plain Greek yogurt makes a simple breakfast side.
  • Whole-grain toast: Serve with toasted bread for extra crunch.
  • Breakfast potatoes: Air fryer potatoes create a hearty brunch combination.
  • Fresh salad: A small green salad works well for a lighter meal.

For weekend brunch, arrange the egg cups on a platter with avocado, fresh fruit, and toasted sourdough.

How to Store and Reheat

Proper storage helps maintain the flavor and quality of leftover breakfast cups.

Refrigeration

Allow the cooked cups to cool before storing them.

Place them in an airtight container and refrigerate within 2 hours of cooking. Keep them refrigerated for up to 3–4 days.

Reheating in the Air Fryer

Place the refrigerated cups in an air fryer-safe dish.

Reheat at 300°F (149°C) for approximately 3–5 minutes, or until heated through.

Check the center before serving. Reheated egg dishes should reach 165°F.

Reheating in the Microwave

Place one breakfast cup on a microwave-safe plate.

Heat in short 15–20-second intervals until warm. Avoid overheating because the egg can become rubbery.

Can You Freeze Them?

You can freeze cooked egg cups, but the texture of the eggs and prosciutto may change after thawing.

For best results, refrigerate and enjoy them within a few days rather than freezing.

Common Mistakes to Avoid

Avoid these mistakes to get better results when making prosciutto and egg cups.

  1. Using thick prosciutto: Thick slices may not fit neatly inside small molds and can cook unevenly.
  2. Skipping the oil: Without a light coating, the cups may stick to the ramekins.
  3. Overfilling with cheese: Too much cheese can spill over and make removal difficult.
  4. Adding large vegetable pieces: Large pieces can prevent the egg from cooking evenly.
  5. Using oversized ramekins: Large molds may allow the prosciutto to lose its cup shape.
  6. Ignoring cooking time: Check the eggs early because smaller cups can cook faster.
  7. Removing them immediately: A short resting period makes the cups easier to remove.

Frequently Asked Questions

1. Can I make prosciutto and egg cups in an air fryer?

Yes. Place prosciutto and eggs in air fryer-safe ramekins and cook at 325°F until the eggs are fully cooked.

2. How long do prosciutto egg cups take to cook?

They generally take 8–12 minutes at 325°F, depending on the air fryer and ramekin size.

3. Can I use bacon instead of prosciutto?

Yes. Thin bacon can be used, but it may need partial cooking before adding the eggs because it is thicker than prosciutto.

4. Why is my prosciutto not crispy?

Excess moisture, thick slices, and overcrowded ramekins can prevent prosciutto from becoming crisp.

5. Can I prepare these breakfast cups ahead of time?

Yes. Cook them in advance and refrigerate in an airtight container for up to 3–4 days.

6. What cheese works best with prosciutto and eggs?

Mozzarella, Parmesan, cheddar, and Gruyère all pair well with the savory flavor of prosciutto.

7. Can I make these egg cups without cheese?

Yes. Simply leave out the cheese and add your favorite herbs or finely chopped vegetables.

8. How do I prevent eggs from overflowing?

Use appropriately sized ramekins, avoid oversized eggs, and leave a little space at the top of each cup.

Final Thoughts

These Air Fryer Crispy Prosciutto & Egg Cups are a simple way to make breakfast more exciting without spending too much time in the kitchen. Crispy prosciutto, tender eggs, and melted cheese create a savory combination that works for everyday mornings and weekend brunch.

The recipe is easy to customize with spinach, tomatoes, mushrooms, or your favorite cheese. You can also prepare a batch ahead of time and refrigerate the leftovers for quick breakfasts during the week.

Serve them warm with fresh fruit, avocado, or toasted bread. If you try this recipe, let us know which variation you enjoyed most!


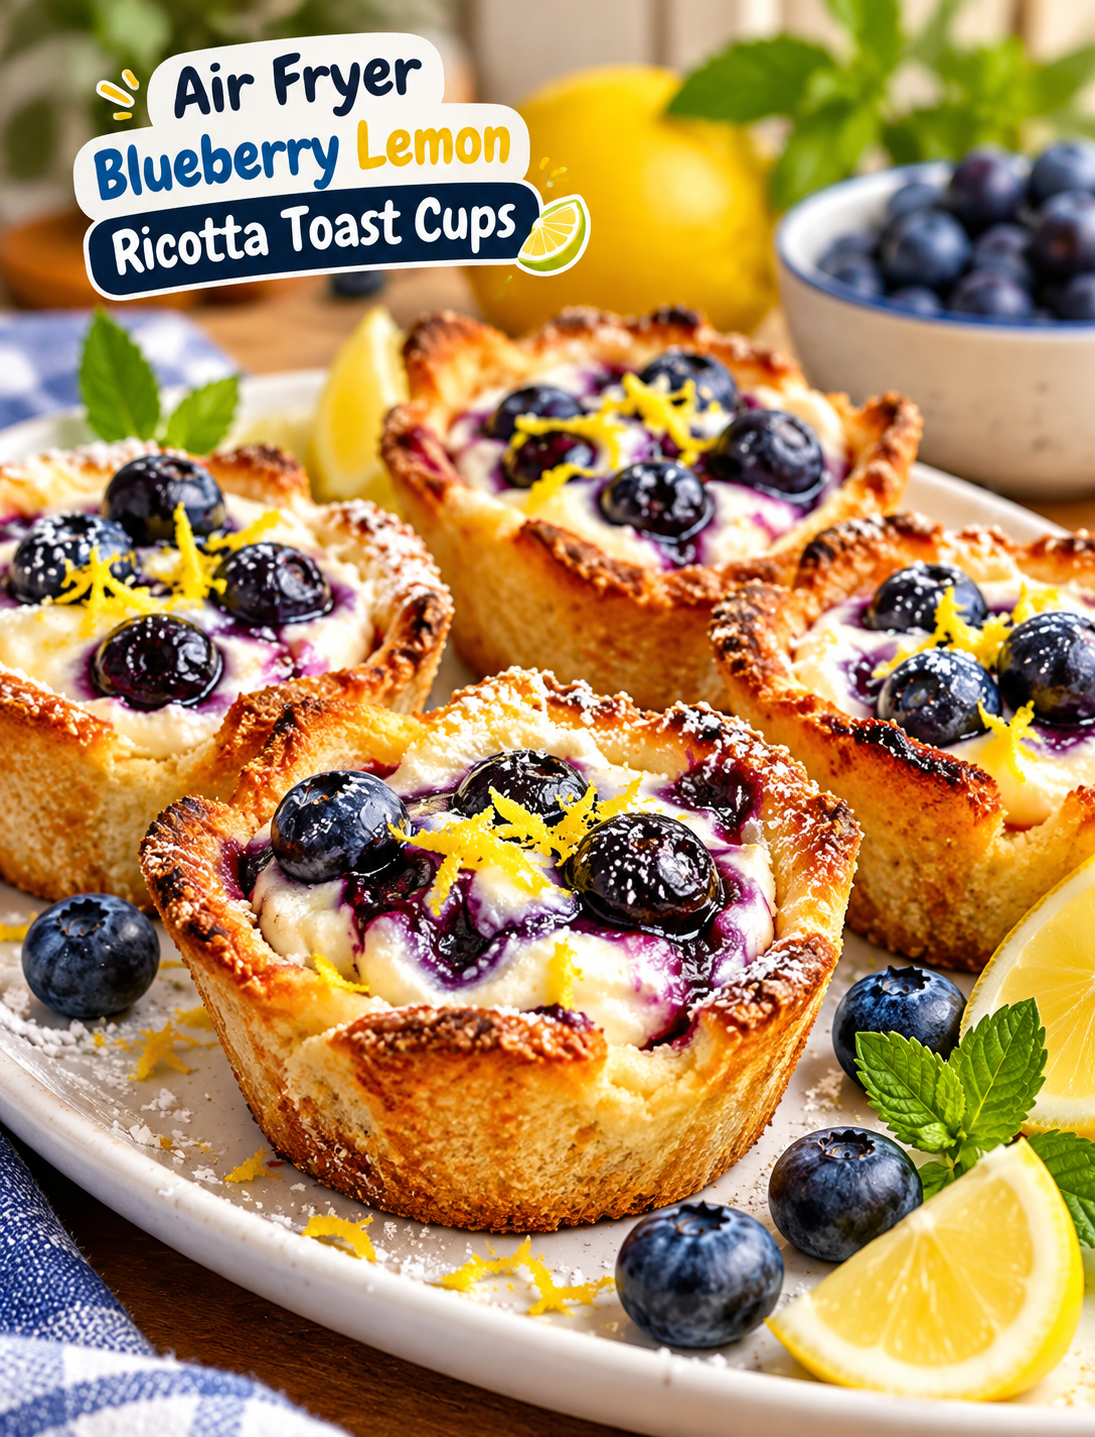
Air Fryer Blueberry Lemon Ricotta Toast Cups

Air Fryer Blueberry Lemon Ricotta Toast Cups

Looking for a quick breakfast that feels special but takes only a few minutes to prepare? These Air Fryer Blueberry Lemon Ricotta Toast Cups are a delicious way to start your morning. They combine crispy golden bread, creamy ricotta cheese, juicy blueberries, and fresh lemon flavor in one easy bite.

Each toast cup has a lightly toasted outside and a soft, creamy center. The ricotta filling adds a mild richness, while blueberries bring natural sweetness and lemon zest gives every bite a fresh citrus taste.

The best part is that you do not need a complicated recipe or special baking equipment. Your air fryer turns ordinary sandwich bread into small, crispy cups that hold the creamy filling perfectly.

These blueberry ricotta toast cups are great for busy weekday mornings, weekend brunch, or a light afternoon snack. You can also prepare them for family gatherings when you want something simple but impressive.

Why You Will Love This Air Fryer Blueberry Lemon Ricotta Toast Cups

  • Quick breakfast: These toast cups are easy to prepare and cook in less time than traditional baked breakfast pastries.

  • Simple ingredients: You only need everyday ingredients that are easy to find at most American grocery stores.

  • Crispy and creamy: Golden bread creates a crunchy shell around the smooth ricotta filling.

  • Fresh fruit flavor: Blueberries add natural sweetness, while lemon zest provides a bright citrus finish.

  • Easy to customize: You can use different berries, sweeteners, and bread varieties.

  • Perfect for brunch: Their individual serving size makes them easy to serve at breakfast tables and weekend gatherings.

Ingredients for Air Fryer Blueberry Lemon Ricotta Toast Cups

You do not need a long shopping list to make this recipe. Each ingredient has a specific purpose in creating the perfect texture and flavor.

Main Ingredients

  1. White sandwich bread – 6 slices: Soft sandwich bread is easy to flatten and shape into small cups. Brioche bread also works well.

  2. Ricotta cheese – ¾ cup: Whole-milk ricotta creates a smooth, creamy filling. Drain excess liquid if the cheese looks watery.

  3. Fresh blueberries – ½ cup: Blueberries add juicy sweetness and a fresh fruit flavor.

  4. Lemon zest – 1 teaspoon: Fresh lemon zest gives the filling a bright citrus aroma.

  5. Honey – 1½ tablespoons: Honey naturally sweetens the ricotta without overpowering the blueberries.

  6. Vanilla extract – ½ teaspoon: Vanilla adds a gentle sweetness and makes the filling taste richer.

  7. Egg – 1 large: The egg helps bind the filling and gives it a slightly custard-like texture.

  8. Melted butter – 1 tablespoon: Butter helps the bread cups turn golden and crisp.

  9. Ground cinnamon – ¼ teaspoon: Cinnamon adds a warm flavor that pairs nicely with blueberries.

  10. Powdered sugar – 1 teaspoon (optional): Use a light dusting for a pretty finishing touch.

Optional Toppings

  • Extra fresh blueberries

  • A little additional lemon zest

  • Maple syrup

  • Chopped almonds

  • A small drizzle of honey

  • Fresh mint leaves

Kitchen Tools Air Fryer Blueberry Lemon Ricotta Toast Cups

Gather these kitchen tools before starting. Having everything ready makes the preparation easier.

  • Air fryer

  • Silicone muffin cups or oven-safe small ramekins

  • Small mixing bowl

  • Fork or small whisk

  • Rolling pin

  • Pastry brush

  • Measuring cups and spoons

  • Small spoon

Important: Use only silicone cups or dishes that are labeled safe for air fryer temperatures. Do not use ordinary paper cups.

How to Make Air Fryer Blueberry Lemon Ricotta Toast Cups

Follow these simple steps to create crispy bread cups with a creamy blueberry filling.

Step 1: Prepare the Bread Cups

Start by removing the crusts from all six bread slices. Use a rolling pin to gently flatten each slice until it becomes thin and flexible.

Press one flattened bread slice into each silicone muffin cup. Gently push the center down and fold the edges upward to create a small cup shape.

Make sure the bread covers the bottom and sides of each mold. Avoid making large tears because the filling may leak through during cooking.

Step 2: Prepare the Ricotta Filling

Add the ricotta cheese, egg, honey, vanilla extract, and lemon zest to a mixing bowl.

Whisk everything until the mixture looks smooth and creamy. Break up any large lumps of ricotta so the filling spreads evenly inside the bread cups.

Avoid adding too much liquid because a watery filling can make the bread soggy.

Step 3: Add the Blueberries

Gently fold most of the fresh blueberries into the ricotta mixture using a spoon.

Keep a few blueberries aside for topping. Mixing gently helps prevent the berries from breaking and turning the filling purple.

If your blueberries are very large, cut a few in half so they distribute more evenly.

Step 4: Fill the Bread Cups

Spoon the blueberry ricotta mixture into each prepared bread cup.

Fill each cup about three-quarters full to leave enough room for the filling to set during cooking.

Place a few reserved blueberries on top of each cup. This gives the finished toast cups a fresh, colorful appearance.

Step 5: Brush with Butter and Season

Mix the melted butter with ground cinnamon in a small bowl.

Use a pastry brush to lightly coat the exposed bread edges with the butter mixture. This helps the bread develop a golden-brown color and a slightly crisp texture.

Avoid brushing too much butter inside the filling because excess moisture and fat can affect the final texture.

Step 6: Air Fry Until Golden

Preheat your air fryer to 320°F (160°C) for about 3 minutes if your model recommends preheating.

Arrange the filled silicone cups in the air fryer basket in a single layer. Leave a little space between them so hot air can circulate.

Air fry at 320°F for approximately 8–11 minutes.

Check the toast cups around the 8-minute mark. The bread edges should look golden brown, and the ricotta filling should appear mostly set.

Cooking time can vary depending on your air fryer model and the thickness of the bread. Add another 1–2 minutes if needed.

Step 7: Cool and Add Toppings

Carefully remove the silicone cups from the air fryer using heat-safe tongs or oven mitts.

Let the toast cups cool for about 3–5 minutes before removing them from their molds. This helps the filling settle and makes them easier to handle.

Finish with powdered sugar, extra lemon zest, or a small drizzle of honey.

Serve warm for the best combination of crispy bread and creamy filling.

Air Fryer Cooking Time and Temperature Air Fryer Blueberry Lemon Ricotta Toast Cups

Use the following cooking guide as a starting point. Different air fryer models may require small adjustments.

Cooking Detail Recommendation
Temperature 320°F (160°C)
Preparation Time 10 minutes
Cooking Time 8–11 minutes
Cooling Time 3–5 minutes
Total Time 21–26 minutes
Serving Size 6 toast cups

Cooking tip: Start checking early because thin bread can brown quickly. The filling should be set rather than runny before serving.

Expert Tips for Air Fryer Blueberry Lemon Ricotta Toast Cups

Small preparation changes can make a big difference in the texture and flavor of your toast cups.

  • Flatten the bread properly: Thin bread creates more space for the ricotta filling and helps the edges become crisp.

  • Drain watery ricotta: Excess moisture can soften the bread and prevent the filling from setting properly.

  • Use fresh blueberries: Firm berries hold their shape better during air frying.

  • Avoid overfilling: Leave a little room at the top to prevent the filling from spilling.

  • Do not overcrowd the basket: Air circulation helps the bread brown evenly.

  • Check your air fryer early: Some models cook faster than others, so check around 8 minutes.

  • Let them cool briefly: A few minutes of cooling helps the filling become more stable.

Variations and Substitutions Air Fryer Blueberry Lemon Ricotta Toast Cups

One of the best things about this recipe is how easily you can change the ingredients.

1. Mixed Berry Ricotta Cups

Replace some of the blueberries with fresh raspberries or chopped strawberries. This creates a colorful filling with a mix of sweet and slightly tart flavors.

2. Honey Almond Toast Cups

Add one tablespoon of finely chopped almonds to the ricotta mixture. Finish with a light honey drizzle for extra texture.

3. Whole Wheat Toast Cups

Use whole wheat sandwich bread instead of white bread. Choose soft slices that can flatten without cracking.

4. Cream Cheese and Ricotta Filling

Replace one-quarter cup of ricotta with softened cream cheese. This creates a thicker filling with a slightly tangy flavor.

5. Sugar-Free Version

Replace the honey with a suitable granulated or liquid sugar substitute according to its sweetness level and cooking instructions.

What to Serve with Air Fryer Blueberry Lemon Ricotta Toast Cups

These toast cups taste delicious on their own, but you can pair them with other breakfast favorites for a more complete meal.

  • Greek yogurt: Serve with plain or vanilla Greek yogurt for a creamy breakfast combination.

  • Scrambled eggs: Add scrambled eggs for a savory side.

  • Fresh fruit salad: Strawberries, melon, and orange slices complement the lemon flavor.

  • Breakfast smoothie: A banana or berry smoothie makes a refreshing pairing.

  • Coffee or tea: Serve with hot coffee, green tea, or your favorite morning drink.

For brunch, arrange the toast cups on a serving platter with fresh berries and lemon slices.

How to Store and Reheat Air Fryer Blueberry Lemon Ricotta Toast Cups

Proper storage helps maintain the flavor and texture of leftover toast cups.

Refrigeration

Allow the toast cups to cool completely. Place them in an airtight container and refrigerate for up to 3 days.

Avoid leaving ricotta-filled toast cups at room temperature for more than 2 hours.

Reheating in the Air Fryer

Place the refrigerated toast cups in the air fryer basket.

Reheat at 300°F for approximately 3–4 minutes, checking that the centers are heated through.

Reheating in the Microwave

Place one toast cup on a microwave-safe plate and heat for approximately 15–20 seconds.

Keep in mind that microwave reheating softens the bread instead of making it crispy.

Can You Freeze Them?

Freezing is not recommended for the best texture. Ricotta can release moisture after thawing, which may make the bread soggy.

For better results, prepare the bread cups and ricotta filling shortly before cooking.

Common Mistakes to Avoid Air Fryer Blueberry Lemon Ricotta Toast Cups

Avoid these common mistakes to get better results every time.

  1. Using wet ricotta: Drain excess liquid before mixing the filling.

  2. Skipping the bread flattening step: Thick bread can make the cups difficult to shape and fill.

  3. Overfilling the cups: Too much filling can spill over during cooking.

  4. Cooking at a very high temperature: High heat may burn the bread before the center sets.

  5. Removing the cups too quickly: Allow a few minutes of cooling before taking them out of the molds.

  6. Using unsuitable containers: Only use air fryer-safe silicone or oven-safe dishes.

Frequently Asked Questions About Air Fryer Blueberry Lemon Ricotta Toast Cups

1. Can I use frozen blueberries?

Yes. Use frozen blueberries directly, but avoid thawing them first because thawed berries release extra moisture.

2. What temperature should I use for ricotta toast cups?

Start at 320°F (160°C) and air fry for approximately 8–11 minutes, adjusting for your air fryer.

3. Can I make these toast cups without silicone molds?

Yes. Use small oven-safe ramekins or another suitable air fryer-safe baking mold to hold the bread shape.

4. How do I keep the bread cups crispy?

Flatten the bread, drain excess ricotta moisture, and avoid overfilling the cups.

5. Can I prepare the filling ahead of time?

Yes. Mix the ricotta filling up to 24 hours ahead and store it in an airtight container in the refrigerator.

6. Can I use cottage cheese instead of ricotta?

Yes. Blend cottage cheese until smooth before using it as a substitute for a similar creamy consistency.

7. How do I know when the ricotta filling is cooked?

The filling should look mostly set and should not appear watery or liquid in the center.

8. Are these toast cups good for meal prep?

They can be refrigerated for up to 3 days, but they taste best freshly cooked because the bread is crispier.

Final Thoughts of Air Fryer Blueberry Lemon Ricotta Toast Cups

These Air Fryer Blueberry Lemon Ricotta Toast Cups are a simple way to make breakfast feel a little more special. Crispy bread, creamy ricotta, sweet blueberries, and fresh lemon create a delicious combination without requiring complicated preparation.

You can customize the filling, experiment with different berries, or prepare the ingredients ahead of time to make busy mornings easier.

Serve them warm with fresh fruit, yogurt, or your favorite morning drink. If you try this recipe, share your experience and let us know which toppings you enjoyed most!


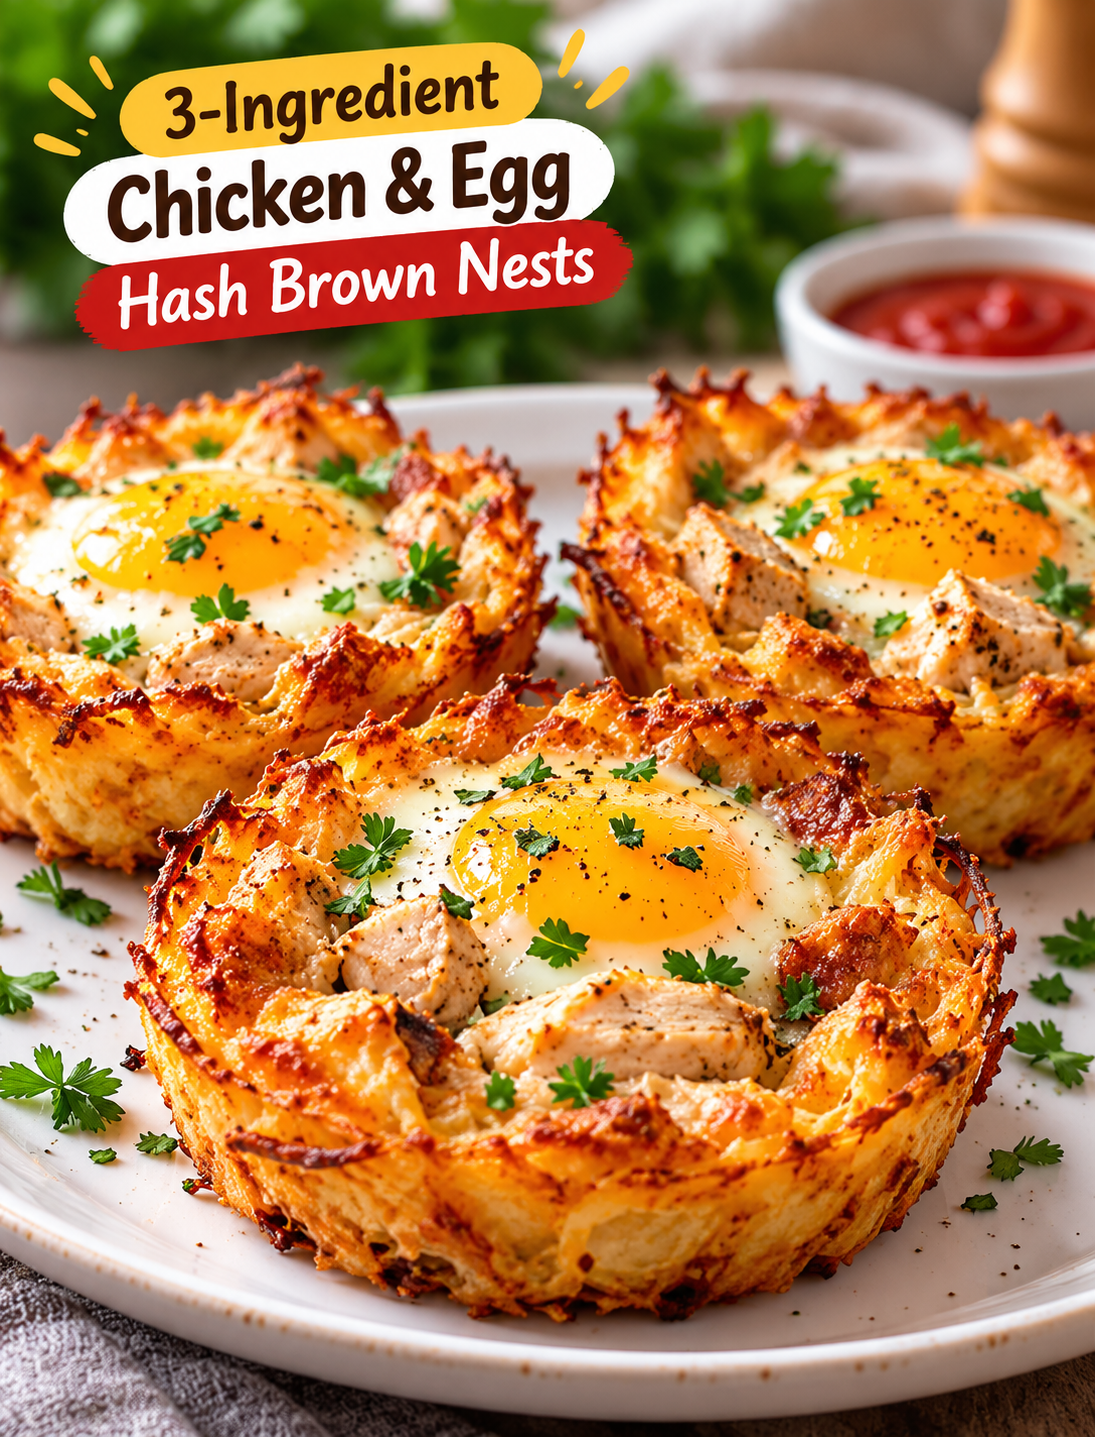
3-Ingredient Crispy Chicken & Egg Hash Brown Nests

3-Ingredient Crispy Chicken & Egg Hash Brown Nests

Want a breakfast that is crispy on the outside, tender in the middle, and easy to make with just three main ingredients? These 3-Ingredient Crispy Chicken & Egg Hash Brown Nests turn simple ingredients into a satisfying breakfast that looks impressive without requiring much prep time.

Each nest combines golden hash browns, savory cooked chicken, and an egg baked right in the center. The potatoes develop crispy edges, the chicken adds a hearty bite, and the egg brings everything together in one easy serving.

This recipe is perfect for busy weekday mornings, relaxed weekend brunches, or a quick breakfast meal prep idea. You can prepare the potato nests ahead of time and bake them when you are ready to eat.

The best part is that you do not need a long ingredient list or complicated cooking steps. With a muffin tin, a few basic kitchen tools, and three main ingredients, you can make a breakfast your whole family will enjoy.

Why You Will Love These Chicken & Egg Hash Brown Nests

  • Only three main ingredients: Frozen hash browns, cooked chicken, and eggs form the base of this easy recipe.
  • Crispy potato edges: Pressing the shredded potatoes into muffin cups helps create golden, crunchy nests.
  • Protein-rich breakfast: Chicken and eggs provide protein to help make breakfast more satisfying.
  • Easy individual servings: Each nest is portioned separately, making breakfast simple to serve.
  • Great for meal prep: Bake the potato shells ahead and add the eggs when you are ready to finish cooking.
  • Easy to customize: Add black pepper, garlic powder, paprika, or your favorite herbs if you have them on hand.
  • Family-friendly: The mild flavors work well for adults and kids who enjoy eggs, chicken, and crispy potatoes.

Ingredients for 3-Ingredient Crispy Chicken & Egg Hash Brown Nests

You need three main ingredients to make these crispy breakfast nests. Salt, pepper, and cooking spray are optional kitchen basics.

1. Frozen Shredded Hash Browns

Use thawed frozen shredded hash browns for a quick and easy potato base. Removing excess moisture is important because wet potatoes can become soft instead of crispy.

2. Cooked Chicken

Use cooked, shredded or finely chopped chicken breast for a savory filling. Leftover roasted chicken or plain rotisserie chicken works well, provided it has been stored safely.

3. Eggs

Use one egg for each nest. The egg cooks in the center of the potato shell and gives each serving a classic breakfast flavor.

Optional Seasonings

  • Salt, to taste
  • Black pepper, to taste
  • Garlic powder, optional
  • Paprika, optional
  • Cooking spray or a little oil for greasing the muffin tin

These extras are optional and are not counted among the three main ingredients.

Equipment You Will Need

  • A standard 6-cup or 12-cup muffin tin
  • A mixing bowl
  • A clean kitchen towel or paper towels
  • A spoon
  • A fork
  • An oven
  • A food thermometer for checking doneness

A nonstick muffin tin makes it easier to remove the nests without breaking their crispy edges.

How to Make 3-Ingredient Crispy Chicken & Egg Hash Brown Nests

Follow these simple steps to create golden potato nests filled with chicken and baked eggs.

Step 1: Preheat the Oven

Preheat your oven to 400°F (200°C). Lightly grease six muffin cups with cooking spray or a small amount of oil.

Preheating helps the potatoes begin cooking as soon as they enter the oven. Greasing the cups also reduces sticking and helps the nests release more easily.

Step 2: Thaw and Dry the Hash Browns

Place the thawed hash browns in a clean kitchen towel or between layers of paper towels. Press gently to remove as much excess moisture as possible.

Dry potatoes brown more effectively because less water needs to evaporate during cooking. Do not skip this step if you want crispier edges.

Step 3: Prepare the Chicken

Shred or finely chop the cooked chicken into small pieces. Smaller pieces fit better inside the potato nests and make each bite easier to eat.

If you are using leftover chicken, make sure it has been refrigerated properly and reheated or cooked as directed in the recipe. Avoid using chicken that has been left at room temperature for more than two hours.

Step 4: Shape the Potato Nests

Divide the dried hash browns among the six greased muffin cups. Press the potatoes firmly against the bottom and sides of each cup to create a small well in the center.

Keep the potato layer even so the edges cook at a similar rate. Avoid making the bottom too thick because it may stay soft while the top becomes brown.

Step 5: Bake the Potato Shells

Bake the potato nests for 15–20 minutes, or until the edges begin to turn golden and crisp.

Oven temperatures and muffin tins vary, so check the potatoes near the end of this first baking period. If the centers still look very wet, give them a few more minutes before adding the filling.

Step 6: Add the Cooked Chicken

Remove the muffin tin from the oven carefully. Divide the chopped chicken evenly among the potato nests, keeping the center of each nest open for an egg.

Do not pack the chicken too tightly into the cups. Leaving enough space in the center helps the eggs sit securely without spilling over the edges.

Step 7: Crack an Egg into Each Nest

Crack one egg into the center of each potato nest. For smaller muffin cups, you may need to remove a little egg white before adding the egg to prevent overflow.

Season lightly with salt and black pepper if desired. Keep the yolk intact if you prefer a classic sunny-center appearance.

Step 8: Bake Until the Eggs Are Set

Return the muffin tin to the oven and bake for another 10–15 minutes, checking the eggs as they cook.

The exact time depends on the size of your eggs and how firm you like the yolks. For food safety, cook the eggs until the whites and yolks are firm, or use pasteurized eggs if preparing a softer-yolk version.

Step 9: Rest and Remove the Nests

Remove the muffin tin from the oven and let the nests rest for about 3–5 minutes. Carefully loosen the edges with a small silicone spatula or butter knife.

Lift each nest out gently to keep the potato shell intact. Serve while warm for the best contrast between crispy potatoes, savory chicken, and tender egg.

Tips for the Crispiest Hash Brown Nests

  • Remove excess water: Wet hash browns are one of the main reasons potato nests turn soft.
  • Grease the muffin tin: A light coating helps prevent the potato shells from sticking.
  • Press firmly: Compact potatoes hold their shape better after baking.
  • Pre-bake the shells: This gives the potatoes time to develop color before the chicken and eggs are added.
  • Use cooked chicken: Raw chicken will not cook safely in the short egg-baking stage.
  • Leave room for the eggs: Overfilled muffin cups can spill and make removal harder.
  • Avoid overcrowding: Leave space between the muffin cups when using a larger baking pan.
  • Check the centers: The edges may brown before the thickest part of the potato base is crisp.

Easy Variations to Try

Cheesy Chicken Hash Brown Nests

Sprinkle a small amount of shredded cheddar or mozzarella over the chicken before adding the egg. The cheese melts into the filling and adds a creamy, savory flavor.

Spicy Breakfast Nests

Add a pinch of smoked paprika, black pepper, or chili flakes to the hash browns. Serve with hot sauce if you enjoy a little heat.

Garlic Herb Chicken Nests

Season the cooked chicken with garlic powder and dried parsley before adding it to the potato shells. This gives the filling more flavor without adding much prep time.

Turkey or Ham Nests

Replace the cooked chicken with chopped cooked turkey or ham. Check the salt level before seasoning because some prepared meats are already salty.

Vegetable Breakfast Nests

Add a small amount of finely chopped bell pepper or spinach to the chicken. Cook watery vegetables first so they do not release too much moisture into the potato shells.

These additions change the original three-ingredient recipe, but they are useful options when you want more variety.

What to Serve with Chicken & Egg Hash Brown Nests

These breakfast nests are filling enough to serve on their own, but a few simple sides can turn them into a complete brunch.

  • Fresh fruit: Serve with berries, orange slices, or melon for a fresh contrast.
  • Avocado slices: Add creamy avocado and a squeeze of lemon for a simple side.
  • Green salad: A light salad works well for a breakfast-for-lunch meal.
  • Whole-grain toast: Serve with toast when you want a more substantial breakfast.
  • Salsa: Add a spoonful of mild or spicy salsa for extra flavor.
  • Greek yogurt: Plain Greek yogurt with fruit makes an easy side for a breakfast spread.

For a family brunch, arrange the nests on a platter and serve the sides separately so everyone can build their own plate.

Make-Ahead and Meal Prep Instructions

You can prepare the potato shells ahead of time to save time on busy mornings.

  1. Bake the hash brown shells until lightly golden.
  2. Let them cool, then refrigerate them in a covered container.
  3. Keep the cooked chicken refrigerated in a separate container.
  4. When ready to serve, add the chicken and eggs to the shells.
  5. Bake until the potato edges are crisp and the eggs are fully cooked.

For the best texture, assemble and bake the eggs shortly before serving. Fully assembled nests can also be reheated, but the egg texture may become firmer and the potatoes may lose some crispness.

How to Store and Reheat Leftovers

Allow leftover nests to cool promptly, then place them in an airtight container in the refrigerator within two hours of cooking. Store them at 40°F (4°C) or below and eat within three to four days.

To reheat, place the nests in an oven or air fryer at approximately 350°F (175°C) until heated through. Check the center with a food thermometer and make sure leftovers reach 165°F (74°C).

Microwaving is faster, but it usually makes the potato edges softer. Avoid leaving cooked eggs and chicken at room temperature for extended periods.

For longer storage, freeze the fully cooked and cooled nests in a freezer-safe container. Thaw them in the refrigerator before reheating, and use a thermometer to confirm that they are heated safely throughout.

Common Mistakes to Avoid

  • Using wet potatoes: Excess moisture prevents proper browning.
  • Skipping the first bake: Adding eggs too early can leave the potato base undercooked.
  • Using too much filling: Overfilled nests are harder to remove from the muffin tin.
  • Adding raw chicken: The chicken should already be fully cooked before assembly.
  • Overbaking the eggs: Long baking times can make eggs rubbery and dry.
  • Removing nests too quickly: A short resting period helps the potato shells hold together.
  • Assuming every oven cooks the same: Check the texture and doneness rather than relying on time alone.

Frequently Asked Questions

1. Can I use fresh potatoes instead of frozen hash browns?

Yes. Peel and shred fresh potatoes, then squeeze out as much moisture as possible before shaping the nests.

2. Can I make these chicken and egg nests without a muffin tin?

Yes. Shape small potato nests on a greased baking sheet, leaving enough space between them to hold the filling.

3. Can I use rotisserie chicken?

Yes. Remove the skin and bones, then shred the cooked chicken into small pieces before adding it to the nests.

4. How do I make hash brown nests extra crispy?

Dry the potatoes well, press them firmly into the muffin cups, and pre-bake the shells until their edges turn golden.

5. Can I prepare these nests the night before?

Yes. Pre-bake the potato shells and refrigerate them with the cooked chicken separately, then add the eggs and finish baking in the morning.

6. Can I freeze cooked hash brown nests?

Yes. Cool them completely, freeze them in a sealed container, and reheat until the centers reach 165°F (74°C).

7. How do I know when the eggs are fully cooked?

The whites and yolks should be firm for the safest preparation. Check the center carefully because cooking times vary by oven and egg size.

8. Are these chicken and egg hash brown nests good for meal prep?

Yes. They provide individual portions of potatoes, chicken, and eggs, and they can be refrigerated and reheated for convenient breakfasts.

Final Thoughts

These 3-Ingredient Crispy Chicken & Egg Hash Brown Nests are a simple way to make breakfast feel special without spending hours in the kitchen. Crispy potato shells, savory cooked chicken, and baked eggs come together in convenient individual portions.

Drying the hash browns, pre-baking the potato shells, and cooking the eggs thoroughly are the most important steps for a successful result. Once you master the basic method, you can try different seasonings, vegetables, and cheeses to suit your taste.

Make a batch for weekend brunch, prepare the potato shells ahead for busy mornings, or serve these nests as part of a hearty breakfast spread. If you try this recipe, share your favorite variation and let us know how your chicken and egg hash brown nests turned out.


Air Fryer Samosa-Style Loaded Egg Cups

Air Fryer Samosa-Style Loaded Egg Cups

Air Fryer Samosa-Style Loaded Egg Cups bring together the bold flavors of a classic samosa and the convenience of an easy egg breakfast. Each cup is filled with fluffy eggs, tender potatoes, green peas, onions, and warm Indian spices. The result is a savory, satisfying meal with plenty of flavor in every bite.

These egg cups are a fun way to use leftover cooked potatoes and make breakfast more exciting. They work well for busy mornings, weekend brunch, meal prep, or a protein-rich snack. You can also adjust the spice level and fillings to suit your taste.

Instead of wrapping the filling in pastry, this recipe uses eggs to hold the samosa-inspired mixture together. The air fryer cooks the cups in individual portions, making them easy to serve and store.

Why You’ll Love These Air Fryer Samosa-Style Loaded Egg Cups

  • Samosa-inspired flavor: Potatoes, peas, cumin, coriander, and garam masala create a familiar savory taste.
  • Easy individual portions: Each egg cup is simple to serve for breakfast or brunch.
  • Air fryer convenience: The compact cooking space helps the eggs cook without heating a full-size oven.
  • Flexible ingredients: Use fresh, frozen, or leftover vegetables based on what you have.
  • Meal-prep friendly: Prepare a batch ahead of time and reheat portions when needed.
  • Adjustable heat: Add green chilies for extra spice or leave them out for a milder flavor.

Ingredients You’ll Need

This recipe makes approximately 6 egg cups, depending on the size of your silicone molds or oven-safe ramekins.

Main Ingredients

  • 4 large eggs
  • 1 medium potato, peeled and diced small
  • 1/3 cup green peas, fresh or frozen
  • 1/4 cup finely chopped onion
  • 1 small green chili, finely chopped (optional)
  • 2 tablespoons chopped fresh cilantro
  • 2 tablespoons milk
  • 1 teaspoon olive oil
  • Salt, to taste
  • Black pepper, to taste

Samosa-Style Seasonings

  • 1/2 teaspoon ground cumin
  • 1/2 teaspoon ground coriander
  • 1/4 teaspoon garam masala
  • 1/4 teaspoon ground turmeric
  • 1/4 teaspoon chili powder, or to taste

Optional Toppings

  • 2 tablespoons shredded cheddar cheese
  • Extra chopped cilantro
  • A pinch of chili flakes
  • Plain Greek yogurt or mint chutney for serving

Ingredient note: The potatoes must be cooked until tender before they go into the egg mixture. Raw potato cubes may remain firm before the eggs finish cooking.

Equipment Needed

  • Air fryer
  • Six small silicone muffin cups or suitable oven-safe ramekins
  • Mixing bowl
  • Whisk or fork
  • Small skillet or microwave-safe bowl
  • Measuring spoons
  • Knife and cutting board

Make sure your cups are heat-safe and fit inside your air fryer basket. Do not use ordinary plastic containers or paper cups that are not rated for air fryer temperatures.

How to Make Air Fryer Samosa-Style Loaded Egg Cups

Step 1: Cook the Potatoes

  1. Peel the potato and cut it into small, evenly sized cubes.
  2. Boil the cubes in water for about 8–12 minutes, or until fork-tender.
  3. Drain the potatoes thoroughly and let them cool slightly.
  4. Gently mash a few pieces while leaving the rest in small chunks for texture.

You can also use leftover boiled potatoes to save time. Avoid adding watery potatoes to the egg mixture because excess moisture can make the cups soft.

Step 2: Prepare the Samosa-Style Filling

  1. Heat the olive oil in a small skillet over medium heat.
  2. Add the chopped onion and cook for 2–3 minutes until softened.
  3. Stir in the cumin, coriander, turmeric, garam masala, and chili powder.
  4. Add the cooked potatoes and green peas.
  5. Cook for another 2–3 minutes, stirring gently to coat the vegetables with the spices.
  6. Add the chopped green chili, if using, and season with salt and black pepper.
  7. Remove the skillet from the heat and stir in the fresh cilantro.

Let the filling cool for a few minutes before combining it with the eggs. This helps prevent the hot filling from starting to cook the eggs too early.

Step 3: Whisk the Eggs

  1. Crack the eggs into a medium mixing bowl.
  2. Add the milk, a small pinch of salt, and black pepper.
  3. Whisk until the yolks and whites are fully combined.
  4. Stir in the shredded cheddar cheese if you want a richer, cheesier result.

Do not overfill the bowl with milk. Too much liquid can make the egg cups watery and slow down the cooking process.

Step 4: Prepare the Air Fryer Cups

  1. Preheat the air fryer to 320°F for about 3 minutes, if your model recommends preheating.
  2. Lightly grease six heat-safe silicone muffin cups or ramekins.
  3. Divide the potato and pea mixture evenly among the cups.
  4. Pour the beaten eggs over the filling, leaving a little room at the top.
  5. Sprinkle extra cilantro or a small amount of cheese over each cup, if desired.

Arrange the cups in a single layer inside the air fryer basket. Leave a little space between them so hot air can circulate.

Step 5: Air Fry Until Set

  1. Place the filled cups carefully in the air fryer basket.
  2. Cook at 320°F for approximately 10–15 minutes.
  3. Begin checking around the 10-minute mark because air fryers and cup sizes vary.
  4. Insert a clean knife into the center of one cup. The eggs should be set rather than liquid.
  5. If needed, continue cooking in 1–2 minute increments until done.

For food safety, the center of an egg dish should reach 160°F. Use a food thermometer to check the temperature when possible. Avoid relying on browning alone to judge doneness.

Step 6: Cool and Serve

  1. Turn off the air fryer and carefully remove the cups using heat-safe tongs or oven mitts.
  2. Let them rest for 2–3 minutes so they can firm up.
  3. Gently loosen the edges with a small silicone spatula if needed.
  4. Transfer the egg cups to a serving plate.
  5. Garnish with fresh cilantro and serve with mint chutney, plain Greek yogurt, or your favorite breakfast sauce.

Enjoy them warm for the best texture and flavor.

Tips for the Best Results

  • Cut the potatoes small: Small cubes distribute evenly and are easier to bite into.
  • Cook the vegetables first: This prevents undercooked potatoes and excess moisture.
  • Use heat-safe cups: Silicone muffin cups or oven-safe ramekins are suitable when rated for your air fryer temperature.
  • Leave room at the top: Eggs expand slightly as they cook, so avoid filling the cups to the rim.
  • Check early: A compact air fryer may cook the eggs faster than a larger model.
  • Adjust the seasoning: Start with a small amount of chili powder and add more next time if you prefer extra heat.
  • Avoid overcrowding: Cook in batches if the cups do not fit comfortably in one layer.

Easy Variations to Try

Cheese and Potato Egg Cups

Add shredded cheddar, Monterey Jack, or pepper jack cheese before cooking. The cheese adds a creamy texture and a little extra richness.

Vegetarian Loaded Egg Cups

The basic recipe is vegetarian. Add finely chopped bell peppers, spinach, or extra peas for more vegetables, but cook moisture-heavy vegetables first.

Spicy Samosa Egg Cups

Include finely chopped green chili or a pinch of cayenne pepper. Adjust the amount to match your preferred heat level.

Higher-Protein Version

Serve the egg cups with plain Greek yogurt, or add a small amount of cooked, finely crumbled tofu to the vegetable filling. Keep the filling quantity moderate so the eggs can hold everything together.

Dairy-Free Version

Replace the milk with an unsweetened plant-based alternative or omit it. Skip the cheese or use a suitable dairy-free alternative.

What to Serve With Samosa-Style Egg Cups

These savory egg cups pair well with simple sides that balance their warm spices.

  • Fresh fruit for a quick breakfast
  • Plain Greek yogurt for a cool, creamy side
  • Mint chutney for a fresh, tangy finish
  • Sliced cucumbers and tomatoes for a light brunch plate
  • Whole-grain toast for a more filling meal
  • A simple green salad for lunch

For a brunch spread, serve the cups alongside fruit, toast, and a small bowl of chutney so everyone can choose their favorite combination.

How to Store and Reheat

Refrigerator

Allow the egg cups to cool, then place them in an airtight container. Refrigerate within 2 hours of cooking and use within 3–4 days.

Freezer

For longer storage, freeze the cooled cups in a single layer until firm, then transfer them to a freezer-safe container. For best quality, use within 2 months. The potato and egg texture may change slightly after freezing.

Reheating in the Air Fryer

Place refrigerated egg cups in the air fryer at 300°F for about 3–5 minutes, checking that the centers are hot. Add a little extra time if needed.

Reheating in the Microwave

Place one egg cup on a microwave-safe plate and heat in short 20–30 second intervals until warmed through. Cooking time depends on the size and power of your microwave.

Reheat leftovers to 165°F. Avoid reheating the same portion multiple times.

Common Mistakes to Avoid

  • Adding raw potatoes: They may not soften before the eggs finish cooking.
  • Using too much milk: Excess liquid can make the center soft and watery.
  • Filling the cups completely: The mixture needs room to expand during cooking.
  • Cooking at too high a temperature: The outside may brown before the center sets.
  • Skipping the temperature check: Egg dishes should reach 160°F for safe cooking.
  • Removing the cups too quickly: A short resting time helps them hold their shape.

Frequently Asked Questions

1. Can I make these egg cups without milk?

Yes. You can omit the milk or replace it with a small amount of unsweetened plant-based milk.

2. Can I use frozen peas?

Yes. Add frozen peas directly to the skillet and cook until heated through before mixing them with the potatoes.

3. What temperature should I use?

Start at 320°F and cook for about 10–15 minutes, checking early because air fryer models and cup sizes differ.

4. How do I know when the egg cups are done?

The center should be set, not runny, and reach 160°F when checked with a food thermometer.

5. Can I prepare them ahead of time?

Yes. Cook the egg cups, refrigerate them in an airtight container, and reheat individual portions when needed.

6. Are these egg cups spicy?

They have a mild, warm spice flavor. Omit the green chili and reduce the chili powder for a gentler version.

7. Can I use a metal muffin pan?

Only if the pan is oven-safe, fits securely in your air fryer, and allows enough room for air circulation.

8. Can I freeze cooked egg cups?

Yes. Freeze them in a sealed, freezer-safe container for best quality within 2 months, then reheat until the center is hot.

Final Thoughts

Air Fryer Samosa-Style Loaded Egg Cups offer a simple way to enjoy the familiar flavors of a samosa in an easy breakfast format. Tender potatoes, green peas, warm spices, and fluffy eggs make each cup flavorful and satisfying.

Prepare them for a weekend brunch, make a batch for busy mornings, or customize the filling with your favorite vegetables and cheese. With pre-cooked potatoes and a few basic ingredients, you can enjoy a savory, samosa-inspired meal without making pastry or deep-frying.