Hot Honey Roasted Cauliflower Steaks with Herb Yogurt

Hot Honey Roasted Cauliflower Steaks with Herb Yogurt

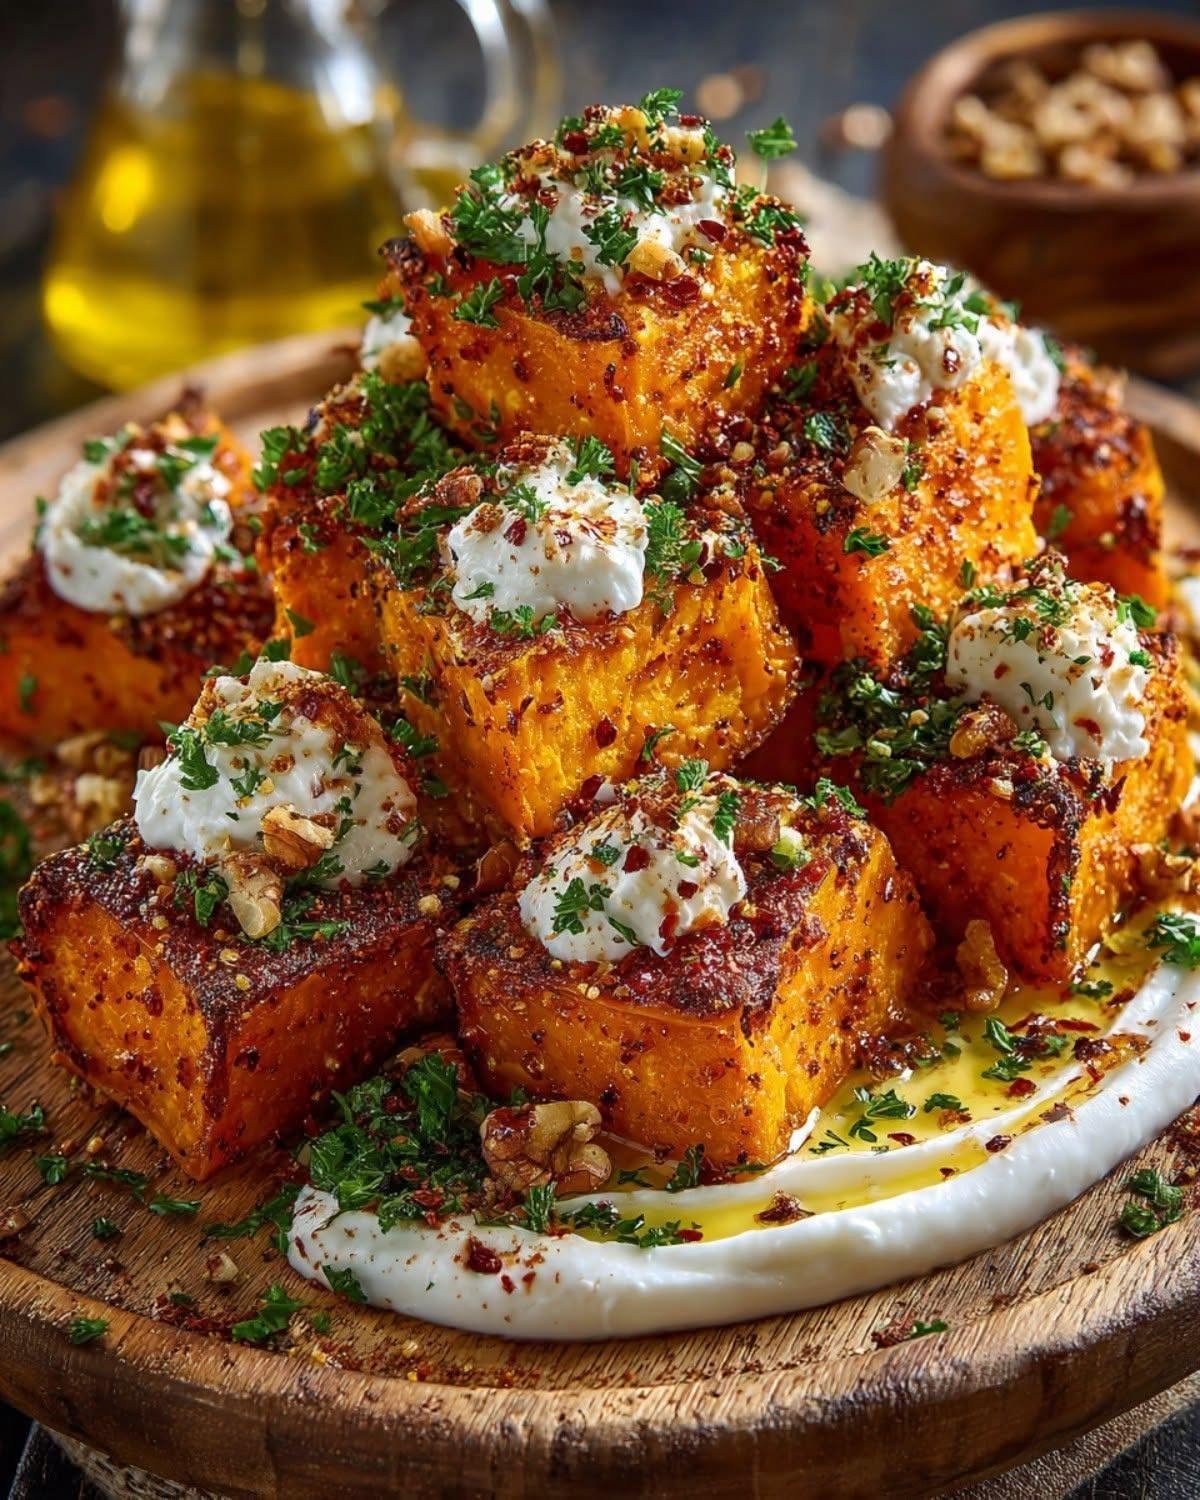
Hot Honey Roasted Cauliflower Steaks with Herb Yogurt are a delicious way to turn a simple head of cauliflower into a satisfying centerpiece. Thick cauliflower slices are roasted until caramelized and tender, then finished with a sweet-and-spicy hot honey glaze and served over a cool, creamy herb yogurt sauce. The contrast between the crispy roasted edges, spicy-sweet glaze, and refreshing yogurt makes every bite flavorful and exciting. This easy vegetarian recipe works beautifully for weeknight dinners, lunch, entertaining, or as a colorful side dish.

Prep Time: 15 minutes

Cook Time: 30–35 minutes

Total Time: 45–50 minutes

Servings: 4

Ingredients

For the Cauliflower Steaks

1 large head cauliflower

2 tablespoons olive oil

½ teaspoon smoked paprika

½ teaspoon garlic powder

½ teaspoon ground cumin

½ teaspoon salt

¼ teaspoon black pepper

For the Hot Honey Glaze

3 tablespoons honey

1–2 teaspoons hot sauce, to taste

½ teaspoon red pepper flakes

1 teaspoon fresh lemon juice

For the Herb Yogurt

1 cup plain Greek yogurt

2 tablespoons fresh parsley, finely chopped

1 tablespoon fresh dill, finely chopped

1 tablespoon fresh mint, finely chopped

1 small garlic clove, minced

1 tablespoon fresh lemon juice

1 tablespoon olive oil

¼ teaspoon salt

¼ teaspoon black pepper

Optional Garnishes

Fresh parsley or dill

Red pepper flakes

Lemon wedges

Toasted sesame seeds

Instructions

Preheat the oven to 220°C/425°F. Line a large baking sheet with parchment paper or lightly grease it with olive oil.

Remove the outer leaves from the cauliflower, but keep the core intact. Place the cauliflower upright on a cutting board and use a sharp knife to cut it into thick slices approximately 1 to 1½ inches thick. These slices are your cauliflower steaks.

The outer pieces may break into smaller florets. Do not discard them. Roast them alongside the steaks or save them for another recipe.

Arrange the cauliflower steaks on the prepared baking sheet. Brush both sides generously with olive oil.

In a small bowl, combine the smoked paprika, garlic powder, cumin, salt, and black pepper. Sprinkle the seasoning mixture evenly over both sides of the cauliflower steaks, gently pressing it onto the surface.

Roast the cauliflower for about 15–18 minutes. Carefully flip each steak with a spatula and continue roasting for another 10–15 minutes, until the edges are deeply golden and caramelized and the center is tender when pierced with a fork.

While the cauliflower is roasting, prepare the hot honey glaze. Add the honey, hot sauce, red pepper flakes, and lemon juice to a small bowl. Stir until smooth and well combined.

For a slightly thinner glaze, warm it gently for a few seconds in the microwave or in a small saucepan over low heat. Do not boil it.

Prepare the herb yogurt by combining the Greek yogurt, parsley, dill, mint, minced garlic, lemon juice, olive oil, salt, and black pepper in a bowl. Stir until creamy and evenly mixed. Taste and adjust the seasoning or lemon juice as desired.

When the cauliflower is almost finished roasting, remove the baking sheet from the oven. Brush the hot honey glaze generously over the tops of the cauliflower steaks.

Return the cauliflower to the oven for another 3–5 minutes. This allows the glaze to become glossy and slightly caramelized. Watch carefully during this final stage because honey can brown quickly.

Remove the cauliflower from the oven and let it rest for a couple of minutes.

To serve, spread a generous layer of herb yogurt onto each plate. Place a roasted cauliflower steak over the yogurt and drizzle with any remaining hot honey glaze.

Finish with fresh parsley or dill, a sprinkle of red pepper flakes, toasted sesame seeds, and a squeeze of fresh lemon if desired.

Serve immediately while the cauliflower is warm and the yogurt is cool and creamy.

Tips

Choose a large, firm cauliflower with tightly packed florets. A sturdy head makes it much easier to cut thick steaks that remain intact during roasting.

Keep the cauliflower core attached while slicing. The core acts as a natural support and helps hold the florets together. If you cut too close to the edges, the slices may fall apart.

Do not cut the steaks too thin. Slices around 1 to 1½ inches thick provide a tender center while still allowing the edges to become beautifully caramelized.

Make sure the cauliflower is dry before seasoning. Excess moisture can cause steaming rather than roasting, which prevents the deep golden color and crisp edges you want.

Use enough olive oil to lightly coat both sides. This helps the seasonings adhere and encourages browning.

For stronger caramelization, avoid overcrowding the baking sheet. Leave space around each steak so hot air can circulate.

The roasting time can vary depending on the size and thickness of your cauliflower steaks. Start checking the center with a fork after about 25 minutes of total roasting.

Adjust the heat in the hot honey to your preference. One teaspoon of hot sauce gives a mild kick, while adding more hot sauce or red pepper flakes creates a noticeably spicier glaze.

The herb yogurt can be prepared ahead of time. Refrigerating it for 30 minutes or longer allows the garlic and fresh herbs to infuse the yogurt with more flavor.

Greek yogurt provides a thick, creamy base, but plain whole-milk yogurt can also be used. If your yogurt is thinner, you may want to use slightly less lemon juice.

Add the hot honey close to the end of roasting. Applying it too early can cause the honey to burn before the cauliflower is fully tender.

For the best presentation, use a wide spatula to lift each cauliflower steak from the baking sheet. If some florets separate, simply arrange them around the steak.

Variations

For a Mediterranean-inspired version, add dried oregano to the cauliflower seasoning and finish the dish with crumbled feta, chopped parsley, and a few toasted pine nuts.

For a smoky version, increase the smoked paprika and add a small pinch of chipotle powder. The smoky seasoning pairs especially well with the sweet honey glaze.

For a lemon-herb cauliflower steak, increase the lemon zest and juice in the herb yogurt and add extra fresh parsley. Finish with grated lemon zest just before serving.

For a cheesy version, sprinkle grated Parmesan over the cauliflower during the final 5 minutes of roasting. Allow it to melt and become lightly golden before adding the hot honey.

For a vegan version, replace the honey with maple syrup and use a dairy-free Greek-style yogurt for the herb sauce.

For extra crunch, sprinkle toasted sesame seeds, chopped pistachios, walnuts, or pumpkin seeds over the finished cauliflower.

For a milder family-friendly version, reduce the hot sauce and omit the red pepper flakes. The honey-lemon glaze will still provide plenty of flavor.

For a stronger garlic flavor, add another small garlic clove to the herb yogurt or rub the roasted cauliflower lightly with fresh garlic immediately after it comes out of the oven.

You can also turn the recipe into a bowl by serving the cauliflower over cooked quinoa, couscous, brown rice, or lentils with extra herb yogurt and fresh vegetables.

Q&A

Why did my cauliflower steaks fall apart?

Cauliflower steaks can break if the head is small, loosely packed, or sliced too close to the edges. Keep the core intact and cut thick slices through the center.

Can I use cauliflower florets instead of steaks?

Absolutely. Cut the cauliflower into large florets and roast them using the same seasoning. Adjust the cooking time according to their size.

Can I make the herb yogurt ahead of time?

Yes. The herb yogurt can be prepared several hours ahead and refrigerated in an airtight container. The flavors often become even better as they sit.

Is hot honey very spicy?

It depends on the amount of hot sauce and red pepper flakes used. Start with a small amount and add more until the heat level suits you.

Can I make this recipe vegan?

Yes. Replace honey with maple syrup and use a dairy-free yogurt alternative for the herb yogurt.

Can I prepare cauliflower steaks in an air fryer?

Yes. Air fry them at around 200°C/400°F until browned and tender, turning halfway through. Work in batches if necessary so they are not overcrowded.

What should I serve with cauliflower steaks?

They are excellent with quinoa, rice, couscous, lentils, roasted potatoes, green salad, or grilled vegetables.

Can I use regular yogurt instead of Greek yogurt?

Yes. Plain yogurt works well, although the sauce will be thinner. For a thicker sauce, strain the yogurt briefly before mixing.

Nutrition

Approximate nutrition per serving, including herb yogurt and hot honey glaze:

Calories: 300–340 kcal

Protein: 11–14 g

Carbohydrates: 31–36 g

Fat: 14–17 g

Fiber: 6–8 g

Sugar: 20–24 g

Sodium: 450–600 mg

Nutrition values are estimates and can vary depending on the size of the cauliflower, yogurt, honey, and amount of olive oil used.

Conclusion

These Hot Honey Roasted Cauliflower Steaks bring together everything you want in a satisfying vegetarian dish: caramelized edges, tender cauliflower, creamy herb yogurt, and a sweet-spicy finish. They are simple enough for a weeknight but impressive enough to serve when guests come over. Serve them warm with plenty of fresh herbs and lemon for a colorful, flavorful meal.

#CauliflowerSteaks #HotHoney #VegetarianRecipes #HealthyDinner #RoastedCauliflower

CHOCOLATE MUG CAKE

Chocolate Mug Cake

Craving something warm, chocolatey, and comforting but don’t want to make an entire cake? This easy Chocolate Mug Cake is the perfect single-serving dessert. It comes together in just a few minutes using simple pantry ingredients and cooks right in the microwave. The result is a soft, moist chocolate cake with a rich cocoa flavor and a tender center. Enjoy it straight from the mug with a few chocolate chips, whipped cream, berries, or a scoop of ice cream for an effortless dessert whenever the craving hits.

Prep Time: 5 minutes

Cook Time: 1–2 minutes

Total Time: 7 minutes

Servings: 1

Ingredients

4 tablespoons all-purpose flour

2 tablespoons unsweetened cocoa powder

2 tablespoons granulated sugar

¼ teaspoon baking powder

Pinch of salt

3 tablespoons milk

2 tablespoons vegetable oil or melted butter

¼ teaspoon vanilla extract

1 tablespoon chocolate chips, optional

1 tablespoon water or extra milk, if needed

Instructions

Choose a microwave-safe mug that holds at least 10–12 ounces. A slightly wider mug works especially well because it allows the cake to cook more evenly and gives you plenty of room for the batter to rise.

Add the flour, cocoa powder, sugar, baking powder, and salt directly to the mug. Stir thoroughly with a small fork or whisk, making sure the cocoa powder is evenly distributed and there are no visible lumps.

Add the milk, vegetable oil or melted butter, and vanilla extract. Stir until the dry and wet ingredients are fully combined and you have a smooth, thick batter.

Scrape around the bottom and corners of the mug as you mix because dry flour or cocoa can sometimes remain hidden underneath the batter.

If the batter appears unusually thick, stir in about 1 tablespoon of water or additional milk. The consistency should be thick but pourable, similar to a traditional cake batter.

Fold in the chocolate chips if using them. You can also sprinkle a few additional chocolate chips over the top for a richer chocolate finish.

Place the mug in the center of the microwave. Cook on high for approximately 60–90 seconds, depending on the strength of your microwave.

Start checking around 60 seconds. The cake should rise and look mostly set on top, while the center may still appear slightly soft. Avoid automatically cooking it for a long time because overcooking is the main reason mug cakes become rubbery or dry.

If the center is still very wet, continue microwaving in 10–15 second intervals until the cake is just cooked through.

Carefully remove the mug from the microwave because it may be hot. Allow the cake to rest for about 1–2 minutes before eating. The cake will continue to set slightly as it cools.

Serve warm directly from the mug. Add whipped cream, powdered sugar, fresh berries, chocolate sauce, peanut butter, or a scoop of vanilla ice cream if desired.

Tips

Use a microwave-safe ceramic or glass mug. Avoid very thin or decorative mugs that are not designed for microwave use.

Do not overfill the mug. The batter can rise significantly while cooking, so keeping the mug no more than about halfway to two-thirds full gives it room to expand.

Measure the flour carefully. Too much flour is one of the easiest ways to end up with a dense mug cake. Spoon the flour into your measuring spoon or cup and level it rather than packing it down.

Use unsweetened cocoa powder so you can control the sweetness of the cake. Dutch-process cocoa can also work, although the flavor and color may vary slightly.

Mix the dry ingredients before adding the wet ingredients. This helps distribute the cocoa and baking powder evenly and prevents pockets of salt or cocoa from remaining in the finished cake.

The amount of microwave time will vary depending on the appliance. A high-powered microwave may need closer to 60 seconds, while a lower-powered model may need 90 seconds or slightly more.

The goal is a moist cake, not a completely dry center. The surface should be set, but a little softness in the center is desirable because residual heat will continue cooking the cake.

Let the cake rest briefly after cooking. Eating it immediately can be difficult because the mug and cake will be extremely hot.

For an extra gooey center, place a teaspoon of chocolate spread or a few chocolate chips in the middle of the batter before microwaving.

For a richer flavor, replace the vegetable oil with melted butter. Butter adds a classic bakery-style flavor, while oil tends to produce a particularly moist texture.

If you are making the recipe frequently, you can pre-mix the dry ingredients in small containers or jars and add the wet ingredients when you are ready to make a cake.

Variations

For a peanut butter chocolate mug cake, swirl 1 tablespoon of creamy peanut butter into the batter before cooking. A small spoonful placed in the center creates a delicious molten-style filling.

For a mocha version, add ½ teaspoon of instant coffee or espresso powder to the dry ingredients. Coffee enhances the chocolate flavor without making the cake taste strongly like coffee.

For a mint chocolate cake, add a tiny amount of peppermint extract along with the vanilla. Start with a very small quantity because peppermint extract is concentrated.

For a coconut chocolate mug cake, replace part of the milk with coconut milk and add 1 tablespoon of unsweetened shredded coconut. Top with a few toasted coconut flakes after cooking.

For a double-chocolate version, increase the chocolate chips to 2 tablespoons and sprinkle a few on top before microwaving.

For a chocolate-orange variation, add a small amount of finely grated orange zest to the batter. The citrus aroma pairs beautifully with cocoa.

For a spiced chocolate cake, add a pinch of cinnamon along with a tiny pinch of chili powder or cayenne. This creates a warm, slightly sophisticated chocolate flavor.

For a dairy-free version, use your favorite plant-based milk and dairy-free chocolate chips. Vegetable oil or melted coconut oil can be used instead of butter.

For a gluten-free option, use a reliable 1-to-1 gluten-free flour blend designed for baking. The texture may vary slightly depending on the blend.

Q&A

Why did my mug cake become rubbery?

The most common reason is overcooking. Microwave cooking happens very quickly, so even an additional 20–30 seconds can make a big difference. Cook until the cake is just set and still slightly moist.

Can I make this mug cake without eggs?

Yes. This recipe is already egg-free, which is one reason it is so quick and easy to prepare.

Can I use butter instead of oil?

Absolutely. Melted butter gives the cake a richer, more traditional cake flavor. Oil tends to make the cake especially moist.

Can I make the batter ahead of time?

It is best to mix and cook the batter immediately. Because the baking powder begins working once it contacts moisture, letting the uncooked batter sit for a long time can affect the rise.

Can I use a different type of milk?

Yes. Dairy milk, almond milk, oat milk, soy milk, and other suitable alternatives can work. The flavor and texture may vary slightly.

How do I make the center extra gooey?

Add a few chocolate chips, a teaspoon of chocolate spread, or a small piece of chocolate into the center of the batter before cooking. Be careful because the filling will be very hot.

Can I bake this instead of microwaving it?

Yes, although it will no longer be a quick microwave mug cake. Transfer the batter to a small oven-safe baking dish or ramekin and bake at approximately 175°C/350°F until the center is set.

Can I double the recipe?

It is better to prepare two individual mug cakes rather than doubling the batter in one mug. A larger quantity may cook unevenly in the microwave.

Nutrition

Approximate nutrition for the cake without optional toppings:

Calories: 390–430 kcal

Protein: 6–8 g

Carbohydrates: 48–55 g

Fat: 20–23 g

Fiber: 4–6 g

Sugar: 24–30 g

Sodium: 180–250 mg

Nutrition values are estimates and will vary depending on the specific flour, milk, chocolate chips, oil, and sugar used.

Conclusion

This Chocolate Mug Cake is the ultimate quick dessert for those moments when you want something homemade without the work of baking a whole cake. It takes only a handful of ingredients and a minute or two in the microwave to create a warm, soft, deeply chocolatey treat. Keep the ingredients on hand and you can enjoy a fresh dessert whenever the craving strikes.

#ChocolateMugCake #EasyDessert #ChocolateLovers #QuickDessert #HomemadeTreat

Keto Avocado Bread

Keto Avocado Bread

Keto Avocado Bread is a soft, flavorful low-carb bread made with creamy avocado, eggs, almond flour, and a few simple ingredients. It has a tender texture, a subtle avocado flavor, and enough structure to slice for breakfast, sandwiches, or a quick snack. Unlike traditional bread, this recipe skips wheat flour and added sugar, making it a convenient option for anyone following a keto or low-carbohydrate eating style. It is also an excellent way to use a ripe avocado and turn it into something completely different and delicious.

Prep Time: 10 minutes

Cook Time: 35–40 minutes

Total Time: 45–50 minutes

Servings: 8 slices

Ingredients

1 large ripe avocado, peeled and pitted

3 large eggs

1½ cups almond flour

2 tablespoons coconut flour

1 teaspoon baking powder

½ teaspoon salt

¼ teaspoon garlic powder

¼ teaspoon black pepper

2 tablespoons olive oil or melted butter

1 tablespoon lemon juice

2 tablespoons grated Parmesan cheese, optional

1 tablespoon sesame seeds or mixed seeds, optional for topping

Butter or oil, for greasing the loaf pan

Instructions

Preheat your oven to 175°C/350°F. Lightly grease a small loaf pan with butter or oil, then line it with parchment paper, leaving a little overhang on the sides. This makes the finished bread much easier to remove.

Cut the avocado in half, remove the pit, and scoop the flesh into a mixing bowl. Make sure the avocado is ripe and soft because a firm avocado will be more difficult to blend smoothly.

Mash the avocado thoroughly with a fork until mostly smooth. For an especially smooth bread, you can process it in a small food processor.

Add the eggs, olive oil or melted butter, and lemon juice to the mashed avocado. Whisk everything together until the mixture is creamy and well combined.

In a separate bowl, combine the almond flour, coconut flour, baking powder, salt, garlic powder, and black pepper. If using Parmesan, add it to the dry ingredients.

Gradually add the dry mixture to the avocado and egg mixture. Stir gently until everything is incorporated and a thick batter forms. Do not overmix once the flour has been incorporated.

Let the batter sit for about 2–3 minutes. Coconut flour absorbs moisture quickly, so the batter may become slightly thicker as it rests.

Transfer the batter to the prepared loaf pan. Use the back of a spoon or spatula to spread the top evenly.

If desired, sprinkle sesame seeds or mixed seeds over the surface for extra flavor and texture.

Place the loaf pan in the preheated oven and bake for approximately 35–40 minutes. The bread should look firm and lightly golden on top.

To check for doneness, insert a toothpick or skewer into the center. It should come out mostly clean with only a few moist crumbs.

Remove the bread from the oven and allow it to cool in the pan for about 10 minutes. Carefully lift it out using the parchment paper and place it on a wire rack.

Allow the bread to cool completely before slicing. This is important because the interior continues to set as it cools. Use a sharp serrated knife to cut it into even slices.

Serve the bread plain, toasted, with butter, or topped with avocado, eggs, cream cheese, smoked salmon, or your favorite keto-friendly toppings.

Tips

Choose a properly ripe avocado for the best texture. The flesh should yield gently when pressed but should not have a strong fermented smell or extensive dark areas.

The avocado should be mashed very smoothly. Small pieces are not necessarily a problem, but large chunks can create uneven pockets of moisture in the finished bread.

Almond flour and coconut flour behave differently from wheat flour. Avoid substituting them cup-for-cup with regular flour because the moisture balance will change significantly.

Do not skip the lemon juice. Besides adding a subtle freshness, the acidity works nicely with the baking powder and helps balance the richness of the avocado.

Avoid overbaking the bread. Because avocado contains natural moisture and fat, the loaf can become dry if left in the oven too long. Start checking around the 35-minute mark.

Allow the bread to cool completely before slicing. Cutting it while very hot can make the center appear gummy or cause the slices to break apart.

For neat slices, use a serrated bread knife and gently saw through the loaf instead of pressing straight down.

If your avocado is particularly large or watery, the batter may be softer than expected. You can add another tablespoon of almond flour if necessary, but avoid adding too much because it can make the bread dense.

For meal prep, slice the cooled loaf before storing it. This makes it easy to take out individual portions whenever needed.

Variations

For a savory herb version, add 1 teaspoon of dried Italian seasoning or a mixture of dried oregano, basil, and parsley. Fresh chopped chives also work beautifully.

For a cheesy version, increase the Parmesan to ¼ cup and add a small amount of shredded cheddar or mozzarella. The result will have a richer flavor and slightly more tender texture.

For a spicy loaf, add ¼ teaspoon of chili flakes, a pinch of cayenne, or finely chopped jalapeño. You can also add a little smoked paprika for deeper flavor.

For a seed-topped version, sprinkle the loaf with sunflower seeds, pumpkin seeds, sesame seeds, or everything bagel seasoning before baking.

For a breakfast-style bread, leave out the garlic and black pepper and add a small pinch of your preferred keto-friendly seasoning. Serve it with scrambled eggs and cheese.

For a Mediterranean variation, add dried oregano, chopped parsley, a little crumbled feta, and a few finely chopped olives. Keep added ingredients modest so they do not make the batter too wet.

For a nut-free variation, almond flour cannot simply be replaced with coconut flour in the same quantity. A suitable keto-friendly nut-free flour blend may be used according to its package instructions, while adjusting the liquid as necessary.

Q&A

Is avocado bread keto-friendly?

This recipe is designed to be low in carbohydrates and suitable for many keto eating plans. Exact carbohydrate values depend on the brands and quantities of ingredients used.

Does the bread taste strongly like avocado?

It has a mild avocado flavor rather than an overpowering one. Garlic, herbs, cheese, and other toppings can further change the flavor.

Why is my bread gummy in the middle?

The most common causes are excess moisture, an especially large avocado, underbaking, or slicing the bread while it is still hot. Make sure the center is fully set and allow the loaf to cool completely.

Can I use coconut flour instead of almond flour?

Not in the same quantity. Coconut flour absorbs considerably more liquid, so replacing almond flour directly will likely produce a dry, dense loaf.

How should I store Keto Avocado Bread?

Store completely cooled bread in an airtight container in the refrigerator for up to several days. Because avocado is highly perishable, refrigeration is recommended.

Can I freeze this bread?

Yes. Slice the completely cooled loaf and place parchment between the slices. Store in a freezer-safe bag or container and thaw individual slices as needed.

Can I toast avocado bread?

Yes. Toasting gives the slices a slightly crisp exterior while keeping the center tender. Watch them closely because low-carb breads can brown quickly.

What can I serve with this bread?

Try butter, cream cheese, eggs, avocado, smoked salmon, turkey, cheese, cucumber, or a simple tomato and herb topping.

Nutrition

Approximate nutrition per slice, based on 8 slices:

Calories: 190–220 kcal

Protein: 7–9 g

Total Carbohydrates: 6–8 g

Fiber: 3–4 g

Net Carbohydrates: approximately 3–4 g

Fat: 16–18 g

Saturated Fat: 3–4 g

Sodium: 220–300 mg

Nutrition values are estimates and can vary depending on avocado size, flour brand, cheese, and other ingredients used.

Conclusion

Keto Avocado Bread is a simple and satisfying homemade alternative to traditional bread. With its soft center, lightly golden crust, and nourishing avocado base, it works beautifully for breakfast, sandwiches, or snacks. Keep a loaf in the refrigerator or freezer and you will always have an easy low-carb option ready to enjoy.

#KetoBread #AvocadoBread #LowCarbRecipes #KetoRecipes #HealthyBread

Cheesy Zucchini & Oats Rolls

Cheesy Zucchini & Oats Rolls

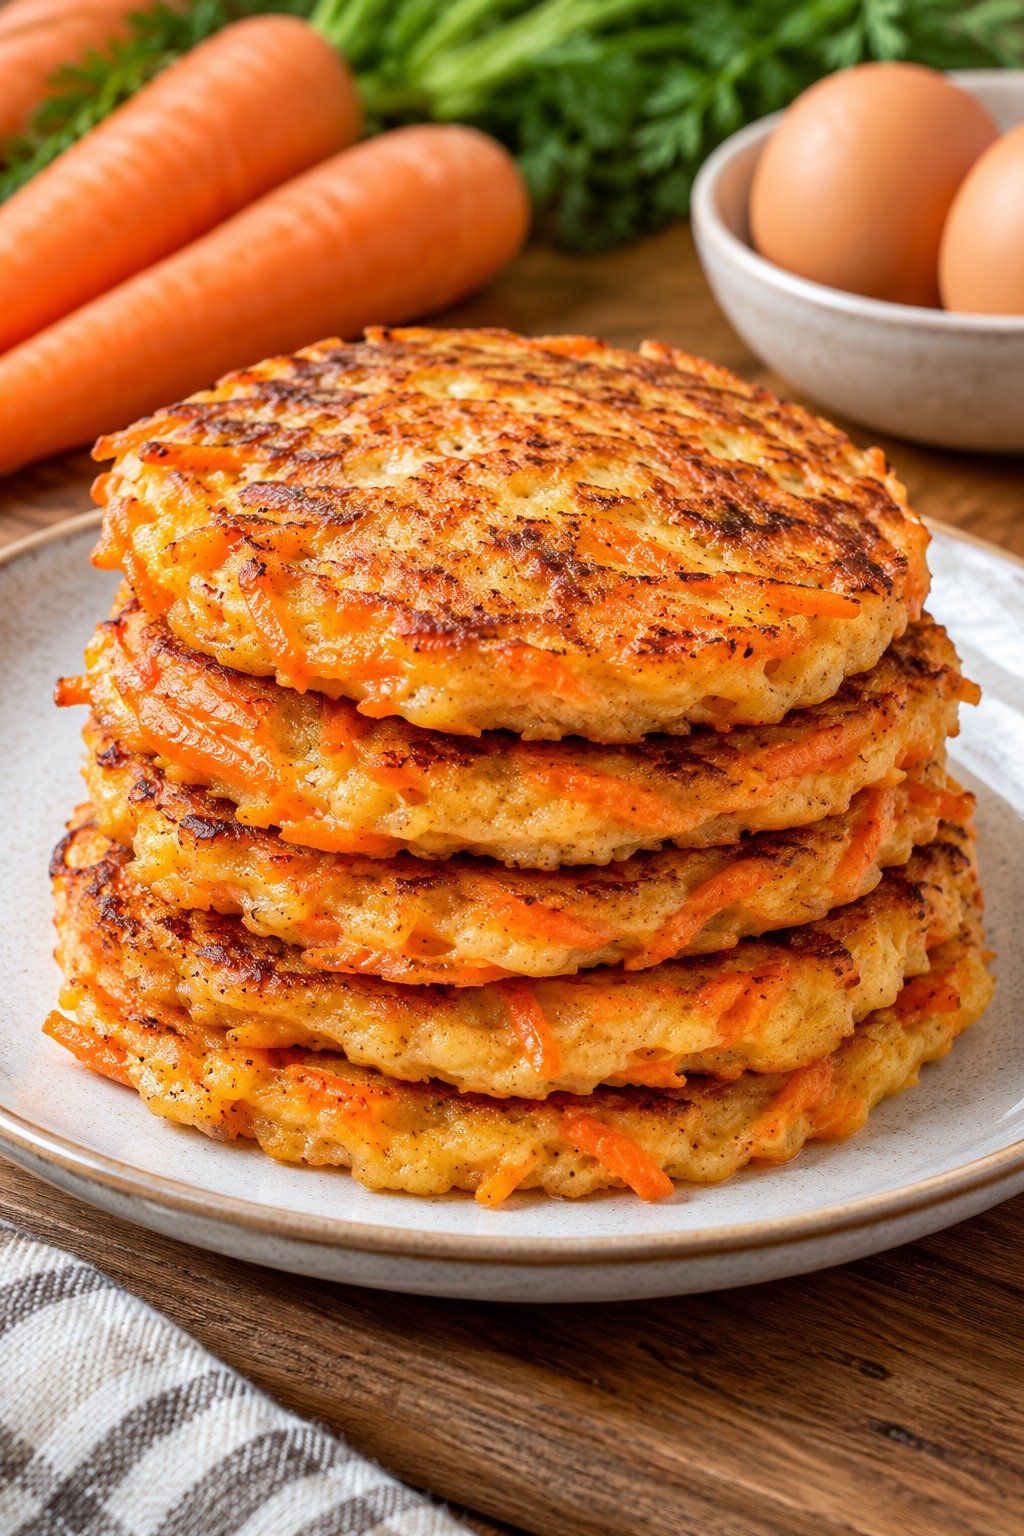
These Cheesy Zucchini & Oats Rolls are a delicious way to turn simple vegetables into a crispy, cheesy, satisfying meal. Grated zucchini and carrot are combined with oats, eggs, herbs, garlic, and plenty of melty cheese, then cooked until golden on the outside and tender inside. They are easy enough for a quick breakfast, light lunch, snack, or meat-free dinner. The oats help absorb moisture and give the rolls a lovely texture, while the cheese adds rich flavor that makes every bite comforting and delicious.

Prep Time: 20 minutes

Cook Time: 20 minutes

Total Time: 40 minutes

Servings: 4

Cuisine: Healthy, Vegetarian, European-inspired

Core Ingredients

1 medium zucchini, grated

1 medium carrot, grated

1 medium potato, grated, optional for binding

4 tablespoons oatmeal, rolled or quick oats

2 large eggs

100 grams grated cheese, such as mozzarella or cheddar

Seasonings & Aromatics

2 cloves garlic, minced

2–3 tablespoons fresh parsley or chives, finely chopped

Salt, to taste

Ground black pepper, to taste

1–2 tablespoons vegetable oil or butter, for cooking or pan-searing

Instructions

Start by preparing the vegetables. Wash the zucchini, carrot, and potato thoroughly. Grate the zucchini and carrot using the large side of a box grater. If you are using potato, grate it as well.

Place the grated zucchini in a clean kitchen towel or several layers of paper towel. Squeeze firmly to remove as much excess liquid as possible. This step is especially important because zucchini naturally contains a lot of water. Removing the moisture helps the rolls hold their shape and become beautifully golden during cooking.

If you are using grated potato, squeeze it thoroughly in the same way. Excess moisture from both the zucchini and potato can make the mixture too loose.

Transfer the squeezed zucchini, carrot, and optional potato to a large mixing bowl. Add the rolled or quick oats, eggs, grated cheese, minced garlic, and chopped parsley or chives.

Season the mixture with salt and black pepper. Stir everything thoroughly until the ingredients are evenly distributed and the mixture becomes cohesive.

Let the mixture rest for about 5 minutes. This gives the oats time to absorb some of the moisture from the vegetables and helps create a mixture that is easier to shape.

Heat a large nonstick skillet over medium heat. Add the vegetable oil or butter and allow it to become hot but not smoking.

Take a portion of the vegetable mixture and shape it into a small oval or compact roll using your hands. Keep the rolls relatively thin so they cook evenly throughout.

Carefully place the rolls into the hot skillet, leaving a little space between each one. Cook for approximately 3–5 minutes on the first side, or until golden brown and firm enough to turn.

Gently flip each roll using a spatula. Continue cooking for another 3–5 minutes until the second side is golden and the cheese is melted.

Continue working in batches until all of the mixture has been cooked. Add a small amount of additional oil or butter to the pan between batches if needed.

Transfer the cooked rolls to a plate lined with paper towels to absorb any excess oil. Allow them to rest for a minute or two before serving.

Serve warm with Greek yogurt, sour cream, a fresh herb dip, tomato sauce, or a simple green salad.

Tips

The most important tip is to remove as much moisture as possible from the zucchini. Zucchini releases a surprising amount of water after grating, and too much liquid can make the mixture difficult to shape. Take your time squeezing it well.

If the mixture feels too wet after resting, add another tablespoon of oats and allow it to sit for a few minutes. The oats will absorb additional moisture and improve the consistency.

Avoid making the rolls too thick. Thin or moderately sized rolls cook more evenly and develop a better golden crust while allowing the cheese inside to melt properly.

Medium heat works best. If the pan is too hot, the outside can brown before the vegetables are fully cooked. If the heat is too low, the rolls may absorb too much oil and become soft rather than crisp.

Use a good nonstick skillet if possible. This makes flipping the delicate vegetable rolls much easier and reduces the amount of oil required.

Mozzarella creates a stretchy, mild center, while cheddar gives the rolls a stronger and richer flavor. You can also combine both cheeses for a balanced result.

Fresh parsley adds brightness, while chives give the rolls a gentle onion flavor. Make sure the herbs are finely chopped so they distribute evenly throughout the mixture.

Taste the mixture before cooking the first batch if desired, but remember that raw egg is present, so do not taste it uncooked. Instead, cook one small test piece first and adjust the seasoning before cooking the rest.

For extra crispiness, use quick oats or lightly pulse rolled oats in a food processor before adding them to the mixture.

Variations

For a Mediterranean-inspired version, add a little dried oregano along with chopped parsley. You can also replace part of the cheese with crumbled feta for a salty, tangy flavor.

For a spicy version, add finely chopped jalapeño, red pepper flakes, or a pinch of cayenne pepper. A little smoked paprika also works beautifully with the cheese and vegetables.

For a protein-rich variation, serve the finished rolls with thick Greek yogurt or cottage cheese on the side. You can also add a small amount of finely chopped cooked chicken to the mixture if you want a heartier meal.

For a different vegetable combination, replace some of the carrot with finely grated bell pepper, spinach, or broccoli. Make sure watery vegetables are squeezed or cooked first so they do not make the mixture too wet.

For a stronger cheesy flavor, use sharp cheddar or a combination of cheddar and Parmesan. Parmesan can also help create a more flavorful golden crust.

For a gluten-free option, use certified gluten-free oats. The remaining ingredients are naturally suitable for a gluten-free preparation, provided your cheese and other packaged ingredients are certified as needed.

For a baked version, shape the mixture into rolls and arrange them on a lightly greased baking sheet. Brush or lightly spray the tops with oil and bake at 200°C/400°F until golden and cooked through, turning once halfway through cooking.

Q&A

Can I make these rolls without potato?

Yes. The potato is optional and mainly helps with binding and texture. The zucchini, carrot, oats, eggs, and cheese can still create a cohesive mixture without it.

Why are my zucchini rolls falling apart?

The most common reason is excess moisture. Make sure the grated zucchini is squeezed very well. You can also add another tablespoon of oats and let the mixture rest before shaping.

Can I prepare the mixture ahead of time?

Yes, you can prepare the mixture several hours ahead and keep it covered in the refrigerator. Stir it before cooking because some moisture may collect at the bottom.

Can I freeze Cheesy Zucchini & Oats Rolls?

Yes. Allow the cooked rolls to cool completely, then freeze them in a single layer before transferring them to a freezer-safe container. Reheat them in an oven, air fryer, or skillet for the best texture.

What can I serve with these rolls?

They pair well with Greek yogurt, sour cream, garlic yogurt sauce, tzatziki, tomato sauce, fresh salad, or roasted vegetables.

Can I use different cheese?

Absolutely. Mozzarella, cheddar, Monterey Jack, gouda, or a combination can work well. Feta can be added for a more savory Mediterranean flavor.

Can I cook them in an air fryer?

Yes. Arrange the shaped rolls in a lightly greased air fryer basket without overcrowding. Cook at around 190°C/375°F until golden and cooked through, turning halfway.

Nutrition

Approximate nutrition per serving, assuming 4 servings and using mozzarella with a moderate amount of cooking oil:

Calories: 250–290 kcal

Protein: 14–16 g

Carbohydrates: 17–20 g

Fat: 14–17 g

Fiber: 3–4 g

Sugar: 4–5 g

Sodium: 350–500 mg

Nutrition values are estimates and can vary depending on the cheese, oats, vegetables, oil, and serving size used.

Conclusion

These Cheesy Zucchini & Oats Rolls are proof that everyday vegetables can become something incredibly satisfying. They are crispy, cheesy, flavorful, and simple enough for busy days. Serve them warm with your favorite dip or salad for an easy vegetarian meal that the whole family can enjoy.

#CheesyZucchiniRolls #HealthyRecipes #ZucchiniRecipes #EasyVegetarian #OatRecipes

Sugar-Free Chocolate Chip Pancakes

Sugar-Free Chocolate Chip Pancakes

These sugar-free chocolate chip pancakes are a delicious way to enjoy a classic breakfast without adding refined sugar to the batter. They are soft, fluffy, lightly golden around the edges, and filled with little pockets of melted chocolate. Ripe banana provides natural sweetness while vanilla and cinnamon add warmth and flavor. They come together quickly with simple ingredients, making them perfect for relaxed weekend breakfasts or busy mornings when you want something homemade. Serve them warm with fresh berries, yogurt, nut butter, or your favorite sugar-free topping for a satisfying breakfast the whole family can enjoy.

Prep Time: 10 minutes

Cook Time: 15 minutes

Total Time: 25 minutes

Servings: 8 pancakes

Ingredients

1 ½ cups all-purpose flour

2 teaspoons baking powder

½ teaspoon baking soda

½ teaspoon ground cinnamon

¼ teaspoon salt

1 large ripe banana, mashed

1 large egg

1 cup milk

2 tablespoons melted unsalted butter or coconut oil

1 teaspoon vanilla extract

½ cup sugar-free or no-added-sugar chocolate chips

Butter or oil, for greasing the pan

Fresh berries, plain Greek yogurt, or sugar-free syrup, for serving, optional

Instructions

In a large mixing bowl, whisk together the flour, baking powder, baking soda, cinnamon, and salt. Mixing the dry ingredients first helps distribute the leavening agents and spices evenly throughout the batter.

In a separate bowl, mash the ripe banana until mostly smooth. A few small pieces are fine and will add little pockets of banana flavor to the pancakes.

Add the egg, milk, melted butter or coconut oil, and vanilla extract to the mashed banana. Whisk until the wet ingredients are well combined.

Pour the wet mixture into the bowl containing the dry ingredients. Using a spatula or wooden spoon, gently stir until just combined. Do not overmix the batter. A few small lumps are perfectly acceptable and will help keep the pancakes tender.

Fold the sugar-free chocolate chips gently into the batter, reserving a few to sprinkle over the pancakes while they cook if desired.

Let the batter rest for about 5 minutes. This gives the flour time to absorb some of the liquid and allows the baking powder to begin working, resulting in a lighter texture.

Heat a nonstick skillet or griddle over medium heat. Lightly grease the surface with a small amount of butter or oil.

Once the pan is hot, pour approximately ¼ cup of batter onto the skillet for each pancake. Leave enough space between pancakes so they are easy to flip.

Cook for about 2 to 3 minutes, or until bubbles begin appearing on the surface and the edges look slightly set. If desired, sprinkle a few additional chocolate chips over the top before flipping.

Carefully flip each pancake using a wide spatula. Cook the second side for another 1 to 2 minutes, or until golden brown and cooked through.

Continue with the remaining batter, lightly greasing the skillet as needed. Adjust the heat if necessary. If the pancakes brown too quickly before the centers cook, lower the heat slightly.

Place the finished pancakes on a plate and keep them warm while cooking the remaining batch.

Serve immediately with fresh berries, plain Greek yogurt, nut butter, or a sugar-free syrup if desired.

Tips

Use a very ripe banana for the best natural sweetness. Bananas with plenty of brown spots are softer, sweeter, and easier to mash. Since this recipe does not use regular granulated sugar, the ripeness of the banana contributes significantly to the overall flavor.

Do not overmix the batter. Overworking the flour can develop too much gluten, resulting in pancakes that are dense instead of light and fluffy. Stir only until the dry ingredients are incorporated.

Allowing the batter to rest for a few minutes can make a noticeable difference. It gives the flour time to hydrate and allows the leavening ingredients to start creating air in the mixture.

Keep the skillet at medium heat rather than using high heat. Pancakes need enough time for the center to cook before the outside becomes too dark. If the first pancake browns very quickly, reduce the heat.

Use a consistent amount of batter for each pancake. A ¼-cup measure makes it easier to create evenly sized pancakes that finish cooking at approximately the same time.

Do not flip the pancakes repeatedly. Wait until bubbles appear on the surface and the edges look set before turning them. One careful flip is usually enough.

If your batter seems unusually thick, add a tablespoon or two of milk until it reaches a thick but pourable consistency. Flour brands and banana sizes can affect how much liquid the batter needs.

If the batter seems too thin, allow it to rest for a few minutes before adding flour. The flour may absorb additional liquid during the resting period.

For the best chocolate flavor, use sugar-free chocolate chips that you enjoy eating on their own. Dark chocolate-style chips can provide a richer flavor, while milk-style varieties create a sweeter taste.

Remember that sugar-free chocolate chips can vary significantly in sweetness and texture. Check the package ingredients if you need the recipe to contain no added sugar.

Keep cooked pancakes warm by placing them in a low oven while finishing the remaining batter. Avoid covering them tightly because trapped steam can soften the edges.

Leftover pancakes can be refrigerated in an airtight container for several days. Reheat them gently in a skillet, toaster, toaster oven, or microwave.

Variations

For a gluten-free version, replace the all-purpose flour with a good-quality gluten-free all-purpose flour blend designed for baking. Choose a blend that already contains a suitable binder if required.

For a higher-protein breakfast, serve the pancakes with plain Greek yogurt or add a small amount of protein powder to the batter. If adding protein powder, you may need a little extra milk to maintain the proper consistency.

For peanut butter chocolate chip pancakes, swirl a tablespoon or two of natural peanut butter into the batter. You can also serve the finished pancakes with warmed peanut butter.

For almond butter pancakes, replace the peanut butter with almond butter. Sliced almonds make a delicious topping and add some crunch.

For blueberry chocolate chip pancakes, gently fold fresh or frozen blueberries into the batter along with the chocolate chips. If using frozen berries, add them directly without thawing to prevent excessive liquid.

For cinnamon banana pancakes, increase the cinnamon slightly and add a small pinch of nutmeg. This creates a warm flavor that pairs beautifully with banana and chocolate.

For coconut pancakes, use melted coconut oil and add a small amount of unsweetened shredded coconut to the batter. Coconut and chocolate make a naturally delicious combination.

For a chocolate pancake variation, replace a few tablespoons of the flour with unsweetened cocoa powder. You may need a small splash of additional milk to maintain a pourable batter.

For an extra-fruity version, serve the pancakes with strawberries, raspberries, blueberries, or sliced banana. Fresh fruit adds color, freshness, and additional natural sweetness.

For a dairy-free option, use an unsweetened plant-based milk and replace the butter with coconut oil or another suitable dairy-free fat.

Q&A

Are these pancakes completely sugar-free?

The batter contains no added granulated sugar. However, bananas naturally contain sugar, and sugar-free chocolate chips may contain sweeteners. Always check the specific products you use if you need to avoid particular sweeteners or sugars.

Can I make these pancakes without banana?

Yes, but the banana contributes natural sweetness, moisture, and flavor. If you omit it, you will need to adjust the liquid and sweetness of the recipe.

What chocolate chips should I use?

Use sugar-free or no-added-sugar chocolate chips according to your dietary needs and preferred taste. Different brands use different sweeteners, so check the ingredient label.

Why are my pancakes not fluffy?

Overmixing, old baking powder, or cooking at the wrong temperature can result in flatter pancakes. Mix gently, use fresh leavening ingredients, and cook over medium heat.

Can I make the batter ahead of time?

It is best to cook the pancakes soon after mixing because the baking powder and baking soda begin working once the wet ingredients are added. However, you can prepare the dry and wet ingredients separately ahead of time.

Can I freeze these pancakes?

Yes. Cool them completely, place parchment paper between individual pancakes, and store them in a freezer-safe bag or container for up to a few months.

How do I reheat frozen pancakes?

You can reheat them in a toaster, toaster oven, skillet, or microwave. A toaster or skillet will help bring back some of the lightly crisp edges.

Can I use whole wheat flour?

Yes. You can replace some or all of the all-purpose flour with whole wheat flour. The pancakes may be slightly denser and may require a little additional milk.

What can I serve with sugar-free pancakes?

Fresh berries, sliced banana, plain Greek yogurt, nut butter, chopped nuts, or sugar-free syrup are all excellent choices.

Nutrition

Approximate nutrition per pancake, based on 8 pancakes and without optional toppings:

Calories: 185

Protein: 5 g

Carbohydrates: 25 g

Fat: 8 g

Saturated Fat: 4 g

Fiber: 2 g

Sugar: 5 g

Sodium: 220 mg

Nutrition values are estimates and will vary depending on the milk, chocolate chips, flour, and other brands used.

Conclusion

These pancakes bring together the comforting flavors of banana, vanilla, cinnamon, and chocolate in a simple breakfast without adding regular granulated sugar. They are fluffy, satisfying, and easy to customize with your favorite toppings. Make a batch for the family and enjoy them warm for a breakfast that feels like a treat while remaining simple to prepare.

#SugarFreePancakes #HealthyBreakfast #ChocolateChipPancakes #EasyBreakfast #PancakeRecipe

Easy Homemade Naan Bread Recipe

Easy Homemade Naan Bread Recipe

There is nothing quite like warm, soft naan fresh from the skillet. This easy homemade naan recipe creates beautifully tender flatbreads with lightly charred spots and a deliciously chewy center. You do not need a traditional tandoor to make excellent naan at home. A hot skillet does the job beautifully and gives the bread those irresistible golden bubbles and toasted edges. Made with simple pantry ingredients, this naan is perfect alongside curries, grilled meats, creamy sauces, soups, or Mediterranean-inspired dishes. Once you try homemade naan, it may quickly become a regular part of your dinner routine.

Prep Time: 20 minutes

Resting Time: 1 hour

Cook Time: 15 minutes

Total Time: About 1 hour 35 minutes

Servings: 8 naan breads

Ingredients

3 cups all-purpose flour

1 teaspoon instant yeast

1 teaspoon sugar

1 teaspoon salt

¾ teaspoon baking powder

¾ cup warm water

½ cup plain Greek yogurt or plain yogurt

2 tablespoons olive oil or melted butter

Extra flour, for rolling

Melted butter, for brushing

Fresh cilantro or parsley, finely chopped, optional

Minced garlic, optional

Instructions

In a large mixing bowl, combine the all-purpose flour, instant yeast, sugar, salt, and baking powder. Whisk or stir the dry ingredients together so the yeast, salt, and baking powder are evenly distributed throughout the flour.

Add the warm water, yogurt, and olive oil or melted butter. Stir everything together with a wooden spoon or spatula until a soft, slightly sticky dough begins to form.

Transfer the dough to a lightly floured work surface. Knead it gently for about 5 to 7 minutes, until it becomes smooth, soft, and elastic. The dough should feel slightly tacky but should not stick heavily to your hands. If it feels excessively sticky, add flour one tablespoon at a time. Avoid adding too much flour because a stiff dough can produce dry naan.

Shape the dough into a ball and place it in a lightly oiled bowl. Turn it once so the surface is lightly coated with oil. Cover the bowl with a clean kitchen towel or plastic wrap.

Let the dough rest in a warm place for about 1 hour, or until it becomes noticeably softer and slightly puffed. It does not necessarily need to double in size, especially when using instant yeast.

Once the dough has rested, gently press it down to release some of the air. Divide it into 8 equal portions. Shape each portion into a smooth ball by pulling the edges toward the center and gently rolling it between your hands.

Cover the dough balls and let them rest for another 10 minutes. This short rest relaxes the gluten and makes the dough much easier to roll.

Heat a heavy skillet or cast-iron pan over medium-high to high heat. Allow the skillet to become very hot before cooking the naan. A properly heated skillet is important for creating bubbles and lightly charred areas.

Take one dough ball and lightly dust your work surface with flour. Roll or stretch it into an oval or round shape about ⅛ inch thick. Naan does not have to be perfectly shaped. A rustic shape is part of its charm.

If desired, gently stretch one end of the naan to create a slightly elongated shape. You can also lightly press chopped garlic or fresh herbs into the surface before cooking.

Carefully place the rolled naan onto the hot, dry skillet. Cook for approximately 1 to 2 minutes, or until bubbles begin forming across the surface and the underside develops golden-brown spots.

Flip the naan and cook the other side for another 1 to 2 minutes. You should see additional golden or lightly charred areas develop. Avoid cooking it for too long because naan can become dry if overcooked.

Transfer the cooked naan to a plate and immediately brush it lightly with melted butter. If making garlic naan, combine minced garlic with melted butter and brush it over the hot bread. Sprinkle with fresh cilantro or parsley if desired.

Cover the cooked naan with a clean kitchen towel while you prepare the remaining pieces. Keeping the bread covered traps a little steam and helps maintain its soft texture.

Repeat with the remaining dough balls, making sure the skillet stays very hot. If the pan begins smoking excessively, reduce the heat slightly.

Serve the naan warm alongside your favorite curry, grilled chicken, roasted vegetables, soups, dips, or other main dishes.

Tips

The temperature of the water matters. Warm water helps activate the yeast and encourages the dough to become soft and workable. The water should feel comfortably warm rather than hot. Very hot water can damage the yeast.

Do not rush the resting process. The dough becomes noticeably easier to work with after resting because the gluten relaxes and the yeast has time to contribute to the texture.

Yogurt is an important ingredient for tender naan. It adds moisture and a gentle tang while helping produce a softer texture. Greek yogurt works especially well, although regular plain yogurt can also be used.

Avoid adding too much flour during kneading or rolling. A slightly soft dough generally produces better naan than a stiff dough. Add only enough flour to prevent excessive sticking.

A very hot skillet is one of the biggest secrets to good homemade naan. If the pan is not hot enough, the dough may dry out before developing the characteristic bubbles and browned spots.

Do not add oil directly to the skillet when cooking traditional-style naan. Cooking the dough on a hot, dry pan allows it to develop the proper toasted surface. Butter is added afterward for flavor.

Roll the naan fairly thin. Dough that is too thick may remain doughy in the center, while dough that is extremely thin may become crisp instead of soft and chewy.

Do not worry about making perfectly shaped circles. Naan is traditionally rustic, and irregular edges can actually create wonderful crispy and charred spots.

Keep cooked naan covered with a clean towel. This prevents the bread from losing moisture while the remaining pieces cook.

For the softest texture, brush the naan with melted butter immediately after it leaves the skillet. Garlic butter is especially delicious and takes the flavor to another level.

If your naan is becoming hard, it is usually a sign that it has been cooked too long or the dough contained too much flour. Reduce the cooking time slightly and keep the dough soft.

For make-ahead preparation, you can prepare the dough several hours in advance and refrigerate it after the initial kneading. Let it come closer to room temperature before dividing and rolling.

Cooked naan can be stored in an airtight container for a couple of days. Reheat it briefly in a hot skillet, oven, or microwave before serving.

Variations

For garlic naan, mix finely minced garlic with melted butter and brush it generously over the hot naan. Finish with fresh cilantro or parsley.

For butter naan, simply brush each freshly cooked piece with melted salted or unsalted butter. The simple combination of warm bread and butter is hard to beat.

For cheese naan, place shredded mozzarella, cheddar, or another melting cheese inside a portion of dough. Seal the edges carefully, flatten gently, and cook until golden and the cheese is melted.

For herb naan, press chopped cilantro, parsley, rosemary, or fresh thyme into the dough before cooking. Brush with butter immediately afterward.

For spicy naan, add finely chopped green chilies or a pinch of red pepper flakes to the garlic butter. You can also mix spices such as cumin or chili powder into the dough.

For sesame naan, sprinkle sesame seeds over the surface before cooking. Gently press them into the dough so they adhere.

For whole wheat naan, replace part of the all-purpose flour with whole wheat flour. Start by replacing about ½ cup and adjust the liquid if necessary because whole wheat flour absorbs more moisture.

For a richer naan, replace some of the olive oil with melted butter or use full-fat yogurt. This creates a particularly tender and flavorful bread.

For a Mediterranean-inspired variation, brush the finished naan with olive oil, garlic, parsley, oregano, and a little crumbled feta. Serve it alongside grilled vegetables, hummus, or roasted chicken.

For mini naan, divide the dough into smaller portions and roll them into smaller flatbreads. They are perfect for appetizers, lunchboxes, or individual servings.

Q&A

Can I make naan without a tandoor?

Yes. A very hot cast-iron or heavy skillet works extremely well for homemade naan. The high heat helps create bubbles and lightly charred spots.

Can I use regular yogurt instead of Greek yogurt?

Yes. Plain regular yogurt works well. If it is particularly thin or watery, you may need slightly less water when mixing the dough.

Why is my naan not becoming bubbly?

The skillet may not be hot enough, or the dough may have been rolled too thick. Preheat the skillet thoroughly and roll the naan relatively thin.

Why is my homemade naan hard?

Naan can become hard when it is overcooked or when too much flour is added to the dough. Keep the dough soft and cook each piece only until golden and lightly charred.

Can I prepare the dough ahead of time?

Yes. You can prepare the dough in advance and refrigerate it in a covered bowl. Bring it toward room temperature before shaping and cooking.

Can I freeze homemade naan?

Yes. Allow the naan to cool completely, separate individual pieces with parchment paper, and place them in a freezer-safe bag. Reheat directly from frozen or thaw first.

How should I reheat naan?

A hot skillet is one of the best methods. Heat each piece briefly on both sides. You can also use an oven or microwave, although the skillet helps restore some of the original texture.

Can I make this recipe dairy-free?

Yes. Use a suitable dairy-free plain yogurt and replace butter with olive oil or a dairy-free butter alternative.

What should I serve with naan?

Naan pairs beautifully with curries, grilled chicken, roasted vegetables, lentils, soups, hummus, dips, and creamy sauces.

Nutrition

Approximate nutrition per naan, based on 8 servings and before additional butter or toppings:

Calories: 245

Protein: 7 g

Carbohydrates: 40 g

Fat: 7 g

Saturated Fat: 2 g

Fiber: 2 g

Sugar: 2 g

Sodium: 330 mg

Nutrition values are estimates and may vary depending on the yogurt, flour, oil, butter, and toppings used.

Conclusion

Making naan at home is easier than it looks, and the result is incredibly rewarding. Soft in the center, lightly crisp around the edges, and beautifully golden from the hot skillet, this homemade bread is perfect for soaking up flavorful sauces and adding something special to any meal. Once you master the basic dough, you can easily experiment with garlic, herbs, cheese, and spices.

#NaanBread #HomemadeBread #EasyRecipes #IndianFood #BreadRecipes

Cheesy Broccoli Chicken Quesadillas

Cheesy Broccoli Chicken Quesadillas

When you need a quick meal that combines crispy tortillas with a warm, cheesy filling, these broccoli chicken quesadillas are an excellent choice. Tender seasoned chicken and lightly cooked broccoli are combined with two delicious cheeses, then tucked inside flour tortillas and toasted until golden and crunchy. They are simple enough for a busy evening but satisfying enough to serve for a casual family lunch or dinner. Add your favorite toppings and dipping sauces to make every quesadilla exactly how you like it.

Prep Time: 15 minutes

Cook Time: 20 minutes

Total Time: 35 minutes

Servings: 4

Ingredients

2 cups cooked chicken, shredded or finely chopped

2 cups broccoli florets, finely chopped

1 tablespoon olive oil

½ small onion, finely diced

2 cloves garlic, minced

1 teaspoon smoked paprika

½ teaspoon garlic powder

½ teaspoon onion powder

½ teaspoon salt

¼ teaspoon black pepper

1 ½ cups shredded cheddar cheese

½ cup shredded Monterey Jack cheese

8 medium flour tortillas

2 tablespoons chopped fresh parsley or cilantro, optional

Sour cream, salsa, or guacamole for serving, optional

Instructions

If you are using raw chicken, cook it completely before beginning the quesadillas. You can use grilled, baked, roasted, or leftover chicken. Once cooked, shred or finely chop it into bite-sized pieces and set aside.

Bring a small pot of water to a boil. Add the broccoli florets and cook for about 2 minutes, just until they become slightly tender and bright green. Drain immediately and rinse briefly with cold water to stop the cooking process. Pat the broccoli dry and chop it into small pieces.

Heat the olive oil in a large skillet over medium heat. Add the diced onion and cook for 3 to 4 minutes, stirring occasionally, until softened and lightly translucent.

Add the minced garlic and cook for about 30 seconds, stirring constantly so it does not burn. Add the chopped broccoli and cooked chicken to the skillet.

Season the mixture with smoked paprika, garlic powder, onion powder, salt, and black pepper. Stir everything together and cook for another 3 to 4 minutes, allowing the chicken and broccoli to absorb the seasonings and warm through.

Remove the skillet from the heat. Let the filling cool for a couple of minutes before assembling the quesadillas. This helps prevent the tortillas from becoming overly moist.

Place one flour tortilla on a clean work surface. Sprinkle a portion of the cheddar and Monterey Jack cheese over one half of the tortilla. Add a generous layer of the chicken and broccoli filling, then sprinkle a little more cheese over the top.

Fold the tortilla in half to cover the filling. Repeat with the remaining tortillas, cheese, and chicken-broccoli mixture.

Heat a clean nonstick skillet or griddle over medium to medium-low heat. Place one assembled quesadilla into the dry skillet. Cook for about 2 to 3 minutes on the first side, until the tortilla becomes golden brown and crisp.

Carefully flip the quesadilla and cook the other side for another 2 to 3 minutes. The cheese should be completely melted and the outside should be crisp and lightly browned.

Transfer the cooked quesadilla to a cutting board and let it rest for 1 to 2 minutes. Cut it into wedges using a sharp knife or pizza cutter.

Repeat the process with the remaining quesadillas. If the skillet becomes too hot, reduce the heat so the tortillas do not brown before the cheese has melted.

Garnish with fresh parsley or cilantro if desired. Serve immediately with salsa, sour cream, guacamole, or another favorite dipping sauce.

Tips

Chop the broccoli into small pieces so it distributes evenly throughout the quesadilla. Large pieces can make the tortillas difficult to fold and can cause the filling to fall out while eating.

Do not overcook the broccoli. A quick blanch keeps it tender while preserving some texture. You can also steam the broccoli instead if preferred.

Using cooked leftover chicken makes this recipe especially quick. Rotisserie chicken is another convenient option, but remove the skin and shred the meat before adding it to the filling.

For the best texture, allow excess moisture to evaporate from the chicken and broccoli mixture before assembling the quesadillas. A wet filling can make the tortillas soft rather than crisp.

Use freshly shredded cheese whenever possible. Pre-shredded cheese can contain ingredients that prevent it from melting as smoothly. Cheddar and Monterey Jack create a particularly creamy combination.

Keep the skillet at medium or medium-low heat. High heat can burn the tortilla while leaving the cheese inside only partially melted.

Do not overload the tortillas with filling. A moderate layer of chicken, broccoli, and cheese makes the quesadillas easier to fold, flip, and eat.

For extra crispiness, you can lightly brush the outside of each tortilla with olive oil before cooking. You only need a small amount.

Let each quesadilla rest for a minute or two after cooking. This gives the melted cheese a chance to settle and makes cutting cleaner.

If preparing several quesadillas, keep the cooked ones warm in a low oven while finishing the rest. Avoid stacking too many directly on top of one another because trapped steam can soften the tortillas.

These quesadillas are best served fresh, but leftovers can be refrigerated in an airtight container and reheated in a skillet or air fryer to restore some of their crisp texture.

Variations

For a spicy version, add diced jalapeños, crushed red pepper flakes, or your favorite hot sauce to the chicken and broccoli filling. Pepper Jack cheese can also replace Monterey Jack for extra heat.

For a Mediterranean-inspired twist, replace some of the cheddar with feta and add chopped roasted red peppers, spinach, oregano, and a few sliced Kalamata olives.

For a ranch-style quesadilla, add a little ranch seasoning to the filling and serve the finished quesadillas with ranch dressing for dipping.

For a Tex-Mex variation, add black beans, corn, diced tomatoes, and a pinch of cumin. Serve with salsa and guacamole.

For extra vegetables, add finely chopped bell peppers, mushrooms, spinach, zucchini, or corn. Cook vegetables until excess moisture has evaporated before combining them with the chicken.

For a lighter option, use whole wheat tortillas and reduce the amount of cheese slightly. You can also add extra broccoli to increase the vegetable content.

For a buffalo chicken version, toss the cooked chicken with buffalo sauce before combining it with the broccoli. Use cheddar or Monterey Jack and serve with a creamy dipping sauce.

For a garlic Parmesan variation, replace part of the cheddar with Parmesan and add extra garlic and Italian seasoning to the filling.

For a breakfast-inspired version, replace some of the chicken with scrambled eggs and add cooked turkey bacon or breakfast sausage.

You can also turn the filling into mini quesadillas by using smaller tortillas. These make an excellent appetizer or party snack and are easy to serve with several dipping sauces.

Q&A

Can I use leftover chicken for these quesadillas?

Yes. Leftover roasted, baked, grilled, or rotisserie chicken works perfectly. Simply shred or finely chop it before adding it to the filling.

Can I use frozen broccoli?

Yes. Thaw the broccoli first and drain it very well. Excess moisture can make the quesadillas soggy.

What cheese melts best in quesadillas?

Cheddar, Monterey Jack, mozzarella, Pepper Jack, and Colby Jack all melt well. Combining two cheeses can give you both great flavor and a creamy texture.

Can I make these quesadillas ahead of time?

You can prepare the filling ahead of time and refrigerate it. For the crispiest results, assemble and cook the quesadillas shortly before serving.

How do I keep quesadillas crispy?

Cook them over medium to medium-low heat and avoid using too much oil. Also, make sure the filling is not watery and do not cover the cooked quesadillas with a lid.

Can I freeze chicken quesadillas?

Yes. Allow cooked quesadillas to cool completely, wrap them individually, and freeze them in a freezer-safe container or bag. Reheat them in a skillet, oven, or air fryer.

Can I use corn tortillas?

Yes, although flour tortillas are generally easier to fold without cracking. If using corn tortillas, warm them slightly before assembling.

What can I serve with these quesadillas?

Salsa, guacamole, sour cream, pico de gallo, ranch dressing, or a simple green salad are all excellent choices.

How long do leftovers last?

Store leftovers in an airtight container in the refrigerator and enjoy them within 3 to 4 days for the best quality.

Nutrition

Approximate nutrition per serving, based on 4 servings and without optional dipping sauces:

Calories: 520

Protein: 39 g

Carbohydrates: 43 g

Fat: 23 g

Saturated Fat: 10 g

Fiber: 5 g

Sugar: 4 g

Sodium: 850 mg

Nutrition values are estimates and can vary depending on the tortillas, cheese, chicken, and other ingredients used.

Conclusion

Golden, crunchy, cheesy, and loaded with tender chicken and broccoli, these quesadillas are an easy way to make an ordinary meal feel special. They come together quickly, use everyday ingredients, and offer plenty of room for customization. Serve them with fresh salsa, creamy guacamole, or your favorite dip for a meal that is sure to disappear quickly.

#QuesadillaRecipe #ChickenDinner #EasyFamilyDinner #BroccoliChicken #QuickMeals

Mediterranean Protein-Packed Sweet Potato Egg Casserole

Mediterranean Protein-Packed Sweet Potato Egg Casserole

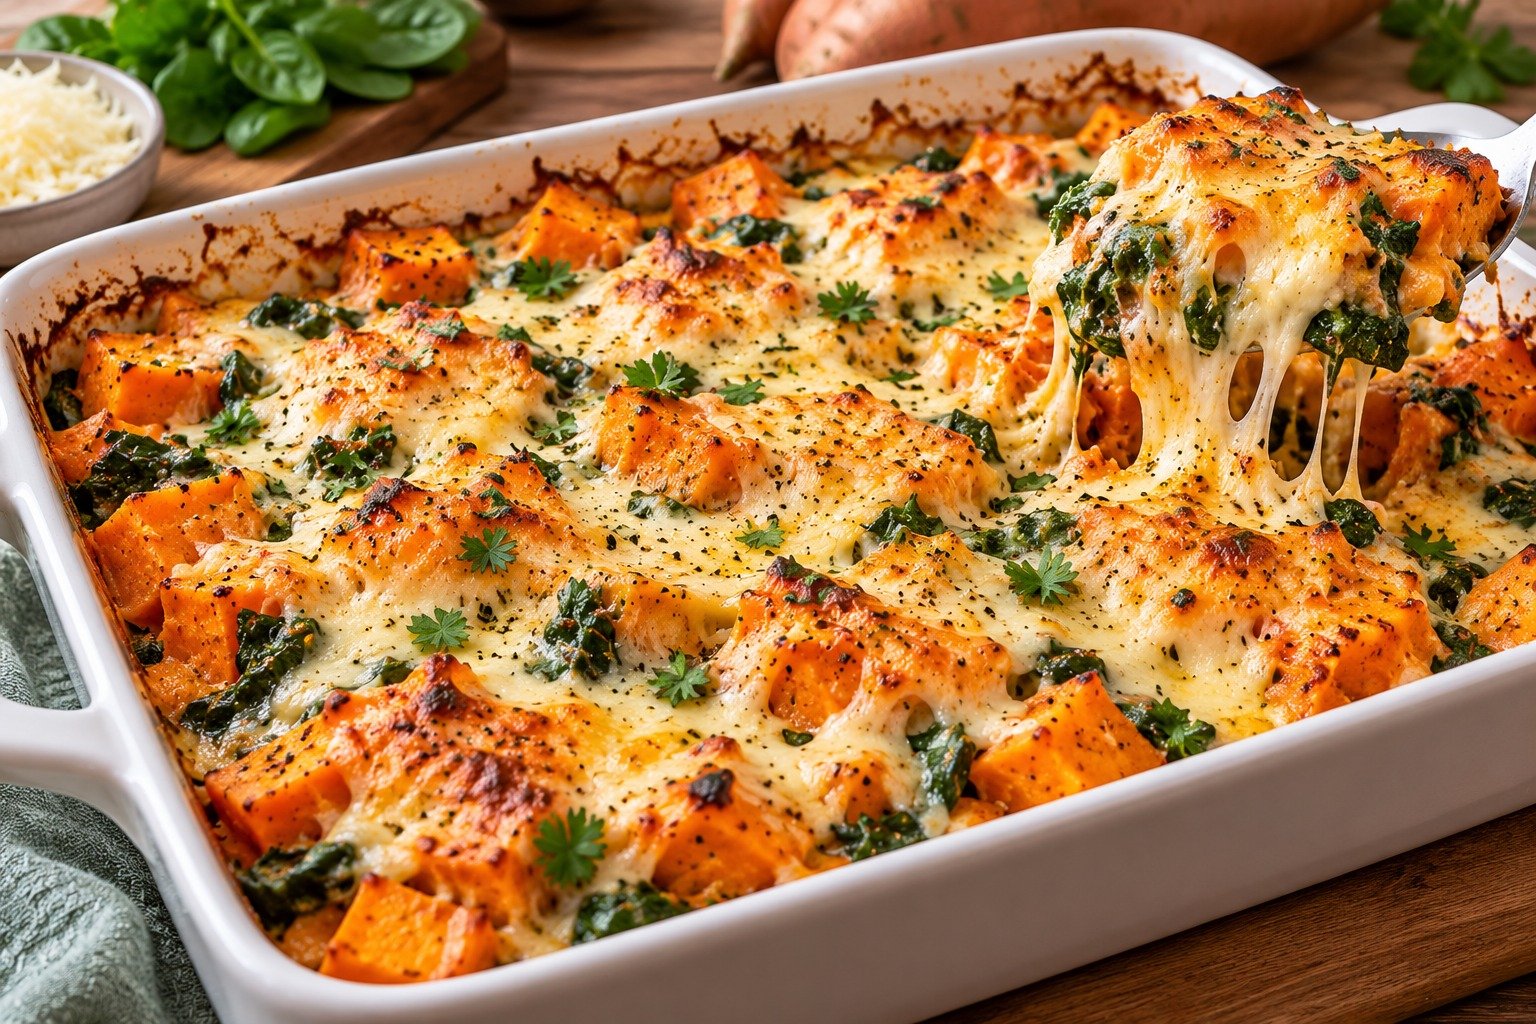
If you are looking for a wholesome breakfast that feels hearty without being complicated, this sweet potato egg casserole is a wonderful choice. It combines naturally sweet roasted potatoes with tender spinach, red bell pepper, onion, fluffy seasoned eggs, and plenty of flavorful cheese. Every bite has a satisfying mix of textures and Mediterranean-inspired ingredients. It is also a practical make-ahead recipe, making it ideal for family breakfasts, weekend brunches, or quick meals during the week.

Prep Time: 20 minutes

Cook Time: 40 to 50 minutes

Total Time: About 1 hour 10 minutes

Servings: 6 to 8

Ingredients

10 large eggs

2 medium sweet potatoes, peeled and diced into small cubes

½ cup milk

2 cups fresh spinach, roughly chopped

1 red bell pepper, cored and chopped

½ small onion, diced

¾ cup shredded cheese, using a combination of Parmesan and Cheddar or feta

Fresh chives or parsley, finely chopped

Salt, to taste

Black pepper, to taste

Olive oil, for roasting the sweet potatoes and sautéing the vegetables

Instructions

Preheat your oven to 400°F (200°C). Lightly grease a 9 x 13-inch baking dish with olive oil or cooking spray and set it aside.

Peel the sweet potatoes and cut them into small, evenly sized cubes. Keeping the pieces relatively small helps them cook more quickly and evenly.

Place the diced sweet potatoes on a large baking sheet. Drizzle them with a little olive oil and season with a small amount of salt and black pepper. Toss well so the cubes are lightly coated.

Spread the sweet potatoes into a single layer. Roast for about 20 to 25 minutes, turning them once halfway through cooking. They should become tender with lightly caramelized edges. Remove them from the oven and reduce the oven temperature to 375°F (190°C).

While the sweet potatoes roast, heat a little olive oil in a large skillet over medium heat. Add the diced onion and chopped red bell pepper. Cook for about 4 to 5 minutes, stirring occasionally, until the vegetables begin to soften.

Add the chopped spinach to the skillet. Cook for another 1 to 2 minutes, just until the spinach wilts. Remove the skillet from the heat and set the vegetables aside.

In a large mixing bowl, crack the eggs and add the milk. Season with salt and black pepper. Whisk thoroughly until the eggs and milk are well combined and slightly frothy. Whisking well helps create a lighter texture in the finished casserole.

Add the roasted sweet potatoes and sautéed vegetables to the prepared baking dish. Spread them evenly so every portion will contain a good combination of vegetables.

Pour the egg mixture evenly over the vegetables. Gently shake the baking dish or use a spatula to distribute the ingredients if necessary.

Sprinkle the shredded cheese evenly over the top. If using feta, scatter the crumbled feta across the surface for a distinctly Mediterranean flavor.

Place the casserole in the 375°F (190°C) oven. Bake for approximately 25 to 30 minutes, or until the eggs are completely set in the center and the top is lightly golden.

To check for doneness, gently insert a knife into the center. It should come out mostly clean, without loose liquid egg. Avoid overbaking because the eggs can become dry and rubbery.

Remove the casserole from the oven and let it rest for about 5 to 10 minutes. This allows the eggs to finish setting and makes the casserole easier to slice.

Garnish with freshly chopped parsley or chives just before serving. Cut into squares or wedges and serve warm.

Tips

Choose sweet potatoes that are firm and free from soft spots. Smaller or medium-sized sweet potatoes are often easier to peel and dice. Cutting them into evenly sized cubes is important because it allows all the pieces to roast at approximately the same rate.

Do not overcrowd the baking sheet when roasting the sweet potatoes. If the pieces are packed too closely together, they may steam instead of roast. Give them enough space to develop lightly browned edges and a richer flavor.

You can prepare the sweet potatoes in advance to make this casserole quicker on busy mornings. Store the roasted cubes in an airtight container in the refrigerator and use them within a few days.

For fluffy eggs, whisk the eggs and milk thoroughly before combining them with the vegetables. The milk adds moisture and helps create a softer texture.

Avoid adding too much salt before adding the cheese. Parmesan, Cheddar, and feta can all contribute saltiness, so taste and adjust carefully.

Fresh spinach works particularly well, but make sure it is not carrying excessive water into the casserole. If your spinach is very wet after washing, dry it thoroughly before chopping.

Do not overcook the casserole. The center should be set but still tender. The eggs continue cooking slightly from residual heat after the dish comes out of the oven.

Letting the casserole rest before slicing is worthwhile. Cutting immediately can cause the egg mixture to separate or make the slices difficult to serve neatly.

For meal prep, allow the casserole to cool completely before dividing it into portions. Store portions in airtight containers in the refrigerator.

The casserole can be reheated gently in the microwave or oven. Reheat only until warmed through to prevent the eggs from becoming tough.

For an especially Mediterranean finish, use feta cheese and garnish the casserole with fresh parsley. A small drizzle of extra virgin olive oil just before serving can also enhance the flavor.

Variations

For a stronger Mediterranean flavor, replace the Cheddar and Parmesan with crumbled feta. You can also add chopped Kalamata olives, sun-dried tomatoes, or a few sliced cherry tomatoes.

For a spicy version, add red pepper flakes, diced jalapeño, or a pinch of smoked paprika to the egg mixture.

For extra protein, add cooked chicken, turkey, or lean sausage. Make sure any meat is fully cooked before adding it to the casserole.

For a mushroom version, sauté sliced mushrooms with the onion and bell pepper. Allow excess moisture to cook away before adding the vegetables to the baking dish.

For a zucchini variation, dice a small zucchini and sauté it along with the other vegetables. Avoid adding too much zucchini because its high water content can make the casserole watery.

For a breakfast casserole with extra herbs, add fresh dill, oregano, basil, or thyme. Fresh herbs can be mixed into the egg mixture or sprinkled over the finished casserole.

For a lower-carbohydrate option, reduce or omit the sweet potatoes and increase the amount of spinach, mushrooms, zucchini, or bell pepper.

For a heartier version, add cooked diced potatoes instead of some of the sweet potatoes. This creates a more traditional breakfast-casserole texture.

For a cheesy version, use mozzarella with feta for a creamy, stretchy topping. A small amount of Parmesan can be added for extra savory flavor.

For individual servings, divide the mixture among greased ramekins or muffin cups. Reduce the cooking time and bake until the egg mixture is fully set.

Q&A

Can I make this casserole ahead of time?

Yes. You can prepare the casserole in advance and refrigerate it after baking. It is particularly convenient for breakfast meal prep.

Can I use frozen spinach?

Yes. Thaw the spinach completely and squeeze out as much excess water as possible before adding it to the recipe.

Can I use a different type of cheese?

Absolutely. Feta, Cheddar, Parmesan, mozzarella, or a combination can work well. Feta gives the casserole a stronger Mediterranean character.

Can I make this casserole without milk?

Yes. You can replace the milk with an unsweetened dairy-free alternative or use a little extra egg if preferred. The texture may vary slightly.

How do I prevent the casserole from becoming watery?

Avoid adding vegetables with excessive moisture. Cook spinach, zucchini, and mushrooms first and allow extra liquid to evaporate before adding them to the casserole.

Can I freeze the casserole?

Yes. Allow it to cool completely, portion it, wrap the pieces well, and freeze them in airtight freezer-safe containers. Thaw in the refrigerator before reheating.

How long does it keep in the refrigerator?

For best quality, keep cooked portions refrigerated and enjoy them within about 3 to 4 days.

Can I add meat to this recipe?

Yes. Cooked chicken, turkey, or sausage can be added. Make sure the meat is fully cooked before combining it with the other ingredients.

What is the best way to reheat leftovers?

Reheat individual portions gently in the microwave or warm larger portions in a moderate oven. Avoid excessive heat because eggs can become rubbery when overheated.

Nutrition

Approximate nutrition per serving, based on 8 servings and without optional additional ingredients:

Calories: 285

Protein: 17 g

Carbohydrates: 22 g

Fat: 15 g

Saturated Fat: 5 g

Fiber: 4 g

Sugar: 6 g

Sodium: 420 mg

Nutrition values are estimates and can vary depending on the specific milk, cheese, and ingredient brands used.

Conclusion

From its colorful vegetables to its creamy cheese topping and naturally sweet roasted potatoes, this casserole makes breakfast feel both nourishing and satisfying. Prepare it once and enjoy easy portions throughout the week, or serve it fresh from the oven at your next brunch. It is a flexible recipe that can easily become a regular favorite in your kitchen.

#HealthyBreakfastIdeas #MediterraneanFood #ProteinBreakfast #SweetPotatoCasserole #BreakfastRecipes

Mediterranean Baked Cod with Cherry Tomatoes & kalmata Olives

Mediterranean Baked Cod with Cherry Tomatoes & kalmata Olives

Ingredients
4 cod fillets, about 6 oz (170 g) each
2 cups cherry tomatoes, halved
½ cup Kalamata olives, pitted
4 cloves garlic, minced
3 tablespoons extra-virgin olive oil
1 lemon, thinly sliced
2 tablespoons fresh lemon juice
1 teaspoon dried oregano
½ teaspoon paprika
½ teaspoon salt
¼ teaspoon black pepper
¼ teaspoon red pepper flakes, optional
2 tablespoons fresh parsley, chopped
2 tablespoons fresh basil, chopped, optional
Instructions
Preheat:
Heat oven to 400°F (200°C). Lightly grease a baking dish.
Prepare the vegetables:
Add cherry tomatoes, Kalamata olives, garlic, olive oil, lemon juice, oregano, paprika, salt, pepper, and red pepper flakes to the baking dish. Toss well.
Add the cod:
Pat the cod fillets dry and place them over the tomato-olive mixture. Season lightly with salt, pepper, and oregano. Top with lemon slices.
Bake:
Bake uncovered for 15–20 minutes, depending on the thickness of the fillets, until the cod is opaque and flakes easily with a fork. The center should reach 145°F (63°C).
Finish:
Spoon the roasted tomatoes, olives, and flavorful juices over the cod. Sprinkle with fresh parsley and basil.

Creamy Cucumber Salad

Creamy Cucumber Salad

Ingredients

* 3 cucumbers, thinly sliced
* ½ cup shredded cheddar cheese
* ½ cup sour cream
* 2 tbsp mayonnaise
* 1 tbsp fresh dill, chopped
* 1 tbsp chives, chopped
* 1 tsp lemon juice
* Salt and black pepper, to taste
* 1 tsp sesame seeds (for garnish)

Instructions

1. Wash the cucumbers and slice them into thin, even rounds. Pat them dry with a paper towel to remove excess moisture.
2. In a large mixing bowl, combine the sour cream, mayonnaise, lemon juice, chopped dill, chives, salt, and black pepper. Stir until the dressing is smooth and creamy.
3. Add the sliced cucumbers and shredded cheddar cheese to the bowl. Gently toss until every slice is evenly coated with the dressing.
4. Let the salad chill in the refrigerator for 15–20 minutes to allow the flavors to blend.
5. Before serving, give the salad a gentle stir and sprinkle sesame seeds and a few extra chives on top for garnish.
Prep Time: 10 minutes
Chill Time: 15–20 minutes
Servings: 4

Caramelized Butternut Squash, Carrots, Brussels Sprouts & Sweet Potato with Feta, Walnuts & Cranberry-Honey Glaze

Caramelized Butternut Squash, Carrots, Brussels Sprouts & Sweet Potato with Feta, Walnuts & Cranberry-Honey Glaze

 What You Need

For the Roasted Vegetables
4 cups (600 g) butternut squash, peeled and cubed
3 large carrots, peeled and sliced diagonally
1 lb (450 g) Brussels sprouts, halved
2 medium sweet potatoes, peeled and cubed
3 tbsp extra virgin olive oil
1 tsp garlic powder
1 tsp smoked paprika
1 tsp dried thyme
1/2 tsp ground cinnamon
Salt & freshly ground black pepper
For the Cranberry-Honey Glaze
1/2 cup (120 g) whole berry cranberry sauce
3 tbsp honey
1 tbsp fresh orange juice
1 tsp orange zest
1 tbsp unsalted butter
1 tsp Dijon mustard
Pinch of flaky sea salt
For the Toppings
7 oz (200 g) feta cheese, crumbled
3/4 cup (75 g) toasted walnuts, roughly chopped
2 tbsp roasted pumpkin seeds
2 tbsp chopped fresh parsley
Optional Toppings
Fresh thyme sprigs
Dried cranberries
Extra orange zest
Freshly cracked black pepper
Extra honey drizzle
Microgreens

 How to make it

Preheat the oven to 425°F (220°C). Line a large baking tray with parchment paper.
In a large bowl, combine the butternut squash, carrots, Brussels sprouts, and sweet potatoes.
Drizzle with the olive oil and season with the garlic powder, smoked paprika, thyme, cinnamon, salt, and black pepper. Toss until evenly coated.
Spread the vegetables in a single layer on the prepared baking tray.
Roast for 35–40 minutes, turning halfway through, until the vegetables are caramelized, tender, and golden around the edges.
While the vegetables roast, combine the cranberry sauce, honey, orange juice, orange zest, butter, Dijon mustard, and flaky sea salt in a small saucepan.
Warm over medium-low heat for 3–4 minutes, stirring until smooth and glossy.
Transfer the roasted vegetables to a large serving platter.
Drizzle the warm cranberry-honey glaze evenly over the vegetables.
Sprinkle with the crumbled feta, toasted walnuts, pumpkin seeds, and chopped parsley.
Garnish with fresh thyme, dried cranberries, orange zest, freshly cracked black pepper, microgreens, and an extra drizzle of honey if desired.
Serve immediately as a colorful holiday side dish or a hearty vegetarian main course.

 Nutritional Info (per serving, serves 6)

Calories: 392
Protein: 10 g
Carbohydrates: 43 g
Fat: 22 g
Fiber: 8 g
Sugar: 19 g
Sodium: 386 mg

Lemon Herb Orzo with Asparagus Feta &Toasted Almonds

Lemon Herb Orzo with Asparagus Feta &Toasted Almonds

Ingredients

The Savory Crepes
1 cup All-purpose flour
2 Large eggs
1 ½ cups Milk (whole or 2%)
2 tbsp Melted butter
Pinch of salt
The Meat Filling
1 lb (500g) Ground beef (lean)
1 Medium onion, finely diced
2 Cloves garlic, minced
2 tbsp Tomato paste (for richness)
½ cup Beef broth (to keep it moist)
Seasoning: 1 tsp Paprika, ½ tsp Salt, ½ tsp Black pepper
The Cheese Sauce (Mornay)
2 tbsp Butter
2 tbsp Flour
1 ½ cups Milk
1 ½ cups Shredded cheese (Cheddar, Monterey Jack, or Mozzarella)
Garnish: Fresh chopped parsley

II. Instructions

1. Make the Crepes
Whisk the flour, eggs, milk, melted butter, and salt until smooth. Let the batter rest for 15 minutes.
Heat a lightly greased non-stick skillet over medium heat.
Pour a small ladle of batter into the pan, swirling it to coat the bottom thinly.
Cook for 1 minute until the edges lift, flip, and cook for another 30 seconds. Repeat until batter is gone. Stack them on a plate.
2. Cook the Filling
Brown the ground beef in a skillet over medium-high heat. Drain excess fat.
Add the onion and garlic; sauté until softened (approx. 5 minutes).
Stir in the tomato paste, beef broth, and seasonings. Simmer for 5-8 minutes until the liquid has mostly reduced, leaving a thick, saucy meat mixture.
3. Make the Cheese Sauce
In a small saucepan, melt butter over medium heat. Whisk in flour and cook for 1 minute (don’t let it brown).
Slowly whisk in the milk to avoid lumps. Simmer until thickened.
Remove from heat and stir in 1 cup of the shredded cheese until smooth.
4. Assemble and Bake
Preheat oven to 375°F (190°C).
Lay a crepe flat. Spoon 2-3 tablespoons of meat filling down the center, then drizzle with a little cheese sauce.
Fold it: Fold the bottom up, then the sides over (like an open-ended burrito), or simply roll them tightly as seen in the image.
Place the rolls side-by-side in a greased baking dish.
Pour the remaining cheese sauce over the center of the rolls and sprinkle with the remaining ½ cup of shredded cheese.
Bake for 15-20 minutes until the cheese is melted and golden

Zucchini Rolls

Zucchini Rolls

These delicious Zucchini Rolls are a light, cheesy, and flavorful dish that makes a perfect low-carb dinner, appetizer, or side. Thin zucchini slices are roasted until tender, then filled with a creamy ricotta and Parmesan mixture, rolled up, and baked in a rich tomato sauce. The result is beautifully tender zucchini with a warm, cheesy center and golden melted cheese on top.

Recipe Details

Prep Time: 15 minutes
Cook Time: 25 minutes
Total Time: 40 minutes
Servings: 4
Cuisine: Italian-inspired
Course: Main Dish / Side Dish

Ingredients

  • 3 medium zucchini
  • 1 cup ricotta cheese
  • ½ cup grated Parmesan cheese
  • 1 cup shredded mozzarella, divided
  • 1 garlic clove, minced
  • 1 teaspoon Italian seasoning
  • ½ teaspoon salt
  • ¼ teaspoon black pepper
  • 1½ cups marinara sauce
  • 1 tablespoon olive oil
  • 2 tablespoons chopped fresh basil

Instructions

  1. Prepare the Zucchini: Preheat the oven to 400°F (200°C). Slice the zucchini lengthwise into thin strips, about ⅛-inch thick. Lightly brush both sides with olive oil.
  2. Roast: Arrange the zucchini slices on a baking sheet and roast for 8–10 minutes, just until flexible. Avoid overcooking, or they may become difficult to roll.
  3. Make the Filling: In a bowl, combine ricotta, Parmesan, ½ cup mozzarella, garlic, Italian seasoning, salt, and black pepper. Mix until creamy and well combined.
  4. Roll: Spread a spoonful of the cheese mixture over each zucchini slice. Carefully roll each slice into a neat spiral.
  5. Bake: Spread marinara sauce across the bottom of a baking dish. Place the zucchini rolls seam-side down over the sauce. Top with the remaining mozzarella.
  6. Finish: Bake for 15 minutes, or until the cheese is melted and lightly golden. Garnish with fresh basil and serve warm.

Tips

For easier rolling, choose medium-sized zucchini with a similar thickness. Pat the zucchini dry after roasting to prevent watery rolls. Add spinach, cooked ground turkey, mushrooms, or red pepper flakes to the filling for extra flavor.

Approximate Nutrition Per Serving: 285 calories, 17g protein, 15g carbohydrates, 18g fat.

Roasted Cabbage Steaks with Bacon, Garlic & Parmesan.

Roasted Cabbage Steaks with Bacon, Garlic & Parmesan.

 Ingredients
1 large green cabbage
5 slices bacon, chopped
3 tbsp olive oil
4 cloves garlic, minced
½ tsp smoked paprika
½ tsp Italian seasoning
½ tsp black pepper
½ tsp salt
½ cup freshly grated Parmesan cheese
2 tbsp fresh parsley, chopped
1 tbsp lemon juice, optional
Red pepper flakes, optional
 Instructions
Prepare the Cabbage:
Preheat your oven to 425°F (220°C). Remove any damaged outer cabbage leaves and slice the cabbage into thick rounds about ¾–1 inch thick. Keep the core intact so the slices hold together.
Prepare the Garlic Oil:
In a small bowl, combine olive oil, minced garlic, smoked paprika, Italian seasoning, black pepper, and salt.
Season:
Arrange the cabbage steaks on a parchment-lined baking sheet. Brush both sides generously with the garlic oil mixture.
Add Bacon:
Scatter chopped bacon around and lightly over the cabbage steaks.
Roast:
Roast for 20 minutes. Carefully flip the cabbage steaks and continue roasting for another 15–20 minutes, until the edges are deeply caramelized and tender and the bacon is crisp.
Add Parmesan:
Sprinkle Parmesan generously over the roasted cabbage. Return to the oven for 3–5 minutes, until the cheese melts and becomes lightly golden.
Finish & Serve:
Remove from the oven and garnish with fresh parsley. Add a squeeze of lemon juice and a pinch of red pepper flakes for extra brightness and heat.

Fluffy Almond Flour Pancakes Light, tender, and perfect for a low-carb breakfast.

Servings: 2–3 (makes 6–8 pancakes)
Total Time: 20 minutes
Difficulty: Easy
Calories per Serving: 250 kcal
Macros per Serving: Protein 12g / Carbs 6g / Fat 20g / Fiber 3g

Introduction

Craving fluffy, golden pancakes without derailing your keto, low-carb, or Weight Watchers plan? These Keto & Low-Carb Almond Flour Pancakes are the perfect solution. They’re soft, satisfying, and packed with protein while keeping carbs to a minimum.

Using almond flour as the base keeps them nutty, tender, and naturally low in carbs. Paired with eggs and a touch of protein-rich Greek yogurt or cottage cheese, these pancakes are a breakfast powerhouse that fuels your morning with energy and flavor.

Perfect for busy mornings or a weekend brunch, this recipe brings the comfort of traditional pancakes with a healthy twist. Quick to make, naturally gluten-free, and friendly for multiple diet plans, they’re sure to become a staple in your kitchen.


Look at the Recipe

  • Sensory Appeal: Golden, fluffy, and light with a tender crumb
  • Flavor Highlight: Mildly nutty almond base balanced with a hint of vanilla
  • Key Benefit: High-protein, low-carb, and Weight Watchers–friendly

Ingredients Needed

Wet Ingredients

  • 3 large eggs
  • ½ cup unsweetened almond milk (or other low-carb milk)
  • 1 tsp vanilla extract
  • 2 tbsp Greek yogurt or cottage cheese

Dry Ingredients

  • 1 cup almond flour
  • 2 tbsp coconut flour
  • 1 tsp baking powder
  • ¼ tsp salt
  • 1–2 tbsp low-carb sweetener (erythritol, monk fruit, optional)

Optional Add-ins & Toppings

  • ½ tsp cinnamon
  • ½ cup fresh berries ( blueberries, raspberries, or strawberries)
  • Sugar-free syrup or a smear of almond butter

How to Make Our Keto & Low-Carb Almond Flour Pancakes

  1. Preheat Pan: Heat a non-stick skillet or griddle over medium heat. Lightly grease with coconut oil or butter.
  2. Mix Wet Ingredients: In a medium bowl, whisk eggs, almond milk, Greek yogurt, and vanilla until smooth.
  3. Combine Dry Ingredients: In another bowl, mix almond flour, coconut flour, baking powder, salt, and sweetener.
  4. Combine Wet & Dry: Fold wet ingredients into dry ingredients and stir until smooth. The batter should be thick but pourable.
  5.  Cook Pancakes: Spoon ¼ cup of batter onto the skillet for each pancake. Cook 2–3 minutes per side until golden brown and  cooked through. Flip carefully.
  6. Serve: Stack and serve with berries, sugar-free syrup, or a dollop of nut butter for extra protein and flavor.

Storage & Serving Suggestions

  • Storing: Keep in an airtight container in the fridge for up to 3 days.
  • Freezing: Freeze individual pancakes for a quick breakfast. Reheat in a toaster or microwave.
  • Serving Pairings: Perfect with keto-friendly syrup, fresh berries, or a sprinkle of chia seeds for added fiber.

Tips & FAQs

Q: Can I make these nut-free?
A: Yes! Substitute almond flour with sunflower seed flour.

Q: Can I make this recipe vegan?
A: You can try flax eggs or chia eggs, but texture may differ.

Q: How can I make them fluffier?
A: Make sure your eggs are at room temperature and avoid overmixing the batter.


Q: Are these pancakes Weight Watchers friendly?
A: Yes, almond flour keeps the carbs low while protein from eggs and yogurt supports your points target.

Q: Can I add chocolate chips?
A: Use sugar-free chocolate chips for a keto-friendly option.

Grilled Chicken & Broccoli Bowl with Creamy Garlic Sauce

Grilled Chicken & Broccoli Bowl with Creamy Garlic Sauce

Description

Grilled Chicken & Broccoli Bowl with Creamy Garlic Sauce is a delicious, satisfying, protein-packed meal that combines juicy seasoned chicken, tender-crisp broccoli, fluffy grains, and a rich yet refreshing homemade garlic sauce. It is colorful, filling, easy to prepare, and perfect for lunch, dinner, meal prep, or a quick family meal.

The chicken is marinated with olive oil, garlic, lemon juice, paprika, oregano, salt, and black pepper before being grilled until beautifully browned on the outside and juicy inside. The broccoli is lightly roasted or grilled until tender with slightly caramelized edges. Everything is served over your choice of cooked rice, quinoa, couscous, or another favorite grain.

The star of the bowl is the creamy garlic sauce. Made with Greek yogurt, mayonnaise, fresh garlic, lemon juice, and herbs, it is tangy, creamy, garlicky, and incredibly easy to prepare. It brings all the components together and adds a restaurant-style finish to this simple homemade meal.

This bowl is highly customizable. Add cucumber, tomatoes, avocado, red onion, chickpeas, feta cheese, roasted peppers, or leafy greens for extra color and flavor.

Recipe Details

Prep Time: 20 minutes
Marinating Time: 20–30 minutes
Cook Time: 20 minutes
Total Time: About 1 hour
Servings: 4
Cuisine: Mediterranean-inspired
Course: Main Dish
Difficulty: Easy

Ingredients

For the Chicken

  • 1½ pounds boneless, skinless chicken breasts or thighs
  • 2 tablespoons extra-virgin olive oil
  • 2 tablespoons fresh lemon juice
  • 3 cloves garlic, minced
  • 1 teaspoon paprika
  • 1 teaspoon dried oregano
  • ½ teaspoon onion powder
  • ½ teaspoon salt
  • ½ teaspoon black pepper
  • ¼ teaspoon red pepper flakes, optional

For the Broccoli

  • 4 cups broccoli florets
  • 1 tablespoon olive oil
  • ¼ teaspoon salt
  • ¼ teaspoon black pepper
  • ½ teaspoon garlic powder

For the Bowl Base

  • 3 cups cooked rice, quinoa, or couscous
  • 1 cup cherry tomatoes, halved
  • 1 cucumber, diced
  • ¼ red onion, thinly sliced
  • ½ cup crumbled feta cheese, optional
  • ¼ cup fresh parsley, chopped

Creamy Garlic Sauce

  • ¾ cup plain Greek yogurt
  • 2 tablespoons mayonnaise
  • 2 cloves garlic, finely grated or minced
  • 1 tablespoon fresh lemon juice
  • 1 tablespoon extra-virgin olive oil
  • 1 tablespoon chopped fresh parsley
  • ½ teaspoon dried oregano
  • ¼ teaspoon salt
  • ¼ teaspoon black pepper
  • 1–2 tablespoons water, as needed

Instructions

Step 1: Marinate the Chicken

Place the chicken breasts or thighs in a large bowl or resealable bag.

Add olive oil, lemon juice, minced garlic, paprika, oregano, onion powder, salt, black pepper, and red pepper flakes if using.

Toss thoroughly until the chicken is evenly coated.

Cover and refrigerate for 20–30 minutes.

If using chicken breasts that are very thick, pound them gently to an even thickness. This helps them cook more evenly and prevents the thinner portions from drying out before the center is done.

Step 2: Prepare the Garlic Sauce

While the chicken marinates, prepare the sauce.

In a small bowl, combine Greek yogurt, mayonnaise, garlic, lemon juice, olive oil, parsley, oregano, salt, and black pepper.

Whisk until smooth.

If the sauce is too thick, add water one tablespoon at a time until it reaches your desired consistency.

Taste and adjust the lemon juice, garlic, salt, or pepper.

Cover and refrigerate until ready to serve.

Allowing the sauce to rest for at least 15 minutes helps the garlic flavor develop.

Step 3: Prepare the Broccoli

Wash and thoroughly dry the broccoli.

Place the florets in a bowl and toss with olive oil, salt, pepper, and garlic powder.

You can either grill the broccoli alongside the chicken or roast it separately.

For grilling, place the broccoli in a grill basket or on a suitable grill-safe surface.

Cook over medium-high heat for approximately 6–10 minutes, turning occasionally, until tender with lightly charred edges.

For roasting, spread the broccoli on a baking sheet and roast at 425°F (220°C) for approximately 15–20 minutes.

Step 4: Grill the Chicken

Preheat an outdoor grill, grill pan, or skillet over medium-high heat.

Lightly oil the cooking surface if necessary.

Place the marinated chicken on the hot grill.

Cook chicken breasts for approximately 5–7 minutes per side, depending on thickness.

Chicken thighs may require slightly longer.

The chicken is safely cooked when the thickest part reaches an internal temperature of 165°F (74°C).

Remove the chicken from the grill and allow it to rest for approximately 5 minutes.

Resting allows the juices to redistribute throughout the meat.

Step 5: Prepare the Bowl Ingredients

While the chicken rests, prepare the remaining ingredients.

Cook your preferred grain if you haven’t already.

For a Mediterranean-style bowl, quinoa, brown rice, white rice, couscous, or bulgur all work well.

Dice the cucumber, halve the tomatoes, slice the red onion, and chop the parsley.

Step 6: Slice the Chicken

After resting, slice the chicken into strips or bite-sized pieces.

Try to slice against the grain for the most tender texture.


Step 7: Assemble the Bowls

Divide the cooked rice or quinoa among four bowls.

Arrange grilled chicken and broccoli on top.

Add cherry tomatoes, cucumber, red onion, and feta if using.

Drizzle generously with the creamy garlic sauce.

Finish with fresh parsley, a squeeze of lemon, and a small drizzle of olive oil.

Serve immediately.

Recipe Notes

Chicken Breast or Thighs?

Both work beautifully.

Chicken breasts are leaner and cook quickly, while chicken thighs are naturally more tender and forgiving.

Don’t Over-Marinate

Because the marinade contains lemon juice, avoid leaving the chicken in it for excessively long periods.

A short marinating time is enough to add plenty of flavor.

Fresh Garlic Makes a Difference

Fresh garlic creates a much stronger and fresher sauce than garlic powder.

For an especially smooth sauce, grate the garlic finely instead of chopping it.

Use Greek Yogurt

Plain Greek yogurt creates a thick, creamy base while adding protein.

Full-fat, low-fat, or nonfat Greek yogurt can be used depending on your preference.

Choose Your Grain

White rice, brown rice, quinoa, couscous, bulgur, farro, or cauliflower rice can all be used.

Helpful Tips for the Best Chicken Bowl

1. Pound Thick Chicken Breasts

If chicken breasts vary greatly in thickness, the thin sections may dry out before the thickest section is fully cooked.

Pounding them to a more even thickness helps solve this problem.

2. Preheat the Grill

A properly heated grill helps create attractive grill marks and prevents the chicken from sticking.

3. Don’t Constantly Flip the Chicken

Allow the chicken to cook undisturbed for several minutes before turning it.

This encourages browning and helps prevent sticking.

4. Let the Chicken Rest

Don’t immediately slice the chicken after removing it from the grill.

Resting for about 5 minutes helps preserve moisture.

5. Dry the Broccoli

Excess moisture can prevent broccoli from browning.

Dry it thoroughly before tossing with oil and seasonings.

6. Char the Broccoli Slightly

A little browning adds smoky flavor and creates a delicious contrast with the creamy garlic sauce.

7. Make Extra Sauce

The creamy garlic sauce is delicious on wraps, sandwiches, roasted vegetables, potatoes, and salads.

Making a double batch can save time later.

Flavor Variations

Spicy Chicken Bowl

Add extra red pepper flakes, cayenne pepper, or hot sauce to the chicken marinade.

Finish the bowl with a drizzle of chili oil.

Mediterranean Chicken Bowl

Add Kalamata olives, feta cheese, cucumber, tomatoes, red onion, and roasted red peppers.

Use lemon-herb quinoa as the base.

Avocado Chicken Bowl

Add sliced avocado for a creamy texture and fresh flavor.

A squeeze of lime or lemon helps brighten the avocado.

Garlic Parmesan Bowl

Add freshly grated Parmesan to the broccoli before serving and sprinkle additional Parmesan over the chicken.

Low-Carb Bowl

Replace rice or quinoa with cauliflower rice or a bed of mixed greens.

High-Fiber Bowl

Use quinoa or brown rice and add chickpeas, extra vegetables, and leafy greens.

Tzatziki-Style Garlic Sauce

Replace the mayonnaise with additional Greek yogurt and add grated cucumber, dill, and extra lemon juice.

This creates a lighter, tzatziki-inspired sauce.

Make-Ahead Instructions

This recipe is excellent for meal prep.

Cook the chicken, broccoli, and grain ahead of time.

Allow everything to cool before storing.

Divide the grain, chicken, and broccoli among meal-prep containers.

Keep the fresh vegetables and creamy garlic sauce in separate containers when possible.

Add the sauce shortly before eating to prevent the vegetables and grains from becoming soggy.

Storage

Store cooked chicken and vegetables in airtight containers in the refrigerator.

For best quality, consume within approximately 3–4 days.

Keep the creamy garlic sauce refrigerated in a separate airtight container.

Fresh cucumber and tomatoes are best stored separately because they release moisture.

Reheat the chicken and broccoli thoroughly before serving.

Freezing Instructions

The cooked chicken and grain can be frozen.

Allow them to cool completely before transferring to freezer-safe containers.

Freeze for up to approximately 2–3 months for best quality.

Broccoli can also be frozen, although its texture may become softer after thawing.

The creamy garlic sauce is best prepared fresh because yogurt-based sauces can separate when frozen and thawed.

Serving Suggestions

Serve this bowl with:

  • Warm pita bread
  • Hummus
  • Greek salad
  • Roasted potatoes
  • Grilled vegetables
  • Lentil salad
  • Tabbouleh
  • Fresh fruit
  • Pickled onions
  • Kalamata olives

For an attractive presentation, arrange each ingredient in separate sections rather than mixing everything together.

Drizzle the creamy garlic sauce across the top just before serving.

Nutritional Information

Approximate nutrition per serving, including rice and sauce:

  • Calories: 560 kcal
  • Protein: 48 g
  • Carbohydrates: 47 g
  • Fiber: 7 g
  • Fat: 22 g
  • Saturated Fat: 5 g
  • Sugar: 6 g
  • Sodium: 650–800 mg
  • Calcium: 180 mg
  • Iron: 3 mg

Nutrition values are estimates and can vary depending on the chicken cut, grain, sauce ingredients, and portion sizes.

Benefits of Grilled Chicken & Broccoli Bowl

1. High in Protein

Chicken and Greek yogurt provide substantial protein, which contributes to a satisfying meal and supports normal maintenance of body tissues.

2. Provides Fiber

Broccoli, vegetables, and whole grains such as quinoa or brown rice can contribute dietary fiber.

Fiber supports normal digestive health and can help meals feel more filling.

3. Rich in Vegetables

This bowl provides several opportunities to include vegetables such as broccoli, tomatoes, cucumber, and onion.

Different vegetables contribute different vitamins, minerals, and beneficial plant compounds.

4. Provides Calcium

Greek yogurt and feta cheese contribute calcium, an important mineral for normal bones and teeth.

5. Contains Unsaturated Fats

Olive oil and avocado, if added, provide predominantly unsaturated fats.

6. Balanced Meal

The combination of protein, carbohydrates, vegetables, and fats makes this bowl a practical and satisfying complete meal.

These benefits are based on the ingredients used and are not intended as medical advice.

Frequently Asked Questions

Can I use chicken thighs?

Yes. Boneless, skinless chicken thighs are excellent because they remain juicy and flavorful when grilled.

Can I use frozen broccoli?

Yes, although fresh broccoli generally provides better texture when grilled.

If using frozen broccoli, thaw and dry it thoroughly before cooking.

Can I use another vegetable?

Absolutely.

Try asparagus, zucchini, bell peppers, green beans, cauliflower, carrots, or Brussels sprouts.

What grain is best for this bowl?

There is no single best choice.

Rice, quinoa, couscous, bulgur, farro, and cauliflower rice all work well.

Can I make this bowl low-carb?

Yes.

Replace the rice or grain with cauliflower rice, mixed greens, or extra roasted vegetables.

Can I make it dairy-free?

Yes.

Use dairy-free Greek-style yogurt and omit the feta, or replace it with a suitable dairy-free alternative.

Can I make the garlic sauce without mayonnaise?

Yes.

Simply use additional Greek yogurt.

You can also add a teaspoon of olive oil for richness.

How do I make the sauce less garlicky?

Use one garlic clove instead of two, or briefly roast the garlic before adding it.

Roasted garlic has a sweeter, milder flavor.

Can I make this recipe spicy?

Yes.

Add red pepper flakes, cayenne, hot sauce, or sliced fresh chili peppers.

How do I keep grilled chicken juicy?

Avoid overcooking it, use an instant-read thermometer, and allow the chicken to rest after grilling.

Can I use leftover chicken?

Absolutely.

This recipe is a great way to transform leftover grilled or roasted chicken into a fresh bowl.

Can I prepare the bowl the night before?

Yes.

Prepare the grain, chicken, and broccoli ahead of time.

For the freshest result, keep the sauce and watery vegetables separate until serving.

How long does the garlic sauce last?

Stored properly in the refrigerator, the sauce is best consumed within several days. Use clean utensils and keep it refrigerated.

Can I use sour cream instead of Greek yogurt?

Yes. Sour cream creates a richer, tangier sauce.

You can also use a combination of sour cream and Greek yogurt.

Can I add hummus?

Definitely.

A spoonful of hummus makes an excellent addition and adds another creamy, savory component.

Can I add chickpeas?

Yes.

Chickpeas add texture and make the bowl even more substantial.

What if my chicken sticks to the grill?

Make sure the grill is properly preheated and the cooking surface is clean and lightly oiled.

Avoid trying to turn the chicken too early.

How do I know when chicken is done?

The thickest part should reach 165°F (74°C) on an instant-read thermometer.

Can I cook the chicken in a skillet?

Yes.

Heat a lightly oiled skillet over medium-high heat and cook until browned and cooked through.

Is this recipe good for meal prep?

Yes. It is particularly well suited to meal prep because the chicken, grain, broccoli, and sauce can all be prepared ahead.

Greek-Style Loaded Beef Gyro Wraps

Greek-Style Loaded Beef Gyro Wraps

Ingredients

For the Beef
* 1 lb (450 g) lean ground beef or thinly sliced beef steak
* 2 tablespoons olive oil
* 1 teaspoon dried oregano
* 1 teaspoon paprika
* ½ teaspoon garlic powder
* ½ teaspoon onion powder
* ½ teaspoon ground cumin
* ½ teaspoon salt
* ¼ teaspoon black pepper
* 1 tablespoon lemon juice
For the Tzatziki Sauce
* 1 cup Greek yogurt
* ½ cucumber, grated and squeezed dry
* 1 garlic clove, minced
* 1 tablespoon lemon juice
* 1 tablespoon chopped fresh dill
* Salt and pepper to taste
For Assembly
* 4 large pita breads or flatbreads
* 1 cup shredded romaine lettuce
* 1 cup diced tomatoes
* ½ red onion, thinly sliced
* ½ cup crumbled feta cheese
* Optional: sliced cucumbers and Kalamata olives

Instructions

1. In a bowl, combine the beef with olive oil, oregano, paprika, garlic powder, onion powder, cumin, salt, pepper, and lemon juice. Mix well.
2. Heat a large skillet over medium-high heat. Cook the beef for 8–10 minutes, breaking it apart if using ground beef, until browned and fully cooked. Remove from heat.
3. To make the tzatziki sauce, combine Greek yogurt, grated cucumber, garlic, lemon juice, dill, salt, and pepper in a bowl. Stir until smooth and refrigerate until ready to use.
4. Warm the pita breads in a dry skillet or oven for 1–2 minutes until soft and pliable.
5. Spread a generous layer of tzatziki sauce down the center of each pita. Add lettuce, tomatoes, red onion, and cooked beef.
6. Sprinkle with feta cheese and add cucumbers or olives if desired.
7. Fold in the sides and roll tightly into wraps.

Sheet Pan Garlic Herb Baked Fish

Sheet Pan Garlic Herb Baked Fish

Ingredients

4 white fish fillets (cod, haddock, tilapia, or halibut), about 6 oz each
2 cups broccoli florets
1 cup cherry tomatoes
1 small zucchini, sliced
4 cloves garlic, minced
3 tbsp extra-virgin olive oil
1 tbsp fresh lemon juice
1 tsp dried oregano
1 tsp dried thyme
½ tsp paprika
½ tsp salt
¼ tsp black pepper
1 lemon, sliced
2 tbsp chopped fresh parsley

Instructions

1. Prepare the oven:
Preheat oven to 425°F (220°C). Line a large sheet pan with parchment paper for easier cleanup.
2. Season the vegetables:
Place broccoli, cherry tomatoes, and zucchini on the pan. Drizzle with 1½ tablespoons olive oil and season lightly with salt and pepper. Toss to coat. Spread vegetables into an even layer.
3. Make the garlic herb mixture:
In a small bowl, combine remaining olive oil, minced garlic, lemon juice, oregano, thyme, paprika, salt, and black pepper.
4. Add the fish:
Pat the fish fillets dry with paper towels. Place them among the vegetables. Spoon the garlic herb mixture generously over each fillet and top with lemon slices.
5. Bake:
Bake for approximately 12–16 minutes, depending on the thickness of the fish. The fish is ready when it flakes easily with a fork and reaches 145°F (63°C) internally.
6. Finish and serve:
Remove from the oven and sprinkle with fresh parsley. Add an extra squeeze of lemon before serving.

Layered Sweet Potato, Butternut Squash, Carrot Lasagna with Feta, Walnuts, and Cranberry-Honey Glaze

Layered Sweet Potato, Butternut Squash, Carrot Lasagna with Feta, Walnuts, and Cranberry-Honey Glaze

What You Need

For the Vegetable Layers
2 large sweet potatoes, peeled and sliced into 1/8-inch rounds
4 cups (600 g) butternut squash, peeled and thinly sliced
3 large carrots, peeled into long ribbons
2 tbsp extra virgin olive oil
1 tsp garlic powder
1 tsp dried thyme
1 tsp smoked paprika
1/2 tsp ground cinnamon
Salt & freshly ground black pepper
For the Creamy Feta Filling
7 oz (200 g) feta cheese, crumbled
1 cup (250 g) whole milk ricotta cheese
1 cup (100 g) shredded mozzarella cheese
1/2 cup (50 g) grated Parmesan cheese
1 large egg
2 cloves garlic, minced
2 tbsp chopped fresh parsley
1 tbsp chopped fresh dill
Freshly ground black pepper
For the Cranberry-Honey Glaze
1/2 cup (120 g) whole berry cranberry sauce
3 tbsp honey
1 tbsp fresh orange juice
1 tsp orange zest
1 tsp Dijon mustard
1 tbsp unsalted butter
Pinch of flaky sea salt
For the Crunchy Walnut Topping
3/4 cup (75 g) walnuts, roughly chopped
2 tbsp grated Parmesan cheese
1 tbsp melted unsalted butter
1 tbsp chopped fresh parsley
Optional Toppings
Extra crumbled feta
Fresh thyme sprigs
Dried cranberries
Orange zest
Microgreens
Freshly cracked black pepper

 How to make it

Preheat the oven to 375°F (190°C). Lightly grease a 9×13-inch baking dish.
In a large bowl, toss the sweet potato slices, butternut squash slices, and carrot ribbons with the olive oil, garlic powder, thyme, smoked paprika, cinnamon, salt, and black pepper.
In another bowl, combine the feta, ricotta, mozzarella, Parmesan, egg, garlic, parsley, dill, and black pepper until smooth and well mixed.
In a small saucepan, combine the cranberry sauce, honey, orange juice, orange zest, Dijon mustard, butter, and flaky sea salt. Simmer over medium-low heat for 3–4 minutes, stirring until smooth and glossy.
Spread a thin layer of the cranberry-honey glaze over the bottom of the baking dish.
Arrange a layer of sweet potato slices over the glaze.
Spread one-third of the feta mixture over the sweet potatoes, then add a layer of butternut squash followed by carrot ribbons.
Repeat the layers until all the vegetables and feta filling have been used, finishing with a final layer of vegetables.
Brush the remaining cranberry-honey glaze over the top.
In a small bowl, combine the walnuts, Parmesan, melted butter, and parsley, then sprinkle evenly over the lasagna.
Cover with foil and bake for 45 minutes. Remove the foil and bake for another 20–25 minutes, until the vegetables are tender and the walnut topping is golden and crisp.
Let the lasagna rest for 10 minutes before serving. Garnish with extra feta, fresh thyme, dried cranberries, orange zest, microgreens, and freshly cracked black pepper.

 Nutritional Info (per serving, serves

Calories: 432
Protein: 14 g
Carbohydrates: 36 g
Fat: 27 g
Fiber: 6 g
Sugar: 16 g
Sodium: 472 mg

Spinach + Feta Cookies

Spinach + Feta Cookies

Ingredients

1 cup all-purpose flour
½ teaspoon baking powder
¼ teaspoon salt
¼ teaspoon black pepper
½ teaspoon dried oregano
½ cup finely chopped fresh spinach
½ cup crumbled feta cheese
¼ cup grated Parmesan cheese
1 large egg
4 tablespoons melted butter
1 small garlic clove, finely minced
1 tablespoon chopped fresh parsley

Instructions

1. Prepare the oven:
Preheat your oven to 350°F (175°C). Line a baking sheet with parchment paper.
2. Prepare the dry ingredients:
In a medium bowl, whisk together flour, baking powder, salt, black pepper, and oregano.
3. Mix the wet ingredients:
In another bowl, whisk the egg with melted butter and minced garlic. Stir in the chopped spinach, feta, Parmesan, and parsley.
4. Make the dough:
Gradually add the dry ingredients to the spinach mixture. Stir gently until a soft, slightly sticky dough forms. Do not overmix.
5. Shape the cookies:
Scoop tablespoon-sized portions onto the prepared baking sheet, leaving space between each one. Gently flatten each portion with your fingers or the back of a spoon.
6. Bake:
Bake for 15–18 minutes, or until the edges are lightly golden and the centers are set.
7. Cool and serve:
Allow the cookies to cool on the baking sheet for 5 minutes before transferring them to a wire rack. Serve warm or at room temperature.

Zucchini Parmesan Stack

Zucchini Parmesan Stack

Ingredients

3 medium zucchini
1½ cups marinara sauce
1 cup shredded mozzarella cheese
½ cup freshly grated Parmesan cheese
2 tablespoons olive oil
2 cloves garlic, minced
1 teaspoon dried Italian seasoning
½ teaspoon dried oregano
½ teaspoon salt
¼ teaspoon black pepper
2 tablespoons chopped fresh basil
¼ cup breadcrumbs, optional

Instructions

1. Prepare the oven:
Preheat oven to 425°F (220°C). Line a large baking sheet with parchment paper.
2. Slice the zucchini:
Wash the zucchini and slice into rounds about ¼-inch thick. Arrange them in a single layer on the baking sheet.
3. Season and roast:
Brush the zucchini lightly with olive oil. Sprinkle with garlic, Italian seasoning, oregano, salt, and pepper. Roast for 12–15 minutes, turning once, until tender and lightly golden.
4. Build the stacks:
Reduce oven temperature to 375°F (190°C). On a baking dish, place one zucchini round, add a spoonful of marinara, a little mozzarella, and Parmesan. Repeat with another zucchini slice. Finish each stack with marinara, mozzarella, and Parmesan.
5. Add breadcrumbs:
If desired, sprinkle a small amount of breadcrumbs over the tops for extra crunch.
6. Bake:
Bake for 15–20 minutes, until the cheese is melted, bubbling, and golden.
7. Garnish:
Remove from the oven and let the stacks rest for 5 minutes. Sprinkle with fresh basil and serve warm.

Layer Taco Dip

Layer Taco Dip

Description

7-Layer Taco Dip is the ultimate easy party appetizer: colorful, creamy, cheesy, flavorful, and incredibly easy to assemble. It combines seven delicious layers into one irresistible dish—seasoned refried beans, creamy sour cream, zesty taco seasoning, fresh guacamole, juicy tomatoes, shredded cheese, and fresh toppings.

This crowd-pleasing dip is perfect for game nights, family gatherings, potlucks, birthday parties, movie nights, Cinco de Mayo celebrations, and holiday appetizer tables. It requires no complicated cooking and can be prepared ahead of time, making it especially convenient when you’re entertaining.

The beauty of this recipe is the contrast between the layers. The warm, savory beans create a hearty base, while sour cream adds cool creaminess. Guacamole brings buttery avocado flavor, tomatoes add freshness, and shredded cheddar or Mexican-blend cheese provides a rich, salty finish. Fresh green onions, cilantro, and jalapeños complete the dish with color and brightness.

Serve this dip chilled or slightly cool with tortilla chips, pita chips, crackers, or fresh vegetables. Every scoop delivers a little bit of every layer, creating the perfect combination of textures and flavors.

Recipe Details

Prep Time: 20 minutes
Cook Time: 5 minutes
Total Time: 25 minutes
Servings: 10–12
Course: Appetizer
Cuisine: Mexican-inspired / Tex-Mex
Difficulty: Easy

Ingredients

Layer 1 — Seasoned Beans

  • 1 can (16 ounces) refried beans
  • ½ teaspoon chili powder
  • ½ teaspoon ground cumin
  • ¼ teaspoon garlic powder
  • 2 tablespoons salsa
  • 1 tablespoon water, if needed

Layer 2 — Creamy Sour Cream

  • 1 cup sour cream
  • ½ cup softened cream cheese
  • 1 tablespoon taco seasoning

Layer 3 — Guacamole

  • 2 large ripe avocados
  • 1 tablespoon fresh lime juice
  • ¼ teaspoon salt
  • 2 tablespoons finely diced red onion

Layer 4 — Salsa

  • ¾ cup chunky salsa, drained slightly

Layer 5 — Fresh Tomatoes

  • 1 cup diced Roma tomatoes
  • 1 tablespoon finely chopped red onion

Layer 6 — Cheese

  • 1½ cups shredded cheddar cheese
  • ½ cup shredded Monterey Jack or Mexican-blend cheese

Layer 7 — Fresh Toppings

  • 2 green onions, thinly sliced
  • 2 tablespoons chopped fresh cilantro
  • 1 small jalapeño, thinly sliced, optional
  • 2 tablespoons sliced black olives, optional

For Serving

  • Tortilla chips
  • Corn chips
  • Bell pepper strips
  • Cucumber slices
  • Carrot sticks

Instructions

Step 1: Prepare the Bean Layer

Place the refried beans in a medium bowl.

Add chili powder, cumin, garlic powder, and salsa.

Stir thoroughly until the seasonings are evenly incorporated.

If the mixture is too thick to spread easily, add about 1 tablespoon of water and mix again.

Spread the seasoned beans evenly across the bottom of a shallow 9 × 13-inch serving dish.

A glass baking dish works particularly well because the colorful layers can be seen from the side.

Step 2: Make the Creamy Layer

In another bowl, combine the softened cream cheese, sour cream, and taco seasoning.

Beat or whisk until smooth and creamy.

Make sure the cream cheese is softened before mixing. Cold cream cheese can leave small lumps.

Spread the creamy mixture gently over the bean layer.

Use the back of a spoon or an offset spatula to create an even layer.

Step 3: Prepare the Guacamole

Cut the avocados in half and remove the pits.

Scoop the flesh into a bowl.

Add lime juice, salt, and finely diced red onion.

Mash gently with a fork until mostly smooth but still slightly chunky.

Don’t over-mash the avocado if you prefer a rustic texture.

Spread the guacamole evenly over the creamy layer.

Step 4: Add the Salsa

Spoon the chunky salsa over the guacamole.

If the salsa contains a lot of liquid, drain some of the excess first.

Too much liquid can make the dip watery.

Spread the salsa gently so you don’t disturb the guacamole layer underneath.

Step 5: Add the Tomatoes

Sprinkle the diced Roma tomatoes evenly over the salsa.

Add the finely chopped red onion.

Roma tomatoes work especially well because they contain less moisture than some other varieties.

Step 6: Add the Cheese

Sprinkle the shredded cheddar and Monterey Jack evenly across the tomatoes.

For the best flavor and texture, use freshly shredded cheese when possible.

The cheese creates a rich, creamy layer that brings all the other ingredients together.

Step 7: Add the Final Toppings

Finish the dip with sliced green onions, fresh cilantro, jalapeño slices, and black olives if desired.

For a colorful presentation, distribute the toppings evenly rather than concentrating them in one area

Step 8: Chill and Serve

Cover the dish loosely with plastic wrap or a suitable reusable cover.

Refrigerate for at least 30 minutes before serving.

Chilling allows the flavors to blend and makes the layers easier to scoop.

Serve with tortilla chips or fresh vegetables.

Recipe Notes

Use a Shallow Dish

A shallow serving dish makes it easier to scoop through all seven layers with each chip.

A deep bowl can make it difficult to reach the bottom layers.

Drain Watery Ingredients

Salsa and tomatoes can release liquid.

Drain excess liquid before adding them to the dip to help maintain distinct layers.

Use Ripe Avocados

Choose avocados that yield gently when pressed.

Hard avocados won’t create creamy guacamole, while overly soft avocados may have brown or watery flesh.

Soften the Cream Cheese

Allow cream cheese to sit at room temperature for approximately 20–30 minutes before mixing.

This makes the creamy layer smoother.

Freshly Shredded Cheese

Freshly shredded cheese generally has better melting and texture than some pre-shredded varieties.

A combination of cheddar and Monterey Jack gives excellent flavor.

Helpful Tips for the Best 7-Layer Taco Dip

1. Make the Bean Layer Smooth

Spread the beans evenly so every scoop has a good base.

If the beans are too thick, stir in a small amount of salsa or water.

2. Build Layers Carefully

Use the back of a spoon or a small spatula to spread each layer.

Don’t press too hard, especially when spreading guacamole over the sour cream layer.

3. Control Moisture

Watery salsa and tomatoes are the biggest causes of runny taco dip.

Drain excess liquid before adding them.

4. Add Fresh Toppings Just Before Serving

Green onions, cilantro, and jalapeños look freshest when added shortly before serving.

5. Chill Before Serving

A short chilling period helps the dip set and makes it easier to serve.

6. Don’t Leave It Out Too Long

Because the recipe contains dairy and fresh avocado, keep it chilled until you’re ready to serve.

For food safety, don’t leave perishable foods at room temperature for extended periods.

7. Serve With Sturdy Chips

Thin tortilla chips may break under the weight of seven layers.

Choose sturdy tortilla chips or scoop-style chips.

Delicious Variations

Spicy 7-Layer Taco Dip

Add extra jalapeños, hot salsa, cayenne pepper, or a few dashes of hot sauce.

You can also use pepper Jack cheese for extra heat.

Beef Taco Dip

Brown approximately 1 pound of lean ground beef with taco seasoning.

Drain excess fat and allow the meat to cool slightly before adding it as an additional layer.

Because this changes the number of layers, you can combine the beef with the refried beans or replace the salsa layer.

Chicken Taco Dip

Use shredded cooked chicken seasoned with taco seasoning and lime.

This turns the appetizer into a more substantial dip.

Black Bean Version

Replace the refried beans with mashed seasoned black beans.

For a chunkier texture, use whole black beans instead.

Corn and Black Bean Dip

Add a layer of sweet corn and black beans for extra texture and color.

This variation is especially good with fresh lime and cilantro.

Mexican Street Corn Version

Add a small layer of cooked corn mixed with lime juice, cilantro, and a little cotija cheese.

Extra-Cheesy Version

Add more cheese between the layers or finish with a combination of cheddar, Monterey Jack, and pepper Jack.

Make-Ahead Instructions

7-Layer Taco Dip is excellent for entertaining because much of the preparation can be done in advance.

Assemble the bean, sour cream, guacamole, and salsa layers several hours before serving.

Cover tightly and refrigerate.

For the freshest presentation, add the tomatoes, cheese, and fresh toppings closer to serving time.

If making the complete dip ahead, press plastic wrap gently over the surface or cover the container tightly to reduce exposure to air.

Storage

Store leftover taco dip covered in the refrigerator.

For best quality, consume it within approximately 2–3 days.

The avocado may darken slightly over time, and the tomatoes and salsa can release liquid.

Before serving leftovers, gently drain any excess liquid that has collected around the edges.

Do not leave the dip unrefrigerated for long periods.

Can You Freeze 7-Layer Taco Dip?

Freezing is not recommended for the complete assembled dip.

Sour cream, fresh tomatoes, guacamole, and other fresh ingredients can change texture after freezing and thawing.

If you need to prepare components ahead, the seasoned bean mixture can be frozen separately.

Prepare the remaining fresh layers shortly before serving.

Serving Suggestions

Serve 7-Layer Taco Dip with:

  • Tortilla chips
  • Corn chips
  • Nacho chips
  • Bell pepper strips
  • Cucumber slices
  • Carrot sticks
  • Celery sticks
  • Crackers
  • Toasted pita chips

For a party, arrange the dip in the center of a large platter and surround it with tortilla chips.

You can also serve individual portions in small cups for parties and gatherings.

Nutritional Information

Approximate nutrition per serving, based on 12 servings and without tortilla chips:

  • Calories: 245 kcal
  • Protein: 8 g
  • Carbohydrates: 14 g
  • Fiber: 4 g
  • Fat: 18 g
  • Saturated Fat: 7 g
  • Sugar: 3 g
  • Sodium: 500–650 mg
  • Calcium: 170 mg
  • Iron: 1.5 mg

Adding tortilla chips will increase the calories, carbohydrates, fat, and sodium per serving.

Nutrition values are estimates and vary according to specific ingredients and brands.

Benefits of 7-Layer Taco Dip

1. Provides Plant-Based Protein

Refried beans provide plant-based protein and contribute to the satisfying nature of the dip.

2. Good Source of Fiber

Beans and avocado provide dietary fiber.

Fiber is important for normal digestive function and can help meals feel more filling.

3. Contains Healthy Fats

Avocados provide predominantly unsaturated fats.

Olive oil-based toppings or salsa can also contribute beneficial unsaturated fats if used.

4. Includes Fresh Vegetables

Tomatoes, onions, jalapeños, and other optional vegetables contribute vitamins, minerals, and plant compounds while adding freshness and texture.

5. Calcium From Cheese and Dairy

Cheddar, Monterey Jack, sour cream, and cream cheese contribute calcium and protein.

6. Colorful and Flavorful

Using a variety of colorful vegetables makes the dish visually appealing while providing a broader range of plant-based nutrients.

These benefits are based on the ingredients used and are not intended as medical advice.

Frequently Asked Questions

Why is it called 7-Layer Taco Dip?

It is called 7-Layer Taco Dip because the traditional concept combines seven distinct layers of ingredients, creating different flavors and textures in every bite.

Can I make this dip the night before?

Yes, but for the freshest appearance, add the final fresh toppings shortly before serving.

Keep the assembled dip refrigerated.

Can I use Greek yogurt instead of sour cream?

Yes. Plain Greek yogurt can replace some or all of the sour cream.

It will give the dip a slightly tangier flavor and thicker texture.

Can I use homemade guacamole?

Absolutely.

Homemade guacamole is an excellent choice and allows you to control the lime, salt, onion, and spice levels.

How do I prevent the guacamole from turning brown?

Fresh lime juice helps slow browning.

Cover the guacamole layer closely with plastic wrap if storing it before serving, minimizing the amount of air touching the surface.

Can I use store-bought guacamole?

Yes. Store-bought guacamole is a convenient option when you’re short on time.

What type of salsa is best?

Chunky salsa works particularly well because it adds texture.

Choose mild, medium, or hot salsa according to your preference.

Can I make it without beans?

Yes. You can replace the bean layer with seasoned cooked ground beef, shredded chicken, or another filling of your choice.

Can I make this vegetarian?

Yes. The basic recipe is vegetarian when made without meat.

Check the ingredients in your refried beans and cheese if you need a strictly vegetarian preparation.

Is 7-Layer Taco Dip gluten-free?

Many of the individual ingredients can be gluten-free, but packaged taco seasoning, refried beans, salsa, and chips should be checked for gluten-containing ingredients or cross-contact if this is important for your dietary needs.

Can I make it dairy-free?

Use dairy-free sour cream, cream cheese, and shredded cheese alternatives.

The flavor and texture will vary depending on the products used.

Can I make it less spicy?

Absolutely.

Use mild salsa, omit jalapeños, and choose a mild taco seasoning.

How can I make it spicier?

Use hot salsa, jalapeños, pepper Jack cheese, cayenne pepper, or your favorite hot sauce.

What is the best dish for serving taco dip?

A shallow 9 × 13-inch dish is ideal for a party-sized batch.

A clear glass dish is especially attractive because guests can see the colorful layers.

Why did my dip become watery?

Excess moisture from salsa or tomatoes is usually responsible.

Drain watery ingredients before layering and avoid using overly juicy tomatoes.

Can I add lettuce?

Yes, shredded lettuce can be added as an extra topping.

For the best texture, add it shortly before serving.

Can I add olives?

Yes. Black olives are a classic taco-dip topping and add a salty flavor.

Can I add corn?

Definitely.

Sweet corn adds color, texture, and a mild sweetness that works beautifully with spicy ingredients.

Can I use homemade taco seasoning?

Yes. Homemade taco seasoning is an excellent way to control salt and spice.

How long can taco dip sit out?

Because the dip contains dairy and fresh ingredients, it should not be left at room temperature for extended periods. Keep it chilled and return leftovers to the refrigerator promptly.

What makes this dip perfect for parties?

It can be prepared ahead, requires minimal cooking, feeds a crowd, and offers creamy, cheesy, fresh, spicy, and savory flavors all in one bite.

Cranberry & Spinach Stuffed Chicken Breasts with Goat Cheese

Cranberry & Spinach Stuffed Chicken Breasts with Goat Cheese

What You Need
For the Chicken Breasts
4 large boneless, skinless chicken breasts
2 tbsp extra virgin olive oil
1 tsp garlic powder
1 tsp onion powder
1 tsp smoked paprika
1 tsp Italian seasoning
1/2 tsp sea salt
1/2 tsp freshly ground black pepper
For the Cranberry & Spinach Filling
3 cups fresh baby spinach
1 cup (90 g) dried cranberries
6 oz (170 g) soft goat cheese
2 cloves garlic, minced
1 tbsp extra virgin olive oil
1 tbsp fresh thyme leaves
1 tbsp chopped fresh parsley
1 tsp lemon zest
For the Garlic Herb Butter
2 tbsp unsalted butter, melted
1 tbsp chopped fresh parsley
1 tsp fresh thyme
1 garlic clove, finely minced
Optional Toppings
Extra crumbled goat cheese
Fresh thyme sprigs
Chopped parsley
Lemon wedges
Toasted pecans
Freshly cracked black pepper
 How to make it
Preheat the oven to 400°F (200°C). Lightly grease a baking dish or line a baking tray with parchment paper.
Heat 1 tablespoon olive oil in a skillet over medium heat. Add the minced garlic and cook for 30 seconds until fragrant.
Add the spinach and cook for 2–3 minutes until wilted. Remove from the heat and let cool slightly.
Stir the goat cheese, dried cranberries, thyme, parsley, and lemon zest into the spinach mixture until well combined.
Slice a pocket into the side of each chicken breast without cutting all the way through.
Season both sides of the chicken with the garlic powder, onion powder, smoked paprika, Italian seasoning, sea salt, and black pepper.
Fill each chicken breast with the spinach, cranberry, and goat cheese mixture. Secure with toothpicks if needed.
Brush the outside of the chicken with the remaining olive oil and place in the prepared baking dish.
Bake for 28–32 minutes, or until the chicken reaches an internal temperature of 165°F (74°C).
Meanwhile, whisk together the melted butter, parsley, thyme, and minced garlic.
Brush the hot chicken breasts with the garlic herb butter immediately after removing them from the oven.
Garnish with extra goat cheese, toasted pecans, fresh thyme, parsley, lemon wedges, and freshly cracked black pepper before serving.

Nutritional Info (per serving, serves 4)

Calories: 512
Protein: 47 g
Carbohydrates: 16 g
Fat: 28 g
Fiber: 2 g
Sugar: 11 g
Sodium: 528 mg

Classic Baked Chicken Mushroom Cream Cheese Casserole

Classic Baked Chicken Mushroom Cream Cheese Casserole

When you need a cozy dinner that is creamy, cheesy, and easy to get on the table, this Classic Baked Chicken Mushroom Cream Cheese Casserole is a great choice. Cooked chicken and fresh mushrooms are coated in a rich cream cheese and sour cream mixture, seasoned with garlic and herbs, and finished with melted mozzarella. The oven does the final work, turning the simple ingredients into a bubbling casserole with a golden cheesy top. It is hearty enough for dinner while remaining simple enough for a busy weeknight.

Prep Time: 15 minutes

Cook Time: 25–30 minutes

Total Time: 40–45 minutes

Servings: 4–6

Ingredients

Main Ingredients

2 cups cooked chicken breast, diced

1 cup fresh mushrooms, sliced

6 oz cream cheese, softened

½ cup sour cream

½ cup shredded mozzarella cheese

Seasonings & Garnish

1 teaspoon garlic powder or 2 fresh garlic cloves, minced

½ teaspoon salt, or to taste

¼ teaspoon black pepper

1 teaspoon Italian seasoning

½ teaspoon dried thyme

2 tablespoons fresh parsley, chopped, for garnish

Instructions

Preheat your oven to 375°F (190°C). Lightly grease an 8 x 8-inch or similar-sized baking dish with cooking spray, butter, or a small amount of olive oil. Set the dish aside while you prepare the casserole mixture.

Make sure the cream cheese is softened before mixing. Room-temperature cream cheese blends much more easily with the sour cream and creates a smoother sauce. If the cream cheese is still firm, let it sit at room temperature for about 20–30 minutes before starting.

Place the softened cream cheese and sour cream in a large mixing bowl. Stir or beat them together until smooth and creamy. Add the garlic powder or minced fresh garlic, salt, black pepper, Italian seasoning, and dried thyme. Mix thoroughly so the seasonings are evenly distributed throughout the creamy mixture.

Add the diced cooked chicken and sliced mushrooms to the bowl. Gently fold everything together until the chicken and mushrooms are evenly coated with the cream cheese mixture. Take care not to break the chicken into very small pieces while mixing.

Transfer the chicken and mushroom mixture to the prepared baking dish. Spread it into an even layer using a spatula or the back of a spoon.

Sprinkle the shredded mozzarella evenly over the top. Try to cover most of the surface so the cheese melts into a golden, bubbly layer during baking.

Place the casserole in the preheated oven and bake uncovered for approximately 25–30 minutes. The casserole should be heated through, bubbling around the edges, and the mozzarella should be melted and lightly golden on top.

If you prefer a more deeply browned cheese topping, switch the oven to broil for the final 1–2 minutes. Watch the casserole carefully during broiling because the cheese can brown very quickly.

Remove the casserole from the oven and allow it to rest for approximately 5–10 minutes before serving. This short resting period allows the creamy mixture to settle and makes the casserole easier to portion.

Sprinkle freshly chopped parsley over the top just before serving. Serve warm with roasted vegetables, steamed green beans, broccoli, a fresh salad, or another favorite side.

Tips

Use softened cream cheese: This is one of the most important steps for a smooth casserole. Cold cream cheese can remain lumpy and difficult to combine with the sour cream.

Use cooked chicken: This recipe is designed around already cooked chicken breast. Leftover roasted, baked, grilled, or poached chicken can all work well as long as it is fully cooked.

Do not overcook the chicken: Since the chicken is already cooked, the oven is primarily heating the casserole and melting the cheese. Excessive baking can make chicken breast dry.

Slice the mushrooms evenly: Similar-sized mushroom slices cook and soften more consistently. Thin or medium slices work especially well.

Use fresh mushrooms: Fresh mushrooms provide a pleasant texture and savory flavor. Wipe them clean before slicing rather than soaking them in water, which can make them unnecessarily wet.

Adjust the seasoning: Cream cheese and mozzarella can vary in saltiness. Taste the creamy mixture before adding the chicken and adjust the salt and pepper according to your preference.

Try fresh garlic: Garlic powder keeps the recipe quick and convenient, but freshly minced garlic gives the casserole a stronger, more aromatic flavor.

Do not skip the resting time: Allowing the casserole to sit for a few minutes after baking helps the creamy sauce thicken slightly and makes serving easier.

Watch the broiler: If you broil the cheese topping, stay close to the oven. One or two minutes can be enough to create a beautiful golden crust.

Use rotisserie chicken: Store-bought rotisserie chicken is a convenient shortcut. Remove the skin and bones, then dice or shred the meat before adding it to the casserole.

Make it ahead: The casserole can be assembled ahead of time and refrigerated until you are ready to bake. If baking directly from the refrigerator, it may require a little additional time to heat through.

Store leftovers properly: Allow leftovers to cool before transferring them to an airtight container. Refrigerate promptly and reheat only the portion you plan to eat.

Variations

Cheesy Chicken Mushroom Casserole: Add an extra ½ cup of shredded mozzarella over the top for a thicker, cheesier layer.

Cheddar Version: Replace some or all of the mozzarella with shredded cheddar cheese. Sharp cheddar adds a stronger flavor and pairs nicely with mushrooms and chicken.

Garlic Herb Chicken Casserole: Increase the fresh garlic and add a little extra thyme or Italian seasoning for a more pronounced herb flavor.

Spinach Chicken Mushroom Casserole: Fold a handful of fresh spinach into the mixture. The spinach will wilt as the casserole bakes and adds extra color.

Broccoli Chicken Casserole: Add lightly steamed broccoli florets to make the casserole more substantial and add another vegetable.

Bacon Chicken Mushroom Casserole: Stir in a small amount of cooked, crumbled bacon for a smoky, savory variation.

Spicy Chicken Casserole: Add red pepper flakes or a small amount of diced jalapeño to give the creamy casserole some heat.

Italian-Style Version: Add extra Italian seasoning, basil, oregano, and a little grated Parmesan cheese before baking.

Turkey Mushroom Casserole: Cooked turkey can be substituted for the chicken, making this a useful recipe for leftover holiday turkey.

Low-Carb Serving: Serve the casserole with roasted cauliflower, zucchini, green beans, or a fresh leafy salad instead of bread, pasta, or rice.

Q&A

Can I use rotisserie chicken?

Yes. Rotisserie chicken is an excellent shortcut for this recipe. Remove the skin and bones and use approximately 2 cups of diced or shredded cooked meat.

Can I use chicken thighs instead of chicken breast?

Yes. Cooked boneless, skinless chicken thighs can be substituted. They tend to be more moist and flavorful than breast meat.

Can I use frozen mushrooms?

Fresh mushrooms are preferred for texture, but frozen mushrooms can work. Thaw and drain them thoroughly first to avoid adding too much moisture to the casserole.

Can I prepare this casserole ahead of time?

Yes. Assemble the casserole, cover it tightly, and refrigerate it until you are ready to bake. Because it will be cold from the refrigerator, allow additional baking time as needed.

Can I freeze the casserole?

The casserole can be frozen, although the texture of the cream cheese and sour cream may change slightly after thawing. For best results, freeze in an airtight freezer-safe container and thaw in the refrigerator before reheating.

Why is my casserole watery?

Excess moisture can come from mushrooms, especially if they were washed or thawed without being drained properly. Make sure mushrooms are well drained and avoid adding extra liquid to the mixture.

Can I add vegetables?

Absolutely. Broccoli, spinach, zucchini, bell peppers, or cauliflower can all be added. For firmer vegetables, lightly cook them first so they become tender during the relatively short baking time.

What can I serve with this casserole?

It pairs well with steamed broccoli, roasted vegetables, green beans, a crisp salad, cauliflower rice, or crusty bread if you are not following a low-carb eating plan.

How do I reheat leftovers?

Reheat individual portions in the microwave until hot, or place the casserole in an oven-safe dish and warm it in a moderate oven. Avoid overheating because the chicken can become dry.

Can I use another cheese?

Yes. Mozzarella can be replaced or combined with cheddar, Monterey Jack, provolone, Parmesan, or another good melting cheese.

Nutrition

Approximate nutrition per serving, based on 6 servings:

Calories: 300–340

Protein: 28–32g

Carbohydrates: 6–8g

Fat: 18–21g

Fiber: 1g

Sugar: 3–4g

Sodium: 500–650mg

Nutrition values are estimates and will vary depending on the chicken, cream cheese, sour cream, mozzarella, and seasonings used.

Conclusion

With its creamy sauce, tender chicken, savory mushrooms, and melted mozzarella topping, this casserole brings plenty of comfort to the dinner table without requiring a complicated cooking process. It is a flexible recipe that can easily accommodate leftover chicken or extra vegetables, making it a useful addition to any weeknight meal rotation.

#BakedChicken #ChickenDinner #CreamCheeseCasserole #MushroomRecipes #EasyCasserole