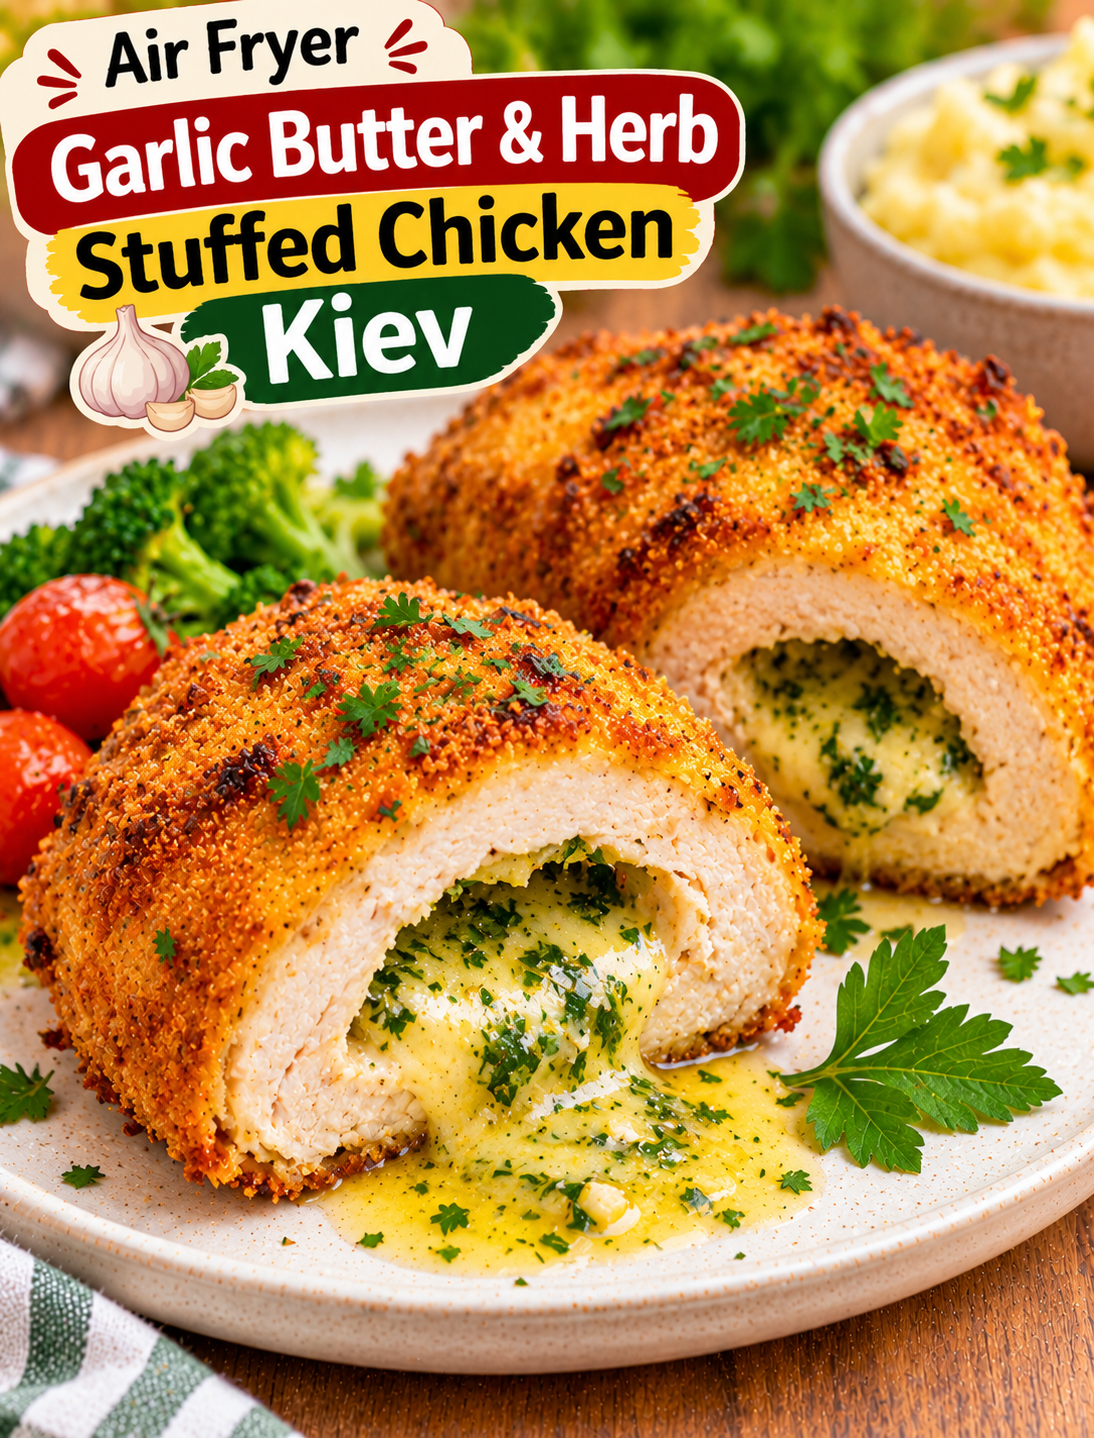
Air Fryer Garlic Butter & Herb Stuffed Chicken Kiev is a delicious homemade dinner featuring tender chicken breast filled with rich garlic butter, fresh herbs, and a crispy golden coating. Every bite brings together juicy chicken, crunchy breadcrumbs, and a warm buttery center that makes this classic comfort food extra special.
Traditional Chicken Kiev is often deep-fried, but this air fryer version offers an easier way to achieve a crispy outside with less oil. The air fryer circulates hot air around the breaded chicken, helping the coating turn golden while keeping the inside tender and flavorful.
The secret to this recipe is the homemade garlic herb butter. Fresh parsley, minced garlic, softened butter, and a little lemon juice create a flavorful filling that melts inside the chicken as it cooks.
This recipe is perfect for family dinners, weekend meals, or special occasions when you want something that looks impressive without using complicated cooking techniques. You can prepare the herb butter ahead of time, making the final cooking process much easier.
Serve your homemade Chicken Kiev with mashed potatoes, roasted vegetables, or a fresh garden salad for a satisfying meal. Once you cut into the crispy chicken and see the warm garlic butter inside, this recipe may become a regular favorite at your dinner table.
Why You’ll Love This Recipe
- Crispy golden coating: Panko breadcrumbs create a crunchy exterior without deep frying.
- Rich garlic butter filling: Butter, fresh garlic, and herbs melt together inside the chicken.
- Less oil required: The air fryer creates a crispy texture using only a light coating of oil.
- Homemade flavor: Fresh ingredients give this classic chicken dish a delicious taste.
- Perfect for dinner: Serve it with vegetables, potatoes, or your favorite side dishes.
- Easy preparation: The ingredients are simple and available at most grocery stores.
- Great for special occasions: The golden crust and buttery center make an impressive dinner.
- Customizable herbs: Use parsley, thyme, chives, or your favorite fresh herbs.
Ingredients for Air Fryer Garlic Butter & Herb Stuffed Chicken Kiev
Choose fresh chicken breasts, good-quality butter, and fresh herbs for the best flavor. The ingredients are divided into three simple parts: the garlic butter filling, chicken, and crispy coating.
Garlic Herb Butter Filling
1. Unsalted Butter
Use ½ cup of softened unsalted butter. Butter creates the rich, creamy center that melts inside the chicken during cooking.
2. Fresh Garlic
Add 3 finely minced garlic cloves. Fresh garlic gives the filling a strong, savory flavor.
3. Fresh Parsley
Use 2 tablespoons of finely chopped fresh parsley. It adds a clean herbal flavor and gives the butter a fresh appearance.
4. Fresh Thyme
Add 1 teaspoon of fresh thyme leaves. Thyme pairs well with garlic and butter.
5. Lemon Juice
Use 1 teaspoon of fresh lemon juice. It balances the richness of the butter with a little acidity.
6. Salt and Black Pepper
Add ¼ teaspoon of salt and ⅛ teaspoon of black pepper, adjusting to your taste.
Chicken Ingredients
- 2 large boneless, skinless chicken breasts
- ½ teaspoon garlic powder
- ½ teaspoon paprika
- ¼ teaspoon salt
- ¼ teaspoon black pepper
Choose chicken breasts with enough thickness to create a pocket for the butter filling.
Crispy Coating
- ½ cup all-purpose flour
- 2 large eggs
- 1 tablespoon milk
- 1 cup panko breadcrumbs
- ½ teaspoon paprika
- ½ teaspoon garlic powder
- Olive oil cooking spray
Panko breadcrumbs create a lighter, crunchier coating than many regular breadcrumbs.
Step-by-Step Instructions
Follow these steps carefully to prepare Chicken Kiev with a flavorful butter center and crispy air-fried coating.
Step 1: Prepare the Garlic Herb Butter
- Place the softened butter in a small mixing bowl.
- Add the minced garlic.
- Add chopped fresh parsley and thyme.
- Pour in the lemon juice.
- Sprinkle in salt and black pepper.
- Mix everything until the herbs and garlic are evenly distributed.
- Taste a small amount and adjust the seasoning if needed.
The butter should be soft enough to mix easily but should not be melted.
Step 2: Shape and Chill the Butter
- Place a sheet of plastic wrap or parchment paper on your work surface.
- Spoon the garlic herb butter onto the center.
- Shape it into a short, compact log.
- Wrap it tightly.
- Place it in the freezer for approximately 20–30 minutes.
- Check that the butter is firm enough to handle.
Chilling the butter helps keep the filling inside the chicken while you prepare the coating.
Step 3: Prepare the Chicken Breasts
- Place the chicken breasts on a clean cutting board.
- Pat them dry with paper towels.
- Use a sharp knife to cut a pocket into the thickest side of each breast.
- Keep the opposite side and edges intact.
- Make the opening large enough to hold the butter without cutting through the chicken.
- Season the outside with garlic powder, paprika, salt, and black pepper.
Avoid making the pocket too large because the butter may escape during cooking.
Step 4: Stuff the Chicken with Garlic Butter
- Remove the chilled butter from the freezer.
- Cut it into two equal portions.
- Place one portion inside each chicken breast pocket.
- Push the butter toward the center of the chicken.
- Fold the chicken over the opening.
- Secure the opening with toothpicks if needed.
- Check that the butter is fully enclosed.
Keep the chicken refrigerated while preparing the breading station.
Step 5: Prepare the Breading Station
Set up three shallow bowls for coating the chicken.
- Add all-purpose flour to the first bowl.
- Whisk the eggs and milk together in the second bowl.
- Add panko breadcrumbs, paprika, and garlic powder to the third bowl.
- Mix the breadcrumbs until the seasonings are evenly distributed.
Keeping the bowls separate makes the breading process easier and cleaner.
Step 6: Coat the Stuffed Chicken
- Take one stuffed chicken breast from the refrigerator.
- Coat it lightly with flour.
- Shake off any excess flour.
- Dip it into the egg mixture.
- Turn it gently to cover all sides.
- Transfer it to the seasoned panko breadcrumbs.
- Press the breadcrumbs gently onto the chicken.
- Check that the pocket opening is well covered.
- Repeat the process with the second chicken breast.
For a thicker crust, repeat the egg and breadcrumb coating once more.
Step 7: Preheat the Air Fryer
- Preheat your air fryer to 360°F for approximately 3 minutes.
- Lightly spray the air fryer basket with cooking oil.
- Use suitable air fryer parchment if needed.
- Arrange the coated chicken breasts in a single layer.
- Leave enough space between them for proper air circulation.
Avoid overcrowding the basket because the chicken needs space to cook evenly.
Step 8: Air Fry the Chicken Kiev
- Lightly spray the breadcrumb coating with olive oil cooking spray.
- Place the basket inside the air fryer.
- Cook at 360°F for approximately 18–22 minutes.
- Carefully turn the chicken halfway through cooking if the coating allows.
- Check the thickest part of the chicken with a food thermometer.
- Continue cooking if necessary until the center of the chicken reaches 165°F.
- Remove the chicken carefully once fully cooked.
Cooking time depends on the thickness of the chicken breasts and your air fryer model. Always use a food thermometer rather than relying on color alone.
Step 9: Rest Before Serving
- Transfer the cooked chicken to a serving plate.
- Allow it to rest for approximately 5 minutes.
- Remove any toothpicks before serving.
- Cut carefully because the melted garlic butter inside will be hot.
- Spoon any escaped garlic herb butter over the chicken if desired.
Your crispy Air Fryer Garlic Butter & Herb Stuffed Chicken Kiev is ready to serve!
Best Tips for Perfect Chicken Kiev
These simple tips help prevent the butter from leaking and keep the breadcrumb coating crispy.
1. Chill the Garlic Butter
Freeze the shaped butter before stuffing the chicken. Firm butter is easier to handle and less likely to melt before the chicken cooks.
2. Choose Thick Chicken Breasts
Thicker chicken breasts provide enough space for the filling. Thin pieces are harder to stuff and seal properly.
3. Do Not Cut Through the Chicken
Create a pocket instead of slicing the chicken completely in half. Keeping the edges intact helps contain the butter.
4. Seal the Opening Properly
Fold the chicken around the butter and use toothpicks when necessary. Cover the opening with breadcrumbs for extra protection.
5. Coat Every Side
Make sure the flour, egg, and panko breadcrumbs cover the entire chicken breast. An even coating helps create a consistent golden crust.
6. Use Panko Breadcrumbs
Panko breadcrumbs produce a lighter and crunchier coating. Lightly spraying them with oil also helps improve browning.
7. Avoid Overcrowding
Cook the chicken in batches if necessary. Proper airflow helps the coating become crisp.
8. Rest Before Cutting
Allowing the chicken to rest for a few minutes helps keep the juices inside and prevents the hot butter from spilling out immediately.
Variations and Substitutions
You can change the herb butter and coating to create different flavors while keeping the same cooking method.
1. Cheesy Garlic Butter Chicken Kiev
Add 2 tablespoons of finely grated Parmesan cheese to the herb butter. It gives the filling a richer, savory flavor.
2. Lemon Herb Chicken Kiev
Add extra lemon zest and fresh thyme to the butter mixture. This creates a bright flavor that balances the richness of the butter.
3. Spicy Garlic Butter Chicken
Mix a pinch of red pepper flakes or cayenne pepper into the butter. This adds gentle heat without overpowering the garlic flavor.
4. Parmesan Crusted Chicken Kiev
Add ¼ cup of grated Parmesan cheese to the panko breadcrumbs. The cheese creates a savory, crunchy coating.
5. Italian Herb Chicken Kiev
Replace thyme with dried Italian seasoning and add a little oregano to the butter. This gives the chicken a classic Italian-inspired flavor.
6. Gluten-Free Chicken Kiev
Use gluten-free all-purpose flour and gluten-free breadcrumbs. Check the ingredient labels on all packaged seasonings and other ingredients.
What to Serve with Garlic Butter Stuffed Chicken
Chicken Kiev pairs well with simple sides that balance its rich garlic butter filling.
- Mashed potatoes: Creamy mashed potatoes complement the crispy chicken and buttery center.
- Roasted broccoli: Lightly seasoned broccoli adds freshness and color to the plate.
- Garlic green beans: Green beans make a simple vegetable side with a savory flavor.
- Garden salad: Lettuce, tomatoes, cucumber, and lemon dressing balance the richness of the chicken.
- Roasted carrots: Naturally sweet carrots pair well with garlic and fresh herbs.
- Rice pilaf: Fluffy rice makes a satisfying side for a family dinner.
- Air fryer asparagus: Tender asparagus adds a fresh vegetable option without much preparation.
For a complete dinner, serve one chicken breast with mashed potatoes and roasted green vegetables.
How to Store Leftover Chicken Kiev
Proper storage helps maintain the quality and safety of leftover stuffed chicken.
Refrigerator Storage
- Allow the cooked chicken to cool slightly.
- Transfer it to an airtight food storage container.
- Refrigerate within 2 hours of cooking.
- Store for up to 3–4 days.
- Keep leftover chicken separate from fresh vegetables and sauces.
Freezer Storage
- Allow the cooked chicken to cool completely.
- Wrap each piece individually.
- Place the wrapped chicken in a freezer-safe container or bag.
- Label it with the storage date.
- Freeze for up to 2–3 months for best quality.
For the best texture, reheat the chicken in the air fryer rather than the microwave.
How to Reheat Air Fryer Chicken Kiev
The air fryer helps bring back some of the crispy texture without deep frying.
Reheating in an Air Fryer
- Preheat the air fryer to 325°F.
- Place the refrigerated chicken in the basket.
- Heat for approximately 8–12 minutes, depending on thickness.
- Turn carefully halfway through if needed.
- Check that the center reaches 165°F.
- Allow it to rest briefly before serving.
Reheating in the Oven
- Preheat your oven to 350°F.
- Place the chicken in an oven-safe baking dish.
- Cover loosely with foil to prevent excessive browning.
- Heat until the center reaches 165°F.
- Remove the foil during the final few minutes if you want a crispier coating.
Avoid cutting the chicken before reheating because the garlic butter can escape and make the meat dry.
Common Mistakes to Avoid
Avoid these mistakes to get better results from your homemade Chicken Kiev.
- Using soft butter: Warm butter can leak before the chicken is fully cooked.
- Cutting through the chicken: A full cut makes it harder to contain the filling.
- Overfilling the pocket: Too much butter increases the chance of leakage.
- Skipping the chilling step: Firm butter is easier to stuff and seal.
- Using wet breadcrumbs: Moist breadcrumbs may create a less crispy coating.
- Overcrowding the air fryer: Poor airflow can cause uneven browning.
- Cooking at excessive heat: High temperatures can brown the outside before the chicken reaches a safe internal temperature.
- Cutting immediately: Resting helps keep the chicken juicy and reduces hot butter spilling onto the plate.
Frequently Asked Questions
1. How long does Chicken Kiev take in the air fryer?
Stuffed chicken breasts usually take approximately 18–22 minutes at 360°F, depending on their thickness.
2. How do I stop garlic butter from leaking out?
Chill the butter until firm, avoid overfilling, and seal the chicken pocket carefully before breading.
3. What temperature should Chicken Kiev reach?
The thickest part of the chicken must reach an internal temperature of 165°F for food safety.
4. Can I use dried herbs instead of fresh herbs?
Yes, use dried parsley and thyme in smaller amounts because dried herbs have a more concentrated flavor.
5. Can I prepare Chicken Kiev ahead of time?
Yes, stuff and bread the chicken, cover it, and refrigerate it until you are ready to air fry.
6. Can I freeze homemade Chicken Kiev?
Yes, freeze individually wrapped cooked or uncooked portions in a freezer-safe container for up to 2–3 months for best quality.
7. Why is my Chicken Kiev coating not crispy?
Excess moisture, insufficient oil spray, or overcrowding can prevent the breadcrumb coating from becoming crisp.
8. Can I use chicken thighs instead of chicken breasts?
Boneless chicken thighs can work, but their shape makes stuffing more difficult and cooking time may vary.
Final Thoughts
Air Fryer Garlic Butter & Herb Stuffed Chicken Kiev is a delicious homemade dinner that combines tender chicken, fresh herbs, rich garlic butter, and a crispy golden coating.
The air fryer makes this classic dish easier to prepare while reducing the need for deep frying. With a little preparation and a few simple ingredients, you can create a flavorful meal that looks impressive and tastes even better.
Serve it with mashed potatoes, roasted vegetables, or a fresh garden salad for a satisfying family dinner. Remember to chill the herb butter, seal the chicken carefully, and check the internal temperature before serving.
Cut into the golden chicken, enjoy the warm garlic butter center, and make this comforting recipe part of your next dinner menu.