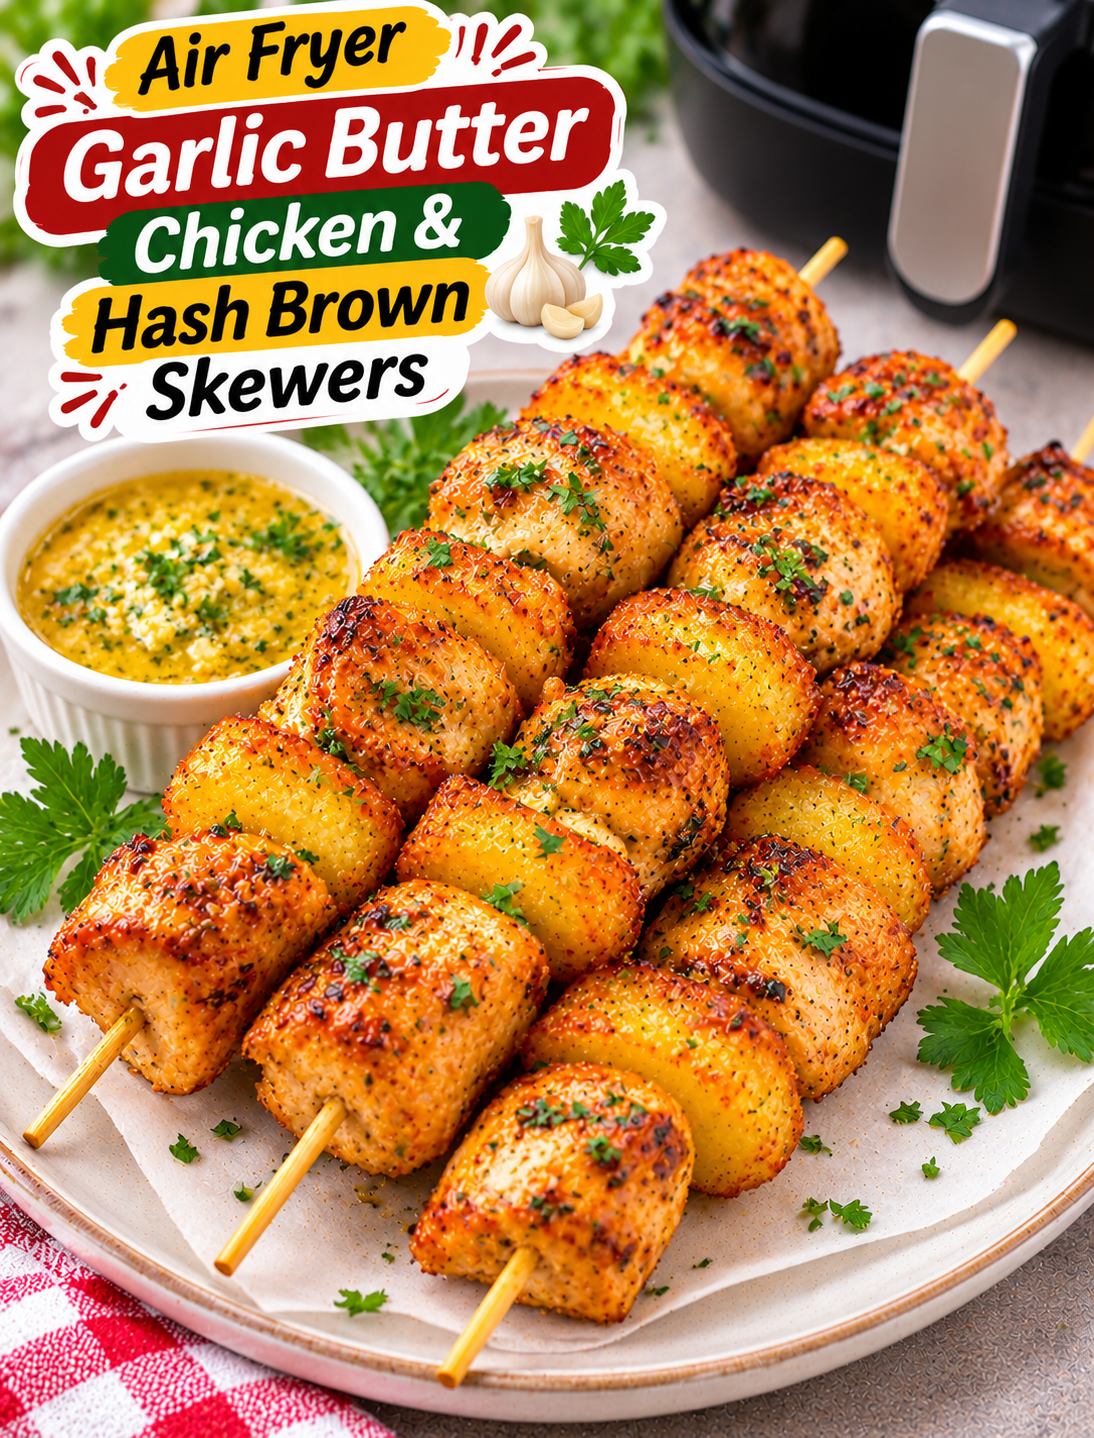
Air Fryer Garlic Butter Chicken & Hash Brown Skewers

Air Fryer Garlic Butter Chicken & Hash Brown Skewers
Crispy golden potatoes, juicy garlic butter chicken, and irresistible savory flavor on every skewer! These Air Fryer Garlic Butter Chicken & Hash Brown Skewers turn simple ingredients into a delicious meal that’s perfect for busy weeknights, weekend lunches, or family gatherings.

Imagine tender chicken pieces seasoned with garlic, paprika, and herbs, paired with crispy golden hash brown bites. Everything cooks in the air fryer until the chicken is juicy and the potatoes develop beautifully crisp edges. A final brush of homemade garlic butter brings all the flavors together.

You don’t need a grill or complicated cooking equipment to make these tasty skewers. With a few pantry seasonings, frozen hash browns, and boneless chicken, you can prepare a satisfying meal with minimal cleanup.

Why You’ll Love This Recipe

  • Juicy chicken: Garlic, paprika, and Italian seasoning give the chicken a savory flavor.
  • Crispy potato bites: Hash browns add a golden, crunchy texture to every skewer.
  • Rich garlic butter: A buttery garlic finish makes the chicken and potatoes taste even better.
  • Air fryer convenience: Enjoy a grilled-style skewer without setting up an outdoor grill.
  • Easy ingredients: The recipe uses simple ingredients available at most grocery stores.
  • Great for sharing: Individual skewers are easy to serve at parties and family dinners.
  • Customizable: Add vegetables, change the seasonings, or adjust the garlic butter to your taste.

Ingredients You’ll Need

For the Chicken

  • 1½ lbs boneless, skinless chicken thighs or breasts, cut into 1½-inch cubes
  • 1 tablespoon olive oil
  • 1 teaspoon garlic powder
  • ½ teaspoon onion powder
  • 1 teaspoon paprika
  • ½ teaspoon Italian seasoning
  • ½ teaspoon salt, or to taste
  • ¼ teaspoon black pepper
  • 1 tablespoon lemon juice

Hash Brown Potatoes

  • 2 cups frozen diced hash browns, thawed
  • 1 tablespoon olive oil
  • ½ teaspoon paprika
  • ¼ teaspoon garlic powder
  • ¼ teaspoon salt
  • ⅛ teaspoon black pepper

Garlic Butter Sauce

  • 3 tablespoons unsalted butter, melted
  • 3 garlic cloves, finely minced
  • 1 tablespoon fresh parsley, chopped
  • ½ teaspoon lemon juice
  • Pinch of black pepper
  • Pinch of red pepper flakes (optional)

Optional Add-Ins

  • 1 small red bell pepper, cut into chunks
  • ½ small red onion, cut into wedges
  • 1 teaspoon chopped fresh rosemary
  • Extra Parmesan cheese for serving

How to Make Air Fryer Garlic Butter Chicken & Hash Brown Skewers

Follow these steps to prepare flavorful chicken and crispy potato skewers with a buttery garlic finish.

Step 1: Prepare the Chicken

Cut the boneless chicken into evenly sized 1½-inch cubes. Trim away any large pieces of excess fat and pat the chicken dry with paper towels.

Try to keep the pieces similar in size so they cook evenly. Chicken thighs are naturally juicy, while chicken breasts provide a leaner option.

Step 2: Season the Chicken

Place the chicken cubes in a large mixing bowl. Add olive oil, garlic powder, onion powder, paprika, Italian seasoning, salt, black pepper, and lemon juice.

Toss until every piece is evenly coated. Cover the bowl and refrigerate for 20–30 minutes to allow the seasonings to flavor the chicken.

Step 3: Prepare the Hash Browns

Thaw the frozen diced hash browns completely. Drain away excess moisture and pat them dry with paper towels.

Place the potatoes in a separate bowl. Add olive oil, paprika, garlic powder, salt, and black pepper. Toss gently until evenly seasoned.

Dry potatoes are important because excess moisture can prevent them from becoming crispy.

Step 4: Pre-Cook the Potatoes

Preheat your air fryer to 375°F (190°C) for approximately 3 minutes if your model recommends preheating.

Arrange the seasoned potatoes in a single layer in the basket. Air fry for 6–8 minutes, shaking the basket halfway through.

The potatoes should begin to turn golden but do not need to be fully crisp at this stage. Transfer them to a plate and allow them to cool slightly.

Step 5: Prepare the Garlic Butter

Add melted butter to a small bowl. Stir in minced garlic, chopped parsley, lemon juice, black pepper, and optional red pepper flakes.

Mix until combined. Set aside half of the garlic butter for brushing after cooking, keeping it separate from any brush or utensils used on raw chicken.

Step 6: Assemble the Skewers

If using wooden skewers, soak them in water for at least 30 minutes. Metal skewers do not need soaking.

Thread the chicken pieces and partially cooked hash browns onto the skewers, alternating between them. If adding bell peppers or onions, place small pieces between the chicken and potatoes.

Leave a little space between the ingredients so hot air can circulate around them. Avoid packing everything too tightly.

Step 7: Preheat and Prepare the Air Fryer

Preheat the air fryer again to 375°F (190°C) if needed. Lightly grease the basket or use an air-fryer-safe rack.

Check that the assembled skewers fit comfortably. If they are too long, use shorter skewers or remove the sticks and arrange the ingredients in a single layer.

Step 8: Air Fry the Chicken and Potatoes

Arrange the skewers in the basket without overcrowding. Cook at 375°F (190°C) for approximately 10–14 minutes, turning halfway through.

Cooking time depends on the size of the chicken pieces, the potato texture, and your air fryer. Check the thickest chicken piece with a food thermometer. Chicken must reach 165°F (74°C) internally.

If the chicken is cooked but the potatoes need more browning, remove the chicken and cook the potatoes for another 2–3 minutes.

Step 9: Brush with Garlic Butter

When the chicken is fully cooked and the potatoes are golden, remove the skewers carefully.

Brush the hot chicken and potatoes with the reserved clean garlic butter. The warmth helps the butter spread across the ingredients and adds a fresh garlic aroma.

Step 10: Garnish and Serve

Transfer the skewers to a serving platter. Sprinkle with fresh parsley, extra black pepper, and grated Parmesan if desired.

Serve immediately with lemon wedges, ranch dressing, garlic yogurt sauce, or your favorite dipping sauce.

Tips for Perfect Chicken & Hash Brown Skewers

  • Cut evenly: Similar-sized chicken pieces cook more consistently.
  • Dry the potatoes: Removing excess moisture helps create crispier hash browns.
  • Pre-cook the potatoes: Giving them a head start helps them finish at the same time as the chicken.
  • Use chicken thighs: They tend to remain juicy and flavorful during air frying.
  • Leave space between ingredients: Air circulation helps the chicken brown and potatoes crisp.
  • Avoid overcrowding: Cook in batches if the skewers do not fit comfortably.
  • Keep garlic butter separate: Never reuse a brush or sauce that has touched raw chicken.
  • Check the temperature: Always confirm that chicken reaches 165°F (74°C).

Delicious Variations

1. Spicy Garlic Butter Chicken Skewers

Add cayenne pepper, extra red pepper flakes, or chili powder to the chicken seasoning. Finish with spicy garlic butter for a little heat.

2. Cheesy Chicken and Potato Skewers

Sprinkle grated Parmesan over the cooked skewers. For extra richness, add a little shredded mozzarella and return the skewers to the air fryer briefly until melted.

3. Lemon Herb Chicken Skewers

Add lemon zest, fresh rosemary, and extra parsley to the marinade. This variation has a bright flavor that pairs well with roasted vegetables.

4. BBQ Garlic Butter Skewers

Brush the cooked chicken lightly with barbecue sauce before adding the garlic butter. Use a small amount so the sauce does not overpower the other flavors.

5. Vegetable Chicken Skewers

Add red bell peppers, zucchini, and red onion between the chicken pieces. Cut the vegetables into similar-sized chunks for more even cooking.

6. Parmesan Ranch Chicken Skewers

Add ½ teaspoon ranch seasoning to the chicken marinade and finish with grated Parmesan. Serve with ranch dressing for dipping.

What to Serve with Chicken & Hash Brown Skewers

These skewers make a satisfying meal on their own, but they also pair well with fresh sides.

  • Fresh garden salad: Lettuce, tomatoes, cucumber, and a light dressing balance the rich garlic butter.
  • Creamy coleslaw: Crunchy cabbage adds a refreshing contrast.
  • Roasted broccoli: A simple vegetable side with a little olive oil and black pepper.
  • Garlic bread: Perfect for soaking up extra garlic butter.
  • Cucumber yogurt dip: A cool, creamy sauce complements the seasoned chicken.
  • Corn on the cob: Adds a sweet side that works well with the savory potatoes.
  • Steamed green beans: A simple option for a balanced dinner plate.

Storage and Reheating

Refrigeration

Remove the chicken and potatoes from the skewers. Store them in an airtight container and refrigerate within 2 hours.

Enjoy leftovers within 3–4 days.

Reheating

Arrange the chicken and potatoes in a single layer in the air fryer. Reheat at 325°F (163°C) until hot throughout.

Leftover chicken should reach 165°F (74°C) when reheated. Add a small amount of fresh garlic butter after warming to refresh the flavor.

Freezing

For the best quality, freeze the cooked chicken and potatoes separately in freezer-safe containers for up to 2 months.

Thaw overnight in the refrigerator before reheating. The potato texture may become softer after freezing.

Make-Ahead Preparation

Season the chicken and prepare the hash browns separately up to one day ahead. Store both covered in the refrigerator.

Assemble and cook the skewers shortly before serving for the best texture.

Frequently Asked Questions

1. Can I use frozen hash browns directly?

Thaw and drain diced hash browns before seasoning so excess moisture does not affect browning.

2. Which chicken is better for these skewers?

Boneless chicken thighs are naturally juicy, while chicken breasts are a leaner option that also works well.

3. How long should I cook chicken skewers in the air fryer?

Start with 10–14 minutes at 375°F (190°C), turning halfway through and checking for an internal temperature of 165°F (74°C).

4. Do I need to pre-cook the hash browns?

Yes. A short pre-cook gives the potatoes a head start so they can become crisp while the chicken finishes cooking.

5. Can I use wooden skewers in an air fryer?

Yes. Soak wooden skewers in water for at least 30 minutes and make sure they fit without touching the heating element.

6. Why are my hash brown potatoes not crispy?

Excess moisture, overcrowding, or too little cooking time can prevent browning. Dry the potatoes and arrange them in a single layer.

7. Can I make these skewers without butter?

Yes. Use olive oil with garlic, parsley, and lemon juice for a lighter finishing sauce.

8. Can I prepare chicken and hash brown skewers ahead of time?

You can season the chicken and prepare the potatoes in advance, but assemble and air fry them shortly before serving for the best results.

Final Thoughts

Air Fryer Garlic Butter Chicken & Hash Brown Skewers combine juicy seasoned chicken, golden potato bites, and rich garlic butter in one easy meal. The air fryer makes preparation simple while giving the ingredients a delicious browned finish.

You can adjust the seasonings, add colorful vegetables, or finish the skewers with Parmesan and fresh herbs. Serve them with a crisp salad, creamy dip, or warm garlic bread for a satisfying family dinner.

Make these skewers when you want something flavorful, easy to customize, and fun to serve. Every bite brings together tender chicken, crispy potatoes, and classic garlic butter flavor!
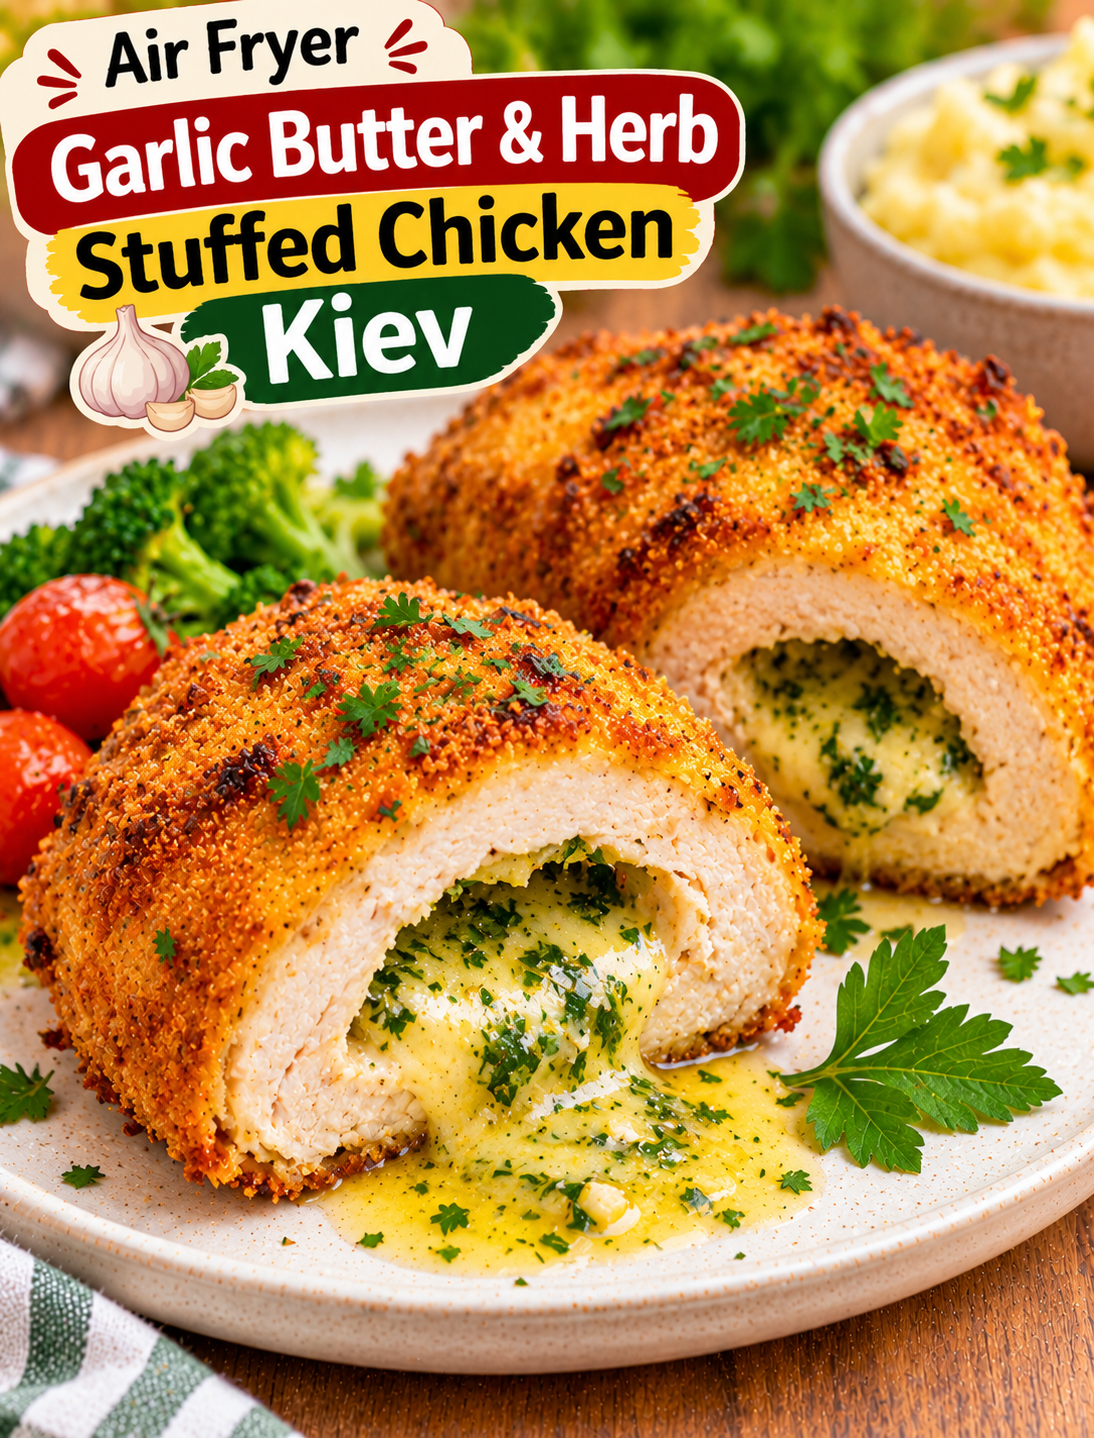
Air Fryer Chicken Kiev

Air Fryer Chicken Kiev

Air Fryer Garlic Butter & Herb Stuffed Chicken Kiev is a delicious homemade dinner featuring tender chicken breast filled with rich garlic butter, fresh herbs, and a crispy golden coating. Every bite brings together juicy chicken, crunchy breadcrumbs, and a warm buttery center that makes this classic comfort food extra special.

Traditional Chicken Kiev is often deep-fried, but this air fryer version offers an easier way to achieve a crispy outside with less oil. The air fryer circulates hot air around the breaded chicken, helping the coating turn golden while keeping the inside tender and flavorful.

The secret to this recipe is the homemade garlic herb butter. Fresh parsley, minced garlic, softened butter, and a little lemon juice create a flavorful filling that melts inside the chicken as it cooks.

This recipe is perfect for family dinners, weekend meals, or special occasions when you want something that looks impressive without using complicated cooking techniques. You can prepare the herb butter ahead of time, making the final cooking process much easier.

Serve your homemade Chicken Kiev with mashed potatoes, roasted vegetables, or a fresh garden salad for a satisfying meal. Once you cut into the crispy chicken and see the warm garlic butter inside, this recipe may become a regular favorite at your dinner table.

Why You’ll Love This Recipe

  • Crispy golden coating: Panko breadcrumbs create a crunchy exterior without deep frying.
  • Rich garlic butter filling: Butter, fresh garlic, and herbs melt together inside the chicken.
  • Less oil required: The air fryer creates a crispy texture using only a light coating of oil.
  • Homemade flavor: Fresh ingredients give this classic chicken dish a delicious taste.
  • Perfect for dinner: Serve it with vegetables, potatoes, or your favorite side dishes.
  • Easy preparation: The ingredients are simple and available at most grocery stores.
  • Great for special occasions: The golden crust and buttery center make an impressive dinner.
  • Customizable herbs: Use parsley, thyme, chives, or your favorite fresh herbs.

Ingredients for Air Fryer Garlic Butter & Herb Stuffed Chicken Kiev

Choose fresh chicken breasts, good-quality butter, and fresh herbs for the best flavor. The ingredients are divided into three simple parts: the garlic butter filling, chicken, and crispy coating.

Garlic Herb Butter Filling

1. Unsalted Butter

Use ½ cup of softened unsalted butter. Butter creates the rich, creamy center that melts inside the chicken during cooking.

2. Fresh Garlic

Add 3 finely minced garlic cloves. Fresh garlic gives the filling a strong, savory flavor.

3. Fresh Parsley

Use 2 tablespoons of finely chopped fresh parsley. It adds a clean herbal flavor and gives the butter a fresh appearance.

4. Fresh Thyme

Add 1 teaspoon of fresh thyme leaves. Thyme pairs well with garlic and butter.

5. Lemon Juice

Use 1 teaspoon of fresh lemon juice. It balances the richness of the butter with a little acidity.

6. Salt and Black Pepper

Add ¼ teaspoon of salt and ⅛ teaspoon of black pepper, adjusting to your taste.

Chicken Ingredients

  • 2 large boneless, skinless chicken breasts
  • ½ teaspoon garlic powder
  • ½ teaspoon paprika
  • ¼ teaspoon salt
  • ¼ teaspoon black pepper

Choose chicken breasts with enough thickness to create a pocket for the butter filling.

Crispy Coating

  • ½ cup all-purpose flour
  • 2 large eggs
  • 1 tablespoon milk
  • 1 cup panko breadcrumbs
  • ½ teaspoon paprika
  • ½ teaspoon garlic powder
  • Olive oil cooking spray

Panko breadcrumbs create a lighter, crunchier coating than many regular breadcrumbs.

Step-by-Step Instructions

Follow these steps carefully to prepare Chicken Kiev with a flavorful butter center and crispy air-fried coating.

Step 1: Prepare the Garlic Herb Butter

  • Place the softened butter in a small mixing bowl.
  • Add the minced garlic.
  • Add chopped fresh parsley and thyme.
  • Pour in the lemon juice.
  • Sprinkle in salt and black pepper.
  • Mix everything until the herbs and garlic are evenly distributed.
  • Taste a small amount and adjust the seasoning if needed.

The butter should be soft enough to mix easily but should not be melted.

Step 2: Shape and Chill the Butter

  • Place a sheet of plastic wrap or parchment paper on your work surface.
  • Spoon the garlic herb butter onto the center.
  • Shape it into a short, compact log.
  • Wrap it tightly.
  • Place it in the freezer for approximately 20–30 minutes.
  • Check that the butter is firm enough to handle.

Chilling the butter helps keep the filling inside the chicken while you prepare the coating.

Step 3: Prepare the Chicken Breasts

  • Place the chicken breasts on a clean cutting board.
  • Pat them dry with paper towels.
  • Use a sharp knife to cut a pocket into the thickest side of each breast.
  • Keep the opposite side and edges intact.
  • Make the opening large enough to hold the butter without cutting through the chicken.
  • Season the outside with garlic powder, paprika, salt, and black pepper.

Avoid making the pocket too large because the butter may escape during cooking.

Step 4: Stuff the Chicken with Garlic Butter

  • Remove the chilled butter from the freezer.
  • Cut it into two equal portions.
  • Place one portion inside each chicken breast pocket.
  • Push the butter toward the center of the chicken.
  • Fold the chicken over the opening.
  • Secure the opening with toothpicks if needed.
  • Check that the butter is fully enclosed.

Keep the chicken refrigerated while preparing the breading station.

Step 5: Prepare the Breading Station

Set up three shallow bowls for coating the chicken.

  • Add all-purpose flour to the first bowl.
  • Whisk the eggs and milk together in the second bowl.
  • Add panko breadcrumbs, paprika, and garlic powder to the third bowl.
  • Mix the breadcrumbs until the seasonings are evenly distributed.

Keeping the bowls separate makes the breading process easier and cleaner.

Step 6: Coat the Stuffed Chicken

  • Take one stuffed chicken breast from the refrigerator.
  • Coat it lightly with flour.
  • Shake off any excess flour.
  • Dip it into the egg mixture.
  • Turn it gently to cover all sides.
  • Transfer it to the seasoned panko breadcrumbs.
  • Press the breadcrumbs gently onto the chicken.
  • Check that the pocket opening is well covered.
  • Repeat the process with the second chicken breast.

For a thicker crust, repeat the egg and breadcrumb coating once more.

Step 7: Preheat the Air Fryer

  • Preheat your air fryer to 360°F for approximately 3 minutes.
  • Lightly spray the air fryer basket with cooking oil.
  • Use suitable air fryer parchment if needed.
  • Arrange the coated chicken breasts in a single layer.
  • Leave enough space between them for proper air circulation.

Avoid overcrowding the basket because the chicken needs space to cook evenly.

Step 8: Air Fry the Chicken Kiev

  • Lightly spray the breadcrumb coating with olive oil cooking spray.
  • Place the basket inside the air fryer.
  • Cook at 360°F for approximately 18–22 minutes.
  • Carefully turn the chicken halfway through cooking if the coating allows.
  • Check the thickest part of the chicken with a food thermometer.
  • Continue cooking if necessary until the center of the chicken reaches 165°F.
  • Remove the chicken carefully once fully cooked.

Cooking time depends on the thickness of the chicken breasts and your air fryer model. Always use a food thermometer rather than relying on color alone.

Step 9: Rest Before Serving

  • Transfer the cooked chicken to a serving plate.
  • Allow it to rest for approximately 5 minutes.
  • Remove any toothpicks before serving.
  • Cut carefully because the melted garlic butter inside will be hot.
  • Spoon any escaped garlic herb butter over the chicken if desired.

Your crispy Air Fryer Garlic Butter & Herb Stuffed Chicken Kiev is ready to serve!

Best Tips for Perfect Chicken Kiev

These simple tips help prevent the butter from leaking and keep the breadcrumb coating crispy.

1. Chill the Garlic Butter

Freeze the shaped butter before stuffing the chicken. Firm butter is easier to handle and less likely to melt before the chicken cooks.

2. Choose Thick Chicken Breasts

Thicker chicken breasts provide enough space for the filling. Thin pieces are harder to stuff and seal properly.

3. Do Not Cut Through the Chicken

Create a pocket instead of slicing the chicken completely in half. Keeping the edges intact helps contain the butter.

4. Seal the Opening Properly

Fold the chicken around the butter and use toothpicks when necessary. Cover the opening with breadcrumbs for extra protection.

5. Coat Every Side

Make sure the flour, egg, and panko breadcrumbs cover the entire chicken breast. An even coating helps create a consistent golden crust.

6. Use Panko Breadcrumbs

Panko breadcrumbs produce a lighter and crunchier coating. Lightly spraying them with oil also helps improve browning.

7. Avoid Overcrowding

Cook the chicken in batches if necessary. Proper airflow helps the coating become crisp.

8. Rest Before Cutting

Allowing the chicken to rest for a few minutes helps keep the juices inside and prevents the hot butter from spilling out immediately.

Variations and Substitutions

You can change the herb butter and coating to create different flavors while keeping the same cooking method.

1. Cheesy Garlic Butter Chicken Kiev

Add 2 tablespoons of finely grated Parmesan cheese to the herb butter. It gives the filling a richer, savory flavor.

2. Lemon Herb Chicken Kiev

Add extra lemon zest and fresh thyme to the butter mixture. This creates a bright flavor that balances the richness of the butter.

3. Spicy Garlic Butter Chicken

Mix a pinch of red pepper flakes or cayenne pepper into the butter. This adds gentle heat without overpowering the garlic flavor.

4. Parmesan Crusted Chicken Kiev

Add ¼ cup of grated Parmesan cheese to the panko breadcrumbs. The cheese creates a savory, crunchy coating.

5. Italian Herb Chicken Kiev

Replace thyme with dried Italian seasoning and add a little oregano to the butter. This gives the chicken a classic Italian-inspired flavor.

6. Gluten-Free Chicken Kiev

Use gluten-free all-purpose flour and gluten-free breadcrumbs. Check the ingredient labels on all packaged seasonings and other ingredients.

What to Serve with Garlic Butter Stuffed Chicken

Chicken Kiev pairs well with simple sides that balance its rich garlic butter filling.

  • Mashed potatoes: Creamy mashed potatoes complement the crispy chicken and buttery center.
  • Roasted broccoli: Lightly seasoned broccoli adds freshness and color to the plate.
  • Garlic green beans: Green beans make a simple vegetable side with a savory flavor.
  • Garden salad: Lettuce, tomatoes, cucumber, and lemon dressing balance the richness of the chicken.
  • Roasted carrots: Naturally sweet carrots pair well with garlic and fresh herbs.
  • Rice pilaf: Fluffy rice makes a satisfying side for a family dinner.
  • Air fryer asparagus: Tender asparagus adds a fresh vegetable option without much preparation.

For a complete dinner, serve one chicken breast with mashed potatoes and roasted green vegetables.

How to Store Leftover Chicken Kiev

Proper storage helps maintain the quality and safety of leftover stuffed chicken.

Refrigerator Storage

  • Allow the cooked chicken to cool slightly.
  • Transfer it to an airtight food storage container.
  • Refrigerate within 2 hours of cooking.
  • Store for up to 3–4 days.
  • Keep leftover chicken separate from fresh vegetables and sauces.

Freezer Storage

  • Allow the cooked chicken to cool completely.
  • Wrap each piece individually.
  • Place the wrapped chicken in a freezer-safe container or bag.
  • Label it with the storage date.
  • Freeze for up to 2–3 months for best quality.

For the best texture, reheat the chicken in the air fryer rather than the microwave.

How to Reheat Air Fryer Chicken Kiev

The air fryer helps bring back some of the crispy texture without deep frying.

Reheating in an Air Fryer

  • Preheat the air fryer to 325°F.
  • Place the refrigerated chicken in the basket.
  • Heat for approximately 8–12 minutes, depending on thickness.
  • Turn carefully halfway through if needed.
  • Check that the center reaches 165°F.
  • Allow it to rest briefly before serving.

Reheating in the Oven

  • Preheat your oven to 350°F.
  • Place the chicken in an oven-safe baking dish.
  • Cover loosely with foil to prevent excessive browning.
  • Heat until the center reaches 165°F.
  • Remove the foil during the final few minutes if you want a crispier coating.

Avoid cutting the chicken before reheating because the garlic butter can escape and make the meat dry.

Common Mistakes to Avoid

Avoid these mistakes to get better results from your homemade Chicken Kiev.

  • Using soft butter: Warm butter can leak before the chicken is fully cooked.
  • Cutting through the chicken: A full cut makes it harder to contain the filling.
  • Overfilling the pocket: Too much butter increases the chance of leakage.
  • Skipping the chilling step: Firm butter is easier to stuff and seal.
  • Using wet breadcrumbs: Moist breadcrumbs may create a less crispy coating.
  • Overcrowding the air fryer: Poor airflow can cause uneven browning.
  • Cooking at excessive heat: High temperatures can brown the outside before the chicken reaches a safe internal temperature.
  • Cutting immediately: Resting helps keep the chicken juicy and reduces hot butter spilling onto the plate.

Frequently Asked Questions

1. How long does Chicken Kiev take in the air fryer?

Stuffed chicken breasts usually take approximately 18–22 minutes at 360°F, depending on their thickness.

2. How do I stop garlic butter from leaking out?

Chill the butter until firm, avoid overfilling, and seal the chicken pocket carefully before breading.

3. What temperature should Chicken Kiev reach?

The thickest part of the chicken must reach an internal temperature of 165°F for food safety.

4. Can I use dried herbs instead of fresh herbs?

Yes, use dried parsley and thyme in smaller amounts because dried herbs have a more concentrated flavor.

5. Can I prepare Chicken Kiev ahead of time?

Yes, stuff and bread the chicken, cover it, and refrigerate it until you are ready to air fry.

6. Can I freeze homemade Chicken Kiev?

Yes, freeze individually wrapped cooked or uncooked portions in a freezer-safe container for up to 2–3 months for best quality.

7. Why is my Chicken Kiev coating not crispy?

Excess moisture, insufficient oil spray, or overcrowding can prevent the breadcrumb coating from becoming crisp.

8. Can I use chicken thighs instead of chicken breasts?

Boneless chicken thighs can work, but their shape makes stuffing more difficult and cooking time may vary.

Final Thoughts

Air Fryer Garlic Butter & Herb Stuffed Chicken Kiev is a delicious homemade dinner that combines tender chicken, fresh herbs, rich garlic butter, and a crispy golden coating.

The air fryer makes this classic dish easier to prepare while reducing the need for deep frying. With a little preparation and a few simple ingredients, you can create a flavorful meal that looks impressive and tastes even better.

Serve it with mashed potatoes, roasted vegetables, or a fresh garden salad for a satisfying family dinner. Remember to chill the herb butter, seal the chicken carefully, and check the internal temperature before serving.

Cut into the golden chicken, enjoy the warm garlic butter center, and make this comforting recipe part of your next dinner menu.

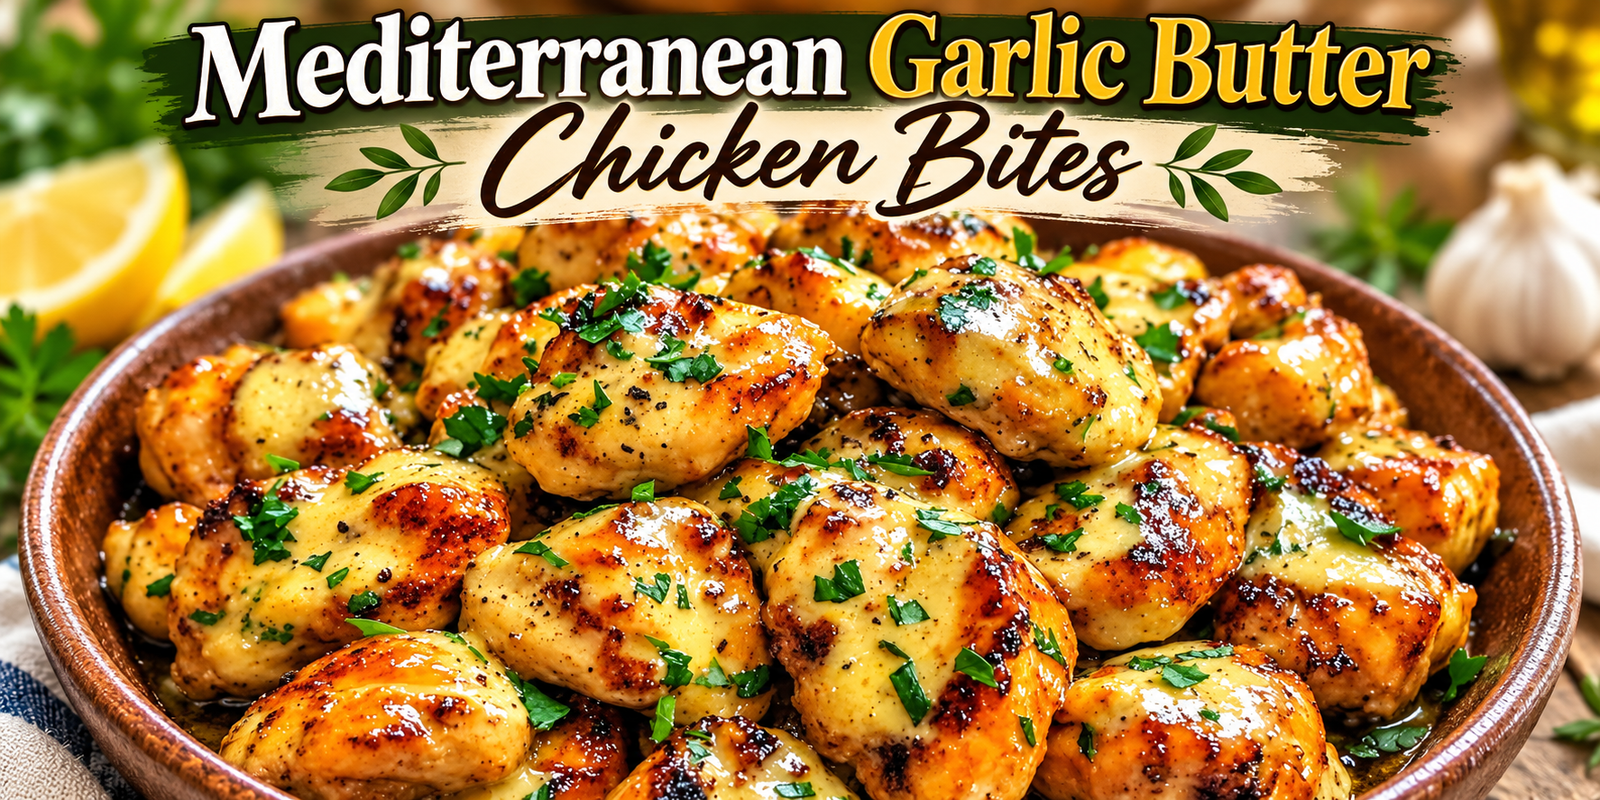
Mediterranean Garlic Butter Chicken Bites

Mediterranean Garlic Butter Chicken Bites in a bowl with golden juicy chicken pieces coated in garlic butter sauce and fresh parsley

Mediterranean Garlic Butter Chicken Bites

Mediterranean Garlic Butter Chicken Bites are juicy, golden pieces of chicken cooked in a rich garlic butter sauce with lemon, herbs, and Mediterranean-inspired seasonings. This quick skillet recipe is full of flavor, easy to prepare, and perfect for lunch, dinner, meal prep, or serving with rice, pasta, potatoes, vegetables, or salad.

The combination of tender chicken, garlic, butter, oregano, parsley, paprika, and fresh lemon creates a bright and savory dish that comes together quickly. It is especially useful when you need a simple dinner without spending too much time in the kitchen.

Prep Time: 10 minutes
Cook Time: 15 minutes
Total Time: 25 minutes
Servings: 4

Ingredients 

For the Chicken

1½ lb boneless, skinless chicken breasts or chicken thighs, cut into bite-size pieces

1 tablespoon olive oil

1 teaspoon paprika

1 teaspoon dried oregano

½ teaspoon garlic powder

½ teaspoon onion powder

½ teaspoon salt

¼ teaspoon black pepper

For the Garlic Butter Sauce

3 tablespoons unsalted butter

4 garlic cloves, finely minced

1 tablespoon fresh lemon juice

1 teaspoon lemon zest

1 tablespoon chopped fresh parsley

1 teaspoon chopped fresh dill, optional

½ teaspoon dried oregano

¼ teaspoon red pepper flakes, optional

Optional Mediterranean Add-Ins

½ cup cherry tomatoes, halved

¼ cup sliced olives

¼ cup crumbled feta cheese

1 tablespoon capers

Fresh basil or parsley

Step-by-Step Instructions

Prepare the Chicken

Pat the chicken dry with paper towels.

This step helps the chicken brown better in the skillet.

Cut the chicken into even bite-size pieces so they cook at the same speed.

Place the chicken in a bowl.

Add paprika, oregano, garlic powder, onion powder, salt, and black pepper.

Toss until all the chicken pieces are evenly coated with seasoning.

Heat the Skillet

Place a large skillet over medium-high heat.

Add the olive oil.

Let the oil heat for about 30 seconds.

The skillet should be hot before adding the chicken.

Cook the Chicken

Add the seasoned chicken in a single layer.

Do not overcrowd the skillet.

If necessary, cook the chicken in two batches.

Let the chicken cook without moving it for about 2 to 3 minutes.

This helps create a golden crust.

Stir and continue cooking for another 4 to 5 minutes.

Cook until the chicken is golden on the outside and fully cooked through.

The internal temperature should reach 165°F or 74°C.

Transfer the chicken to a plate.

Make the Garlic Butter Sauce

Reduce the heat to medium-low.

Add the butter to the same skillet.

Once melted, add the minced garlic.

Cook for about 30 seconds.

Stir constantly so the garlic does not burn.

Add lemon juice, lemon zest, oregano, parsley, and red pepper flakes if using.

Stir everything together.

Return the Chicken to the Skillet

Add the cooked chicken back to the pan.

Toss the chicken in the garlic butter sauce until every piece is coated.

Cook for another 1 to 2 minutes.

This allows the chicken to absorb the lemon, garlic, and herb flavors.

Add Optional Mediterranean Ingredients

If using cherry tomatoes, olives, or capers, add them during the final minute.

Stir gently.

Remove the skillet from the heat.

Sprinkle feta cheese over the top if desired.

Finish with extra parsley or basil.

Serve immediately.

Why You’ll Love Mediterranean Garlic Butter Chicken Bites

This recipe is simple but packed with flavor.

The chicken cooks quickly because it is cut into small pieces.

The garlic butter sauce gives the dish richness.

Fresh lemon keeps it bright and balanced.

Mediterranean herbs add savory flavor without making the recipe complicated.

You can also customize the dish easily.

Add vegetables, olives, feta, or chili flakes depending on what you have available.

For a cozy and comforting chicken dinner, try our Crockpot Chicken and Dumplings, an easy slow cooker recipe perfect for family meals.

Tips for the Best Chicken Bites

Dry the Chicken First

Moisture prevents browning.

Patting the chicken dry helps create a better golden crust.

Use a Hot Skillet

A properly heated skillet helps sear the chicken quickly.

This keeps the outside golden while the inside stays juicy.

Do Not Overcrowd the Pan

Too much chicken in the skillet can create steam.

Cook in batches if needed.

Use Fresh Garlic

Fresh garlic gives the sauce the strongest flavor.

Avoid overcooking it because burned garlic tastes bitter.

Add Lemon at the End

Fresh lemon tastes brightest when added near the end of cooking.

Use Chicken Thighs for Extra Juiciness

Boneless chicken thighs work especially well because they stay tender and juicy.

Easy Variations

Mediterranean Garlic Butter Chicken with Spinach

Add 2 cups of fresh baby spinach during the final few minutes.

Cook until wilted.

Garlic Butter Chicken with Tomatoes

Add halved cherry tomatoes to the skillet after the chicken is cooked.

Let them soften slightly in the sauce.

Chicken Bites with Feta

Sprinkle crumbled feta over the finished dish.

The feta adds salty, creamy flavor.

Spicy Garlic Butter Chicken

Add red pepper flakes or a pinch of cayenne.

Creamy Garlic Butter Chicken

Add ¼ cup of heavy cream after the garlic cooks.

Stir until creamy.

Then return the chicken to the skillet.

Garlic Butter Chicken and Vegetables

Add zucchini, bell peppers, mushrooms, or asparagus.

Cook the vegetables before making the sauce.

What to Serve with Mediterranean Garlic Butter Chicken Bites

These chicken bites pair well with many side dishes.

Serve them with rice for a simple meal.

You can also serve them with:

Roasted potatoes

Mashed potatoes

Orzo

Couscous

Quinoa

Pasta

Garlic bread

Roasted vegetables

Greek salad

Cucumber tomato salad

The chicken also works well inside wraps or pita bread.

If you enjoy bright lemon and herb flavors, you may also like our Perfectly Seared Scallops in Creamy Lemon-Herb Sauce for another elegant Mediterranean-inspired meal.

Meal Prep Instructions

This recipe is a good option for meal prep.

Cook the chicken and allow it to cool.

Divide it into airtight containers.

Add rice, quinoa, or roasted vegetables.

Store the containers in the refrigerator.

For best quality, enjoy within 3 days.

Keep fresh garnishes such as parsley, feta, and lemon wedges separate until serving.

Storage Instructions

Allow leftovers to cool completely.

Transfer them to an airtight container.

Store in the refrigerator for up to 3 days.

The garlic butter sauce may thicken when cold.

This is normal.

How to Reheat

Reheat the chicken in a skillet over low heat.

Add a small splash of water, chicken broth, or butter if needed.

Stir gently until warmed through.

You can also use the microwave.

Heat in short intervals to avoid drying out the chicken.

Can You Freeze Mediterranean Garlic Butter Chicken Bites?

Yes.

Allow the chicken to cool completely.

Place it in a freezer-safe container.

Freeze for up to 2 months.

Thaw overnight in the refrigerator.

Reheat gently in a skillet.

Add fresh lemon juice and parsley after reheating to refresh the flavor.

Frequently Asked Questions

Can I use chicken thighs instead of chicken breasts?

Yes.

Chicken thighs are an excellent choice because they are naturally juicy and flavorful.

Can I make this recipe dairy-free?

Yes.

Replace butter with olive oil or a dairy-free butter substitute.

Can I add vegetables?

Yes.

Zucchini, bell peppers, mushrooms, spinach, asparagus, and tomatoes all work well.

Can I make it spicy?

Yes.

Add red pepper flakes, cayenne pepper, or chopped fresh chili.

Can I use bottled lemon juice?

Fresh lemon juice is recommended for the best flavor.

Bottled juice can be used if necessary.

Can I make it ahead of time?

Yes.

Cook the chicken ahead and refrigerate it.

Reheat gently before serving.

What can I use instead of butter?

Olive oil works well.

You can also use a combination of olive oil and a small amount of butter.

Can I serve this over pasta?

Yes.

Toss the chicken and garlic butter sauce with cooked pasta.

Add Parmesan or feta if desired.

Servings & Nutrition

Servings: 4

Estimated nutrition per serving:

Calories: 330

Protein: 38 g

Carbohydrates: 4 g

Fat: 18 g

Fiber: 1 g

Sugar: 1 g

Sodium: 480 mg

Nutrition values are estimates and may vary depending on the type of chicken, butter, seasonings, and optional ingredients used.

Final Thoughts

Mediterranean Garlic Butter Chicken Bites are quick, flavorful, and easy enough for busy weeknights.

The chicken turns golden and juicy in the skillet, while the garlic butter sauce adds richness and fresh Mediterranean flavor.

Lemon, oregano, parsley, and optional feta or olives make the dish bright and satisfying.

You can serve these chicken bites with rice, pasta, potatoes, vegetables, or salad.

They are also easy to prepare ahead, making them useful for both family dinners and meal prep.