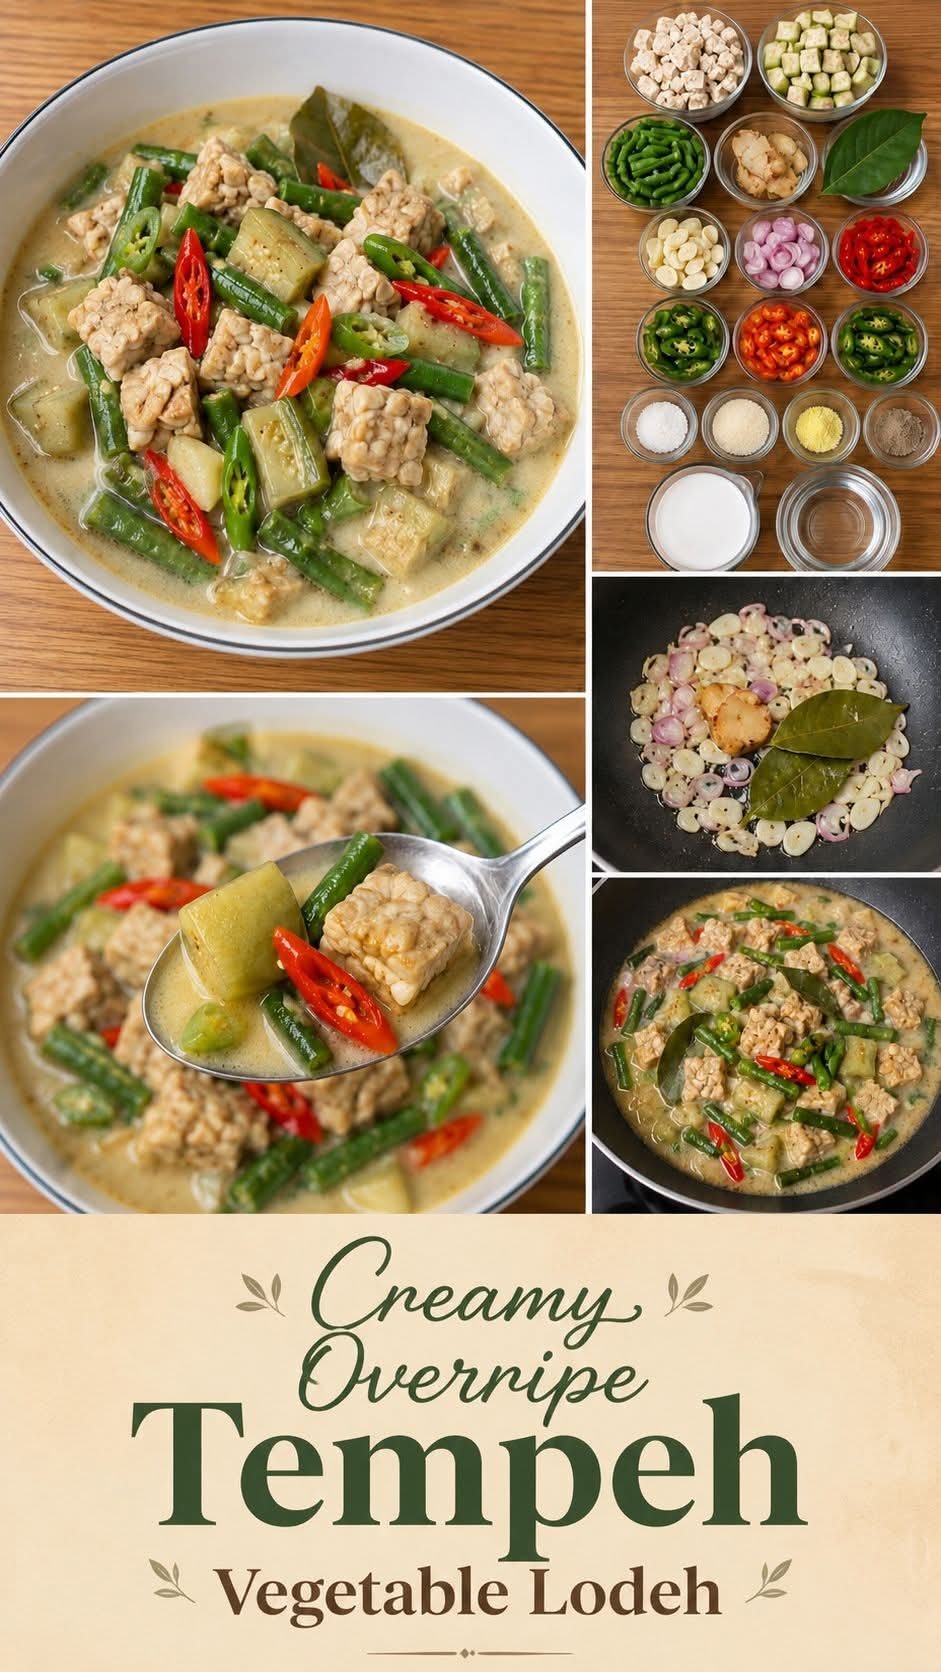
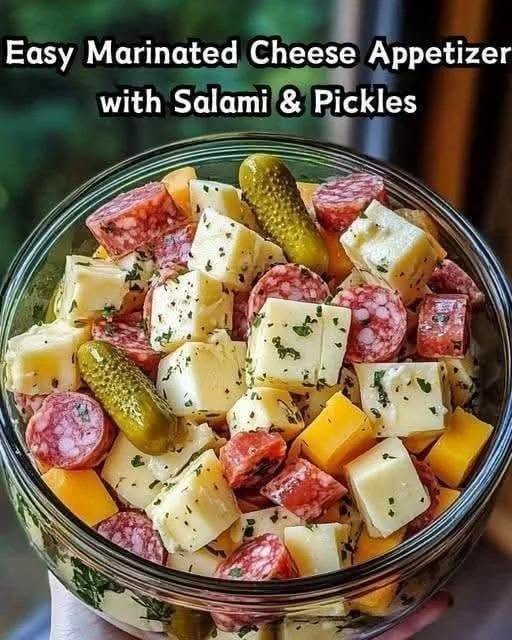
Easy Marinated Cheese Appetizer with Salami & Pickles
There are some recipes that instantly become a favorite after the very first bite, and this Easy Marinated Cheese Appetizer with Salami & Pickles is definitely one of them. I actually tried this recipe with my family last weekend when we were hosting a casual game night at home. I was looking for something simple that didn’t require hours in the kitchen, and a close friend recommended this appetizer. She promised it would disappear quickly from the table, and she was absolutely right.
The moment I placed the platter out, everyone gathered around it. Between the creamy cheese cubes, savory salami slices, tangy pickles, and flavorful marinade, there was something for everyone to love. Even the picky eaters in my family kept coming back for more. By the end of the evening, the serving tray was completely empty.
What I love most about this recipe is how effortless it is. Whether I’m feeling happy and celebrating with friends, stressed after a busy week, or simply enjoying a relaxing weekend at home, this appetizer always feels like a special treat. It’s one of those recipes that looks impressive but requires very little work.
Why You’ll Love This Recipe
Quick and easy to prepare
Perfect for parties, holidays, and family gatherings
Packed with bold flavors
Can be made ahead of time
Requires minimal cooking skills
Looks beautiful on any appetizer table
Ingredients
8 ounces cheddar cheese, cubed
8 ounces mozzarella cheese, cubed
6 ounces salami, sliced into bite-sized pieces
1 cup dill pickles, sliced
½ cup olive oil
2 tablespoons red wine vinegar
1 teaspoon Italian seasoning
½ teaspoon garlic powder
½ teaspoon onion powder
¼ teaspoon crushed red pepper flakes (optional)
1 tablespoon fresh parsley, chopped
Salt and black pepper, to taste
Instructions
Step 1: Prepare the Ingredients
Cut the cheddar and mozzarella into bite-sized cubes. Slice the salami into smaller pieces if needed, and drain and slice the pickles.
Step 2: Make the Marinade
In a small bowl, whisk together the olive oil, red wine vinegar, Italian seasoning, garlic powder, onion powder, crushed red pepper flakes, parsley, salt, and pepper until well combined.
Step 3: Combine Everything
Place the cheese cubes, salami, and pickles in a large mixing bowl. Pour the marinade over the top and gently toss until everything is evenly coated.
Step 4: Marinate
Cover the bowl and refrigerate for at least 2 hours. For the best flavor, let it marinate overnight.
Step 5: Serve
Transfer to a serving platter or bowl and serve chilled with crackers, toasted bread, or fresh vegetables.
Tips for the Best Marinated Cheese Appetizer
Allow enough marinating time so the flavors fully develop.
Use high-quality cheese for the best texture and taste.
Add olives or cherry tomatoes for extra variety.
Prepare it the night before a party to save time.
Serve with a variety of crackers and breadsticks.
Variations
Spicy Version
Add extra crushed red pepper flakes or diced jalapeños for a spicy kick.
Mediterranean Style
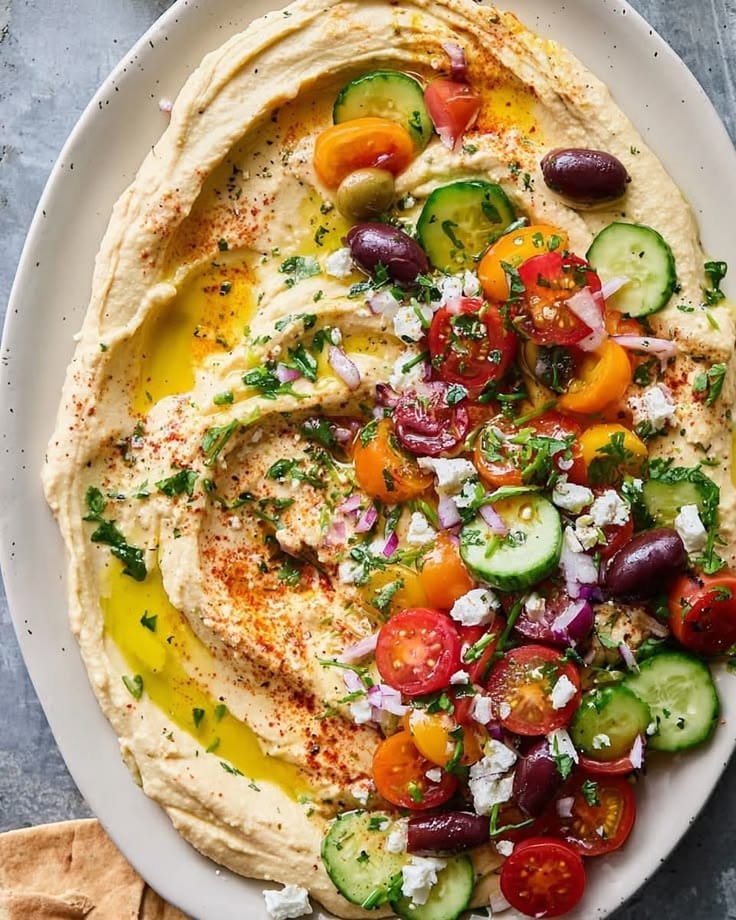
Include olives, feta cheese, and sun-dried tomatoes.
Herb Lovers Version
Add fresh basil, oregano, and thyme for even more flavor.
What to Serve With It
This appetizer pairs wonderfully with:
Assorted crackers
Toasted baguette slices
Fresh vegetable sticks
Fruit platters
Charcuterie boards
I recently served it alongside a simple fruit tray and some crackers during a family movie night. The combination was fantastic, and everyone kept asking for the recipe.
Storage Instructions
Store leftovers in an airtight container in the refrigerator for up to 4 days. The flavors often become even better after a day as the ingredients continue to marinate together.
Nutritional Information
Nutrient Amount Per Serving
Calories 280 kcal
Protein 14 g
Carbohydrates 3 g
Fat 23 g
Saturated Fat 8 g
Cholesterol 35 mg
Sodium 720 mg
Fiber 0.5 g
Sugar 1 g
Calcium 220 mg
Nutritional values are approximate and may vary depending on the specific ingredients used.
Frequently Asked Questions
Can I make this appetizer ahead of time?
Absolutely. In fact, it tastes even better when made a day in advance because the flavors have more time to blend together.
What type of cheese works best?
Cheddar and mozzarella are excellent choices, but you can also use Monterey Jack, Colby, or pepper jack cheese.
Can I use different pickles?
Yes. Dill pickles are traditional, but bread-and-butter pickles or spicy pickles can add a unique twist.
Is this recipe suitable for parties?
Definitely. It’s one of my favorite make-ahead party appetizers because it’s easy, affordable, and always gets compliments.
Final Thoughts
This Easy Marinated Cheese Appetizer with Salami & Pickles has become one of those reliable recipes I turn to again and again. It reminds me of relaxed weekends, family gatherings, and sharing good food with people I care about. The first time I made it, I wasn’t expecting much from such a simple combination of ingredients, but it completely won everyone over.


 Low sugar / diabetic-friendly

 Ingredients
 Vegetables
 Instructions
 Thin slices absorb the pickling brine better
 Pro Tips
 Anti-Inflammatory Benefits (from ingredients)
 Variations
 Why this works