Cream Cheese Gooey Butter Cake

Cream Cheese Gooey Butter Cake

Description

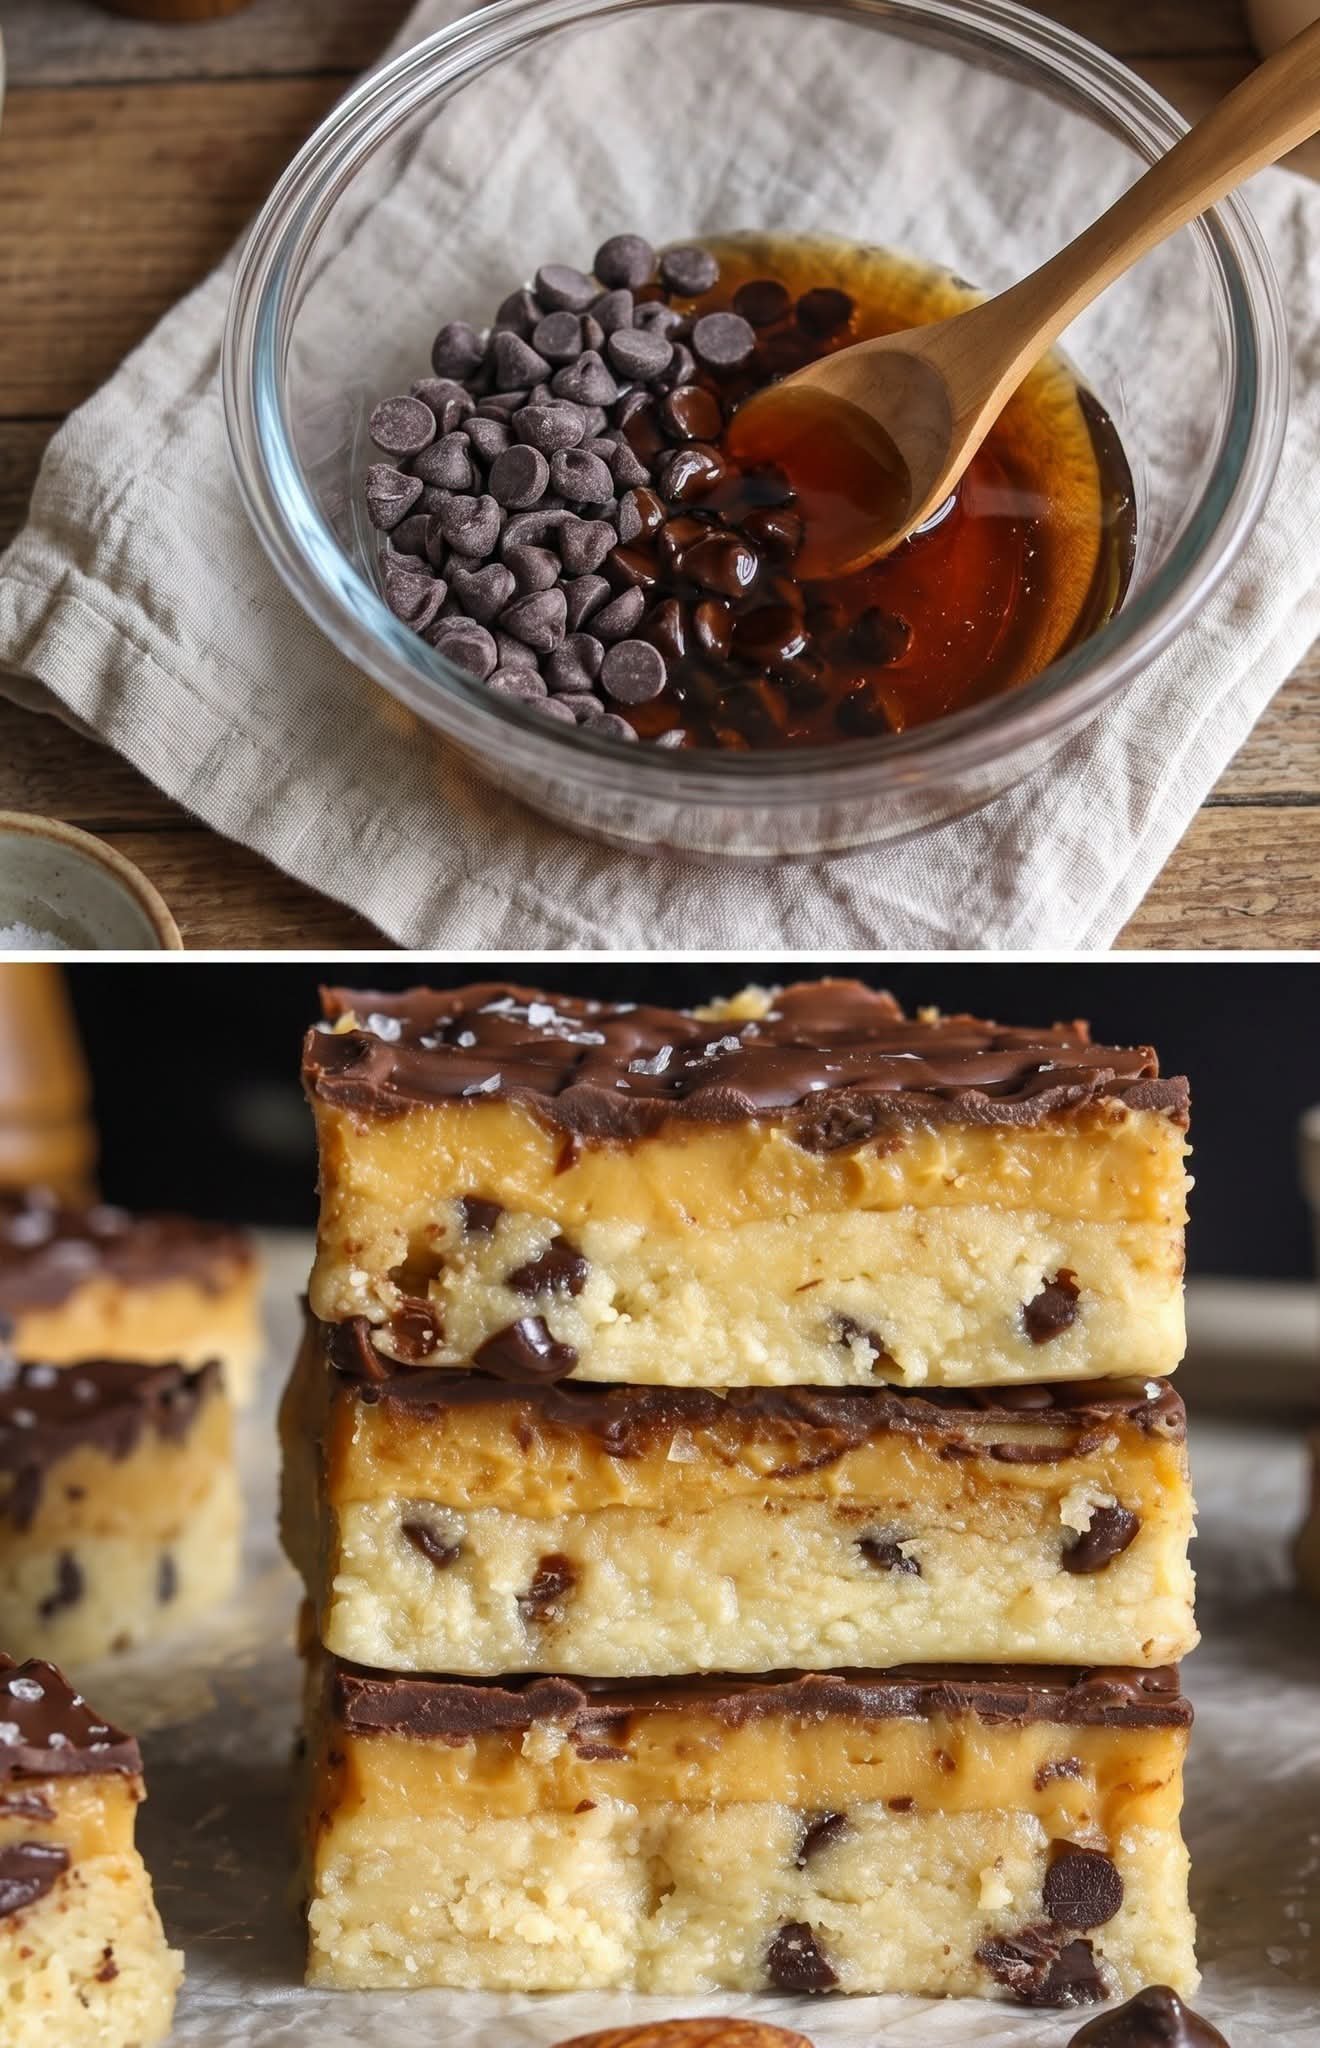
Cream  Cheese Gooey Butter  Cake is a decadent dessert with two distinct layers:

Description

Cream  Cheese Gooey Butter  Cake is a decadent dessert with two distinct layers:

Ingredients

For the Cake Base:

  • 1 box yellow cake mix
  • ½ cup (115g) unsalted butter, melted
  • 1 large egg

For the Cream Cheese Layer:

  • 8 oz (225g) cream cheese, softened
  • 2 large eggs
  • 1 tsp vanilla extract
  • ½ cup (115g) unsalted butter, melted
  • 4 cups powdered sugar

Instructions

Step 1: Prepare

  • Preheat oven to 175°C (350°F)
  • Grease a 9×13-inch baking pan

Step 2: Make the Base

  • In a bowl, mix cake mix, melted butter, and egg
  • Stir until a thick dough forms
  • Press evenly into the bottom of the pan

Step 3: Make the Filling

  • Beat cream cheese until smooth
  • Add eggs and vanilla, mix well
  • Add melted butter and mix again
  • Gradually add powdered sugar, beating until smooth and creamy

Step 4: Assemble

  • Pour cream cheese mixture over the base
  • Spread evenly

Step 5: Bake

  • Bake for 40–45 minutes
  • Center should still be slightly gooey (do not overbake)

Step 6: Cool & Serve

  • Let cool completely before slicing
  • Dust with powdered sugar (optional)

Servings

  • Makes 12–16 servings

Notes

  • The center will look underbaked—that’s normal
  • Texture firms up as it cools
  • Best served at room temperature

Tips for Best Results

  • Use full-fat cream cheese for richness
  • Don’t overmix once sugar is added (prevents air bubbles)
  • Line pan with parchment for easy removal
  • Chill slightly before cutting for cleaner slices
  • Add a pinch of salt to balance sweetness

Nutritional Information (Approx. per serving)

  • Calories: 420–480 kcal
  • Fat: 22g
  • Carbohydrates: 55g
  • Sugar: 40g
  • Protein: 5g

Benefits (Yes, even dessert has some!)

  • Provides quick energy (carbs + fats)
  • Cream cheese adds calcium
  • Mood-boosting comfort food
  • Great for celebrations and sharing

Q & A

Q1: Why is my cake too runny?

Because it’s underbaked. The center should be gooey, not liquid. Bake a few more minutes if needed.

Q2: Can I use a different cake mix?

Yes! Chocolate, red velvet, or lemon work great.

Q3: How do I store it?

  • Refrigerate in an airtight container for up to 4–5 days
  • Bring to room temp before serving

Q4: Can I freeze it?

Yes. Wrap tightly and freeze up to 2 months

Q5: Why did my top crack?

That’s normal—it happens from sugar expansion during baking.

Q6: Can I make it from scratch without cake mix?

Yes, but cake mix gives the classic texture. Scratch versions require more precision.

Variations to Try

  • Add chocolate chips
  • Swirl in caramel or Nutella
  • Top with fresh berries
  • Add lemon zest for brightness

Banana Sleep Drink

🍌🌙 Banana Sleep Drink (Nighttime Remedy)

🛒 Ingredients

  • 1 ripe banana
  • 1 cup warm milk (or almond milk)
  • ½ teaspoon cinnamon
  • 1 teaspoon honey (optional)

👩‍🍳 Step-by-Step Instructions

  • 🔥 Warm the milk
    → Heat the milk gently until warm (not boiling)
    → It should be comfortable to drink, not too hot
  • 🍌 Prepare the banana
    → Peel the ripe banana
    → Break it into small chunks for easy blending
  • 🥣 Blend the base
    → Add banana pieces into a blender
    → Pour in the warm milk
    → Blend until smooth and creamy with no lumps
  • 🍯 Add flavor & goodness
    → Add cinnamon and honey (if using)
    → Blend again briefly or stir well
  • Serve
    → Pour into a cup or mug
    → Drink warm for best calming effect
  • Best timing
    → Drink 30–60 minutes before bed for best results

🌙 Benefits

  • 😌 Relaxes muscles → Rich in magnesium & potassium
  • 💤 Supports sleep → Contains tryptophan (helps melatonin production)
  • 🍽️ Reduces late-night cravings → Keeps you full longer
  • Steady energy → Prevents nighttime hunger dips

💡 Tips

  • ⏰ Best time: about 1 hour before sleep
  • 🍌 Use slightly ripe banana (not overly soft)
  • 🥛 Milk improves the calming effect
  • ⚖️ Stick to 1 banana only

⚠️ Notes

  • ❗ Avoid overeating (can cause bloating)
  • ⚠️ If you have blood sugar concerns, control portion size
  • 🚫 Not a weight-loss drink — mainly supports better sleep

❓ Q&A

Q1: Can I skip honey?
✔️ Yes, the banana already adds natural sweetness.

Q2: Can I drink it daily?
✔️ Yes, in moderation it’s safe and helpful for sleep routine.

Q3: Can I make it without milk?
✔️ Yes, use almond milk or drink banana blended with warm water.


✨ A simple, cozy bedtime drink to help you relax and sleep better!

Asian Cucumber Carrot Salad 

🥒🥕 Asian Cucumber Carrot Salad

🛒 Ingredients

  • English cucumbers
  • Carrots
  • Rice vinegar
  • Sesame oil
  • Sesame seeds
  • Fresh cilantro or parsley
  • Salt

👩‍🍳 Step-by-Step Instructions

  • 🔪 Prep the vegetables
    → Wash cucumbers and carrots thoroughly
    → Use a julienne peeler or sharp knife to cut them into thin matchstick strips
    → Try to keep the size even so everything mixes well and looks neat
  • 🥒 Remove excess moisture
    → Place cucumber strips in a colander
    → Sprinkle a small pinch of salt over them
    → Let sit for about 10 minutes
    → Gently squeeze or press to remove extra water (this keeps salad crisp, not soggy)
  • 🥣 Prepare the dressing
    → In a large mixing bowl, add rice vinegar and sesame oil
    → Whisk or stir well until nicely combined
    → The dressing should smell light, tangy, and slightly nutty
  • 🥗 Combine everything
    → Add drained cucumbers and julienned carrots into the bowl
    → Toss gently using tongs or hands
    → Make sure every strip is evenly coated with dressing
  • Add toppings
    → Sprinkle sesame seeds over the salad
    → Add freshly chopped cilantro or parsley for freshness
    → Toss lightly again to distribute flavors
  • ❄️ Chill for best taste
    → Cover and place in the fridge for at least 15–20 minutes
    → This allows flavors to blend and enhances crunch
  • 🍽️ Serve & enjoy
    → Serve cold as a refreshing side dish
    → Mix lightly before serving if any liquid settles at the bottom

❓ Common Questions

Q1: Can I make this ahead of time?
✔️ Yes, but keep dressing separate and mix before serving for best crunch.

Q2: How can I add protein?
✔️ Add grilled chicken, tofu, or chickpeas to make it more filling.

Q3: What can I use instead of rice vinegar?
✔️ Apple cider vinegar or lemon juice works as a good substitute.


✨ Light, tangy, and super refreshing salad perfect for any meal!

Fresh Cucumber Beetroot Salad 

Fresh Cucumber Beetroot Salad

🛒 Ingredients

  • Cucumber (thinly sliced)
  • Beetroot (thinly sliced, raw or cooked)
  • Olive oil
  • Lemon juice
  • Salt
  • Black pepper
  • Fresh dill or basil leaves

👩‍🍳 Step-by-Step Instructions

  • 🥒 Prepare the cucumber
    → Wash thoroughly and slice into thin, even rounds
    → If seeds are too watery, lightly pat slices dry
  • ❤️ Prepare the beetroot
    → If using raw beetroot: peel and slice very thin (use a sharp knife or slicer)
    → If using cooked beetroot: boil until tender, cool, then slice thinly
    → Keep slices uniform for a beautiful look and balanced taste
  • 🥗 Combine the base
    → In a large bowl, add cucumber and beetroot slices
    → Gently toss to mix the colors evenly
  • 🍋 Make the dressing
    → In a small bowl, mix olive oil with fresh lemon juice
    → Add a pinch of salt and black pepper
    → Stir well until slightly combined
  • 🫒 Dress the salad
    → Pour the dressing over the vegetables
    → Toss gently so every slice is lightly coated
  • 🌿 Add fresh herbs
    → Chop dill or basil leaves finely
    → Sprinkle on top for freshness and aroma
  • Let it rest (optional but recommended)
    → Leave the salad for 5–10 minutes
    → This allows flavors to blend and enhances taste
  • 🍽️ Serve fresh
    → Serve immediately for a crisp texture
    → Or chill slightly for a refreshing cold salad

❓ Q&A

Q1: Can I use cooked beetroot instead of raw?
✔️ Yes! Cooked beetroot gives a softer texture and sweeter taste.

Q2: How do I keep the salad from getting watery?
✔️ Pat cucumber slices dry and avoid over-mixing after adding dressing.

Q3: Can I store this salad?
✔️ Best eaten fresh, but you can refrigerate for up to 1 day.

Q4: Can I add extra ingredients?
✔️ Yes! Feta cheese, nuts, or onions can enhance flavor and texture.


✨ Light, refreshing, and packed with natural goodness!

Oven-Roasted Veggie Tray

Oven-Roasted Veggie Tray

🛒 Ingredients

  • Carrots (whole or halved)
  • Butternut squash (cubed)
  • Brussels sprouts (halved)
  • Potatoes (cubed)
  • Cranberries (fresh or dried)
  • Olive oil
  • Garlic (minced)

👩‍🍳 Step-by-Step Instructions

  • 🔥 Preheat the oven
    → Set oven to 200°C (400°F)
    → Line a large baking tray with parchment paper or lightly grease it
  • 🔪 Prep all vegetables
    → Peel and cube the butternut squash into medium-sized chunks
    → Cut potatoes into similar-sized cubes for even cooking
    → Trim and halve Brussels sprouts
    → Wash carrots and leave whole or slice lengthwise
  • 🧄 Make garlic oil mix
    → In a bowl, combine olive oil with minced garlic
    → Let it sit for 2–3 minutes so the flavor infuses nicely
  • 🥕 Arrange veggies on tray
    → Place each vegetable in separate sections (like in the image)
    → Keep carrots together, squash together, sprouts together, etc.
    → This helps control cooking and gives a beautiful presentation
  • 🫒 Coat with flavor
    → Drizzle garlic olive oil over all vegetables
    → Toss lightly or brush so every piece is coated
    → Make sure not to overcrowd—leave a little space between pieces
  • 🍇 Add cranberries
    → Scatter cranberries over one section (or across the tray)
    → They’ll become soft and slightly jammy when baked
  • 🫕 Roast to perfection
    → Place tray in oven and bake for 25–30 minutes
    → Flip/stir vegetables halfway through for even roasting
  • 🔥 Final roasting touch
    → Bake another 10–15 minutes until edges are golden and slightly crispy
    → Carrots should be tender, squash soft, and sprouts nicely browned
  • Rest & serve
    → Let the tray rest for 5 minutes after removing from oven
    → Serve warm directly from tray or plate beautifully

❓ Q&A

Q1: Why are my veggies not crispy?
✔️ Overcrowding causes steaming. Keep space between pieces for roasting.

Q2: Can I add nuts like in the image?
✔️ Yes! Add chopped nuts in the last 5 minutes for crunch.

Q3: Can I use other vegetables?
✔️ Absolutely! Sweet potatoes, zucchini, or bell peppers work great too.

Q4: How do I store leftovers?
✔️ Keep in fridge for up to 3 days and reheat in oven for best texture.


✨ A colorful, healthy, and super satisfying roasted veggie tray!

Oven-Baked Layered Ratatouille

Oven-Baked Layered Ratatouille (Colorful & Flavorful)

🛒 Ingredients

  • Zucchini (thinly sliced)
  • Eggplant (thinly sliced)
  • Tomatoes (thinly sliced)
  • Yellow squash (thinly sliced)
  • Olive oil
  • Garlic (minced)

👩‍🍳 Step-by-Step Instructions

  • 🔥 Preheat & prepare the dish
    → Preheat your oven to 180°C (350°F) so it’s evenly hot before baking
    → Take a baking dish (round or rectangular) and grease it well with olive oil
    → Make sure every corner is lightly coated to prevent sticking and enhance flavor
  • 🧄 Create a flavorful base layer
    → In a small bowl, mix minced garlic with 2–3 tablespoons of olive oil
    → Let it sit for 2–3 minutes so the garlic infuses into the oil
    → Spread this mixture evenly across the bottom of your baking dish
    → This layer will act as a rich, aromatic base for all the vegetables
  • 🔪 Prepare the vegetables carefully
    → Wash all vegetables thoroughly
    → Slice zucchini, eggplant, tomatoes, and yellow squash into thin, even rounds (about 2–3 mm thick)
    → Try to keep all slices similar in size so they cook evenly
    → If eggplant feels too watery, lightly pat slices dry with a paper towel
  • 🎨 Arrange the vegetables beautifully
    → Start stacking the slices in a repeating pattern:
    zucchini → eggplant → tomato → yellow squash
    → Place them upright (slightly tilted) in the dish
    → Pack them tightly together so they support each other and create that classic layered look
    → You can arrange in straight rows or a spiral pattern for a more aesthetic presentation
  • 🫒 Season and add moisture
    → Drizzle olive oil evenly over all the vegetables
    → Make sure every slice gets a light coating so it doesn’t dry out
    → Gently brush or spread oil if needed for even coverage
    → The oil helps in roasting and brings out natural sweetness
  • 🫕 Cover and start baking
    → Cover the dish tightly with foil
    → Bake in the preheated oven for 30–35 minutes
    → This step helps soften the vegetables and allows flavors to blend together
  • 🔥 Uncover for roasting finish
    → Remove the foil carefully
    → Continue baking for another 20–25 minutes
    → Watch for lightly golden edges and tender texture
    → The top should look slightly roasted but not burnt
  • Rest before serving
    → Remove from oven and let it sit for 5–10 minutes
    → This helps the juices settle and enhances flavor
    → It also makes serving easier without the layers collapsing
  • 🍽️ Serve and enjoy
    → Serve warm as a main dish or side
    → Scoop gently to keep the layered look intact
    → Enjoy the soft, rich, and naturally sweet flavors

❓ Q&A

Q1: Why is my ratatouille watery?
✔️ This happens if vegetables release too much moisture. Slice thinly and avoid overcrowding with too much oil.

Q2: Can I make it ahead of time?
✔️ Yes! You can assemble it earlier and bake when needed, or reheat before serving.

Q3: Can I add herbs?
✔️ Absolutely! Herbs like thyme or basil can enhance the flavor beautifully.

Q4: How do I know it’s fully cooked?
✔️ The vegetables should be soft when pierced with a fork and slightly golden on top.

Spinach and Ricotta Puff Pastry Twists

Spinach and Ricotta Puff Pastry Twists


Ingredients

  • 1 sheet Puff Pastry (thawed if frozen)

  • 1 cup Fresh spinach, finely chopped and squeezed dry

  • ½ cup Ricotta cheese

  • ¼ cup Parmesan cheese, finely grated

  • 1 clove Garlic, minced

  • 1 Large egg (for egg wash)

  • Optional: Flaky sea salt or sesame seeds for topping

  • Seasoning: A pinch of nutmeg, salt, and black pepper to taste


Instructions

1. Prepare the Filling

In a medium mixing bowl, combine the ricotta cheese, grated Parmesan, and minced garlic. Stir in the chopped spinach. Pro Tip: Ensure your spinach is very dry; any excess moisture will make the pastry soggy. Add a pinch of salt, pepper, and nutmeg, then mix until smooth.

2. Assemble the Pastry

Preheat your oven to 200°C (400°F) and line a baking sheet with parchment paper. On a lightly floured surface, roll out the puff pastry sheet into a large rectangle. Spread the spinach and cheese mixture evenly over one-half of the pastry sheet, leaving a small border at the edges.

3. Fold and Cut

Fold the empty half of the pastry over the filling, creating a long sandwich. Use a rolling pin to gently press the layers together. Using a sharp knife or a pizza cutter, slice the pastry into strips about 2 cm (¾ inch) wide.

4. The Twist

Take each strip and gently twist it 3–4 times to create a spiral shape. Place the twists onto your prepared baking sheet, pressing the ends down slightly so they don’t uncurl during baking.

5. Bake to Perfection

Beat the egg with a teaspoon of water and brush the tops of the twists generously. Sprinkle with flaky sea salt or sesame seeds. Bake for 15–18 minutes, or until the pastry is puffed up and a deep golden brown.


Serving Suggestion

Let them cool for 5 minutes before serving so the cheese sets. These are best enjoyed warm and pair wonderfully with a simple marinara dipping sauce or a light balsamic glaze. Enjoy your homemade savory treats!

Broccoli and Cheese Stuffed Chicken Breast.

Broccoli and Cheese Stuffed Chicken Breast.


Ingredients

  • Chicken: 2 large boneless, skinless chicken breasts.

  • The Filling: 1 cup finely chopped broccoli florets (steamed slightly), ½ cup shredded cheddar or mozzarella, 2 tbsp cream cheese (softened), and 1 clove minced garlic.

  • Seasoning: 1 tsp paprika, 1 tsp garlic powder, ½ tsp onion powder, salt, and black pepper to taste.

  • Cooking: 2 tbsp olive oil or butter.


Instructions

1. Prepare the Filling

In a small bowl, combine your finely chopped broccoli, shredded cheese, softened cream cheese, and minced garlic. Mix them until they form a thick, cohesive paste. Season the mixture with a pinch of salt and pepper.

2. Create the Pocket

Lay the chicken breasts flat on a cutting board. Using a sharp knife, carefully slice a pocket into the thickest side of each breast. Be mindful not to cut all the way through to the other side; you want a “pita pocket” shape to hold the filling inside.

3. Season and Stuff

Rub the outside of the chicken generously with the paprika, garlic powder, onion powder, salt, and pepper. Then, spoon the broccoli-cheese mixture into the pockets. If the pockets are very full, you can use toothpicks to secure the edges shut so the cheese doesn’t escape too early.

4. Sear for Color

Heat the olive oil in an oven-safe skillet over medium-high heat. Place the chicken in the pan and sear for about 3–5 minutes per side until the skin is beautifully golden and crisp, just like in your photo.

5. Bake to Perfection

Transfer the skillet into a preheated oven at 200°C (400°F). Bake for 10–15 minutes, or until the internal temperature of the chicken reaches 75°C (165°F).


Pro Tips

  • Pat Dry: Always pat your chicken dry with a paper towel before seasoning to ensure a crispy, golden exterior.

  • Resting: Let the chicken rest for 5 minutes after taking it out of the oven. This allows the juices to redistribute, ensuring the meat stays tender.

Raspberry & Cream Layered Smoothie

Raspberry & Cream Smoothie

Yield: 1 Large Serving | Prep time: 5 minutes

Ingredients

For the Creamy Base:

  • 1 Frozen Banana: Sliced before freezing for a smoother blend.

  • 1/2 cup Greek Yogurt: Plain or vanilla works best for that thick, velvety texture.

  • 1/2 cup Milk of Choice: Almond, oat, or dairy milk.

  • 1/2 tsp Vanilla Extract: To enhance the “dessert-like” flavor.

  • 1 tbsp Honey or Maple Syrup: Optional, depending on your preferred sweetness.

For the Raspberry Layer:

  • 1/2 cup Frozen Raspberries: These provide the bold color and tartness.

  • A splash of water or milk: Just enough to help the berries blend.

For the Topping:

  • 2 tbsp Granola: For a satisfying crunch.

  • Fresh Raspberries: For garnish.


Instructions

  1. Prepare the Base: In a high-speed blender, combine the frozen banana slices, Greek yogurt, milk, vanilla, and sweetener. Blend on high until the mixture is completely smooth and has a thick, soft-serve consistency.

  2. Divide the Mixture: Pour about two-thirds of this creamy white mixture into your serving glass. If you want a “swirled” look like the photo, tilt the glass slightly as you pour.

  3. Create the Berry Layer: Add the frozen raspberries and a tiny splash of liquid to the remaining one-third of the base still in the blender. Blend again until the mixture turns a deep, vibrant pink.

  4. Layer and Swirl: Carefully pour the raspberry mixture over the vanilla base. To achieve the ombre effect seen in the image, use a long spoon or a straw to gently swirl the two layers together where they meet.

  5. Garnish and Serve: Top the smoothie with a generous sprinkle of granola and a few fresh raspberries. Insert a glass straw and enjoy immediately while icy cold.


Chef’s Tips

  • Consistency is Key: If the smoothie is too thin, add more frozen fruit or a few ice cubes. If it’s too thick to blend, add liquid one tablespoon at a time.

  • Boost the Nutrition: Feel free to add a tablespoon of chia seeds or flax seeds into the vanilla base for extra fiber and Omega-3s without changing the flavor profile.

Lemon Cheesecake Smoothie

Lemon Cheesecake Smoothie.


Ingredients

To achieve that signature “cheesecake” flavor and creamy consistency, you will need:

  • 1 cup Milk of choice: (Dairy, almond, or oat milk all work beautifully).

  • 1/2 cup Greek Yogurt: This provides the “tang” and protein essential for the cheesecake profile.

  • 1 large Frozen Banana: Ensure it’s peeled before freezing; this creates the thick, frosty base.

  • 2 tbsp Raw Cashews: Preferably soaked for 20 minutes to ensure total smoothness.

  • 1 tbsp Lemon Juice: Freshly squeezed is always best.

  • 1 tsp Lemon Zest: This carries the aromatic oils for a punchy flavor.

  • 1/2 tsp Vanilla Extract: To mimic the crust and filling notes.

  • 1-2 tsp Maple Syrup or Honey: Optional, depending on your preferred sweetness level.

  • Garnish: A sprinkle of hemp seeds, extra lemon zest, and a few crushed graham crackers (optional).


Instructions

  1. Prep the Cashews: If you don’t have a high-speed blender, soak your cashews in warm water for about 20 minutes. This softens them, ensuring your smoothie isn’t gritty. Drain before using.

  2. Combine: Add the milk, Greek yogurt, frozen banana, soaked cashews, lemon juice, lemon zest, vanilla, and sweetener into your blender canister.

  3. Liquids First: Always place your liquid (milk) at the bottom. This helps the blades move freely and prevents the frozen ingredients from getting stuck.

  4. Blend: Start the blender on a low speed, then gradually increase to high. Blend for 45–60 seconds until the mixture is completely smooth and looks like liquid silk.

  5. Adjust: Taste the smoothie. If you want it more tart, add a splash more lemon. If you want it thicker, add a few ice cubes and pulse again.

  6. Serve: Pour into a chilled glass. Top with a pinch of fresh lemon zest and hemp seeds as seen in the photo.


Why This Works

The frozen banana provides sweetness without refined sugar, while the cashews and yogurt create a healthy fat profile that mimics the richness of cream cheese. It’s a bright, cheerful way to start your day!

Creamy Coconut Pudding

Creamy Coconut Pudding is a smooth and luscious dessert made with milk, coconut, and a touch of sweetness. It’s light, tropical, and easy to prepare, making it perfect for any occasion. The combination of creamy texture and coconut flavor gives a comforting taste that melts in your mouth.

Discover more
coconut milk
Condensed Milk
Coconut Milk

Ingredients

2 cups whole  milk

1 cup coconut milk

½ cup sugar

Fruits & Vegetables

Discover more
Butter
butter
pudding

3 tablespoons cornstarch

2 tablespoons butter

1 teaspoon vanilla extract

¼ cup shredded coconut (plus extra for topping)

A pinch of salt

Dairy & Eggs

Instructions

In a medium saucepan, pour the whole milk and coconut milk.

Pudding

Add the sugar, cornstarch, and a pinch of salt.

Cooking & Recipes

Discover more
sugar
Soups & Stews
Soup

Whisk the mixture well until the cornstarch fully dissolves.

Sugar

Place the saucepan over medium heat and cook, stirring constantly.

When the mixture thickens and starts to bubble, lower the heat.

Fruits & Vegetables

Add the butter, vanilla extract, and shredded coconut.

Continue stirring for another 1–2 minutes until creamy and smooth.

Dairy & Eggs

Remove from heat and pour into serving bowls.

Discover more
Flora & Fauna
Fromage
Chocolat

Let cool to room temperature, then refrigerate for at least 2 hours.

Before serving, sprinkle with extra shredded coconut or toasted coconut flakes.

How to Make

Start by mixing the milk, coconut milk, sugar, and cornstarch together until smooth.

Cooking & Recipes

Cook the mixture gently over medium heat, stirring constantly to prevent lumps.

Dairy & Eggs

Once it thickens to a pudding-like consistency, stir in butter and vanilla for extra flavor and richness.

Discover more
Cheesecake
food
Stuffed

Add coconut flakes for texture, then pour into small dessert cups.

Sugar
Discover more
Cheesecakes
Desserts
Meal planning service
Cooking classes online
Food

Chill in the refrigerator so the pudding sets perfectly creamy and firm.

Discover more
Beverages
Drink
Butter

Variations

Add a few drops of almond extract for a nutty twist.

Fruits & Vegetables

Top with caramelized sugar to make a coconut crème brûlée version.

Mix in a handful of crushed pineapple for a tropical coconut-pineapple pudding.

Use brown sugar instead of white sugar for a deeper, caramel flavor.

Add a layer of crushed biscuits at the bottom for a no-bake pudding base.

Tips

Stir constantly while cooking to prevent burning or lumps.

Pudding

Use full-fat coconut milk for the best creamy texture.

Chill the pudding well before serving—it tastes better cold.

Toast the shredded coconut lightly before topping for extra aroma.

If you like it sweeter, add a drizzle of condensed milk before chilling.

Conclusion (short)

This Creamy Coconut Pudding is a delightful dessert that combines simplicity with rich, tropical flavor. It’s easy to make, wonderfully smooth, and perfect for serving family and guests any time of the year.

The Breakfast Tortilla Triangle ​Ingredients

The Breakfast Tortilla Triangle

Ingredients

  • 1 Large  Flour Tortilla (Burrito size works best)
  • 3 Breakfast  Sausage Links (Pre-cooked or browned)
  • Shredded Mozzarella (or a pizza blend)
  • 1 Fresh  Egg
  • Toppings: Sliced red chilies (optional) and fresh spinach
  • Egg Wash: 1 egg yolk whisked
  • Garnish: Black sesame seeds or Nigella seeds

Step-by-Step Instructions

  1. Prep the Crust: Place your tortilla on a baking sheet lined with parchment paper. Position your three sausages in a triangle shape in the center of the tortilla.
  2. Fold and Secure: Fold the edges of the tortilla over each sausage to create a “rim.” Use toothpicks to pin the corners together so the triangle holds its shape during baking.
  3. Fill the Center: * Layer a small bed of fresh spinach at the bottom.
    • ​Add a generous layer of shredded cheese.
    • ​Sprinkle your sliced chilies on top.
  4. The Centerpiece: Crack a fresh egg directly into the center of the cheese nest. (If you prefer it extra cheesy, you can add a little more cheese over the egg whites).
  5. The Golden Touch: Brush the “rim” (the folded tortilla parts) with the egg yolk wash. This gives it that deep golden, pastry-like finish. Sprinkle with black sesame seeds.
  6. Bake: Pop it into the oven at 180°C (350°F) for about 10–12 minutes. You’re looking for the cheese to be bubbly and the tortilla to be crisp and golden.
  7. Serve: Remove the toothpicks before serving! Slice it down the middle for that epic cheese pull and a perfectly runny yolk.

Pro-Tips

  • Sausage Choice: If you use raw sausage, make sure to pan-fry it first. The oven time isn’t quite long enough to cook raw meat thoroughly.
  • Crispy Bottom: For an even crispier base, you can lightly brush the bottom of the tortilla with oil or melted butter before assembling

Multi-Seed Low-Carb Loaf

Multi-Seed Low-Carb Loaf

Prep time: 15 minutes | Bake time: 50-60 minutes | Yield: 1 loaf

Ingredients

Dry Ingredients:

  • 1 ½ cups blanched almond flour

  • ½ cup ground flaxseed (flaxseed meal)

  • ¼ cup whole psyllium husk (essential for the bread-like texture)

  • ½ cup raw sunflower seeds (plus a few extra for sprinkling on top)

  • ¼ cup raw pumpkin seeds (pepitas)

  • 2 tbsp chia seeds or whole flaxseeds

  • 1 tbsp baking powder

  • 1 tsp sea salt

Wet Ingredients:

  • 4 large eggs, room temperature

  • ¼ cup melted coconut oil or butter

  • ½ cup warm water

  • 1 tsp apple cider vinegar (helps activate the baking powder for a better rise)

Instructions

  1. Preheat and Prep: Preheat your oven to 350°F (175°C). Line an 8×4-inch loaf pan with parchment paper, leaving some overhang on the sides so you can easily lift the bread out later.

  2. Mix Dry Ingredients: In a large mixing bowl, whisk together the almond flour, ground flaxseed, psyllium husk, sunflower seeds, pumpkin seeds, chia seeds, baking powder, and salt. Ensure there are no clumps of almond flour.

  3. Mix Wet Ingredients: In a separate medium bowl, beat the eggs. Whisk in the melted coconut oil (or butter), warm water, and apple cider vinegar.

  4. Combine: Pour the wet ingredients into the dry ingredients. Stir well with a spatula until everything is completely combined. The batter will thicken up quickly as the psyllium husk and flaxseed absorb the liquids. Let the batter rest for 5 minutes.

  5. Shape and Bake: Transfer the thick dough into your prepared loaf pan. Smooth out the top with the back of a wet spoon or your fingers. Sprinkle a few extra seeds over the top and press them down lightly.

  6. Bake: Bake on the center rack for 50 to 60 minutes. The bread is done when the top is golden brown, firm to the touch, and a toothpick inserted into the center comes out clean.

  7. Cool Completely: Crucial step! Remove the bread from the oven and use the parchment overhang to carefully lift it out of the pan. Place it on a wire cooling rack. Allow the bread to cool completely before slicing. If you slice it while it’s still hot, the inside may seem gummy.

Serving Suggestion: Because this bread is dense and packed with seeds, it holds up beautifully to being toasted. Try slicing it thin, toasting it until the seeds get perfectly nutty and crisp, and topping it with mashed avocado or a smear of cottage cheese!

Creamy Olive & Herb Whipped Feta Dip 🫒🧄

Creamy Olive & Herb Whipped Feta Dip 🫒🧄
10-min no cook, Mediterranean style
Serves 6–8 | Prep 10 min
Ingredients
Feta: 250g / 8oz block
Cream cheese: 4oz / 115g, softened
Olive oil: ⅓ cup + extra for topping
Garlic: 1 clove, minced
Lemon juice: 1 tbsp
Parsley + oregano: ¼ cup chopped total
Green olives: ½ cup, halved
Chili flakes: 1 tbsp, for garnish
Method
Whip: Blend feta + cream cheese + 3 tbsp oil + garlic + lemon juice until creamy.
Herbs: Pulse in herbs. Fold in half the olives.
Top: Spoon into bowl. Add remaining olives, chili, drizzle of oil.
High-Protein Version:
Use 1 cup blended cottage cheese instead of cream cheese. Add 1 scoop unflavored whey.
Macros per ¼ cup: ∼190 cal, 8g protein, 2g net carbs
Key tip: Don’t over-blend herbs — you want green flecks.

Crispy Fried Semolina Balls Recipe – Golden, Crunchy, and Irresistibly Delicious

Introduction

Crispy fried semolina balls are a simple yet delicious homemade treat with a golden crunchy outside and a soft, flavorful inside. Perfect for tea time, breakfast, or a quick dessert, they’re easy, affordable, and always satisfying 😋


🧾 Ingredients

  • 1 cup fine semolina
  • 1 cup milk 🥛
  • 2 tbsp sugar
  • 1 tbsp butter 🧈
  • 1 egg 🥚
  • 1 tsp vanilla extract
  • ½ tsp baking powder
  • Pinch of salt
  • Oil for frying

Optional: powdered sugar or honey 🍯 for serving


👩‍🍳 Instructions

1️⃣ Prepare the Mixture

➡️ Heat milk, sugar, butter, and salt in a pan
➡️ Stir until butter melts and sugar dissolves


2️⃣ Add Semolina

➡️ Gradually add semolina while stirring
➡️ Cook until thick and smooth dough forms


3️⃣ Add Remaining Ingredients

➡️ Let mixture cool slightly
➡️ Add egg, vanilla, and baking powder
➡️ Mix until soft and smooth


4️⃣ Shape Balls

➡️ Take small portions
➡️ Roll into evenly sized balls


5️⃣ Fry

➡️ Heat oil on medium heat
➡️ Fry balls until golden brown
➡️ Turn for even cooking


6️⃣ Drain & Serve

➡️ Remove and place on paper towel
➡️ Serve warm with powdered sugar or honey 😍


🍽️ Serving Ideas

☕ With tea or coffee
🍫 Drizzle with chocolate or caramel
🍓 Serve with jam or fruit


❓ Quick Tips

✔ Use fine semolina for soft texture
✔ Don’t add egg to hot mixture
✔ Maintain medium oil heat for perfect frying


🌟 Final Note

These crispy semolina balls are proof that simple ingredients can create something truly comforting and delicious 💛

Sugar-Free Chocolate Glazed Loaf Cake

Sugar-Free Chocolate Glazed Loaf Cake

Description

A moist, deeply chocolatey loaf cake made without added sugar, sweetened with a balanced blend of low-carb sweeteners. Finished with a silky sugar-free chocolate glaze that still gives that beautiful shine.

 Ingredients

For the Cake:

  • 1 ¾ cups (220g) all-purpose flour (or almond flour for low-carb)
  • ¾ cup unsweetened cocoa powder
  • 1 ½ tsp baking powder
  • ½ tsp baking soda
  • ½ tsp salt
  • ¾ cup erythritol + monk fruit blend (or allulose for softer texture)
  • 2 large eggs
  • 1 cup (240ml) unsweetened almond milk or milk
  • ½ cup (120ml) vegetable oil or melted butter
  • 1 tbsp vanilla extract
  • ¾ cup (180ml) hot coffee or hot water

For the Sugar-Free Chocolate Glaze:

  • 1 cup sugar-free chocolate chips (sweetened with stevia/erythritol)
  • ½ cup heavy cream
  • 1 tbsp butter
  • 1 tsp vanilla extract

 Instructions

Follow the same method as the original:

  1. Preheat oven to 350°F (175°C), line loaf pan.
  2. Mix dry ingredients.
  3. Mix wet ingredients.
  4. Combine and stir in hot coffee.
  5. Bake 50–60 minutes. Cool completely.
  6. Heat cream, pour over sugar-free chocolate, stir smooth, add butter + vanilla.
  7. Pour glaze over cake and let set.

 Servings

  • 8–10 slices

 Nutritional Info (Approx, varies by sweetener)

  • Calories: ~250
  • Net Carbs: significantly lower (especially with almond flour)
  • Sugar: 0g added sugar

 Important Tips (Sugar-Free Baking Reality Check)

  • Allulose is best → gives the most moist, non-gritty texture.
  • Erythritol alone can feel “cooling” and slightly dry—blend it if possible.
  • Don’t skip fat (oil/butter), it replaces moisture lost from sugar.
  • Cake may brown faster—check early.

 Benefits

  • No added sugar
  • Lower glycemic impact
  • Suitable for diabetic-friendly or low-carb diets
  • Still rich and satisfying

 Q&A

Q: Why is my sugar-free cake dry?
A: Sugar holds moisture—use allulose or add a bit of yogurt/sour cream.

Q: Can I make it keto?
A: Yes—use almond flour + allulose + sugar-free chocolate.

Q: Does it taste exactly like regular cake?
A: Very close, but slightly different depending on sweetener used.

Peanut Butter Protein Truffles

Peanut Butter Protein Truffles

Ingredients

For the Filling:

  • 1 cup creamy natural peanut butter (look for “peanuts and salt” only)

  • 1/4 cup coconut flour (helps provide structure without traditional flour)

  • 1/4 cup granulated monk fruit or erythritol

  • 1 tsp vanilla extract

  • A pinch of sea salt (if the peanut butter is unsalted)

For the Chocolate Coating:

  • 1 cup sugar-free dark chocolate chips

  • 1 tbsp coconut oil (helps the chocolate melt smoothly and stay shiny)


Instructions

1. Mix the Center

  1. In a medium bowl, combine the peanut butter, coconut flour, sweetener, and vanilla.

  2. Stir until the mixture forms a thick, dough-like consistency. If it feels too soft, add one more tablespoon of coconut flour.

2. Roll the Truffles

  1. Scoop about one tablespoon of the mixture at a time and roll it between your palms to create smooth balls.

  2. Place the balls on a tray lined with parchment paper.

  3. Freeze for 15–20 minutes to firm them up; this makes the dipping process much cleaner.

3. Melt the Chocolate

  1. In a microwave-safe bowl, combine the sugar-free chocolate chips and coconut oil.

  2. Microwave in 30-second intervals, stirring in between, until the chocolate is completely smooth.

4. Dip and Set

  1. Remove the truffles from the freezer.

  2. Using a fork or a toothpick, dip each ball into the melted chocolate, allowing the excess to drip off.

  3. Place them back on the parchment paper.

  4. Optional: Sprinkle a tiny pinch of sea salt on top before the chocolate sets.

  5. Refrigerate for at least 30 minutes until the shells are hard.

Point Lemon Pudding Pots

Ingredients

  • 1 package (approx. 0.3 oz) Sugar-Free Lemon Gelatin Mix

  • 1/2 cup boiling water

  • 1 cup non-fat plain Greek yogurt (this provides the creamy base and protein)

  • 1/2 cup fat-free whipped topping (like Cool Whip Lite), plus extra for garnish

  • 1 tsp fresh lemon zest

  • Optional: 1 reduced-fat graham cracker, crushed (to be divided among the pots for the “crumb” topping shown in the image)


Instructions

1. Dissolve the Gelatin

  1. In a medium mixing bowl, combine the sugar-free lemon gelatin mix with the boiling water.

  2. Whisk for about 2 minutes or until the powder is completely dissolved.

  3. Let the mixture sit for 5 minutes to cool slightly (do not let it set).

2. Create the Creamy Base

  1. Whisk the Greek yogurt and lemon zest into the gelatin mixture until smooth and pale yellow.

  2. Gently fold in the whipped topping using a spatula until well incorporated. This keeps the pudding light and airy.

3. Portion and Chill

  1. As seen in “692214906_122229273260050475_6786567098652985247_n.jpg”, pour the mixture into small individual containers or “pots”.

  2. Place the containers in the refrigerator and chill for at least 2 hours, or until firm.

4. Add the Finishing Touch

  1. Just before serving, sprinkle a small amount of crushed graham cracker over the top of each pudding pot.

  2. The “1 point” value typically accounts for the yogurt and gelatin base; be mindful of the amount of cracker crumb used to stay within your goal!


Quick Tips for Your Recipe Page:

  • Protein Boost: Mention that using Greek yogurt makes this a filling snack that won’t cause a sugar crash.

  • Meal Prep: These pots are great for preparing in advance since they stay fresh in the fridge for up to 4 days.

  • Variation: For a more intense citrus kick, add a teaspoon of fresh lemon juice to the mixture before chilling.

Grilled Chicken Rice Bowl

Introduction

This chicken rice bowl is a perfect mix of fresh, healthy, and satisfying ingredients. Juicy spiced chicken, fluffy rice, creamy avocado, and fresh veggies come together for a balanced meal that’s great for lunch or dinner 😋


🧾 Ingredients

🍗 Chicken:

  • 2 chicken breasts (cut into cubes)
  • 1 tbsp olive oil 🫒
  • 1 tsp paprika
  • ½ tsp garlic powder
  • ½ tsp cumin
  • Salt & pepper to taste

🍚 Base:

  • 2 cups cooked white rice

🥗 Toppings:

  • 1 avocado (sliced) 🥑
  • 1 cup lettuce (chopped)
  • 1 tomato (diced) 🍅
  • ½ cup sweet corn 🌽
  • ½ cup black beans (cooked)
  • ¼ cup shredded cheese 🧀 (optional)

👩‍🍳 Instructions

1️⃣ Cook the Chicken

➡️ Heat olive oil in a pan
➡️ Add chicken pieces and season with paprika, garlic powder, cumin, salt & pepper
➡️ Cook for 6–8 minutes until golden and fully cooked
➡️ Set aside


2️⃣ Prepare the Base

➡️ Cook rice according to package instructions
➡️ Fluff with a fork and keep warm


3️⃣ Prepare Toppings

➡️ Slice avocado
➡️ Chop lettuce and tomato
➡️ Rinse beans and prepare corn


4️⃣ Assemble the Bowl

➡️ Add rice as the base
➡️ Arrange chicken, avocado, lettuce, tomato, corn, and beans on top
➡️ Sprinkle cheese if using


5️⃣ Serve

➡️ Serve fresh and enjoy! 😍


🍽️ Optional Add-ons

🌶️ Add chili sauce or hot sauce
🥄 Drizzle with garlic mayo or yogurt sauce
🍋 Squeeze fresh lemon for extra freshness


❓ Quick Q&A

Q1: Can I use brown rice?
👉 Yes, it’s a healthier option.

Q2: Can I make it vegetarian?
👉 Replace chicken with tofu or extra beans.

Q3: Can I meal prep this?
👉 Yes! Store in containers for up to 3 days.


🌟 Tip

Season your chicken well — that’s the key to making this bowl taste amazing!

Air Fryer Twisted Bacon

Introduction

Air Fryer Twisted Bacon is crispy, fun, and packed with flavor! Twisting the bacon makes it extra crunchy on the outside while staying slightly juicy inside. Perfect for breakfast, snacks, or even party platters 😋


🧾 Ingredients

  • 8–10 strips of bacon 🥓
  • Optional: black pepper, brown sugar, or chili flakes

👩‍🍳 Instructions

1️⃣ Twist the Bacon

➡️ Take each strip of bacon and twist it tightly from end to end
➡️ Place on a plate while you prepare the rest


2️⃣ Preheat Air Fryer

➡️ Set air fryer to 180°C (350°F) for 2–3 minutes


3️⃣ Arrange Bacon

➡️ Place twisted bacon in the air fryer basket
➡️ Do not overcrowd (leave space for air to circulate)


4️⃣ Cook

➡️ Air fry for 8–10 minutes
➡️ Flip halfway for even crispiness

🔥 Cook longer if you want it extra crispy


5️⃣ Serve

➡️ Remove and let cool for 2 minutes
➡️ Serve hot and crispy 😍


🍽️ Serving Ideas

🍳 With eggs for breakfast
🥪 In sandwiches or burgers
🥗 Crumbled over salads
🍯 Drizzle with honey or maple syrup for sweet & savory


❓ Quick Q&A

Q1: Why twist the bacon?
👉 It makes it crispier and cooks more evenly.

Q2: Can I add flavor?
👉 Yes! Try brown sugar, pepper, or spices before cooking.

Q3: How do I store leftovers?
👉 Keep in fridge for 2–3 days and reheat in air fryer.


🌟 Tip

Place parchment paper or foil under the basket to catch grease for easy cleanup 👍

Natural Ginger Lemon Honey Drink

This simple and comforting drink is made with natural ingredients that many people enjoy for supporting digestion, soothing the throat, and feeling refreshed. It’s warm, slightly sweet, and perfect for mornings or whenever you need something calming and cozy.

🧾 Ingredients

  • 2 cups water
  • 1 tablespoon fresh ginger (grated)
  • 1 tablespoon lemon juice (fresh)
  • 1 tablespoon honey 🍯
  • (Optional: pinch of turmeric or cinnamon)

👩‍🍳 Instructions

1️⃣ Bring the water to a boil in a small pot or kettle.

2️⃣ Add the grated ginger to the boiling water and reduce the heat. Let it simmer for 5–7 minutes to release its flavor.

3️⃣ Strain the liquid into a cup to remove ginger pieces.

4️⃣ Add fresh lemon juice and stir well.

5️⃣ Add honey and mix until fully dissolved.

6️⃣ Serve warm and enjoy 🍵

💡 Tips

✔ Drink in the morning for a refreshing start
✔ Serve cold with ice for a summer version ❄️
✔ Adjust honey or lemon to your taste

🌿 Why People Love It

This drink combines simple ingredients that work beautifully together:

  • Ginger adds warmth and a bold flavor
  • Lemon brings freshness and brightness
  • Honey adds natural sweetness and smoothness

3-Ingredient Brown Gravy Potato Bake

3-Ingredient Brown Gravy Potato Bake

This 3-Ingredient Brown Gravy Potato Bake is the definition of simple comfort food. It’s warm, filling, and full of rich, savory flavor—perfect for busy days when you want something homemade without spending hours in the kitchen. With just a few basic ingredients, you can create a dish that tastes like it took much more effort.

🧾 Ingredients

  • 1.2 kg potatoes (about 6–7 medium), peeled and thinly sliced
  • 2 packets brown gravy mix
  • 500 ml hot water
  • (Optional: butter, salt, pepper)

👩‍🍳 Instructions

1️⃣ Preheat your oven to 190°C (375°F) and lightly grease a baking dish.

2️⃣ In a bowl, mix the brown gravy packets with hot water. Whisk until smooth and slightly thick. This will be your rich, flavorful sauce.

3️⃣ Arrange a layer of thinly sliced potatoes in the baking dish. Pour a small amount of gravy over the layer so the slices are coated.

4️⃣ Repeat the layering process—potatoes, then gravy—until all ingredients are used. Finish with gravy on top so everything stays moist while baking.

5️⃣ Cover the dish tightly with foil and bake for 45 minutes. This step allows the potatoes to soften and absorb the gravy.

6️⃣ Remove the foil and bake for another 10–15 minutes until the top is slightly golden and the sauce thickens.

7️⃣ Let the dish rest for 5–10 minutes before serving. This helps the gravy settle and improves texture.

🍽️ Serving Tip

Serve hot with roasted chicken, beef, or a simple salad. You can also add cheese on top for a richer twist.

Blueberry Cream Cheese Bake

Blueberry Cream Cheese Bake

📝 Ingredients:

➡️ 2 cups fresh or frozen blueberries
➡️ 200g cream cheese (softened)
➡️ ½ cup sugar
➡️ 1 tsp vanilla extract
➡️ 1 cup milk
➡️ 1 cup all-purpose flour
➡️ 1½ tsp baking powder
➡️ ¼ tsp salt
➡️ ½ cup melted butter
➡️ 2–3 tbsp powdered sugar (for topping)


👩‍🍳 Steps:

1️⃣ Preheat & Prepare

➡️ Preheat oven to 180°C (350°F)
➡️ Grease a baking dish


2️⃣ Make Cream Layer

➡️ In a bowl, mix:
✔️ cream cheese
✔️ sugar
✔️ vanilla
➡️ Beat until smooth and creamy


3️⃣ Prepare Batter

➡️ In another bowl, mix:
✔️ flour
✔️ baking powder
✔️ salt
➡️ Add milk + melted butter
➡️ Stir until smooth (don’t overmix)


4️⃣ Assemble 🍰

➡️ Pour batter into baking dish
➡️ Spoon cream cheese mixture over it
➡️ Add blueberries on top (and slightly press in)


5️⃣ Bake 🔥

➡️ Bake for 35–45 minutes
➡️ Top should turn golden brown and bubbly


6️⃣ Finish ✨

➡️ Let it cool slightly
➡️ Sprinkle powdered sugar
➡️ Add fresh blueberries on top (optional)


❓ Q & A

Q: Can I use frozen blueberries?
👉 Yes! No need to thaw—just use directly.

Q: Why is the texture soft in the middle?
👉 That’s normal—it’s a cobbler-style dessert with a creamy center.

Q: Can I reduce sugar?
👉 Yes, adjust to your taste.

Q: What can I serve it with?
👉 Vanilla ice cream 🍦 or whipped cream 😋

Mineral Salt Night Drink

🌙 Mineral Salt Night Drink

🛒 Ingredients (1 serving)

  • 1 cup warm (not boiling) filtered water
  • ¼ teaspoon natural mineral salt (pink Himalayan salt or unrefined sea salt)

Optional additions (choose one, not required):

  • A squeeze of fresh lemon
  • A pinch of magnesium flakes (food-grade, optional)

👩‍🍳 Instructions

  • Warm the water until comfortably hot but not boiling.
  • Add the mineral salt to the water.
  • Stir well until fully dissolved.
  • Drink slowly 30–60 minutes before bedtime.

🍽️ Servings

  • 1 serving per night
  • Can be used daily as part of a nighttime routine

💡 Tips for Best Results

  • Drink slowly — this is meant to be calming, not rushed
  • Avoid adding sweeteners before bed
  • Pair with deep breathing or light stretching
  • Stay consistent rather than increasing the amount
  • Do not exceed recommended salt intake

🌿 Wellness Benefits (Supportive, Not Medicinal)

This drink may help support:

  • Muscle comfort through mineral intake
  • Relaxation as part of a calming bedtime ritual
  • Digestive regularity by supporting hydration
  • Electrolyte balance, especially if you sweat or exercise
  • Sleep readiness when paired with a low-stimulation evening routine

👉 This recipe supports general wellness and comfort. It is not intended to treat or cure medical conditions.


📊 Nutritional Information (Approximate, per serving)

  • Calories: 0
  • Sugar: 0 g
  • Fat: 0 g
  • Protein: 0 g
  • Sodium: ~290 mg (varies by salt type)
  • Trace minerals: magnesium, potassium, calcium (small amounts)

⚠️ Notes & Precautions

  • Not recommended for individuals on low-sodium diets unless approved by a healthcare provider
  • If you have kidney, heart, or blood pressure conditions, consult a professional first
  • More is not better — stick to small amounts

❓ Q & A

Q: Can I drink this every night?
👉 Yes, when kept within recommended amounts and as part of a balanced diet.

Q: Will this cure pain, diabetes, or anxiety?
👉 No. This drink does not cure medical conditions. It may support comfort and relaxation as part of a healthy lifestyle.

Q: Can I add honey or sugar?
👉 Not recommended before bed, especially for sleep quality.

Q: Can I use regular table salt?
👉 Unrefined mineral salts are preferred due to trace minerals, but table salt can be used occasionally if needed.

Cheesy Garlic and Herb Pull-Apart Rolls.

Cheesy Garlic and Herb Pull-Apart Rolls.

Ingredients

For the Dough:

  • 3 cups All-purpose flour

  • 1 packet (2 ¼ tsp) Active dry yeast

  • 1 cup Warm milk (about 110°F)

  • 2 tbsp Sugar

  • 1 tsp Salt

  • 4 tbsp Unsalted butter, melted

For the Filling:

  • ½ cup Unsalted butter, softened

  • 3 cloves Garlic, minced

  • 2 cups Shredded Mozzarella or Monterey Jack cheese

  • ¼ cup Fresh parsley, finely chopped (plus more for garnish)

  • ½ tsp Black pepper


Instructions

1. Prepare the Dough In a large bowl, combine the warm milk, sugar, and yeast. Let it sit for about 5–10 minutes until it becomes foamy. Stir in the melted butter. Gradually add the flour and salt, mixing until a soft dough forms.

2. Knead and Rise Turn the dough onto a lightly floured surface and knead for 5–7 minutes until smooth and elastic. Place the dough in a lightly greased bowl, cover with a clean towel, and let it rise in a warm spot for about 1 hour, or until it has doubled in size.

3. Assemble the Filling In a small bowl, mix the softened butter with the minced garlic, chopped parsley, and black pepper until well combined.

4. Shape the Rolls Punch down the risen dough to release air. Roll it out on a floured surface into a large rectangle (about 12×18 inches). Spread the garlic butter mixture evenly over the dough, then sprinkle the shredded cheese across the surface.

5. Roll and Cut Starting from the long edge, tightly roll the dough into a log. Use a sharp knife or unscented dental floss to cut the log into 12 even slices.

6. Second Rise Grease a round baking pan or a cast-iron skillet. Arrange the rolls in the pan, leaving a little space between them. Cover and let them rise again for 30 minutes. Preheat your oven to 375°F (190°C) during this time.

7. Bake Bake for 20–25 minutes, or until the tops are golden brown and the cheese is bubbly.

8. Garnish and Serve Remove from the oven and immediately brush with a little extra melted butter if desired. Sprinkle with fresh parsley and serve warm. Enjoy the gooey, cheesy layers!