
Air Fryer Crispy Egg & Mince Toast

Air Fryer Crispy Egg & Mince Toast

Air Fryer Crispy Egg & Mince Toast is a savory, satisfying meal made with golden bread, seasoned ground meat, and a perfectly cooked egg. The air fryer helps create crisp edges while the spiced mince adds rich flavor to every bite. It is a great choice for breakfast, brunch, or a quick lunch when you want something more filling than plain toast.

This recipe combines simple ingredients with South Asian-inspired seasoning. Ground beef or ground turkey works well with onion, garlic, ginger, cumin, and paprika. You can adjust the spices to suit your taste and finish the toast with fresh cilantro, sliced tomatoes, or a little hot sauce.

The key to getting the best results is to cook the mince before adding it to the bread. A quick pre-toast helps prevent sogginess, while a single layer in the air fryer allows the bread to brown more evenly. Follow these simple steps for a flavorful meal with a crisp texture and a tender egg.

Why You’ll Love This Recipe

  • Crispy and savory: Golden bread, seasoned mince, and egg create a satisfying mix of textures.

  • Easy preparation: Cook the meat in a skillet, assemble the toast, and finish it in the air fryer.

  • Flexible protein options: Use ground beef, turkey, or chicken to suit your preferences.

  • Great for busy mornings: Prepare the mince ahead of time to make breakfast faster.

  • Adjustable spice level: Keep it mild with paprika or add chili for extra heat.

  • Easy to customize: Top the finished toast with cheese, cilantro, tomatoes, or your favorite sauce.

  • Useful for different meals: Serve it for breakfast, weekend brunch, or a simple lunch.

Ingredients You’ll Need

This recipe makes approximately four slices of mince toast. Use sturdy bread and small eggs so the toppings stay in place during cooking.

  • 4 slices of thick bread: Sourdough, whole-wheat, or thick white bread works well.

  • ½ pound ground beef: Choose lean ground beef for a less greasy topping.

  • 4 small eggs: One small egg per slice is a useful starting point.

  • ¼ cup finely chopped onion: Adds sweetness and flavor to the mince.

  • 1 teaspoon minced garlic: Creates a savory base for the seasoning.

  • 1 teaspoon grated fresh ginger: Adds warmth and a fresh aroma.

  • 1 tablespoon cooking oil: Helps soften the onion and brown the meat.

  • ½ teaspoon ground cumin: Gives the mince an earthy flavor.

  • ½ teaspoon ground coriander: Adds a mild citrus-like note.

  • ½ teaspoon paprika: Provides color and gentle pepper flavor.

  • ¼ teaspoon garam masala: Adds warm, aromatic spice.

  • ¼ teaspoon black pepper: Gives the mixture a little bite.

  • Salt to taste: Seasons the meat and brings out the other flavors.

  • 1 tablespoon chopped fresh cilantro: Adds freshness to the finished toast.

  • 1 small green chili, optional: Use for extra heat.

  • A little oil for the bread: Helps the surface become golden and crisp.

  • Shredded cheese, optional: Adds a creamy, savory layer.

Ingredient tip: In this recipe, “mince” means ground meat. Ground beef is a flavorful option, but ground turkey or chicken can also work. Cook ground beef to 160°F and ground poultry to 165°F before using it as a topping.

How to Make Air Fryer Crispy Egg & Mince Toast

Step 1: Prepare the Ingredients

  1. Finely chop the onion so it cooks quickly and mixes evenly with the mince.

  2. Mince the garlic and grate the ginger.

  3. Measure the cumin, coriander, paprika, garam masala, black pepper, and salt.

  4. Place the bread slices on a clean work surface.

  5. Keep the eggs refrigerated until you are ready to assemble the toast.

Preparing the ingredients first makes cooking easier and helps you avoid overcooking the bread while preparing the topping.

Step 2: Cook the Mince

  1. Heat the cooking oil in a skillet over medium heat.

  2. Add the chopped onion and cook for 3–4 minutes until softened.

  3. Stir in the garlic and ginger and cook for about 30 seconds.

  4. Add the ground beef and break it into small pieces with a spoon.

  5. Sprinkle in the cumin, coriander, paprika, garam masala, black pepper, and salt.

  6. Cook while stirring until the meat is browned and fully cooked.

Ground beef should reach an internal temperature of 160°F. If you use ground turkey or chicken instead, cook it to 165°F. Check the temperature with a food thermometer rather than relying on the color of the meat.

Continue cooking until excess liquid has evaporated. A thick, relatively dry mince mixture spreads more easily and helps keep the bread crisp.

Stir in the cilantro and optional green chili. Remove the skillet from the heat and allow the mixture to cool slightly before assembling the toast.

Step 3: Pre-Toast the Bread

  1. Preheat your air fryer to 350°F for about 3 minutes, following the appliance instructions.

  2. Lightly brush or spray one side of each bread slice with oil.

  3. Place the bread in the basket in a single layer.

  4. Toast for 2–3 minutes until the surface starts to firm up.

  5. Remove the bread carefully with a heat-safe utensil.

Do not fully brown the bread during this step because it will cook again with the mince and egg. A light pre-toast creates a stronger base for the topping.

Step 4: Add the Cooked Mince

  1. Divide the cooked mince evenly among the four bread slices.

  2. Spread the mixture over each slice, leaving a small border around the edges.

  3. Press the topping gently with the back of a spoon so it stays in place.

  4. Keep the layer even to help the toast heat consistently.

  5. Add a small sprinkle of shredded cheese if desired.

Avoid piling the mince too high. A thick topping can make the bread difficult to handle and may prevent the egg from cooking evenly.

Step 5: Add the Egg

  1. Make a shallow well in the center of the mince on each slice.

  2. Carefully crack a small egg into each well.

  3. Keep the egg white on the bread as much as possible.

  4. If the bread is too small, beat the egg and spoon a suitable amount over the topping instead.

  5. Arrange the slices so they sit flat in the air fryer basket or on a compatible tray.

Small eggs are easier to manage than large eggs on individual slices. If the egg spills over the bread, use less egg next time or choose a wider slice.

For food safety, cook the egg until both the white and yolk are firm, or until it reaches 160°F when checked with a food thermometer. This is especially important when serving children, older adults, pregnant people, or anyone with a weakened immune system.

Step 6: Air Fry Until Golden and Crispy

  1. Return the assembled toast to the air fryer.

  2. Cook at 350°F for approximately 5–8 minutes.

  3. Check the bread after 5 minutes to see whether the edges are turning golden.

  4. Continue cooking in short intervals until the egg is safely cooked.

  5. If the bread browns too quickly, reduce the temperature slightly and continue until the egg is done.

Cooking time depends on the bread thickness, egg size, amount of mince, and air fryer model. Always check the egg rather than assuming it is ready when the bread looks crisp.

Cook in batches if needed. Leaving space around each slice helps hot air circulate and supports more even browning.

Step 7: Garnish and Serve

  1. Carefully lift the toast from the air fryer using a heat-safe spatula.

  2. Sprinkle with fresh cilantro.

  3. Add sliced tomatoes or green chilies if desired.

  4. Serve immediately while the bread is crisp.

  5. Offer ketchup, mint chutney, or hot sauce on the side.

For breakfast, serve the toast with fresh fruit or sliced cucumber. For lunch, pair it with a green salad or a bowl of soup.

Tips for the Best Results

  • Choose thick bread: Sturdy slices support the mince and egg better than thin sandwich bread.

  • Cook the mince first: The air-frying stage is not a reliable substitute for fully cooking raw ground meat.

  • Remove excess liquid: A drier topping helps prevent soggy bread.

  • Use small eggs: Smaller eggs are easier to contain on individual slices.

  • Avoid overcrowding: Leave room around each slice for hot air to circulate.

  • Check the egg carefully: Use a thermometer when possible to confirm safe doneness.

  • Serve immediately: The toast softens as moisture moves from the topping into the bread.

  • Adjust the seasoning: Add chili for heat or reduce the spices for a milder breakfast.

Variations and Substitutions

Use Ground Turkey or Chicken

Replace ground beef with ground turkey or chicken for a different flavor. Cook ground poultry to 165°F and drain excess liquid before adding it to the toast.

Make It Extra Spicy

Add finely chopped green chili, extra chili powder, or a dash of hot sauce to the mince. Increase the heat gradually so the spices do not overpower the egg.

Add Melted Cheese

Sprinkle shredded cheddar or mozzarella over the cooked mince before adding the egg. The cheese melts during air frying and creates a richer topping.

Choose Whole-Wheat or Sourdough Bread

Whole-wheat bread gives the toast a nutty flavor, while sourdough adds a mild tang. Both are good choices when cut thick enough to hold the topping.

Make an Egg-Free Version

Skip the egg and top the mince with sliced tomatoes, cilantro, and a squeeze of lemon. Air fry briefly until the bread is crisp and the topping is hot.

Use Leftover Mince

Previously cooked mince can shorten preparation time. Refrigerate leftovers promptly and reheat the mince to 165°F before assembling the toast.

What to Serve With Egg & Mince Toast

Choose fresh or cooling sides to balance the warm spices and rich topping.

  • Fresh fruit: Berries, melon, or orange slices add a refreshing contrast.

  • Cucumber and tomato salad: Crisp vegetables bring freshness to the meal.

  • Mint yogurt sauce: Mix plain yogurt with mint, lemon juice, and a pinch of salt.

  • Green salad: Serve mixed greens with a light lemon dressing for lunch.

  • Fresh chutney: Mint or cilantro chutney adds bright herbal flavor.

  • Coffee or tea: A warm drink pairs well with this savory breakfast.

  • Roasted vegetables: Serve with air-fried peppers or tomatoes for a more substantial plate.

For a quick breakfast, one or two slices with fresh fruit can make a satisfying meal. For a larger brunch, serve the toast with salad, yogurt sauce, and your favorite drink.

Storage and Reheating

Egg and mince toast tastes best when freshly cooked because the bread loses crispness as it sits. If you have leftovers, cool them and refrigerate them promptly.

  • Refrigeration: Store cooked toast in an airtight container in the refrigerator within two hours.

  • Storage time: Use refrigerated leftovers within 3–4 days.

  • Reheating: Air fry at 325–350°F until the center reaches 165°F.

  • Freezing: For better texture, freeze cooked mince separately and prepare fresh toast and egg when needed.

  • Food safety: Discard perishable food left at room temperature for more than two hours, or one hour when temperatures exceed 90°F.

For meal prep, cook the mince ahead and store it separately. Reheat it thoroughly, then assemble the toast with fresh bread and egg when you are ready to eat.

Frequently Asked Questions

1. Can I make egg and mince toast without an air fryer?

Yes. Assemble the toast on a baking sheet and bake at 375°F until the bread is crisp and the egg is safely cooked.

2. Which bread is best for mince toast?

Thick white bread, sourdough, and whole-wheat bread work well because they support the topping without becoming too soft.

3. Can I use leftover cooked mince?

Yes. Reheat the mince to 165°F before spreading it on the bread and adding the egg.

4. How do I keep the toast from getting soggy?

Cook the mince until excess liquid evaporates and lightly toast the bread before adding the topping.

5. Can I use ground turkey instead of beef?

Yes. Ground turkey works with the same seasonings, but make sure it reaches an internal temperature of 165°F.

6. How do I know when the egg is done?

Cook until the white and yolk are firm, or use a food thermometer to confirm the egg reaches 160°F.

7. Can I make this recipe less spicy?

Yes. Leave out the green chili and reduce the paprika or chili powder while keeping the other spices for flavor.

8. Can I prepare the mince ahead of time?

Yes. Cook it in advance, refrigerate it promptly, and reheat it to 165°F before assembling the toast.

Final Thoughts

Air Fryer Crispy Egg & Mince Toast combines crunchy bread, seasoned ground meat, and egg in one satisfying meal. Cooking the mince separately and lightly toasting the bread first helps create a crisp texture with simple preparation.

Customize the seasoning, use your favorite bread, and finish with fresh cilantro or chutney. Whether you serve it for breakfast, brunch, or lunch, this air fryer recipe is an easy way to enjoy a savory, South Asian-inspired meal at home.
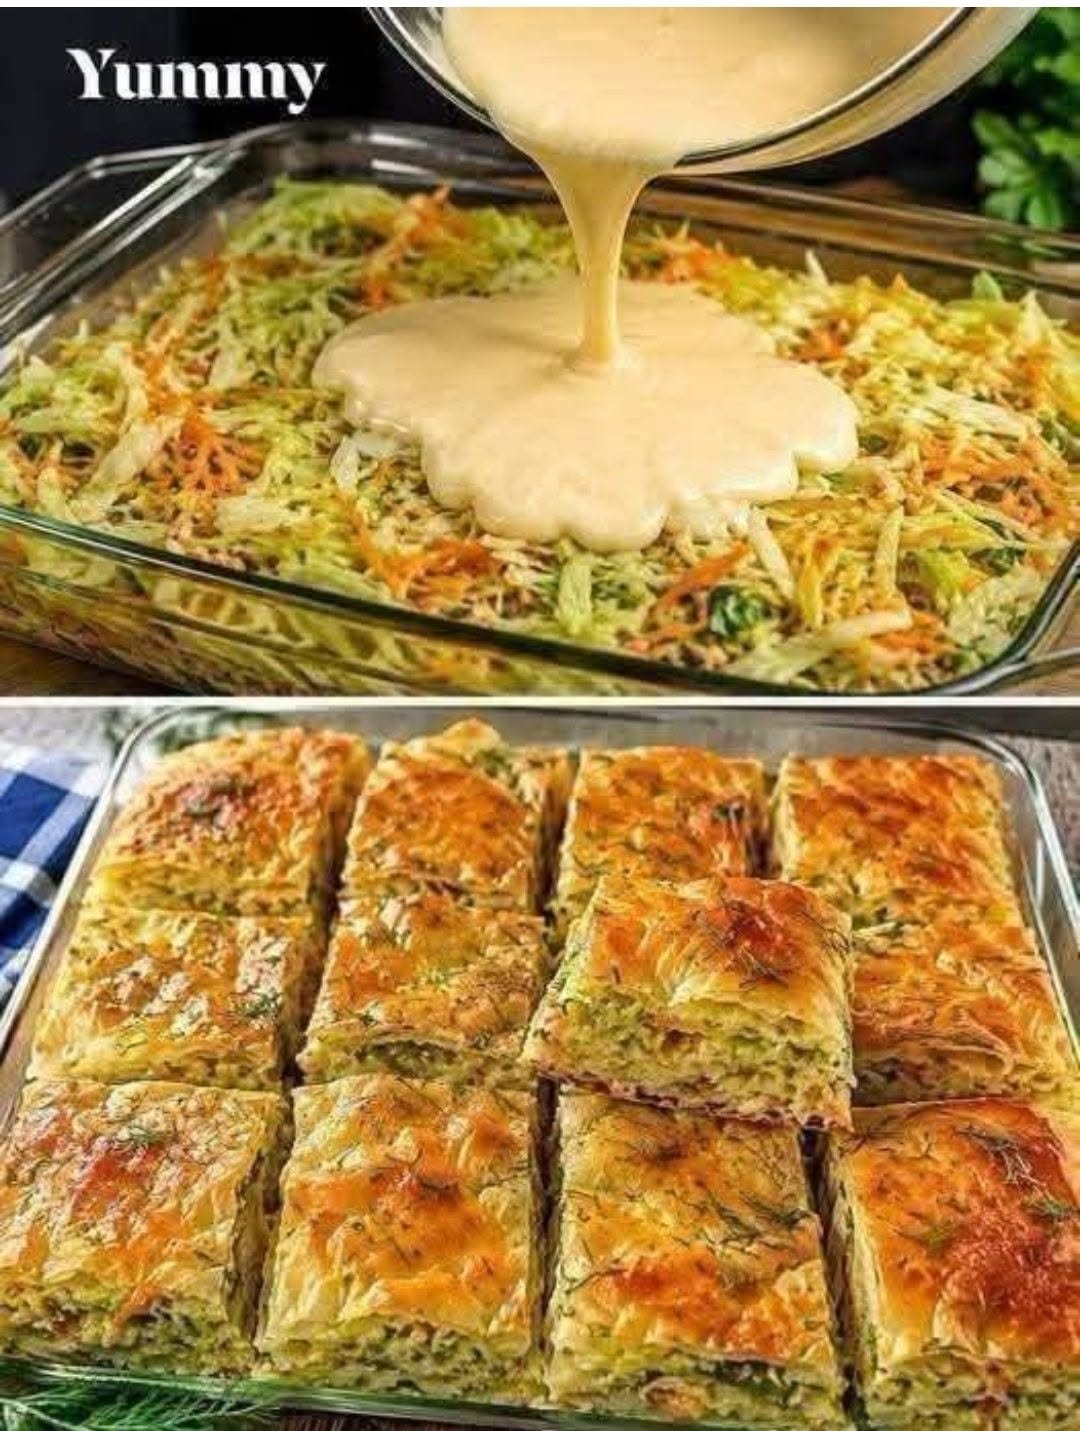

Zucchini Carrot Bake

Zucchini Carrot Bake with shredded zucchini, carrots, eggs, yogurt, fresh herbs, and melted cheese

Zucchini Carrot Bake

Zucchini Carrot Bake is a soft, savory, oven-baked vegetable dish made with shredded zucchini, carrots, eggs, yogurt, flour, herbs, and cheese. It has a tender interior, a lightly golden top, and plenty of fresh flavor from dill, parsley, and green onions. The mixture comes together in one bowl, pours easily into a baking dish, and slices into neat squares once baked.

This Zucchini Carrot Bake is great for breakfast, brunch, lunchboxes, light dinners, or as a side. The grated vegetables keep the bake moist, while eggs and yogurt help create a soft, slightly custardy texture.

Prep Time: 20 minutes
Bake Time: 40–45 minutes
Rest Time: 10 minutes
Total Time: About 1 hour 15 minutes
Servings: 8

Ingredients

the Vegetable Mixture

  • 3 medium zucchini, coarsely grated
  • 2 medium carrots, grated
  • 1 small onion, finely chopped
  • 4 green onions, sliced
  • 1/2 cup chopped fresh parsley
  • 1/3 cup chopped fresh dill
  • 4 large eggs
  • 1 cup plain Greek yogurt
  • 1/3 cup olive oil
  • 1 cup all-purpose flour
  • 1 teaspoon baking powder
  • 1 teaspoon salt
  • 1/2 teaspoon black pepper
  • 1/2 teaspoon paprika
  • 1/2 teaspoon dried oregano

the Cheese Layer

  • 1 cup shredded mozzarella
  • 1/2 cup crumbled feta
  • 1/4 cup grated Parmesan

Finishing

  • Extra dill or parsley
  • Pinch of red pepper flakes, optional
  • Spoonful of Greek yogurt for serving, optional

Why You’ll Love This Recipe

Zucchini Carrot Bake is easy to prepare, packed with vegetables, and versatile enough for breakfast, brunch, lunch, or dinner. The combination of zucchini, carrots, herbs, and cheese creates a mild, savory flavor with a touch of natural sweetness.

Once rested, the bake slices neatly and works well for meal prep, lunchboxes, picnics, or family gatherings.

How to Make Zucchini Carrot Bake

Step 1: Prepare the Oven and Pan

Preheat the oven to 375°F or 190°C.

Lightly grease a 9 x 13-inch baking dish with olive oil or cooking spray.

Step 2: Grate the Zucchini

Wash the zucchini and trim the ends.

Grate the zucchini using the large holes of a box grater.

Transfer it to a clean kitchen towel or cheesecloth, gather the edges, and squeeze firmly to remove as much excess water as possible.

Removing extra moisture is one of the most important steps for Zucchini Carrot Bake because zucchini naturally releases a lot of liquid while baking.

Step 3: Prepare the Carrots and Onion

Peel the carrots if desired and grate them using the same side of the box grater.

Finely chop the onion and slice the green onions.

Place the vegetables in a large mixing bowl.

Step 4: Add the Fresh Herbs

Add chopped parsley and dill to the vegetable mixture.

Fresh herbs give Zucchini Carrot Bake a bright, savory flavor and help balance the richness of the cheese.

Step 5: Make the Wet Mixture

In a separate bowl, whisk the eggs until smooth.

Add Greek yogurt and olive oil, then whisk again until fully combined.

The yogurt gives the bake a tender texture, while the oil helps keep it moist.

Step 6: Add the Dry Ingredients

In another small bowl, whisk together flour, baking powder, salt, black pepper, paprika, and oregano.

Add the dry mixture to the egg and yogurt mixture.

Whisk just until smooth.

Step 7: Combine Everything

Pour the batter over the vegetables.

Fold gently with a large spoon or silicone spatula until the zucchini, carrots, onions, and herbs are evenly coated.

Fold in half of the mozzarella, feta, and Parmesan.

The mixture for Zucchini Carrot Bake should look thick but still easy to spread.

Step 8: Transfer to the Baking Dish

Pour the mixture into the prepared baking dish.

Spread it into an even layer and smooth the top with a spatula.

Sprinkle the remaining mozzarella, feta, and Parmesan over the surface.

Step 9: Bake

Place the baking dish on the center rack.

Bake for 35 to 45 minutes, or until the center is set and the top is golden.

The edges of Zucchini Carrot Bake should look lightly browned, and a knife inserted near the center should come out without wet batter.

Step 10: Brown the Top

If you want a deeper golden finish, switch the oven to broil for 1 to 2 minutes.

Watch closely so the cheese does not burn.

Step 11: Rest Before Cutting

Remove the dish from the oven and let it rest for at least 10 minutes.

Resting allows the structure to firm up and makes Zucchini Carrot Bake easier to cut into clean squares.

Step 12: Slice and Serve

Cut into squares or rectangles.

Sprinkle with fresh dill, parsley, or red pepper flakes if desired.

Serve warm, slightly cooled, or at room temperature.

Serving Suggestions

Zucchini Carrot Bake works beautifully for breakfast or brunch with boiled eggs, sliced tomatoes, cucumbers, olives, or a spoonful of Greek yogurt.

For lunch, serve Zucchini Carrot Bake with a crisp green salad, lentil salad, chickpea salad, or tomato-cucumber salad.

It also works as a side dish with grilled chicken, baked fish, roasted turkey, or simple soups.

For a light vegetarian meal, pair it with hummus, roasted peppers, olives, and warm pita bread.

For another veggie-packed Mediterranean dish, try our Layered Mediterranean Eggplant Zucchini Bake with tender vegetables, herbs, and rich baked flavor.


Recipe Tips

Squeeze the zucchini very well. Too much moisture can make the center soft and watery.

Grate the carrots finely enough that they soften during baking.

Use fresh dill and parsley for the best flavor.

Do not overmix the batter after adding the flour.

Spread the mixture to the same thickness across the whole pan for even baking.

Let the bake rest before slicing.

If the top browns too quickly, cover loosely with foil during the final part of baking.

Easy Variations

Zucchini Carrot Bake is easy to customize depending on the ingredients you have available.

For extra greens, add a handful of chopped spinach.

A Mediterranean version can include more feta, chopped olives, sun-dried tomatoes, and oregano.

For extra protein, stir in cooked shredded chicken or turkey.

You can also add finely chopped bell peppers, corn, or mushrooms.

For a spicier version, add red pepper flakes, cayenne, or chopped jalapeño.

If you want a stronger cheese flavor, replace part of the mozzarella with cheddar or Gruyère.

Make-Ahead Instructions

This is a good make-ahead recipe because it stores and reheats well.

You can prepare the vegetables several hours ahead. Grate the zucchini, squeeze out the water, and store it in a covered container in the refrigerator.

You can also bake the full dish one day ahead, cool it completely, cover, and refrigerate.

Reheat before serving or enjoy it at room temperature.

Storage and Reheating

Store leftover Zucchini Carrot Bake in an airtight container in the refrigerator for up to 4 days.

To reheat, place individual slices in the microwave for 30 to 60 seconds.

For a better texture, reheat larger portions in a 350°F or 175°C oven for 10 to 15 minutes.

You can also freeze individual slices for up to 2 months. Thaw overnight in the refrigerator before reheating.

Nutrition Information

Approximate nutrition per serving:

Calories: 260
Protein: 12 g
Carbohydrates: 19 g
Fat: 16 g
Saturated Fat: 6 g
Fiber: 3 g
Sugar: 5 g
Sodium: 510 mg

Nutrition values are estimates and may vary depending on the cheese, yogurt, oil, vegetables, and serving size.

Frequently Asked Questions

Why is my bake watery?

The zucchini may not have been squeezed thoroughly enough. Zucchini contains a lot of water, so removing as much moisture as possible before mixing is important.

Can I use frozen zucchini?

Fresh zucchini is best, but frozen zucchini can work if thawed completely and squeezed very dry.

Can I use another cheese?

Yes. Cheddar, Monterey Jack, Gruyère, ricotta, or extra feta can all work.

Can I make it gluten-free?

Yes. Use a 1:1 gluten-free flour blend in place of all-purpose flour.

Can I make it without yogurt?

Yes. Sour cream can be used instead, or you can use a thick dairy-free yogurt.

Can I serve it cold?

Yes. Zucchini Carrot Bake can be served warm, at room temperature, or chilled.

Can I freeze it?

Yes. Freeze cooled slices in an airtight container for up to 2 months.

Final Thoughts

Zucchini Carrot Bake is an easy way to turn simple vegetables into a soft, cheesy, and flavorful oven-baked dish.

Because Zucchini Carrot Bake can be served for breakfast, brunch, lunch, or dinner, it is a versatile recipe to keep in your regular rotation.

Keep this Zucchini Carrot Bake recipe handy whenever you have extra zucchini and carrots and want something warm, savory, and easy to prepare.

With fresh herbs, tender vegetables, creamy yogurt, and plenty of melted cheese, Zucchini Carrot Bake is a practical homemade recipe that works just as well for meal prep as it does for family meals and casual entertaining.

You may also enjoy our Chicken Zucchini Bake for a hearty, protein-rich meal with tender chicken, zucchini, and plenty of comforting flavor.

High-Protein Sausage, Cheddar & Cottage Cheese Breakfast Biscuits

Sausage Breakfast Biscuits with sausage, cottage cheese, cheddar, eggs, spinach, peppers, and a soft golden savory crumb

High-Protein Sausage, Cheddar & Cottage Cheese Breakfast Biscuits

Sausage Breakfast Biscuits are savory, filling, and perfect for busy mornings when you want something you can grab and go. These soft breakfast biscuits combine cooked sausage, cottage cheese, sharp cheddar, eggs, vegetables, and simple seasonings in a tender biscuit-style batter. They are satisfying enough for breakfast yet convenient for meal prep, lunchboxes, or a quick afternoon snack.

The browned sausage and cheddar add plenty of flavor, while cottage cheese keeps the centers moist and adds extra protein. They also refrigerate well and reheat in minutes.

Prep Time: 20 minutes
Cook Time: 22–25 minutes
Total Time: About 45 minutes
Servings: 10 biscuits

Ingredients

For the Sausage Mixture

  • 12 ounces breakfast sausage, turkey sausage, or chicken sausage
  • 1/2 cup finely diced red bell pepper
  • 1/3 cup finely diced onion
  • 1 cup baby spinach, finely chopped
  • 1 teaspoon olive oil, if needed

For the Biscuit Batter

  • 1 1/2 cups all-purpose flour
  • 2 teaspoons baking powder
  • 1/2 teaspoon baking soda
  • 1/2 teaspoon garlic powder
  • 1/2 teaspoon smoked paprika
  • 1/4 teaspoon black pepper
  • 1/4 teaspoon salt
  • 2 large eggs
  • 1 cup cottage cheese
  • 1/2 cup plain Greek yogurt
  • 1 cup shredded sharp cheddar cheese
  • 2 tablespoons chopped chives
  • 1 tablespoon melted butter or olive oil

Why You’ll Love This Recipe

Sausage Breakfast Biscuits combine protein, vegetables, cheese, and a tender biscuit base in one portable breakfast. You do not need to cook eggs, toast, and sausage separately, which makes them especially convenient on busy mornings.

They are especially useful for meal prep. Bake once, refrigerate or freeze the extras, and reheat individual portions when needed.

You can also customize them with turkey sausage, extra vegetables, different cheese, or smaller portions for lunchboxes.

How to Make Sausage Breakfast Biscuits

Step 1: Preheat the Oven

Preheat the oven to 375°F or 190°C.

Line a large baking sheet with parchment paper or lightly grease it with cooking spray.

Step 2: Cook the Sausage

Heat a large skillet over medium heat.

Add the sausage and cook for 6 to 8 minutes, breaking it into small crumbles with a wooden spoon.

Cook until no pink remains and the sausage is lightly browned. Transfer it to a paper-towel-lined plate to drain excess grease.

Step 3: Cook the Vegetables

In the same skillet, add the bell pepper and onion.

If the pan is dry, add a teaspoon of olive oil.

Cook for 3 to 4 minutes until the vegetables begin to soften.

Add the chopped spinach and cook for another minute, just until wilted.

Remove the skillet from the heat and let the vegetables cool slightly.

Step 4: Mix the Dry Ingredients

In a large bowl, whisk together the flour, baking powder, baking soda, garlic powder, smoked paprika, black pepper, and salt.

Mixing the dry ingredients first helps the leavening and seasonings distribute evenly.

Step 5: Mix the Wet Ingredients

In a separate bowl, whisk the eggs until smooth.

Add the cottage cheese, Greek yogurt, and melted butter or olive oil.

Stir until combined.

A slightly textured cottage cheese mixture is fine; the curds soften as Sausage Breakfast Biscuits bake.

Step 6: Combine Wet and Dry Mixtures

Pour the wet mixture into the bowl with the dry ingredients.

Use a spatula to fold everything together until only a few streaks of flour remain.

Do not overmix. Too much stirring can make Sausage Breakfast Biscuits dense instead of soft and tender.

Step 7: Add the Fillings

Fold in the cooked sausage, vegetables, shredded cheddar, and chives.

Mix gently until everything is evenly distributed.

The batter should be thicker than muffin batter but softer than traditional biscuit dough. Add a little milk if too dry or flour if unusually loose.

Step 8: Portion the Biscuits

Use a large cookie scoop or two spoons to divide the batter into 10 equal portions on the prepared baking sheet.

Leave about 2 inches between each portion.

Shape the tops lightly with a spoon, but do not press them flat.

Keeping the batter slightly mounded helps Sausage Breakfast Biscuits stay thick and soft in the center.

Step 9: Bake Until Golden

Bake for 22 to 25 minutes, or until the tops are golden and the centers feel set.

A toothpick inserted into the center should come out clean or with a few moist crumbs.

Step 10: Cool Briefly

Remove the baking sheet from the oven and let Sausage Breakfast Biscuits cool on the tray for 5 minutes.

Transfer them to a wire rack.

Allowing Sausage Breakfast Biscuits to rest briefly helps the structure firm up and makes them easier to handle.

Step 11: Serve Warm

Serve Sausage Breakfast Biscuits warm on their own or split them and add a little butter, avocado, hot sauce, or extra cheese.

Serving Suggestions

Sausage Breakfast Biscuits are filling on their own, but simple sides can make breakfast more complete.

Serve with berries, orange slices, melon, or apple for something fresh. For brunch, add scrambled eggs, avocado, roasted potatoes, or a green salad.

They also pair well with Greek yogurt, salsa, coffee, or tea.

For another warm and comforting meal, try our Hearty Chicken and Vegetable Stew with tender chicken, potatoes, carrots, peas, and savory herbs.

Recipe Tips

Cook and drain the sausage well before adding it to the batter.

Dice the vegetables finely so each biscuit holds together easily.

Use sharp cheddar for stronger cheese flavor.

Do not overmix once the flour and wet ingredients come together.

For the softest Sausage Breakfast Biscuits, measure the flour carefully and avoid packing it into the measuring cup.

Full-fat or low-fat cottage cheese both work, but very watery cottage cheese should be drained briefly.

Freshly shredded cheddar usually melts more smoothly. Let Sausage Breakfast Biscuits cool briefly so the centers can finish setting.

Easy Variations

Change the flavor with simple swaps. Add jalapeño, chili flakes, or pepper jack for heat. Mix in mushrooms, broccoli, or roasted red pepper for extra vegetables.

Swap cheddar for mozzarella, Monterey Jack, Swiss, or a cheese blend. Turkey or chicken sausage also works well. Fresh parsley, dill, basil, or extra chives can add more herb flavor.

For mini biscuits, use smaller portions and reduce the baking time.

Make-Ahead Instructions

Sausage Breakfast Biscuits are excellent for meal prep. Bake the full batch, cool completely, and store in an airtight container.

You can also cook the sausage and vegetables one day ahead and refrigerate them separately, then mix and bake the batter the next morning. Wrap cooled portions individually for faster grab-and-go breakfasts.

Storage and Reheating

Store leftover Sausage Breakfast Biscuits in an airtight container in the refrigerator for up to 4 days.

Reheat one biscuit in the microwave for 20 to 30 seconds, or warm several in a 325°F or 165°C oven for about 8 minutes.

For longer storage, freeze the cooled biscuits for up to 2 months. Wrap each biscuit individually and place them in a freezer-safe bag.

Thaw overnight in the refrigerator or reheat from frozen at a lower oven temperature until warmed through.

Nutrition Information

Approximate nutrition per biscuit:

Calories: 245
Protein: 16 g
Carbohydrates: 18 g
Fat: 12 g
Saturated Fat: 5 g
Fiber: 2 g
Sugar: 3 g
Sodium: 480 mg

Nutrition values are estimates and will vary depending on the sausage, cottage cheese, cheddar, and exact portion size.

Frequently Asked Questions

Can I use turkey sausage?

Yes. Turkey sausage is a great choice and keeps Sausage Breakfast Biscuits flavorful while reducing some of the fat.

Can I use small-curd cottage cheese?

Yes. Small-curd or large-curd cottage cheese both work. If your cottage cheese is very watery, drain it briefly before mixing.

Can I make these gluten-free?

Yes. Use a 1:1 gluten-free baking flour designed for quick breads or biscuits.

Can I freeze them?

Yes. Sausage Breakfast Biscuits freeze very well and can be reheated directly from frozen or thawed overnight first.

Why are my biscuits dense?

Overmixing the batter or adding too much flour is usually the cause. Stir gently and stop as soon as the ingredients are combined.

Can I make them without vegetables?

Yes. Leave out the bell pepper, onion, and spinach if you prefer a simpler sausage-and-cheese biscuit.

Can I make mini biscuits?

Yes. Use smaller portions and begin checking them several minutes earlier because they will bake faster.

Final Thoughts

Sausage Breakfast Biscuits are a convenient way to combine sausage, eggs, cottage cheese, cheddar, vegetables, and a tender biscuit base in one filling breakfast.

Because Sausage Breakfast Biscuits can be prepared ahead, refrigerated, frozen, and reheated in minutes, they are especially practical for busy families and weekly meal prep.

Keep Sausage Breakfast Biscuits handy whenever you want a portable breakfast that feels homemade, satisfying, and easy to serve.

With savory sausage, melty cheddar, creamy cottage cheese, and colorful vegetables, Sausage Breakfast Biscuits deliver plenty of flavor and protein in every bite.

If you enjoy rich and hearty one-pot dinners, you may also like our Goulash Recipe with tender beef, paprika, tomatoes, and vegetables.