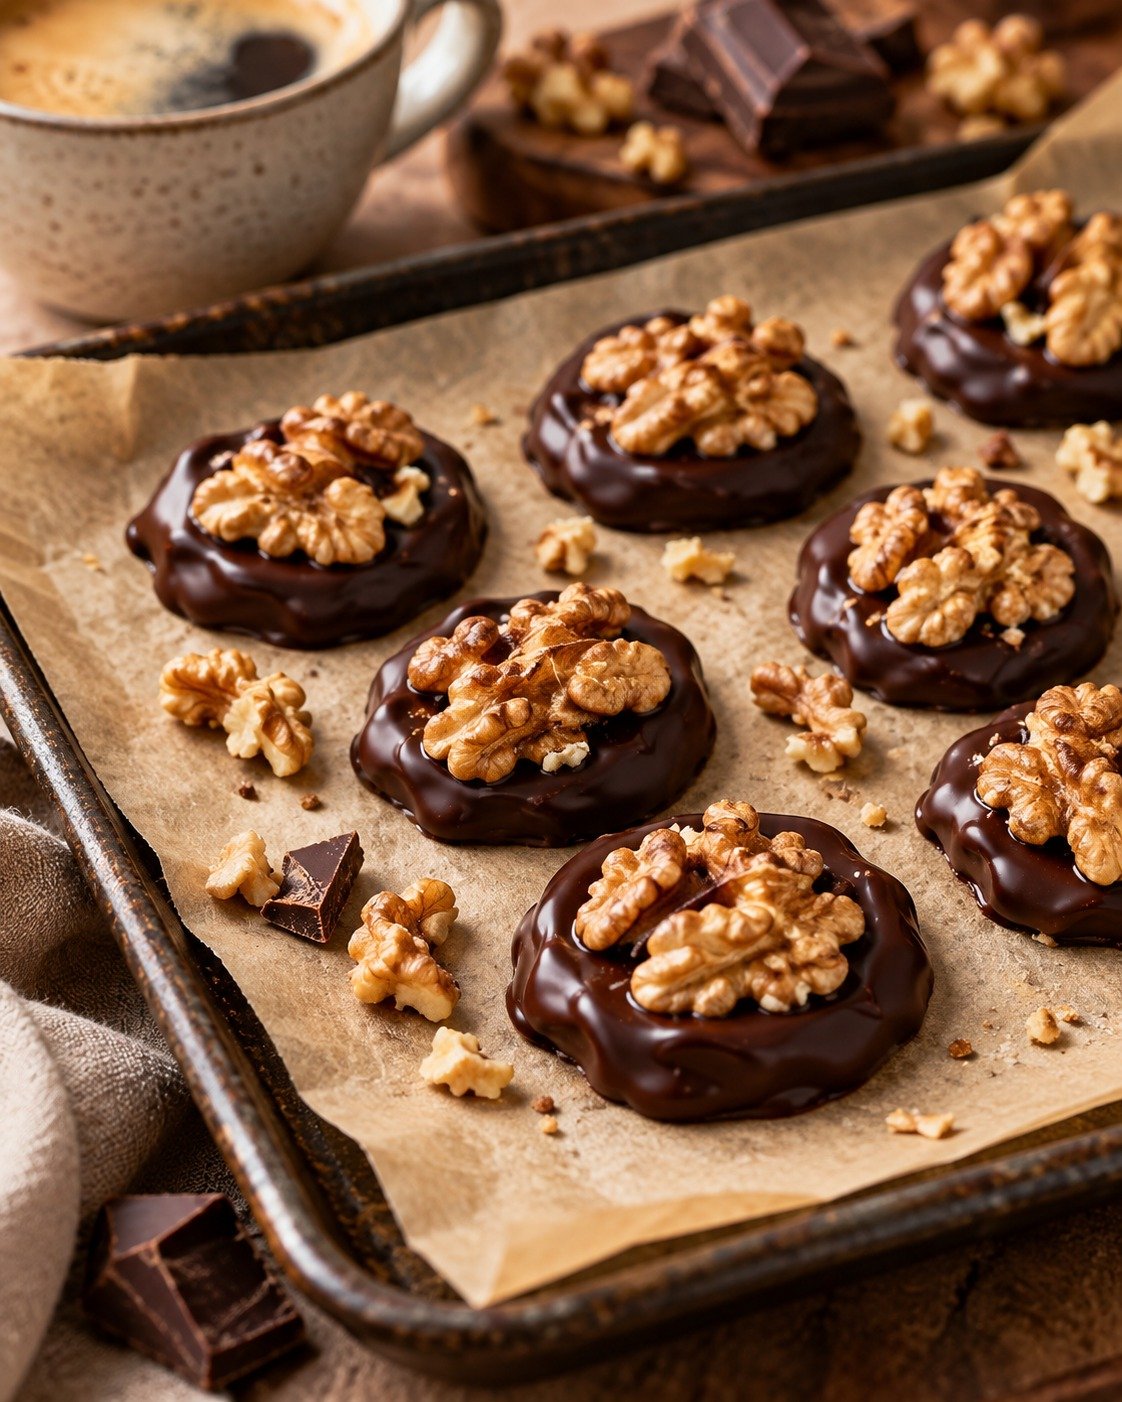
2-Ingredient Chocolate Walnut Bites – Easy No-Bake Chocolate Treat
Sometimes the simplest desserts are the most delicious. These 2-Ingredient Chocolate Walnut Bites combine rich, smooth dark chocolate with crunchy walnuts to create an irresistible homemade treat. With only two ingredients and minimal preparation, this recipe is perfect for anyone who loves chocolate but doesn’t want to spend hours in the kitchen.
Whether you’re looking for a quick afternoon snack, a sweet treat to enjoy with coffee, or an easy dessert for family gatherings, Chocolate Walnut Bites are an excellent choice.
Each bite offers the satisfying crunch of walnuts surrounded by a smooth layer of chocolate. The combination creates a wonderful balance of texture and flavor without requiring flour, eggs, butter, or complicated baking techniques.
These homemade chocolate treats are also convenient for meal preparation, special occasions, holiday dessert platters, and edible gifts.
Best of all, you can customize the sweetness by choosing your favorite dark or milk chocolate.
Why You’ll Love These Chocolate Walnut Bites
There are several reasons why this easy recipe deserves a place in your dessert collection.
Only two ingredients: You need chocolate and walnuts, making the recipe incredibly simple.
No baking required: Melt the chocolate, add walnuts, and refrigerate until firm.
Quick preparation: The active preparation takes approximately 10 minutes.
Perfect portion sizes: Individual bites make it easy to serve and share.
Rich chocolate flavor: Dark chocolate provides a deep cocoa taste that pairs beautifully with walnuts.
Ideal for entertaining: These homemade treats look elegant on dessert trays and party platters.
Easy to customize: Choose dark, semi-sweet, or milk chocolate depending on your preference.
Ingredients for Chocolate Walnut Bites
One of the best things about this recipe is its short ingredient list.
What You Need
- 200 g (7 oz) dark chocolate, preferably 60–70% cocoa
- 24 walnut halves
This recipe makes approximately 12 chocolate bites, with two walnut halves per piece.
Choosing the Best Chocolate
The quality of chocolate plays an important role in the finished flavor.
Dark chocolate containing 60–70% cocoa creates a rich taste with moderate sweetness.
For a more intense chocolate flavor, choose a chocolate bar with a higher cocoa percentage.
If you prefer a sweeter dessert, milk chocolate is a delicious alternative.
Chocolate bars designed for melting or baking are particularly convenient because they usually melt smoothly.
Choosing Fresh Walnuts
Walnuts add a distinctive nutty flavor and satisfying crunch.
Choose walnuts that smell fresh and have no bitter or rancid odor.
Walnut halves create an attractive topping, while smaller walnut pieces can be used if you prefer more evenly distributed crunch.
Lightly toasting the walnuts before assembling the bites can enhance their flavor.
How to Make 2-Ingredient Chocolate Walnut Bites
Follow these simple instructions to prepare beautiful homemade chocolate treats.
Step 1: Prepare Your Baking Tray
Start by lining a baking tray or large plate with parchment paper.
Make sure the surface is flat so the chocolate discs maintain an even shape while setting.
Place the tray on a stable countertop where you can easily arrange the chocolate.
Step 2: Break the Chocolate into Pieces
Break the chocolate bar into small, evenly sized pieces.
Place the chocolate pieces in a microwave-safe bowl.
Smaller pieces melt more evenly and reduce the risk of overheating.
Step 3: Melt the Chocolate
Microwave the chocolate in 20-second intervals.
After each interval, remove the bowl and stir gently.
Repeat until the chocolate is almost completely melted.
Continue stirring until any remaining pieces dissolve and the chocolate becomes smooth.
Alternatively, place the chocolate in a heatproof bowl over a saucepan of gently simmering water.
Keep the bowl above the water rather than allowing it to touch the hot liquid.
Stir until the chocolate is melted and glossy.
Avoid allowing water or steam to enter the chocolate because moisture can cause it to seize.
Step 4: Shape the Chocolate Discs
Use a tablespoon to place small portions of melted chocolate onto the prepared parchment paper.
Gently spread each portion into a round disc approximately 1½–2 inches wide.
Try to keep the discs similar in size so the finished chocolate bites look uniform.
Leave a little space between each piece to prevent them from touching.
Step 5: Add the Walnut Halves
Place two walnut halves on top of each chocolate disc.
Press them lightly into the soft chocolate.
The chocolate should surround the bottom of the walnuts while leaving their attractive textured surface visible.
Work while the chocolate is still soft to help the walnuts attach securely.
Step 6: Refrigerate Until Firm
Carefully transfer the prepared tray to the refrigerator.
Chill for approximately 20–30 minutes, or until the chocolate has completely hardened.
The exact setting time depends on the thickness of the chocolate and the temperature of your refrigerator.
Once firm, the chocolate bites should lift away easily from the parchment paper.
Step 7: Serve and Enjoy
Arrange the Chocolate Walnut Bites on a serving plate.
Serve them with coffee, tea, or as part of a homemade dessert platter.
For the best texture, allow refrigerated bites to sit at room temperature for a few minutes before serving, especially if they have become very firm.
Tips for Making Perfect Chocolate Walnut Bites
Although this recipe is simple, a few useful techniques can improve the flavor, texture, and appearance.
Use High-Quality Chocolate
Because chocolate is the main ingredient, choosing a good-quality variety makes a noticeable difference.
Look for chocolate with a smooth texture and a flavor you enjoy eating on its own.
Melt Chocolate Slowly
Overheated chocolate may become thick, grainy, or scorched.
Use short microwave intervals and stir frequently.
A gentle double boiler is another reliable method.
Toast the Walnuts for Extra Flavor
Toasting gives walnuts a deeper nutty taste.
Spread them on a baking tray and toast at 325°F (165°C) for approximately 6–8 minutes, watching carefully to prevent burning.
Allow them to cool completely before placing them on the chocolate.
Keep the Chocolate Discs Even
Use approximately the same amount of melted chocolate for each bite.
This creates a consistent appearance and makes portion sizes easier to estimate.
Use Parchment Paper
Parchment paper helps prevent the chocolate from sticking to the tray.
It also makes removing the hardened bites much easier.
Keep Your Kitchen Cool
Chocolate sets more easily in a cool environment.
If your kitchen is particularly warm, refrigerate the prepared bites promptly.
Delicious Chocolate Walnut Bite Variations
The original recipe requires only two ingredients, but you can experiment with different chocolate varieties.
Dark Chocolate Walnut Bites
Use dark chocolate containing approximately 70% cocoa for a rich and slightly bitter chocolate flavor.
This option is ideal for people who prefer desserts that are less sweet.
Milk Chocolate Walnut Bites
Replace dark chocolate with milk chocolate for a creamier, sweeter treat.
Milk chocolate pairs especially well with toasted walnuts.
Extra-Dark Chocolate Walnut Bites
Choose chocolate containing 80–85% cocoa for a stronger chocolate flavor.
Keep in mind that higher cocoa percentages usually create a less sweet result.
Chocolate Walnut Clusters
Instead of placing walnut halves on top, chop the walnuts into smaller pieces and mix them directly into the melted chocolate.
Spoon small clusters onto parchment paper and refrigerate until firm.
This version provides walnut crunch throughout each bite.
How to Store Chocolate Walnut Bites
Proper storage helps preserve the chocolate’s texture and keeps the walnuts tasting fresh.
Refrigerator Storage
Place the finished Chocolate Walnut Bites in an airtight container.
Separate layers with parchment paper to prevent sticking.
Refrigerate for up to two weeks for the best quality.
Protect the chocolate from moisture and strong food odors.
Freezer Storage
Chocolate Walnut Bites can also be frozen.
Arrange them in a freezer-safe container with parchment paper between layers.
Freeze for up to two months for optimal quality.
When ready to enjoy, thaw them in their closed container in the refrigerator to help reduce condensation.
Room Temperature Storage
If your kitchen is cool and dry, the bites can be stored in an airtight container for a shorter period.
However, warm conditions can cause chocolate to soften or melt.
Refrigeration is usually the most convenient choice in hot weather.
Are Chocolate Walnut Bites a Healthy Snack?
Chocolate Walnut Bites contain ingredients that can contribute useful nutrients to a balanced diet.
Walnuts provide unsaturated fats, some protein, fiber, and minerals.
They also contain alpha-linolenic acid, a plant-based omega-3 fatty acid.
Dark chocolate supplies naturally occurring cocoa compounds, including flavanols, although the amounts vary according to the chocolate and processing method.
However, dark chocolate also contains calories, saturated fat, and often added sugar.
These bites are best enjoyed as an occasional treat in reasonable portions rather than considered a replacement for more nutrient-dense everyday foods.
Choosing smaller portions can help you enjoy their rich flavor without consuming large amounts at once.
When to Serve Chocolate Walnut Bites
These simple treats are suitable for many occasions.
Afternoon coffee breaks: Enjoy one or two bites alongside a warm cup of coffee.
Holiday gatherings: Arrange them on a dessert platter with other homemade sweets.
Family celebrations: Prepare a batch for birthdays or casual get-togethers.
Homemade gifts: Place the finished bites in a decorative food-safe box with parchment paper.
Weekend treats: Keep a small batch in the refrigerator when you want something sweet.
Dessert boards: Serve them alongside fresh strawberries, grapes, or other fruits.
Because they require so little preparation, these treats are especially useful when you need a quick homemade dessert.
Frequently Asked Questions
Can I Make Chocolate Walnut Bites Without an Oven?
Yes. The basic recipe is completely no-bake.
Simply melt the chocolate in a microwave or double boiler, shape the discs, add walnuts, and refrigerate until firm.
Can I Use Milk Chocolate Instead of Dark Chocolate?
Absolutely.
Milk chocolate produces a sweeter, creamier version.
The preparation method remains the same.
Can I Use Chopped Walnuts?
Yes. Chopped walnuts work well.
Sprinkle them over the melted chocolate or stir them directly into the chocolate to create small clusters.
Why Is My Melted Chocolate Thick?
Chocolate can become thick if it overheats or comes into contact with water.
Melt it gently, stir frequently, and use completely dry utensils.
Do Chocolate Walnut Bites Need to Be Refrigerated?
Not always.
Well-set chocolate can remain firm at a cool room temperature, but refrigeration is helpful in warm climates and keeps the treats protected.
Can I Prepare Chocolate Walnut Bites Ahead of Time?
Yes.
These bites are an excellent make-ahead dessert.
Prepare them several days before serving and keep them in an airtight container.
Can I Use White Chocolate?
Yes, but white chocolate is sweeter and has a different flavor profile.
Use a good-quality white chocolate and melt it gently because it can scorch easily.
How Long Does the Chocolate Take to Set?
Most bites become firm after approximately 20–30 minutes in the refrigerator.
Thicker chocolate discs may require additional chilling time.
Nutritional Information
Approximate nutrition per bite, based on 12 servings using 200 g of 70% dark chocolate and 24 walnut halves.
| Nutrient | Approximate Amount |
|---|---|
| Calories | 145 kcal |
| Protein | 2.5 g |
| Carbohydrates | 9 g |
| Total Fat | 12 g |
| Fiber | 2 g |
| Sugar | 4.5 g |
| Sodium | 3 mg |
Nutritional values vary depending on the chocolate brand, cocoa percentage, and size of the walnut halves.
Recipe Information
Recipe Name: 2-Ingredient Chocolate Walnut Bites
Cuisine: American-Inspired
Course: Dessert, Snack
Preparation Time: 10 minutes
Cooking Time: 0 minutes
Chilling Time: 20–30 minutes
Total Time: 30–40 minutes
Yield: Approximately 12 bites
Difficulty: Easy
Cooking Method: No-Bake
Final Thoughts
These 2-Ingredient Chocolate Walnut Bites are proof that delicious homemade desserts don’t need complicated ingredients or lengthy preparation.
The combination of rich chocolate and crunchy walnuts creates a satisfying treat that looks beautiful and tastes wonderful.
Whether you prefer dark chocolate for its deeper cocoa flavor or milk chocolate for extra sweetness, this recipe is easy to adapt to your preferences.
With minimal preparation, convenient storage, and simple ingredients, Chocolate Walnut Bites are perfect for coffee breaks, family gatherings, homemade gifts, or whenever you’re craving something sweet.
Try this easy recipe the next time you want a delicious chocolate treat without spending hours in the kitchen.