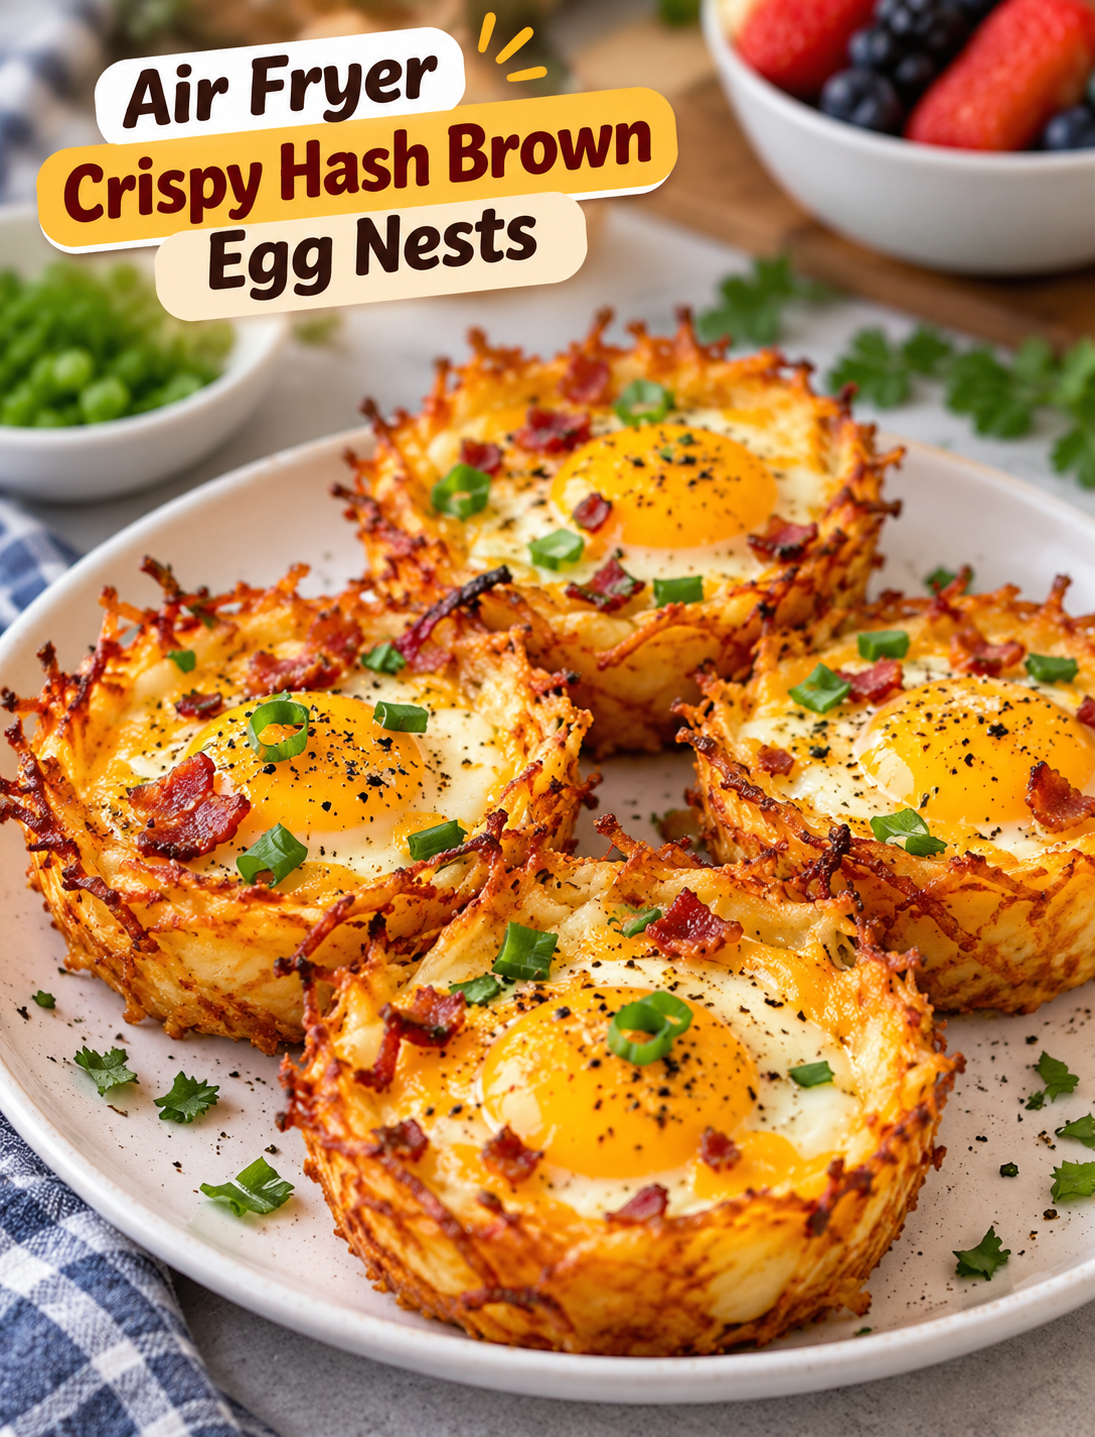
Air Fryer Crispy Hash Brown Egg Nests are a delicious way to turn simple breakfast ingredients into a crispy, satisfying morning meal. Shredded potatoes form golden little nests, while eggs cook in the center for a tasty combination of crunchy edges, soft potatoes, and rich egg yolks.
This easy breakfast recipe is perfect for busy weekday mornings, relaxed weekend brunches, or a family breakfast at home. You only need a few basic ingredients, an air fryer, and a little preparation time to make these homemade egg nests.
The best part is that you can customize each nest with shredded cheese, green onions, cooked bacon, or your favorite seasonings. Whether you prefer runny yolks or fully cooked eggs, this recipe gives you a simple way to prepare a warm, filling breakfast without heating up the entire kitchen.
Why You’ll Love This Recipe
- Crispy potato edges: The air fryer helps the shredded potatoes develop a golden, crunchy outside.
- Simple ingredients: You can make this breakfast with potatoes, eggs, oil, and a few seasonings.
- Easy preparation: Shape the potato mixture into nests and add the eggs after the potatoes begin to crisp.
- Customizable toppings: Add cheddar cheese, chopped chives, bell peppers, or cooked bacon to suit your taste.
- Perfect for brunch: Serve these individual portions with fruit, toast, or fresh vegetables.
- Less oil required: Air frying uses less oil than deep-frying while still producing crisp potato edges.
Ingredients You’ll Need
These ingredients make approximately 4 egg nests, depending on the size of your muffin cups or ramekins.
- 2 cups frozen shredded hash brown potatoes, thawed and squeezed dry
- 4 large eggs
- 1 tablespoon olive oil or avocado oil
- 1/4 teaspoon garlic powder
- 1/4 teaspoon paprika
- 1/4 teaspoon salt, or to taste
- 1/8 teaspoon ground black pepper
- 1/3 cup shredded cheddar cheese, optional
- 1 tablespoon chopped green onions, optional
Ingredient notes
Hash brown potatoes: Frozen shredded potatoes are convenient and easy to portion. Thaw them completely and remove excess moisture before cooking.
Eggs: Use large eggs for a good balance between the potato nest and the filling. Smaller eggs may fit better in narrow nests.
Oil: A small amount of oil helps the potatoes brown and prevents sticking. Olive oil or avocado oil works well.
Seasonings: Garlic powder, paprika, salt, and black pepper add flavor without overpowering the eggs.
Cheese: Cheddar adds a savory taste and melts into the potato edges. You can also use Monterey Jack or mozzarella.
Equipment You’ll Need
- Air fryer
- Mixing bowl
- Measuring spoons
- Silicone spatula or spoon
- Small, air-fryer-safe ramekins or suitable silicone muffin cups, if needed
- Cooking spray, if required for your cookware
Choose cookware that fits comfortably inside your air fryer basket and is approved for the cooking temperature. Avoid using containers that block airflow or touch the heating element.
How to Make Air Fryer Crispy Hash Brown Egg Nests
Follow these steps for golden potato nests with eggs cooked in the center.
Step 1: Prepare the Hash Brown Potatoes
If you are using frozen hash browns, thaw them according to the package instructions. Place the shredded potatoes in a clean kitchen towel and squeeze out as much water as possible.
Removing excess moisture is important because wet potatoes tend to steam instead of crisp. Dry potatoes also hold their shape better when formed into nests.
Step 2: Season the Potatoes
Add the shredded potatoes to a mixing bowl. Pour in the olive oil, then add garlic powder, paprika, salt, and black pepper.
Mix everything thoroughly until the seasonings are distributed evenly. If you want a cheesy breakfast, stir in a small amount of shredded cheddar at this stage.
Step 3: Shape the Potato Nests
Lightly grease your air-fryer-safe ramekins or silicone muffin cups if needed. Divide the potato mixture into four portions.
Press each portion into the bottom and up the sides of its container, leaving a hollow center for the egg. Make the potato layer reasonably even so the edges cook at a similar rate.
If you are shaping the nests directly in the basket, use a suitable method that keeps the potatoes together without obstructing airflow. Individual oven-safe or air-fryer-safe cups are often easier for beginners.
Step 4: Preheat the Air Fryer
Preheat your air fryer to 375°F for about 3 minutes, if your model recommends preheating.
Preheating helps the potato mixture start cooking immediately and can improve browning. Air fryer models vary, so check your appliance instructions before using accessories or selecting a temperature.
Step 5: Cook the Potato Nests
Place the prepared nests in the air fryer basket in a single layer. Leave enough space for hot air to circulate.
Air fry at 375°F for approximately 8–12 minutes, or until the potatoes begin to turn golden and the sides feel firm.
Check the nests near the end of this stage. If the potatoes still look pale or feel soft, cook them for another 2–3 minutes before adding the eggs.
Important tip: Pre-cooking the potatoes helps the nests hold their shape and gives them a head start on crisping before the eggs are added.
Step 6: Add the Eggs
Carefully remove the basket or containers from the air fryer. Use a spoon to adjust the hollow in each nest if necessary.
Crack one egg into the center of each potato nest. If the opening is small, crack the egg into a small bowl first and gently transfer it into the nest.
Try to keep the egg white inside the potato edges. If you prefer, add a light sprinkle of cheddar cheese around the egg rather than covering the entire surface.
Step 7: Air Fry Until the Eggs Are Cooked
Return the nests to the air fryer and cook at 320–350°F for approximately 5–9 minutes, depending on the size of the eggs and your preferred texture.
- Soft yolks: Start checking near the lower end of the cooking range.
- Medium yolks: Cook a little longer until the whites are set and the yolks begin to thicken.
- Firm yolks: Continue cooking until the yolks are fully set.
Cooking time varies by air fryer and egg size. For food safety, cook eggs until both the whites and yolks are firm, or until an egg dish reaches 160°F.
Step 8: Add Toppings and Serve
Carefully remove the finished nests from the air fryer. Let them rest for 1–2 minutes before lifting them out of their containers.
Sprinkle chopped green onions, extra black pepper, or fresh herbs over the top. Serve immediately while the potato edges are warm and crisp.
For a complete breakfast, pair the nests with fresh berries, sliced avocado, whole-grain toast, or a simple fruit salad.
Tips for Extra Crispy Hash Brown Egg Nests
A few small adjustments can make a noticeable difference in the final texture.
- Remove extra moisture: Squeeze thawed hash browns thoroughly before seasoning.
- Avoid thick potato layers: Thin, even layers cook more evenly and brown more quickly.
- Pre-cook before adding eggs: Give the potatoes time to firm up so the eggs do not overcook while the potatoes crisp.
- Do not overcrowd the basket: Leave room for hot air to move around each nest.
- Check the eggs early: Start checking a few minutes before the estimated finish time.
- Use suitable cookware: Ramekins and silicone cups can help the nests keep their shape.
- Serve promptly: Potato nests lose some crispness as they sit, especially when covered.
Variations and Substitutions
You can change the flavor of these breakfast nests without changing the basic cooking method.
Cheesy Hash Brown Egg Nests
Add shredded cheddar, Monterey Jack, or mozzarella to the potato mixture. You can also sprinkle a little extra cheese over the nests during the final minutes of cooking.
Bacon and Egg Nests
Add finely chopped, fully cooked bacon before serving. Cooking the bacon separately keeps the potato mixture from becoming greasy.
Vegetable Egg Nests
Mix in small amounts of finely chopped bell pepper, spinach, or green onion. Cook watery vegetables first and drain them well to avoid adding excess moisture.
Spicy Breakfast Nests
Add a pinch of cayenne pepper or crushed red pepper flakes to the potato seasoning. Serve with your favorite hot sauce if you enjoy a little extra heat.
Sweet Potato Nests
Try shredded sweet potatoes for a slightly sweeter flavor. They may cook and brown differently from regular potatoes, so check the texture frequently and adjust the cooking time as needed.
What to Serve with Hash Brown Egg Nests
These nests work well with both light and hearty breakfast sides.
- Fresh strawberries, blueberries, or orange slices
- Whole-grain toast or English muffins
- Sliced avocado with black pepper
- Greek yogurt with fresh fruit
- Sautéed spinach or mushrooms
- Turkey bacon or breakfast sausage
- A small green salad for a brunch-style meal
For a simple weekday breakfast, serve two nests with fruit. For a larger weekend brunch, arrange them on a platter with toast and vegetables so everyone can choose their favorite sides.
Storage and Reheating Instructions
Refrigeration: Let the cooked nests cool, then place them in an airtight container and refrigerate within 2 hours. Eat refrigerated leftovers within 3–4 days.
Reheating: Place the nests in the air fryer at 325°F for approximately 3–5 minutes, checking that the centers are heated thoroughly. Add more time as needed.
Freezing: You can freeze cooked nests in a suitable airtight container, although the potato texture and egg consistency may change after thawing. For the best results, make them fresh or refrigerate leftovers for short-term storage.
Food safety: Reheat leftovers to 165°F. Do not leave cooked eggs at room temperature for more than 2 hours, or more than 1 hour when temperatures are above 90°F.
Common Mistakes to Avoid
Using wet potatoes: Excess water prevents the shredded potatoes from crisping properly. Always squeeze out moisture before cooking.
Adding the eggs too soon: Raw eggs can finish cooking before the potato base becomes crisp. Pre-cook the nests first.
Making the sides too thick: Thick potato walls take longer to cook and can remain soft in the center. Spread the potatoes evenly.
Overcooking the eggs: Eggs continue cooking briefly after removal from the air fryer. Check them early and remove them when they reach your preferred doneness, following food-safety guidance.
Ignoring air fryer differences: Basket size, heating power, and cookware affect cooking time. Use the suggested times as a starting point rather than a guarantee.
Frequently Asked Questions
1. Can I use frozen hash browns without thawing them?
Thawing and draining frozen shredded potatoes first gives you better control over moisture and helps the nests hold their shape.
2. How long do hash brown egg nests take in the air fryer?
Allow approximately 13–21 minutes of cooking time, including pre-cooking the potatoes and cooking the eggs, plus any preheating time.
3. What temperature is best for air fryer hash brown egg nests?
Start the potato nests at 375°F, then reduce the temperature to around 320–350°F when adding the eggs.
4. How do I keep the potato nests from falling apart?
Remove excess moisture, press the potatoes firmly into an even layer, and pre-cook them until the edges become golden and firm.
5. Can I make hash brown egg nests without cheese?
Yes. Cheese is optional, and the recipe works well with seasoned potatoes and eggs alone.
6. How do I make the egg yolks fully cooked?
Continue air frying until the whites and yolks are firm, checking frequently to prevent the potato edges from becoming too dark.
7. Can I prepare the potato nests ahead of time?
You can shape the seasoned potato nests and refrigerate them before cooking, but dry the potatoes well and cook them before adding the eggs.
8. Are air fryer hash brown egg nests good for meal prep?
They can be prepared ahead for short-term refrigerated storage, but the potatoes are crispiest when freshly cooked.
Final Thoughts
Air Fryer Crispy Hash Brown Egg Nests make a practical breakfast from everyday ingredients. The combination of golden shredded potatoes, freshly cooked eggs, and optional cheese creates a satisfying meal that works for busy mornings and weekend brunches.
For the best results, squeeze the potatoes dry, pre-cook the nests before adding the eggs, and adjust the final cooking time to suit your air fryer. Add your favorite toppings, serve the nests warm, and enjoy an easy homemade breakfast with minimal cleanup.