3-Ingredient Crispy Chicken & Egg Hash Brown Nests

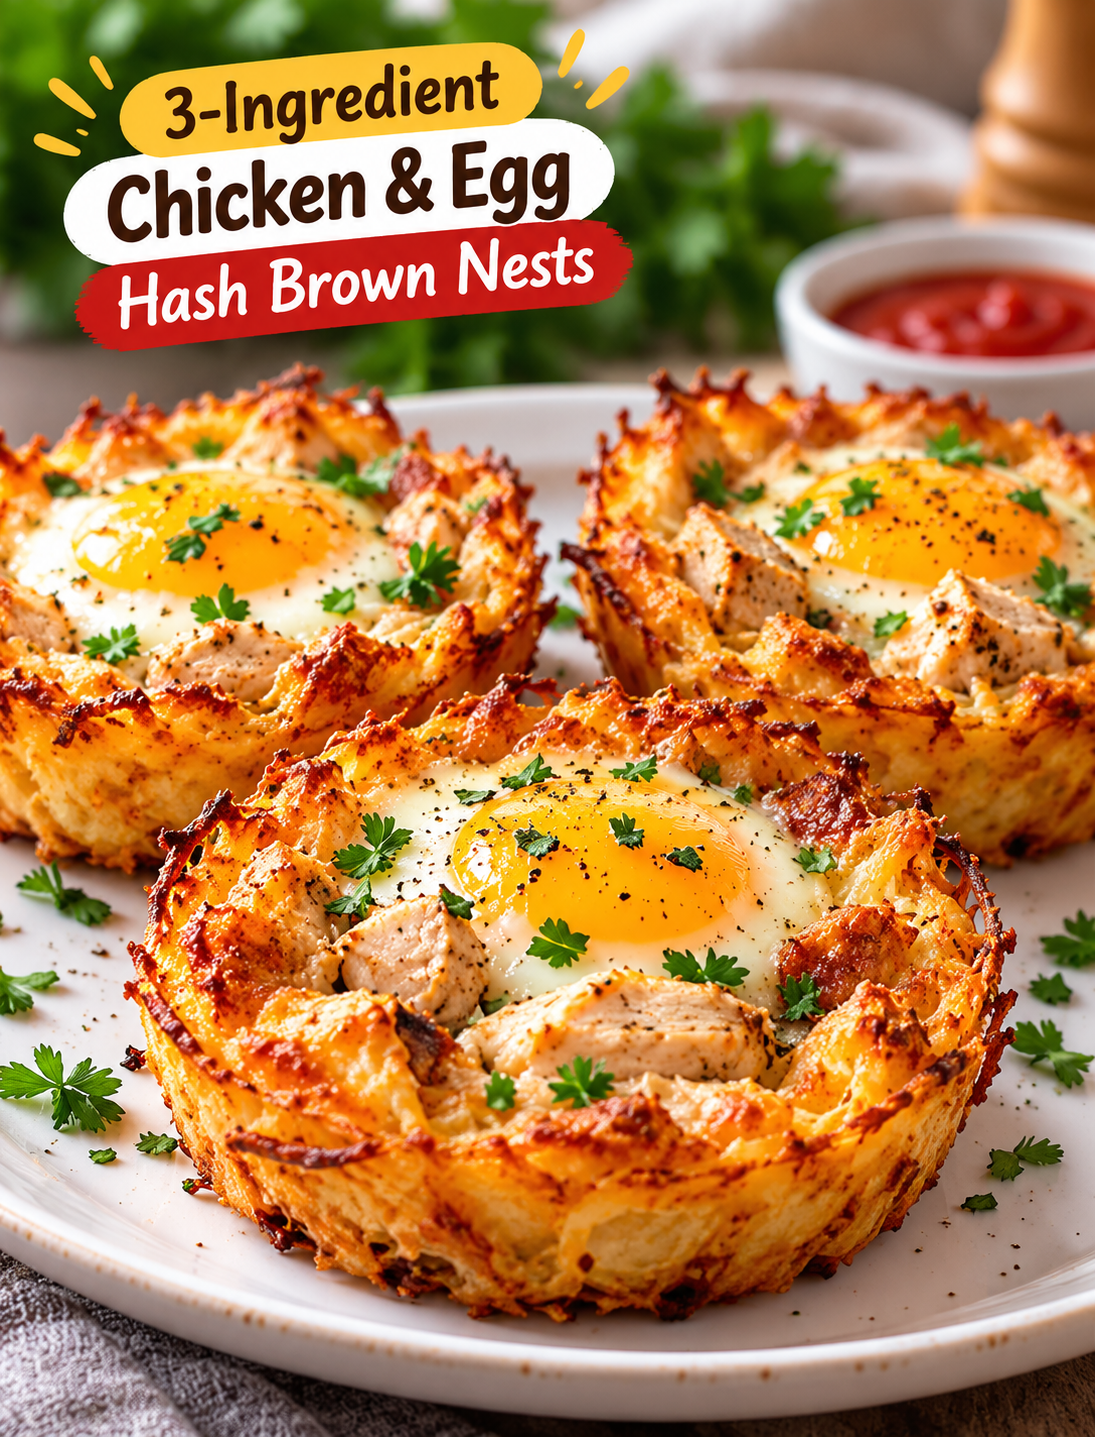
3-Ingredient Crispy Chicken & Egg Hash Brown Nests

Want a breakfast that is crispy on the outside, tender in the middle, and easy to make with just three main ingredients? These 3-Ingredient Crispy Chicken & Egg Hash Brown Nests turn simple ingredients into a satisfying breakfast that looks impressive without requiring much prep time.

Each nest combines golden hash browns, savory cooked chicken, and an egg baked right in the center. The potatoes develop crispy edges, the chicken adds a hearty bite, and the egg brings everything together in one easy serving.

This recipe is perfect for busy weekday mornings, relaxed weekend brunches, or a quick breakfast meal prep idea. You can prepare the potato nests ahead of time and bake them when you are ready to eat.

The best part is that you do not need a long ingredient list or complicated cooking steps. With a muffin tin, a few basic kitchen tools, and three main ingredients, you can make a breakfast your whole family will enjoy.

Why You Will Love These Chicken & Egg Hash Brown Nests

  • Only three main ingredients: Frozen hash browns, cooked chicken, and eggs form the base of this easy recipe.
  • Crispy potato edges: Pressing the shredded potatoes into muffin cups helps create golden, crunchy nests.
  • Protein-rich breakfast: Chicken and eggs provide protein to help make breakfast more satisfying.
  • Easy individual servings: Each nest is portioned separately, making breakfast simple to serve.
  • Great for meal prep: Bake the potato shells ahead and add the eggs when you are ready to finish cooking.
  • Easy to customize: Add black pepper, garlic powder, paprika, or your favorite herbs if you have them on hand.
  • Family-friendly: The mild flavors work well for adults and kids who enjoy eggs, chicken, and crispy potatoes.

Ingredients for 3-Ingredient Crispy Chicken & Egg Hash Brown Nests

You need three main ingredients to make these crispy breakfast nests. Salt, pepper, and cooking spray are optional kitchen basics.

1. Frozen Shredded Hash Browns

Use thawed frozen shredded hash browns for a quick and easy potato base. Removing excess moisture is important because wet potatoes can become soft instead of crispy.

2. Cooked Chicken

Use cooked, shredded or finely chopped chicken breast for a savory filling. Leftover roasted chicken or plain rotisserie chicken works well, provided it has been stored safely.

3. Eggs

Use one egg for each nest. The egg cooks in the center of the potato shell and gives each serving a classic breakfast flavor.

Optional Seasonings

  • Salt, to taste
  • Black pepper, to taste
  • Garlic powder, optional
  • Paprika, optional
  • Cooking spray or a little oil for greasing the muffin tin

These extras are optional and are not counted among the three main ingredients.

Equipment You Will Need

  • A standard 6-cup or 12-cup muffin tin
  • A mixing bowl
  • A clean kitchen towel or paper towels
  • A spoon
  • A fork
  • An oven
  • A food thermometer for checking doneness

A nonstick muffin tin makes it easier to remove the nests without breaking their crispy edges.

How to Make 3-Ingredient Crispy Chicken & Egg Hash Brown Nests

Follow these simple steps to create golden potato nests filled with chicken and baked eggs.

Step 1: Preheat the Oven

Preheat your oven to 400°F (200°C). Lightly grease six muffin cups with cooking spray or a small amount of oil.

Preheating helps the potatoes begin cooking as soon as they enter the oven. Greasing the cups also reduces sticking and helps the nests release more easily.

Step 2: Thaw and Dry the Hash Browns

Place the thawed hash browns in a clean kitchen towel or between layers of paper towels. Press gently to remove as much excess moisture as possible.

Dry potatoes brown more effectively because less water needs to evaporate during cooking. Do not skip this step if you want crispier edges.

Step 3: Prepare the Chicken

Shred or finely chop the cooked chicken into small pieces. Smaller pieces fit better inside the potato nests and make each bite easier to eat.

If you are using leftover chicken, make sure it has been refrigerated properly and reheated or cooked as directed in the recipe. Avoid using chicken that has been left at room temperature for more than two hours.

Step 4: Shape the Potato Nests

Divide the dried hash browns among the six greased muffin cups. Press the potatoes firmly against the bottom and sides of each cup to create a small well in the center.

Keep the potato layer even so the edges cook at a similar rate. Avoid making the bottom too thick because it may stay soft while the top becomes brown.

Step 5: Bake the Potato Shells

Bake the potato nests for 15–20 minutes, or until the edges begin to turn golden and crisp.

Oven temperatures and muffin tins vary, so check the potatoes near the end of this first baking period. If the centers still look very wet, give them a few more minutes before adding the filling.

Step 6: Add the Cooked Chicken

Remove the muffin tin from the oven carefully. Divide the chopped chicken evenly among the potato nests, keeping the center of each nest open for an egg.

Do not pack the chicken too tightly into the cups. Leaving enough space in the center helps the eggs sit securely without spilling over the edges.

Step 7: Crack an Egg into Each Nest

Crack one egg into the center of each potato nest. For smaller muffin cups, you may need to remove a little egg white before adding the egg to prevent overflow.

Season lightly with salt and black pepper if desired. Keep the yolk intact if you prefer a classic sunny-center appearance.

Step 8: Bake Until the Eggs Are Set

Return the muffin tin to the oven and bake for another 10–15 minutes, checking the eggs as they cook.

The exact time depends on the size of your eggs and how firm you like the yolks. For food safety, cook the eggs until the whites and yolks are firm, or use pasteurized eggs if preparing a softer-yolk version.

Step 9: Rest and Remove the Nests

Remove the muffin tin from the oven and let the nests rest for about 3–5 minutes. Carefully loosen the edges with a small silicone spatula or butter knife.

Lift each nest out gently to keep the potato shell intact. Serve while warm for the best contrast between crispy potatoes, savory chicken, and tender egg.

Tips for the Crispiest Hash Brown Nests

  • Remove excess water: Wet hash browns are one of the main reasons potato nests turn soft.
  • Grease the muffin tin: A light coating helps prevent the potato shells from sticking.
  • Press firmly: Compact potatoes hold their shape better after baking.
  • Pre-bake the shells: This gives the potatoes time to develop color before the chicken and eggs are added.
  • Use cooked chicken: Raw chicken will not cook safely in the short egg-baking stage.
  • Leave room for the eggs: Overfilled muffin cups can spill and make removal harder.
  • Avoid overcrowding: Leave space between the muffin cups when using a larger baking pan.
  • Check the centers: The edges may brown before the thickest part of the potato base is crisp.

Easy Variations to Try

Cheesy Chicken Hash Brown Nests

Sprinkle a small amount of shredded cheddar or mozzarella over the chicken before adding the egg. The cheese melts into the filling and adds a creamy, savory flavor.

Spicy Breakfast Nests

Add a pinch of smoked paprika, black pepper, or chili flakes to the hash browns. Serve with hot sauce if you enjoy a little heat.

Garlic Herb Chicken Nests

Season the cooked chicken with garlic powder and dried parsley before adding it to the potato shells. This gives the filling more flavor without adding much prep time.

Turkey or Ham Nests

Replace the cooked chicken with chopped cooked turkey or ham. Check the salt level before seasoning because some prepared meats are already salty.

Vegetable Breakfast Nests

Add a small amount of finely chopped bell pepper or spinach to the chicken. Cook watery vegetables first so they do not release too much moisture into the potato shells.

These additions change the original three-ingredient recipe, but they are useful options when you want more variety.

What to Serve with Chicken & Egg Hash Brown Nests

These breakfast nests are filling enough to serve on their own, but a few simple sides can turn them into a complete brunch.

  • Fresh fruit: Serve with berries, orange slices, or melon for a fresh contrast.
  • Avocado slices: Add creamy avocado and a squeeze of lemon for a simple side.
  • Green salad: A light salad works well for a breakfast-for-lunch meal.
  • Whole-grain toast: Serve with toast when you want a more substantial breakfast.
  • Salsa: Add a spoonful of mild or spicy salsa for extra flavor.
  • Greek yogurt: Plain Greek yogurt with fruit makes an easy side for a breakfast spread.

For a family brunch, arrange the nests on a platter and serve the sides separately so everyone can build their own plate.

Make-Ahead and Meal Prep Instructions

You can prepare the potato shells ahead of time to save time on busy mornings.

  1. Bake the hash brown shells until lightly golden.
  2. Let them cool, then refrigerate them in a covered container.
  3. Keep the cooked chicken refrigerated in a separate container.
  4. When ready to serve, add the chicken and eggs to the shells.
  5. Bake until the potato edges are crisp and the eggs are fully cooked.

For the best texture, assemble and bake the eggs shortly before serving. Fully assembled nests can also be reheated, but the egg texture may become firmer and the potatoes may lose some crispness.

How to Store and Reheat Leftovers

Allow leftover nests to cool promptly, then place them in an airtight container in the refrigerator within two hours of cooking. Store them at 40°F (4°C) or below and eat within three to four days.

To reheat, place the nests in an oven or air fryer at approximately 350°F (175°C) until heated through. Check the center with a food thermometer and make sure leftovers reach 165°F (74°C).

Microwaving is faster, but it usually makes the potato edges softer. Avoid leaving cooked eggs and chicken at room temperature for extended periods.

For longer storage, freeze the fully cooked and cooled nests in a freezer-safe container. Thaw them in the refrigerator before reheating, and use a thermometer to confirm that they are heated safely throughout.

Common Mistakes to Avoid

  • Using wet potatoes: Excess moisture prevents proper browning.
  • Skipping the first bake: Adding eggs too early can leave the potato base undercooked.
  • Using too much filling: Overfilled nests are harder to remove from the muffin tin.
  • Adding raw chicken: The chicken should already be fully cooked before assembly.
  • Overbaking the eggs: Long baking times can make eggs rubbery and dry.
  • Removing nests too quickly: A short resting period helps the potato shells hold together.
  • Assuming every oven cooks the same: Check the texture and doneness rather than relying on time alone.

Frequently Asked Questions

1. Can I use fresh potatoes instead of frozen hash browns?

Yes. Peel and shred fresh potatoes, then squeeze out as much moisture as possible before shaping the nests.

2. Can I make these chicken and egg nests without a muffin tin?

Yes. Shape small potato nests on a greased baking sheet, leaving enough space between them to hold the filling.

3. Can I use rotisserie chicken?

Yes. Remove the skin and bones, then shred the cooked chicken into small pieces before adding it to the nests.

4. How do I make hash brown nests extra crispy?

Dry the potatoes well, press them firmly into the muffin cups, and pre-bake the shells until their edges turn golden.

5. Can I prepare these nests the night before?

Yes. Pre-bake the potato shells and refrigerate them with the cooked chicken separately, then add the eggs and finish baking in the morning.

6. Can I freeze cooked hash brown nests?

Yes. Cool them completely, freeze them in a sealed container, and reheat until the centers reach 165°F (74°C).

7. How do I know when the eggs are fully cooked?

The whites and yolks should be firm for the safest preparation. Check the center carefully because cooking times vary by oven and egg size.

8. Are these chicken and egg hash brown nests good for meal prep?

Yes. They provide individual portions of potatoes, chicken, and eggs, and they can be refrigerated and reheated for convenient breakfasts.

Final Thoughts

These 3-Ingredient Crispy Chicken & Egg Hash Brown Nests are a simple way to make breakfast feel special without spending hours in the kitchen. Crispy potato shells, savory cooked chicken, and baked eggs come together in convenient individual portions.

Drying the hash browns, pre-baking the potato shells, and cooking the eggs thoroughly are the most important steps for a successful result. Once you master the basic method, you can try different seasonings, vegetables, and cheeses to suit your taste.

Make a batch for weekend brunch, prepare the potato shells ahead for busy mornings, or serve these nests as part of a hearty breakfast spread. If you try this recipe, share your favorite variation and let us know how your chicken and egg hash brown nests turned out.
 

Air Fryer Stuffed French Toast Fingers

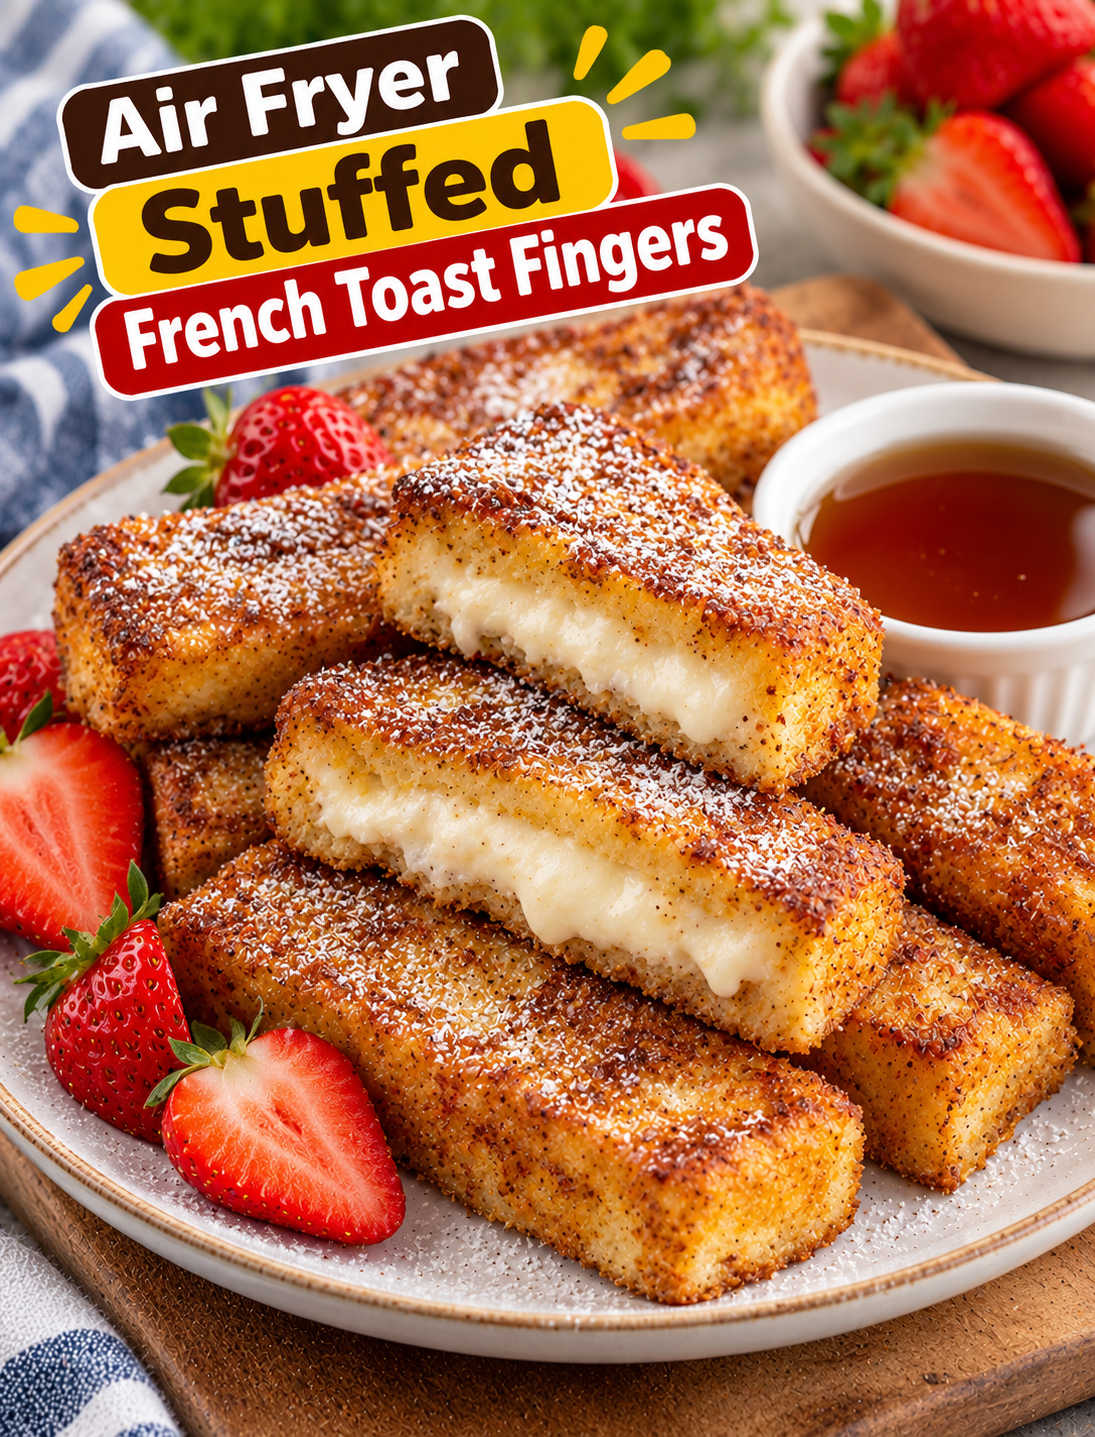
Air Fryer Stuffed French Toast Fingers

Air Fryer Stuffed French Toast Fingers turn ordinary bread into a sweet, creamy breakfast that is easy to prepare and fun to eat. Each finger has a golden, lightly crisp coating with a soft center filled with sweetened cream cheese. The air fryer helps create a delicious French toast texture without needing a skillet full of butter.

This recipe is perfect for busy mornings, weekend brunch, or a family breakfast. The bread is cut into easy-to-hold strips, filled with a smooth cream cheese mixture, dipped in a cinnamon-vanilla egg coating, and air-fried until golden. Serve the finished fingers with maple syrup, fresh berries, or a light dusting of powdered sugar.

You can prepare the filling ahead of time and customize the sweetness to your taste. With a few simple ingredients and easy steps, you can make a breakfast treat that feels special without complicated cooking.

Why You’ll Love This Recipe

  • Creamy filling: Sweetened cream cheese creates a smooth center in every bite.

  • Golden outside: The air fryer gives the bread a lightly crisp coating.

  • Easy to hold: Finger-shaped pieces are convenient for breakfast plates and brunch boards.

  • Simple ingredients: Bread, eggs, milk, cream cheese, cinnamon, and vanilla are easy to find in U.S. grocery stores.

  • Customizable flavor: Add strawberries, blueberries, chocolate chips, or a little lemon zest.

  • Less added fat: Air frying requires only a light coating of butter or oil instead of pan-frying in a larger amount.

  • Family-friendly breakfast: Serve the fingers with fruit and maple syrup for a fun morning meal.

Ingredients You’ll Need

This recipe makes approximately 8–10 French toast fingers, depending on the size of the bread and how you cut each piece.

For the Stuffed Filling

  • 4 ounces cream cheese, softened: Creates a smooth, creamy center.

  • 1 tablespoon powdered sugar: Sweetens the filling without making it grainy.

  • ½ teaspoon vanilla extract: Adds a warm dessert-like flavor.

  • 1 teaspoon lemon zest, optional: Provides a fresh note that balances the cream cheese.

French Toast Fingers

  • 6 slices thick bread: Brioche, Texas toast, or sturdy white bread works well.

  • 2 large eggs: Help the cinnamon coating stick to the bread.

  • ¼ cup milk: Softens the egg mixture and helps coat the bread evenly.

  • 1 teaspoon vanilla extract: Adds sweetness and aroma.

  • 1 teaspoon ground cinnamon: Gives the toast its classic warm flavor.

  • 1 tablespoon granulated sugar, optional: Adds extra sweetness to the coating.

  • 1 tablespoon melted butter or a little neutral oil: Helps the outside brown.

  • Cooking spray suitable for your air fryer, optional: Use only if recommended for your appliance.

Serving

  • Maple syrup: Adds classic French toast sweetness.

  • Fresh strawberries or blueberries: Provide a fruity contrast.

  • Powdered sugar: Creates a simple finishing touch.

  • Greek yogurt, optional: Adds a tangy side that balances the sweet filling.

Ingredient tip: Slightly stale, thick-cut bread is easier to handle than very soft bread. If your bread is fresh and delicate, chill it briefly before cutting and filling it.

How to Make Air Fryer Stuffed French Toast Fingers

Step 1: Prepare the Cream Cheese Filling

  1. Place the softened cream cheese in a small mixing bowl.

  2. Add the powdered sugar and vanilla extract.

  3. Add the optional lemon zest if you want a fresher flavor.

  4. Mix with a spoon or hand mixer until smooth.

  5. Set the filling aside while you prepare the bread.

Softened cream cheese spreads more easily and is less likely to tear the bread. If the filling feels too firm, let it sit at room temperature for a few minutes rather than adding extra liquid.

Step 2: Cut and Prepare the Bread

  1. Lay the bread slices on a clean cutting board.

  2. Trim the crusts if you prefer softer French toast fingers.

  3. Cut each slice into two or three long strips, depending on its size.

  4. If the bread is very thin, use two strips together to create a stronger finger.

  5. Arrange the strips on the board before adding the filling.

Thick bread is useful because it holds the filling without falling apart during dipping. Keep the strips similar in size so they cook at roughly the same rate.

Step 3: Fill the Bread Fingers

  1. Spread a thin layer of cream cheese filling over one side of a bread strip.

  2. Place another strip on top to form a small sandwich if you are using paired strips.

  3. Press the edges gently to help the pieces stick together.

  4. Repeat with the remaining bread and filling.

  5. Wipe away any filling that squeezes out from the sides.

Use enough filling to create a creamy center without overstuffing the bread. Too much filling may leak during cooking and make the coating difficult to crisp.

If you prefer a simpler method, spread the filling down the center of wider bread strips and fold them gently before dipping. Make sure the seams are closed as much as possible.

Step 4: Mix the Egg Coating

  1. Crack the eggs into a shallow bowl.

  2. Add the milk and vanilla extract.

  3. Whisk until the mixture is smooth.

  4. Stir the cinnamon and optional granulated sugar into the egg mixture.

  5. Pour the mixture into a dish wide enough to fit each bread finger.

A shallow dish makes dipping easier and helps coat the bread evenly. Whisk again if the cinnamon gathers on the surface.

Step 5: Coat the Stuffed Fingers

  1. Dip each stuffed bread finger briefly into the egg mixture.

  2. Turn it to coat all sides.

  3. Lift it out and allow the extra mixture to drip back into the bowl.

  4. Place the coated finger on a clean plate or tray.

  5. Repeat with the remaining pieces.

Do not soak the bread for too long because excess liquid can make it soggy and cause the filling to escape. A quick dip on each side is usually enough for thick bread.

Wash your hands and clean surfaces after handling raw egg. Keep the coated bread refrigerated if you are not cooking it right away.

Step 6: Preheat the Air Fryer

  1. Preheat your air fryer to 350°F for about 3 minutes, following the manufacturer’s instructions.

  2. Lightly grease the basket if your appliance requires it.

  3. Arrange the stuffed fingers in a single layer.

  4. Leave a little space between pieces for air to circulate.

  5. Brush the tops lightly with melted butter or use a suitable light oil coating.

Avoid using aerosol cooking sprays that may damage some nonstick coatings. Apply oil with a brush or a mister designed for cooking if needed.

If your basket is small, cook in batches instead of stacking the fingers. Good airflow helps the outside brown more evenly.

Step 7: Air Fry Until Golden

  1. Cook the fingers at 350°F for approximately 6–10 minutes.

  2. Check the underside after about 4–5 minutes.

  3. Turn the fingers carefully with tongs or a spatula.

  4. Continue cooking until both sides are golden and the center is hot.

  5. Add another minute or two if needed, checking often to prevent over-browning.

Cooking time varies with bread thickness, filling amount, and air fryer model. The egg coating should be fully cooked, not wet or runny. If the bread browns too quickly, reduce the temperature slightly and continue cooking until the center is heated.

Step 8: Add Toppings and Serve

  1. Transfer the cooked fingers to a serving plate.

  2. Let them rest for about 1–2 minutes so the filling settles.

  3. Dust lightly with powdered sugar if desired.

  4. Add fresh berries on the side.

  5. Serve with maple syrup for dipping.

For a brunch platter, arrange the fingers around small bowls of syrup and fruit. Serve them warm for the best contrast between the golden bread and creamy center.

Tips for the Best Results

  • Choose thick bread: Sturdy slices hold the filling and egg coating better than thin bread.

  • Soften the cream cheese: A smooth filling spreads without tearing the bread.

  • Avoid overfilling: Too much cream cheese can leak during air frying.

  • Dip quickly: Excess egg mixture can make the bread soggy.

  • Leave space in the basket: Air circulation helps the fingers brown evenly.

  • Turn halfway through: This helps both sides develop a golden coating.

  • Check the center: The egg coating must be fully cooked before serving.

  • Serve immediately: The outside is crispest just after cooking.

Variations and Substitutions

Strawberry Cream Cheese Filling

Mix a small amount of finely chopped fresh strawberries into the cream cheese filling. Pat the berries dry first to reduce excess moisture and prevent the filling from becoming watery.

Cinnamon Sugar French Toast

For a sweeter finish, mix one tablespoon of sugar with half a teaspoon of cinnamon. Sprinkle the mixture lightly over the cooked fingers while they are still warm.

Chocolate Chip Filling

Fold a tablespoon of mini chocolate chips into the cream cheese mixture. The chocolate softens during cooking and adds a dessert-style flavor.

Peanut Butter and Cream Cheese

Mix one tablespoon of smooth peanut butter into the filling for a nutty flavor. Use a small amount so the filling remains easy to spread.

Dairy-Free Version

Use dairy-free cream cheese, an unsweetened plant-based milk, and a suitable dairy-free butter alternative. Choose bread that does not contain dairy if you need the entire recipe to be dairy-free.

Whole-Wheat Bread

Use thick whole-wheat bread for a heartier texture and nutty flavor. Cut it into sturdy strips and avoid soaking it for too long.

What to Serve With Stuffed French Toast Fingers

Pair these sweet breakfast bites with fresh or lightly savory sides.

  • Fresh berries: Strawberries, raspberries, and blueberries add freshness.

  • Banana slices: Bananas pair well with cinnamon and vanilla.

  • Greek yogurt: Plain or lightly sweetened yogurt balances the creamy filling.

  • Scrambled eggs: A savory side creates a more balanced breakfast.

  • Turkey sausage: Adds a savory protein option for a larger brunch.

  • Maple syrup: Provides a classic dipping sauce.

  • Fresh fruit salad: A mix of melon, grapes, and berries makes the plate colorful.

For a quick breakfast, serve a few fingers with fruit and yogurt. For a weekend brunch, add scrambled eggs and turkey sausage to create a more complete spread.

Storage and Reheating

Stuffed French toast fingers are best served fresh, but leftovers can be stored safely.

  • Refrigeration: Place cooled leftovers in an airtight container and refrigerate within two hours.

  • Storage time: Use refrigerated leftovers within 3–4 days.

  • Air fryer reheating: Reheat at 325°F for about 3–5 minutes, checking that the center is hot.

  • Oven reheating: Warm on a baking sheet at 325°F until heated through.

  • Freezing: Freeze cooked, cooled fingers in a single layer before transferring them to a freezer-safe container.

  • Thawing: Thaw in the refrigerator before reheating, or reheat from frozen with extra time and frequent checks.

Avoid leaving the egg-coated bread at room temperature for more than two hours, or one hour when temperatures exceed 90°F. Refrigerate promptly to keep leftovers safe.

Frequently Asked Questions

1. Can I make stuffed French toast fingers without an air fryer?

Yes. Bake them on a lined baking sheet at 375°F, turning once, until the coating is cooked and the outside is golden.

2. Which bread works best for this recipe?

Brioche, Texas toast, and thick white bread work well because they hold the filling and stay sturdy when dipped.

3. How do I stop the cream cheese filling from leaking?

Use a thin layer of filling, press the bread edges gently, and avoid soaking the stuffed fingers in the egg mixture.

4. Can I prepare the fingers ahead of time?

You can prepare the cream cheese filling in advance and refrigerate it, but assemble and coat the bread close to cooking time for better texture.

5. Can I use flavored cream cheese?

Yes. Plain, strawberry, or honey cream cheese can work, but reduce or omit the added sugar if the filling is already sweet.

6. How do I know when the French toast fingers are done?

The outside should be golden, and the egg coating should be fully cooked with no wet mixture remaining.

7. Can I freeze stuffed French toast fingers?

Yes. Freeze cooked and cooled fingers in a single layer, then store them in a freezer-safe container for convenient reheating.

8. What can I use instead of maple syrup?

Serve them with honey, fruit puree, strawberry sauce, or a light dusting of powdered sugar.

Final Thoughts

Air Fryer Stuffed French Toast Fingers offer a fun way to enjoy a creamy, cinnamon-scented breakfast with a golden exterior. The simple cream cheese filling and easy air-fryer method make them suitable for weekday mornings, family brunch, or a sweet weekend treat.

Choose sturdy bread, keep the filling layer thin, and avoid soaking the strips for too long. Serve the fingers warm with fresh berries and maple syrup, or customize them with chocolate chips, peanut butter, or your favorite fruit.

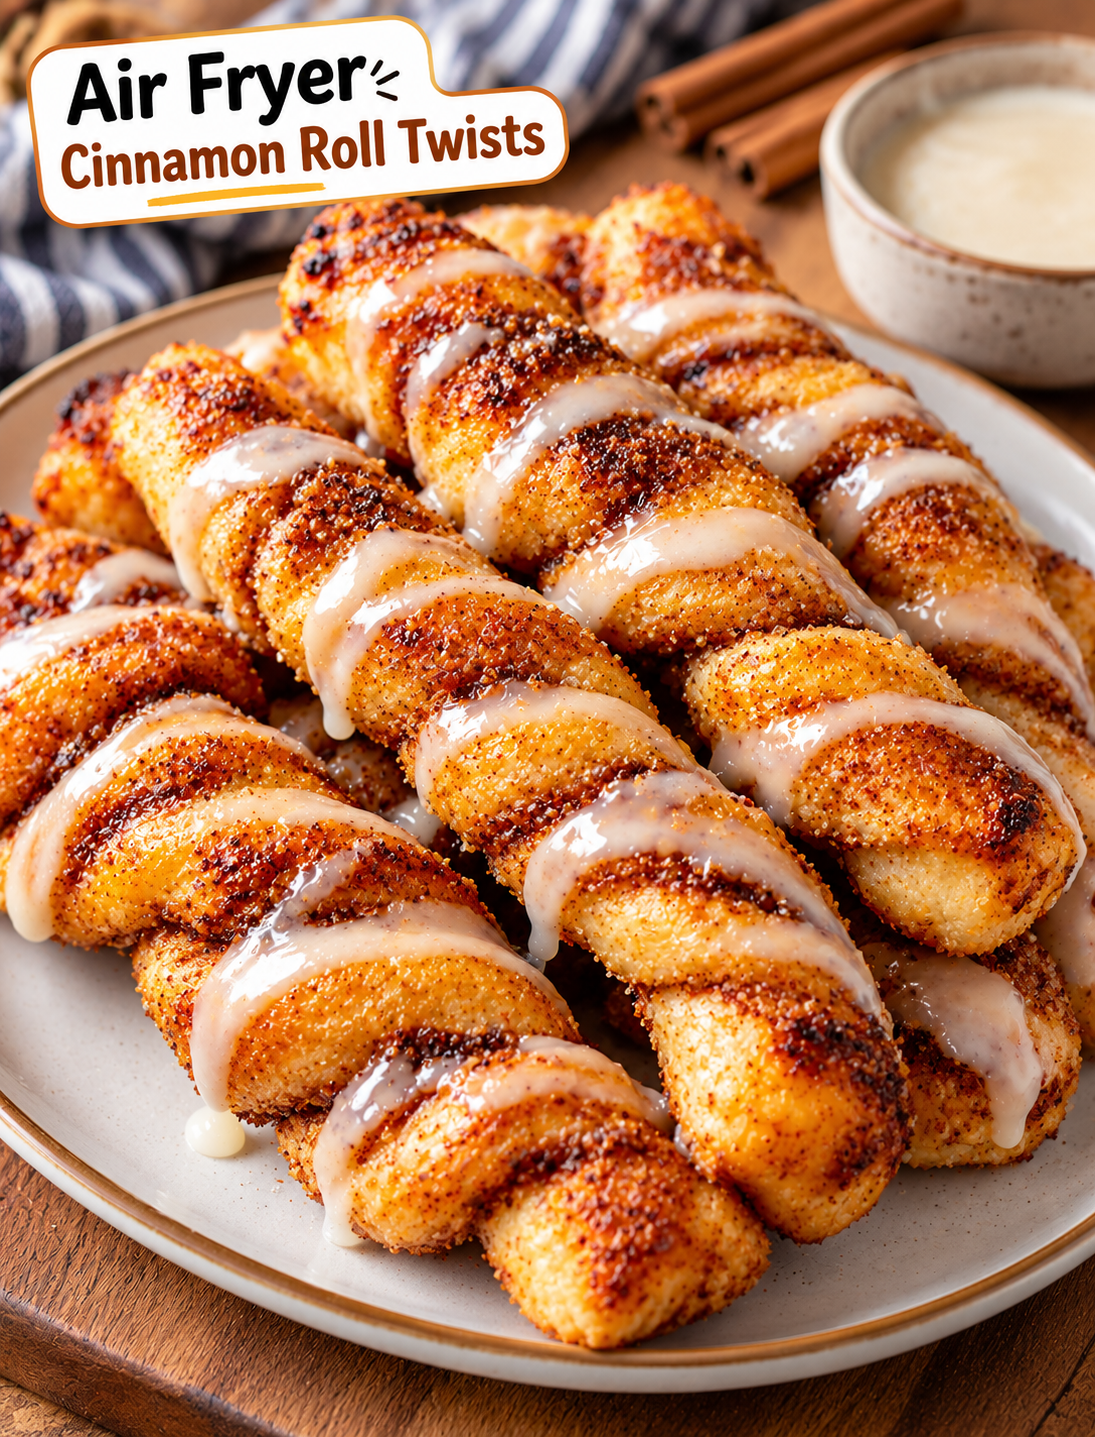
Air Fryer Crispy Cinnamon Roll Twists

Air Fryer Crispy Cinnamon Roll Twists

Want a sweet breakfast treat with crisp edges, a soft center, and warm cinnamon sugar in every bite? These Air Fryer Crispy Cinnamon Roll Twists are an easy way to turn refrigerated cinnamon roll dough into a fun, bakery-style snack at home. They cook quickly in the air fryer and need only a few simple ingredients.

Each twist has a golden outside, a tender middle, and a sweet cinnamon flavor. A drizzle of vanilla icing adds the classic cinnamon roll finish without making the recipe complicated. Serve them warm for breakfast, brunch, an afternoon snack, or a quick dessert.

The best part is how easy these cinnamon twists are to prepare. You do not need to make dough from scratch, wait for yeast to rise, or heat up your oven. With a few minutes of preparation and a short cooking time, you can enjoy a fresh batch whenever a sweet craving strikes.

Why You’ll Love This Recipe

  • Quick and easy: Refrigerated cinnamon roll dough saves time and keeps preparation simple.
  • Crispy edges: The circulating hot air helps the dough turn golden and lightly crisp.
  • Soft centers: The inside stays tender when the twists are cooked for the right amount of time.
  • Simple ingredients: You only need a few pantry staples and a can of cinnamon roll dough.
  • Fun shape: Twisting the dough creates an attractive treat that looks special on a breakfast plate.
  • Easy to customize: Add extra cinnamon sugar, melted butter, or a sweet icing drizzle.
  • Perfect for sharing: Serve these treats at brunch, family breakfasts, holiday mornings, or casual get-togethers.

Ingredients You’ll Need

This recipe uses refrigerated cinnamon roll dough for a convenient shortcut. The extra butter and cinnamon sugar help create a flavorful finish.

  • 1 can refrigerated cinnamon roll dough with icing, about 8 rolls
  • 1 tablespoon melted butter
  • 1 tablespoon granulated sugar
  • 1/2 teaspoon ground cinnamon
  • Cooking spray suitable for your air fryer, if needed

Optional toppings:

  • The icing included with the cinnamon rolls
  • 1 teaspoon powdered sugar for dusting
  • A pinch of extra cinnamon
  • Chopped pecans or walnuts
  • A light drizzle of caramel sauce

Ingredient Notes

Refrigerated cinnamon roll dough: Use the dough and icing from a standard package of refrigerated cinnamon rolls. Different brands may vary in size, sweetness, and cooking time.

Melted butter: A light brush of butter helps the cinnamon sugar stick to the dough and adds a richer flavor.

Ground cinnamon: Cinnamon gives the twists their warm, sweet aroma. Mix it with granulated sugar for an even coating.

Cooking spray: A light coating can help prevent sticking if your air fryer basket requires it. Check your air fryer manual before using aerosol sprays, as some can damage nonstick coatings.

Icing: Use the included icing for a classic finish. If it is too thick to drizzle, stir in a few drops of milk until it reaches your preferred consistency.

Kitchen Tools You’ll Need

  • Air fryer
  • Small mixing bowl
  • Pastry brush or spoon
  • Sharp knife or kitchen scissors
  • Measuring spoons
  • Small spatula or tongs
  • Parchment liner made for air fryers, if suitable for your model

Use an air fryer liner only when it is designed for your appliance and secured beneath the food. Never place loose parchment paper in a preheated air fryer because the fan can lift it toward the heating element.

How to Make Air Fryer Crispy Cinnamon Roll Twists

Follow these simple steps to prepare sweet cinnamon twists with golden edges and soft centers.

Step 1: Prepare the Cinnamon Roll Dough

Open the can of refrigerated cinnamon rolls according to the package directions. Separate the rolls and place them on a clean cutting board.

Unroll each piece of dough carefully into a long strip. If the dough has a thick spiral shape, gently loosen it without pulling it apart. Keep the strips as even as possible so they cook at a similar rate.

If the dough becomes too soft or sticky to handle, place it in the refrigerator for a few minutes before continuing.

Step 2: Cut the Dough Into Strips

Cut each unrolled dough piece lengthwise into two thinner strips, if the dough is wide enough to handle safely. Keep the strips similar in thickness for even cooking.

You can also leave the dough in longer strips if you prefer larger twists. Avoid making the strips too thin because they may dry out or brown too quickly in the air fryer.

Step 3: Twist the Dough

Hold one end of a dough strip and gently turn the other end in the opposite direction to create a spiral shape. Repeat until the strip has several twists along its length.

Do not twist the dough too tightly. Leaving a little space between the turns helps the hot air reach more of the surface.

Repeat with the remaining strips. If a strip begins to unravel, press the ends gently together to help it hold its shape.

Step 4: Add the Butter and Cinnamon Sugar

Brush the dough twists lightly with melted butter. In a small bowl, mix the granulated sugar and ground cinnamon until evenly combined.

Sprinkle the cinnamon sugar over the twists, turning them gently to coat more than one side. Use only enough butter to help the mixture stick without making the dough greasy.

For a stronger cinnamon flavor, add a small extra pinch of cinnamon to the sugar mixture.

Step 5: Preheat the Air Fryer

Preheat the air fryer to 320°F for about 2 to 3 minutes if your model recommends preheating.

Check the instructions for your appliance because air fryer designs and heating speeds can differ. A moderate temperature helps the dough cook through while the outside becomes golden.

Step 6: Arrange the Twists in the Basket

Place the cinnamon twists in a single layer in the air fryer basket. Leave space between each piece so hot air can circulate around the dough.

Cook in batches if needed. Overcrowding the basket can cause uneven browning and softer sides.

If your air fryer tends to stick, use a suitable liner or a light coating of approved cooking spray. Make sure the liner cannot move freely while the air fryer is running.

Step 7: Air-Fry Until Golden

Air-fry the twists at 320°F for approximately 5 to 8 minutes, checking them early. Cooking time depends on the thickness of the dough, the brand, and the model of your air fryer.

Turn the twists carefully after about 3 to 4 minutes if your appliance browns unevenly. Continue cooking until the dough is puffed, golden, and cooked through in the center.

If the outside browns too quickly, lower the temperature slightly and allow the center more time to cook. Always follow any package cooking guidance that applies to your dough, and do not rely on color alone to judge doneness.

Step 8: Warm the Icing

While the twists finish cooking, transfer the included icing to a small bowl. If needed, warm it briefly according to the package directions or stir in a few drops of milk to make it easier to drizzle.

Avoid overheating the icing because it can become too thin. A smooth, slightly thick consistency works best for topping the warm twists.

Step 9: Add the Icing

Carefully remove the cooked twists from the air fryer and place them on a serving plate. Let them cool for about 1 to 2 minutes so the icing does not immediately run off.

Drizzle the icing over the top using a spoon. For extra cinnamon flavor, add a light dusting of cinnamon sugar before serving.

Step 10: Serve Warm

Serve the cinnamon roll twists while they are warm for the best contrast between the crisp outside and soft center.

Arrange them on a platter for brunch, serve them with coffee for breakfast, or add fresh fruit for a simple snack. Offer extra icing on the side for anyone who enjoys a sweeter finish.

Tips for the Best Cinnamon Roll Twists

  • Keep the dough cold: Chilled dough is easier to unroll, cut, and twist.
  • Use even strips: Similar thickness helps the twists finish cooking at the same time.
  • Twist gently: Tight twists may prevent the center from cooking evenly.
  • Leave space in the basket: Air circulation helps the outside brown properly.
  • Check early: Refrigerated dough can cook quickly in a compact air fryer.
  • Use a moderate temperature: Excessive heat can brown the outside before the inside is done.
  • Add icing after cooking: This keeps the icing from melting away during air-frying.
  • Serve soon after cooking: The twists are at their best when freshly made.

What to Serve With Cinnamon Roll Twists

These sweet twists pair well with simple breakfast and brunch favorites.

  • Fresh berries: Strawberries, blueberries, and raspberries add freshness to the sweet dough.
  • Sliced apples or bananas: Fresh fruit creates an easy breakfast plate.
  • Scrambled eggs: Serve eggs alongside the twists for a more filling morning meal.
  • Greek yogurt: Plain or vanilla yogurt adds a creamy contrast.
  • Coffee or tea: A warm drink complements the cinnamon and vanilla flavors.
  • Hot chocolate: Serve the twists with cocoa for a cozy cold-weather treat.
  • Fresh orange juice: Citrus adds a bright flavor to a sweet brunch spread.

Variations and Topping Ideas

Extra cinnamon sugar: Mix another small batch of cinnamon and sugar, then sprinkle it over the twists just before serving.

Cream cheese icing: Blend softened cream cheese with powdered sugar, a little milk, and vanilla extract for a tangy topping.

Caramel cinnamon twists: Drizzle a small amount of caramel sauce over the icing for a richer dessert.

Nutty cinnamon twists: Add finely chopped pecans or walnuts after icing the twists.

Chocolate drizzle: Melt a small amount of chocolate and drizzle it over the cooled icing for a dessert-style finish.

Apple pie flavor: Serve with finely diced cooked apples seasoned with cinnamon. Keep the topping portion small so it does not make the twists soggy.

Less icing: Use only a light drizzle or serve the icing on the side to control the sweetness.

How to Store and Reheat Leftovers

Let leftover twists cool, then place them in an airtight container. Store them at room temperature for up to 2 days, following the dough manufacturer’s storage guidance and taking care with any perishable toppings.

For the best texture, store extra icing separately when possible. Refrigerate cream cheese-based icing and other toppings that require refrigeration.

To reheat, place the twists in the air fryer at 300°F for about 2 to 3 minutes, checking frequently. Add the icing after reheating to keep the topping smooth.

You can also reheat a twist briefly in the microwave, but the outside will be softer rather than crisp. Avoid overheating because the sugar can become very hot.

Freezing is possible, but the texture may change after thawing. For the best results, make a fresh batch when you want a crisp outside and tender center.

Common Mistakes to Avoid

  • Overtwisting the dough: Tight spirals may cook unevenly in the middle.
  • Using too much butter: Excess butter can make the twists greasy and cause sugar to melt off.
  • Overcrowding the basket: Crowded pieces may remain soft on the sides.
  • Cooking at too high a temperature: The outside can brown before the inside finishes cooking.
  • Skipping early checks: Different air fryers can cook the same dough at different speeds.
  • Icing too soon: Letting the twists rest briefly helps the icing stay on top.
  • Using loose parchment: Unsecured parchment can lift toward the heating element and create a fire risk.

Frequently Asked Questions

1. How long do cinnamon roll twists take in the air fryer?

They generally take about 5 to 8 minutes at 320°F, depending on the dough thickness and air fryer model.

2. Can I use canned cinnamon roll dough?

Yes. Refrigerated canned cinnamon roll dough is convenient for making quick twists without preparing dough from scratch.

3. What temperature is best for air fryer cinnamon roll twists?

Start at 320°F and check early to help the dough cook through without browning too quickly.

4. Why are my cinnamon twists doughy inside?

The strips may be too thick or tightly twisted, or they may need more cooking time at a moderate temperature.

5. Can I make cinnamon roll twists without butter?

Yes. The twists can cook without extra butter, although the cinnamon sugar may not stick as well.

6. When should I add the icing?

Add the icing after air-frying and let the twists rest for 1 to 2 minutes before drizzling.

7. Can I prepare cinnamon twists ahead of time?

You can shape the twists shortly before cooking, but freshly air-fried twists usually have the best texture.

8. How do I keep cinnamon roll twists crispy?

Cook them in a single layer, avoid excess butter, and serve them soon after cooking rather than storing them while warm.

Final Thoughts

Air Fryer Crispy Cinnamon Roll Twists are a simple way to make a warm, cinnamon-sugar treat with minimal preparation. Refrigerated dough saves time, while the air fryer creates golden edges and a tender center without heating the whole kitchen.

Shape the dough gently, leave space between the twists, and check them early to avoid overcooking. Finish with vanilla icing and serve warm for an easy breakfast treat, brunch snack, or quick dessert.

Ready to make a batch? Save this recipe for your next cozy breakfast, and tell us in the comments: would you top your cinnamon twists with classic icing, caramel, or extra cinnamon sugar?

Fluffy Blueberry Pancakes with Honey Drizzle

Fluffy Blueberry Pancakes with fresh blueberries and warm honey drizzle

Fluffy Blueberry Pancakes with Honey Drizzle

Blueberry Pancakes are soft, fluffy, and packed with juicy berries in every bite. Finished with a warm honey drizzle, they make a simple but special breakfast that works for busy mornings, weekend brunch, or family gatherings. The batter comes together with basic pantry ingredients, while fresh or frozen blueberries add natural sweetness and color.

These pancakes are designed to rise well without becoming heavy. A combination of baking powder, buttermilk, and a short resting time gives the batter extra lift. The honey drizzle adds sweetness without overpowering the berries, making the pancakes taste balanced, fresh, and comforting.

Prep Time: 15 minutes
Rest Time: 10 minutes
Cook Time: 20 minutes
Total Time: 45 minutes
Servings: 4

Ingredients

For the Pancakes

2 cups all-purpose flour

2 tablespoons granulated sugar

1 tablespoon baking powder

1/2 teaspoon baking soda

1/2 teaspoon salt

2 large eggs

1 3/4 cups buttermilk

1 teaspoon lemon zest, optional

1/4 cup melted unsalted butter

1 teaspoon vanilla extract

Butter or oil, for the skillet

1 1/2 cups fresh or frozen blueberries

For the Honey Drizzle

1/3 cup honey

1 tablespoon unsalted butter

1 teaspoon fresh lemon juice

Pinch of cinnamon, optional

For Serving

Extra blueberries

Greek yogurt or whipped cream

Chopped nuts, optional

Powdered sugar, optional

Why You’ll Love This Recipe

Blueberry Pancakes are easy to make but still feel like a special breakfast. The batter is simple, the cooking method is straightforward, and you do not need any unusual equipment.

The blueberries burst slightly as the pancakes cook, adding pockets of sweet fruit throughout. The warm honey drizzle gives them a glossy finish and a gentle sweetness that works especially well with the berries.

Another reason to love Blueberry Pancakes is how flexible they are. You can use fresh or frozen fruit, adjust the sweetness, add lemon zest, or serve them with yogurt, nuts, or extra fruit.

How to Make Fluffy Blueberry Pancakes

Step 1: Mix the Dry Ingredients

In a large bowl, whisk together the flour, sugar, baking powder, baking soda, and salt.

Mixing the dry ingredients first helps distribute the leavening evenly, which is important for light Blueberry Pancakes.

Make sure there are no large lumps before adding the wet ingredients.

Step 2: Mix the Wet Ingredients

In a separate bowl, whisk the eggs, buttermilk, melted butter, vanilla, and lemon zest if using.

The buttermilk adds tenderness and helps activate the baking soda.

For the best Blueberry Pancakes, let the melted butter cool slightly before adding it so it does not scramble the eggs.

Step 3: Combine the Batter

Pour the wet mixture into the dry ingredients.

Stir gently with a spatula or wooden spoon until just combined.

A few small lumps are fine. Overmixing develops too much gluten and can make the pancakes dense.

Let the batter rest for 10 minutes. This short pause helps Blueberry Pancakes cook up thicker and fluffier.

Step 4: Fold in the Blueberries

Gently fold most of the blueberries into the batter, reserving a few for serving.

If using frozen berries, do not thaw them first. Add them directly to the batter to reduce streaking.

Fold only a few times so the berries stay intact.

Step 5: Heat the Skillet

Place a large nonstick skillet or griddle over medium heat.

Lightly grease the surface with butter or oil.

The pan should be hot enough to cook the pancakes evenly but not so hot that the outside browns before the center is done.

Step 6: Cook the Pancakes

Pour about 1/4 cup of batter onto the skillet for each pancake.

Cook until bubbles appear on the surface and the edges look slightly set, usually 2 to 3 minutes.

Flip carefully and cook for another 1 to 2 minutes.

Blueberry Pancakes should be golden on both sides and cooked through in the center.

Transfer finished pancakes to a warm plate while you cook the remaining batter.

Step 7: Make the Honey Drizzle

Add the honey and butter to a small saucepan over low heat.

Warm gently until the butter melts.

Stir in lemon juice and cinnamon if using.

Do not boil the honey. A gentle warming keeps the flavor smooth and gives the sauce a pourable texture.

Step 8: Serve

Stack the warm pancakes on plates.

Drizzle generously with the warm honey mixture.

Top Blueberry Pancakes with extra berries, yogurt, nuts, or a light dusting of powdered sugar if desired.

Serve immediately for the best texture.

Serving Suggestions

Blueberry Pancakes are delicious on their own, but a few simple sides can turn them into a complete breakfast.

Serve them with scrambled eggs, Greek yogurt, turkey sausage, or fresh fruit for a balanced meal.

For brunch, add a fruit salad, coffee, tea, or a smoothie.

You can also serve Blueberry Pancakes with almond butter, peanut butter, or a spoonful of ricotta for extra richness.

Recipe Tips

Do not overmix the batter. Stir only until the flour disappears.

Let the batter rest before cooking for better lift.

Use medium heat so the pancakes cook evenly.

Fresh blueberries give the cleanest appearance, but frozen berries work well too.

If using frozen fruit, add it straight from the freezer.

Keep cooked Blueberry Pancakes warm in a low oven while finishing the rest of the batch.

Grease the skillet lightly between batches if needed.

Use a measuring cup or scoop for evenly sized pancakes.

Easy Variations

For lemon flavor, add extra lemon zest to the batter and a little more lemon juice to the honey drizzle.

For extra protein, replace a small portion of the flour with protein powder and serve with Greek yogurt.

You can make Blueberry Pancakes with whole wheat flour by replacing up to half of the all-purpose flour.

For added texture, stir in chopped walnuts, pecans, or sliced almonds.

A chocolate version can include a small handful of mini chocolate chips.

For a mixed-berry variation, replace some of the blueberries with raspberries or chopped strawberries.

For another delicious pancake idea, try our Sugar-Free Chocolate Chip Pancakes.

Make-Ahead Instructions

The dry ingredients can be mixed the night before and stored in a covered bowl.

The wet ingredients can also be measured separately and refrigerated.

For the best texture, combine the wet and dry mixtures shortly before cooking.

Cooked Blueberry Pancakes can also be prepared ahead and reheated for quick breakfasts during the week.

Storage and Reheating

Store leftover Blueberry Pancakes in an airtight container in the refrigerator for up to 3 days.

Place parchment paper between layers if you want to prevent sticking.

Reheat them in a toaster, skillet, or microwave.

For a slightly crisp edge, the toaster or skillet works best.

The pancakes can also be frozen for up to 2 months. Freeze them in a single layer first, then transfer to a freezer-safe bag.

Nutrition Information

Approximate nutrition per serving:

Calories: 430
Protein: 10 g
Carbohydrates: 67 g
Fat: 14 g
Saturated Fat: 7 g
Fiber: 4 g
Sugar: 27 g
Sodium: 560 mg

Nutrition values are estimates and may vary depending on the buttermilk, butter, honey, and serving size.

Frequently Asked Questions

Can I use frozen blueberries?

Yes. Frozen blueberries work very well. Add them directly to the batter without thawing.

Why are my pancakes flat?

Flat Blueberry Pancakes are usually caused by old baking powder, overmixed batter, or a pan that is not hot enough.

Can I use regular milk instead of buttermilk?

Yes. You can use regular milk, but buttermilk gives a softer texture. To make a quick substitute, add 1 tablespoon of lemon juice or vinegar to 1 3/4 cups milk and let it sit for 5 minutes.

Can I make the batter ahead?

It is better to cook the batter soon after mixing because the leavening starts working right away.

How do I stop the blueberries from sinking?

Toss the berries lightly with a teaspoon of flour before folding them into the batter.

Can I reduce the sugar?

Yes. The batter contains only a small amount of sugar, and the honey drizzle provides most of the sweetness.

Can I make these dairy-free?

Yes. Use plant-based milk mixed with a little lemon juice and replace the butter with a neutral oil or dairy-free butter.

Final Thoughts

Fluffy Blueberry Pancakes with Honey Drizzle are an easy breakfast that combines soft, tender pancakes with juicy fruit and a warm, lightly sweet topping.

Blueberry Pancakes work well for everyday mornings, weekend brunch, holidays, or meal prep. They use simple ingredients, can be customized in several ways, and pair easily with yogurt, eggs, fruit, or coffee.

Whether you serve Blueberry Pancakes with a generous honey drizzle or keep the toppings simple, the fluffy texture and bright berry flavor make this a dependable breakfast recipe worth making again.

For a savory side dish to serve later in the day, you may also like our Creamy Cajun Corn with Parmesan.

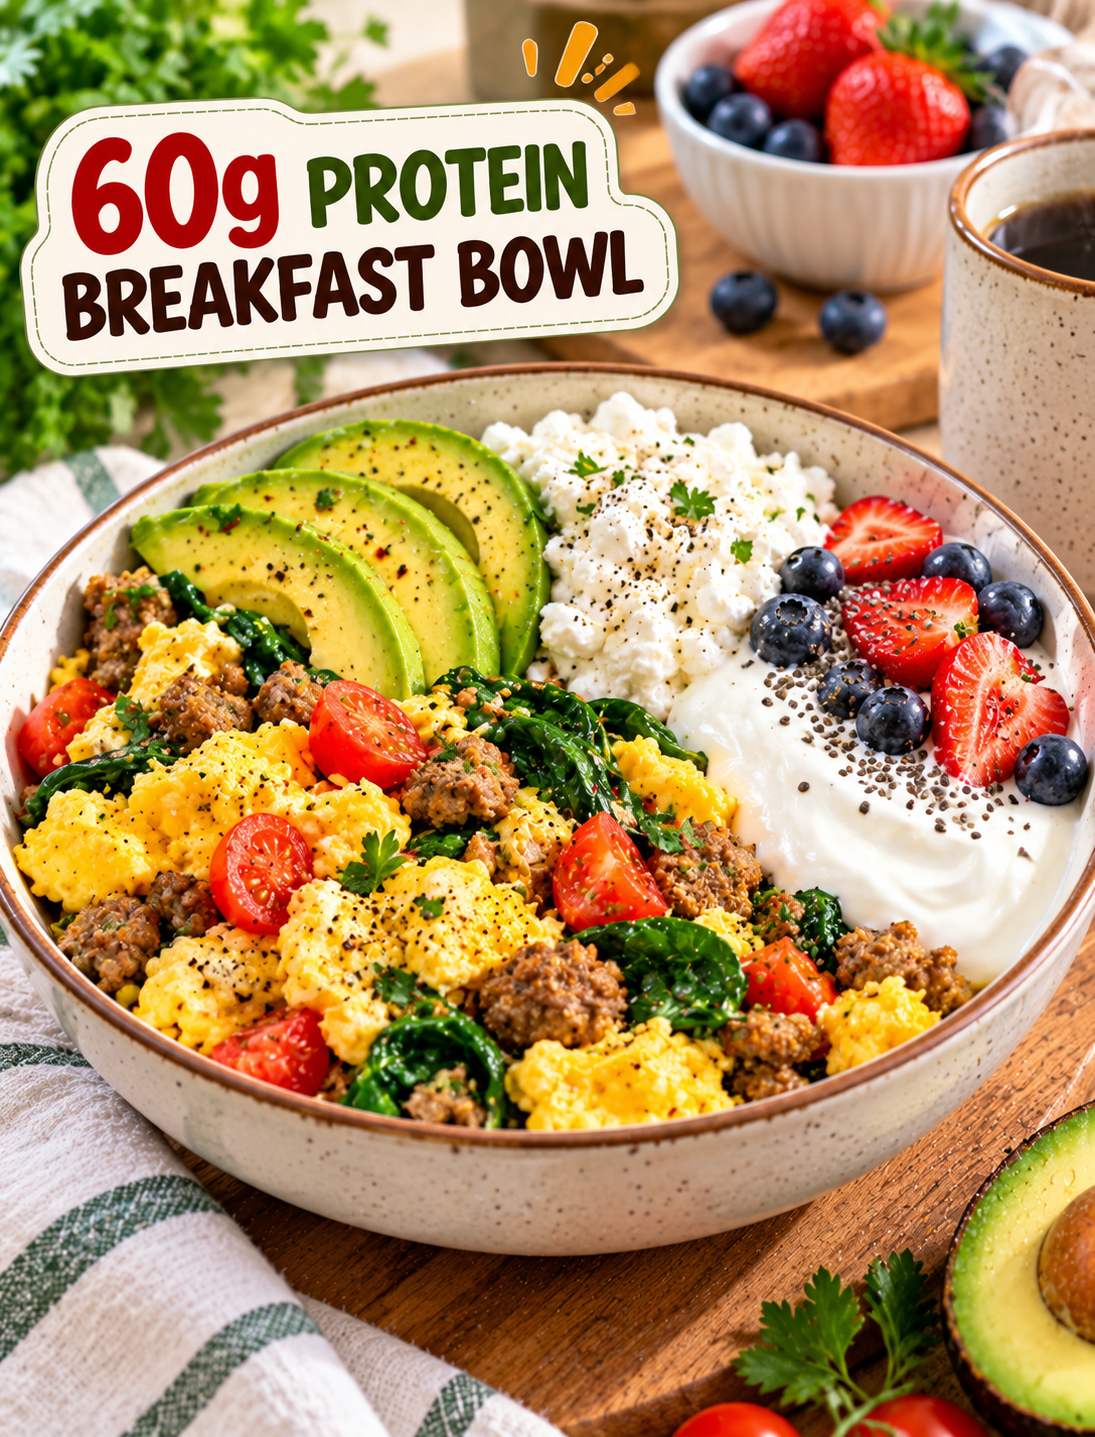
Tired on Monday Morning? Try This 60g-Protein Breakfast Bowl

60g-protein breakfast bowl with eggs, cottage cheese, Greek yogurt, turkey sausage, spinach, tomatoes, and avocado

Tired on Monday Morning? Try This 60g-Protein Breakfast: High-Protein Egg, Cottage Cheese & Turkey Breakfast Bowl

Feeling tired on Monday morning can make it hard to get into the day. A balanced breakfast can give you a practical start, especially when it includes protein, vegetables, and healthy fats.

This High-Protein Egg, Cottage Cheese & Turkey Breakfast Bowl combines eggs, cottage cheese, plain Greek yogurt, lean turkey sausage, spinach, tomatoes, and avocado. Depending on the brands and portions you use, the bowl provides about 60g of protein.

The recipe is designed for busy mornings. It takes about 5 minutes to prepare and 7–8 minutes to cook, making it a useful option for a weekday breakfast.

Why a High-Protein Breakfast Can Be Useful After 50

Protein is important for maintaining muscle, supporting normal body functions, and helping you stay satisfied after meals. Maintaining muscle becomes especially important with age because muscle mass and strength can gradually decline.

A protein-rich breakfast also gives you an easy way to spread protein across the day instead of trying to eat most of it at dinner.

This breakfast also includes vegetables and avocado, which add fiber, vitamins, minerals, and healthy fats.

However, protein is not a guaranteed fix for morning fatigue. Feeling tired can be related to poor sleep, stress, dehydration, medication effects, anemia, thyroid problems, or other health issues. Persistent or unexplained fatigue should be discussed with a healthcare professional.

Ingredients for the 60g-Protein Breakfast Bowl

The following amounts make one serving.

  • 2 large eggs — about 12g protein
  • ½ cup low-fat cottage cheese — about 14g protein
  • 1 cup plain nonfat Greek yogurt — about 23g protein
  • 2 ounces lean turkey breakfast sausage — about 12g protein
  • ½ cup fresh spinach
  • ¼ cup diced tomatoes
  • ¼ avocado
  • 1 teaspoon olive oil
  • ¼ teaspoon garlic powder
  • Black pepper to taste
  • Optional red pepper flakes

The estimated protein total is approximately 61g, but the exact amount depends on the nutrition labels of the products you buy.

For a lower-sodium version, compare turkey sausage labels and choose one with less sodium.

How to Make This High-Protein Breakfast Bowl

Step 1: Prepare the ingredients

Wash the spinach and tomatoes if needed. Dice the tomatoes and slice the avocado.

Measure the cottage cheese and Greek yogurt so the portions are ready before cooking.

Step 2: Cook the turkey sausage

Place a skillet over medium heat and add the turkey sausage.

Cook according to the package directions until it reaches the safe temperature recommended for the product. Break it into small pieces as it cooks.

Avoid relying only on color to judge whether meat is fully cooked.

Step 3: Add the vegetables

Add the spinach and diced tomatoes to the skillet.

Cook for about 1–2 minutes, stirring occasionally, until the spinach wilts and the tomatoes warm through.

Step 4: Add the eggs

Crack the eggs into a small bowl and whisk them with black pepper and garlic powder.

Pour the eggs into the skillet with the turkey and vegetables.

Gently stir until the eggs are fully cooked and no longer runny.

Step 5: Build the bowl

Transfer the cooked egg mixture to a serving bowl.

Add the cottage cheese on one side and sliced avocado on the other side.

Keeping the ingredients separate makes the bowl colorful and gives you different textures in each bite.

Step 6: Add the Greek yogurt

Serve the plain Greek yogurt alongside the savory bowl.

If you prefer, add a small serving of berries to the yogurt for natural sweetness.

This gives you a breakfast that combines protein-rich foods with produce instead of relying on a single ingredient.

How This Breakfast Reaches About 60g of Protein

The protein comes from several ingredients rather than one large portion of meat.

  • Eggs: approximately 12g
  • Cottage cheese: approximately 14g
  • Greek yogurt: approximately 23g
  • Turkey sausage: approximately 12g

That gives an estimated total of 61g of protein.

Because brands differ, always check the Nutrition Facts label on your specific cottage cheese, yogurt, and turkey sausage.

You do not need to reach exactly 60g at every breakfast. Your ideal protein intake depends on your body size, activity level, overall diet, and health needs.

Easy Ways to Adjust the Recipe

This breakfast is flexible, so you can change it based on your preferences.

For less sodium: Choose lower-sodium turkey sausage and cottage cheese.

For more fiber: Add berries to the yogurt or include extra vegetables such as bell peppers.

For a meat-free version: Replace the turkey sausage with another protein-rich food, such as additional eggs or a suitable plant-based protein.

For fewer calories: Use less avocado or choose lower-fat dairy products while keeping the vegetables.

For meal prep: Cook the turkey and vegetables ahead of time and prepare the eggs fresh in the morning.

Best Way to Serve It on a Busy Morning

You do not need to eat every ingredient separately.

Place the warm egg, turkey, spinach, and tomato mixture in the bowl first. Add cottage cheese and avocado beside it, then serve Greek yogurt on the side.

A glass of water can also be a simple addition to your morning routine, especially if you wake up thirsty.

Coffee or tea can fit into a balanced breakfast as well, but avoid using large amounts of added sugar to turn the meal into a dessert-like drink.

What Women 50+ Should Know About Protein

Protein needs are different for every person.

The basic adult protein recommendation is based on body weight, while some older adults may benefit from higher protein intake depending on their health, activity level, and muscle goals.

A 60g breakfast may be appropriate for some people but unnecessary for others.

If you have kidney disease or another condition that affects protein intake, do not substantially increase your protein intake without discussing it with your healthcare professional.

The same applies if you have been given a specific dietary plan or take medications that affect your nutrition needs.

Can This Breakfast Stop Monday Morning Fatigue?

No single breakfast can guarantee that you will feel energetic.

This bowl does provide protein, vegetables, healthy fats, and a substantial meal, which can make it a practical choice when you want a filling breakfast.

But ongoing tiredness should not automatically be blamed on a lack of protein.

If fatigue continues despite adequate sleep and regular meals, consider discussing it with a healthcare professional. Persistent tiredness can have many possible causes that require individual evaluation.

Simple Monday Morning Routine

You can make this breakfast easier by doing a few things the night before.

  • Wash and chop the vegetables.
  • Portion the cottage cheese and Greek yogurt.
  • Slice the avocado shortly before eating to reduce browning.
  • Keep the turkey sausage refrigerated until ready to cook.
  • Put your skillet and utensils where you can reach them quickly.

With the ingredients prepared, the cooking process becomes much easier on a busy morning.

Frequently Asked Questions

Is 60g of protein too much for breakfast?

Not necessarily, but individual protein needs vary by body size, health, activity level, and total daily intake.

How much protein is in two eggs?

Two large eggs provide about 12g of protein, although the exact amount varies slightly by egg size.

Can women over 50 eat a high-protein breakfast?

Yes, many women over 50 can include protein-rich foods at breakfast as part of a balanced diet.

Can I make this breakfast without turkey sausage?

Yes, you can replace turkey sausage with another protein-rich ingredient that fits your dietary preferences.

Is Greek yogurt good for a high-protein breakfast?

Plain Greek yogurt is a convenient protein source, but protein amounts vary significantly between brands, so check the label.

Can I prepare this breakfast ahead of time?

You can prepare the turkey and vegetables ahead of time, but freshly cooked eggs usually have the best texture.

What if I do not like cottage cheese?

Try a different protein-rich dairy food or another suitable protein source that fits your nutritional needs.

Does eating more protein cure tiredness?

No, fatigue has many possible causes, so increasing protein should not be treated as a cure for persistent tiredness.

Final Takeaway

A busy Monday morning does not require a complicated breakfast.

This High-Protein Egg, Cottage Cheese & Turkey Breakfast Bowl combines several protein sources with vegetables and avocado in one simple meal. With approximately 60g of protein, it can be a convenient option for people who want a substantial breakfast while supporting a balanced eating pattern.

The most important point is to look at the whole diet rather than one meal. Choose a variety of protein foods, vegetables, fruits, whole grains, and healthy fats throughout the week.

And if feeling tired every Monday becomes a regular problem—or fatigue continues throughout the week—look beyond breakfast and consider discussing the issue with a healthcare professional.

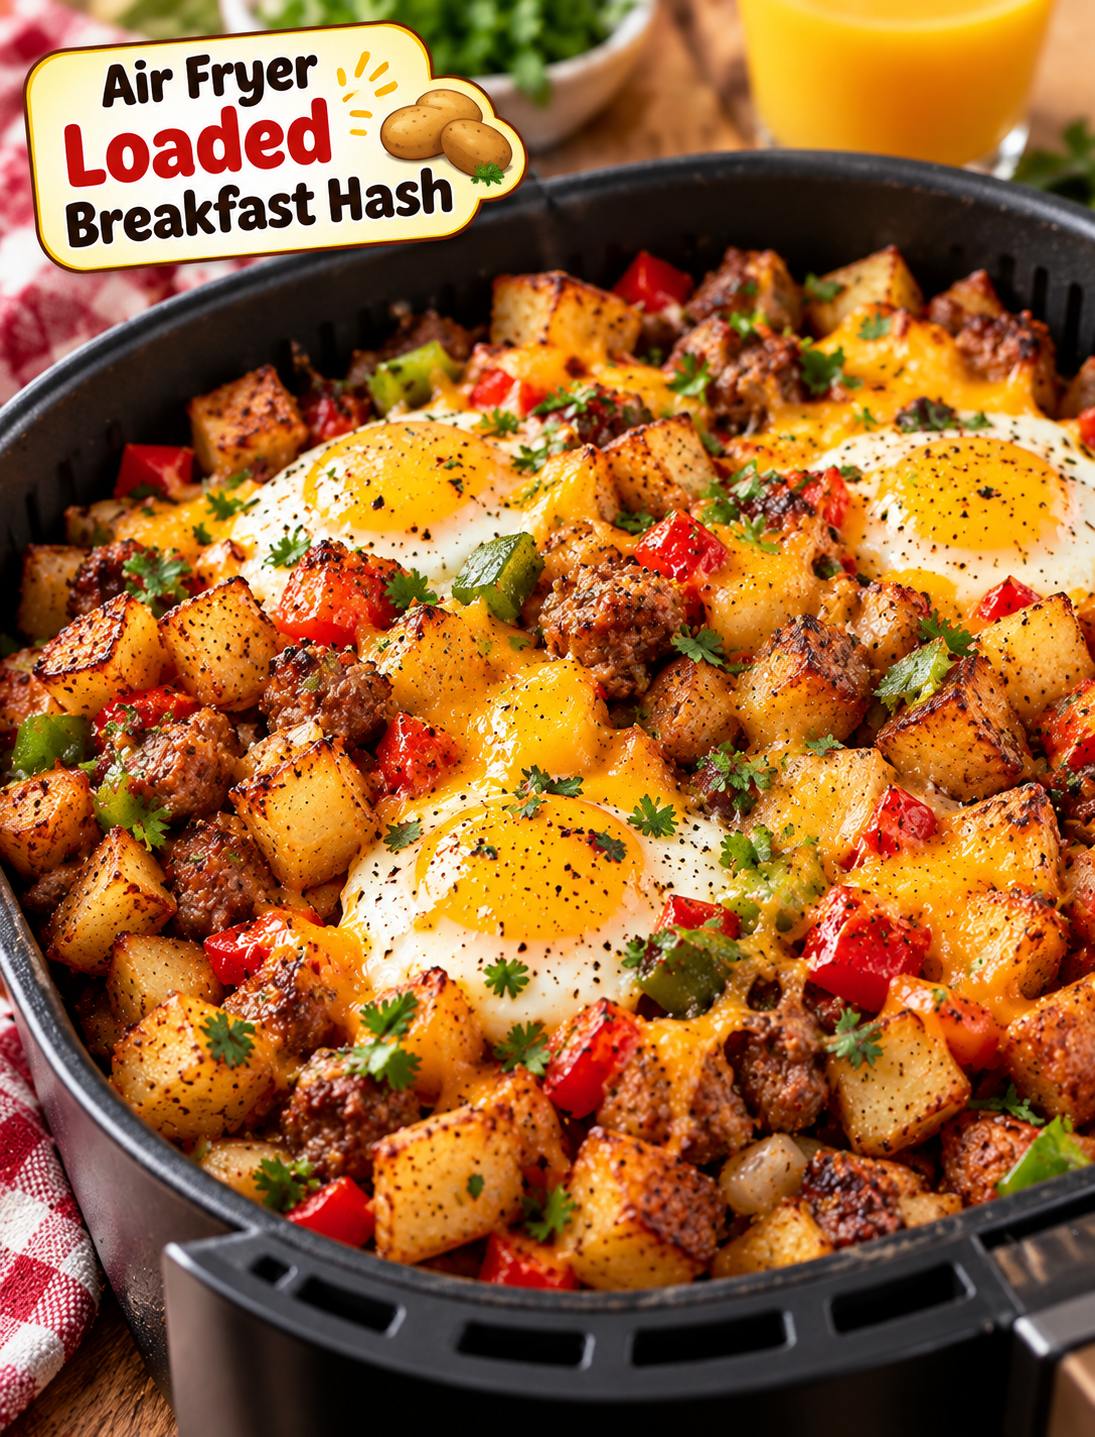
Air Fryer Loaded Breakfast Hash

Air Fryer Loaded Breakfast Hash with crispy potatoes, sausage, peppers, melted cheddar, and eggs.

Air Fryer Loaded Breakfast Hash

Air Fryer Loaded Breakfast Hash is an easy way to turn simple breakfast ingredients into a crispy, hearty morning meal. Golden potatoes, savory sausage, peppers, onions, and melted cheese come together in one flavorful dish.

The air fryer gives the potatoes crisp edges while keeping the inside tender. It also cooks the ingredients quickly without requiring a large skillet or a lot of oil.

This loaded breakfast hash works well for busy weekday mornings, lazy weekend breakfasts, and family brunch. You can also change the ingredients based on what you already have in the refrigerator.

Why You’ll Love This Breakfast Hash

This breakfast recipe is filling, flexible, and easy to prepare.

  • Crispy potatoes: The air fryer creates browned edges without deep frying.
  • Hearty breakfast: Potatoes, sausage, and eggs make this a satisfying meal.
  • One appliance: Most of the cooking happens in the air fryer.
  • Easy cleanup: Fewer pans mean less cleanup after breakfast.
  • Customizable: Add your favorite vegetables, cheese, or breakfast meat.
  • Meal-prep friendly: The cooked hash reheats well for quick breakfasts.
  • Family-friendly: Mild ingredients make it easy to serve to both adults and kids.

Ingredients You’ll Need

For the Breakfast Hash

  • 1½ pounds Yukon Gold or russet potatoes, cut into ½-inch cubes
  • 8 ounces breakfast sausage, crumbled
  • ½ medium yellow onion, diced
  • 1 red bell pepper, diced
  • 1 green bell pepper, diced
  • 1 tablespoon olive oil
  • 1 teaspoon garlic powder
  • ½ teaspoon smoked paprika
  • ½ teaspoon onion powder
  • ½ teaspoon salt
  • ¼ teaspoon black pepper
  • ½ cup shredded cheddar cheese
  • 2 tablespoons chopped fresh parsley

For the Eggs

  • 4 large eggs
  • ¼ teaspoon salt
  • ⅛ teaspoon black pepper

You can use mild, spicy, turkey, or chicken breakfast sausage depending on your preference. Yukon Gold potatoes are especially good because they become crisp outside while staying creamy inside.

How to Make Air Fryer Loaded Breakfast Hash

Step 1: Prepare the Potatoes

Wash the potatoes and cut them into small, evenly sized cubes.

Keeping the pieces close to the same size helps them cook at the same rate.

Pat the potatoes dry with a clean kitchen towel or paper towel. Removing excess moisture helps the outside brown and crisp.

Place the potatoes in a large bowl.

Step 2: Season the Potatoes

Add olive oil, garlic powder, smoked paprika, onion powder, salt, and black pepper.

Toss until the potatoes are evenly coated.

Do not add too much oil. A light coating is enough for the air fryer to create crispy edges.

Step 3: Air Fry the Potatoes

Preheat the air fryer to 400°F (200°C) for about 3 minutes.

Place the seasoned potatoes in the basket.

Cook for 10 minutes, then shake the basket well.

Continue cooking for another 5–7 minutes, or until the potatoes begin to turn golden and tender.

Avoid filling the basket too deeply. A crowded basket can trap steam and prevent the potatoes from becoming crisp.

Step 4: Add the Sausage

Add the crumbled breakfast sausage to the partially cooked potatoes.

Shake or stir carefully to distribute the sausage.

Return the basket to the air fryer and cook at 390°F (200°C) for about 5–7 minutes.

The sausage should be fully cooked and browned before moving to the next step.

If your sausage pieces are large, break them into smaller pieces during cooking so they brown evenly.

Step 5: Add the Vegetables

Add the diced onion, red bell pepper, and green bell pepper.

Toss everything together.

Cook for another 4–5 minutes, until the vegetables soften slightly while keeping some texture.

Adding the vegetables later prevents them from becoming overly soft during the longer potato cooking time.

Step 6: Add the Cheese

Sprinkle shredded cheddar cheese over the hot hash.

Return the basket to the air fryer for 1–2 minutes, just until the cheese melts.

Keep an eye on the cheese because it can brown quickly under the air fryer’s strong heat.

Step 7: Cook the Eggs

There are two easy ways to finish the eggs.

For fried eggs, cook them separately in a small skillet and place them on top of the finished hash.

For air fryer eggs, transfer the hash to an air-fryer-safe dish, make four small spaces in the mixture, and carefully crack an egg into each space.

Cook at 350°F (175°C) for about 4–6 minutes, depending on how firm you like the yolks.

Eggs will continue cooking slightly after they are removed, so take them out when they are close to your preferred doneness.

Step 8: Finish and Serve

Sprinkle fresh parsley over the finished breakfast hash.

Add extra black pepper, hot sauce, or sliced green onions if desired.

Serve immediately while the potatoes are crisp and the cheese is melted.

Tips for Crispy Breakfast Hash

Small details can make a big difference when cooking potatoes in an air fryer.

  • Dry the potatoes well: Moisture creates steam and can prevent browning.
  • Cut evenly: Similar-sized cubes cook more consistently.
  • Avoid overcrowding: Leave enough space for hot air to circulate.
  • Shake the basket: Moving the potatoes helps them brown on multiple sides.
  • Use moderate oil: Too much oil can make the hash greasy instead of crisp.
  • Add vegetables later: Peppers and onions cook faster than potatoes.
  • Use freshly shredded cheese: It melts smoothly and creates a better finish.
  • Serve immediately: The potatoes are crispiest right after cooking.

Best Potatoes for Breakfast Hash

Yukon Gold and russet potatoes are both excellent choices.

Yukon Gold potatoes have a naturally creamy center and crisp nicely in the air fryer.

Russet potatoes contain more starch and can develop very crisp edges when cooked properly.

Red potatoes also work well if you prefer a firmer texture.

Whatever variety you choose, cut the potatoes into small cubes and dry them thoroughly before seasoning.

Easy Ways to Customize It

One of the best things about a loaded breakfast hash is how easy it is to change.

Spicy version, add diced jalapeño, hot breakfast sausage, crushed red pepper, or your favorite hot sauce.

Meat-free option, replace the sausage with mushrooms, black beans, or extra vegetables.

Richer breakfast, add shredded Monterey Jack, pepper jack, or mozzarella cheese.

You can also add cooked bacon, diced ham, leftover chicken, or turkey sausage.

For extra freshness, top the finished hash with avocado, tomatoes, cilantro, or green onions.

How to Serve Loaded Breakfast Hash

Serve the hash as a complete breakfast with eggs on top.

You can also serve it with fresh fruit, toast, avocado slices, or a simple green salad for brunch.

A spoonful of salsa adds acidity and freshness that balances the crispy potatoes and savory sausage.

For a classic American breakfast plate, serve the hash with scrambled or fried eggs and a side of fresh fruit.

How to Store Leftovers

Allow the breakfast hash to cool before placing it in an airtight container.

Refrigerate leftovers for up to 3 days.

For the best texture, reheat the hash in the air fryer at 350°F (175°C) for about 3–5 minutes.

You can also reheat it in a skillet over medium heat.

Avoid reheating it for too long because the potatoes can become dry.

If you plan to store leftovers, keep fried eggs separately when possible. This makes it easier to reheat the potato mixture without overcooking the eggs.

Can You Make Breakfast Hash Ahead of Time?

Yes. You can prepare the potatoes, sausage, and vegetables ahead of time and refrigerate them.

For meal prep, divide the cooked hash into individual containers.

When ready to eat, reheat one portion in the air fryer and add a freshly cooked egg on top.

This method keeps the breakfast convenient while giving you better texture than reheating everything together.

Common Mistakes to Avoid

The biggest mistake is overcrowding the air fryer basket.

When too many ingredients are packed together, the hot air cannot circulate properly. The potatoes may become soft instead of crisp.

Another common mistake is cutting the potatoes too large. Large pieces take longer to cook and may remain firm in the center.

Adding vegetables too early can also make them overly soft or browned before the potatoes are ready.

Finally, avoid adding cheese too early. It can stick to the basket or become overly browned before the rest of the hash is finished.

Frequently Asked Questions

Can I use frozen potatoes for breakfast hash?

Yes. Frozen diced potatoes can be used, but check them frequently because cooking time may vary by brand and size.

Can I make this hash without sausage?

Yes. Replace the sausage with bacon, ham, turkey sausage, black beans, mushrooms, or additional vegetables.

How do I make the potatoes extra crispy?

Dry the potatoes thoroughly, use a light oil coating, avoid overcrowding, and shake the basket during cooking.

Can I add eggs directly to the hash?

Yes. Transfer the hash to an air-fryer-safe dish, create small spaces, crack in the eggs, and cook until the eggs reach your preferred doneness.

What cheese is best for breakfast hash?

Cheddar is a classic choice, while pepper jack, Monterey Jack, and mozzarella also melt well.

Can I make this breakfast hash vegetarian?

Yes. Skip the sausage and add mushrooms, black beans, spinach, zucchini, or extra bell peppers.

How long does leftover breakfast hash last?

Store cooked hash in an airtight container in the refrigerator for up to 3 days.

Can I freeze breakfast hash?

Yes, but the potatoes may lose some crispness after thawing; reheat them in the air fryer to restore some texture.

Final Thoughts

This Air Fryer Loaded Breakfast Hash brings crispy potatoes, savory sausage, colorful vegetables, melted cheese, and eggs together in one satisfying meal.

The recipe is simple enough for a weekday breakfast but hearty enough for a weekend brunch. You can also adjust the ingredients to match your family’s favorite flavors.

For the best results, keep the potatoes dry, avoid overcrowding the basket, and add the faster-cooking ingredients later. Serve the finished hash hot with your favorite egg style, salsa, avocado, or hot sauce.