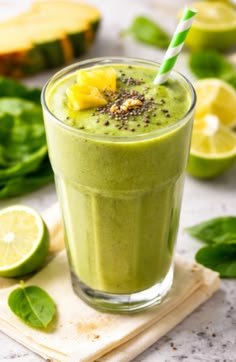
Tropical Spinach Pineapple Smoothie

Tropical Spinach Pineapple Smoothie

This vibrant green smoothie is packed with fresh tropical flavors, creamy texture, and essential nutrients. It combines sweet pineapple, fresh spinach, a squeeze of lime, and a sprinkle of chia seeds for an invigorating drink perfect for breakfast or a mid-day refresh.

Ingredients

  • 1 cup fresh or frozen pineapple chunks

  • 1 cup fresh spinach leaves, packed

  • 1/2 ripe banana (frozen works great for extra creaminess)

  • 1 cup unsweetened almond milk, coconut water, or milk of choice

  • 1 tbsp chia seeds (plus extra for garnish)

  • 1 tbsp fresh lime juice

  • 1/2 cup ice cubes (optional, if using fresh fruit)

Instructions

  1. Layer the Liquids First: Add the almond milk (or liquid of choice) and fresh lime juice into the blender container first. Adding liquid first helps the blades run smoothly without getting jammed.

  2. Add Greens and Base: Add the fresh spinach leaves and banana into the blender.

  3. Add Frozen Fruit & Seeds: Top with the pineapple chunks, chia seeds, and ice (if using).

  4. Blend: Secure the lid and blend on high speed for 60 to 90 seconds until completely smooth, creamy, and bright green.

  5. Serve & Garnish: Pour into a tall glass, top with fresh pineapple chunks and a sprinkle of chia seeds, insert a straw, and enjoy immediately!

Expert Tips

  • Freeze Your Bananas: Using frozen banana slices gives the smoothie a rich, milkshake-like texture without needing extra ice.

  • Blend Greens First (Optional): If your blender has lower power, blend the liquid and spinach together first until smooth, then add the remaining fruit and seeds. This prevents small spinach flecks in your drink.

  • Meal Prep: Pack pineapple, banana, and spinach into individual freezer bags. When ready to make, just dump the bag contents into the blender with liquid, lime juice, and chia seeds!

Frequently Asked Questions (Q&A)

Q: Can I substitute the spinach with another green?

A: Yes! Baby kale or Swiss chard work well, though spinach has the mildest flavor and blends seamlessly with pineapple.

Q: Is this smoothie dairy-free and vegan?

A: Absolutely! Using plant-based milk (like almond, oat, or coconut milk) or coconut water makes this recipe 100% dairy-free and vegan.

Q: How can I add extra protein to this smoothie?

A: You can easily add a scoop of unflavored or vanilla plant-based protein powder, 2 tablespoons of hemp seeds, or 1/4 cup of plain Greek yogurt.

Q: How long can I keep leftovers in the fridge?

A: Smoothies are best enjoyed fresh, but you can store leftovers in an airtight glass jar in the refrigerator for up to 24 hours. Give it a good shake before drinking, as natural separation may occur.

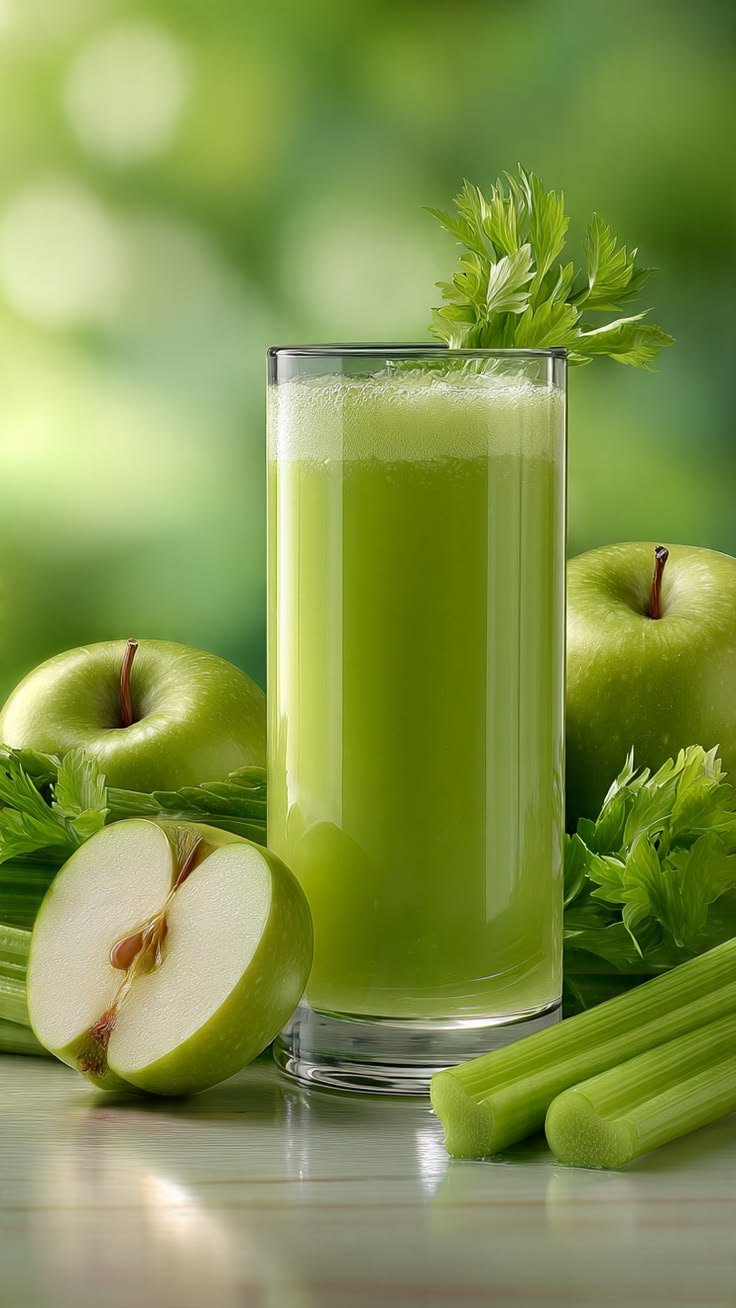
Fresh Green Apple & Celery Juice

Fresh Green Apple & Celery Juice

This vibrant, crisp green juice combines the tart sweetness of Granny Smith apples with the clean, hydrating freshness of raw celery stalks. It makes a wonderfully refreshing morning pick-me-up or mid-afternoon energy booster

Ingredients

  • 2 large Granny Smith green apples, cored and cut into slices

  • 4–5 large fresh celery stalks, thoroughly washed with leaves attached

  • 1/2 lemon, peeled

  • 1/2 inch fresh ginger root (optional, for a subtle spicy kick)

  • 1/2 cup cold water or ice cubes (if using a blender)

Instructions

  1. Prep the Ingredients: Wash the apples and celery stalks thoroughly under cold running water to remove any dirt. Slice the green apples into quarters or smaller wedges that fit easily into your juicer or blender chute.

  2. Juicing Method (Juicer):

    • Turn on your juicer and alternate feeding the celery stalks, green apple slices, ginger, and peeled lemon into the feed chute.

    • Allow the juicer to extract all the liquid into the collector pitcher.

  3. Blending Method (High-Speed Blender):

    • If you do not have a juicer, place the apple slices, chopped celery stalks, ginger, lemon, and $1/2$ cup of cold water into a blender.

    • Blend on high speed for 40 to 60 seconds until completely liquefied and smooth.

    • Pour the mixture through a fine-mesh strainer or nut milk bag over a large bowl or glass, pressing down with a spatula to extract all the fresh juice while leaving behind the heavy pulp.

  4. Serve: Pour the fresh green juice over ice cubes in a tall glass, garnish with a leafy celery stalk, and enjoy immediately!

Pro Tips for Success

  • Chill Your Produce: Store your green apples and celery in the refrigerator beforehand so your juice is cold and ready to drink right after extraction without needing excess ice.

  • Balance the Sweetness: If you prefer a sweeter beverage, add an extra half of an apple or a small dash of pure honey. If you prefer a lighter drink, double the celery amount.

  • Pulp Repurposing: Don’t throw away the leftover vegetable pulp from blending! You can mix it into compost or bake it into savory veggie crackers.

Frequently Asked Questions (Q&A)

Q: How long does fresh green apple and celery juice stay fresh?

A: Freshly made juice is best consumed immediately to enjoy maximum flavor and nutrients. However, you can store it in an airtight glass container or mason jar in the refrigerator for up to 24 hours. Give it a gentle shake before drinking as natural separation will occur.

Q: Can I use red apples instead of green apples?

A: Absolutely! Green apples are preferred for their tangy flavor and vibrant green color, but red varieties like Honeycrisp or Gala work wonderfully if you prefer a sweeter drink.

Q: Do I need to peel the celery or apples before juicing?

A: No peeling is necessary! The skin of green apples contains plenty of natural goodness, and the juicer or strainer will process the celery fibers smoothly. Just be sure to wash all produce thoroughly before preparing.

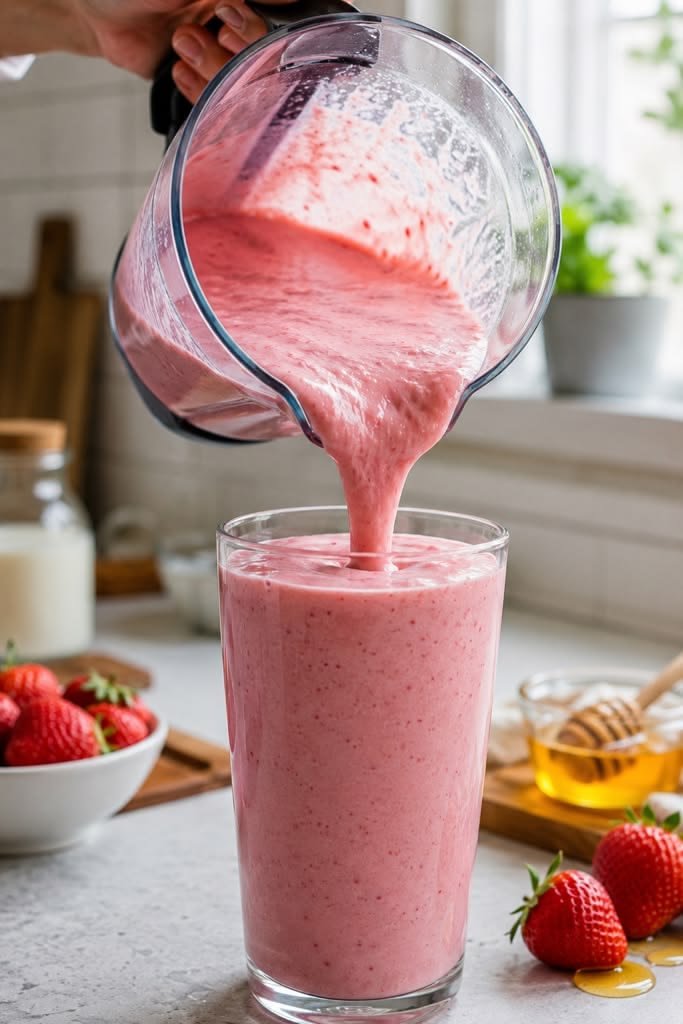
Creamy Strawberry Honey Smoothie

Creamy Strawberry Honey Smoothie

This vibrant strawberry honey smoothie is rich, refreshing, and naturally sweetened. Made with frozen strawberries, plain Greek yogurt, milk, and a drizzle of natural honey, it creates a perfectly thick and silky drink for breakfast or an afternoon pick-me-up.

Ingredients

  • 2 cups frozen strawberries (yields a thick, cold texture)

  • 1/2 cup Greek yogurt (plain or vanilla)

  • 3/4 cup milk (whole milk, almond milk, or oat milk)

  • 1 to 2 tablespoons honey (adjust to desired sweetness)

  • 1/2 teaspoon vanilla extract (optional, for extra aroma)

  • 1 tablespoon chia seeds or flaxseeds (optional, for added fiber)

Instructions

  1. Prep the Blender: Pour the liquid ingredients—milk and Greek yogurt—into the blender pitcher first. Placing liquids at the bottom prevents the blades from jamming and helps create a smooth swirl.

  2. Add the Sweetener & Boosters: Drizzle in the honey, vanilla extract, and optional seeds into the liquid mixture.

  3. Add Frozen Fruit: Layer the frozen strawberries on top of the liquid ingredients.

  4. Blend Until Smooth: Secure the lid tightly and start blending on low speed, then gradually increase to high. Blend for 60 to 90 seconds until the mixture is completely uniform, velvety, and smooth.

  5. Adjust Consistency: If the smoothie feels too thick, splash in an extra tablespoon or two of milk and pulse briefly.

  6. Serve: Pour into a tall chilled glass and serve immediately with a straw or fresh strawberry garnish.

Pro Tips for the Best Smoothie

  • Use Frozen Fruit: Frozen strawberries eliminate the need for extra ice, which can dilute the natural flavor of the fruit.

  • Layering Order: Always put liquid ingredients at the bottom near the blender blades, followed by softer ingredients, and end with frozen items on top.

  • Sweetness Adjustment: Taste the blend before pouring; if your berries are slightly tart, add an extra teaspoon of honey.

Questions & Answers (Q&A)

Q: Can I make this smoothie ahead of time?

A: Fresh smoothies taste best immediately, but you can store it in an airtight jar in the refrigerator for up to 24 hours. Shake well before drinking, as natural separation may occur.

Q: How can I make this smoothie dairy-free or vegan?

A: Replace the milk with almond, oat, or coconut milk, use plant-based yogurt (such as coconut or almond yogurt), and substitute pure maple syrup or agave nectar for the honey.

Q: How can I add extra protein to this smoothie?

A: You can add a scoop of your favorite unflavored or vanilla protein powder, or increase the Greek yogurt portion to 1 full cup.

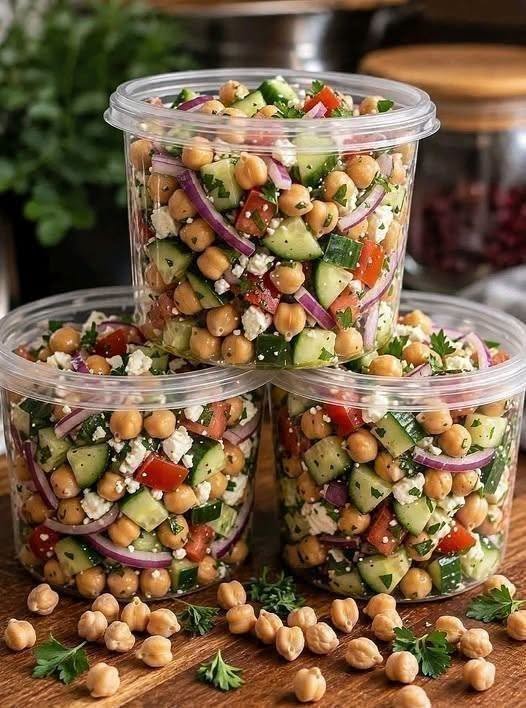
Mediterranean Chickpea Cucumber Salad

Mediterranean Chickpea Cucumber Salad

There are some recipes that just make you feel like you’re eating something fresh and wholesome, and this  Mediterranean Chickpea  Cucumber  Salad is definitely one of them. It’s colorful, crunchy, tangy, and surprisingly filling without feeling heavy.

I first made this salad after a friend recommended adding chickpeas to my usual cucumber and tomato salad. I was a little skeptical at first because I thought it might be too simple, but one bite completely changed my mind. I made a big bowl for my family last weekend, and somehow it disappeared much faster than I expected.

Now, this is one of those recipes I make when I want something easy and refreshing. It’s especially nice on warm weekends, but I also find myself making it on busy days when I don’t want to spend much time cooking. Sometimes a big bowl of crisp vegetables, creamy feta, and chickpeas is exactly what I need.

And honestly, the colors alone make me happy. 🥗

Why You’ll Love This Salad

This Mediterranean Chickpea Cucumber Salad is:

  • Fresh and crunchy

  • Naturally filling from the chickpeas

  • Full of colorful vegetables

  • Easy to prepare

  • Great for lunch or a light dinner

  • Perfect for meal prep

  • Delicious served cold or at room temperature

The combination of juicy tomatoes, crisp cucumber, slightly sharp red onion, salty feta, creamy chickpeas, and fresh herbs is so good together.

The homemade dressing brings everything together with a bright lemony flavor.

Ingredients

For the Salad

  • 2 cans (15 oz each) chickpeas, drained and rinsed

  • 2 medium cucumbers, diced

  • 2 medium tomatoes, diced

  • 1/2 small red onion, thinly sliced

  • 3/4 cup crumbled feta cheese

  • 1/4 cup fresh parsley, chopped

  • 2 tablespoons fresh dill, chopped

  • 1/4 cup Kalamata olives, sliced, optional

For the Dressing

  • 1/4 cup extra-virgin olive oil

  • 2 tablespoons fresh lemon juice

  • 1 tablespoon red wine vinegar

  • 1 small garlic clove, minced

  • 1/2 teaspoon dried oregano

  • 1/4 teaspoon black pepper

  • 1/4 teaspoon salt, or to taste

How to Make Mediterranean Chickpea Cucumber Salad

1. Prepare the chickpeas

Drain and rinse the chickpeas thoroughly under cold water.

I like to give them a quick shake in a colander to remove as much excess water as possible. If they’re very wet, the dressing can become diluted.

2. Chop the vegetables

Dice the cucumber and tomatoes into bite-sized pieces.

Thinly slice the red onion. If you find raw onion a little too strong, soak the slices in cold water for about 5–10 minutes, then drain them. It makes the flavor much milder.

3. Combine everything

Add the chickpeas, cucumber, tomatoes, red onion, feta, parsley, and dill to a large mixing bowl.

If you’re using Kalamata olives, add those too.

Already at this point, the bowl looks beautiful. I always seem to take a few extra seconds just admiring all the colors before adding the dressing.

4. Make the dressing

In a small bowl or jar, whisk together the olive oil, lemon juice, red wine vinegar, garlic, oregano, black pepper, and salt.

Give it a taste and adjust the seasoning if needed.

If you like a more lemony salad, add another squeeze of fresh lemon juice.

5. Toss the salad

Pour the dressing over the salad and gently toss everything together.

Be a little careful with the feta so it doesn’t completely disappear into the salad. I love having little creamy pieces scattered throughout.

6. Let it rest

For the best flavor, let the salad sit in the refrigerator for about 15–30 minutes before serving.

This gives the chickpeas and vegetables time to soak up the dressing.

A Little Tip From My Kitchen

If you’re making this salad ahead of time, I recommend keeping the dressing separate and tossing it through just before serving. This keeps the cucumbers especially crisp.

For an even heartier meal, I sometimes add grilled chicken, cooked quinoa, or a little avocado.

What to Serve With It

This  salad works beautifully as a side dish, but it’s filling enough to enjoy on its own for lunch.

Try serving it with:

  • Grilled chicken

  • Grilled fish

  • Warm pita bread

  • Hummus

  • Falafel

  • Roasted vegetables

  • Mediterranean-style rice

For a simple weekend lunch, I love serving it with warm pita and hummus. It’s one of those meals where everyone can help themselves, and there’s very little cleanup afterward.

Can I Make It Ahead?

Absolutely.

The salad can be prepared several hourspea  Cucumber  Salad has become one of those recipes I make whenever I want something that feels fresh, colorful ahead and kept refrigerated. In fact, I think the flavor gets even better after it has had a little time to sit.

If you’re meal prepping, store it in airtight containers and keep the dressing separate when possible. For the best texture, enjoy it within 3–4 days.

Easy Variations

There are so many ways to make this salad your own.

Add avocado: Creamy avocado makes the salad even more satisfying.

Add olives: Kalamata olives bring a delicious salty, briny flavor.

Add bell pepper: Diced red, yellow, or green bell pepper adds extra crunch.

Make it spicy: Add a pinch of red pepper flakes to the dressing.

Add protein: Grilled chicken or tuna can turn it into a more substantial meal.

Switch the herbs: Fresh mint is also wonderful here.

Nutrition Information

The following is an approximate estimate per serving, assuming the recipe makes 6 servings. Actual values will vary depending on the brands and exact quantities used.

Nutrient Approx. Amount Per Serving
Calories 285 kcal
Protein 9 g
Total Fat 15 g
Saturated Fat 4 g
Carbohydrates 31 g
Fiber 8 g
Sugars 6 g
Cholesterol 8 mg
Sodium 430 mg
Calcium 125 mg
Iron 3 mg
Potassium 430 mg


Final Thoughts

This Mediterranean Chickpea Cucumber Salad has become one of those recipes I make whenever I want something that feels fresh, colorful, and comforting at the same time.

I love that it doesn’t require turning on the oven or spending a long time in the kitchen. Just chop, mix, dress, and let all those flavors come together.

The first time I served it to my family, I expected there to be leftovers for the next day. There weren’t.

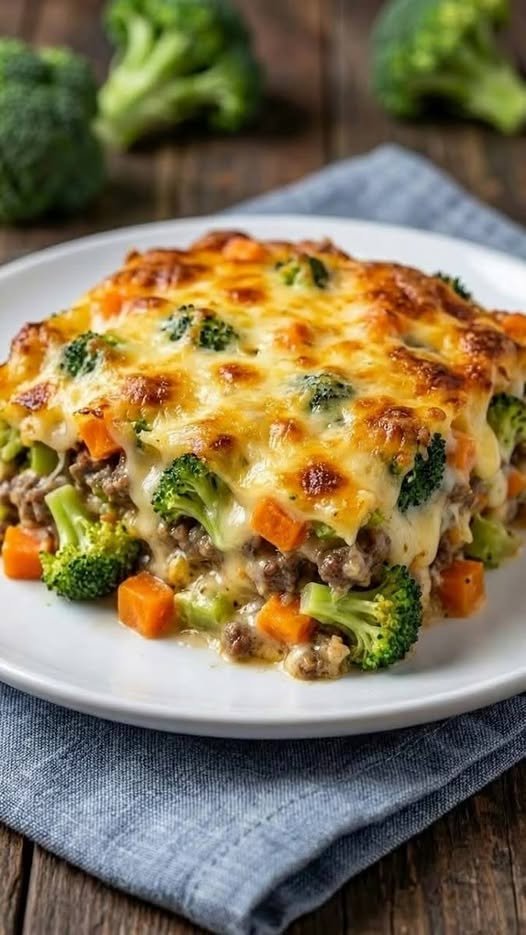
Cheesy Beef, Broccoli, and Sweet Potato Casserole

Cheesy Beef, Broccoli, and Sweet Potato Casserole

Description

Cheesy Beef, Broccoli, and Sweet Potato Casserole is the kind of comforting, wholesome dinner that brings together everything you want in a satisfying family meal. Tender roasted sweet potatoes, savory seasoned ground beef, crisp-tender broccoli, and plenty of melted cheese are layered together and baked until bubbling, golden, and irresistible.

The natural sweetness of roasted sweet potatoes balances beautifully with the rich, savory beef, while broccoli adds freshness, color, texture, and valuable nutrients. A creamy, cheesy sauce ties everything together without making the casserole overly heavy.

This casserole is especially convenient for busy weeknights because most of the preparation can be completed ahead of time. It also makes excellent leftovers, so one baking dish can provide several easy meals throughout the week.

Whether you are looking for a cozy fall dinner, a meal-prep recipe, or an easy way to get the whole family eating more vegetables, this beef, broccoli, and sweet potato casserole is a delicious choice.

Recipe Details

Prep Time: 25 minutes
Cook Time: 40–45 minutes
Total Time: About 1 hour 10 minutes
Servings: 6–8
Course: Main Course
Cuisine: American-inspired comfort food
Difficulty: Easy to Moderate

Ingredients

For the Sweet Potatoes

  • 3 medium sweet potatoes, peeled and cut into ¾-inch cubes
  • 1 tablespoon olive oil
  • ½ teaspoon salt
  • ¼ teaspoon black pepper
  • ½ teaspoon smoked paprika
  • ½ teaspoon garlic powder

For the Beef Mixture

  • 1½ pounds lean ground beef
  • 1 tablespoon olive oil, if needed
  • 1 medium yellow onion, finely diced
  • 3 cloves garlic, minced
  • 1 teaspoon Italian seasoning
  • ½ teaspoon smoked paprika
  • ½ teaspoon onion powder
  • ½ teaspoon salt
  • ¼ teaspoon black pepper
  • 1 tablespoon tomato paste
  • ½ cup beef broth

For the Broccoli

  • 4 cups fresh broccoli florets
  • 1 teaspoon olive oil
  • Pinch of salt

For the Cheesy Sauce

  • 2 tablespoons butter
  • 2 tablespoons all-purpose flour
  • 1½ cups milk
  • ½ teaspoon garlic powder
  • ½ teaspoon mustard powder
  • ¼ teaspoon black pepper
  • 1 cup shredded sharp cheddar cheese
  • ½ cup shredded mozzarella cheese
  • ¼ cup grated Parmesan cheese

For the Topping

  • 1 cup shredded cheddar cheese
  • ½ cup shredded mozzarella cheese
  • 2 tablespoons grated Parmesan
  • 2 tablespoons chopped fresh parsley

Instructions

Step 1: Prepare the Sweet Potatoes

Preheat your oven to 425°F (220°C).

Lightly grease a large 9×13-inch baking dish and set it aside.

Place the cubed sweet potatoes in a large bowl. Add olive oil, salt, black pepper, smoked paprika, and garlic powder. Toss thoroughly until every piece is evenly coated.

Spread the sweet potatoes on a large baking sheet in a single layer. Try not to overcrowd the pan because this can cause them to steam instead of roast.

Roast for approximately 20–25 minutes, stirring once halfway through. The sweet potatoes should become tender around the edges with lightly caramelized surfaces.

They do not need to be completely soft at this point because they will continue cooking inside the casserole.

Remove from the oven and reduce the oven temperature to 375°F (190°C).

Step 2: Cook the Beef

While the sweet potatoes roast, heat a large skillet over medium-high heat.

Add the ground beef and cook for approximately 5–7 minutes, breaking it apart with a wooden spoon as it browns.

If there is a large amount of excess grease, carefully drain it from the skillet.

Add the diced onion and continue cooking for another 3–4 minutes, until the onion becomes soft and translucent.

Add the minced garlic and cook for about 30 seconds, just until fragrant.

Season the beef with Italian seasoning, smoked paprika, onion powder, salt, and black pepper.

Stir in the tomato paste and cook for about 1 minute. The tomato paste adds savory depth and helps give the beef mixture a richer flavor.

Pour in the beef broth and stir well, scraping up any browned bits from the bottom of the pan.

Allow the mixture to simmer for 2–3 minutes, until the broth has reduced slightly.

Remove the skillet from the heat.

Step 3: Prepare the Broccoli

Bring a medium saucepan of water to a boil.

Add the broccoli florets and blanch for approximately 2 minutes.

Drain immediately and rinse briefly under cold water.

This quick blanching process keeps the broccoli bright green while giving it just enough tenderness to finish perfectly in the casserole.

Pat the broccoli dry with a clean kitchen towel or paper towels.

You can also skip blanching and add the broccoli directly to the casserole, but blanching produces a better texture.

Step 4: Make the Cheesy Sauce

Place a medium saucepan over medium heat and melt the butter.

Once melted, whisk in the flour.

Cook the butter and flour mixture for about 1 minute, whisking constantly. This creates the base for the sauce.

Gradually pour in the milk while continuously whisking to prevent lumps.

Continue cooking for approximately 3–5 minutes, stirring frequently, until the sauce becomes smooth and slightly thickened.

Add garlic powder, mustard powder, and black pepper.

Reduce the heat to low.

Add 1 cup cheddar, ½ cup mozzarella, and Parmesan cheese.

Stir until the cheese melts completely and the sauce becomes creamy and smooth.

Do not boil the sauce after adding the cheese because excessive heat can cause the cheese to separate.

Taste and adjust the seasoning if needed.

Step 5: Assemble the Casserole

Lightly grease your prepared 9×13-inch baking dish.

Spread the roasted sweet potatoes evenly across the bottom.

Add the cooked beef mixture over the sweet potatoes.

Arrange the broccoli evenly over the beef.

Pour the creamy cheese sauce over the entire casserole, making sure it reaches the corners.

Use a spatula or the back of a spoon to gently spread the sauce.

Sprinkle the remaining cheddar and mozzarella evenly over the top.

Finish with Parmesan cheese.

At this point, the casserole should have colorful layers of orange sweet potato, savory beef, bright green broccoli, creamy sauce, and a generous blanket of cheese.

Step 6: Bake

Place the casserole in the 375°F (190°C) oven.

Bake uncovered for approximately 20–25 minutes, or until the cheese has completely melted and the edges are bubbling.

For an extra golden top, switch the oven to broil for the final 1–2 minutes.

Watch carefully during broiling because cheese can go from beautifully golden to burnt very quickly.

Remove the casserole from the oven and allow it to rest for 8–10 minutes before serving.

This resting time allows the creamy sauce to settle slightly and makes the casserole easier to portion.

Garnish with freshly chopped parsley just before serving.

Why This Casserole Works

This recipe succeeds because every component contributes something different.

The sweet potatoes provide natural sweetness, creaminess, and a satisfying texture. Roasting them first develops caramelized edges and prevents the casserole from becoming watery.

The ground beef delivers rich savory flavor and protein, while onion and garlic build the aromatic foundation.

Broccoli adds freshness and a pleasant contrast to the richer ingredients.

The homemade cheese sauce brings everything together with a smooth, creamy texture. Sharp cheddar provides bold flavor, mozzarella gives excellent melting qualities, and Parmesan adds salty, nutty depth.

The result is a casserole that tastes indulgent while still containing a generous amount of vegetables.

Tips for the Best Casserole

1. Cut the sweet potatoes evenly

Try to cut the sweet potatoes into similarly sized cubes. Uneven pieces will cook at different speeds, leaving some hard while others become too soft.

2. Roast instead of boiling

Roasting concentrates the flavor of the sweet potatoes and creates caramelized edges. Boiling can introduce too much moisture.

3. Use lean ground beef

Ground beef with around 85–90% lean meat works especially well. It provides enough flavor without making the casserole excessively greasy.

4. Don’t overcook the broccoli

The broccoli will continue cooking while the casserole bakes. Blanching it briefly keeps it tender-crisp instead of mushy.

5. Shred your own cheese

Freshly shredded cheese generally melts more smoothly than pre-shredded cheese because many packaged cheeses contain anti-caking ingredients.

6. Let the casserole rest

Don’t immediately cut into the casserole after removing it from the oven. A short resting period helps the layers hold together.

Easy Variations

Make It Spicy

For a little heat, add ½ teaspoon crushed red pepper flakes to the beef mixture.

You can also drizzle hot sauce over individual servings.

Add Mushrooms

Sauté 1½ cups sliced mushrooms with the onions before adding the beef. Mushrooms provide additional savory flavor and a meaty texture.

Use Ground Turkey

Ground turkey can replace ground beef if you prefer a lighter version. Because turkey is leaner, add a little extra olive oil and season generously.

Add Bell Peppers

Diced red, yellow, or green bell peppers are excellent additions. Add them to the skillet with the onions.

Make It Extra Cheesy

For an especially indulgent casserole, add another ½ cup of shredded cheddar to the sauce.

Try Different Cheese

Monterey Jack, Colby Jack, Gruyère, or a sharp white cheddar can be used instead of some or all of the cheddar.

Add Greens

Chopped spinach or kale can be stirred into the beef mixture during the final few minutes of cooking.

Make-Ahead Instructions

This casserole is excellent for meal preparation.

You can prepare the sweet potatoes, beef, broccoli, and cheese sauce up to one day ahead.

Allow each component to cool before assembling the casserole.

Cover the assembled casserole tightly and refrigerate for up to 24 hours.

When ready to bake, remove the casserole from the refrigerator and let it sit at room temperature for approximately 20–30 minutes.

Bake at 375°F (190°C) until heated through and bubbling. Because the casserole starts cold, it may require an additional 10–15 minutes of baking time.

If the cheese begins browning too quickly, loosely cover the top with foil.

Storage

Allow leftovers to cool before transferring them to airtight containers.

Refrigerate for up to 4 days.

For the best texture, reheat individual portions in the microwave in short intervals, or reheat larger portions covered in the oven at 350°F until hot.

If reheating in the oven, uncover the casserole during the final few minutes so the cheese can become bubbly again.

Freezing Instructions

This casserole can be frozen, although the creamy sauce may change slightly in texture after thawing.

For best results, assemble the casserole but do not bake it.

Cover tightly with plastic wrap followed by aluminum foil.

Freeze for up to 2–3 months.

Thaw overnight in the refrigerator before baking.

Bake at 375°F until completely heated through and bubbling in the center.

For better texture, freshly added cheese can be sprinkled over the top before baking.

Serving Suggestions

This casserole is filling enough to serve as a complete meal, but you can pair it with a simple side.

Try serving it with:

  • A crisp green salad
  • Lemon-dressed arugula
  • Roasted green beans
  • Steamed asparagus
  • Cucumber and tomato salad
  • Garlic bread
  • Crusty whole-grain bread
  • Simple cabbage slaw

For a lighter dinner, serve smaller portions with a fresh salad dressed with lemon juice and olive oil.

Nutritional Benefits

This casserole combines several nutrient-rich ingredients.

Sweet potatoes provide carbohydrates for energy and are a source of fiber and beta-carotene.

Broccoli contributes fiber, vitamin C, vitamin K, folate, and other beneficial plant compounds.

Lean beef provides high-quality protein, iron, zinc, and vitamin B12.

Cheese and milk contribute protein and calcium while adding richness and flavor.

Using lean beef, plenty of vegetables, and a moderate amount of cheese allows you to enjoy the comforting character of a cheesy casserole while still incorporating nutritious ingredients.

For a lighter version, use reduced-fat milk and cheese, leaner ground beef, and increase the amount of broccoli.

Approximate Nutrition

Nutrition varies depending on the exact brands and ingredients used.

Per serving, assuming 8 servings:

  • Calories: approximately 520
  • Protein: approximately 31 g
  • Carbohydrates: approximately 40 g
  • Fat: approximately 27 g
  • Fiber: approximately 6 g
  • Sugar: approximately 8 g
  • Calcium: approximately 300 mg
  • Iron: approximately 4 mg

These numbers are estimates and should be adjusted according to the specific ingredients and portion sizes used.

Frequently Asked Questions

Can I use frozen broccoli?

Yes. Frozen broccoli works very well. Thaw it first and drain excess moisture before adding it to the casserole.

Can I use regular potatoes instead of sweet potatoes?

Absolutely. Yukon Gold or russet potatoes can be substituted. Keep the cubes relatively small and roast them until nearly tender before assembling.

Can I make this without the cheese sauce?

Yes. For a simpler version, toss the cooked ingredients together with a small amount of sour cream or Greek yogurt, then top generously with shredded cheese and bake.

Can I use ground turkey?

Yes. Ground turkey is an easy substitute for beef. Choose ground turkey with enough fat to prevent the casserole from becoming dry.

Why is my casserole watery?

Excess moisture usually comes from under-drained vegetables or meat, especially frozen broccoli. Make sure the broccoli is well drained and the beef mixture isn’t overly liquid before assembly.

Can I prepare this in a smaller dish?

Yes. A smaller casserole dish works, but the ingredients will be deeper and may require slightly more baking time.

Can I make this gluten-free?

Yes. Replace the all-purpose flour with a gluten-free flour blend or cornstarch-based thickener. Also verify that your broth and seasonings are certified gluten-free if necessary.

How do I make it lower-carb?

Reduce or replace the sweet potatoes with cauliflower, zucchini, or additional broccoli. You can also use a lower-carbohydrate thickener for the cheese sauce.
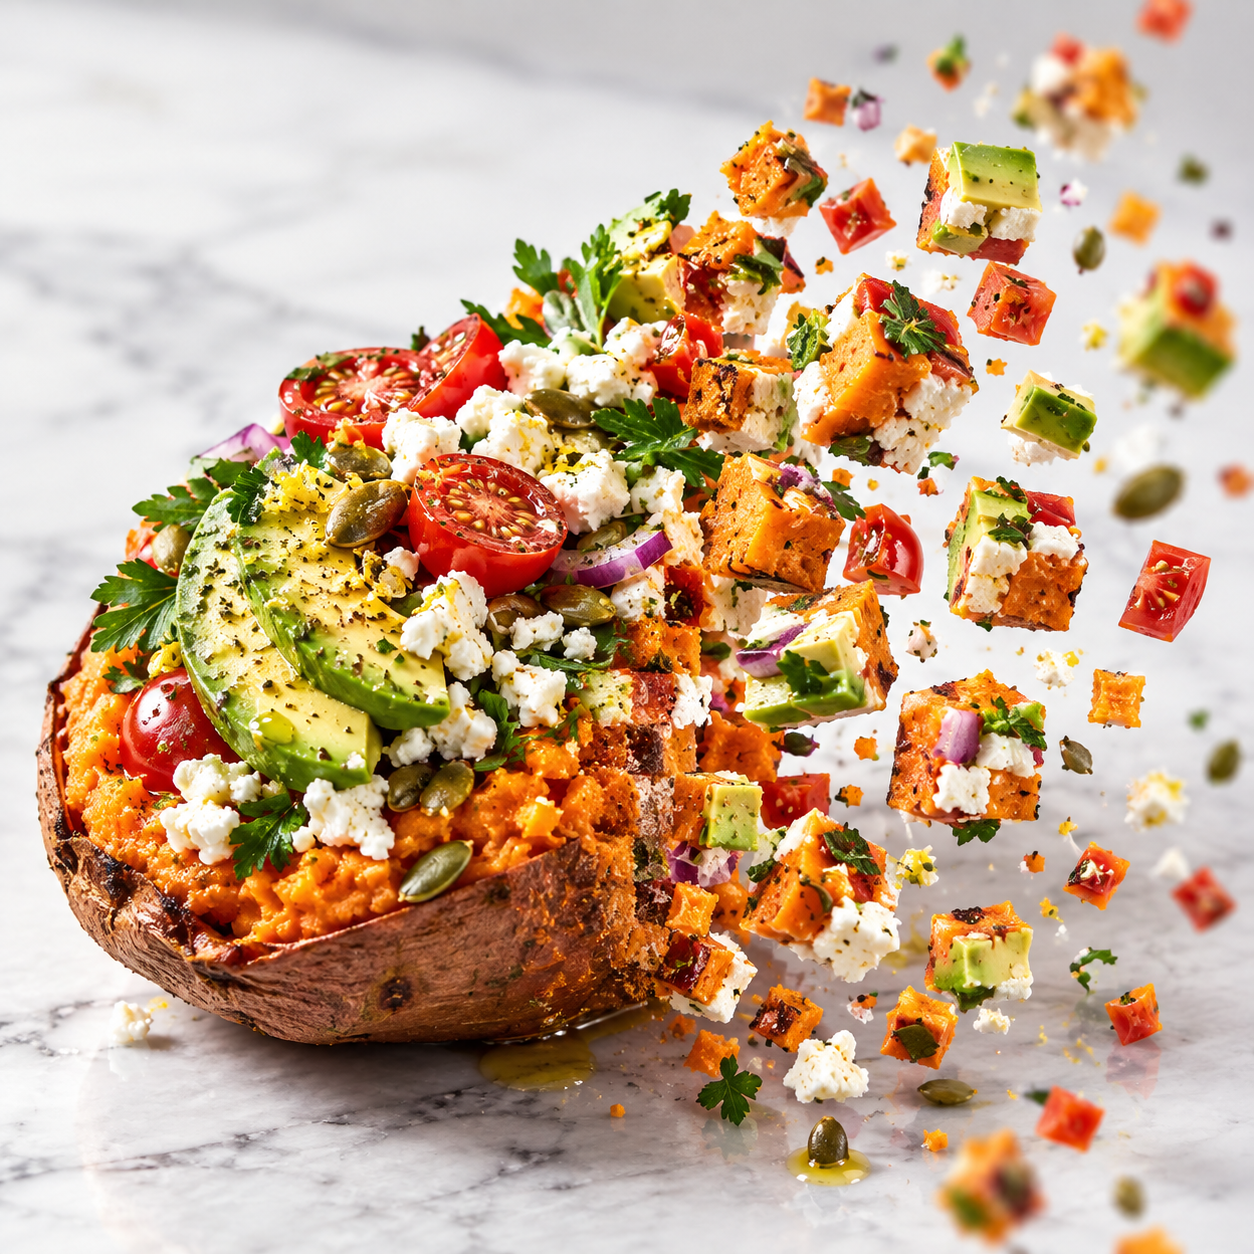
Sweet Potatoes with Avocado & Feta

Loaded Mediterranean Sweet Potatoes with avocado feta tomatoes and herbs

Loaded Mediterranean Sweet Potatoes with Avocado & Feta

Loaded Mediterranean Sweet Potatoes with Avocado & Feta are a colorful, wholesome, and satisfying meal packed with fresh Mediterranean-inspired flavors. Soft roasted sweet potatoes create a naturally creamy base, while salty feta, fresh avocado, juicy cherry tomatoes, herbs, toasted seeds, and a bright lemon dressing add freshness, richness, and texture.

This recipe works beautifully for lunch, dinner, meal prep, or even as a hearty side dish. You can keep it vegetarian or add chickpeas, chicken, shrimp, salmon, or lentils for extra protein.

Prep Time: 15 minutes
Cook Time: 35–40 minutes
Total Time: 50–55 minutes
Servings: 4

Ingredients

For the Sweet Potatoes

4 medium sweet potatoes
2 tablespoons olive oil
1 teaspoon dried oregano
1/2 teaspoon smoked paprika
1/2 teaspoon garlic powder
1/2 teaspoon onion powder
1/2 teaspoon salt
1/4 teaspoon black pepper

For the Mediterranean Topping

2 ripe avocados, sliced
3/4 cup crumbled feta cheese
1 cup cherry tomatoes, halved
1/4 cup finely chopped red onion
2 tablespoons fresh parsley, chopped
1 tablespoon fresh dill, optional
2 tablespoons toasted pumpkin seeds or pine nuts
1/4 teaspoon red pepper flakes, optional

For the Lemon Herb Drizzle

2 tablespoons extra-virgin olive oil
1 1/2 tablespoons fresh lemon juice
1 teaspoon honey or maple syrup, optional
1/2 teaspoon dried oregano
1 small garlic clove, finely minced
Pinch of salt
Pinch of black pepper

Instructions

Step 1: Preheat the Oven

Preheat your oven to 425°F or 220°C.

Line a large baking sheet with parchment paper for easy cleanup.

Step 2: Prepare the Sweet Potatoes

Wash the sweet potatoes thoroughly and pat them dry.

Cut each sweet potato in half lengthwise.

Drizzle the cut sides with olive oil, then season with oregano, smoked paprika, garlic powder, onion powder, salt, and black pepper.

Rub the seasoning evenly over the potatoes.

Step 3: Roast the Sweet Potatoes

Place the sweet potatoes cut-side down on the baking sheet.

Roast for 30 to 40 minutes, depending on size, until the centers are soft and the edges are golden and caramelized.

For extra browning, flip them cut-side up during the final 5 to 8 minutes.

Step 4: Prepare the Toppings

While the sweet potatoes are roasting, slice the avocado and cherry tomatoes.

Finely chop the red onion, parsley, and dill.

Toast the pumpkin seeds or pine nuts in a dry skillet over medium-low heat for a few minutes until lightly golden.

Step 5: Make the Lemon Herb Drizzle

In a small bowl, whisk together olive oil, lemon juice, honey or maple syrup if using, oregano, garlic, salt, and black pepper.

Set aside.

Step 6: Fluff the Sweet Potatoes

Remove the roasted sweet potatoes from the oven and let them cool for 2 to 3 minutes.

Turn them cut-side up and gently fluff the soft centers with a fork.

Step 7: Add the Toppings

Top each sweet potato with crumbled feta, avocado slices, cherry tomatoes, red onion, parsley, and dill.

Sprinkle with toasted seeds or pine nuts.

Add red pepper flakes if you want a little heat.

Step 8: Finish and Serve

Drizzle the lemon herb dressing over the loaded sweet potatoes.

Serve immediately while the potatoes are warm and the toppings are fresh.

Tips for the Best Loaded Mediterranean Sweet Potatoes

Choose sweet potatoes that are similar in size so they cook evenly.

Roasting cut-side down helps the surface caramelize better.

Do not add avocado too early because it can brown.

If your feta is very salty, reduce the added salt in the recipe.

Use fresh lemon juice for the best flavor.

Toast the seeds or pine nuts before serving for extra crunch.

Variations

Chickpea Version

Add roasted chickpeas for extra plant-based protein.

Chicken Version

Top with sliced grilled chicken breast for a heartier meal.

Shrimp Version

Add garlic shrimp for a Mediterranean seafood variation.

Greek-Style Version

Add Kalamata olives, cucumber, extra feta, and oregano.

Vegan Version

Use dairy-free feta and maple syrup instead of honey.

Spicy Version

Add chili flakes, chili oil, or sliced jalapeños.

What to Serve With It

These loaded sweet potatoes pair well with:

Greek salad
Mediterranean chickpea salad
Grilled chicken
Lemon herb salmon
Garlic shrimp
Quinoa salad
Lentil salad
Roasted vegetables
Cucumber tomato salad

Storage

Store the roasted sweet potatoes separately from the fresh toppings if possible.

Refrigerate the potatoes in an airtight container for up to 4 days.

Fresh toppings such as avocado are best added just before serving.

Reheating

Reheat the sweet potatoes in the oven at 350°F or 175°C for about 10 to 15 minutes.

You can also microwave them for 1 to 2 minutes.

Add fresh avocado, feta, herbs, and dressing after reheating.

Frequently Asked Questions

Can I make these ahead of time?

Yes. Roast the sweet potatoes ahead of time and store them in the refrigerator. Add the fresh toppings when ready to serve.

Can I use regular potatoes?

Yes. Russet or Yukon Gold potatoes can be used, although the flavor will be different.

Can I use goat cheese instead of feta?

Yes. Goat cheese works very well and gives the dish a creamier texture.

How do I keep avocado from browning?

Lightly coat the avocado slices with lemon juice before serving.

Can I add protein?

Yes. Chickpeas, chicken, shrimp, salmon, lentils, and white beans all work well.

Nutrition Information

Approximate nutrition per serving:

Calories: 340
Protein: 8 g
Carbohydrates: 43 g
Fat: 17 g
Fiber: 9 g
Sugar: 10 g
Sodium: 430 mg

Nutrition may vary depending on portion size and toppings.

Final Thoughts

Loaded Mediterranean Sweet Potatoes with Avocado & Feta combine sweet, savory, creamy, fresh, and crunchy textures in one easy meal.

The roasted sweet potatoes provide a warm and satisfying base, while feta adds salty richness and avocado brings creaminess. Fresh tomatoes, herbs, toasted seeds, and lemon dressing brighten the whole dish and make it feel fresh and colorful.

This is a flexible recipe that works for a simple vegetarian dinner or can easily be upgraded with your favorite protein.