Spinach & Feta Puff Pastries

Spinach Feta Pastries with flaky puff pastry, spinach, feta cheese, herbs, and golden crispy layers

Spinach & Feta Puff Pastries

Spinach Feta Pastries are crisp, flaky, and filled with a savory mixture of spinach, feta, herbs, and creamy cheese. They work beautifully as an appetizer, brunch item, lunchbox snack, or light meal. If you like Mediterranean-inspired flavors, Spinach Feta Pastries are an easy recipe to make with store-bought puff pastry and simple ingredients.

The combination of buttery pastry and salty feta gives every bite plenty of flavor, while spinach adds freshness and color. These pastries can also be prepared ahead, frozen before baking, and cooked whenever you need a quick homemade snack.

Prep Time: 20 minutes
Cook Time: 20 to 25 minutes
Total Time: 45 minutes
Servings: 8 pastries

Ingredients

For the Filling

10 ounces fresh spinach

1 tablespoon olive oil

2 cloves garlic, minced

1 small shallot, finely chopped

1 cup crumbled feta cheese

1/3 cup ricotta cheese

1/4 cup grated Parmesan

1 large egg

1 tablespoon chopped fresh dill

1 tablespoon chopped fresh parsley

1 teaspoon lemon zest

1/4 teaspoon black pepper

Pinch of red pepper flakes, optional

For the Pastry

1 package puff pastry, 2 sheets, thawed

1 egg, beaten with 1 tablespoon water

1 tablespoon sesame seeds, optional

1 tablespoon nigella seeds, optional

Why You’ll Love This Recipe

Spinach Feta Pastries look impressive but are surprisingly easy to prepare. Using ready-made puff pastry saves time while still giving you golden, crisp layers.

The filling is creamy without being heavy. Feta provides saltiness, ricotta softens the texture, and fresh herbs add brightness.

Another reason to love Spinach Feta Pastries is their versatility. You can shape them as rectangles, triangles, pinwheels, or small hand pies depending on the occasion.

How to Make Spinach & Feta Puff Pastries

Step 1: Cook the Spinach

Heat olive oil in a large skillet over medium heat.

Add the shallot and cook for 2 to 3 minutes until softened. Stir in the garlic and cook for about 30 seconds.

Add the spinach in batches and cook until wilted.

Transfer the spinach to a bowl and let it cool slightly.

For the best Spinach Feta Pastries, squeeze as much excess moisture as possible from the cooked spinach. Too much liquid can make the pastry soggy.

Step 2: Make the Filling

Chop the drained spinach and place it in a mixing bowl.

Add feta, ricotta, Parmesan, egg, dill, parsley, lemon zest, black pepper, and red pepper flakes.

Stir until everything is evenly combined.

Taste the mixture before adding extra salt because feta and Parmesan are naturally salty.

The filling for Spinach Feta Pastries should be creamy but not runny.

Step 3: Prepare the Puff Pastry

Preheat the oven to 400°F or 200°C.

Line a large baking sheet with parchment paper.

Unfold the thawed puff pastry on a lightly floured surface.

Roll each sheet gently to smooth the folds, then cut each one into four equal rectangles.

Keep the pastry cool while working. Cold pastry creates better layers when baked.

Step 4: Fill the Pastries

Place about 2 tablespoons of filling in the center of each pastry rectangle.

Do not overfill. Too much filling can push through the seams during baking.

Fold each rectangle over the filling to create a pocket.

Press the edges firmly, then crimp with a fork.

Spinach Feta Pastries can also be folded into triangles if you prefer a more traditional shape.

Step 5: Add the Egg Wash

Arrange the filled pastries on the prepared baking sheet.

Brush the tops lightly with beaten egg.

Sprinkle with sesame seeds, nigella seeds, or a small amount of extra Parmesan if desired.

Use a sharp knife to cut a tiny slit in the top of each pastry. This allows steam to escape and helps Spinach Feta Pastries stay crisp.

Step 6: Bake

Bake for 20 to 25 minutes, or until deeply golden and puffed.

Rotate the tray halfway through if your oven browns unevenly.

The bottoms should be firm and golden rather than pale.

Let Spinach Feta Pastries rest on the tray for about 5 minutes before transferring them to a cooling rack.

Step 7: Serve

Serve warm or at room temperature.

The filling will be hot directly from the oven, so a short resting period makes the pastries easier to eat.

Spinach Feta Pastries taste especially good with lemon wedges, tzatziki, yogurt sauce, or a simple tomato salad.

Serving Suggestions

These pastries are perfect for brunch with eggs, fruit, and fresh salad.

For lunch, serve them with tomato soup, lentil soup, Greek salad, or roasted vegetables.

Spinach Feta Pastries also make excellent party appetizers because they can be made smaller and served as finger food.

For a Mediterranean-style spread, pair them with hummus, olives, cucumber, tomatoes, and a yogurt-based dip.

For a fresh and creamy dessert, you may also like our Key Lime Cheesecake Mousse Parfait.

Recipe Tips

Drain the spinach very well to prevent soggy pastry.

Keep the puff pastry chilled until you are ready to fill it.

Do not overwork the dough because warm pastry will not puff as well.

Freshly crumbled feta gives Spinach Feta Pastries the best salty, tangy flavor.

Use only a small amount of filling in each pocket so the edges seal properly.

Brush egg wash only on the tops, not heavily along the cut edges, because it can interfere with rising.

Bake until the pastry is deeply golden for the crispest texture.

Allow the pastries to rest briefly before serving so the filling can set.

Easy Variations

For extra vegetables, add finely chopped mushrooms, roasted red peppers, or artichoke hearts.

For more herbs, add mint, basil, or oregano to the filling.

Spinach Feta Pastries can also be made with a small amount of mozzarella for a softer, stretchier cheese texture.

For a stronger Mediterranean flavor, add chopped Kalamata olives or sun-dried tomatoes.

If you prefer a milder filling, replace some of the feta with ricotta.

For extra crunch, sprinkle sesame seeds over the pastry before baking.

Make-Ahead Instructions

Spinach Feta Pastries are a convenient make-ahead recipe.

Prepare and shape the pastries, place them on a parchment-lined baking sheet, and refrigerate for up to 8 hours before baking.

Brush with egg wash just before they go into the oven.

You can also freeze the unbaked pastries. Freeze them on a tray until firm, then transfer them to a freezer-safe container.

Bake from frozen, adding a few extra minutes to the cooking time.

Storage and Reheating

Store leftover Spinach Feta Pastries in an airtight container in the refrigerator for up to 3 days.

For the best texture, reheat them in a 350°F oven for 8 to 10 minutes.

An air fryer can also crisp them quickly at a moderate temperature.

The microwave works in a hurry, but the pastry will become softer.

Avoid storing the pastries while they are still warm because trapped steam can make the crust soggy.

Nutrition Information

Approximate nutrition per pastry:

Calories: 310
Protein: 10 g
Carbohydrates: 24 g
Fat: 20 g
Saturated Fat: 9 g
Fiber: 2 g
Sugar: 2 g
Sodium: 540 mg

Nutrition values are estimates and will vary depending on the puff pastry and cheeses used.

Frequently Asked Questions

Can I use frozen spinach?

Yes. Thaw it completely and squeeze out as much water as possible before mixing it with the cheese. Frozen spinach works very well in Spinach Feta Pastries.

Can I prepare the filling a day ahead?

Yes. Keep the filling covered in the refrigerator and assemble the pastries the next day.

Why did my puff pastry turn soggy?

The most common cause is excess moisture in the spinach or overfilling. Make sure the spinach is very dry before assembling Spinach Feta Pastries.

Can I use phyllo dough instead?

Yes, but the texture will be different. Phyllo creates thinner, crispier layers and requires brushing each layer with butter or oil.

Can I make smaller appetizer-size pastries?

Absolutely. Cut the dough into smaller pieces and reduce the amount of filling. Check them earlier because smaller Spinach Feta Pastries will bake faster.

What dip goes well with them?

Tzatziki, garlic yogurt sauce, marinara, roasted red pepper dip, and hummus are all good options.

Final Thoughts

Spinach & Feta Puff Pastries are an easy way to turn a few simple ingredients into a golden, bakery-style snack. The buttery puff pastry contrasts beautifully with the creamy spinach and feta filling, while lemon and herbs keep the flavor fresh.

Spinach Feta Pastries work for breakfast, brunch, lunch, parties, or meal prep. They can be shaped in different ways, prepared ahead, and customized with vegetables or herbs.

Whether you serve Spinach Feta Pastries warm from the oven or pack them for later, their crisp layers and savory filling make them an easy recipe worth keeping.

For another savory Mediterranean option, try our Mediterranean Air Fryer Falafel with Tahini.
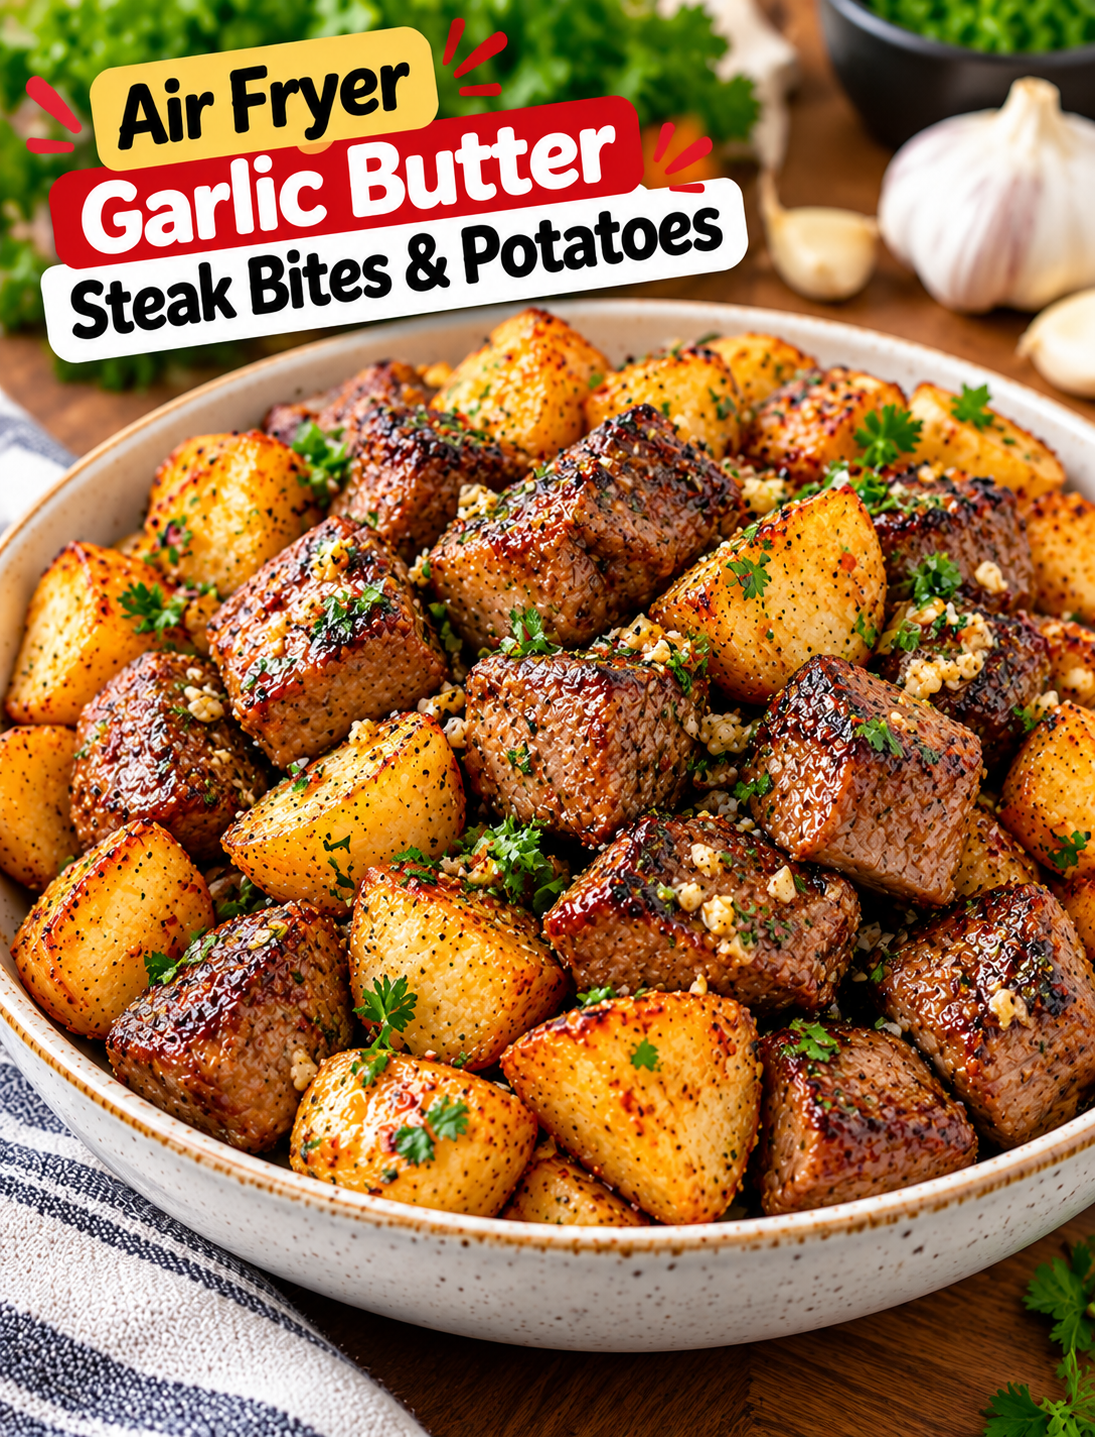
Air Fryer Garlic Butter Steak Bites & Potatoes

Air Fryer Garlic Butter Steak Bites and crispy potatoes with fresh parsley

Air Fryer Garlic Butter Steak Bites & Potatoes

These Air Fryer Garlic Butter Steak Bites & Potatoes bring tender steak, crispy potatoes, and rich garlic butter together in one easy meal. The air fryer gives the potatoes golden edges while keeping the steak juicy and flavorful.

This recipe is a great choice for a busy weeknight when you want a filling dinner without using several pans. The potatoes start cooking first because they need more time, then the seasoned steak joins them for a quick finish.

A simple garlic butter mixture coats everything at the end. Fresh garlic, melted butter, parsley, and a touch of red pepper create a savory finish that works well with both the steak and potatoes.

Why You’ll Love This Steak and Potato Recipe

This recipe combines familiar ingredients with a simple air fryer cooking method.

  • One air fryer meal: Steak and potatoes cook in the same basket.
  • Crispy potatoes: High heat creates browned, golden edges.
  • Tender steak: Small pieces cook quickly without a long preparation time.
  • Garlic butter finish: Melted butter and fresh garlic add rich flavor.
  • Simple ingredients: Most items are common pantry staples.
  • Easy cleanup: Using one cooking appliance reduces the number of dishes.
  • Flexible seasoning: You can make the dish mild, smoky, or spicy.
  • Weeknight friendly: The entire meal comes together quickly.

The most important step is cutting both the steak and potatoes into pieces that are close in size. This helps the ingredients cook more evenly.

Ingredients You’ll Need

For the Potatoes

  • 1 pound baby Yukon Gold or red potatoes
  • 1 tablespoon olive oil
  • 1/2 teaspoon garlic powder
  • 1/2 teaspoon paprika
  • 1/2 teaspoon Italian seasoning
  • 1/2 teaspoon salt
  • 1/4 teaspoon black pepper

Baby potatoes work well because their creamy centers pair nicely with crisp edges. Yukon Gold potatoes are especially good for this method, but red potatoes are also a reliable option.

For the Steak

  • 1 pound sirloin steak
  • 1 tablespoon olive oil
  • 1/2 teaspoon garlic powder
  • 1/2 teaspoon smoked paprika
  • 1/2 teaspoon salt
  • 1/4 teaspoon black pepper

Sirloin is a practical choice because it has good beef flavor and cooks quickly when cut into bite-sized pieces. You can also use another tender steak suitable for quick cooking.

For the Garlic Butter

  • 3 tablespoons unsalted butter, melted
  • 3 garlic cloves, finely minced
  • 1 tablespoon fresh parsley, chopped
  • 1/4 teaspoon red pepper flakes, optional
  • 1 teaspoon fresh lemon juice, optional

Fresh garlic gives the butter sauce a stronger flavor than garlic powder. Lemon juice is optional, but a small amount adds brightness and balances the richness of the butter.

How to Make Air Fryer Garlic Butter Steak Bites & Potatoes

Step 1: Prepare the Potatoes

Wash the potatoes and remove any dirt.

Cut each potato into small halves or quarters, depending on its size. Aim for pieces that are approximately 1-inch thick.

Pat the potatoes dry with paper towels. Removing excess moisture helps them brown more effectively in the air fryer.

Step 2: Season the Potatoes

Place the potato pieces in a large bowl.

Add olive oil, garlic powder, paprika, Italian seasoning, salt, and black pepper.

Toss until every piece is lightly coated with oil and seasoning.

Avoid using too much oil because excess oil can make the potatoes greasy instead of crisp.

Step 3: Preheat the Air Fryer

Preheat the air fryer to 400°F (200°C) for about 3 minutes if your model recommends preheating.

A hot basket helps the potatoes begin browning as soon as they start cooking.

Step 4: Start Cooking the Potatoes

Place the seasoned potatoes in the air fryer basket in a single layer.

Cook at 400°F for about 10 minutes.

Shake the basket after about 5 minutes so the potatoes brown more evenly.

The potatoes should be starting to develop golden edges before you add the steak.

Step 5: Prepare the Steak

While the potatoes cook, pat the steak dry with paper towels.

Trim away any large pieces of excess fat.

Cut the steak into approximately 1-inch cubes.

Place the steak in a bowl and toss with olive oil, garlic powder, smoked paprika, salt, and black pepper.

Keep the steak pieces similar in size so they cook at a similar rate.

Step 6: Add the Steak

After the potatoes have cooked for about 10 minutes, carefully shake the basket.

Add the seasoned steak pieces around the potatoes.

Try to keep the ingredients in a single layer. If the basket is too crowded, cook the steak separately so the hot air can circulate properly.

Step 7: Air Fry Together

Continue cooking at 400°F for another 6–9 minutes.

Shake the basket once or twice during this stage.

The potatoes should be golden and tender, while the steak should be browned on the outside.

Cooking time depends on the steak thickness and your preferred level of doneness.

Step 8: Make the Garlic Butter

While the steak and potatoes finish cooking, melt the butter in a small bowl.

Stir in minced garlic, fresh parsley, red pepper flakes, and lemon juice if using.

Do not cook the garlic butter for a long time because fresh garlic can burn easily.

Step 9: Check the Steak and Potatoes

Check the largest potato with a fork. It should be tender enough to pierce easily.

For the steak, use an instant-read thermometer if you want a precise doneness check.

Remember that recommended safe cooking temperatures vary by steak preference and local food-safety guidance. If serving steak to higher-risk diners, follow the appropriate food-safety temperature guidance.

Step 10: Add the Garlic Butter

Transfer the cooked steak and potatoes to a large bowl.

Pour the garlic butter over the top.

Gently toss everything until the steak and potatoes are evenly coated.

The residual heat helps the fresh garlic and butter cling to the hot ingredients.

Step 11: Garnish and Serve

Sprinkle with additional fresh parsley.

Add a pinch of red pepper flakes for more heat if desired.

Serve immediately while the potatoes are crisp and the steak is warm.

Tips for Crispy Potatoes

Getting crisp potatoes from an air fryer depends on airflow and surface moisture.

  • Dry the potatoes: Wet surfaces create steam and slow browning.
  • Don’t overcrowd: Give each piece room for hot air to circulate.
  • Cut evenly: Similar pieces cook at a similar rate.
  • Use moderate oil: A thin coating is enough for browning.
  • Shake the basket: Turning the pieces exposes more surfaces to the hot air.
  • Cook potatoes first: They need more time than the steak.

If your air fryer basket is small, cooking in batches usually produces better results than filling it completely.

Tips for Tender Steak Bites

Small steak pieces can overcook quickly, so keep a close eye on them.

Choose the Right Cut

Sirloin works well for bite-sized pieces because it is flavorful and cooks quickly. A tender steak cut can also be used.

Pat the Steak Dry

Surface moisture can prevent the steak from browning properly. Dry steak develops better color when exposed to high heat.

Don’t Cut the Pieces Too Small

Pieces smaller than about 1 inch can cook very quickly and may become dry before the potatoes finish.

Add the Garlic Butter After Cooking

Adding fresh garlic and butter at the end protects the garlic from burning and gives the finished dish a stronger flavor.

What to Serve With Steak Bites and Potatoes

This recipe is filling enough to serve on its own, but a fresh side can balance the meal.

Try serving it with:

  • Green salad
  • Roasted broccoli
  • Steamed green beans
  • Asparagus
  • Sautéed spinach
  • Cucumber salad
  • Roasted vegetables

For extra flavor, serve the steak bites with a small bowl of ranch dressing, creamy horseradish sauce, or steak sauce.

Easy Flavor Variations

The basic recipe is easy to change without altering the cooking method.

Spicy Garlic Butter

Add extra red pepper flakes or a small amount of cayenne pepper to the butter mixture.

Parmesan Garlic Butter

Add 2 tablespoons of finely grated Parmesan after cooking and toss with the hot steak and potatoes.

Herb Butter Steak Bites

Add fresh parsley, rosemary, or thyme to the melted butter for a stronger herb flavor.

Cajun Steak and Potatoes

Replace the basic steak seasoning with your favorite Cajun seasoning for a smoky and spicy variation.

Lemon Garlic Steak Bites

Add extra fresh lemon juice and lemon zest to the finished dish for a brighter flavor.

How to Store Leftovers

Allow leftovers to cool before transferring them to an airtight container.

Refrigerate cooked steak and potatoes promptly and use them within 3–4 days.

For better texture, keep the leftovers in a shallow container so they cool more evenly.

How to Reheat Steak Bites and Potatoes

The air fryer is the best option for bringing back some of the potato crispness.

Preheat the air fryer to 350°F.

Place the leftovers in a single layer and heat for about 3–5 minutes, shaking halfway through.

Check the steak early because it can become dry if reheated for too long.

Add a small amount of fresh garlic butter after reheating if desired.

Frequently Asked Questions

Can I use frozen potatoes?

Fresh potatoes work best for this recipe because they allow you to control the size and seasoning, but frozen potato pieces can be used with adjusted cooking time.

What steak is best for steak bites?

Sirloin is a convenient choice because it is flavorful, tender enough for quick cooking, and widely available.

Why do my potatoes take longer to cook?

Large pieces, excess moisture, and an overcrowded basket can slow cooking and reduce browning.

Can I cook the steak and potatoes at the same time?

Yes, but potatoes need a head start because they usually require more cooking time than small steak pieces.

How do I keep steak bites juicy?

Cut the steak into even pieces, avoid overcooking, and toss the cooked pieces with garlic butter immediately after cooking.

Can I use baby potatoes?

Yes, baby Yukon Gold or red potatoes are excellent choices because they become creamy inside while developing browned edges.

Can I make this recipe without butter?

Yes, you can use olive oil instead, although butter provides the rich flavor that makes the garlic butter finish distinctive.

Can I add vegetables?

Yes, broccoli, bell peppers, mushrooms, or asparagus can be added, but adjust the cooking time according to the vegetable.

Final Thoughts

These Air Fryer Garlic Butter Steak Bites & Potatoes are a practical one-basket dinner with crispy potatoes, tender steak, and a rich garlic butter finish.

Starting the potatoes first gives them enough time to become golden and tender before the steak is added. Cutting the steak and potatoes into similar-sized pieces also helps the ingredients cook more evenly.

The garlic butter should be added after cooking so the fresh garlic stays flavorful without burning. Fresh parsley and a little lemon juice provide a bright finish that balances the richness of the butter.

Serve this meal with a simple salad or roasted vegetable for an easy weeknight dinner. You can also change the seasoning with Cajun spices, Parmesan, fresh herbs, or red pepper flakes to create a different version whenever you make it.

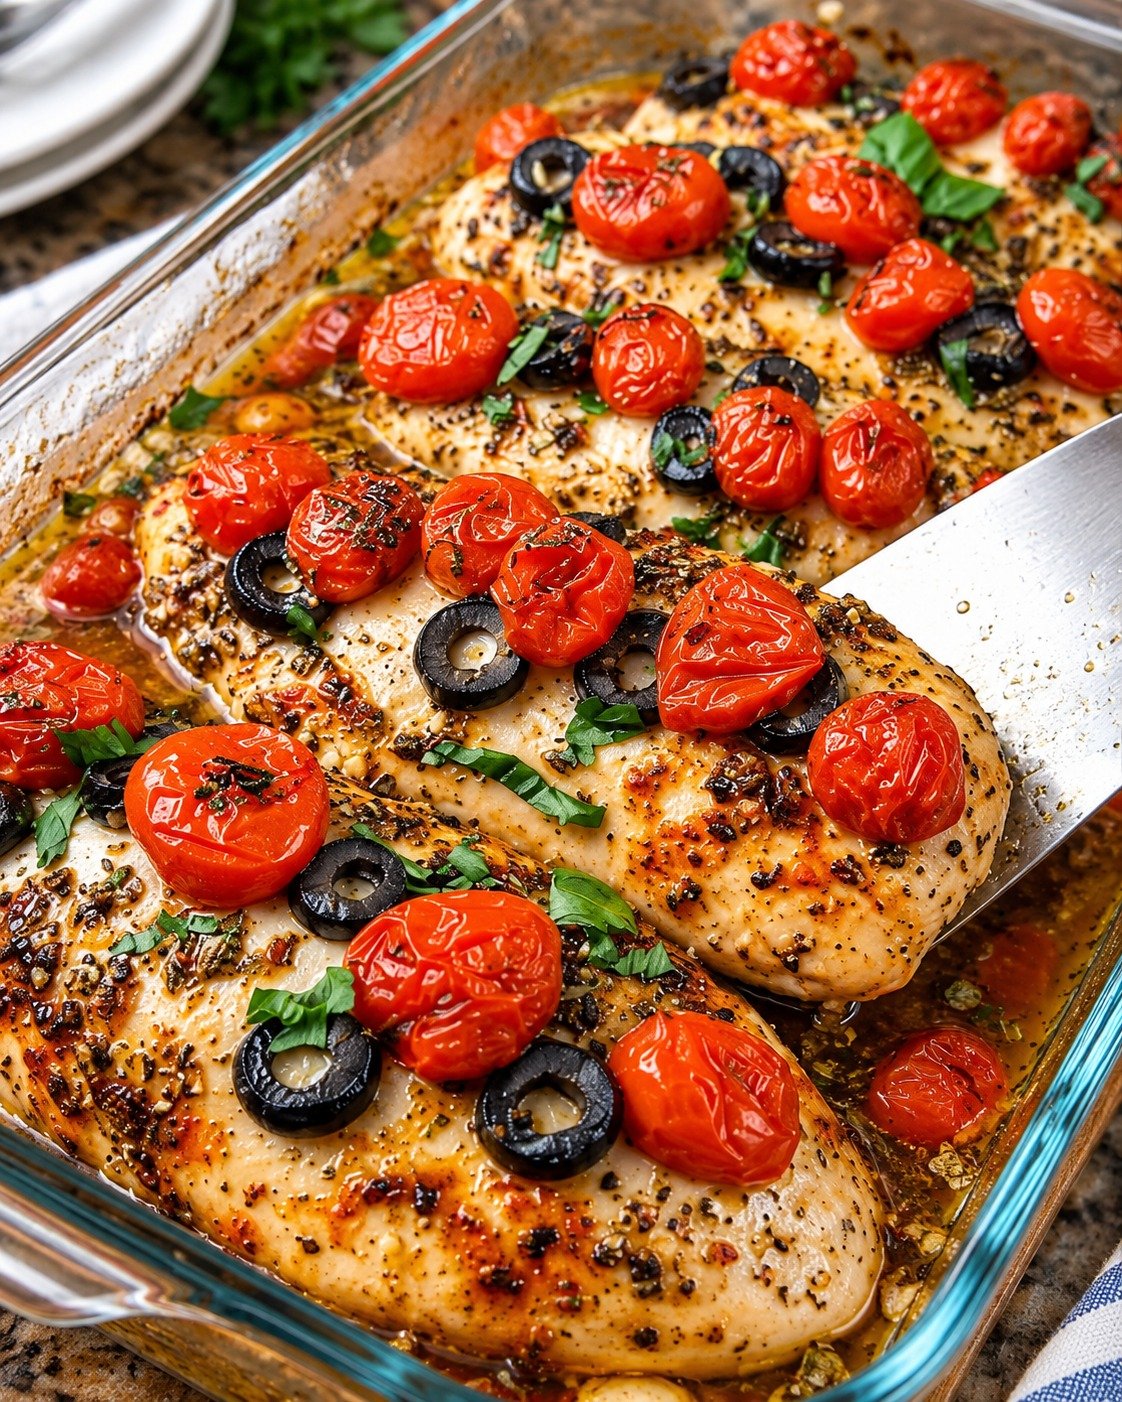
Mediterranean Baked Chicken Juicy and Flavorful

Mediterranean Baked Chicken with lemon, garlic, tomatoes, olives, feta, and fresh herbs

Mediterranean Baked Chicken Juicy and Flavorful

Mediterranean Baked Chicken is a simple, colorful dinner made with juicy chicken breasts, olive oil, lemon, garlic, tomatoes, herbs, and Mediterranean seasonings. The chicken cooks in a flavorful mixture that keeps it tender while creating a light, savory sauce in the baking dish. This easy recipe is ideal for weeknight meals, meal prep, or family dinners when you want something wholesome without complicated preparation.

The fresh lemon, oregano, garlic, and olive oil give Mediterranean Baked Chicken its bright flavor, while cherry tomatoes add natural sweetness and moisture. A small amount of feta adds a creamy, salty finish that pairs beautifully with the herbs. Serve the chicken with rice, potatoes, couscous, or a fresh salad for a complete meal.

Prep Time: 15 minutes
Marinating Time: 20 minutes
Cook Time: 25–30 minutes
Total Time: About 1 hour
Servings: 4

Ingredients

For the Chicken

4 boneless, skinless chicken breasts

3 tablespoons extra virgin olive oil

3 tablespoons fresh lemon juice

1 teaspoon lemon zest

1 teaspoon dried oregano

4 cloves garlic, minced

1 teaspoon dried basil

1/2 teaspoon dried thyme

1/2 teaspoon salt

1 teaspoon paprika

1/4 teaspoon black pepper

1/4 teaspoon red pepper flakes, optional

For the Vegetables

2 cups cherry tomatoes, halved

1 small red onion, sliced

1 small zucchini, sliced into half-moons

1/2 cup Kalamata olives

1 tablespoon olive oil

For Finishing

1/3 cup crumbled feta cheese

2 tablespoons chopped fresh parsley

1 tablespoon chopped fresh basil, optional

Fresh lemon wedges

Extra black pepper, to taste

Why You’ll Love This Recipe

Mediterranean Baked Chicken is packed with flavor but uses everyday ingredients. Garlic, lemon, olive oil, and herbs create a simple marinade that adds plenty of freshness without requiring a long list of sauces or seasonings.

Another reason to love Mediterranean Baked Chicken is that everything cooks together in one baking dish. The vegetables become tender, the tomatoes release their juices, and the chicken stays moist as it bakes.

This recipe is also flexible. You can change the vegetables, adjust the herbs, or add more olives and feta depending on your preferences.

How to Make Mediterranean Baked Chicken

Step 1: Prepare the Chicken

Pat the chicken breasts dry with paper towels.

If the pieces are very thick, gently pound them to an even thickness. This helps them cook at the same rate and reduces the chance of dry edges.

Place the chicken in a large bowl or shallow dish.

For the juiciest Mediterranean Baked Chicken, avoid using extremely thin chicken cutlets because they can overcook quickly.

Step 2: Make the Marinade

In a small bowl, whisk together olive oil, lemon juice, lemon zest, garlic, oregano, basil, paprika, thyme, salt, black pepper, and red pepper flakes.

Pour the marinade over the chicken and turn each piece until well coated.

Let the Mediterranean Baked Chicken marinate for about 20 minutes at room temperature, or refrigerate it for up to 4 hours.

Avoid marinating overnight because the lemon juice can begin to change the texture of the chicken.

Step 3: Prepare the Baking Dish

Preheat the oven to 400°F or 200°C.

Lightly grease a large baking dish with olive oil.

Arrange the cherry tomatoes, onion, zucchini, and olives around the dish.

Drizzle the vegetables with 1 tablespoon olive oil and toss gently.

Place the marinated chicken breasts among the vegetables.

Pour any remaining marinade over the top.

The vegetables help create extra moisture and flavor as Mediterranean Baked Chicken cooks.

Step 4: Bake Until Juicy

Place the baking dish in the center of the oven.

Bake for approximately 25 to 30 minutes, depending on the thickness of your chicken.

The tomatoes should soften and release their juices, while the onions and zucchini become tender.

Mediterranean Baked Chicken is ready when the thickest part reaches a safe internal temperature of 165°F or 74°C.

Avoid baking longer than necessary because overcooking is one of the main reasons chicken breasts become dry.

Step 5: Add Feta and Herbs

Remove the baking dish from the oven.

Sprinkle crumbled feta over the chicken and vegetables.

Let everything rest for 5 minutes before slicing.

Resting allows the juices to settle back into the meat, making Mediterranean Baked Chicken noticeably more tender.

Finish with parsley, fresh basil, lemon wedges, and a little black pepper.

Serving Suggestions

Mediterranean Baked Chicken pairs well with many simple side dishes.

Serve it over fluffy basmati rice, brown rice, quinoa, or couscous so the grains can absorb the tomato and lemon juices from the baking dish.

Roasted potatoes are another excellent choice. Season them with garlic, oregano, and olive oil to continue the Mediterranean flavors.

For a lighter meal, pair Mediterranean Baked Chicken with cucumber tomato salad, Greek salad, steamed vegetables, or leafy greens dressed with lemon and olive oil.

Warm pita bread and hummus also make easy additions.

For another easy high-protein meal, try our High Protein Cottage Cheese Wrap.

Recipe Tips

Use chicken breasts that are similar in size so they finish cooking at approximately the same time.

Pound very thick pieces gently before marinating.

Fresh lemon juice gives Mediterranean Baked Chicken a brighter taste than bottled lemon juice.

Do not skip the resting time after baking. Even five minutes can help the chicken retain more moisture.

Use good-quality olive oil because its flavor is noticeable in this simple recipe.

Check the chicken with a meat thermometer rather than cutting repeatedly into the meat.

Add feta only after baking so it keeps some of its texture instead of disappearing into the sauce.

For even more flavor, spoon the juices from the baking dish over Mediterranean Baked Chicken immediately before serving.

Easy Variations

For extra vegetables, add sliced bell peppers, mushrooms, artichoke hearts, or spinach.

If you prefer dark meat, boneless chicken thighs can replace chicken breasts. They may require a slightly different cooking time.

For a spicier Mediterranean Baked Chicken, increase the red pepper flakes or add a small pinch of cayenne.

You can also add sun-dried tomatoes for a stronger tomato flavor.

For a creamy variation, stir a few tablespoons of Greek yogurt with lemon and garlic and serve it on the side.

If you do not like feta, try Parmesan or simply leave the cheese out.

Make-Ahead Instructions

Mediterranean Baked Chicken is easy to prepare ahead.

Mix the marinade and coat the chicken up to 4 hours before cooking.

The vegetables can also be chopped and stored separately in the refrigerator.

When ready to cook, arrange everything in the baking dish and follow the recipe as written.

You can also bake the full meal ahead and reheat individual portions for meal prep.

Storage and Reheating

Store leftover Mediterranean Baked Chicken in an airtight container in the refrigerator for up to 3 days.

Keep some of the roasted tomatoes and cooking juices with the chicken. They help prevent it from drying out when reheated.

Warm leftovers gently in a covered skillet over low heat or in the microwave in short intervals.

You can add a tablespoon of broth or water before reheating if the chicken seems dry.

Cooked chicken can also be frozen for up to 2 months. Thaw it overnight in the refrigerator before reheating.

Nutrition Information

Approximate nutrition per serving:

Calories: 390
Protein: 43 g
Carbohydrates: 12 g
Fat: 20 g
Saturated Fat: 5 g
Fiber: 3 g
Sugar: 6 g
Sodium: 690 mg

Nutrition values are estimates and can vary depending on the size of the chicken breasts, amount of feta, olives, and olive oil used.

Frequently Asked Questions

Can I use chicken thighs instead of breasts?

Yes. Boneless, skinless chicken thighs work very well and stay especially juicy. Adjust the cooking time as needed.

How do I keep the chicken from drying out?

Use evenly sized pieces and check the internal temperature toward the end of cooking. Remove Mediterranean Baked Chicken from the oven once it reaches 165°F or 74°C.

Can I prepare this without feta?

Yes. The feta adds saltiness and creaminess, but the recipe is still flavorful without it.

Can I make it dairy-free?

Absolutely. Simply leave out the feta or replace it with a dairy-free alternative.

What vegetables work best?

Tomatoes, zucchini, onions, bell peppers, mushrooms, artichokes, and olives all work well.

Can I bake everything on a sheet pan?

Yes. Spread the ingredients across a large rimmed sheet pan and follow the same basic cooking method. Make sure the chicken is not overcrowded.

Is this recipe good for meal prep?

Yes. Mediterranean Baked Chicken reheats well and can be divided into containers with rice, quinoa, potatoes, or vegetables for easy lunches.

Final Thoughts

Mediterranean Baked Chicken is an easy way to turn simple chicken breasts into a colorful and satisfying dinner. Lemon, garlic, herbs, olive oil, tomatoes, olives, and feta create layers of flavor while the oven does most of the work.

The recipe is practical enough for busy weekdays but attractive enough to serve to guests. You can pair it with grains, vegetables, salads, or warm bread and adjust the ingredients based on what you already have.

Whether you are preparing a family dinner or planning meals for the week, Mediterranean Baked Chicken delivers juicy meat, fresh Mediterranean flavors, and an easy one-dish cooking method that makes dinner much simpler.

If you enjoy fresh and flavorful dinners, you may also like our Fish Tacos with Cabbage Slaw – The Perfect Fresh & Flavorful Recipe.


Lemon Water / Lemon Detox Drink.

Certain recipes seem like they belong in a high-end wellness regimen, while others are easy, revitalising, and genuinely pleasurable. For me, this Lemon Water/Lemon Detox Drink falls into the second group.

This combination was first introduced to me by a friend who suggested mixing lemon water with fresh ginger and a small amount of turmeric. I made a pitcher for the family one weekend because I was intrigued. To be honest, I thot everyone would just have a taste and move on, but the pitcher vanished far more quickly than I anticipated!

Since then, this has grown to be one of my favourite quick recipes to make whenever I’m craving something cool. Occasionally, I will prepare,

Anti-Inflammatory Lemon Ginger Turmeric Water

A refreshing lemon detox water made with fresh lemon, ginger, and turmeric. It can be a flavorful way to increase fluid intake while adding vitamin C and plant compounds to your diet. However, it should not be presented as a treatment for inflammation or as a guaranteed flat-belly or weight-loss drink. Evidence for turmeric and ginger as treatments for inflammatory conditions is still limited or mixed.

🍋 Recipe Description

This lemon ginger turmeric drink combines bright citrus with warming ginger and earthy turmeric. Serve it chilled for a refreshing morning wellness drink, or enjoy it warm as a caffeine-free alternative to tea.

Ingredients — 4 servings

  • 4 cups (950 ml) filtered water
  • 1 large lemon, thinly sliced
  • 2 tablespoons fresh lemon juice
  • 1-inch piece fresh ginger, thinly sliced or grated
  • ½ teaspoon ground turmeric
  • ⅛ teaspoon freshly ground black pepper, optional
  • 1–2 teaspoons raw honey or maple syrup, optional
  • 4–6 fresh mint leaves, optional
  • Ice, for serving

Instructions

  1. Add the water, lemon slices, ginger, turmeric, and black pepper to a pitcher.
  2. Stir well and refrigerate for 2–4 hours so the flavors infuse.
  3. Add the fresh lemon juice shortly before serving.
  4. Taste and add a small amount of honey or maple syrup if desired.
  5. Serve over ice with extra lemon and mint.
  6. For a warm version, gently warm one serving rather than boiling the lemon juice.

Tip: Fresh ginger can add a strong flavor, so start with less if you’re sensitive to spicy ingredients.

🥤 Serving Suggestions

  • Morning wellness drink: Enjoy a glass with breakfast.
  • Hydration drink: Keep a pitcher refrigerated and pour a glass throughout the day.
  • Post-workout: Serve chilled, but pair it with a balanced meal or snack rather than treating it as a sports-recovery drink.
  • Warm lemon ginger tea: Use warm water and omit the ice.
  • Summer detox water: Add cucumber, mint, and plenty of ice.
  • Low-sugar option: Skip the honey or maple syrup.

For food-safety and flavor, refrigerate the prepared drink and use it within about 2–3 days.

🌿 Why These Ingredients?

Lemon: Adds acidity, flavor, and vitamin C while making plain water more appealing.

Ginger: Traditionally used for digestive discomfort and nausea. Research on ginger for inflammatory conditions such as osteoarthritis is less conclusive, so it’s better described as a flavorful wellness ingredient rather than an anti-inflammatory treatment.

Turmeric: Contains curcuminoids, including curcumin. Laboratory and some clinical research suggests potential anti-inflammatory effects, but evidence isn’t strong enough to claim that turmeric water treats inflammation or disease.

Black pepper: Often paired with turmeric because piperine can increase curcumin absorption. That doesn’t mean adding pepper turns the drink into a proven therapeutic treatment.

🔄 Healthy Variations

1. Cucumber Lemon Detox Water

Add:

  • ½ cucumber, sliced
  • Fresh mint
  • Lemon slices

Light, crisp, and excellent served cold.

2. Pineapple Ginger Drink

Add:

  • ½ cup fresh pineapple
  • Extra ginger
  • Lime instead of some of the lemon

This creates a naturally sweeter tropical version.

3. Honey Lemon Ginger Tea

Use warm water and add:

  • 1 teaspoon honey
  • Fresh ginger
  • Lemon juice

4. Green Wellness Water

Add:

  • Cucumber
  • Mint
  • Lemon
  • A few slices of fresh ginger

5. Lower-Acid Version

Use less lemon juice and more water if citrus beverages tend to irritate your stomach.

🧾 Approximate Nutrition

For 1 serving of the unsweetened recipe, the nutrition is approximately:

  • Calories: 10–20 kcal
  • Carbohydrates: 3–5 g
  • Sugar: 1–2 g, naturally occurring
  • Fat: 0 g
  • Protein: <1 g
  • Fiber: <1 g

Actual nutrition varies substantially with the amount of lemon, ginger, turmeric, and especially sweetener used. USDA FoodData Central is a useful reference for calculating nutrition from the specific ingredients and quantities you use.

❓ Related Questions

Can I drink lemon ginger turmeric water every day?

For most healthy adults, culinary quantities of these ingredients can be incorporated into a normal diet. However, more isn’t necessarily better. Ginger can cause heartburn, abdominal discomfort, diarrhea, or mouth irritation in some people.

Does lemon water burn belly fat?

No. Lemon water itself has not been established as a fat-burning treatment. Replacing sugary beverages with unsweetened lemon water can reduce calorie intake, but actual fat loss depends primarily on overall energy intake, dietary pattern, physical activity, and other lifestyle factors.

Will this make my stomach flat in two weeks?

There is no reliable evidence that this drink can make someone’s stomach “100% flat” in two weeks. Temporary bloating can fluctuate for many reasons, but that’s different from losing abdominal body fat.

Is turmeric water an anti-inflammatory drink?

It is reasonable to describe turmeric as containing compounds with potential anti-inflammatory activity, but clinical evidence remains insufficient to claim that turmeric water treats inflammatory diseases.

Is this a detox drink?

“Detox water” is mainly a wellness/marketing term. Your body already has organs such as the liver and kidneys that process and eliminate waste. This drink can contribute to hydration, but it isn’t a medical detoxification treatment.

Can I drink it before bed?

You can, but the acidity of lemon may cause discomfort or reflux in some people. If that happens, drink it earlier in the day or reduce the lemon.

Who should be cautious?

If you take medications or have a medical condition, ask your healthcare professional before regularly consuming concentrated amounts of ginger or turmeric. Ginger can interact with some medicines, and turmeric/curcumin products have their own safety considerations.

🔎 SEO / High-CPM Keyword Ideas

For a food or wellness blog, naturally incorporate relevant terms such as:

Primary keywords:
anti-inflammatory drink, lemon ginger turmeric drink, lemon detox water, healthy lemon water, turmeric water recipe, ginger lemon water, homemade detox drink

Long-tail keywords:
easy anti-inflammatory drink recipe, lemon ginger turmeric water recipe, healthy morning drink, natural wellness drink, low-calorie detox water, refreshing lemon ginger drink, homemade turmeric drink, healthy hydration recipe

Related wellness keywords:
healthy lifestyle, balanced diet, hydration, wellness routine, antioxidant-rich foods, natural ingredients, healthy beverages, nutritious recipes

Use these naturally rather than repeating them excessively; the recipe’s usefulness and accuracy should come first.

🍋 Final Thoughts

This lemon ginger turmeric water is best viewed as a refreshing, low-calorie hydration recipe rather than a miracle weight-loss, belly-fat, or inflammation cure. Its biggest practical advantage is that it makes water more enjoyable while incorporating flavorful ingredients associated with traditional wellness practices.

Cheesy Beef Puff Pastry Twists

Cheesy Beef Puff Pastry Twists

Golden, flaky,  cheesy, and packed with savory seasoned  beef—these  Cheesy Beef Puff Pastry Twists are the kind of appetizer that disappears almost as soon as you put them on the table! 🥰 The buttery puff pastry gets beautifully crisp in the oven while the beef and melted cheese create a deliciously hearty filling inside.

They’re perfect for parties, game days, family gatherings, lunchbox treats, or simply when you want an easy snack that feels a little special. They’re also surprisingly simple to prepare, making them a great last-minute option when you need something delicious without spending hours in the kitchen.

🥩 Ingredients

For the Beef Filling:

  • 1 lb (450 g) lean ground beef
  • 1 small onion, finely diced
  • 2 cloves garlic, minced
  • 1 tbsp tomato paste
  • 1 tsp smoked paprika
  • 1/2 tsp onion powder
  • 1/2 tsp garlic powder
  • 1/2 tsp Italian seasoning
  • 1/4 tsp black pepper
  • 1/2 tsp salt, or to taste
  • 1 tbsp Worcestershire sauce
  • 1 tbsp olive oil, if needed

For the Twists:

  • 1 sheet puff pastry, thawed
  • 1 cup shredded cheddar cheese
  • 1/2 cup shredded mozzarella cheese
  • 1 egg
  • 1 tbsp water
  • 1 tbsp sesame seeds or everything bagel seasoning, optional
  • Fresh parsley, optional, for garnish

👩‍🍳 Instructions

1. Prepare the Beef

Heat a skillet over medium heat. Add the ground beef and cook, breaking it apart with a spoon, until browned and fully cooked.

Add the diced onion and cook for 3–4 minutes until softened. Stir in the minced garlic and cook for another 30 seconds.

Add tomato paste, smoked paprika, onion powder, garlic powder, Italian seasoning, black pepper, salt, and Worcestershire sauce. Stir well and cook for another 1–2 minutes.

Remove from the heat and allow the beef mixture to cool slightly. A cooler filling makes the pastry much easier to handle.

2. Prepare the Pastry

Preheat your oven to 400°F (200°C) and line a baking sheet with parchment paper.

Lightly flour your work surface and gently roll out the thawed puff pastry into a rectangle if needed.

Spread the cooled beef mixture evenly over half of the pastry, leaving a small border around the edges. Sprinkle the cheddar and mozzarella evenly over the beef.

Fold the uncovered half of the pastry over the filling and gently press around the edges to seal.

3. Cut and Twist

Using a sharp knife or pizza cutter, cut the filled pastry into strips about 1 inch wide.

Take each strip and carefully twist it several times. Place the twists on the prepared baking sheet, leaving a little space between each one.

If some filling escapes while twisting, simply tuck it back in gently.

4. Add the Egg Wash

Whisk the egg with 1 tablespoon of water.

Brush the tops of the pastry twists with the egg wash. Sprinkle with sesame seeds or everything bagel seasoning if desired.

5. Bake

Bake for 18–23 minutes, or until the pastry is puffed, golden brown, and crisp.

Let the twists cool for 5 minutes before serving. Garnish with fresh parsley if desired.

🧀 Serving Ideas

Serve these warm with your favorite dipping sauce. They’re delicious with:

  • Garlic aioli
  • Marinara sauce
  • Ranch dressing
  • Spicy ketchup
  • Creamy cheese dip
  • Burger sauce

For a party, arrange the twists on a large platter with several dipping sauces in the center.

💡 Helpful Tips

Cool the beef first: Hot filling can soften the puff pastry and make twisting difficult.

Don’t overfill: Too much beef and cheese can cause the pastry to split while baking.

Keep the pastry cold: If the pastry becomes very soft, place it in the refrigerator for 10–15 minutes before cutting.

Use freshly shredded cheese: It melts beautifully and gives the twists a gooey center.

Make them ahead: Assemble the twists, cover them, and refrigerate until ready to bake. Add a few extra minutes to the baking time if necessary.

For extra flavor: Add finely chopped jalapeños, red pepper flakes, or a little grated Parmesan to the filling.

❤️ Why You’ll Love Them

These  Cheesy  Beef Puff Pastry Twists combine everything people love in one bite—crispy pastry, savory  beef, and gooey melted cheese. They look impressive enough for entertaining but are easy enough for a casual family snack.

Make a batch for your next gathering and watch how quickly they disappear!

Hearty Stuffed Pepper Soup

Hearty Stuffed Pepper Soup with ground beef, bell peppers, tomatoes, rice, and fresh herbs

Hearty Stuffed Pepper Soup

Hearty Stuffed Pepper Soup is a cozy, filling dinner made with ground beef, bell peppers, tomatoes, rice, broth, onions, garlic, and simple seasonings. It has all the familiar flavors of classic stuffed peppers but comes together in one pot with much less effort. If you enjoy comforting meals that are easy to prepare, Stuffed Pepper Soup is a great recipe for busy weeknights, meal prep, or cold-weather dinners.

The combination of tender peppers, savory beef, juicy tomatoes, and rice creates a rich and satisfying texture. Stuffed Pepper Soup is also easy to customize, so you can make it mild, spicy, lower-carb, or even vegetarian depending on what you have available.

Prep Time: 15 minutes
Cook Time: 35 minutes
Total Time: 50 minutes
Servings: 6

Ingredients

For the Soup

1 pound lean ground beef

1 tablespoon olive oil

1 medium yellow onion, diced

3 cloves garlic, minced

1 green bell pepper, diced

1 red bell pepper, diced

1 yellow bell pepper, diced

1 can diced tomatoes, 14.5 ounces

1 can tomato sauce, 15 ounces

4 cups low-sodium beef broth

1 cup cooked white or brown rice

1 teaspoon Italian seasoning

1 teaspoon paprika

1/2 teaspoon dried oregano

1/2 teaspoon black pepper

1/2 teaspoon salt, or to taste

1 teaspoon Worcestershire sauce

1 tablespoon tomato paste

Optional Garnishes

Fresh parsley

Shredded cheddar cheese

Grated Parmesan

Red pepper flakes

Fresh basil

Crusty bread, for serving

Why You’ll Love This Recipe

Stuffed Pepper Soup is simple, hearty, and easy to make in one pot. It gives you the comfort of baked stuffed peppers without the extra work of filling and baking individual peppers.

The soup is also flexible. You can use ground beef, turkey, chicken, or a plant-based alternative. Different rice varieties work too, which makes the recipe easy to adapt to your pantry.

Another reason to love Stuffed Pepper Soup is that it stores and reheats well. The flavors deepen after a night in the refrigerator, making leftovers especially delicious.

How to Make Hearty Stuffed Pepper Soup

Step 1: Brown the Beef

Heat olive oil in a large soup pot or Dutch oven over medium-high heat.

Add the ground beef and cook for 5 to 7 minutes, breaking it into small pieces with a wooden spoon.

Continue cooking until the meat is browned and no longer pink.

Drain excess grease if necessary.

The browned beef creates the savory base that gives Stuffed Pepper Soup its rich flavor.

Step 2: Cook the Onion and Peppers

Add the diced onion and bell peppers to the pot.

Cook for about 5 minutes, stirring occasionally, until the vegetables begin to soften.

Add the garlic and cook for another 30 seconds.

You want the peppers tender but not completely soft at this stage because they will continue cooking in the broth.

Step 3: Add the Tomato Base

Stir in the tomato paste and cook for 1 minute.

Add the diced tomatoes, tomato sauce, Worcestershire sauce, Italian seasoning, paprika, oregano, black pepper, and salt.

Stir everything together until the vegetables and beef are evenly coated.

This tomato-rich base gives Stuffed Pepper Soup its familiar stuffed-pepper flavor.

Step 4: Add the Broth

Pour in the beef broth and stir well.

Bring the mixture to a gentle boil.

Reduce the heat to medium-low, cover partially, and let the soup simmer for 20 to 25 minutes.

During this time, the peppers soften and the flavors blend together.

Step 5: Add the Rice

Stir in the cooked rice near the end of the cooking time.

Let the soup simmer for another 5 minutes so the rice can absorb some of the broth and flavor.

Adding cooked rice at the end helps prevent Stuffed Pepper Soup from becoming too thick or mushy.

Step 6: Adjust the Seasoning

Taste the soup and add more salt, black pepper, or Italian seasoning if needed.

If you prefer a thinner soup, stir in a little extra broth.

For a stronger tomato flavor, add another spoonful of tomato paste or a splash of tomato sauce.

Step 7: Serve

Ladle the soup into bowls.

Top with parsley, Parmesan, cheddar, or red pepper flakes if desired.

Serve Stuffed Pepper Soup hot with crusty bread, garlic toast, or a simple green salad.

Serving Suggestions

Stuffed Pepper Soup is filling enough to serve on its own, but a few simple sides can turn it into a complete dinner.

Crusty bread, dinner rolls, or garlic bread are perfect for soaking up the tomato broth.

For a lighter side, pair the soup with a green salad, cucumber salad, roasted vegetables, or steamed broccoli.

You can also serve Stuffed Pepper Soup with a small grilled cheese sandwich for a classic comfort-food combination.

For a lighter protein-packed side or snack, you may also like our Tuna Salad Dip.

Recipe Tips

Use lean ground beef to keep the soup hearty without making it greasy.

Cut the bell peppers into similar-sized pieces so they cook evenly.

Cook the tomato paste briefly before adding broth to deepen its flavor.

Use cooked rice instead of raw rice if you want better control over the final consistency.

Do not overcook the rice because it will continue to soften as it sits in the soup.

Stuffed Pepper Soup tastes even better after resting for 10 to 15 minutes before serving.

If the soup becomes too thick, add extra broth a little at a time.

Fresh herbs added at the end can brighten the flavor.

Easy Variations

For a lighter version, replace ground beef with ground turkey or chicken.

For a vegetarian version, use vegetable broth and replace the meat with lentils, black beans, or plant-based crumbles.

For a lower-carb option, skip the rice and add cauliflower rice near the end.

If you enjoy spicy food, add red pepper flakes, diced jalapeño, or a pinch of cayenne.

You can also add mushrooms, zucchini, corn, or spinach to make Stuffed Pepper Soup even more vegetable-packed.

For extra richness, stir in a little shredded cheese just before serving.

For another quick and protein-packed soup, try our Easy Black Bean Soup (High Protein, 30 Minutes).

Make-Ahead Instructions

Stuffed Pepper Soup is an excellent make-ahead meal.

Prepare the soup as directed, but consider storing the rice separately if you plan to keep it for more than one day.

Cooked rice continues absorbing liquid while refrigerated, which can make the soup thicker.

When ready to serve, reheat the soup and stir in the rice.

Storage and Reheating

Store leftover Stuffed Pepper Soup in an airtight container in the refrigerator for up to 4 days.

Reheat it on the stovetop over medium-low heat, stirring occasionally.

Add a splash of broth or water if the soup has thickened.

You can also reheat individual portions in the microwave.

The soup can be frozen for up to 2 months, but for the best texture, freeze it without the rice and add freshly cooked rice after reheating.

Nutrition Information

Approximate nutrition per serving:

Calories: 360
Protein: 24 g
Carbohydrates: 34 g
Fat: 15 g
Saturated Fat: 5 g
Fiber: 5 g
Sugar: 9 g
Sodium: 720 mg

Nutrition values are estimates and may vary depending on the ground beef, broth, rice, and garnishes used.

Frequently Asked Questions

Can I use uncooked rice?

Yes, but you will need extra broth and a longer cooking time. Cooked rice gives you more control over the final texture of Stuffed Pepper Soup.

Can I make this in a slow cooker?

Yes. Brown the meat first, then add everything except the cooked rice to the slow cooker. Cook on low for 6 to 7 hours or high for 3 to 4 hours. Stir in the rice near the end.

Can I use only one color of bell pepper?

Yes. Using several colors makes the soup more colorful, but any bell peppers will work.

Can I make it without beef?

Absolutely. Ground turkey, chicken, sausage, lentils, or beans are all good alternatives.

How can I make the soup thicker?

Let it simmer uncovered for a few extra minutes or add a little more cooked rice.

How can I make it thinner?

Add more broth until the soup reaches your preferred consistency.

Is this recipe good for meal prep?

Yes. Stuffed Pepper Soup stores well and is easy to portion into containers for lunches or dinners.

Final Thoughts

Hearty Stuffed Pepper Soup is an easy one-pot meal that brings together the classic flavors of stuffed peppers in a simpler, more convenient form. Ground beef, sweet bell peppers, tomatoes, broth, herbs, and rice create a filling soup that works well for weeknight dinners or meal prep.

Stuffed Pepper Soup is especially useful when you want something warm and comforting without spending a lot of time in the kitchen. The ingredients are simple, the method is straightforward, and the recipe can be adjusted to suit different preferences.

Serve Stuffed Pepper Soup with bread, salad, or your favorite simple side, and you have a satisfying family meal that is easy to make again and again.