Boat Dip (Rotel Ranch Dip)

Description


Boat Dip, also known as Rotel Ranch Dip, is a rich and flavorful cold or warm dip made with cream cheese, sour cream, shredded cheese, ranch seasoning, and Rotel (diced tomatoes with green chilies). It’s creamy, slightly spicy, and loaded with bold flavor in every bite. Despite the name, it’s perfect for boats, parties, tailgates, and gatherings of any kind.

Ingredients

  • 8 oz cream cheese, softened
  • 1 cup sour cream
  • 1 packet ranch seasoning mix
  • 1½ cups shredded cheddar cheese
  • 1 can (10 oz) Rotel diced tomatoes & green chilies (drained for thicker dip)
  • ½ teaspoon garlic powder
  • ½ teaspoon onion powder
  • ¼ teaspoon black pepper
  • Optional: chopped jalapeños for extra heat
  • Optional garnish: green onions or cilantro

Instructions

Step 1: Mix Base

In a large bowl, combine cream cheese and sour cream until smooth.

Step 2: Add Seasoning

Stir in ranch seasoning, garlic powder, onion powder, and black pepper.

Step 3: Add Cheese & Rotel

Fold in shredded cheddar cheese and drained Rotel tomatoes.

Mix until well combined.

Step 4: Chill or Heat

Cold Version:

Cover and refrigerate for 1 hour before serving.

Warm Version:

Heat in microwave or slow cooker until warm and melty.

Step 5: Serve

Serve with tortilla chips, crackers, celery sticks, or bread slices.

Notes

  • Draining Rotel makes the dip thicker.
  • Freshly shredded cheese melts and mixes better.
  • Can be served cold or warm depending on preference.
  • Flavor improves after chilling.

Tips

  • Add cooked ground beef or shredded chicken for a heartier dip.
  • Use spicy Rotel for extra heat.
  • Let cream cheese soften for smoother mixing.
  • Stir before serving if refrigerated.
  • Double the recipe for parties.

Servings

  • Serves: 6–10 people

Nutritional Information (Approximate Per Serving)

  • Calories: 210
  • Protein: 6g
  • Carbohydrates: 4g
  • Fat: 18g
  • Fiber: 1g
  • Sugar: 2g
  • Sodium: 420mg

Benefits

Quick & Easy

No complicated cooking required.

Crowd Favorite

Perfect for parties and gatherings.

Low Carb Friendly

Great snack option for keto diets.

Versatile Dip

Can be served cold or warm.

Customizable

Easy to adjust spice and add-ins.

Storage

Refrigerator

Store in airtight container for up to 3–4 days.

Freezer

Not recommended due to dairy texture changes.

Q&A

Can I make it ahead of time?

Yes, it actually tastes better after chilling overnight.

Can I make it warm instead of cold?

Absolutely, heat in microwave or slow cooker until melted.

Can I add meat?

Yes, cooked ground beef or chicken works great.

Is it very spicy?

Mild by default, but you can increase heat with jalapeños or spicy Rotel.

What chips go best?

Tortilla chips, Fritos, or pita chips work best.

Can I use Greek yogurt instead of sour cream?

Yes, it’s a lighter alternative.

Why is my dip watery?

Make sure to drain Rotel well before mixing.

Soft and Fluffy Homemade Cinnamon Rolls

Soft and Fluffy Homemade Cinnamon Rolls

Prep Time: 30 minutes
Rising Time: 1½–2 hours
Bake Time: 22–27 minutes
Total Time: About 3 hours
Servings: 9 large cinnamon rolls

Ingredients
For the Dough
¾ cup whole milk, warmed to 105–110°F (40–43°C)
2¼ teaspoons active dry yeast
¼ cup granulated sugar, divided
1 large egg, at room temperature
1 egg yolk, at room temperature
¼ cup unsalted butter, melted and slightly cooled
1 teaspoon vanilla extract
3 cups all-purpose flour, plus more if needed
¾ teaspoon salt
½ teaspoon ground cinnamon
For the Cinnamon Filling
½ cup unsalted butter, softened
¾ cup packed brown sugar
1½ tablespoons ground cinnamon
¼ teaspoon salt
⅓ cup finely chopped pecans or walnuts, optional
For the Cream Cheese Frosting
4 ounces cream cheese, softened
3 tablespoons unsalted butter, softened
¾ cup powdered sugar
1 teaspoon vanilla extract
1–2 tablespoons milk
Small pinch of salt
Instructions
Activate the yeast:
Pour the warm milk into a large mixing bowl. Add the yeast and 1 tablespoon of the measured sugar. Stir gently and let it stand for 5–10 minutes. The mixture should become foamy. If it does not foam, the yeast may be inactive or the milk may have been too hot.
Prepare the wet mixture:
Add the remaining sugar, egg, egg yolk, melted butter, and vanilla extract to the yeast mixture. Whisk until thoroughly combined.
Make the dough:
Add 2¾ cups flour, salt, and cinnamon. Mix with a wooden spoon until a soft, shaggy dough forms. Add the remaining flour gradually as needed. The dough should be soft and slightly tacky but not extremely sticky.
Knead the dough:
Transfer the dough to a lightly floured surface. Knead for 8–10 minutes until smooth and elastic. Alternatively, knead it in a stand mixer fitted with a dough hook for 5–7 minutes on medium-low speed.
First rise:
Place the dough in a lightly greased bowl and turn it once to coat the surface. Cover with a clean kitchen towel or plastic wrap. Let it rise in a warm place for 60–90 minutes, or until doubled in size.
Prepare the filling:
Combine the brown sugar, cinnamon, and salt in a small bowl. Keep the softened butter separate so it can be spread easily over the dough.
Roll out the dough:
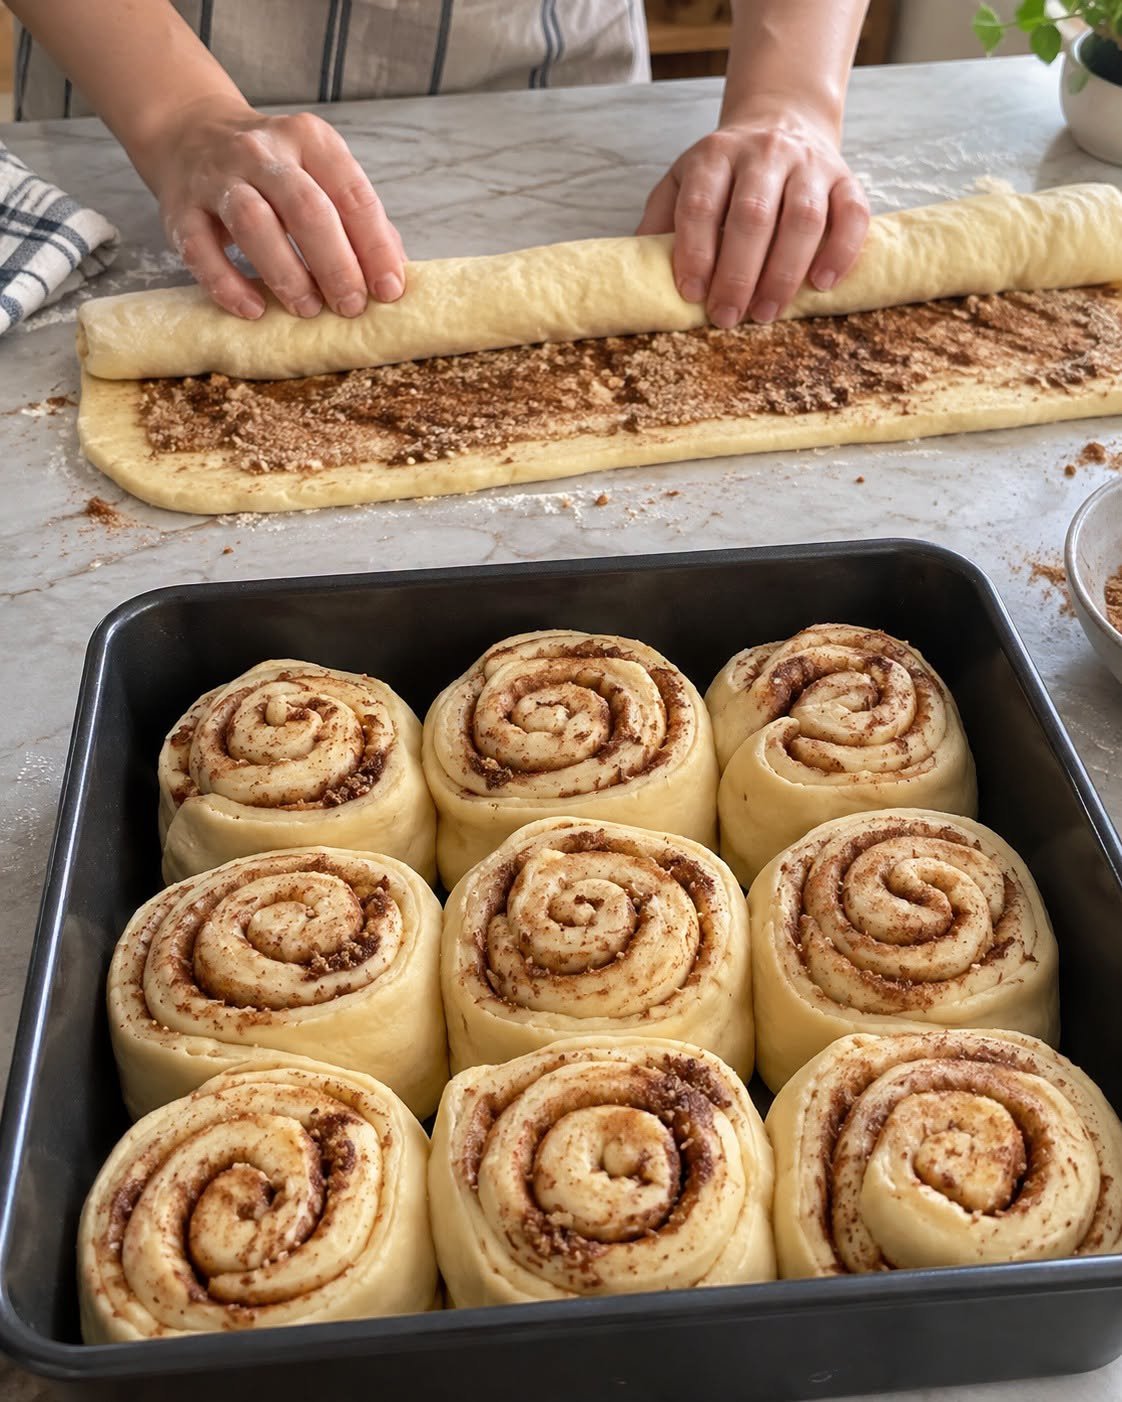
Gently punch down the risen dough. Transfer it to a lightly floured work surface and roll it into a rectangle measuring approximately 14 × 18 inches.
Add the filling:
Spread the softened butter evenly over the dough, leaving a ½-inch border along one long edge. Sprinkle the cinnamon-sugar mixture evenly over the butter. Add chopped nuts if desired and press the filling gently into the dough.
Roll the dough:
Beginning with the long filled edge, tightly roll the dough into a log. Keep the roll even without squeezing it too firmly. Pinch the seam closed when you reach the unfilled border.
Cut the rolls:
Use unflavored dental floss or a sharp serrated knife to cut the log into nine equal pieces. Dental floss produces clean cuts without flattening the rolls.
Arrange and rise again:
Lightly grease a 9-inch square baking pan or similar baking dish. Arrange the rolls in three rows of three, leaving a little room between them. Cover and let them rise for 30–45 minutes, until visibly puffy and nearly touching.
Preheat the oven:
While the rolls are rising, preheat the oven to 350°F (175°C).
Bake:
Bake the cinnamon rolls for 22–27 minutes, until lightly golden on top. The center rolls should appear set rather than doughy. If the tops begin browning too quickly, loosely cover the pan with foil for the final few minutes.
Prepare the frosting:
Beat the softened cream cheese and butter until smooth. Add the powdered sugar, vanilla, and salt. Beat again, adding milk one tablespoon at a time until the frosting reaches your preferred consistency.
Frost and serve:
Let the cinnamon rolls cool for approximately 10 minutes. Spread the cream cheese frosting over the warm rolls so it melts slightly into the swirls. Serve warm.
Tips
Measure the flour carefully. Too much flour will make the cinnamon rolls dry and heavy.
The milk should feel warm, not hot. Excessive heat can kill the yeast.
Use room-temperature eggs so the dough rises properly.
The dough should remain slightly tacky after kneading. Avoid adding unnecessary flour.
Spread softened—not melted—butter over the dough to keep the filling from leaking.
Cut the rolls as evenly as possible so they finish baking simultaneously.
For exceptionally soft rolls, pour ¼ cup of slightly warmed heavy cream around the risen rolls immediately before baking.
Check the middle roll when testing for doneness because it normally takes the longest to bake.
Overnight Method

Prepare and cut the rolls, then arrange them in the baking pan. Cover tightly and refrigerate for up to 12 hours. The following morning, remove the pan from the refrigerator and let the rolls stand at room temperature for 45–60 minutes. Once puffy, bake as directed.

Storage
Room temperature: Store unfrosted rolls in an airtight container for up to 2 days.
Refrigerator: Store frosted rolls for up to 5 days.
Freezer: Freeze unfrosted cinnamon rolls for up to 2 months.

Reheat an individual roll in the microwave for 15–20 seconds. If frozen, thaw it overnight in the refrigerator before reheating.

Nutritional Information

Approximate values per frosted cinnamon roll:

Calories: 460
Protein: 7 grams
Carbohydrates: 64 grams
Fat: 21 grams
Fiber: 2 grams
Sugar: 32 grams

Values may vary according to the ingredients and amount of frosting used.

Benefits
Homemade rolls contain no artificial preservatives.
Milk and eggs provide protein and important nutrients.
Cinnamon adds warm flavor without requiring excessive ingredients.
The recipe can be prepared ahead for holidays, brunches, or family breakfasts.
Nuts can add healthy fats, fiber, and texture when included.
Questions and Answers

Why didn’t my dough rise?
The yeast may have expired, the milk may have been too hot, or the room may have been too cold. Let the dough rise in a warm, draft-free place.

Can I use instant yeast?
Yes. Use the same amount and mix it directly with the flour. The rising time may be slightly shorter.

Can I make the rolls without cream cheese?
Yes. Mix powdered sugar with vanilla and enough milk to make a simple glaze.

Why are my cinnamon rolls dry?
The most common causes are adding too much flour or baking the rolls too long.

Can I use bread flour?
Yes. Bread flour produces a slightly chewier cinnamon roll, while all-purpose flour gives a softer texture.

Can I make smaller rolls?
Yes. Cut the log into 12 pieces and begin checking them after approximately 18 minutes.

Guilt-Free 3-Ingredient Lemon Cake

Light, soft, tangy, and wonderfully simple, this Guilt-Free 3-Ingredient Lemon Cake is the kind of dessert you can make when you want something sweet without a long ingredient list. With just three main ingredients, this cake has a delicate texture and bright lemon flavor that makes every bite refreshing.

It’s especially lovely served chilled with fresh berries, a dusting of powdered sweetener, or a spoonful of Greek yogurt. Whether you’re looking for a simple dessert, a light afternoon treat, or an easy recipe for guests, this lemon cake is a delicious choice.

Recipe Information
Prep Time: 10 minutes

Bake Time: 25–30 minutes

Cooling Time: 20 minutes

Total Time: 55–60 minutes

Servings: 8

Difficulty: Easy

Cuisine: American-inspired

Category: Dessert

Ingredients
The 3 Main Ingredients
4 large eggs
1 cup lemon-flavored Greek yogurt, approximately 240 g
1 box lemon cake mix, approximately 15–16 oz
Optional Garnish
The cake itself uses only three main ingredients, but you can add optional toppings after baking:

Fresh lemon zest
Fresh berries
Powdered sugar or powdered sweetener
Plain Greek yogurt
Thin lemon slices
A small drizzle of lemon glaze
Instructions
1. Preheat the Oven
Preheat your oven to 350°F (175°C).

Lightly grease an 8-inch or 9-inch round cake pan. You can also use an 8-inch square baking dish.

For easier removal, place a piece of parchment paper on the bottom of the pan.

2. Prepare the Eggs
Crack the eggs into a large mixing bowl.

Whisk them for approximately 1–2 minutes until they are well combined and slightly foamy.

There is no need to beat them until stiff or create a meringue. The goal is simply to evenly distribute the eggs.

3. Add the Lemon Yogurt
Add the lemon-flavored Greek yogurt to the eggs.

Whisk until the mixture is smooth and creamy.

The lemon yogurt provides moisture and additional lemon flavor while helping create the cake’s soft texture.

4. Add the Cake Mix
Gradually add the lemon cake mix to the wet ingredients.

Use a spatula or whisk to gently combine everything.

Mix just until there are no obvious dry pockets of cake mix.

Do not overmix the batter.

The finished batter should be thick but pourable.

5. Transfer to the Pan
Pour the batter into your prepared cake pan.

Use a spatula to gently spread the batter into an even layer.

Tap the pan lightly against the counter once or twice to remove large air bubbles.

6. Bake
Place the pan in the preheated oven.

Bake for approximately 25–30 minutes.

Start checking around the 25-minute mark.

The cake is ready when the top is lightly golden and a toothpick inserted into the center comes out mostly clean or with a few moist crumbs.

Avoid overbaking, because this can make the cake dry.

7. Cool
Remove the cake from the oven and place it on a cooling rack.

Allow it to cool in the pan for approximately 15–20 minutes.

Then carefully remove it from the pan.

Let it cool completely before slicing.

For an especially refreshing dessert, refrigerate the cooled cake for 30–60 minutes before serving.

8. Garnish and Serve
Once cooled, add your preferred topping.

A little fresh lemon zest gives the cake a beautiful citrus aroma.

You can also add fresh strawberries, blueberries, raspberries, or a spoonful of Greek yogurt.

For a simple finish, dust the top very lightly with powdered sugar or powdered sweetener.

Slice and serve.

Description Notes
This Guilt-Free 3-Ingredient Lemon Cake is designed for simplicity. There is no need to measure several different dry ingredients, prepare complicated frosting, or spend hours in the kitchen.

The lemon cake mix gives the dessert its structure and classic lemon-cake flavor, while the Greek yogurt adds moisture and tanginess. Eggs help bind everything together and create a soft, tender crumb.

The finished cake is light and pleasantly citrusy rather than overwhelmingly sweet.

For the best result, allow the cake to cool completely before cutting it. The texture becomes more stable as it cools, and chilling gives it an especially refreshing consistency.

Tips for the Best 3-Ingredient Lemon Cake
Use Room-Temperature Eggs
Room-temperature eggs mix more easily with the yogurt and cake mix.

If your eggs are refrigerated, place them in a bowl of warm water for a few minutes before using.

Don’t Overmix
Once the cake mix has been incorporated, stop mixing.

Overmixing can result in a denser texture.

Don’t Overbake
This is one of the most important tips.

The cake should be just set in the center. A toothpick should come out with a few moist crumbs rather than completely dry.

Let It Cool
The cake continues to set as it cools.

Cutting it while it is extremely hot can make the slices seem softer than they actually are.

Chill for a Refreshing Dessert
For a bright, cool lemon dessert, refrigerate the finished cake before serving.

The chilled cake pairs beautifully with fresh berries.

Add Extra Lemon Zest
If you love a strong lemon flavor, add 1–2 teaspoons freshly grated lemon zest to the batter.

This is optional and technically takes the recipe beyond the three main ingredients, but it adds wonderful fresh citrus flavor.

Choose the Right Yogurt
A thick lemon Greek yogurt works particularly well.

If using regular yogurt, the batter may be slightly thinner.

Watch the Pan Size
A smaller, deeper pan creates a thicker cake and may require additional baking time.

A wider pan produces a thinner cake that may bake more quickly.

Serving Suggestions
With Fresh Berries
Serve each slice with strawberries, raspberries, blueberries, or blackberries.

The tartness of berries complements the lemon beautifully.

With Greek Yogurt
Add a spoonful of plain or vanilla Greek yogurt for a creamy topping.

With Lemon Zest
Freshly grated lemon zest adds color and an intense citrus aroma.

With Powdered Sugar
A very light dusting of powdered sugar creates a classic bakery-style appearance.

With Fresh Mint
A few fresh mint leaves make an attractive garnish and add a refreshing contrast.

As a Light Dessert
Serve a small slice after dinner with tea or coffee.

Variations
Lemon Blueberry Cake
Fold approximately ½ cup fresh blueberries into the batter before baking.

Toss the berries with a small amount of cake mix first to help distribute them throughout the batter.

Lemon Raspberry Cake
Add fresh raspberries to the batter or serve them on top after baking.

Lemon Poppy Seed Cake
Add 1 tablespoon poppy seeds for a classic lemon-poppy-seed variation.

Creamy Lemon Cake
Serve each slice with a dollop of Greek yogurt mixed with a little lemon zest.

Extra-Lemony Cake
Add fresh lemon zest and a teaspoon of fresh lemon juice to intensify the citrus flavor.

Strawberry Lemon Cake
Top the cooled cake with sliced strawberries just before serving.

Make-Ahead Instructions
This cake is excellent for preparing ahead of time.

Bake the cake according to the recipe and allow it to cool completely.

Cover tightly and refrigerate.

For the best texture, add fresh fruit and other toppings immediately before serving.

If preparing the cake for a gathering, you can bake it the day before.

The lemon flavor becomes even more noticeable after the cake has rested.

Storage
Refrigerator
Store the cake in an airtight container or cover the baking dish tightly.

Refrigerate for up to 4 days.

Room Temperature
If serving the same day, the cake can generally remain covered at room temperature for several hours.

Because the recipe contains eggs and yogurt, refrigerate leftovers promptly.

Freezer
Individual slices can be wrapped tightly and frozen for up to 1–2 months for best quality.

Thaw overnight in the refrigerator.

Allow the slice to sit at room temperature for several minutes before serving.

Nutritional Information
Estimated per serving, based on 8 servings and the main three ingredients without optional toppings. Actual nutrition will vary according to the specific cake mix and yogurt used.

Nutrient Estimated Amount
Calories 190–230 kcal
Protein 6–8 g
Total Fat 4–6 g
Saturated Fat 2–3 g
Carbohydrates 32–38 g
Fiber 0–1 g
Sugar 17–23 g
Sodium 250–350 mg
These figures are approximate estimates and should not be considered laboratory-tested nutritional values.

Benefits of This Recipe
Simple Ingredient List
The recipe uses three main ingredients, making it convenient when you want a quick homemade dessert.

Provides Protein
Eggs and Greek yogurt contribute protein to each serving.

Contains Yogurt
Greek yogurt contributes protein and calcium while helping create a moist texture.

Portion-Friendly
Dividing the cake into eight servings makes it easy to enjoy a moderate portion.

Bright Citrus Flavor
Lemon provides a naturally refreshing flavor that makes the dessert feel lighter and less heavy than many rich cakes.

Easy for Beginners
There is no complicated frosting, special baking technique, or lengthy preparation process.

Frequently Asked Questions
Can I use regular yogurt instead of Greek yogurt?
Yes. Regular lemon yogurt can be used, although the batter may be thinner and the finished cake may have a slightly different texture.

Can I use plain Greek yogurt?
Yes, but the lemon flavor will be less pronounced. Add fresh lemon zest and a little lemon juice if you want a stronger citrus flavor.

Can I use a different cake mix?
Yes. White or vanilla cake mix can be used with lemon yogurt and fresh lemon zest to create a lemon-flavored cake.

Can I make this cake without eggs?
Eggs are important to the structure of this particular three-ingredient recipe. Replacing them will change the texture and may require additional adjustments.

Can I make cupcakes with this batter?
Yes. Divide the batter among lined muffin cups, filling each approximately two-thirds full.

Bake at 350°F (175°C) for roughly 15–20 minutes, checking with a toothpick.

Why did my cake sink in the middle?
A cake can sink if it is underbaked, the oven door is opened too early, or the batter is overmixed.

Make sure the center is properly set before removing the cake from the oven.

Can I make it more lemony?
Absolutely. Add fresh lemon zest and a little lemon juice, or serve the cake with a light lemon glaze.

Can I add fresh fruit?
Yes. Blueberries, raspberries, strawberries, and blackberries all pair beautifully with lemon.

Should I refrigerate the cake?
Yes, refrigerating leftovers is recommended because the cake contains eggs and yogurt.

Can I freeze it?
Yes. Wrap individual slices tightly and freeze for up to 1–2 months for best quality.

Is this cake actually guilt-free?
“Guilt-free” is a recipe-style description rather than a nutritional or health claim. Dessert can absolutely be enjoyed as part of a balanced eating pattern, and portion size and the specific ingredients you use determine the nutritional profile.

Can I reduce the calories further?
Using a lower-calorie cake mix and nonfat Greek yogurt can reduce the calorie content, but the exact result depends on the brands and quantities used.

Final Recipe Notes
This Guilt-Free 3-Ingredient Lemon Cake is proof that an easy dessert doesn’t need a long ingredient list.

With lemon cake mix, Greek yogurt, and eggs, you get a soft, tender cake with plenty of bright citrus flavor and a wonderfully simple preparation.

Serve it chilled with fresh berries, lemon zest, or a little Greek yogurt for a refreshing dessert that’s perfect for any day of the week.

Classic Greek Salad with Feta, Olives, Cucumber & Tomatoes

Classic Greek Salad with Feta, Olives, Cucumber & Tomatoes

Description

This Classic Greek Salad with Feta, Olives, Cucumber, Tomatoes, and Red Onion is a fresh, colorful, and incredibly flavorful Mediterranean dish that is perfect for lunch, dinner, meal prep, summer gatherings, or a light side dish. It combines crisp cucumbers, juicy tomatoes, briny olives, creamy feta cheese, fresh herbs, and thinly sliced red onion with a simple homemade olive oil and lemon dressing.

The beauty of Greek salad is its simplicity. There is no complicated cooking process, no heavy sauce, and no long list of ingredients. The vegetables provide freshness and crunch, while feta cheese adds a creamy, salty element. Kalamata olives bring a rich, savory flavor, and extra-virgin olive oil ties everything together.

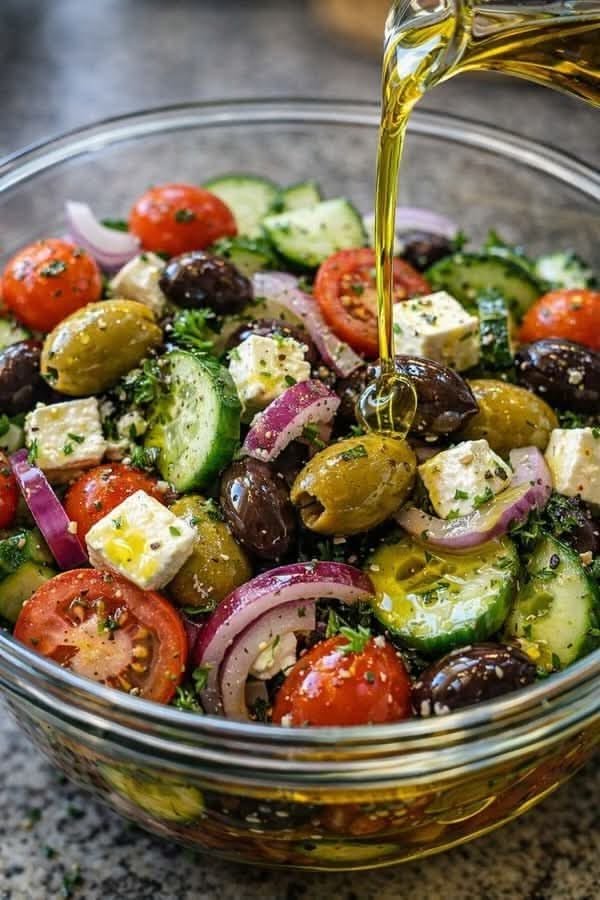
The salad pictured features a beautiful combination of red and green vegetables with colorful olives and generous cubes of feta. A drizzle of golden olive oil over the top gives the salad an especially appetizing Mediterranean finish.

This recipe is incredibly versatile. It can be served alongside grilled chicken, fish, shrimp, steak, roasted vegetables, or warm pita bread. You can also add chickpeas or grilled chicken to turn it into a more filling main-course salad.

Whether you are looking for a quick weekday lunch or a beautiful dish for a family gathering, this Greek salad is an easy recipe that delivers fresh Mediterranean flavor in every bite.

Ingredients

For the Salad

  • 2 large English cucumbers, sliced into half-moons
  • 4 medium ripe tomatoes, cut into wedges
  • 1 cup cherry tomatoes, halved
  • ½ large red onion, thinly sliced
  • ¾ cup Kalamata olives, pitted
  • ¾ cup green olives, pitted
  • 6 ounces feta cheese, cut into cubes or crumbled
  • ¼ cup fresh parsley, finely chopped
  • 2 tablespoons fresh dill, chopped
  • 1 teaspoon dried oregano
  • ¼ teaspoon freshly ground black pepper

For the Greek Dressing

  • ⅓ cup extra-virgin olive oil
  • 3 tablespoons fresh lemon juice
  • 1 tablespoon red wine vinegar
  • 1 teaspoon Dijon mustard
  • 1 small garlic clove, finely minced
  • 1 teaspoon dried oregano
  • ½ teaspoon honey or maple syrup, optional
  • ½ teaspoon salt
  • ¼ teaspoon black pepper

Instructions

1. Prepare the Cucumbers

Wash the cucumbers thoroughly and pat them dry.

If using English cucumbers, there is no need to peel them because their thin skin adds color, texture, and nutrients.

Slice the cucumbers into approximately ¼-inch to ½-inch half-moons.

If the cucumbers are particularly large and contain many seeds, you can cut them lengthwise and gently remove some of the seeds before slicing.

Place the sliced cucumbers into a large mixing bowl.

2. Prepare the Tomatoes

Wash and dry the tomatoes.

Cut the larger tomatoes into wedges.

If using cherry tomatoes, slice them in half.

For the best Greek salad, use tomatoes that are ripe, juicy, and flavorful.

Fresh tomatoes are especially important because they provide much of the moisture and natural sweetness in the salad.

Add the tomatoes to the bowl with the cucumbers.

Try not to crush them while mixing.

3. Slice the Red Onion

Thinly slice half of a red onion.

If you prefer a milder onion flavor, place the slices in a bowl of cold water for approximately 5–10 minutes.

Drain and pat them dry before adding them to the salad.

This simple step removes some of the sharpness while allowing the onion to retain its crisp texture.

Add the onion to the cucumber and tomato mixture.

4. Add the Olives

Add the Kalamata olives and green olives.

Kalamata olives provide a deep, fruity, slightly salty flavor, while green olives add a lighter and more buttery taste.

You can use only Kalamata olives if you prefer a more traditional flavor, or combine different varieties for extra color and texture.

Make sure the olives are pitted before adding them.

5. Add the Feta Cheese

Cut the feta cheese into small cubes or gently crumble it into large pieces.

For the best texture, avoid crumbling the feta too finely.

Larger pieces of feta create little pockets of creamy, salty flavor throughout the salad.

Add the feta gently to the bowl.

Traditional Greek-style feta made from sheep’s milk provides an especially authentic flavor, although cow’s milk feta works perfectly well for everyday cooking.

6. Add the Fresh Herbs

Add chopped parsley and fresh dill.

Sprinkle the dried oregano over the vegetables.

Fresh herbs give the salad a bright aroma and complement the salty olives and feta.

You can also add a little fresh mint if desired.

Gently toss the ingredients together.

Be careful not to mix too aggressively because the tomatoes and feta can break apart.

7. Make the Dressing

In a small bowl or jar, combine the extra-virgin olive oil, fresh lemon juice, red wine vinegar, Dijon mustard, minced garlic, oregano, salt, and black pepper.

Add the honey or maple syrup if you prefer a slightly balanced dressing.

Whisk vigorously until the ingredients are combined.

Alternatively, place everything in a small jar, close the lid tightly, and shake for approximately 20 seconds.

Taste the dressing.

If it seems too acidic, add a little more olive oil.

If it tastes too rich, add another squeeze of lemon juice.

If you want more savory flavor, add another small pinch of oregano.

8. Dress the Salad

Pour approximately three-quarters of the dressing over the salad.

Use salad spoons or large serving utensils to gently toss everything together.

Make sure the cucumbers, tomatoes, olives, onion, and feta are lightly coated.

Avoid adding too much dressing at once.

You can always add more later, but it is difficult to remove excess dressing.

9. Let the Salad Rest

For the best flavor, allow the salad to rest for approximately 10–15 minutes before serving.

This gives the vegetables time to absorb some of the dressing.

Do not leave it at room temperature for an extended period, especially in hot weather.

If preparing the salad several hours ahead, keep the vegetables refrigerated and add the dressing shortly before serving.

10. Finish and Serve

Transfer the salad to a large serving bowl or platter.

Add a final drizzle of extra-virgin olive oil.

Sprinkle with fresh oregano or parsley.

Add a few extra feta cubes and olives on top for a beautiful presentation.

Serve immediately with warm pita bread, grilled protein, or your favorite Mediterranean dishes.

Why This Greek Salad Is So Delicious

The success of this salad comes from the balance of flavors.

The tomatoes provide sweetness and juiciness.

Cucumbers contribute coolness and crunch.

Red onion adds a sharp, slightly spicy flavor.

Kalamata olives bring saltiness and depth.

Green olives provide another layer of briny flavor.

Feta cheese adds creaminess and tang.

Fresh herbs make the salad bright and aromatic.

Finally, extra-virgin olive oil, lemon juice, vinegar, garlic, and oregano create a simple dressing that brings every ingredient together.

Each bite offers something different.

You get crisp cucumber, juicy tomato, creamy feta, chewy olives, crunchy onion, and fresh herbs all at once.

Tips for the Best Greek Salad

Use Fresh Ingredients

Because this recipe contains only a few ingredients, freshness makes a huge difference.

Choose ripe tomatoes, firm cucumbers, fresh herbs, and good-quality feta.

When the ingredients are fresh, the salad requires very little additional seasoning.

Use Good Olive Oil

Extra-virgin olive oil is one of the main flavors in Greek salad.

Choose a good-quality olive oil with a fresh, fruity flavor.

Avoid using an olive oil that tastes stale or bitter.

Don’t Overdress the Salad

A Greek salad should taste fresh rather than greasy.

Start with about three-quarters of the dressing and add more only if needed.

Don’t Overmix

Feta and tomatoes can break apart easily.

Gently toss the salad instead of vigorously stirring it.

Season Carefully

Feta and olives are already salty.

Taste the finished salad before adding additional salt.

You may find that only a small amount is necessary.

Choosing the Best Tomatoes

Tomatoes are one of the most important ingredients in Greek salad.

When tomatoes are in season, use the ripest tomatoes you can find.

Roma tomatoes, vine-ripened tomatoes, heirloom tomatoes, and cherry tomatoes can all work.

Cherry tomatoes are especially useful when making the salad outside of peak tomato season because they tend to remain flavorful and firm.

A combination of large tomatoes and cherry tomatoes also creates a beautiful presentation.

Choosing Feta Cheese

For an authentic Mediterranean flavor, choose a block of feta rather than pre-crumbled feta.

Block feta tends to be creamier and more flavorful.

It also holds its shape better when cut into cubes.

If the feta is very salty, you can briefly rinse it or soak it in cold water before using it.

Pat it completely dry afterward.

Variations

Greek Chicken Salad

Add sliced grilled chicken breast for a high-protein main-course salad.

Season the chicken with olive oil, lemon, garlic, oregano, salt, and pepper before grilling.

Slice the cooked chicken and arrange it over the salad.

Chickpea Greek Salad

Add one can of drained and rinsed chickpeas.

Chickpeas provide extra protein and fiber and turn the salad into a more substantial vegetarian meal.

Greek Pasta Salad

Add 2–3 cups of cooked rotini, penne, or bow-tie pasta.

Increase the dressing slightly and toss everything together.

This makes an excellent picnic or potluck dish.

Avocado Greek Salad

Add one diced avocado just before serving.

The creamy avocado pairs beautifully with salty feta and olives.

Because avocado can brown, add it immediately before eating.

Mediterranean Tuna Salad

Add drained tuna for a quick protein-rich lunch.

Tuna pairs particularly well with olives, tomatoes, cucumber, and lemon.

Add Peppers

For extra crunch and color, add sliced green or red bell peppers.

They provide a naturally sweet, crisp texture.

Make It a Complete Meal

This salad can easily become a complete meal with a few additions.

For protein, add:

  • Grilled chicken
  • Grilled shrimp
  • Tuna
  • Salmon
  • Chickpeas
  • White beans
  • Hard-boiled eggs

For carbohydrates, serve it with:

  • Warm pita
  • Whole-grain bread
  • Couscous
  • Quinoa
  • Brown rice
  • Orzo

For additional healthy fats, add:

  • Avocado
  • Extra olives
  • Pumpkin seeds
  • Toasted almonds

This makes the salad filling enough to serve as lunch or dinner.

Serving Suggestions

This Greek salad is incredibly versatile.

Serve it as a side dish with grilled chicken or fish.

It pairs especially well with grilled lemon chicken, chicken souvlaki, salmon, shrimp skewers, or roasted lamb.

For a vegetarian Mediterranean dinner, serve it alongside hummus, warm pita, roasted vegetables, and tzatziki.

For a summer gathering, place the salad in a large chilled serving bowl and allow guests to serve themselves.

It is also an excellent addition to a picnic or potluck.

Meal Prep Instructions

Greek salad can be prepared ahead, but a few adjustments will help maintain the best texture.

Chop the cucumbers, tomatoes, onions, and herbs and store them separately or together in an airtight container.

Keep the feta and olives separate if possible.

Prepare the dressing in a small jar.

Store everything in the refrigerator.

When ready to eat, combine the ingredients and add the dressing.

This keeps the vegetables crisp and prevents them from becoming watery.

For the best texture, consume prepared Greek salad within 2–3 days.

Storage

Store leftover dressed salad in an airtight container in the refrigerator.

It is best consumed within 1–2 days after dressing.

The vegetables will release liquid over time, especially the tomatoes and cucumbers.

If you know you will have leftovers, keep the dressing separate and add it to individual portions.

Undressed vegetables can generally remain fresh for approximately 2–3 days when refrigerated properly.

Can You Freeze Greek Salad?

Freezing is not recommended.

Cucumbers and tomatoes contain a large amount of water, so freezing and thawing them significantly changes their texture.

The vegetables can become soft and watery.

Feta and olives freeze better, but the complete salad is best enjoyed fresh.

Nutrition Information

Approximate nutrition per serving, assuming six servings and without additional protein:

  • Calories: 285
  • Protein: 7g
  • Carbohydrates: 12g
  • Fat: 23g
  • Fiber: 4g
  • Sugar: 6g
  • Sodium: 650–750mg

Actual nutrition will vary depending on the amount of feta, olives, and olive oil used.

If you want to reduce sodium, use fewer olives and choose a lower-sodium feta.

Benefits of This Mediterranean Salad

Rich in Fresh Vegetables

Tomatoes, cucumbers, and onions provide a variety of vitamins, minerals, water, and dietary fiber.

Healthy Fats

Extra-virgin olive oil and olives contribute unsaturated fats and help create a satisfying meal.

Protein from Feta

Feta cheese adds protein along with calcium.

For an even higher-protein meal, add chicken, tuna, shrimp, or chickpeas.

Fiber

Vegetables and optional chickpeas provide dietary fiber, which can contribute to fullness and digestive health.

Naturally Flavorful

Because the salad relies on herbs, lemon, garlic, olive oil, and vegetables, there is no need for a heavy creamy dressing.

Frequently Asked Questions

Is this an authentic Greek salad?

This recipe is inspired by traditional Greek salad, also known as Horiatiki. Traditional versions commonly feature tomatoes, cucumber, onion, olives, feta, olive oil, and oregano.

Some versions vary by region and personal preference.

Can I use regular black olives?

Yes. Kalamata olives provide the most characteristic Greek flavor, but regular black olives can be used if that is what you have.

Can I prepare this salad the night before?

Yes, but it is best to keep the dressing separate until shortly before serving.

Can I use bottled lemon juice?

Fresh lemon juice is strongly recommended because it has a brighter flavor.

However, bottled lemon juice can work in a pinch.

Can I use bottled dressing?

You can, but homemade dressing is quick and gives the salad a much fresher Mediterranean flavor.

Why is my salad watery?

Tomatoes and cucumbers naturally release water.

To reduce excess liquid, use firm vegetables and add the dressing shortly before serving.

Can I add lettuce?

Yes. Although traditional Greek salad does not require lettuce, you can add chopped romaine if you prefer a larger salad with extra crunch.

Can I make it dairy-free?

Yes. Simply omit the feta or replace it with a dairy-free feta alternative.

Is Greek salad good for meal prep?

Yes, especially when the dressing is stored separately.

Keep the vegetables refrigerated and add dressing shortly before eating.

Air Fryer Greek Lemon Herb Chicken & Tzatziki Bowls

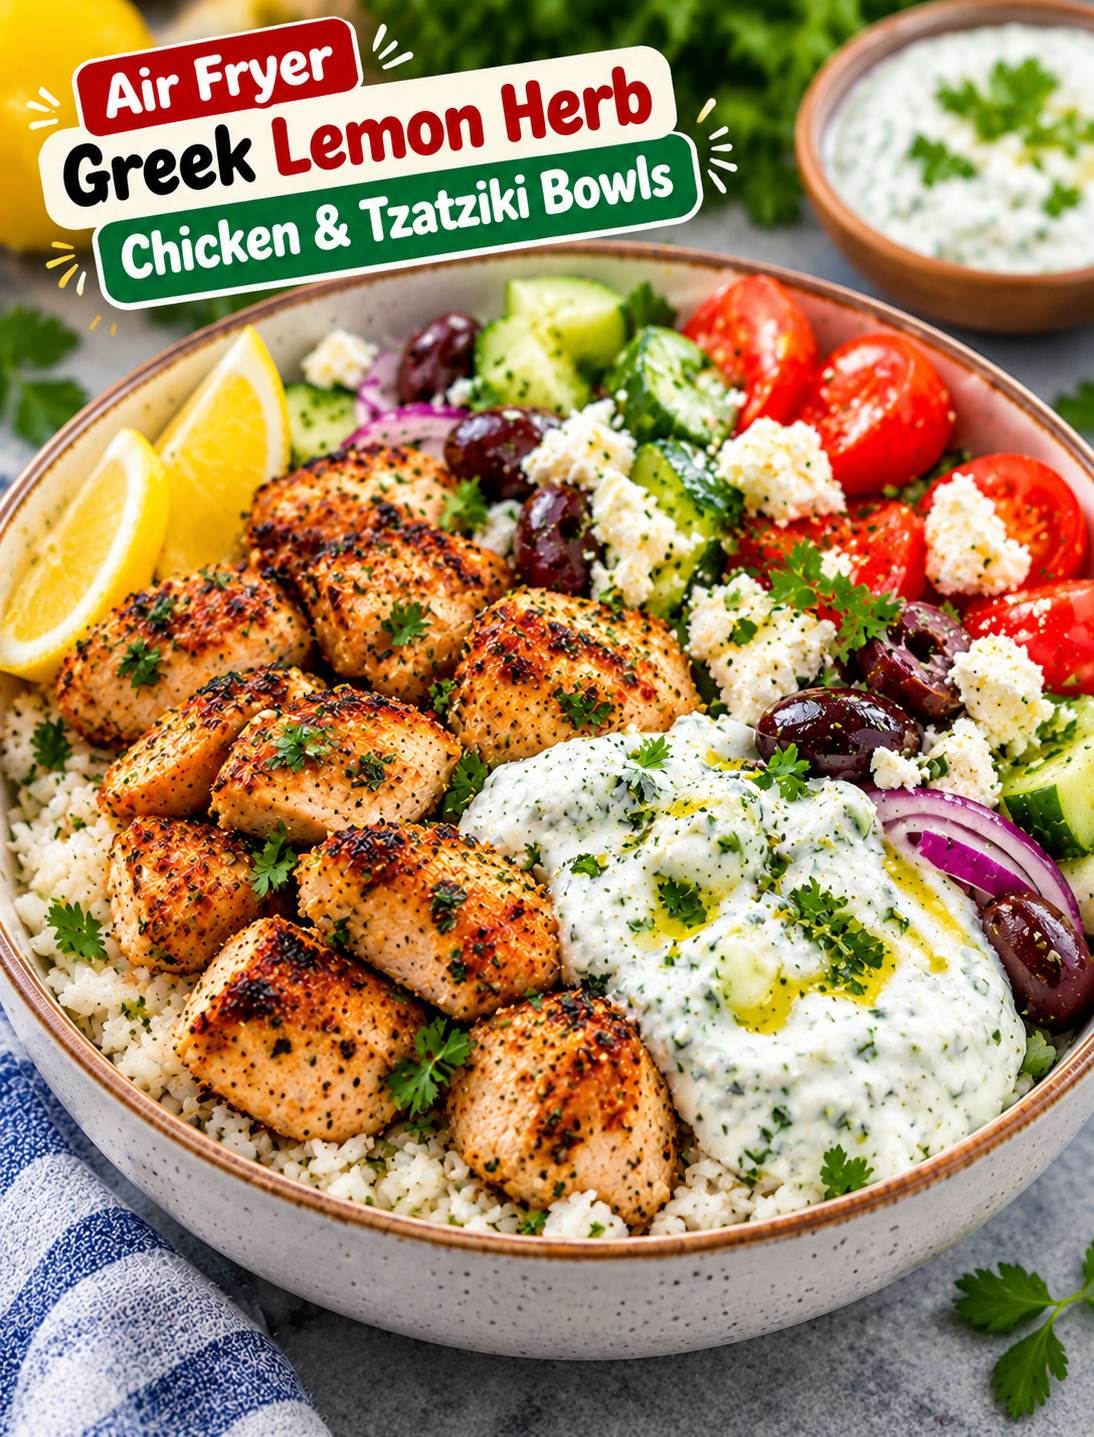
Air fryer Greek lemon herb chicken and tzatziki bowl with rice, cucumber, tomatoes, feta, olives, and fresh herbs

Air Fryer Greek Lemon Herb Chicken & Tzatziki Bowls

Fresh, bright, and easy to make, these Air Fryer Greek Lemon Herb Chicken & Tzatziki Bowls bring classic Mediterranean flavors to your dinner table. Tender chicken is coated with lemon, garlic, oregano, and herbs, then air fried until golden around the edges.

The chicken is served over fluffy rice with crisp cucumber, juicy tomatoes, red onion, feta cheese, Kalamata olives, and creamy homemade tzatziki. Every bite combines warm, savory chicken with cool, fresh toppings.

This Greek-inspired bowl is a great option for busy weeknights because most of the ingredients can be prepared while the chicken cooks. You can also change the base and toppings to fit your family’s preferences.

Why You’ll Love This Recipe

These Mediterranean chicken bowls are flavorful without requiring complicated cooking techniques.

  • Fresh Greek flavors: Lemon, garlic, oregano, and herbs give the chicken a bright savory taste.
  • Crispy edges: The air fryer helps brown the chicken without deep frying.
  • Creamy tzatziki: Greek yogurt, cucumber, garlic, and lemon create a cool sauce.
  • Easy weeknight meal: The chicken cooks quickly while the toppings are prepared.
  • Meal-prep friendly: Store the ingredients separately and assemble each bowl when ready.
  • Customizable: Use rice, quinoa, greens, or cauliflower rice as the base.
  • Family-friendly: Everyone can choose their favorite vegetables and toppings.

Ingredients You’ll Need

For the Greek Lemon Herb Chicken

  • 1 ½ pounds boneless, skinless chicken thighs
  • 2 tablespoons extra-virgin olive oil
  • 2 tablespoons fresh lemon juice
  • 1 teaspoon lemon zest
  • 3 cloves garlic, minced
  • 2 teaspoons dried oregano
  • 1 teaspoon dried parsley
  • ½ teaspoon paprika
  • 1 teaspoon kosher salt
  • ½ teaspoon black pepper

Chicken thighs stay juicy and develop flavorful browned edges in the air fryer. Chicken breast can also be used if you prefer leaner meat.

For the Tzatziki Sauce

  • 1 cup plain Greek yogurt
  • ½ cup finely grated cucumber
  • 1 tablespoon fresh lemon juice
  • 1 small garlic clove, finely grated
  • 1 tablespoon chopped fresh dill
  • 1 teaspoon extra-virgin olive oil
  • ¼ teaspoon salt

Squeeze as much liquid as possible from the grated cucumber before mixing. This keeps the tzatziki thick enough to spoon over the bowl.

For the Bowl

  • 3 cups cooked white or brown rice
  • 1 large cucumber, diced
  • 1 cup cherry tomatoes, halved
  • ¼ small red onion, thinly sliced
  • ½ cup crumbled feta cheese
  • ¼ cup Kalamata olives
  • 2 tablespoons chopped fresh parsley
  • Lemon wedges for serving

Basmati rice, jasmine rice, quinoa, or cauliflower rice can replace the rice base.

How to Make Air Fryer Greek Lemon Herb Chicken & Tzatziki Bowls

Step 1: Prepare the Chicken

Pat the chicken thighs dry with paper towels.

Cut the chicken into bite-size pieces of similar size. Even pieces cook more evenly and make the bowls easier to assemble.

Place the chicken in a large bowl.

Add olive oil, lemon juice, lemon zest, minced garlic, oregano, parsley, paprika, salt, and black pepper.

Toss thoroughly until the chicken is evenly coated.

For deeper flavor, cover the bowl and refrigerate the chicken for 20 to 30 minutes. You can also cook it right away when you need a quick meal.

Step 2: Preheat the Air Fryer

Preheat the air fryer to 400°F for 3 to 5 minutes.

A hot cooking basket helps the chicken begin browning immediately.

Lightly spray the basket with cooking spray if your air fryer tends to stick.

Step 3: Air Fry the Chicken

Place the seasoned chicken in the air fryer basket in a single layer.

Leave space between the pieces so hot air can circulate around them.

Cook at 400°F for about 10 to 14 minutes, shaking the basket halfway through.

The exact cooking time depends on the size of the chicken pieces and the air fryer model.

Check the thickest piece with an instant-read thermometer. The chicken should reach 165°F internally.

For darker, crispier edges, cook for another 1 to 2 minutes after the chicken reaches a safe temperature.

Step 4: Make the Tzatziki

While the chicken cooks, prepare the sauce.

Place Greek yogurt, squeezed cucumber, lemon juice, garlic, dill, olive oil, and salt in a small bowl.

Stir until smooth and evenly combined.

Taste the sauce and add a little more lemon juice or salt if needed.

Refrigerate the tzatziki until you are ready to build the bowls.

Step 5: Prepare the Fresh Toppings

Add diced cucumber, cherry tomatoes, sliced red onion, and chopped parsley to a bowl.

Toss gently to combine.

Keep the feta cheese and Kalamata olives ready for assembly.

For a brighter flavor, add a small squeeze of lemon juice to the vegetables just before serving.

Step 6: Warm the Rice

Prepare the rice according to the package directions if you are starting with uncooked rice.

For meal prep, leftover rice works well as long as it has been stored safely in the refrigerator.

Warm the rice before assembling the bowls so it provides a pleasant contrast to the cool tzatziki and vegetables.

Step 7: Assemble the Bowls

Divide the warm rice between four serving bowls.

Add a generous portion of the air-fried lemon herb chicken.

Arrange cucumber, tomatoes, red onion, feta, and Kalamata olives around the chicken.

Add a large spoonful of tzatziki.

Finish each bowl with fresh parsley and a lemon wedge.

Serve immediately while the chicken is warm.

Tips for Juicy, Flavorful Chicken

Small details can improve the texture and flavor of the chicken.

  • Pat the chicken dry: Removing surface moisture helps the seasoning stick and promotes browning.
  • Cut pieces evenly: Similar-sized pieces cook at the same rate.
  • Do not overcrowd the basket: Crowding traps steam and reduces browning.
  • Use fresh lemon: Fresh lemon juice gives the marinade a brighter flavor.
  • Do not overcook: Remove the chicken once it reaches 165°F internally.
  • Shake halfway: Moving the pieces helps them brown more evenly.
  • Rest briefly: Let the cooked chicken sit for 2 to 3 minutes before serving.

Easy Bowl Variations

You can easily adjust this recipe to suit different tastes or dietary preferences.

Greek Chicken Salad Bowl

Replace the rice with chopped romaine lettuce or mixed greens. Add extra cucumber, tomato, feta, and olives for a lighter option.

Mediterranean Quinoa Bowl

Use cooked quinoa instead of rice. Quinoa adds a nutty flavor and works well with the lemon-herb chicken.

Low-Carb Chicken Bowl

Use cauliflower rice as the base and increase the amount of fresh vegetables.

Pita Chicken Bowl

Add warm pita bread on the side for dipping into tzatziki or scooping up the chicken and vegetables.

Spicy Greek Chicken Bowl

Add crushed red pepper flakes or a pinch of cayenne to the chicken seasoning for extra heat.

Extra-Herby Version

Add fresh dill, parsley, or mint to the finished bowl for a stronger herb flavor.

What to Serve With This Greek Chicken Bowl

The bowl is filling by itself, but simple sides can turn it into a larger Mediterranean-style meal.

Try serving it with:

  • Warm pita bread
  • Hummus
  • Greek salad
  • Roasted potatoes
  • Lemon potatoes
  • Grilled vegetables
  • Marinated artichoke hearts
  • Fresh fruit

For a casual dinner, place the chicken, rice, vegetables, feta, olives, and tzatziki in separate serving bowls and let everyone build their own meal.

How to Store Leftovers

Store the cooked chicken, rice, vegetables, and tzatziki in separate airtight containers.

Refrigerate the cooked chicken and rice for up to 3 to 4 days.

Keep the tzatziki refrigerated and use it within about 3 to 4 days for the best quality.

Reheat the chicken in the air fryer at 350°F for 3 to 5 minutes.

Warm the rice separately and add the cold vegetables and tzatziki after reheating.

Keeping the components separate prevents the vegetables and sauce from making the warm ingredients soggy.

Meal Prep Tips

These bowls are convenient for preparing several lunches or dinners ahead of time.

  • Cook the chicken and rice in advance.
  • Prepare the tzatziki and refrigerate it in a sealed container.
  • Chop the vegetables and store them separately.
  • Portion the rice and chicken into meal-prep containers.
  • Add feta and olives before serving.
  • Keep tzatziki in a separate small container.
  • Reheat only the rice and chicken.

For the freshest texture, add cucumber, tomatoes, and tzatziki after the warm ingredients have been reheated.

Common Mistakes to Avoid

Overcrowding the Air Fryer

Too many chicken pieces in the basket can create steam instead of crisp edges. Cook in batches if necessary.

Using Too Much Lemon Juice

Lemon adds brightness, but too much acid can overpower the herbs. Stick close to the recommended amount.

Leaving Water in the Cucumber

Watery cucumber can make tzatziki thin. Squeeze the grated cucumber well before mixing.

Overcooking the Chicken

Chicken breast especially can become dry when cooked too long. Use a thermometer rather than relying only on cooking time.

Adding Tzatziki Too Early

Add the sauce after the chicken and rice are ready so the bowl stays fresh and balanced.

Skipping the Seasoning

The chicken is the main source of savory flavor, so coat each piece evenly with the lemon-herb mixture.

Frequently Asked Questions

Can I use chicken breast instead of thighs?

Yes. Chicken breast works well, but cut it evenly and monitor the temperature closely to prevent it from drying out.

How long should I air fry Greek chicken?

Bite-size chicken pieces usually take about 10 to 14 minutes at 400°F, depending on their size and your air fryer.

Can I make the tzatziki ahead of time?

Yes. Homemade tzatziki can be prepared ahead and kept refrigerated so the flavors have time to blend.

What rice works best for this bowl?

Basmati, jasmine, brown rice, or quinoa all work well as a base for the lemon-herb chicken and fresh toppings.

Can I make this bowl without rice?

Absolutely. Use romaine lettuce, mixed greens, cauliflower rice, or quinoa instead.

How do I make the chicken extra crispy?

Keep the chicken pieces in a single layer, avoid excess moisture, and cook for another 1 to 2 minutes after reaching 165°F if needed.

Can I freeze the cooked chicken?

Yes. Freeze the cooked chicken in an airtight freezer-safe container for up to about 3 months, then thaw safely before reheating.

Is store-bought tzatziki okay?

Yes. Refrigerated store-bought tzatziki is a convenient shortcut when you want to make the bowl quickly.

Final Thoughts

These Air Fryer Greek Lemon Herb Chicken & Tzatziki Bowls combine juicy seasoned chicken with fresh Mediterranean toppings and a cool, creamy yogurt sauce. The air fryer makes the chicken quick to cook while creating flavorful browned edges.

The combination of lemon, garlic, oregano, cucumber, tomato, feta, olives, and tzatziki gives every bite a fresh Greek-inspired flavor. Rice makes the meal filling, while greens or cauliflower rice offer easy alternatives.

For the best results, avoid overcrowding the air fryer, check the chicken with a thermometer, squeeze the cucumber well for the tzatziki, and keep the fresh toppings separate until serving.

Whether you are making a quick weeknight dinner or preparing several lunches for the week, this customizable bowl is an easy way to enjoy a fresh Mediterranean-inspired meal at home.

Air Fryer Loaded Mini Pizza Roll-Ups

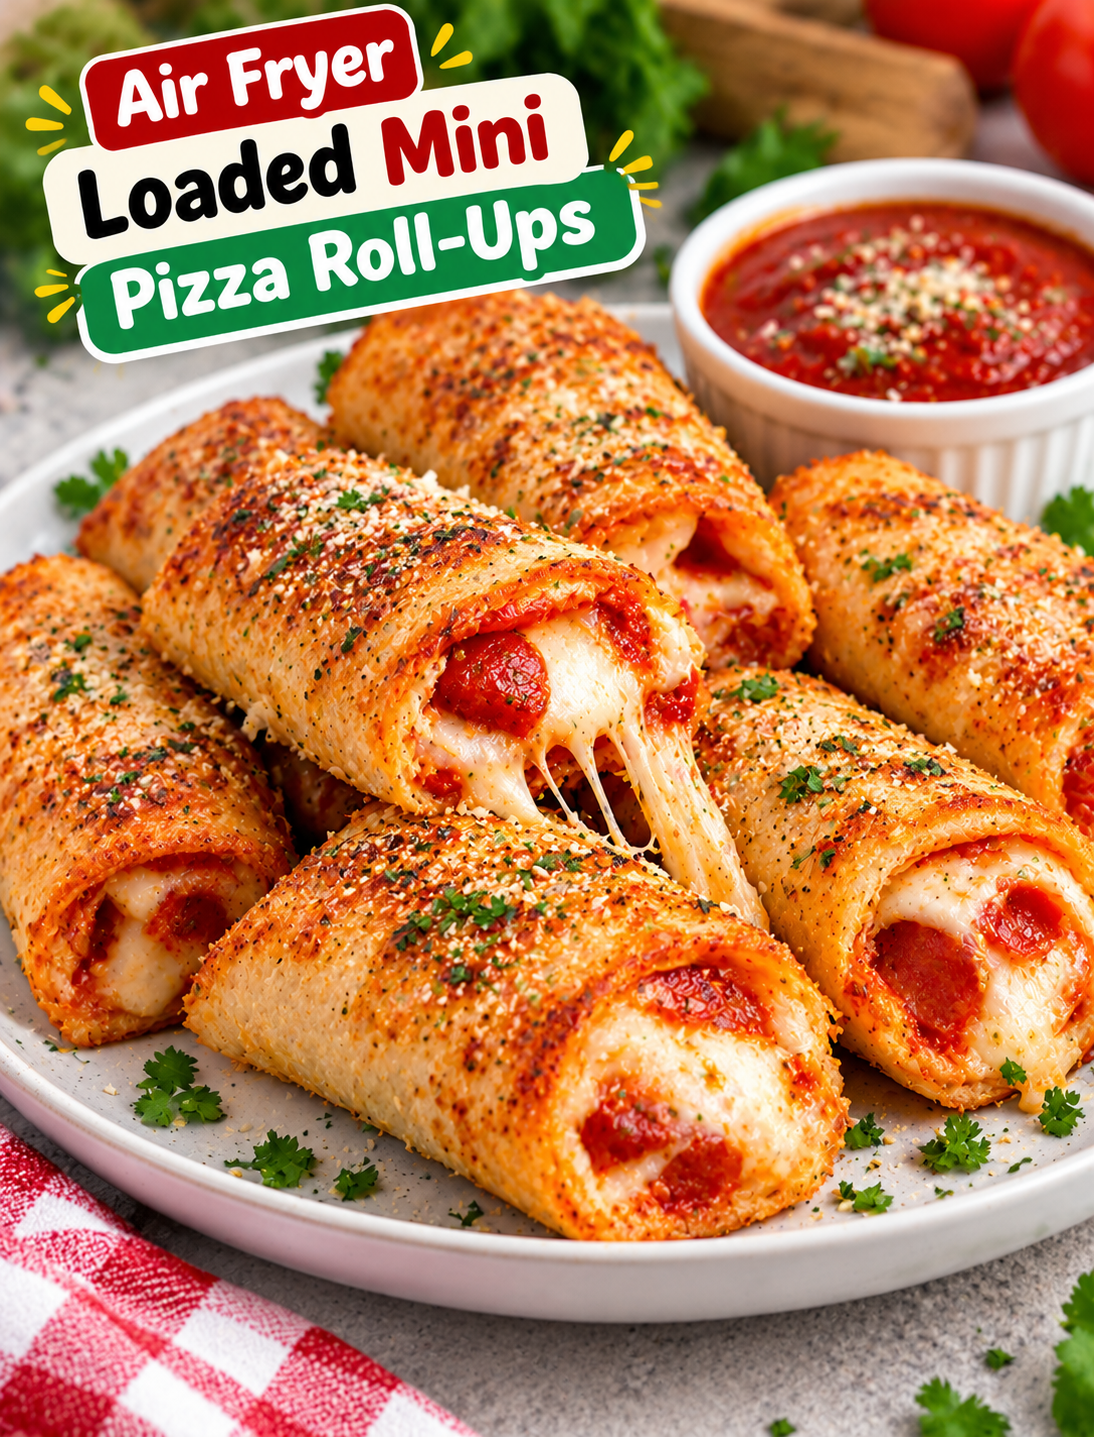
Crispy air fryer loaded mini pizza roll-ups filled with melted mozzarella, pepperoni, and pizza sauce

Air Fryer Loaded Mini Pizza Roll-Ups

These Air Fryer Loaded Mini Pizza Roll-Ups turn classic pizza flavors into crispy, bite-sized rolls that are ready in minutes. Each roll is packed with melted mozzarella, savory pepperoni, pizza sauce, and Italian seasoning, then cooked until the outside is golden and crisp.

They are a fun choice for game days, after-school snacks, quick lunches, family movie nights, or easy party appetizers. The air fryer gives the rolls a crunchy finish without needing a deep fryer.

You can also customize the filling with your favorite pizza toppings. Try cooked sausage, mushrooms, bell peppers, olives, or extra cheese to make every batch your own.

Why You’ll Love These Mini Pizza Roll-Ups

This recipe uses simple ingredients and a fast cooking method, making it useful when you want pizza without waiting for a full pie to bake.

  • Quick to make: The roll-ups cook in the air fryer in just a few minutes.
  • Crispy outside: Lightly brushing the rolls with oil helps create a golden finish.
  • Cheesy center: Mozzarella melts into the pizza sauce for a warm, gooey filling.
  • Easy to customize: Use your favorite pizza toppings or leftover cooked ingredients.
  • Great for sharing: Their small size makes them easy to serve at parties and gatherings.
  • Kid-friendly: Familiar pizza flavors make these an easy snack for children.
  • No deep frying: The air fryer provides crisp texture with only a small amount of oil.

Ingredients You’ll Need

For the Pizza Roll-Ups

  • 8 slices soft white or wheat sandwich bread
  • ½ cup pizza sauce
  • 1 cup shredded mozzarella cheese
  • ½ cup finely chopped pepperoni
  • 1 teaspoon Italian seasoning
  • ¼ teaspoon garlic powder
  • 1 tablespoon grated Parmesan cheese
  • 1 tablespoon melted butter or olive oil
  • ½ teaspoon dried parsley, optional

Use soft sandwich bread that can flatten without cracking. Fresh mozzarella can also work, but shredded low-moisture mozzarella melts evenly and creates less excess moisture.

Optional Pizza Toppings

You can add small amounts of other toppings without making the rolls difficult to wrap.

Good options include:

  • Cooked Italian sausage
  • Finely diced bell peppers
  • Sliced black olives
  • Finely chopped mushrooms
  • Diced jalapeños
  • Cooked bacon
  • Sun-dried tomatoes
  • Red pepper flakes

Always cook raw meat before adding it to the roll-ups. Keep vegetable pieces small so the rolls remain easy to fold and seal.

How to Make Air Fryer Loaded Mini Pizza Roll-Ups

Step 1: Flatten the Bread

Place one slice of bread on a clean cutting board.

Use a rolling pin to flatten the bread into a thin, even rectangle.

Repeat with all the slices.

Flattening the bread makes it flexible enough to roll tightly and helps create a crisp outer layer during air frying.

Tip: Avoid pressing the bread so hard that it becomes torn or paper-thin.

Step 2: Add the Pizza Sauce

Spread about 1 tablespoon of pizza sauce over each flattened bread slice.

Leave a small border around the edges.

Too much sauce can make the bread soggy and cause the filling to leak during cooking.

For a stronger tomato flavor, use a thick pizza sauce rather than a thin pasta sauce.

Step 3: Add Cheese and Toppings

Sprinkle mozzarella evenly over the sauce.

Add the chopped pepperoni and a small amount of Parmesan.

Finish with Italian seasoning and garlic powder.

Keep the filling toward the center of the bread so the roll can close properly.

Avoid overfilling because melted cheese and sauce can escape while the rolls cook.

Step 4: Roll the Bread

Starting from one short end, roll the bread tightly around the filling.

Continue rolling until you have a compact cylinder.

Place the roll seam-side down.

Repeat with the remaining bread slices.

If a roll does not stay closed, lightly press the seam against the cutting board for a few seconds.

Step 5: Prepare the Air Fryer

Preheat the air fryer to 375°F for about 3 minutes.

Lightly brush the outside of each roll with melted butter or olive oil.

A thin coating is enough to help the bread brown and crisp.

Do not soak the rolls with oil because excess oil can make the bread greasy.

Step 6: Air Fry the Pizza Roll-Ups

Place the rolls in the air fryer basket with the seam-side down.

Leave a little space between each roll so hot air can circulate around them.

Air fry at 375°F for 5 to 8 minutes.

Turn the rolls halfway through cooking if your air fryer does not brown evenly.

Cook until the bread is golden and crisp and the cheese inside has melted.

Because air fryers vary in power, start checking around the 5-minute mark.

Step 7: Let Them Rest

Carefully remove the pizza roll-ups from the basket.

Let them rest for about 1 to 2 minutes before serving.

The filling will be extremely hot immediately after cooking, especially the melted cheese and sauce.

Sprinkle the finished rolls with dried parsley or a little Parmesan if desired.

Tips for Crispy Pizza Roll-Ups

Getting the outside crisp while keeping the filling inside takes a few simple steps.

  • Flatten the bread evenly: This helps the rolls cook at the same rate.
  • Use less sauce: A thin layer prevents soggy bread.
  • Do not overfill: Too much cheese or pepperoni can make the rolls burst.
  • Roll tightly: A compact roll keeps the filling contained.
  • Place seam-side down: This helps the roll stay closed while cooking.
  • Use a light oil coating: A small amount helps create a golden crust.
  • Avoid overcrowding: Space allows hot air to reach every side.
  • Watch the final minutes: Bread can brown quickly in an air fryer.

Easy Flavor Variations

These roll-ups are easy to change based on your favorite pizza combination.

Pepperoni Pizza Roll-Ups

Use pepperoni, mozzarella, pizza sauce, and Italian seasoning for a classic pizza flavor.

Supreme Pizza Roll-Ups

Add finely chopped bell peppers, olives, mushrooms, and cooked sausage along with the cheese.

Spicy Pizza Roll-Ups

Add crushed red pepper flakes and diced jalapeños for a spicy version.

BBQ Chicken Pizza Roll-Ups

Replace pizza sauce with a thin layer of BBQ sauce and add cooked shredded chicken, mozzarella, and red onion.

Garlic Cheese Roll-Ups

Skip the meat and add extra mozzarella, Parmesan, garlic powder, and Italian herbs.

Hawaiian-Style Roll-Ups

Add finely chopped cooked ham and small pieces of pineapple with the mozzarella.

Keep the added ingredients finely chopped so the bread can still roll tightly.

What to Serve With Pizza Roll-Ups

These mini pizza rolls are delicious on their own, but a dipping sauce makes them even more enjoyable.

Try serving them with:

  • Warm marinara sauce
  • Ranch dressing
  • Garlic butter
  • Spicy marinara
  • Creamy Parmesan dip
  • Hot honey
  • Garlic herb sauce

For a party platter, arrange the rolls around small bowls of two or three dipping sauces.

For a quick family meal, serve them with a simple green salad, roasted vegetables, or fresh fruit.

How to Store Leftovers

Allow leftover roll-ups to cool completely before storing them.

Place them in an airtight container and refrigerate for up to 3 days.

For the best texture, reheat them in the air fryer instead of the microwave.

Air fry refrigerated roll-ups at 350°F for about 3 to 5 minutes, or until heated through and crisp again.

Check the center before serving because the melted cheese can become very hot.

Can You Make Them Ahead?

Yes. You can prepare the rolls several hours before cooking and keep them covered in the refrigerator.

For the best results, avoid storing them for too long after assembly because the sauce can gradually soften the bread.

When ready to serve, lightly brush the rolls with oil and air fry them directly from the refrigerator.

Add about 1 to 2 minutes to the cooking time if needed.

Common Mistakes to Avoid

Adding Too Much Sauce

Excess sauce can make the bread soft and difficult to roll. Use a thin, even layer instead.

Overloading the Filling

Too many toppings can prevent the bread from sealing and cause cheese to leak during cooking.

Skipping the Preheat

A preheated air fryer helps the bread begin crisping as soon as it enters the basket.

Using Wet Toppings

Drain vegetables and other ingredients with excess moisture before adding them to the rolls.

Overcrowding the Basket

Crowding blocks hot air and can leave some sides pale or soft.

Cutting Immediately

Give the rolls a minute or two to rest so the hot cheese and sauce are less likely to spill out.

Frequently Asked Questions

Can I use tortillas instead of bread?

Yes, small flour tortillas can work, but the texture will be different and more like a crispy tortilla pizza roll.

How long do pizza roll-ups take in an air fryer?

Most batches take about 5 to 8 minutes at 375°F, depending on the air fryer and the size of the rolls.

Can I make these without pepperoni?

Yes. Replace pepperoni with cooked sausage, vegetables, chicken, bacon, or simply add more cheese.

Why are my pizza roll-ups soggy?

Too much sauce, wet toppings, or overcrowding the air fryer can prevent the bread from becoming crisp.

Can I freeze pizza roll-ups?

Yes. Freeze fully cooled rolls in a freezer-safe container, then reheat them in the air fryer until hot and crisp.

What cheese is best for pizza roll-ups?

Low-moisture shredded mozzarella melts smoothly and gives the rolls a classic pizza-style cheese pull.

Can I use whole wheat bread?

Yes. Soft whole wheat bread works well, although it may produce a slightly firmer texture than white bread.

What temperature is best for air frying them?

375°F provides a good balance between crisping the bread and melting the cheese without burning the outside too quickly.

Final Thoughts

These Air Fryer Loaded Mini Pizza Roll-Ups are an easy way to enjoy classic pizza flavors in a small, crispy package. Soft bread wraps around pizza sauce, mozzarella, pepperoni, and Italian seasoning before the air fryer turns everything golden and crunchy.

The recipe is flexible enough for busy weeknights, school snacks, game-day gatherings, and casual parties. You can keep the filling classic or add your favorite toppings for a personalized version.

For the best results, use a thin layer of sauce, avoid overfilling, roll the bread tightly, and leave space between the rolls in the air fryer. Serve them warm with marinara, ranch, or your favorite dipping sauce for an easy snack everyone can grab and enjoy.