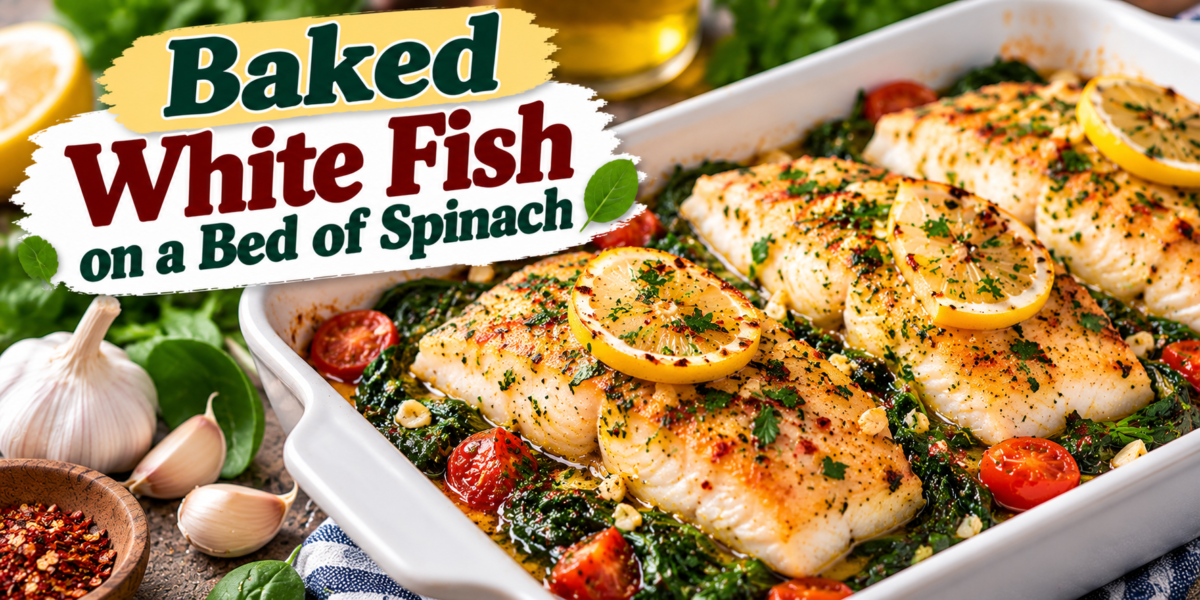
Baked White Fish on a Bed of Spinach

Baked White Fish on a bed of spinach with garlic, lemon, herbs, olive oil, and tender white fish fillets

Baked White Fish on a Bed of Spinach

Baked White Fish is a light, flavorful, and easy dinner made with tender white fish fillets, fresh spinach, garlic, lemon, olive oil, and simple herbs. The fish bakes gently over the spinach, allowing the juices to season the greens while keeping the fillets moist and delicate.

This Baked White Fish recipe works well for busy weeknights, family dinners, or weekends. It is simple for beginners yet elegant enough for guests with potatoes, rice, or crusty bread.

Prep Time: 15 minutes
Cook Time: 20–25 minutes
Total Time: 35–40 minutes
Servings: 4

Ingredients

For the Fish

  • 4 white fish fillets, about 5–6 ounces each
  • 1 tablespoon extra virgin olive oil
  • 1 tablespoon fresh lemon juice
  • 1 teaspoon lemon zest
  • 1 teaspoon garlic powder
  • 1/2 teaspoon paprika
  • 1/2 teaspoon dried oregano
  • 1/2 teaspoon salt
  • 1/4 teaspoon black pepper

For the Spinach Bed

  • 8 cups fresh baby spinach
  • 1 tablespoon extra virgin olive oil
  • 3 garlic cloves, minced
  • 1 small shallot, finely sliced
  • 1/4 teaspoon salt
  • 1/4 teaspoon black pepper
  • 2 tablespoons grated Parmesan, optional
  • 2 tablespoons chopped fresh parsley

For Serving

  • Lemon wedges
  • Fresh dill or parsley
  • Red pepper flakes
  • Extra virgin olive oil, for finishing

Why You’ll Love This Recipe

Baked White Fish is a great choice when you want something satisfying without a heavy sauce. The mild fish pairs naturally with lemon, garlic, herbs, and spinach, creating a balanced meal with bright, fresh flavor.

Another reason to love Baked White Fish is its simplicity. Everything cooks in one baking dish, cleanup is easy, and you can change the herbs, fish, or vegetables without changing the basic method.

How to Make Baked White Fish

Step 1: Preheat the Oven

Preheat the oven to 400°F or 200°C.

Lightly grease a baking dish with olive oil, large enough to hold the spinach and fish in one layer.

Step 2: Prepare the Spinach

Heat 1 tablespoon olive oil in a large skillet over medium heat.

Add the sliced shallot and cook for about 2 minutes, until slightly softened. Stir in the garlic and cook for 30 seconds.

Add the spinach in batches, tossing gently until just wilted. Season with salt and black pepper.

The spinach should remain bright green because it will continue cooking beneath the Baked White Fish in the oven.

Step 3: Arrange the Spinach Bed

Transfer the wilted spinach to the prepared baking dish and spread it evenly.

If there is a lot of liquid in the skillet, leave most of it behind so the finished dish does not become watery.

Sprinkle Parmesan over the spinach if using.

Step 4: Season the Fish

Pat the fish fillets dry with paper towels.

Brush both sides with olive oil and lemon juice. Season with lemon zest, garlic powder, paprika, oregano, salt, and black pepper.

Even seasoning helps Baked White Fish develop flavor while preserving the clean taste of the fish.

Step 5: Place the Fish Over the Spinach

Arrange the fillets directly on top of the spinach, leaving a little space between each piece.

Tuck thin ends under slightly if necessary so the fish cooks evenly.

Drizzle any remaining lemon and olive oil mixture over the top.

Step 6: Bake Until Tender

Bake uncovered for 15 to 20 minutes, depending on the thickness of the fillets.

Baked White Fish is ready when the flesh is opaque, flakes easily with a fork, and reaches an internal temperature of 145°F or 63°C at the thickest part.

Avoid overbaking because white fish can dry out quickly.

Step 7: Add Fresh Herbs

Remove the baking dish from the oven.

Sprinkle fresh parsley or dill over the fish and spinach. Add red pepper flakes if you like a little heat.

Fresh herbs give the dish a brighter finish and balance the savory garlic and spinach.

Step 8: Rest Briefly

Let the dish rest for 3 to 5 minutes before serving.

This brief rest helps the juices settle and keeps the fish moist.

Step 9: Finish with Lemon

Squeeze fresh lemon juice over the fish just before serving.

A light drizzle of olive oil adds a smooth Mediterranean-style finish.

Step 10: Serve

Divide the spinach among four plates and place one fish fillet over each portion.

Serve Baked White Fish immediately while the fillets are warm and tender.

Serving Suggestions

Baked White Fish pairs well with many simple side dishes.

Serve it with roasted baby potatoes, mashed potatoes, brown rice, quinoa, couscous, or orzo for a more filling meal.

For a lighter plate, add cucumber salad, roasted asparagus, green beans, or arugula.

Crusty bread is also excellent because it can soak up the lemony juices from the spinach and fish.

For a Mediterranean-style dinner, serve Baked White Fish with olives, hummus, pita, and tomato salad.

For a protein-rich breakfast option, try our Baked Blueberry Cottage Cheese Breakfast Bowl with cottage cheese, oats, and juicy blueberries.

Recipe Tips

Choose fish fillets of similar thickness so they finish cooking at the same time.

Pat the fish dry before seasoning. Removing surface moisture helps the seasonings cling better.

Do not fully cook the spinach before it goes into the baking dish because it will continue to soften in the oven.

Use fresh lemon juice for the best flavor.

Check the fish early if the fillets are thin.

Baked White Fish should flake easily but still look moist inside.

If the spinach releases too much water, spoon off a little liquid before serving.

A small amount of Parmesan adds savory flavor, but the dish is also delicious without cheese.

Easy Variations

You can make Baked White Fish with cod, haddock, pollock, tilapia, halibut, or another mild white fish.

For extra Mediterranean flavor, add halved cherry tomatoes, Kalamata olives, capers, or roasted red peppers around the fish before baking.

For a creamy variation, spoon a small amount of Greek yogurt mixed with lemon and dill over the fish after cooking.

You can replace part of the spinach with kale or Swiss chard; sauté tougher greens slightly longer first.

For extra crunch, sprinkle seasoned breadcrumbs or crushed whole-grain crackers over the fillets before they go into the oven.

Make-Ahead Instructions

Baked White Fish is best cooked shortly before serving, but several parts can be prepared ahead.

Wash the spinach, slice the shallot, mince the garlic, and mix the seasonings one day ahead.

You can also sauté the spinach earlier in the day. Let it cool, cover it, and refrigerate until needed.

For the best texture, season and bake the fish just before serving rather than leaving raw fish in the baking dish for many hours.

Storage and Reheating

Store leftover Baked White Fish in an airtight container in the refrigerator for up to 2 days.

Reheat gently in a 300°F or 150°C oven until warmed through. Cover the dish loosely with foil to help prevent the fish from drying out.

Individual portions can also be reheated gently in the microwave.

Avoid repeated reheating because delicate fish can become dry and tough.

Freezing is possible, but the spinach may become softer after thawing. Refrigerated leftovers usually give the best texture.

Nutrition Information

Approximate nutrition per serving:

Calories: 280
Protein: 34 g
Carbohydrates: 8 g
Fat: 13 g
Saturated Fat: 3 g
Fiber: 3 g
Sugar: 2 g
Sodium: 520 mg

Nutrition values are estimates and vary with the fish, oil, and optional Parmesan.

Frequently Asked Questions

What type of white fish works best?

Cod, haddock, pollock, tilapia, and halibut all work well. Choose fresh fillets with a mild aroma and firm texture.

Can I use frozen fish?

Yes. Thaw the fish completely in the refrigerator and pat it very dry before seasoning and baking.

Can I use frozen spinach?

Yes. Thaw it completely and squeeze out as much liquid as possible before placing it in the baking dish.

How do I know when the fish is done?

The flesh should be opaque and should separate easily into flakes with a fork. The thickest part should reach 145°F or 63°C.

Can I add tomatoes to this recipe?

Yes. Cherry tomatoes are especially good because they roast quickly and add sweet, juicy flavor.

Can I make it dairy-free?

Yes. Simply omit the optional Parmesan. The lemon, garlic, herbs, and olive oil provide plenty of flavor.

Is this recipe good for meal prep?

Yes, although fish is best within a couple of days. Prepare individual portions with rice or potatoes and refrigerate them in airtight containers.

Final Thoughts

Baked White Fish is a simple way to turn mild fish and fresh spinach into a complete, flavorful dinner. Lemon, garlic, olive oil, herbs, and tender greens complement the fish without covering its delicate flavor.

Because Baked White Fish requires minimal preparation and cooks quickly, it is especially useful for weeknight meals when you want something fresh without spending a long time in the kitchen.

Keep this Baked White Fish recipe handy whenever you want a light, comforting, Mediterranean-inspired dinner made with simple ingredients.

If you enjoy easy Mediterranean-inspired meals, you may also like our Mediterranean Baked Feta & Veggie Pasta.
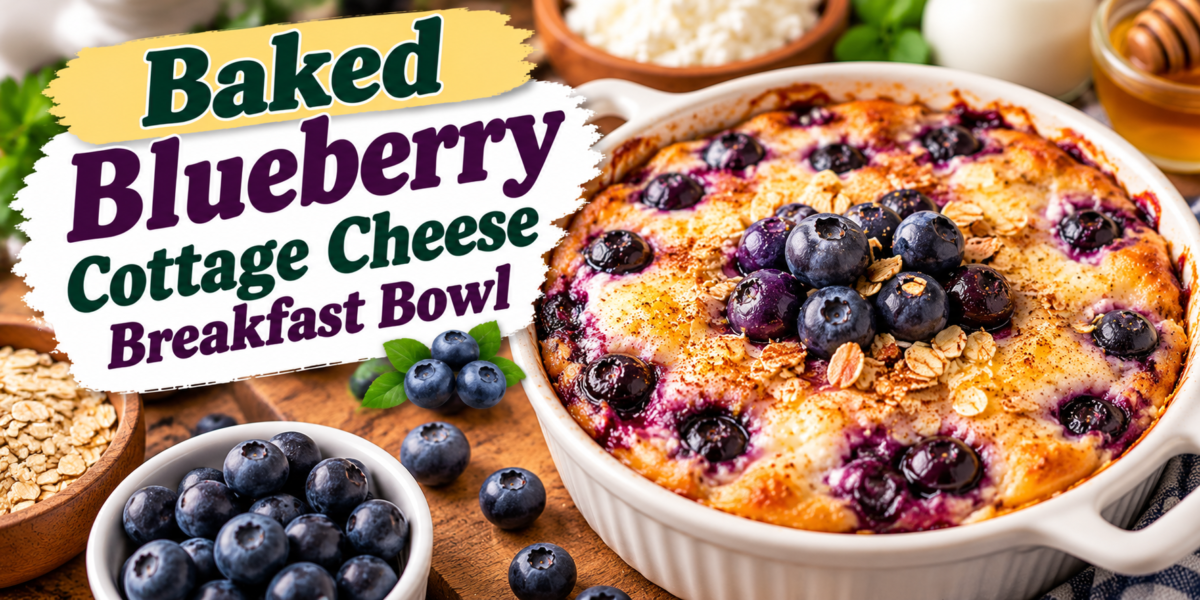
Baked Blueberry Cottage Cheese Breakfast Bowl

Blueberry Cottage Cheese Bowl with cottage cheese, blueberries, oats, eggs, vanilla, cinnamon, and fresh toppings

Baked Blueberry Cottage Cheese Breakfast Bowl

Blueberry Cottage Cheese Bowl is a warm, protein-rich breakfast made with creamy cottage cheese, juicy blueberries, eggs, oats, vanilla, and a touch of honey or maple syrup. It bakes into a soft, lightly custardy breakfast with golden edges and sweet bursts of fruit in every spoonful.

This Blueberry Cottage Cheese Bowl is especially useful on busy mornings because the ingredients are simple, the preparation takes only a few minutes, and the oven does most of the work. It feels comforting like baked oatmeal while offering extra protein from cottage cheese and eggs.

Prep Time: 10 minutes
Cook Time: 25–30 minutes
Total Time: 35–40 minutes
Servings: 

Ingredients

For the Breakfast Bowl

  • 1 cup cottage cheese
  • 2 large eggs
  • 1/2 cup rolled oats
  • 1 cup fresh or frozen blueberries
  • 2 tablespoons honey or maple syrup
  • 1 teaspoon vanilla extract
  • 1/2 teaspoon ground cinnamon
  • 1/2 teaspoon baking powder
  • Pinch of salt
  • 1 teaspoon lemon zest, optional

For Topping

  • 2 tablespoons chopped walnuts or almonds
  • 2 tablespoons Greek yogurt, optional
  • Extra blueberries
  • Small drizzle of honey or maple syrup
  • Ground cinnamon

Why You’ll Love This Recipe

Blueberry Cottage Cheese Bowl is creamy, fruity, filling, and easy to prepare with everyday ingredients. It combines the comfort of a baked breakfast with the convenience of a simple one-bowl recipe.

Another reason to love Blueberry Cottage Cheese Bowl is its balance of protein, fiber, and naturally sweet fruit. Cottage cheese and eggs provide protein, oats add satisfying texture, and blueberries bring freshness and color.

You can also change the fruit, sweetener, spices, or toppings without changing the basic method, which makes it an easy recipe to keep in your regular breakfast rotation.

How to Make Blueberry Cottage Cheese Bowl

Step 1: Preheat the Oven

Preheat the oven to 375°F or 190°C.

Lightly grease a small oven-safe baking dish or two individual ramekins. A little cooking spray or butter will help prevent sticking and make cleanup easier.

Step 2: Blend the Base

Add the cottage cheese, eggs, honey or maple syrup, vanilla, cinnamon, baking powder, and salt to a blender.

Blend until mostly smooth.

Blending gives Blueberry Cottage Cheese Bowl a softer, more custardy texture. If you prefer more cottage cheese texture, blend only briefly or whisk everything by hand.

Step 3: Add the Oats

Pour the blended mixture into a bowl and stir in the rolled oats.

Let the mixture sit for about 2 minutes so the oats begin absorbing some of the liquid.

This helps Blueberry Cottage Cheese Bowl bake with a tender center instead of becoming watery.

Step 4: Fold in the Blueberries

Reserve a small handful of blueberries for the top.

Gently fold the remaining berries into the mixture.

If using frozen blueberries, add them directly from frozen rather than thawing them first. Thawed berries can release extra juice and turn the entire mixture purple.

Step 5: Fill the Baking Dish

Pour the mixture into the prepared baking dish or divide it between two ramekins.

Smooth the top gently with a spoon.

Scatter the reserved blueberries over the surface and add chopped nuts if desired.

Step 6: Bake

Bake for 25 to 30 minutes, or until the center is set and the edges are lightly golden.

Blueberry Cottage Cheese Bowl should look puffed around the edges while remaining soft and tender in the middle.

If using two small ramekins, begin checking around 22 minutes because smaller portions may bake faster.

Step 7: Rest Before Serving

Remove the dish from the oven and let it rest for 5 minutes.

The texture will firm slightly as it cools, making Blueberry Cottage Cheese Bowl easier to spoon and giving the flavors time to settle.

Step 8: Add Toppings

Top with Greek yogurt, extra blueberries, chopped nuts, cinnamon, or a small drizzle of honey or maple syrup.

Serve warm.

Serving Suggestions

Blueberry Cottage Cheese Bowl can be enjoyed by itself because it already contains protein, fruit, and oats, but a few simple additions can turn it into a larger breakfast.

Serve it with sliced banana, strawberries, raspberries, or orange segments for more fresh fruit.

For extra crunch, add toasted walnuts, pecans, almonds, pumpkin seeds, or a spoonful of granola.

A spoonful of Greek yogurt works especially well with Blueberry Cottage Cheese Bowl because it adds cool creaminess next to the warm baked center.

For brunch, serve it alongside scrambled eggs, turkey sausage, whole-grain toast, or a fresh fruit platter.

For a sweet breakfast or brunch option, try our Strawberry Cream Cheese Loaf with a soft, creamy center and fresh strawberry flavor.

Recipe Tips

Use small-curd or smooth cottage cheese if you want the creamiest texture.

Full-fat cottage cheese creates a richer bowl, while low-fat cottage cheese also works well.

Do not overbake the mixture. The center should be set but still soft.

If your cottage cheese is very watery, drain off some excess liquid before blending.

Fresh and frozen blueberries both work.

For frozen berries, add them without thawing.

Rolled oats provide the best texture, but quick oats can be used for a softer result.

Adjust the sweetness to your taste. Some cottage cheese brands are saltier than others, so tasting the mixture before adding extra sweetener can help.

Lemon zest is optional, but it gives Blueberry Cottage Cheese Bowl a bright flavor that complements blueberries particularly well.

Easy Variations

For a strawberry version, replace the blueberries with chopped strawberries.

You can also prepare Blueberry Cottage Cheese Bowl with raspberries, blackberries, diced peaches, or chopped apples.

For a banana-blueberry variation, mash half a ripe banana into the base and slightly reduce the honey or maple syrup.

Add chia seeds or ground flaxseed for extra fiber.

For a chocolate variation, add 1 tablespoon of unsweetened cocoa powder and a few dark chocolate chips.

If you enjoy warm spices, add nutmeg or cardamom along with the cinnamon.

For extra crunch, mix chopped walnuts or almonds into the batter before baking.

You can also add a small spoonful of peanut butter or almond butter on top after baking.

Make-Ahead Instructions

Blueberry Cottage Cheese Bowl can be assembled ahead, making it helpful for busy mornings.

Blend the cottage cheese mixture and refrigerate it overnight in a covered container. Keep the blueberries separate and fold them in just before baking.

You can also bake the entire dish one day ahead, let it cool, cover it, and refrigerate it.

Reheat gently in the morning for a quick breakfast.

Storage and Reheating

Store leftover Blueberry Cottage Cheese Bowl in an airtight container in the refrigerator for up to 3 days.

Reheat individual portions in the microwave for 30 to 60 seconds, depending on the size of the serving.

You can also warm it in a 325°F or 165°C oven for about 8 to 10 minutes.

If the bowl seems dry after refrigeration, add a spoonful of yogurt, a splash of milk, or fresh berries before serving.

Freezing is possible, although the texture may become slightly softer after thawing. For best results, refrigerate and enjoy within a few days.

Nutrition Information

Approximate nutrition per serving:

Calories: 330
Protein: 24 g
Carbohydrates: 37 g
Fat: 11 g
Saturated Fat: 4 g
Fiber: 5 g
Sugar: 19 g
Sodium: 430 mg

Nutrition values are estimates and may vary depending on the cottage cheese, sweetener, toppings, and serving size.

Frequently Asked Questions

Can I use frozen blueberries?

Yes. Add them directly from the freezer. There is no need to thaw them first.

Can I make this without oats?

Yes. The texture will be softer and more custard-like. You can also substitute almond flour or a small amount of ground flaxseed.

Can I make it without a blender?

Yes. Whisk the ingredients together thoroughly. The finished texture will have more visible cottage cheese curds but will still taste delicious.

Can I use another sweetener?

Yes. Maple syrup, honey, date syrup, or your preferred granulated sweetener can work.

How do I know when it is fully baked?

The edges should look lightly golden and the center should no longer appear liquid. A slight softness in the middle is fine because it continues setting while resting.

Can I add protein powder?

Yes. Add a small scoop and include a splash of milk if the mixture becomes too thick.

Is this good for meal prep?

Yes. Blueberry Cottage Cheese Bowl reheats well and can be divided into individual portions for quick breakfasts.

Final Thoughts

Blueberry Cottage Cheese Bowl is an easy way to turn a few everyday breakfast ingredients into something warm, filling, and comforting. Cottage cheese, eggs, oats, blueberries, vanilla, and cinnamon create a soft baked breakfast with plenty of flavor and satisfying texture.

Because Blueberry Cottage Cheese Bowl is simple to customize, it works well for weekday breakfasts, weekend brunch, or meal prep.

Keep this Blueberry Cottage Cheese Bowl recipe handy whenever you want a protein-rich breakfast that feels cozy, tastes naturally sweet, and requires very little hands-on preparation.

If you enjoy hearty make-ahead meals, you may also like our Crockpot Red Beans and Chicken Sausage.

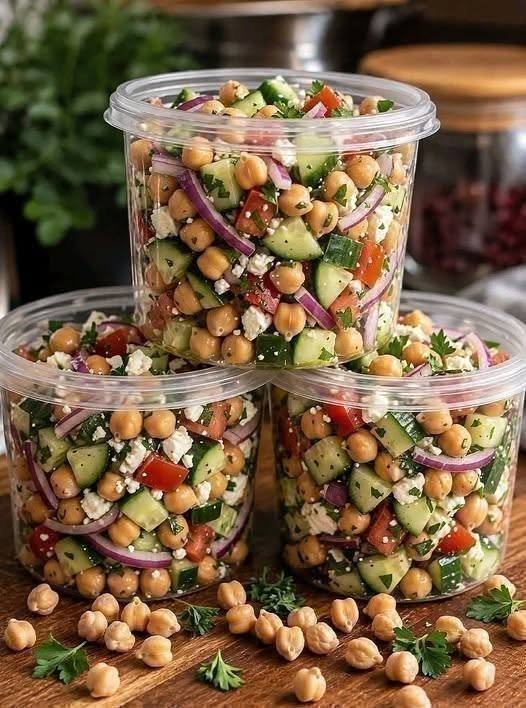
Mediterranean Chickpea Cucumber Feta Salad

Mediterranean Chickpea Salad with fresh cucumber, cherry tomatoes, crumbled feta cheese, chickpeas, parsley, and lemon olive oil dressing

Mediterranean Chickpea Cucumber Feta Salad

– Fresh, Healthy & Easy Recipe

Description

Mediterranean Chickpea Cucumber Feta Salad is a refreshing, colorful, and nutritious dish filled with fresh vegetables, protein-rich chickpeas, creamy feta cheese, and aromatic herbs. Tossed in a homemade lemon-olive oil dressing, this delicious salad delivers bright Mediterranean flavors in every bite.

The combination of crunchy cucumbers, juicy cherry tomatoes, tender chickpeas, tangy feta, and fresh parsley creates the perfect balance of flavor and texture.

This easy, no-cook recipe is ideal for quick lunches, healthy dinners, summer gatherings, and weekly meal preparation. It takes just 15 minutes to prepare and tastes even better after chilling.

Recipe Information

Prep Time: 15 minutes Chill Time: 15–30 minutes Total Time: 30–45 minutes Servings: 6 Cooking Method: No-cook Cuisine: Mediterranean

🛒 Ingredients

For the Salad

  • 2 cans (15 oz each) chickpeas, drained and rinsed

  • 1 large English cucumber, diced

  • 1 cup cherry tomatoes, halved

  • ½ small red onion, thinly sliced

  • ½ cup crumbled feta cheese

  • ¼ cup fresh parsley, chopped

  • 2 tablespoons fresh mint, chopped

  • ¼ cup Kalamata olives, sliced (optional)

For the Lemon Dressing

  • ¼ cup extra-virgin olive oil

  • 3 tablespoons fresh lemon juice

  • 1 tablespoon red wine vinegar

  • 1 garlic clove, minced

  • ½ teaspoon dried oregano

  • ½ teaspoon salt, or to taste

  • ¼ teaspoon freshly ground black pepper

Optional Garnishes

  • Extra crumbled feta cheese

  • Fresh parsley leaves

  • Lemon wedges

  • Freshly cracked black pepper

👨‍🍳 Step-by-Step Instructions

Step 1: Prepare the Chickpeas

Open both cans of chickpeas and drain them in a colander.

Rinse thoroughly under cold running water to remove excess sodium and the canned liquid.

Allow the chickpeas to drain completely before transferring them to a large mixing bowl.

For extra flavor, gently pat them dry using paper towels.

Step 2: Chop the Vegetables

Wash the cucumber, cherry tomatoes, parsley, and mint.

Dice the English cucumber into small, bite-sized pieces.

Slice the cherry tomatoes in half and thinly slice the red onion.

For a milder onion flavor, soak the sliced onion in cold water for five minutes, then drain.

Step 3: Combine the Salad Ingredients

Add the chickpeas, diced cucumber, tomatoes, red onion, parsley, mint, and Kalamata olives to a large serving bowl.

Gently mix everything using a large spoon.

Sprinkle the crumbled feta cheese over the vegetables.

Step 4: Prepare the Lemon Dressing

In a small bowl, combine extra-virgin olive oil, fresh lemon juice, red wine vinegar, minced garlic, dried oregano, salt, and black pepper.

Whisk vigorously until the ingredients are well combined.

Taste the dressing and adjust the lemon juice or seasonings according to preference.

Step 5: Toss Everything Together

Pour the lemon dressing evenly over the chickpea mixture.

Use two large spoons to gently toss the ingredients until everything is lightly coated.

Avoid vigorous stirring because it can break the chickpeas and crumble the feta excessively.

Step 6: Chill and Serve

Cover the salad and refrigerate for 15–30 minutes.

This resting period allows the Mediterranean flavors to develop.

Before serving, toss gently and garnish with extra feta, parsley, and lemon wedges.

Serve chilled or at room temperature.

Why You’ll Love This Mediterranean Salad

This recipe offers several wonderful benefits.

  • Fresh and colorful ingredients create an appetizing presentation.

  • Chickpeas provide plant-based protein and dietary fiber.

  • Cucumbers and tomatoes add refreshing crunch.

  • Feta cheese provides a creamy, tangy flavor.

  • Olive oil contributes heart-healthy unsaturated fats.

  • Lemon juice and herbs deliver brightness without complicated seasonings.

  • No cooking is required, making preparation incredibly easy.

It’s also naturally vegetarian when prepared with vegetarian-rennet feta.

Helpful Tips for the Best Results

Use Fresh Vegetables

Choose firm cucumbers and ripe cherry tomatoes for maximum freshness and flavor.

Drain Chickpeas Thoroughly

Excess moisture can dilute the dressing and make the salad watery.

Add Feta Gently

Fold the feta into the salad at the end to help preserve its texture.

Adjust the Dressing

If you enjoy tangy salads, add another teaspoon of lemon juice.

Chill Before Serving

Refrigerating briefly helps the chickpeas absorb the delicious dressing.

Avoid Over-Salting

Feta cheese and Kalamata olives are naturally salty, so taste before adding extra salt.

Delicious Recipe Variations

Avocado Chickpea Salad

Add one diced avocado immediately before serving for extra creaminess.

High-Protein Mediterranean Salad

Add grilled chicken breast or cooked shrimp for additional protein.

Mediterranean Quinoa Salad

Mix in one cup of cooked, cooled quinoa for a more substantial meal.

Vegan Chickpea Salad

Replace feta cheese with a dairy-free feta alternative or omit it entirely.

Spicy Mediterranean Salad

Add crushed red pepper flakes or finely chopped jalapeño for extra heat.

Storage and Meal Preparation

Store leftover Mediterranean Chickpea Cucumber Feta Salad in an airtight container in the refrigerator for up to three days.

For the freshest texture, keep the dressing separate until shortly before serving.

If preparing ahead, store chopped vegetables, chickpeas, and dressing in separate containers.

Add feta and fresh herbs just before serving.

Freezing is not recommended because cucumbers and tomatoes become watery after thawing.

Frequently Asked Questions

Can I make this salad ahead of time?

Yes. Prepare the ingredients several hours in advance and refrigerate. Add the dressing and feta shortly before serving for the freshest texture.

Is Mediterranean chickpea salad healthy?

Yes. Chickpeas provide fiber and protein, while vegetables contribute vitamins and minerals. Olive oil provides beneficial unsaturated fats.

Can I use dried chickpeas?

Absolutely. Cook dried chickpeas until tender, drain, and cool completely before adding them to the salad.

What can I serve with this salad?

Serve alongside grilled chicken, baked salmon, pita bread, roasted vegetables, or Mediterranean rice.

📊 Nutritional Information (Per Serving)

Approximate values for 6 servings, including optional olives; actual values depend on brands and portions.

Nutrient Amount
Calories 285 kcal
Protein 10 g
Carbohydrates 30 g
Fat 15 g
Fiber 8 g
Sugar 5 g
Sodium 620 mg

Final Thoughts

Mediterranean Chickpea Cucumber Feta Salad is a simple, fresh, and satisfying recipe that brings delicious Mediterranean flavors to your table.

With crunchy vegetables, creamy feta, tender chickpeas, and bright lemon dressing, it’s perfect for healthy lunches, family dinners, potlucks, and meal preparation.

Make a bowl today and enjoy a refreshing, flavorful salad that requires minimal effort and delivers plenty of taste!

Classic Egg Salad Recipe

Classic Egg Salad made with chopped hard-boiled eggs, creamy mayonnaise, mustard, celery, green onions, and fresh herbs

Classic Egg Salad Recipe – Easy, Creamy & Delicious Homemade Favorite

Classic Egg Salad is a creamy, flavorful, and easy-to-make recipe prepared with perfectly hard-boiled eggs, mayonnaise, tangy mustard, crunchy celery, fresh green onions, and a touch of lemon juice. This simple homemade salad combines everyday ingredients to create a satisfying dish that’s perfect for sandwiches, wraps, lettuce cups, or a quick lunch.

The beauty of this Classic Egg Salad Recipe lies in its simplicity. With just a few ingredients and minimal preparation, you can create a rich, creamy filling that tastes delicious without requiring complicated cooking techniques.

The combination of smooth egg yolks, tender egg whites, crisp vegetables, and creamy dressing creates a wonderful balance of textures. Meanwhile, mustard adds a slightly tangy flavor, and freshly squeezed lemon juice brightens the entire dish.

Whether you’re planning a family lunch, preparing sandwiches for a picnic, or looking for a convenient make-ahead meal, this easy egg salad is a reliable recipe that everyone can enjoy.

Prep Time: 10 minutes Cook Time: 12 minutes Chilling Time: 20–30 minutes Total Time: 42–52 minutes Servings: 4

Ingredients for Classic Egg Salad

For the Egg Salad

  • 6 large eggs

  • ⅓ cup mayonnaise

  • 1 tablespoon Dijon mustard or yellow mustard

  • 2 tablespoons celery, finely chopped

  • 2 tablespoons green onions, finely chopped

  • 1 tablespoon sweet pickle relish, optional

  • 1 teaspoon fresh lemon juice

  • ¼ teaspoon paprika

  • ¼ teaspoon salt, or to taste

  • ⅛ teaspoon freshly ground black pepper

For Garnishing

  • 1 tablespoon fresh chives, chopped

  • 1 tablespoon fresh parsley, chopped

  • A small pinch of paprika

Optional Additions

  • 1 tablespoon chopped fresh dill

  • 1 tablespoon finely chopped dill pickles

  • 1 tablespoon finely chopped red onion

  • ¼ teaspoon garlic powder

  • A few drops of hot sauce

  • 1 tablespoon finely diced jalapeño, for extra heat

How to Make Classic Egg Salad

Step 1: Prepare the Eggs

Place six large eggs in a medium saucepan.

Arrange them in a single layer to ensure even cooking.

Add enough cold water to cover the eggs by approximately 1 inch.

Place the saucepan over medium-high heat and bring the water to a gentle boil.

Once boiling, reduce the heat slightly and cook for approximately 10–12 minutes until the yolks are fully set.

Avoid cooking the eggs for too long because overcooking can create dry yolks and an unpleasant texture.

For the best Classic Egg Salad, the eggs should be fully cooked but still tender.

Step 2: Prepare an Ice Bath

While the eggs are cooking, fill a large bowl with cold water and ice cubes.

Once the eggs are cooked, carefully transfer them into the ice bath using a slotted spoon.

Allow the eggs to cool for approximately 5–10 minutes.

The ice bath stops the cooking process and makes the eggs easier to handle.

Cooling also helps prevent the yolks from becoming excessively firm.

Step 3: Peel the Eggs

Gently tap each cooled egg against a hard surface to crack the shell.

Roll it lightly between your hands to loosen the shell.

Carefully peel the eggs, starting from the wider end if possible.

If small pieces of shell remain attached, rinse the eggs briefly under cool running water.

Pat the peeled eggs dry with a clean paper towel.

Removing excess moisture helps prevent watery egg salad.

Step 4: Chop the Eggs

Place the peeled eggs on a clean cutting board.

Use a sharp knife to chop them into small or medium-sized pieces.

For a chunky Classic Egg Salad, leave some larger pieces of egg white.

For a smoother consistency, finely chop the eggs and lightly mash a few yolks.

Transfer the chopped eggs into a medium mixing bowl.

Avoid excessive mashing if you prefer a salad with more texture.

Step 5: Prepare the Creamy Dressing

In a separate small bowl, combine the mayonnaise, mustard, lemon juice, paprika, salt, and black pepper.

Whisk everything together until smooth and creamy.

Taste the dressing and adjust the seasoning if necessary.

For extra tanginess, add a little more mustard or lemon juice.

For a milder flavor, increase the mayonnaise slightly.

The dressing should be creamy enough to coat the eggs without making the salad runny.

Step 6: Add the Fresh Vegetables

Add the finely chopped celery and green onions to the bowl containing the eggs.

If using sweet pickle relish, add it at this stage.

Stir gently to distribute the vegetables.

Celery adds a pleasant crunch, while green onions contribute a mild savory flavor.

The pickle relish provides a subtle sweetness and tanginess that complements the creamy dressing.

Step 7: Combine Everything

Pour the prepared mayonnaise dressing over the chopped eggs and vegetables.

Using a spatula or large spoon, gently fold the ingredients together.

Mix until the eggs are evenly coated with the dressing.

Avoid stirring too aggressively because the egg pieces may break down and create a pasty texture.

A well-made Classic Egg Salad should be creamy while still retaining small pieces of egg for texture.

Step 8: Taste and Adjust

Taste the prepared salad.

Add additional salt, black pepper, or mustard according to your preference.

If the mixture appears too thick, stir in another teaspoon of mayonnaise.

If it seems slightly loose, refrigerate it before making further adjustments.

For a brighter flavor, add a few additional drops of fresh lemon juice.

Step 9: Chill the Egg Salad

Cover the mixing bowl with a lid or transfer the salad into an airtight container.

Refrigerate for approximately 20–30 minutes.

Chilling allows the flavors to blend and improves the overall texture.

Although the salad can be served immediately, a short chilling period makes it particularly delicious.

Step 10: Garnish and Serve

Remove the chilled egg salad from the refrigerator.

Sprinkle with chopped chives, fresh parsley, and a little paprika.

Serve on toasted bread, inside lettuce cups, with crackers, or in a tortilla wrap.

For a refreshing lunch, pair the salad with sliced cucumbers and cherry tomatoes.

Enjoy your homemade Classic Egg Salad while fresh and chilled.

Tips for the Best Classic Egg Salad

1. Cook the Eggs Properly

Fully cooked egg yolks create the best texture for traditional egg salad.

Cooking times may vary depending on egg size and stove temperature.

2. Use an Ice Bath

Cooling the eggs immediately after cooking helps stop the cooking process.

It also makes peeling easier in many cases.

3. Choose Good-Quality Mayonnaise

Mayonnaise is an important ingredient because it creates the signature creamy texture.

Use your favorite brand or homemade mayonnaise prepared safely.

4. Finely Chop the Vegetables

Small pieces of celery and green onion distribute evenly throughout the salad.

This ensures a balanced flavor in every bite.

5. Add Mustard Gradually

Mustard gives the dressing a pleasantly tangy flavor.

However, too much mustard can overpower the eggs.

Start with the suggested amount and adjust according to taste.

6. Avoid Overmixing

Stir gently to prevent the chopped eggs from becoming completely mashed.

Leaving some texture makes the finished salad more enjoyable.

7. Use Fresh Lemon Juice

Fresh lemon juice balances the richness of mayonnaise.

It also provides a refreshing flavor without requiring additional heavy ingredients.

8. Refrigerate Before Serving

Chilled egg salad generally tastes better because the dressing and seasonings have time to blend.

9. Add Fresh Herbs

Parsley, dill, and chives complement the creamy egg mixture beautifully.

Use fresh herbs whenever available.

10. Adjust the Creaminess

For a thicker salad, use slightly less mayonnaise.

For a creamier consistency, add mayonnaise one teaspoon at a time until you reach your preferred texture.

Delicious Classic Egg Salad Variations

Avocado Egg Salad

Replace approximately half of the mayonnaise with mashed ripe avocado.

The avocado creates a creamy texture and adds a mild, buttery flavor.

Add extra lemon juice to reduce browning.

Greek Yogurt Egg Salad

Replace half of the mayonnaise with plain Greek yogurt.

This creates a tangier dressing and can reduce the amount of fat, depending on the yogurt used.

Spicy Egg Salad

Add finely diced jalapeño, a few drops of hot sauce, or a pinch of cayenne pepper.

This variation is perfect for anyone who enjoys spicy flavors.

Dill Pickle Egg Salad

Add extra finely chopped dill pickles and fresh dill.

The tangy pickles provide extra crunch and flavor.

Mediterranean Egg Salad

Add a small amount of chopped cucumber, fresh parsley, dill, and crumbled feta cheese.

Replace part of the mayonnaise with Greek yogurt for a Mediterranean-inspired version.

Bacon Egg Salad

Stir in 2 tablespoons of finely chopped, fully cooked crispy bacon.

This adds a smoky flavor and additional crunch.

Garlic Herb Egg Salad

Add ¼ teaspoon garlic powder along with fresh chives, parsley, and dill.

This version offers a stronger herb flavor.

What to Serve with Classic Egg Salad

Classic Egg Salad is versatile enough to serve as a complete light meal or as part of a larger lunch.

Toasted Whole-Grain Bread: Spread the egg salad between slices of toasted bread with lettuce and tomato.

Lettuce Wraps: Spoon the mixture into crisp romaine or butter lettuce leaves.

Whole-Grain Crackers: Serve small portions on crackers for a quick snack or appetizer.

Avocado Slices: Fresh avocado complements the creamy eggs beautifully.

Cucumber Tomato Salad: A refreshing vegetable salad balances the richness of the mayonnaise.

Warm Pita Bread: Fill soft pita pockets with egg salad, lettuce, and cucumber.

Fresh Fruit: Serve alongside strawberries, grapes, or apple slices for a refreshing contrast.

For a satisfying lunch, pair an egg salad sandwich with a fresh garden salad or vegetable sticks.

Health Benefits of Classic Egg Salad

Provides High-Quality Protein

Eggs contain complete protein, including all nine essential amino acids.

Protein supports muscle maintenance, tissue repair, and normal body functions.

Contains Important Vitamins

Eggs provide vitamin B12, riboflavin, and other essential nutrients.

These vitamins contribute to normal energy metabolism and overall health.

Provides Choline

Egg yolks contain choline, an important nutrient involved in normal brain and nervous system function.

Includes Fresh Vegetables

Celery and green onions provide small amounts of fiber, vitamins, and minerals.

They also add flavor and texture without requiring additional heavy sauces.

Easy to Customize

Replacing part of the mayonnaise with Greek yogurt can change the protein and fat content.

You can also add extra vegetables or herbs according to your dietary preferences.

Convenient for Meal Preparation

Egg salad can be prepared ahead of time and refrigerated.

This makes it a useful option for quick lunches, sandwiches, and snacks.

How to Store Classic Egg Salad

Refrigerator Storage

Transfer the prepared egg salad into an airtight container.

Keep refrigerated at 40°F (4°C) or below.

For food safety, consume within 3–4 days.

Avoid Leaving It at Room Temperature

Do not leave egg salad unrefrigerated for longer than 2 hours.

If the temperature is above 90°F (32°C), refrigerate within 1 hour.

This is especially important during outdoor picnics and summer gatherings.

Can You Freeze Egg Salad?

Freezing is not recommended.

Mayonnaise may separate after thawing, while cooked egg whites can develop a rubbery texture.

Meal Preparation

Prepare the egg salad in advance and store it separately from bread or crackers.

Assemble sandwiches shortly before serving to prevent the bread from becoming soggy.

Frequently Asked Questions

How Long Does Homemade Egg Salad Last?

Properly refrigerated Classic Egg Salad can generally be stored for 3–4 days.

Always use clean utensils and keep the container tightly covered.

Can I Make Classic Egg Salad the Night Before?

Yes.

Preparing the salad the night before allows the flavors to blend.

Store it in an airtight container in the refrigerator until ready to serve.

Why Is My Egg Salad Watery?

Excess moisture from celery, pickle relish, or other vegetables may make the salad watery.

Drain ingredients thoroughly before mixing.

Can I Replace Mayonnaise with Greek Yogurt?

Yes.

Plain Greek yogurt can replace some or all of the mayonnaise.

However, the finished salad will have a tangier flavor and slightly different texture.

Can I Use Miracle Whip Instead of Mayonnaise?

Yes.

Miracle Whip has a sweeter, more seasoned flavor than traditional mayonnaise.

Adjust the mustard and other seasonings to taste.

How Can I Make Egg Salad Creamier?

Mash some of the egg yolks into the mayonnaise dressing.

You can also add an additional teaspoon of mayonnaise until the desired consistency is reached.

Can I Make This Recipe Without Celery?

Absolutely.

You can omit celery or replace it with finely chopped cucumber, radish, or dill pickles.

Can I Add Red Onion?

Yes.

Finely minced red onion provides a stronger savory flavor than green onion.

Start with a small amount to avoid overpowering the eggs.

Is Classic Egg Salad Gluten-Free?

The basic ingredients are generally gluten-free.

However, check the labels on mayonnaise, mustard, relish, and seasonings.

Serve with gluten-free bread or lettuce cups if needed.

Is Classic Egg Salad Suitable for Meal Prep?

Yes.

Prepare the salad in advance and keep it refrigerated.

For the best texture, add it to sandwiches or wraps shortly before eating.

Can I Use Light Mayonnaise?

Yes.

Light mayonnaise can be used to reduce fat and calories, although the texture may be slightly different.

Can I Add Cheese?

Yes.

A small amount of shredded cheddar or crumbled feta can be added for additional flavor.

Can I Make This Recipe Spicy?

Absolutely.

Add chopped jalapeños, hot sauce, or crushed red pepper flakes according to your preferred spice level.

What Is the Best Bread for Egg Salad Sandwiches?

Whole-grain bread, sourdough, white sandwich bread, and toasted rye bread all work well.

Choose bread that can hold the creamy filling without becoming soggy.

Can I Serve Egg Salad Warm?

Classic egg salad is traditionally served chilled.

For the best flavor and food safety, keep it refrigerated until serving rather than leaving it at room temperature.

Nutritional Information (Per Serving)

Approximate nutritional values based on 4 servings, without bread or optional additions. Values vary depending on the mayonnaise brand, egg size, and quantities used.

Nutrient Estimated Amount
Calories 285 kcal
Protein 10 g
Carbohydrates 3 g
Total Fat 26 g
Saturated Fat 5 g
Fiber Less than 1 g
Sugar 1 g
Sodium 420 mg
Cholesterol 295 mg

Final Thoughts

Classic Egg Salad is a timeless homemade recipe that combines tender hard-boiled eggs, creamy mayonnaise, tangy mustard, crunchy celery, and fresh herbs.

Its simple preparation, rich flavor, and versatile serving options make it an excellent choice for breakfast, lunch, sandwiches, wraps, and meal preparation.

Whether served on toasted bread, tucked into lettuce cups, or enjoyed with crackers, this creamy egg salad is easy to customize and satisfying to eat.

With proper egg cooking, balanced seasoning, and a short chilling period, you can prepare a delicious Classic Egg Salad that is perfect for everyday meals and family gatherings.

Golden Turmeric Chicken Vegetable Soup

Golden Turmeric Chicken Vegetable Soup

This recipe is perfect for cozy family dinners, chilly evenings, meal preparation, or whenever you want a wholesome bowl of homemade comfort food. It uses simple ingredients and straightforward cooking techniques, making it suitable for beginner cooks and experienced home chefs alike.

Unlike cream-based soups, this version gets its richness from chicken broth, vegetables, and a little olive oil. A squeeze of fresh lemon juice at the end brightens the flavors and balances the earthy turmeric. You can also customize it with potatoes, zucchini, spinach, or your favorite seasonal vegetables.

Recipe Overview

  • Preparation time: 15 minutes

  • Cooking time: 35–40 minutes

  • Total time: Approximately 55 minutes

  • Servings: 6

  • Cuisine: Comfort food with Mediterranean-inspired flavors

  • Difficulty: Easy

  • Cooking method: Stovetop

  • Main ingredients: Chicken, turmeric, carrots, celery, onion, garlic, and chicken broth

Ingredients

For the Chicken and Vegetables

  • 1½ pounds boneless, skinless chicken breasts or thighs

  • 2 tablespoons olive oil

  • 1 medium yellow onion, finely chopped

  • 3 medium carrots, peeled and sliced

  • 3 celery stalks, chopped

  • 1 medium zucchini, diced (optional)

  • 1 medium potato, peeled and diced (optional)

  • 4 cloves garlic, minced

  • 1 tablespoon freshly grated ginger

  • 2 cups fresh baby spinach, roughly chopped

  • ½ cup frozen peas (optional)

For the Golden Turmeric Broth

  • 8 cups low-sodium chicken broth

  • 1½ teaspoons ground turmeric

  • ½ teaspoon ground cumin

  • ½ teaspoon ground coriander

  • ½ teaspoon freshly ground black pepper

  • 1 teaspoon dried thyme

  • 1 bay leaf

  • 1 teaspoon salt, or to taste

  • 1 tablespoon fresh lemon juice

  • 2 tablespoons chopped fresh parsley

  • 1 tablespoon chopped fresh dill (optional)

Optional Additions

  • ½ cup small pasta or orzo

  • ½ cup cooked rice

  • A pinch of red pepper flakes

  • Extra lemon wedges for serving

  • A drizzle of olive oil for garnish

Instructions

Step 1: Prepare the Ingredients

Begin by preparing all your vegetables. Finely chop the onion, slice the carrots, and chop the celery into small, evenly sized pieces. Dice the zucchini and potato if you are using them.

Mince the garlic and grate the fresh ginger. Keep the turmeric, cumin, coriander, thyme, and black pepper nearby so you can add them easily during cooking.

Pat the chicken dry with paper towels. If using chicken breasts, leave them whole for poaching in the broth. If using chicken thighs, trim any excess fat.

Preparing everything before turning on the stove makes the cooking process easier and helps the vegetables cook evenly.

Step 2: Sauté the Aromatics

Place a large heavy-bottomed soup pot or Dutch oven over medium heat. Add the olive oil and allow it to warm for a few seconds.

Add the chopped onion, carrots, and celery. Cook for approximately 5–7 minutes, stirring occasionally, until the onion becomes translucent and the vegetables begin to soften.

Add the minced garlic and grated ginger. Stir continuously for about 30–60 seconds, just until fragrant.

Avoid browning the garlic too much because burnt garlic can introduce bitterness into the broth.

This first step builds the soup’s flavor. Cooking the vegetables in olive oil releases their natural sweetness and creates a savory foundation for the turmeric broth.

Step 3: Bloom the Turmeric and Spices

Add the ground turmeric, cumin, coriander, black pepper, and dried thyme to the vegetables.

Stir for approximately 30 seconds so the spices become fragrant and coat the vegetables evenly.

Turmeric provides the soup with its rich golden color and earthy flavor. Cumin adds warmth, coriander contributes a subtle citrusy note, and black pepper gives the broth a gentle peppery finish.

Cooking the spices briefly in olive oil helps distribute their flavor throughout the soup.

Do not leave the spices in the hot pot for too long without liquid, as ground spices can burn quickly.

Step 4: Add the Chicken and Broth

Pour in the chicken broth and stir well, scraping the bottom of the pot to release any flavorful bits.

Add the chicken breasts or thighs, the bay leaf, and the diced potato if using.

Increase the heat until the broth reaches a gentle boil. Then reduce the heat to low and cover the pot partially with a lid.

Simmer for approximately 18–25 minutes, depending on the thickness and cut of the chicken. Keep the broth at a gentle simmer rather than a vigorous boil to help the chicken remain tender.

Chicken must reach an internal temperature of 165°F (74°C) at its thickest point. Use a food thermometer to check for doneness.

If you are using particularly thick chicken breasts, they may require a little additional cooking time.

Step 5: Shred the Chicken

Once the chicken is cooked through, carefully remove it from the pot and place it on a clean cutting board or plate.

Allow it to rest briefly until it is cool enough to handle safely. Using two forks, shred the chicken into bite-sized pieces.

You can also chop the chicken into small cubes if you prefer a chunkier texture.

Return the shredded chicken to the pot and stir it into the golden broth.

Shredded chicken distributes evenly throughout the soup, ensuring that every serving contains a satisfying amount of protein.

If you prefer larger pieces of chicken, simply shred it into thicker strands rather than pulling it apart finely.

Step 6: Add the Remaining Vegetables

If using zucchini, add it to the soup after returning the chicken to the pot. Simmer for approximately 5–7 minutes, or until the zucchini is tender but not mushy.

Add the frozen peas during the final 3–4 minutes of cooking.

If you are adding small pasta, cook it according to the package instructions in the soup, allowing sufficient time for it to become tender. Alternatively, cook the pasta separately and add it to individual bowls before ladling in the soup.

For rice, use already-cooked rice and stir it in near the end.

These additions make the soup more substantial while allowing you to adapt it to your family’s preferences.

Step 7: Add the Spinach

Stir in the chopped baby spinach during the final 2–3 minutes of cooking.

The spinach will wilt quickly in the hot broth while retaining its fresh flavor and adding a beautiful green contrast to the golden soup.

Taste a piece of carrot or potato to make sure the vegetables are tender. Remove the bay leaf before serving.

If the broth has reduced more than expected, add a little extra chicken broth or hot water until you reach your preferred consistency.

Step 8: Finish with Lemon and Fresh Herbs

Turn the heat to low and stir in the fresh lemon juice.

Add the chopped parsley and dill, if using. Taste the soup and adjust the salt, pepper, or lemon juice as needed.

The lemon juice is particularly important because its bright acidity balances the earthy turmeric and savory chicken broth.

For a stronger peppery flavor, add a small pinch of additional black pepper. If you enjoy a little heat, a pinch of red pepper flakes works beautifully.

Avoid boiling the soup vigorously after adding the fresh herbs and lemon juice. A gentle final warming helps preserve their fresh flavors.

Step 9: Serve the Golden Soup

Ladle the hot soup into individual bowls, making sure each serving contains plenty of chicken and vegetables.

Garnish with additional fresh parsley, a few cracks of black pepper, and a light drizzle of olive oil if desired.

Serve with crusty whole-grain bread, warm pita, or a simple green salad.

For a Mediterranean-inspired meal, pair the soup with toasted bread rubbed lightly with garlic and olive oil.

The finished soup should have a clear, golden broth, tender shredded chicken, soft vegetables, and a fresh lemon-herb aroma.

Tips for the Best Golden Turmeric Chicken Vegetable Soup

1. Use fresh aromatics. Fresh garlic and ginger add a brighter flavor than dried alternatives. They complement turmeric particularly well.

2. Choose the right chicken. Chicken thighs tend to stay juicy and flavorful, while chicken breasts offer a leaner option. Both work beautifully in this recipe.

3. Bloom the spices. Briefly cooking turmeric and the other spices in olive oil enhances their aroma and helps the flavors blend throughout the broth.

4. Avoid overcooking the vegetables. Add quick-cooking vegetables, such as zucchini, peas, and spinach, toward the end so they maintain their texture.

5. Adjust the consistency. For a lighter soup, add more broth. For a heartier version, include diced potatoes, rice, or small pasta.

6. Balance the seasoning. Turmeric has a naturally earthy flavor, so lemon juice, fresh herbs, and freshly ground black pepper help keep the overall taste bright.

7. Use low-sodium broth. This allows you to control the salt level, especially if you plan to add other seasoned ingredients.

8. Make it ahead. The flavors often deepen after resting overnight. If preparing in advance, add delicate greens and fresh lemon closer to serving for the freshest flavor.

Delicious Variations

Creamy Golden Turmeric Chicken Soup

For a creamier version, stir in ½ cup of coconut milk or ¼–½ cup of heavy cream during the final few minutes of cooking. Coconut milk complements turmeric and ginger particularly well, giving the soup a slightly sweet, silky finish.

Golden Chicken and Rice Soup

Add 1–2 cups of cooked rice before serving. This creates a more filling meal and gives the broth a comforting, home-style texture. Cooked rice is best added near the end to prevent it from becoming overly soft.

Low-Carb Turmeric Chicken Soup

Skip the potatoes, rice, and pasta. Increase the zucchini, spinach, celery, and mushrooms instead. This creates a vegetable-rich soup without the traditional starches.

Spicy Golden Chicken Soup

Add a pinch of cayenne pepper or red pepper flakes with the turmeric. You can also add a little extra grated ginger for a warming flavor.

Lemon Herb Chicken Soup

Increase the lemon juice slightly and add fresh dill, parsley, and a little lemon zest just before serving. This variation is especially refreshing and pairs nicely with Mediterranean-style meals.

Golden Chicken and Lentil Soup

Add ¾ cup of rinsed red lentils and increase the broth as necessary. Red lentils soften as they cook and naturally thicken the soup, creating a heartier texture. Allow additional simmering time until the lentils are tender.

Serving Suggestions

Golden Turmeric Chicken Vegetable Soup is versatile enough to serve as a complete meal or as part of a larger dinner.

  • Crusty bread: Ideal for dipping into the flavorful golden broth.

  • Warm pita bread: A lovely option for a Mediterranean-inspired meal.

  • Fresh green salad: Adds crisp texture and freshness.

  • Roasted vegetables: Complement the soup for a vegetable-rich dinner.

  • Cooked quinoa: Serve a small portion alongside the soup for additional texture.

  • Lemon wedges: Let everyone adjust the brightness of their bowl.

For an attractive presentation, serve the soup in wide, shallow bowls and finish with green parsley, a light swirl of olive oil, and freshly ground black pepper.

Storage and Reheating

Refrigeration: Allow the soup to cool slightly, then transfer it to shallow, airtight containers. Refrigerate within two hours of cooking and consume within 3–4 days.

Freezing: Freeze the soup in freezer-safe containers for approximately 2–3 months for best quality. Leave a little space at the top because liquids expand when frozen. If possible, freeze the soup without pasta or rice, then add freshly cooked portions when serving.

Reheating on the stove: Place the desired portion in a saucepan and warm over medium-low heat, stirring occasionally, until it reaches 165°F (74°C).

Microwave reheating: Place a portion in a microwave-safe bowl, cover loosely, and heat in intervals, stirring between each interval until thoroughly hot.

If the broth thickens during storage, add a splash of chicken broth or water to restore its consistency. Add a squeeze of fresh lemon juice after reheating if the flavor needs brightening.

Nutritional Information

The following values are estimates for one of six servings, assuming the recipe uses chicken breast, olive oil, broth, and the listed vegetables without optional pasta, rice, potatoes, or cream.

Nutrient Estimated amount
Calories 280–330
Protein 32–38 g
Carbohydrates 12–18 g
Fat 9–13 g
Fiber 3–5 g
Sodium 450–750 mg

Actual nutrition will vary with the chicken cut, broth brand, vegetable quantities, and serving size. Using low-sodium broth can help reduce sodium.

Benefits of the Ingredients

Chicken: Provides complete protein, which supports muscle maintenance and normal body functions.

Turmeric: Contains curcumin, a compound studied for its antioxidant and anti-inflammatory properties. The amount of curcumin absorbed from a typical serving of soup varies, and this recipe should not be considered a treatment for disease.

Carrots: Supply beta-carotene, which the body can convert into vitamin A.

Spinach: Provides folate, vitamin K, and other useful nutrients.

Garlic and ginger: Add flavor along with naturally occurring plant compounds.

Olive oil: Supplies unsaturated fats and helps carry the flavors of the spices.

Lemon juice: Adds vitamin C and freshness, although the amount per serving depends on how much juice is used.

Together, these ingredients make a flavorful, balanced soup that can fit into a varied,
nutritious eating pattern.

Frequently Asked Questions

1. Can I use rotisserie chicken?

Yes. Replace the raw chicken with approximately 3–4 cups of shredded cooked chicken. Simmer the broth and vegetables until tender, then stir in the cooked chicken during the final 5–10 minutes to warm it through.

2. Can I prepare this soup in advance?

Absolutely. Prepare it a day ahead and refrigerate it promptly. Reheat thoroughly before serving. For the best texture, add spinach and lemon juice near the end of reheating.

3. Does turmeric make the soup taste bitter?

Turmeric has an earthy, slightly peppery flavor. Using the recommended quantity and balancing it with garlic, ginger, broth, and lemon creates a pleasant flavor without overwhelming the soup.

4. Can I make this soup dairy-free?

Yes. The basic recipe contains no dairy. Simply check that your chicken broth and any optional additions meet your dietary requirements.

5. How can I thicken the broth?

Mash a few cooked potato pieces into the broth, add cooked red lentils, or stir in a small amount of cornstarch mixed with cold water. Simmer gently until the desired consistency is reached.

6. Can I make it in a slow cooker?

Yes. Add the chicken, broth, onion, carrots, celery, garlic, ginger, and spices to the slow cooker. Cook on low for approximately 4–6 hours or high for 2–3 hours, checking that the chicken reaches 165°F (74°C). Shred the chicken, then add quick-cooking vegetables and spinach near the end.

7. Is this soup suitable for meal preparation?

Yes. Divide it into individual portions after cooking and refrigerate or freeze appropriately. Keeping rice or pasta separate helps preserve the texture when reheating.

8. What can I use instead of chicken broth?

Vegetable broth works well, although the flavor will be slightly different. Choose a well-seasoned, low-sodium variety and adjust the final seasoning to taste.

Parmesan Crusted Potatoes – Crispy, Golden, and Delicious

Parmesan Crusted Potatoes – Crispy, Golden, and Delicious

Introduction

Parmesan Crusted Potatoes are the perfect combination of crispy edges, golden crusts, and soft, fluffy centers. Coated with freshly grated Parmesan cheese, garlic, Italian herbs, and olive oil, these oven-roasted potatoes transform simple ingredients into an irresistible side dish. The Parmesan forms a beautifully browned, savory crust as the potatoes roast, creating a delicious contrast with their tender interiors.

This easy recipe is ideal for family dinners, weekend gatherings, holiday meals, or casual entertaining. Serve these potatoes alongside roasted chicken, grilled steak, baked fish, or your favorite vegetables. They are also delicious on their own with a creamy garlic dip or tangy ranch dressing.

The best part is that you do not need complicated ingredients or special equipment. With a baking sheet, a few pantry seasonings, and the right roasting technique, you can prepare restaurant-style Parmesan potatoes right in your kitchen.

Recipe Overview

  • Preparation Time: 15 minutes
  • Cooking Time: 35–45 minutes
  • Total Time: Approximately 55–60 minutes
  • Servings: 4–6
  • Course: Side Dish
  • Cuisine: American-inspired
  • Cooking Method: Oven-roasted
  • Difficulty: Easy

Ingredients

For the Potatoes

  • 2 pounds baby Yukon Gold or red potatoes
  • ½ cup freshly grated Parmesan cheese
  • 3 tablespoons olive oil
  • 3 cloves garlic, finely minced
  • 1 teaspoon Italian seasoning
  • ½ teaspoon smoked paprika
  • ½ teaspoon onion powder
  • ½ teaspoon salt, or to taste
  • ½ teaspoon freshly ground black pepper
  • 1 tablespoon chopped fresh parsley
  • 1 tablespoon melted butter, optional
  • Extra Parmesan cheese, for serving

Optional Dipping Sauce

  • ½ cup mayonnaise or Greek yogurt
  • 2 tablespoons sour cream
  • 1 small garlic clove, finely grated
  • 1 teaspoon lemon juice
  • 1 tablespoon chopped fresh parsley
  • Salt and black pepper, to taste

Instructions

Step 1: Preheat the Oven

Preheat your oven to 425°F (220°C). A properly heated oven is essential for achieving crispy potatoes with a golden Parmesan crust.

Lightly grease a large metal baking sheet with olive oil or line it with parchment paper. For the crispiest bottoms, a bare, lightly greased metal baking sheet generally provides better direct contact with the hot surface.

Make sure the baking sheet is large enough to hold the potatoes in a single layer. If necessary, use two baking sheets to prevent overcrowding.

Step 2: Prepare the Potatoes

Wash the potatoes thoroughly under running water, scrubbing away any dirt. Pat them completely dry with a clean kitchen towel.

Cut baby potatoes in half lengthwise. If they are particularly large, cut them into quarters so the pieces are approximately the same size. Uniform pieces cook more evenly and develop a consistent golden crust.

You can leave the skins on for extra texture, flavor, and convenience. If you prefer peeled potatoes, that works too, although leaving the skins intact helps the pieces hold their shape.

For especially crispy results, avoid leaving excess moisture on the potatoes after washing. Water on the surface can interfere with browning.

Step 3: Prepare the Parmesan Mixture

In a medium bowl, combine the grated Parmesan cheese, minced garlic, Italian seasoning, smoked paprika, onion powder, salt, and black pepper.

Add the olive oil and stir until the mixture is evenly moistened. The cheese and seasonings should form a flavorful coating rather than a watery sauce.

Freshly grated Parmesan is especially useful because it melts and browns beautifully. Finely grated cheese also spreads more evenly over the cut surfaces than large cheese shavings.

If you enjoy a stronger garlic flavor, add an extra clove. For a little heat, include a pinch of crushed red pepper flakes.

Step 4: Coat the Potatoes

Place the dry potato halves in a large mixing bowl. Add the Parmesan mixture and toss thoroughly until the potatoes are coated on all sides.

Pay special attention to the cut surfaces, as these will form the delicious golden crust during roasting.

For an extra-crispy presentation, you can press the flat cut side of each potato gently into any Parmesan mixture remaining in the bowl before arranging it on the baking sheet.

Try to distribute the garlic and cheese evenly so that every piece receives plenty of flavor.

Step 5: Arrange the Potatoes

Spread the coated potatoes across the prepared baking sheet in a single layer.

For the best Parmesan crust, arrange the potatoes with their flat, cut sides facing down. This allows the cheese-coated surfaces to make direct contact with the hot baking sheet and develop a crisp, golden layer.

Leave a little space between each piece. When potatoes are crowded together, steam becomes trapped, making them softer rather than crispier.

If the potatoes do not fit comfortably in one layer, divide them between two baking sheets.

Step 6: Roast Until Golden

Transfer the baking sheet to the preheated oven and roast for approximately 35–45 minutes, depending on the size of the potatoes.

Avoid moving the potatoes during the first 25–30 minutes. Allowing them to remain undisturbed helps the Parmesan crust develop properly.

After about 30 minutes, check their color. The bottoms should be golden brown, and the potatoes should be becoming tender.

If needed, continue roasting until the potatoes are easily pierced with a fork and the cheese coating looks crisp and deeply golden.

Cooking time can vary depending on your oven, potato size, and baking sheet, so use tenderness and color as your main guides.

Step 7: Finish With Butter and Herbs

Remove the potatoes from the oven once they are golden and tender.

If desired, drizzle them with a tablespoon of melted butter for extra richness. Sprinkle with chopped fresh parsley and a little additional Parmesan cheese while they are still hot.

Let the potatoes rest on the baking sheet for approximately 2–3 minutes. This brief resting period helps the crust settle and makes the potatoes easier to lift without breaking.

Use a thin spatula to release any pieces that have adhered to the baking sheet. Turn them carefully so the crispy Parmesan layer stays intact.

Step 8: Prepare the Optional Dipping Sauce

While the potatoes roast, prepare a quick creamy dipping sauce.

In a small bowl, combine mayonnaise or Greek yogurt, sour cream, grated garlic, lemon juice, chopped parsley, salt, and black pepper.

Stir until smooth. Taste and adjust the seasoning, adding a little more lemon juice if you prefer a brighter flavor.

Refrigerate the sauce until serving time. Its cool, tangy flavor complements the hot, salty Parmesan crust beautifully.

Step 9: Serve and Enjoy

Transfer the finished potatoes to a serving platter. Garnish with additional parsley and freshly grated Parmesan.

Serve immediately while the crust is crisp and the centers are fluffy. Place the dipping sauce on the side, or offer ranch dressing, garlic aioli, or spicy mayonnaise as alternatives.

These potatoes are best enjoyed fresh from the oven, when the cheese coating has its most satisfying crunch.

Tips for Perfect Parmesan Crusted Potatoes

1. Choose the Right Potatoes

Baby Yukon Gold potatoes are an excellent choice because they have a naturally creamy interior and a buttery flavor. Red potatoes also work well because they hold their shape during roasting.

Russet potatoes can be used, but their starchier texture may produce a different result. If using larger potatoes, cut them into evenly sized chunks.

2. Use Freshly Grated Parmesan

Freshly grated Parmesan generally gives the potatoes a better texture and more pronounced flavor. Pre-grated cheese can contain anti-caking ingredients that affect how it melts and browns.

Grate the cheese finely enough to coat the potatoes evenly, but avoid turning it into a powder.

3. Dry the Potatoes Thoroughly

After washing, remove as much surface moisture as possible. Dry potatoes brown more effectively and help the cheese coating become crisp instead of soggy.

This simple preparation step can make a noticeable difference.

4. Roast at a High Temperature

An oven temperature of 425°F (220°C) helps the potatoes cook through while the Parmesan becomes golden and crisp.

If your oven runs hot, check the potatoes earlier to prevent the cheese and garlic from burning.

5. Keep the Cut Sides Down

Placing the flat sides against the baking sheet encourages direct contact with the hot surface. This is one of the most effective ways to create a flavorful crust.

Avoid repeatedly turning the potatoes while they cook.

6. Do Not Overcrowd the Pan

Give each potato piece enough room for hot air to circulate. A crowded pan traps moisture and reduces browning.

Two baking sheets are better than one overcrowded sheet.

7. Watch the Garlic

Finely minced garlic adds wonderful flavor, but it can brown quickly. Keep the oven temperature controlled and avoid placing loose piles of garlic directly on the baking sheet where they may burn.

If you prefer a milder garlic flavor, use garlic powder instead of fresh garlic.

Delicious Variations

Garlic Herb Parmesan Potatoes

Add extra rosemary, thyme, and parsley to the seasoning mixture. This variation pairs especially well with roasted chicken and grilled vegetables.

Spicy Parmesan Potatoes

Add ¼–½ teaspoon of cayenne pepper or crushed red pepper flakes. The gentle heat balances the rich cheese and buttery potato centers.

Lemon Parmesan Potatoes

Add a little lemon zest to the potatoes before roasting. Finish with a small squeeze of fresh lemon juice just before serving for a bright, fresh flavor.

Cheddar Parmesan Potatoes

Combine the Parmesan with a small amount of finely grated sharp cheddar. The cheddar adds richness, although Parmesan should remain the main cheese for a crisp, savory crust.

Loaded Parmesan Potatoes

After roasting, top the potatoes with sliced green onions, a small spoonful of sour cream, and crumbled cooked bacon. Serve immediately for a loaded-potato-inspired side dish.

Dairy-Free Option

Use a suitable dairy-free Parmesan-style alternative and check that it browns well at high temperatures. The flavor and crust may differ from traditional Parmesan potatoes.

What to Serve With Parmesan Crusted Potatoes

These potatoes complement a wide range of main dishes.

  • Roasted chicken: Their crispy texture pairs beautifully with juicy chicken and pan gravy.
  • Grilled steak: Serve them alongside steak with garlic butter for a hearty dinner.
  • Baked salmon: The savory cheese crust balances the delicate flavor of fish.
  • Pork chops: Pair with roasted vegetables or a fresh green salad.
  • Burgers: Replace ordinary fries with these flavorful potato bites.
  • Vegetarian meals: Serve with roasted broccoli, sautéed mushrooms, green beans, or a crisp garden salad.

For entertaining, arrange the potatoes on a large platter with several dipping sauces so guests can help themselves.

Storage and Reheating

Refrigeration

Allow leftover potatoes to cool, then transfer them to an airtight container. Refrigerate for up to 3–4 days.

For food safety, refrigerate cooked potatoes within two hours of cooking, or sooner in very hot conditions.

Reheating in the Oven

Preheat the oven to 400°F (200°C). Spread the potatoes on a baking sheet and heat for approximately 8–12 minutes, or until warmed through and crisp again.

The exact time depends on the size and quantity of the leftovers.

Reheating in an Air Fryer

Place the potatoes in a single layer in an air fryer basket. Heat at 375°F (190°C) for approximately 4–7 minutes, shaking the basket once if necessary.

Check frequently because smaller pieces can brown quickly.

Microwave Reheating

The microwave is convenient for quick reheating, but it softens the crust. If crispiness matters, finish the potatoes in an oven or air fryer after warming them.

Can You Freeze Them?

You can freeze roasted potatoes, although the texture may become softer after thawing. For the best result, freeze them in a single layer until firm, then transfer them to a freezer-safe container.

Reheat from frozen in a hot oven or air fryer until heated through and crisp. Avoid relying on freezing if you want the same texture as freshly roasted potatoes.

Frequently Asked Questions

Can I prepare Parmesan crusted potatoes ahead of time?

You can wash, dry, and cut the potatoes a few hours in advance. Store the cut pieces submerged in cold water in the refrigerator, then drain and dry them very thoroughly before seasoning. For the best crust, coat and roast them shortly before serving.

Do I need to boil the potatoes first?

No. Small baby potatoes cook well directly in the oven when cut into halves or quarters. Boiling is optional and may shorten the roasting time, but the potatoes must be drained and dried thoroughly before coating.

Why did my Parmesan crust stick to the pan?

The cheese may stick if the baking sheet is not adequately greased, the potatoes are moved too early, or the crust has not browned enough to release naturally. Use a lightly greased metal pan and allow the potatoes to roast undisturbed before turning or removing them.

Can I use grated Parmesan from a container?

Yes, although freshly grated Parmesan usually gives the best flavor and texture. If using packaged grated cheese, check the texture and watch the potatoes closely as they roast.

How can I make the potatoes extra crispy?

Dry the potatoes thoroughly, use a hot oven, avoid overcrowding, and place the cut sides down. A metal baking sheet also helps the bottoms brown effectively.

Can I make this recipe in an air fryer?

Yes. Arrange the coated potatoes in a single layer in the air fryer basket, cut side down. Cook at approximately 380°F (193°C) for 15–22 minutes, turning only if needed and checking for tenderness and browning. Cook in batches if necessary.