Crispy Parmesan Zucchini Potato Muffins

Crispy Parmesan Zucchini Potato Muffins

Introduction

Crispy Parmesan Zucchini Potato Muffins are a delicious, savory baked treat made with freshly grated zucchini, tender potatoes, savory Parmesan cheese, and a flavorful blend of garlic and herbs. These little muffins have beautifully golden edges, a lightly crispy exterior, and a soft, cheesy center that makes every bite satisfying.

If you love crispy potato pancakes, cheesy vegetable fritters, or savory breakfast muffins, this recipe combines those comforting flavors in a convenient, oven-baked form. Instead of frying individual patties, the mixture is portioned into a muffin tin, making preparation simple and serving effortless.

Zucchini adds moisture and a mild, fresh vegetable flavor, while potatoes provide a hearty texture. Parmesan cheese brings a salty, nutty taste and helps the edges develop a delicious golden crust. Eggs bind the ingredients together, and a small amount of flour or breadcrumbs helps absorb moisture so the muffins hold their shape.

These muffins are perfect for breakfast, brunch, lunchboxes, snacks, or as a side dish for dinner. They can be served warm with garlic yogurt sauce, sour cream, or a refreshing herb dip. You can also customize them with green onions, fresh parsley, paprika, or a little mozzarella for extra cheesiness.

Best of all, the recipe uses affordable, everyday ingredients and does not require complicated cooking techniques. With proper preparation and a few simple tricks, you can make vegetable muffins that are flavorful, beautifully browned, and satisfying for the whole family.

Recipe Overview

  • Preparation Time: 20 minutes

  • Cooking Time: 25–35 minutes

  • Total Time: Approximately 50–55 minutes

  • Servings: 12 muffins

  • Cuisine: American-inspired, Mediterranean-style

  • Course: Breakfast, snack, appetizer, or side dish

  • Difficulty: Easy

  • Cooking Method: Oven-baked

  • Texture: Crispy edges with a tender, cheesy center

Ingredients

Main Ingredients

  • 2 medium zucchini, approximately 400 g

  • 2 medium potatoes, approximately 350 g

  • 2 large eggs

  • ¾ cup finely grated Parmesan cheese

  • ⅓ cup all-purpose flour or plain breadcrumbs

  • 2 cloves garlic, finely minced

  • 2 green onions, thinly sliced

  • 2 tablespoons fresh parsley, finely chopped

  • ½ teaspoon paprika

  • ½ teaspoon dried oregano

  • ¼ teaspoon freshly ground black pepper

  • Salt, to taste

  • 2 tablespoons olive oil, divided

Optional Ingredients

  • ¼ cup shredded mozzarella for a softer, cheesier center

  • ¼ teaspoon onion powder for extra savory flavor

  • A pinch of chili flakes for mild heat

  • Extra Parmesan for sprinkling on top

For Serving

  • ½ cup plain Greek yogurt

  • 1 teaspoon lemon juice

  • 1 tablespoon chopped fresh dill or parsley

  • A small pinch of garlic powder

  • Black pepper, to taste

The yogurt dip is optional, but its creamy, tangy flavor pairs especially well with the crispy Parmesan coating.

Instructions

Step 1: Preheat the Oven

Preheat your oven to 400°F (200°C).

Lightly grease a standard 12-cup muffin tin with olive oil or cooking spray. Make sure to grease the bottoms and sides of each cavity to help prevent sticking.

For easier removal, you can use silicone muffin cups or parchment liners designed for savory muffins. However, greasing a metal muffin tin directly often helps the edges become more golden and crisp.

Place the prepared tin aside while you prepare the vegetables.

Step 2: Grate the Zucchini

Wash the zucchini and trim off both ends. Using the large holes of a box grater, grate the zucchini into a large bowl.

Zucchini contains a considerable amount of water, which is useful in many dishes but can make these muffins soggy if it is not removed.

Transfer the grated zucchini to a clean kitchen towel or several layers of paper towels. Gather the edges and squeeze firmly over the sink to remove as much liquid as possible.

Repeat if necessary. The zucchini should feel moist but should no longer release large amounts of water when squeezed.

This step is one of the most important secrets to achieving crispy vegetable muffins. Excess moisture can prevent browning and cause the muffins to fall apart.

Step 3: Prepare the Potatoes

Peel the potatoes if desired, then grate them using the large holes of a box grater.

Place the grated potatoes in a bowl of cold water and gently stir to remove some of the surface starch. Drain thoroughly.

Transfer the potatoes to a clean kitchen towel and squeeze out as much moisture as possible.

For the crispiest texture, dry the grated potatoes thoroughly before mixing them with the zucchini. Wet potatoes can release steam during baking, making the muffins softer.

If you prefer a more rustic texture, you can leave the potato skins on after washing them thoroughly.

Step 4: Combine the Vegetables

Place the squeezed zucchini and grated potatoes in a large mixing bowl.

Add the sliced green onions, minced garlic, and chopped parsley.

Use a fork or your hands to mix the vegetables until they are evenly distributed.

The green onions contribute a mild onion flavor, while the garlic and parsley make the mixture more aromatic. You can replace parsley with fresh chives or add a small amount of chopped dill for a different flavor profile.

Step 5: Add the Cheese and Seasonings

Add the grated Parmesan, flour or breadcrumbs, paprika, oregano, and black pepper to the vegetable mixture.

If using mozzarella, add it now.

Toss everything together until the cheese and seasonings are evenly distributed.

Parmesan contributes a savory, nutty flavor and helps the surface brown. Finely grated Parmesan tends to distribute more evenly than large shavings.

Add salt cautiously because Parmesan already contains salt. You can taste a tiny amount of the mixture before adding the eggs, or simply season lightly and adjust the seasoning in the finished dish.

Step 6: Add the Eggs

In a small bowl, whisk the eggs until the yolks and whites are combined.

Pour the eggs into the vegetable mixture and stir thoroughly.

The eggs help bind the grated vegetables together during baking, while the flour or breadcrumbs absorb some remaining moisture and provide structure.

The mixture should hold together when pressed gently between your fingers. It should be moist but not watery.

If it seems excessively wet, add one tablespoon of breadcrumbs at a time until it becomes easier to portion.

Avoid adding too much flour, as this can create dense muffins instead of a tender vegetable texture.

Step 7: Fill the Muffin Tin

Divide the mixture evenly among the 12 prepared muffin cups.

Use a spoon to place the mixture into each cavity, filling it nearly to the top.

Press the mixture down gently with the back of a spoon. This helps the vegetables make contact with the hot surface of the tin and encourages the muffins to hold their shape.

Do not compress the mixture excessively. A gentle press is enough to bring the ingredients together.

Drizzle or brush a small amount of the remaining olive oil over the tops. Sprinkle a little extra Parmesan over each muffin if desired.

The oil and cheese help create an attractive golden crust.

Step 8: Bake Until Golden

Place the muffin tin on the middle rack of the preheated oven.

Bake for approximately 25–35 minutes, checking around the 25-minute mark.

The muffins should become golden brown around the edges, and the tops should look set. The grated potatoes should be tender when tested with a small knife.

If the tops are cooked but the potatoes still feel firm, continue baking for a few more minutes.

For extra browning, you can place the tin under the oven broiler for the final one to two minutes, watching continuously to prevent burning.

Ovens vary, so use the appearance and tenderness of the muffins as your guide rather than relying on time alone.

Step 9: Let the Muffins Rest

Remove the muffin tin from the oven and place it on a heat-safe surface.

Allow the muffins to rest in the tin for approximately five to ten minutes.

This short resting period helps the eggs and cheese set, making the muffins easier to remove without breaking.

Run a thin silicone spatula or butter knife around the edges if necessary. Carefully lift each muffin from its cavity and transfer it to a serving plate or wire rack.

Avoid leaving them in the hot tin for too long, as trapped steam can soften the crispy bottoms.

Step 10: Prepare the Garlic Yogurt Dip

While the muffins rest, prepare the optional dip.

In a small bowl, combine the Greek yogurt, lemon juice, chopped dill or parsley, garlic powder, and black pepper.

Stir until smooth.

Taste and adjust the lemon juice or herbs according to your preference. If you want a thinner consistency, add a teaspoon of water.

The cool, creamy dip balances the warm, savory flavor of the Parmesan and provides a refreshing contrast to the crispy vegetables.

Step 11: Serve Warm

Arrange the muffins on a serving plate and sprinkle with a little extra parsley or Parmesan.

Serve immediately with the garlic yogurt dip on the side.

The edges should be lightly crisp, the potatoes tender, and the zucchini and cheese evenly distributed throughout the center.

These muffins are particularly enjoyable when served warm, but they can also be eaten at room temperature as a packed snack or lunchbox addition.

Tips for Extra-Crispy Zucchini Potato Muffins

1. Remove as much water as possible. Both zucchini and potatoes release moisture. Squeezing them thoroughly is essential for good browning.

2. Grate the vegetables evenly. Consistent shreds cook more evenly and help the muffins hold together.

3. Use freshly grated Parmesan. Freshly grated cheese often melts and browns more evenly than some pre-shredded varieties.

4. Grease the muffin tin well. A thin coating of oil encourages browning and makes the muffins easier to remove.

5. Do not overcrowd the mixture with extra ingredients. Adding too many wet vegetables or too much cheese can affect the texture.

6. Avoid excessive flour. Too much flour can make the center heavy. Add only enough to bind the vegetables.

7. Let the muffins rest briefly. A short cooling period helps them firm up before removal.

8. Use the upper rack carefully for extra browning. If the tops need more color, finish briefly under the broiler while watching closely.

Delicious Recipe Variations

1. Cheesy Mozzarella Zucchini Potato Muffins

Add ¼ cup shredded mozzarella to the mixture. Mozzarella creates a softer, stretchy cheese texture, while Parmesan contributes a more savory flavor.

For the best balance, keep Parmesan as the main cheese and use mozzarella as an addition.

2. Mediterranean Herb Muffins

Add chopped fresh basil, oregano, and a few finely chopped sun-dried tomatoes. These ingredients give the muffins a Mediterranean-inspired flavor that pairs well with Greek yogurt dip.

If using sun-dried tomatoes packed in oil, drain and chop them before adding.

3. Spicy Parmesan Potato Muffins

Add chili flakes, a pinch of cayenne pepper, or a little smoked paprika. The gentle heat contrasts nicely with the mild zucchini and salty Parmesan.

4. Gluten-Free Version

Replace the all-purpose flour with a suitable gluten-free flour blend or use gluten-free breadcrumbs. Check the consistency before baking and add small amounts as necessary to help bind the vegetables.

5. Extra-Herby Muffins

Replace dried oregano with fresh thyme, chives, or dill. Finely chopped herbs add freshness without requiring a complicated seasoning blend.

6. Sweet Potato Variation

Replace one of the regular potatoes with a small sweet potato. This adds natural sweetness and a slightly different texture. Because sweet potatoes have a different moisture and starch composition, check that the mixture remains firm enough to hold together.

Serving Suggestions

Crispy Parmesan Zucchini Potato Muffins are versatile enough to be served at almost any time of day.

  • For breakfast: Serve two muffins with scrambled eggs and fresh tomatoes.

  • For brunch: Arrange them on a platter with yogurt dip, sliced cucumbers, and olives.

  • For lunch: Pair with a green salad dressed with lemon and olive oil.

  • For dinner: Serve alongside roasted chicken, baked fish, or grilled vegetables.

  • As a snack: Enjoy a muffin with a spoonful of Greek yogurt dip.

  • As an appetizer: Make mini muffins using a mini muffin tin and reduce the baking time, checking for golden edges and tender centers.

For a Mediterranean-style plate, combine the muffins with cucumber, tomato, olives, and a simple lemon dressing.

Nutritional Information

The following values are approximate estimates per muffin, assuming the recipe makes 12 muffins and includes the main ingredients but excludes the optional mozzarella and dipping sauce.

Nutrient Approximate amount per muffin
Calories 85–110 kcal
Protein 4–5 g
Carbohydrates 10–13 g
Fat 3–5 g
Fiber 1–2 g
Sodium 150–250 mg

Actual nutritional values depend on the size of the vegetables, the amount of oil absorbed, the type of flour or breadcrumbs, and the Parmesan brand.

Adding mozzarella or serving the muffins with dip will increase the total calories and protein. These estimates are intended as a general guide rather than exact nutritional measurements.

Health and Nutrition Benefits

1. Provides Vegetables in a Convenient Form

Zucchini contributes water, fiber, and nutrients such as vitamin C. Potatoes provide carbohydrates and potassium. Combining them in a baked muffin makes vegetables easy to portion and serve.

2. Contains Protein From Eggs and Cheese

Eggs and Parmesan provide protein, which supports normal tissue maintenance and muscle function. The amount per muffin is modest, so pairing them with Greek yogurt or eggs can increase the protein content of a meal.

3. Offers Flavor From Herbs and Garlic

Garlic, parsley, oregano, and paprika provide flavor without relying entirely on salt. Herbs also contribute small amounts of beneficial plant compounds.

4. Uses Baking Instead of Deep-Frying

These muffins are baked with a measured amount of olive oil rather than deep-fried. This makes it easier to control the amount of added fat while still developing a golden exterior.

5. Can Fit Into a Balanced Meal

Serve the muffins with a source of protein and additional vegetables for a more complete meal. Their nutritional value depends on the portion size and the other foods included throughout the day.

Storage and Reheating Instructions

Refrigerator: Allow the muffins to cool completely, then place them in an airtight container and refrigerate within two hours. For best quality, eat them within three to four days.

Freezer: Arrange cooled muffins on a tray and freeze until firm. Transfer them to a freezer-safe container or bag, separating layers with parchment paper. For best quality, use within two to three months.

Oven reheating: Place refrigerated muffins on a baking tray and heat at 350°F (175°C) for approximately 8–12 minutes, or until heated through.

Air fryer reheating: Heat at approximately 325–350°F (160–175°C) for 3–6 minutes, checking regularly to prevent over-browning.

Microwave reheating: Heat for approximately 20–40 seconds per muffin, adjusting as needed. The centers will warm quickly, but the exterior will generally be softer than when reheated in an oven or air fryer.

For the crispiest leftovers, use the oven or air fryer rather than the microwave.

Frequently Asked Questions

Q1: Why are my zucchini potato muffins soggy?

The most common reason is excess moisture in the grated vegetables. Squeeze the zucchini and potatoes thoroughly before mixing, and add a little extra breadcrumb if the mixture remains too wet.

Q2: Can I make these muffins without flour?

Yes, but they may be more delicate. Replace the flour with breadcrumbs or a suitable alternative that absorbs moisture. Make sure the vegetables are well-drained and allow the muffins to rest before removing them from the tin.

Q3: Can I use frozen zucchini?

Fresh zucchini is preferable. Frozen zucchini releases a lot of water when thawed. If using frozen zucchini, thaw it completely and squeeze out as much liquid as possible before measuring.

Q4: Can I prepare the mixture ahead of time?

It is best to bake the muffins shortly after mixing because grated potatoes can discolor and release moisture. You can grate and squeeze the vegetables shortly before cooking, then combine everything just before baking.

Q5: How do I keep the muffins from sticking?

Grease the muffin tin thoroughly, or use suitable silicone cups. Allow the muffins to rest for five to ten minutes after baking before carefully loosening the edges.

Q6: Can I make them without Parmesan?

Yes. You can substitute another finely grated hard cheese, such as a vegetarian-friendly Italian-style cheese. The flavor and browning may differ, so adjust the salt accordingly.

Q7: Are these muffins suitable for children?

They can be a convenient savory snack for children who tolerate the ingredients. Let them cool to a safe temperature and cut them into age-appropriate portions.

Q8: Can I make them in an air fryer?

Yes, if you have suitable silicone muffin cups or small oven-safe molds that fit your air fryer. Cooking time and temperature will vary, so check for tender potatoes and a fully set center.

Q9: Can I serve them cold?

Yes. They can be eaten cold or at room temperature, although the edges are generally crispier when freshly baked or reheated in an oven.

Q10: How can I increase the protein content?

Serve the muffins with Greek yogurt dip, eggs, or another protein-rich food. You can also experiment with a small amount of additional cheese, keeping in mind that this changes the nutritional content and texture.

Garlic & Herb No-Knead Bread

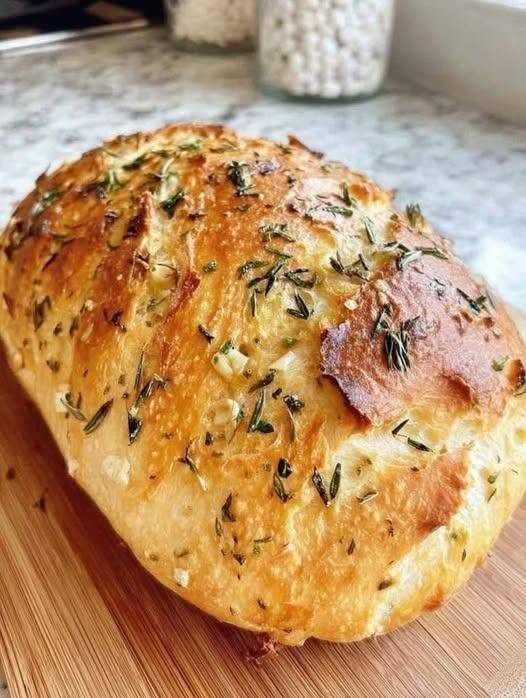
Garlic & Herb No-Knead Bread

Introduction

Garlic & Herb No-Knead Bread is a rustic homemade bread with a beautifully golden, crispy crust and a soft, airy interior infused with fragrant garlic and fresh herbs. It delivers the comforting aroma of freshly baked bread without the hard work of traditional kneading. With a few simple ingredients, a mixing bowl, and a little patience, you can prepare a delicious loaf that looks and tastes like it came from an artisan bakery.

The secret to this recipe is allowing time to do most of the work. Instead of kneading the dough by hand, you simply stir together flour, yeast, salt, water, garlic, and herbs. During the resting period, the dough gradually develops its structure and flavor. When baked in a preheated Dutch oven or another suitable covered baking pot, the dough traps steam, helping create a crisp, crackly crust while keeping the inside tender and moist.

Garlic adds a savory aroma, while rosemary and thyme contribute an earthy, Mediterranean-inspired flavor. A little olive oil enhances the richness, and a sprinkle of flaky salt on the crust makes each slice even more delicious.

This bread is wonderful alongside soups, pasta, salads, roasted vegetables, and hearty stews. You can also serve it warm with olive oil for dipping or toast leftover slices for breakfast.

Whether you are a beginner baker or someone who enjoys making homemade bread, this Garlic & Herb No-Knead Bread is a straightforward recipe worth adding to your kitchen routine.

Recipe Overview

  • Preparation Time: 15 minutes

  • Resting Time: 12–18 hours

  • Additional Rising Time: 30–45 minutes, if needed

  • Cooking Time: 40–50 minutes

  • Total Time: Approximately 13–20 hours, mostly inactive

  • Servings: 8–10 slices

  • Difficulty: Easy

  • Cuisine: Rustic, Mediterranean-inspired

  • Cooking Method: Oven-baked

  • Texture: Crispy crust with a soft, airy center

Ingredients

For the Bread Dough

  • 3 cups (375 g) all-purpose flour or bread flour

  • 1½ cups (360 ml) lukewarm water

  • 1 teaspoon instant yeast

  • 1½ teaspoons fine salt

  • 1 tablespoon extra-virgin olive oil

  • 4 cloves garlic, finely minced

  • 1 tablespoon fresh rosemary, finely chopped

  • 1 tablespoon fresh thyme leaves

  • 2 tablespoons chopped fresh parsley

  • ½ teaspoon freshly ground black pepper, optional

For the Topping

  • 1 teaspoon olive oil, optional

  • 1 small garlic clove, finely grated, optional

  • 1 teaspoon chopped fresh rosemary

  • A pinch of flaky sea salt, optional

Ingredient notes: Bread flour generally produces a chewier loaf, while all-purpose flour creates a slightly softer texture. Fresh herbs provide a particularly fragrant flavor, but you can substitute dried herbs if necessary. Use approximately one-third of the quantity of dried herbs because they are more concentrated.

For a more pronounced garlic flavor, serve the baked bread with garlic-infused olive oil rather than adding too much raw garlic to the dough.

Equipment Needed

  • Large mixing bowl

  • Wooden spoon or sturdy spatula

  • Measuring cups or kitchen scale

  • Clean kitchen towel or plastic wrap

  • Parchment paper

  • Dutch oven or oven-safe covered baking pot

  • Oven mitts

  • Wire cooling rack

  • Sharp bread knife

A Dutch oven is ideal because it traps steam during baking. If you do not have one, you can use a suitable oven-safe covered pot or follow the alternative baking method described below.

Instructions

Step 1: Prepare the Garlic and Herbs

Peel and finely mince the garlic cloves. Chop the rosemary and parsley, then remove the small thyme leaves from their stems.

Try to chop the rosemary finely so that its firm leaves distribute evenly through the dough. Large pieces can create concentrated pockets of flavor.

Fresh garlic provides a strong, savory aroma, while rosemary and thyme bring an earthy fragrance. Parsley adds a fresh herbal note that balances the stronger ingredients.

If you are using dried herbs, measure them before beginning. You can also combine rosemary and thyme with a little dried oregano for a more Mediterranean-inspired loaf.

Set the prepared ingredients aside.

Step 2: Combine the Dry Ingredients

Place the flour in a large mixing bowl. Add the instant yeast, salt, black pepper if using, rosemary, thyme, and parsley.

Stir the mixture thoroughly with a wooden spoon so the yeast and seasonings are distributed throughout the flour.

Keeping the ingredients evenly mixed helps ensure that the bread rises consistently and that every slice contains a balanced amount of herbs.

If you are using active dry yeast instead of instant yeast, check the manufacturer’s instructions. Some active dry yeast products benefit from being dissolved in lukewarm water before mixing.

Step 3: Add the Garlic and Water

Add the minced garlic and olive oil to the dry ingredients.

Gradually pour in the lukewarm water, stirring as you go. Continue mixing until all the flour is moistened and a rough, sticky dough forms.

The dough will not look smooth like traditional kneaded bread dough. Instead, it should look shaggy, uneven, and slightly sticky.

This is completely normal.

Avoid adding large amounts of extra flour simply because the dough feels sticky. A wetter dough helps create the open, airy crumb associated with no-knead bread.

If there are small dry patches at the bottom of the bowl, add a teaspoon of water at a time until they are incorporated.

Step 4: Cover and Let the Dough Rise

Cover the mixing bowl with plastic wrap, a lid, or a clean kitchen towel.

Leave the dough at a cool room temperature for approximately 12–18 hours. During this time, the yeast gradually produces gas, causing the dough to expand and develop flavor.

The ideal resting time depends on room temperature and yeast activity. In a warm kitchen, the dough may rise more quickly; in a cooler environment, it may need longer.

When ready, the dough should look bubbly, expanded, and noticeably softer. Its surface may appear slightly uneven, and small bubbles should be visible around the edges.

Do not rely on the clock alone. The appearance and expansion of the dough are useful indicators of fermentation.

Because this dough contains fresh garlic and herbs, do not leave it at room temperature indefinitely. Follow the recommended rising period and move to the next step when the dough is ready.

Step 5: Prepare the Dough for Shaping

Lightly flour a clean work surface.

Use a spatula to gently release the dough from the bowl and turn it onto the floured surface. It will feel soft and sticky.

With lightly floured hands or a dough scraper, gently fold the edges of the dough toward the center several times. This helps create a rounder shape without conventional kneading.

Turn the dough seam-side down and gently shape it into a round loaf.

Do not press out all the air. The bubbles developed during fermentation help create a light, airy interior.

If the dough sticks excessively, use a little flour on your hands rather than working large quantities of flour into the dough.

Step 6: Allow a Short Second Rise

Place a sheet of parchment paper on the counter and set the shaped dough on top.

Cover it loosely with a clean towel and let it rest for approximately 30–45 minutes.

During this time, the dough may puff slightly. This brief rest helps relax the dough and prepares it for baking.

Meanwhile, preheat your oven to 450°F (232°C). Place your empty Dutch oven, including its lid, inside the oven while it heats.

Allow the pot to preheat for approximately 30 minutes if its manufacturer permits this. Always verify that the pot and lid are oven-safe at the intended temperature.

Important safety note: A very hot Dutch oven can cause serious burns. Use dry oven mitts, keep the pot on a stable surface, and avoid placing a hot pot on a cold or wet surface.

Step 7: Transfer the Dough to the Hot Pot

Carefully remove the preheated Dutch oven from the oven and place it on a heat-safe surface.

Using the parchment paper as a sling, lower the dough into the hot pot.

Keep your hands away from the pot’s interior because the metal will be extremely hot.

If desired, use a sharp knife or bread lame to make one shallow cut across the top of the dough. This gives the loaf room to expand as it bakes.

Sprinkle a little chopped rosemary and flaky salt over the top if you like.

Cover the pot with its lid and return it to the oven.

Step 8: Bake Covered

Bake the bread, covered, for approximately 30 minutes.

The covered pot traps moisture released by the dough, creating a steamy environment that allows the loaf to expand before its crust fully sets.

During this stage, the bread begins developing its structure and internal crumb.

Avoid lifting the lid repeatedly, because doing so releases steam and reduces the effectiveness of the covered baking method.

Step 9: Bake Uncovered Until Golden

After 30 minutes, carefully remove the lid.

Continue baking for another 10–20 minutes, until the crust is deep golden brown and crisp.

The exact time depends on your oven, the size of your loaf, and the type of pot used.

If the top browns too quickly, reduce the oven temperature slightly and continue baking until the loaf is cooked through.

The bread should feel firm when gently tapped, and the crust should look dry and well developed. For a more precise check, the center of a fully baked loaf generally reaches approximately 200–210°F (93–99°C).

Avoid judging doneness by color alone. A beautiful crust is important, but the center must also be fully baked.

Step 10: Add the Optional Garlic-Herb Finish

For an extra fragrant crust, mix one teaspoon of olive oil with a small amount of finely grated garlic and chopped rosemary.

Brush a very thin layer over the loaf immediately after baking, if desired.

Use the raw garlic topping sparingly. Raw garlic has a sharper flavor than baked garlic, and too much can overpower the delicate herbs.

Alternatively, skip the topping and let the natural garlic and rosemary aroma speak for itself.

Step 11: Cool Before Slicing

Carefully remove the bread from the pot using the parchment paper or suitable utensils.

Transfer it to a wire rack and allow it to cool for at least 45–60 minutes before slicing.

Cooling is an important part of baking. The interior continues to settle as the loaf cools, helping it maintain a tender crumb instead of becoming gummy.

Cutting into the bread too early can release steam and compress the interior.

Once cooled, slice with a serrated bread knife using gentle sawing motions.

Step 12: Serve and Enjoy

Arrange the slices on a serving board or plate.

Serve warm or at room temperature with olive oil, balsamic vinegar, soup, pasta, or a fresh Mediterranean salad.

For a delicious appetizer, toast slices lightly and top them with chopped tomatoes, basil, and a drizzle of olive oil.

The crust should be crisp, the center soft and airy, and the garlic-herb aroma noticeable without being overpowering.

Tips for the Best Garlic & Herb No-Knead Bread

1. Measure the Flour Accurately

Too much flour can make the bread dense and dry. Weighing the flour is the most reliable approach. If using cups, spoon the flour into the measuring cup and level it rather than packing it tightly.

2. Use Lukewarm Water

Water that is comfortably lukewarm helps the yeast become active. Very hot water can damage the yeast, while cold water may slow fermentation.

3. Give the Dough Enough Time

The long rise allows flavor and structure to develop. If the dough has not expanded or developed bubbles, it may need additional time, depending on room temperature.

4. Avoid Excessive Flour During Shaping

Sticky dough is normal for this recipe. Use lightly floured hands and a scraper to shape it gently.

5. Preheat the Dutch Oven Carefully

A hot, covered pot helps produce the loaf’s signature crust. Check that your pot, lid, and handles can safely withstand the oven temperature.

6. Let the Bread Cool Completely

Cooling preserves the texture and makes slicing easier. Patience at this stage makes a noticeable difference.

7. Balance the Herbs

Rosemary has a strong, pine-like flavor, while thyme is earthy and delicate. Parsley adds freshness. Keep the quantities balanced so the bread remains fragrant rather than bitter or overpowering.

Variations to Try

Roasted Garlic and Herb Bread: Replace the raw minced garlic with several soft cloves of roasted garlic. Roasted garlic has a sweeter, milder flavor.

Parmesan Garlic Bread: Add approximately ¼ cup finely grated Parmesan cheese to the dough. Cheese can increase browning, so watch the loaf during the uncovered baking stage.

Mediterranean Olive Bread: Add ⅓ cup of chopped, well-drained Kalamata olives. Pat them dry before mixing so they do not introduce excessive moisture.

Chili Garlic Bread: Add ¼–½ teaspoon red pepper flakes for gentle heat.

Whole-Wheat Garlic Bread: Replace up to one cup of the all-purpose flour with whole-wheat flour. You may need a little extra water, and the finished loaf will be denser.

Dried Herb Version: Substitute approximately one teaspoon dried rosemary, one teaspoon dried thyme, and one teaspoon dried parsley for the fresh herbs, adjusting to taste.

Alternative Baking Method Without a Dutch Oven

If you do not own a Dutch oven, you can still make this bread.

  1. Preheat the oven to 450°F (232°C).

  2. Place the shaped dough on parchment paper on a sturdy baking tray.

  3. Put an empty, oven-safe metal tray on a lower rack while the oven preheats.

  4. Place the loaf in the oven and carefully pour hot water into the lower tray to create steam, if the tray is designed for this use.

  5. Close the oven door promptly and bake until the loaf is golden and cooked through, approximately 35–45 minutes depending on its shape and thickness.

Use appropriate oven protection when handling hot water and trays. Never pour water onto the oven floor, a glass dish, or an unsuitable hot surface. This method may produce a slightly different crust from the Dutch oven method.

Serving Suggestions

Garlic & Herb No-Knead Bread works beautifully with many dishes.

  • Tomato soup: Dip warm slices into creamy tomato or roasted red pepper soup.

  • Mediterranean pasta: Serve alongside tomato-based pasta, pesto pasta, or a simple garlic olive oil sauce.

  • Fresh salad: Pair with cucumber, tomatoes, red onion, olives, and feta.

  • Olive oil dip: Combine extra-virgin olive oil with black pepper, dried oregano, and a little balsamic vinegar.

  • Roasted vegetables: Serve with eggplant, zucchini, bell peppers, or roasted mushrooms.

  • Cheese board: Add slices to a platter with olives, cheese, fresh tomatoes, and herbs.

  • Garlic toast: Toast leftover slices and brush them lightly with olive oil.

Nutritional Information

The following is an approximate estimate per slice, assuming the loaf is divided into 10 slices and the optional topping is omitted.

Nutrient Approximate amount
Calories 165–190 kcal
Protein 4–6 g
Carbohydrates 32–36 g
Fat 2–4 g
Fiber 1–2 g
Sodium 300–400 mg

Actual values depend on the flour brand, slice size, amount of olive oil, and quantity of salt used. Bread flour and all-purpose flour may also differ slightly in their nutritional composition.

Health and Nutrition Benefits

Provides carbohydrates for energy: Flour supplies carbohydrates that the body can use for energy throughout the day.

Contains small amounts of healthy fats: Olive oil contributes predominantly monounsaturated fat, although the amount per slice is relatively modest.

Adds flavor without requiring a heavy topping: Garlic, rosemary, thyme, and parsley make the bread flavorful without needing large amounts of butter or cheese.

Can complement a balanced meal: Pairing the bread with vegetables, legumes, soup, or a protein-rich dish helps create a more varied meal.

This bread is still primarily a flour-based food, so portion size and the overall balance of your diet matter.

Storage Instructions

At room temperature: Once completely cooled, store the loaf in a bread bag or suitable bread container for approximately two to three days. A breathable container helps preserve the crust, although the crust naturally softens over time.

In the refrigerator: Refrigeration is generally unnecessary and may cause bread to stale more quickly.

In the freezer: Slice the cooled loaf and place the slices in a freezer-safe bag or container. Freeze for up to approximately three months for good quality.

To reheat: Warm slices in a toaster or oven until crisp. To refresh a larger portion of the loaf, heat it in a moderate oven for several minutes, checking frequently to prevent excessive drying.

Because the dough contains fresh garlic and herbs, follow the recipe’s fermentation time rather than leaving it at room temperature for an extended period.

Frequently Asked Questions

Q1: Can I make this bread without kneading at all?

Yes. The recipe requires only mixing and gentle shaping. The long resting period allows the dough to develop structure without conventional kneading.

Q2: Can I use active dry yeast?

Yes. Use the same general quantity, but follow the yeast package instructions for activation. Dissolving active dry yeast in some of the lukewarm water before adding it can help ensure it is active.

Q3: Why is my dough so sticky?

No-knead dough contains relatively high moisture, which helps create an airy crumb. Use a scraper and lightly floured hands rather than adding excessive flour.

Q4: Why did my bread turn out dense?

Possible causes include inactive yeast, insufficient rising time, too much flour, or a dough that did not develop enough gas before baking.

Q5: Can I use dried herbs instead of fresh herbs?

Yes. Use smaller quantities of dried herbs because their flavor is concentrated. Dried rosemary and thyme work particularly well.

Q6: Can I prepare the dough in advance?

The dough can be prepared ahead, but fermentation needs to be controlled. For a longer delay, refrigerate the dough rather than allowing it to rise indefinitely at room temperature. The dough may need additional time to warm and rise before baking.

Q7: How do I know when the bread is fully baked?

Look for a deep golden crust and a firm loaf. An internal temperature around 200–210°F (93–99°C) is a useful guide.

Q8: Can I add cheese to the dough?

Yes. Finely grated Parmesan is a good choice. Keep additions moderate so they do not interfere with the dough’s structure.

Q9: Is this recipe suitable for beginners?

Absolutely. There is no complicated kneading technique. The most important steps are measuring the ingredients, allowing enough fermentation time, and baking the loaf thoroughly.

Q10: Why should I cool the bread before slicing?

Cooling allows the interior crumb to set. Slicing too early can make the bread appear gummy and cause the soft center to compress.

Mediterranean Crispy Halloumi Pasta with Lemon Zest

Mediterranean Crispy Halloumi Pasta with Lemon Zest

Introduction

Mediterranean Crispy Halloumi Pasta with Lemon Zest is a delicious combination of golden, pan-fried halloumi cheese, tender pasta, fresh vegetables, fragrant garlic, extra-virgin olive oil, and bright lemon flavor. This satisfying Mediterranean-inspired dish brings together contrasting textures and simple ingredients to create a meal that feels fresh, colorful, and restaurant-worthy.

Halloumi is a firm cheese that holds its shape when heated, making it perfect for pan-frying. Its exterior becomes beautifully golden and slightly crispy, while the inside remains soft and pleasantly chewy. When combined with warm pasta, juicy cherry tomatoes, baby spinach, and freshly grated lemon zest, it creates a flavorful dish with a balance of salty, savory, tangy, and fresh notes.

The lemon zest is especially important because it adds an aromatic citrus flavor without introducing too much extra liquid. Fresh lemon juice provides additional brightness, while garlic and olive oil create a simple Mediterranean-style sauce that coats the pasta beautifully.

This recipe is ideal for lunch, a quick weeknight dinner, or a relaxed weekend meal. It is easy to customize with olives, fresh basil, roasted peppers, or your favorite pasta shape.

Recipe details

  • Prep time: 15 minutes

  • Cook time: 20 minutes

  • Total time: 35 minutes

  • Servings: 4

  • Cuisine: Mediterranean-inspired

  • Difficulty: Easy

  • Course: Lunch or dinner

  • Cooking method: Boiling and pan-frying

Ingredients

For the Pasta

  • 12 ounces (340 g) pasta, such as penne, fusilli, or rigatoni

  • 8 ounces (225 g) halloumi cheese

  • 2 tablespoons extra-virgin olive oil, divided

  • 3 cloves garlic, finely minced

  • 1 pint cherry tomatoes, halved

  • 3 cups fresh baby spinach

  • 1 small red onion, thinly sliced

  • Zest of 1 large unwaxed lemon

  • 2 tablespoons freshly squeezed lemon juice

  • ½ teaspoon dried oregano

  • ¼ teaspoon red pepper flakes, optional

  • Salt, to taste

  • Freshly ground black pepper, to taste

For the Mediterranean Finish

  • ¼ cup fresh basil leaves, roughly torn

  • 2 tablespoons chopped fresh parsley

  • ¼ cup sliced Kalamata olives, optional

  • ¼ cup reserved pasta cooking water, as needed

  • Extra lemon zest, for serving

  • A small drizzle of extra-virgin olive oil, optional

Ingredient tip: Halloumi is naturally salty, so taste the dish before adding extra salt. Reserve some pasta water before draining because its starch helps the olive oil, lemon juice, and tomato juices cling to the pasta.

Instructions

Step 1: Prepare the Ingredients

Begin by washing the cherry tomatoes and spinach. Halve the tomatoes, thinly slice the red onion, and finely mince the garlic.

Wash the lemon thoroughly and dry it before zesting. Use a fine grater to remove only the yellow outer peel, avoiding the bitter white pith underneath.

Squeeze the lemon juice into a small bowl and set it aside.

Drain the halloumi and pat it dry with paper towels. Cut it into approximately ½-inch cubes or thick bite-sized rectangles. Drying the cheese helps it develop a golden crust instead of steaming in the pan.

Prepare the basil and parsley, and set all the ingredients within easy reach. Once the pasta and cheese are cooking, the remaining steps move quickly.

Step 2: Cook the Pasta

Bring a large pot of water to a boil. Add a modest amount of salt, remembering that halloumi will contribute plenty of saltiness to the finished dish.

Add the pasta and cook according to the package directions until al dente. The pasta should be tender but still have a slight bite in the center.

Before draining, carefully reserve approximately ½ cup of the starchy cooking water. You may not need all of it, but it is useful for adjusting the sauce.

Drain the pasta without rinsing it. Set it aside while you prepare the halloumi and vegetables.

If the pasta finishes before the other ingredients are ready, toss it with a small splash of olive oil to reduce sticking.

Step 3: Pan-Fry the Halloumi

Heat one tablespoon of olive oil in a large nonstick or well-seasoned skillet over medium heat.

Add the halloumi pieces in a single layer, leaving a little space between them. If necessary, cook in two batches rather than crowding the pan.

Let the cheese cook undisturbed for approximately two to three minutes, until the underside becomes golden brown. Turn the pieces and cook the other sides for another two to four minutes, depending on their size.

The goal is a deeply golden exterior with a warm, soft, chewy interior.

Transfer the cooked halloumi to a plate. Avoid covering it tightly, because trapped steam can soften the crispy surface.

Halloumi can brown quickly, so adjust the heat if the outside darkens before the cheese is warmed through.

Step 4: Sauté the Red Onion and Garlic

Using the same skillet, add the remaining tablespoon of olive oil.

Add the sliced red onion and cook for approximately three to four minutes, stirring occasionally. The onion should soften and become slightly translucent without burning.

Add the minced garlic and cook for about 30 seconds, stirring continuously until fragrant.

Do not allow the garlic to become dark brown, as burnt garlic can introduce a bitter taste.

If the skillet is too dry, add a small splash of water or a little more olive oil.

Step 5: Add the Cherry Tomatoes

Add the halved cherry tomatoes to the skillet along with the dried oregano, black pepper, and optional red pepper flakes.

Cook for approximately five to seven minutes, stirring occasionally.

As the tomatoes heat, their skins soften and their juices begin to release. Some tomatoes will collapse slightly, creating a light, naturally flavorful sauce.

Use the back of a wooden spoon to gently press a few tomatoes against the skillet. Leave others intact so the finished pasta has a mixture of juicy sauce and fresh tomato pieces.

If you are using Kalamata olives, add them now so their briny flavor can blend with the tomatoes.

Step 6: Add the Baby Spinach

Add the baby spinach to the tomato mixture in handfuls.

Stir gently for one to two minutes, allowing the leaves to wilt. The spinach will reduce considerably in volume while adding color and freshness to the dish.

Avoid cooking it for too long. Once the leaves have softened, they are ready for the pasta.

If the mixture looks dry, add one or two tablespoons of reserved pasta water. The liquid helps loosen the tomato juices and creates a light coating for the other ingredients.

Step 7: Build the Lemon-Zest Sauce

Reduce the heat to low.

Add the lemon zest and freshly squeezed lemon juice to the skillet. Stir well to distribute the citrus flavor throughout the tomato and spinach mixture.

Add two tablespoons of reserved pasta water and stir again.

The lemon zest provides an intense, fragrant citrus aroma, while the juice gives the sauce a fresh, tangy finish. Together, they balance the richness of the olive oil and the salty character of the halloumi.

Taste the mixture before adding any salt. Depending on your cheese and olives, you may not need any additional seasoning.

For a more pronounced lemon flavor, add a small amount of extra zest just before serving rather than adding too much juice at once.

Step 8: Toss the Pasta with the Sauce

Add the drained pasta directly to the skillet.

Use tongs or a large spoon to toss everything together until the pasta is evenly coated with the tomato, spinach, garlic, and lemon mixture.

Add a little more reserved pasta water if needed. Start with one tablespoon at a time until the sauce lightly clings to the pasta without pooling at the bottom of the pan.

Cook for another one to two minutes over low heat, stirring gently.

Taste and adjust the black pepper, lemon juice, or oregano as desired.

The finished pasta should look glossy and colorful, with the tomato juices coating the noodles and the spinach distributed throughout.

Step 9: Add the Crispy Halloumi

Turn off the heat and return the golden halloumi to the skillet.

Gently fold most of the cheese through the pasta, reserving a few pieces for the top of each serving.

Avoid vigorous stirring, which can break the halloumi into smaller pieces and soften its crust.

Add the torn basil and chopped parsley. Their fresh, herbal aromas complement the citrus and bring out the Mediterranean character of the dish.

If desired, finish with a small drizzle of extra-virgin olive oil and another light sprinkle of lemon zest.

Step 10: Serve Immediately

Divide the pasta among four warm bowls.

Arrange the reserved crispy halloumi pieces on top so their golden surfaces remain visible. Add a few fresh basil leaves, extra lemon zest, and freshly ground black pepper.

Serve immediately while the halloumi is warm and the pasta is glossy.

For a complete meal, pair it with a simple cucumber salad, roasted vegetables, or warm whole-grain bread.

Tips for Perfect Crispy Halloumi Pasta

1. Dry the cheese before cooking. Excess surface moisture prevents proper browning. Patting halloumi dry helps it form a golden crust.

2. Use medium heat. Very high heat can darken the exterior before the cheese warms through. Medium heat gives you better control.

3. Do not overcrowd the pan. Halloumi needs direct contact with the hot skillet to brown properly. Cook in batches if necessary.

4. Zest before juicing the lemon. It is much easier to zest a whole lemon than a squeezed one. Remove only the colored peel.

5. Keep some pasta water. A little starchy water helps the sauce coat the noodles and prevents the dish from becoming dry.

6. Add halloumi at the end. Mixing it in just before serving helps preserve its texture.

7. Balance the salt carefully. Halloumi and olives are both salty. Taste the completed sauce before adding more salt.

8. Use fresh herbs. Basil and parsley brighten the finished dish, especially alongside the lemon zest.

Delicious Variations

1. Mediterranean Halloumi Pasta with Olives

Add sliced Kalamata olives and a tablespoon of chopped sun-dried tomatoes. Their intense, savory flavors complement the fresh tomatoes and lemon.

2. Halloumi Pasta with Roasted Red Peppers

Replace half the cherry tomatoes with sliced roasted red peppers. They add sweetness, color, and a slightly smoky flavor.

3. Spicy Lemon Halloumi Pasta

Increase the red pepper flakes or add a small pinch of chili powder. The heat contrasts nicely with the fresh lemon and creamy texture of the cheese.

4. Halloumi Pasta with Zucchini

Slice one small zucchini into half-moons and sauté it with the red onion. Cook until lightly golden and tender before adding the garlic and tomatoes.

5. Creamy Mediterranean Version

Stir two tablespoons of plain Greek yogurt into a small amount of cooled pasta water, then mix it into the pasta off the heat. This creates a creamier finish. Avoid boiling the yogurt mixture, which can cause it to separate.

6. Gluten-Free Halloumi Pasta

Use your preferred gluten-free pasta and follow its package instructions. Reserve some cooking water, but note that its starchiness can differ from traditional wheat pasta, so add it gradually.

Serving Suggestions

This pasta is flavorful enough to serve as a standalone meal, but simple side dishes can make the table feel more complete.

  • Greek cucumber salad: Cucumber, tomato, red onion, and a lemon-olive oil dressing provide a refreshing contrast.

  • Roasted vegetables: Roasted zucchini, eggplant, or bell peppers complement the warm Mediterranean flavors.

  • Garlic bread: A small serving of crusty bread is useful for enjoying any remaining tomato and lemon sauce.

  • Lemon-dressed greens: Arugula or mixed greens with olive oil and lemon create a light side.

  • Fresh fruit: Watermelon or orange slices provide a refreshing finish.

Because halloumi is rich in salt and the pasta supplies carbohydrates, serving the dish with fresh vegetables is an easy way to add variety to the meal.

Nutritional Information

The following values are approximate estimates per serving, based on four servings and the main ingredients, including the halloumi, pasta, olive oil, tomatoes, spinach, and lemon. Exact values vary by brand and portion size.

Nutrient Approximate amount
Calories 500–600 kcal
Protein 20–25 g
Carbohydrates 55–65 g
Total fat 20–28 g
Dietary fiber 4–7 g
Sugar 5–9 g
Sodium 800–1,300 mg

Halloumi can contain substantial sodium, so the sodium level will depend on the brand and serving size. For a lighter version, use a little less cheese and olive oil, increase the spinach and tomatoes, and choose a lower-sodium halloumi if available.

Nutrition Benefits

Protein for Muscle Maintenance

Halloumi and pasta both contribute protein, which supports normal muscle maintenance and tissue repair. The amount varies according to the cheese and pasta used.

Vegetables and Micronutrients

Tomatoes provide vitamin C and the antioxidant lycopene. Spinach contributes folate, vitamin K, and other nutrients. Fresh herbs add flavor and small amounts of additional micronutrients.

Olive Oil and Unsaturated Fats

Extra-virgin olive oil is a source of predominantly monounsaturated fat. Using it in place of some saturated fats can be part of a heart-conscious eating pattern.

Citrus Flavor Without a Heavy Sauce

Lemon zest and juice add a strong flavor with relatively few calories. They help create a bright sauce without requiring heavy cream.

A Satisfying Meal

The combination of pasta, cheese, vegetables, and olive oil provides carbohydrates, protein, fat, and fiber. Portion sizes and the balance of the rest of your diet determine how the meal fits into your individual nutritional needs.

Storage and Reheating

Refrigeration: Transfer leftovers to a shallow, airtight container and refrigerate within two hours. For best quality, consume within three to four days.

Reheating on the stovetop: Place the pasta in a skillet over medium-low heat with one or two tablespoons of water. Stir gently until heated through. The halloumi will soften, so it will not be quite as crispy as when freshly cooked.

Microwave reheating: Place a serving in a microwave-safe bowl, cover loosely, and heat in short intervals, stirring as needed until hot throughout.

Meal-preparation tip: If you are preparing the dish ahead, store the fried halloumi separately from the pasta. Reheat the pasta and vegetables, then quickly pan-fry or reheat the cheese in a skillet before serving.

Freezing is not recommended for the best texture because cooked pasta can soften and halloumi can become firmer or rubbery after thawing.

Frequently Asked Questions

Q1: What is halloumi cheese?

Halloumi is a firm cheese traditionally associated with Cyprus. It has a salty flavor and a high melting point, allowing it to brown in a pan while retaining its shape.

Q2: Can I use another cheese instead of halloumi?

Yes, but the texture will change. Paneer can be pan-fried as a mild alternative, while feta is better crumbled over the finished pasta because it does not hold its shape in the same way.

Q3: Which pasta shape works best?

Penne, fusilli, rigatoni, and farfalle are excellent choices. Their shapes help capture the tomato juices, herbs, and small pieces of vegetables.

Q4: Can I make this recipe ahead of time?

Yes. You can prepare the vegetables and cook the pasta ahead of time. For the best texture, fry the halloumi shortly before serving and add the final lemon zest and herbs at the end.

Q5: How do I keep the halloumi crispy?

Pat it dry, fry it in a hot skillet without overcrowding, and transfer it to a plate without covering it tightly. Add it to the pasta just before serving.

Q6: Can I make this dish without spinach?

Absolutely. Substitute arugula, chopped kale, or thinly sliced zucchini. Add each vegetable at the appropriate cooking stage so it becomes tender without losing its texture.

Q7: Is this pasta vegetarian?

It can be suitable for a vegetarian diet, but check the halloumi label. Some cheeses are made with animal-derived rennet, while others use vegetarian-friendly alternatives.

Q8: Can I make the recipe more lemony?

Yes. Add a little extra zest at the end and gradually increase the lemon juice to taste. Adding zest provides a fragrant citrus aroma without making the sauce too watery.

Q9: Is halloumi pasta healthy?

It can fit into a balanced diet, particularly when served with plenty of vegetables. Halloumi is high in sodium and can be relatively high in saturated fat, so portion size and the overall balance of your meals matter.

Q10: What can I use if I do not have fresh basil?

Fresh parsley is an excellent substitute. You can also use a small amount of dried oregano or dried basil, although fresh herbs provide a brighter finishing flavor.

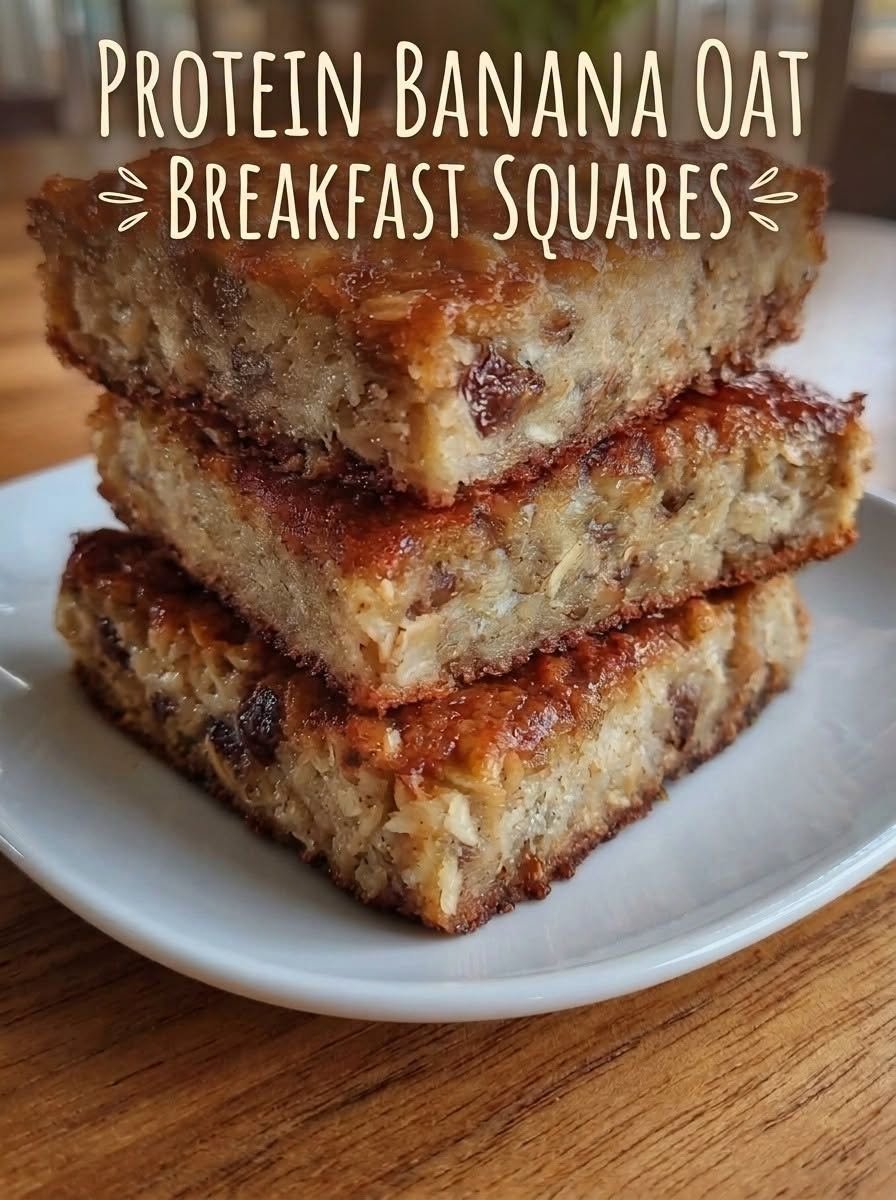
Protein Banana Oat Breakfast Squares

Protein Banana Oat Breakfast Squares

Introduction

Protein Banana Oat Breakfast Squares are a delicious, wholesome, and convenient breakfast option made with ripe bananas, hearty oats, protein-rich ingredients, and a touch of natural sweetness. These soft, satisfying squares are perfect for busy mornings, meal preparation, afternoon snacks, or a quick bite after a workout.

If you enjoy banana bread, baked oatmeal, and healthy breakfast bars, this recipe combines the best qualities of all three. The ripe bananas provide natural sweetness and moisture, while rolled oats create a hearty texture. Eggs help bind the ingredients together, and Greek yogurt adds moisture along with extra protein. You can also include your favorite protein powder to increase the protein content.

Unlike many store-bought breakfast bars, homemade banana oat squares allow you to control the ingredients, sweetness, and portion sizes. You can make them with simple pantry staples and customize them with cinnamon, vanilla, chopped nuts, dark chocolate chips, or fresh berries.

The finished squares are tender in the center, lightly golden around the edges, and naturally flavored with banana and cinnamon. They are easy to transport, store well in the refrigerator, and can be frozen for future breakfasts.

Whether you are looking for a nutritious breakfast for the family or a convenient meal-prep recipe for the week, these Protein Banana Oat Breakfast Squares are an excellent addition to your kitchen.

Recipe Overview

  • Preparation Time: 10–15 minutes

  • Cooking Time: 25–35 minutes

  • Cooling Time: 15 minutes

  • Total Time: Approximately 50–65 minutes

  • Servings: 9 breakfast squares

  • Difficulty: Easy

  • Cooking Method: Oven-baked

  • Cuisine: American-inspired healthy breakfast

  • Dietary Style: High-protein, oat-based breakfast

  • Best For: Breakfast, meal prep, snacks, and post-workout meals

Ingredients

This recipe makes approximately nine medium-sized squares.

Main Ingredients

  • 2 large ripe bananas, mashed

  • 2 cups old-fashioned rolled oats

  • 2 large eggs

  • ½ cup plain Greek yogurt

  • ¼ cup milk of your choice

  • ¼ cup vanilla or unflavored protein powder, optional

  • 1 teaspoon baking powder

  • 1 teaspoon ground cinnamon

  • 1 teaspoon vanilla extract

  • 1–2 tablespoons honey or maple syrup, optional

  • ¼ teaspoon salt

  • 2 tablespoons chopped walnuts or almonds, optional

  • 2 tablespoons dark chocolate chips, optional

For Preparing the Baking Pan

  • A small amount of cooking spray or butter

  • Parchment paper, optional

Ingredient note: Protein powders vary in sweetness and absorbency. If your powder is already sweetened, you may not need honey or maple syrup. If you leave out the protein powder, the squares will still work, although their protein content will be lower.

Equipment Needed

You will need:

  • An 8-inch square baking pan

  • A large mixing bowl

  • A medium bowl

  • A fork or potato masher

  • A whisk

  • A rubber spatula or wooden spoon

  • Measuring cups and spoons

  • A wire cooling rack

  • A sharp knife

An 8-inch square pan works well for thicker, soft-centered squares. A slightly larger pan can also be used, but the squares will be thinner and may bake faster.

Instructions

Step 1: Preheat the Oven

Preheat your oven to 350°F (175°C).

Prepare an 8-inch square baking pan by lightly greasing it with cooking spray or butter. Alternatively, line the pan with parchment paper, leaving a little extra paper over two opposite sides. This makes it easier to lift the baked oatmeal out of the pan once it has cooled.

Preparing the pan before mixing the ingredients helps you transfer the batter quickly and evenly.

Step 2: Mash the Bananas

Peel the ripe bananas and place them in a large mixing bowl.

Mash them thoroughly with a fork until they form a mostly smooth puree. A few small banana pieces are perfectly fine and can add little pockets of sweetness to the finished squares.

For the best flavor, use bananas with yellow skins and several brown spots. These bananas are generally sweeter and easier to mash than firm, greenish bananas.

If your bananas are very large, measure approximately one cup of mashed banana. Too much banana can make the squares overly moist and soft.

Step 3: Mix the Wet Ingredients

Add the eggs, Greek yogurt, milk, and vanilla extract to the mashed bananas.

If you prefer a sweeter breakfast, add one or two tablespoons of honey or maple syrup.

Whisk everything together until the mixture is well combined. The batter should look creamy, with the banana evenly distributed throughout.

The eggs help hold the squares together as they bake. Greek yogurt contributes moisture and protein, while milk helps the oats absorb liquid and soften during baking.

If you are using cold ingredients straight from the refrigerator, allow them to sit at room temperature for a few minutes if convenient. This can make mixing easier, although it is not essential.

Step 4: Combine the Dry Ingredients

In a separate bowl, combine the rolled oats, protein powder if using, baking powder, cinnamon, and salt.

Stir the ingredients thoroughly so the baking powder and cinnamon are distributed evenly.

Old-fashioned rolled oats provide a hearty, chewy texture. Quick oats can also be used, but they may create a softer, less distinct texture.

Avoid using steel-cut oats without modifying the recipe. They require substantially more liquid and cooking time than rolled oats.

Step 5: Make the Batter

Gradually add the dry ingredients to the wet banana mixture.

Stir with a spatula until everything is evenly combined. Scrape the sides and bottom of the bowl to make sure there are no pockets of dry protein powder or oats.

The batter should be thick but moist. Let it rest for approximately five minutes so the oats can begin absorbing the liquid.

If the batter becomes extremely thick after resting, stir in one or two additional tablespoons of milk. If it looks very runny, allow it to rest for another few minutes before adding more ingredients.

Protein powder can absorb different amounts of moisture depending on its formulation, so a small adjustment may be helpful.

Step 6: Add Optional Ingredients

If desired, gently fold chopped walnuts, almonds, or dark chocolate chips into the batter.

Walnuts provide a pleasant crunch and a nutty flavor that complements banana and cinnamon. Almonds offer a similar texture with a slightly milder taste.

Dark chocolate chips make the squares taste more like banana bread with chocolate, while a small handful of blueberries creates a fruity variation.

For a simple everyday breakfast, you can skip these additions entirely. The banana, oats, vanilla, and cinnamon already provide plenty of flavor.

If you are adding nuts, chop them into small pieces so the squares are easy to cut and eat.

Step 7: Transfer the Batter to the Pan

Pour the batter into the prepared baking pan.

Use a spatula to spread it evenly into the corners. Smooth the surface gently so the squares bake at a consistent thickness.

If you like, sprinkle a few extra oats or chocolate chips over the top. A light sprinkle of cinnamon can also enhance the aroma.

Do not press the batter too firmly into the pan. Spreading it evenly is sufficient.

Step 8: Bake Until Set

Place the pan on the middle rack of the preheated oven.

Bake for approximately 25–35 minutes. The exact time will depend on your oven, the thickness of the batter, the moisture in your bananas, and whether you added protein powder.

Begin checking around the 25-minute mark.

The top should appear set and lightly golden, and the edges should look firmer than the center. Insert a toothpick into the middle. It should come out without wet batter, although a few moist crumbs are normal.

If the center still looks liquid, continue baking for another three to five minutes before checking again.

Avoid baking the squares for too long. Excessive baking can make them dry, especially when protein powder is included.

If the top browns too quickly while the center remains soft, loosely cover the pan with foil for the remaining baking time.

Step 9: Cool Completely

Remove the pan from the oven and place it on a heat-safe surface.

Allow the squares to cool in the pan for approximately 15 minutes. Then lift them out using the parchment paper, if used, and transfer them to a wire rack.

For cleaner slices, let them cool until the center has set. Cutting them while they are very hot may cause them to crumble or appear undercooked because the structure is still settling.

The squares will become firmer as they cool.

Step 10: Slice and Serve

Once cooled, cut the baked oatmeal into nine equal squares.

Serve them plain or add a spoonful of Greek yogurt, a few banana slices, or fresh berries on the side.

For a warm breakfast, heat one square briefly in the microwave. For a more filling meal, pair it with Greek yogurt, milk, or another protein-rich food.

These squares are naturally portable, making them suitable for packed breakfasts, lunchboxes, and snacks during a busy day.

Tips for the Best Protein Banana Oat Breakfast Squares

1. Choose Very Ripe Bananas

Ripe bananas are one of the most important ingredients in this recipe. They provide natural sweetness, a strong banana flavor, and moisture that helps keep the squares tender.

Bananas with brown spots are usually ideal. Avoid relying on unripe bananas if you want a sweeter flavor.

2. Measure the Oats Correctly

Too many oats can make the squares dry and crumbly, while too few can leave them overly soft.

Measure the oats using standard measuring cups and avoid packing them tightly into the cup.

If using a kitchen scale, approximately 180 grams of rolled oats is a useful starting point, depending on the brand and how the oats are measured.

3. Select the Right Protein Powder

Vanilla protein powder pairs especially well with bananas and cinnamon. Unflavored protein powder works when you prefer a less sweet taste.

Whey-based and plant-based powders can behave differently. Some plant-based powders absorb more liquid, so you may need a little extra milk.

Start with the recommended amount and adjust the consistency before baking.

4. Avoid Overmixing

Mix until the ingredients are combined rather than beating the batter for an extended period.

The oats do not require vigorous mixing, and gentle folding helps distribute optional ingredients without making the batter difficult to handle.

5. Do Not Overbake

Overbaking is a common reason for dry breakfast squares.

Begin checking early, especially if your oven runs hot or your pan is wider than recommended. Remove the pan once the center is set and no wet batter remains.

6. Allow Enough Cooling Time

Cooling helps the squares hold their shape. If you want neat, bakery-style pieces, wait until they are fully cooled before slicing.

A clean, sharp knife makes cutting easier. Wipe the blade between cuts if the squares are sticking.

7. Customize the Texture

For a softer texture, blend some or all of the oats into oat flour before mixing.

For a heartier texture, keep the rolled oats whole.

For extra crunch, sprinkle chopped nuts over the top just before baking.

Baked Tomato & Mozzarella Caprese Crostini 

Baked Tomato & Mozzarella Caprese Crostini 

Introduction

Baked Tomato & Mozzarella Caprese Crostini is a delicious Italian-inspired appetizer made with crispy toasted baguette slices, juicy tomatoes, creamy melted mozzarella cheese, fresh basil, and a drizzle of balsamic glaze. Every bite combines crunchy bread, warm cheese, sweet tomatoes, and fragrant herbs to create a simple yet elegant dish that is perfect for entertaining.

Inspired by the classic Caprese salad, this recipe transforms traditional Italian flavors into a warm, bite-sized appetizer. Baking the crostini allows the mozzarella to melt beautifully while the tomatoes soften and release their natural sweetness. Fresh basil adds a refreshing aroma, and balsamic glaze provides a sweet, tangy finish.

These crostini are ideal for holiday gatherings, dinner parties, family celebrations, game-day snacks, or casual weekend meals. They can be served as an appetizer before pasta, grilled chicken, roasted fish, or a Mediterranean-inspired dinner. Because the ingredients are simple and easy to find, you can prepare this recipe without complicated techniques or expensive equipment.

Preparation Time: 15 minutes

Cooking Time: 12–15 minutes

Total Time: Approximately 30 minutes

Servings: 6–8 people

Yield: Approximately 20–24 crostini

Course: Appetizer or Snack

Cuisine: Italian-inspired

Cooking Method: Oven-baked

Ingredients

For the Crostini

  • 1 French baguette, approximately 12–16 inches long

  • 3 tablespoons extra-virgin olive oil

  • 2 cloves garlic, peeled

  • 2 cups cherry tomatoes, halved, or diced ripe tomatoes

  • 8 ounces fresh mozzarella cheese, sliced or diced

  • ¼ teaspoon salt, or to taste

  • ¼ teaspoon freshly ground black pepper

  • ½ teaspoon dried Italian seasoning

  • ¼ teaspoon garlic powder, optional

For the Fresh Topping

  • ½ cup fresh basil leaves, thinly sliced or torn

  • 2 tablespoons balsamic glaze

  • 1 tablespoon extra-virgin olive oil, optional

  • A pinch of red pepper flakes, optional

Optional Additions

  • 2 tablespoons grated Parmesan cheese

  • 1 tablespoon finely chopped fresh parsley

  • 1 teaspoon lemon zest

  • 2 tablespoons finely chopped red onion

  • A small handful of baby spinach leaves

Fresh, high-quality ingredients make the biggest difference in this recipe. Choose tomatoes that are ripe but still firm, mozzarella that melts smoothly, and fresh basil with bright green leaves.

Instructions

Step 1: Preheat the Oven

Preheat your oven to 400°F (200°C). Position a rack in the center of the oven so the bread toasts evenly and the cheese melts without burning.

Line a large baking sheet with parchment paper for easy cleanup. You can also lightly grease the baking sheet with olive oil if you prefer not to use parchment paper.

Preparing the oven before assembling the crostini helps ensure the bread becomes crisp and the toppings cook evenly.

Step 2: Slice the Baguette

Place the baguette on a cutting board and slice it into pieces approximately ½ inch thick. For attractive presentation, cut the slices slightly diagonally to create larger oval-shaped pieces.

Aim for 20–24 slices, depending on the size of your baguette. Try to keep the slices relatively even so they toast at the same rate.

Arrange the bread slices in a single layer on the prepared baking sheet. Leave a little space between each slice to allow hot air to circulate.

Step 3: Prepare the Garlic Olive Oil

Pour the olive oil into a small bowl. If desired, add the garlic powder and a pinch of Italian seasoning.

Brush a thin layer of olive oil over the surface of each bread slice. Avoid soaking the bread, because too much oil can make the crostini greasy rather than crisp.

Peel the garlic cloves and set them aside for later. Rubbing a fresh garlic clove over the warm toasted bread adds a traditional Italian flavor without requiring extra ingredients.

Step 4: Toast the Bread

Bake the prepared bread slices for approximately 5–7 minutes, or until they become lightly golden around the edges.

The bread should feel crisp on the outside while retaining enough structure to support the tomatoes and cheese.

Remove the baking sheet from the oven. While the slices are still warm, gently rub one side of each piece with the peeled garlic cloves.

Use a light touch so the garlic adds fragrance without overwhelming the other ingredients.

Pre-toasting is important because the tomato topping releases moisture during baking. A lightly toasted base helps prevent the bread from becoming soggy.

Step 5: Prepare the Tomatoes

Wash the cherry tomatoes and pat them dry with a clean kitchen towel. Cut each tomato in half. If using larger tomatoes, dice them into small, even pieces.

Transfer the tomatoes to a mixing bowl. Add the salt, black pepper, dried Italian seasoning, and optional garlic powder.

Toss gently to distribute the seasonings.

Allow the mixture to rest for approximately 3–5 minutes. This gives the flavors time to combine. If the tomatoes release a large amount of liquid, drain the excess before topping the bread.

Removing extra tomato juice is one of the easiest ways to keep the finished crostini crisp.

Step 6: Prepare the Mozzarella

Cut the mozzarella into small cubes or thin slices that fit comfortably on the baguette pieces.

If using fresh mozzarella stored in water, drain it thoroughly and pat it dry with paper towels. Fresh mozzarella contains more moisture than many low-moisture varieties, so removing excess liquid is particularly important.

For a more traditional melted-cheese texture, you can use low-moisture mozzarella. Fresh mozzarella offers a softer texture and delicate flavor, while low-moisture mozzarella tends to produce a more consistent melt.

Both options work well, so choose according to your preference.

Step 7: Assemble the Crostini

Arrange the toasted baguette slices on the baking sheet.

Spoon a small amount of seasoned tomato mixture onto each slice. Spread the tomatoes evenly, leaving a little space around the edges to prevent excessive dripping.

Add the mozzarella on top of the tomatoes. Make sure each piece receives a balanced amount of bread, tomato, and cheese.

Sprinkle lightly with Parmesan cheese if desired. For additional flavor, add a tiny pinch of red pepper flakes to selected pieces.

Avoid overloading the bread. A moderate topping helps the crostini bake evenly and makes each piece easier to pick up and eat.

Step 8: Bake Until the Cheese Melts

Return the baking sheet to the oven and bake for approximately 5–8 minutes.

Watch for the mozzarella to soften and melt, and for the tomatoes to become slightly tender. The bread edges should remain golden and crisp.

If you prefer a lightly browned cheese topping, switch the oven to broil for the final 30–60 seconds. Stay close to the oven because cheese and bread can brown quickly under the broiler.

Remove the crostini once the cheese is melted and the toppings look appetizing.

Allow them to cool for 1–2 minutes before adding the fresh basil.

Step 9: Add Fresh Basil

Wash the basil leaves and dry them thoroughly. Tear larger leaves into smaller pieces or slice them into thin ribbons.

Scatter the basil over the warm crostini just before serving.

Adding basil after baking preserves its fresh aroma, vibrant color, and delicate flavor. If basil is baked for too long, it can darken and lose some of its freshness.

For extra Mediterranean flavor, finish with a small drizzle of extra-virgin olive oil.

Step 10: Finish With Balsamic Glaze

Arrange the crostini on a serving platter. Drizzle a small amount of balsamic glaze over each piece using a spoon.

The glaze adds sweetness and acidity that complement the creamy mozzarella and juicy tomatoes.

Use a light drizzle rather than covering the entire surface. Too much glaze can overpower the fresh ingredients and soften the toasted bread.

Serve immediately while the bread is crisp and the mozzarella is warm.

Tips for Perfect Caprese Crostini

Choose the Right Bread

A French baguette is ideal because its firm crust and compact interior hold the toppings well. Ciabatta also works beautifully and gives the crostini a slightly more rustic texture.

Avoid bread that is extremely soft or thinly sliced, as it may collapse under the moisture of the tomatoes.

Prevent Soggy Bread

Toast the baguette before adding toppings, dry the mozzarella, and drain excess tomato juice. These three steps make a significant difference in the final texture.

For parties, you can toast the bread in advance and add the toppings shortly before baking.

Use Ripe, Firm Tomatoes

Very watery or overripe tomatoes may release too much liquid. Cherry tomatoes are especially convenient because they are naturally sweet and easy to portion.

Roma tomatoes are another good option because they generally have a firmer texture.

Avoid Overbaking

The goal is melted mozzarella, softened tomatoes, and crisp bread. Baking too long can dry out the cheese or darken the bread excessively.

Check the crostini frequently during the final few minutes.

Add Basil at the End

Fresh basil is one of the defining flavors of Caprese-inspired dishes. Adding it after baking helps maintain its bright appearance and fragrance.

Balance the Balsamic Glaze

Balsamic glaze should enhance the tomatoes and cheese rather than dominate them. Start with a small drizzle and add more only if needed.

Delicious Variations

Pesto Caprese Crostini: Spread a thin layer of basil pesto over each toasted baguette slice before adding tomatoes and mozzarella. This creates a richer, herbaceous flavor.

Spicy Caprese Crostini: Add red pepper flakes or a tiny drizzle of chili oil before serving. The heat contrasts nicely with the mild mozzarella.

Parmesan Caprese Crostini: Sprinkle grated Parmesan over the mozzarella before baking. It creates a savory finish and adds extra depth.

Roasted Garlic Version: Mash roasted garlic with olive oil and spread it over the bread before adding the toppings. The result is sweeter and more mellow than raw garlic.

Spinach and Tomato Crostini: Add a few finely chopped baby spinach leaves beneath the mozzarella for extra color and texture.

Mediterranean Olive Crostini: Add a few chopped Kalamata olives to the tomato mixture. Their salty, briny flavor works particularly well with basil and balsamic glaze.

Whole-Grain Crostini: Use a whole-grain baguette for a heartier flavor and additional fiber, depending on the bread selected.

Serving Suggestions

Baked Tomato & Mozzarella Caprese Crostini can be served in many ways.

  • As a party appetizer: Arrange the crostini on a large platter and garnish with fresh basil leaves.

  • For an Italian dinner: Serve before pasta, lasagna, baked chicken, or grilled fish.

  • For a Mediterranean spread: Pair with olives, hummus, cucumber salad, and grilled vegetables.

  • For a light lunch: Serve two or three crostini with a green salad or vegetable soup.

  • For a holiday gathering: Prepare several variations, such as pesto, spicy, and Parmesan, to offer guests different flavors.

For an attractive platter, alternate the crostini with fresh basil leaves and small bowls of extra balsamic glaze.

Storage and Reheating

Crostini taste best immediately after baking because the bread is crisp and the mozzarella is soft.

If you have leftovers, allow them to cool and place them in an airtight container in the refrigerator within two hours. For the best quality, consume within 1–2 days.

Reheat the crostini in an oven or toaster oven at 350°F (175°C) for approximately 5–8 minutes, until heated through. An air fryer can also work; check frequently to prevent the bread from becoming too dark.

Microwaving is not recommended because it tends to soften the bread and make the texture less appealing.

For advance preparation, toast the baguette slices and store them separately in an airtight container once completely cool. Prepare the tomatoes and mozzarella separately, refrigerating them as needed. Assemble and bake shortly before serving.

Do not freeze assembled crostini, as the tomatoes and mozzarella can release moisture during thawing and negatively affect the texture.

Nutritional Information

The following values are estimates per serving, assuming approximately 3 crostini per serving and variations in bread size, cheese, and olive oil.

  • Calories: 250–350

  • Protein: 9–14 grams

  • Carbohydrates: 25–35 grams

  • Fat: 11–19 grams

  • Saturated fat: 4–7 grams

  • Fiber: 2–4 grams

  • Sugar: 3–6 grams

  • Sodium: 350–600 milligrams

Actual values will vary according to the ingredients and portion sizes. Using less olive oil, a smaller amount of cheese, or thinner baguette slices can reduce calories. Whole-grain bread may provide more fiber, while reduced-sodium mozzarella can help lower sodium content.

Potential Benefits of the Ingredients

Tomatoes: Tomatoes provide vitamin C, potassium, and lycopene, a naturally occurring antioxidant. They also add freshness and flavor to the recipe.

Mozzarella cheese: Mozzarella contributes protein and calcium, which are important nutrients in a balanced diet.

Extra-virgin olive oil: Olive oil provides predominantly monounsaturated fats and plant compounds. It is a common ingredient in Mediterranean-style eating patterns.

Fresh basil: Basil adds aromatic flavor and small amounts of micronutrients without requiring heavy sauces.

Baguette: Bread supplies carbohydrates, which the body uses for energy. Choosing whole-grain bread can increase the fiber content.

These crostini can fit into a varied, balanced diet. Their nutritional value depends on portion size and the overall ingredients used.

Frequently Asked Questions

1. Can I make Caprese crostini ahead of time?

Yes. Toast the bread and prepare the toppings in advance, but assemble and bake the crostini close to serving time. This helps preserve the crisp texture.

2. Can I use shredded mozzarella?

Yes. Shredded mozzarella melts easily and is convenient. Fresh mozzarella provides a softer, more traditional Caprese-style texture, while shredded low-moisture mozzarella may make the bread less watery.

3. Do I need balsamic glaze?

No. Balsamic glaze is optional, but its sweet and tangy flavor complements the tomatoes and cheese. You can use a few drops of balsamic vinegar instead, although it will be thinner and less sweet.

4. Can I make this recipe gluten-free?

Yes. Use a gluten-free baguette or another sturdy gluten-free bread. Toast it carefully because some gluten-free breads become crisp more quickly than traditional baguettes.

5. Can I make the crostini vegetarian?

The basic recipe is vegetarian when made with suitable mozzarella and Parmesan. Check cheese labels if you specifically require vegetarian-friendly cheese, as some cheeses use animal-derived rennet.

6. How can I keep the bread crispy?

Pre-toast the bread, remove excess liquid from the tomatoes and mozzarella, and avoid adding too much olive oil. Serve the crostini shortly after baking.

7. Can I use dried basil?

Fresh basil is recommended for the finishing garnish. If fresh basil is unavailable, a small amount of dried basil can be added to the tomato mixture before baking, but the final flavor will be different.

8. What tomatoes work best?

Cherry tomatoes, grape tomatoes, and firm Roma tomatoes all work well. Choose ripe tomatoes with good flavor and avoid excessively watery pieces.

9. Can I make these in an air fryer?

Yes. Toast the bread and add the toppings as directed, then cook in a preheated air fryer at approximately 350°F (175°C) for 3–5 minutes, checking frequently. Work in batches and avoid overcrowding the basket.

10. What should I serve with Caprese crostini?

They pair well with pasta, grilled chicken, baked fish, fresh salads, roasted vegetables, and other Italian-inspired appetizers.

Pickled Cucumber, Onion & Bell Pepper Salad

🌟 Description

This vibrant, tangy salad is a perfect balance of crisp cucumbers, sweet bell peppers, and sharp red onions, all soaked in a flavorful pickling brine. It’s refreshing, slightly sweet, mildly spicy, and incredibly versatile. Often considered a “quick pickle” or “refrigerator pickle,” this dish doesn’t require canning and can be ready within hours.

It’s ideal for summer meals, BBQs, healthy snacking, or as a low-calorie side dish. The longer it sits, the deeper and more complex the flavor becomes.


🧾 Ingredients

Vegetables:

  • 3–4 cups cucumbers (thinly sliced)
  • 1 cup red onion (thinly sliced into rings)
  • 1–2 cups bell peppers (mixed colors, sliced)
  • 2–3 cloves garlic (optional, sliced)
  • 1–2 tbsp fresh parsley or dill (chopped)

Pickling Brine:

  • 1 cup white vinegar (or apple cider vinegar)
  • ½ cup water
  • 2–3 tbsp sugar (adjust to taste)
  • 1 tbsp salt
  • 1 tsp black peppercorns
  • 1 tsp mustard seeds (optional)
  • ½ tsp red pepper flakes (optional for heat)

🔪 Instructions

1. Prep the Vegetables

Wash all vegetables thoroughly. Slice cucumbers into thin rounds, onions into rings, and bell peppers into strips. Try to keep everything evenly sliced for consistent texture and flavor absorption.

2. Pack the Jar

Place the vegetables into a large glass jar or container. Layer them evenly to create a colorful mix. Add garlic slices and fresh herbs if using.

3. Make the Brine

In a saucepan, combine vinegar, water, sugar, salt, and spices. Heat gently over medium heat, stirring until the sugar and salt dissolve completely. Do not boil heavily—just warm enough to combine.

4. Pour & Cool

Carefully pour the warm brine over the vegetables until fully submerged. Let the jar cool to room temperature.

5. Refrigerate

Seal the jar and refrigerate for at least 4 hours, preferably overnight. For best flavor, let it sit 24 hours.


🧊 Storage Tips

  • Keeps in the refrigerator for up to 1 week
  • Flavor intensifies over time
  • Always use clean utensils to avoid contamination

🍽️ Serving Ideas

  • Serve as a side with grilled meats
  • Add to sandwiches, burgers, or wraps
  • Pair with rice bowls or Mediterranean dishes
  • Enjoy as a healthy, low-carb snack

💡 Pro Tips

  • Use English cucumbers for fewer seeds
  • Adjust sugar for a keto-friendly version
  • Add sliced jalapeños for extra spice
  • Try rice vinegar for a milder flavor

🔍 Related Questions (High-Interest Topics)

❓ How do you make quick pickles without boiling?

You can skip heating entirely by whisking the brine until dissolved and pouring it directly over the vegetables. However, warming helps the flavors infuse faster.

❓ Are pickled cucumbers healthy for weight loss?

Yes! This dish is low in calories and carbs, making it ideal for weight loss diets, keto meal plans, and clean eating lifestyles.

❓ What is the best vinegar for pickling vegetables?

White vinegar is most common, but apple cider vinegar adds a slightly sweet, fruity note. Rice vinegar is also great for a lighter taste.

❓ Can you reuse pickle brine?

Yes, but only once or twice and only if stored properly. Reusing brine is popular in budget meal prep and zero-waste cooking.

❓ How long do refrigerator pickles last?

Typically 5–7 days for best quality, though some can last longer depending on acidity and storage conditions.

❓ Are homemade pickles better than store-bought?

Homemade versions allow control over sugar, salt, and preservatives, making them ideal for organic diets, low-sodium lifestyles, and clean eating trends.