3 Natural Wellness Drinks to Try at Home

3 Natural Wellness Drinks with honey cinnamon, ginger lemon water, and turmeric golden milk

3 Natural Wellness Drinks to Try at Home

Simple kitchen ingredients can be turned into warm, comforting drinks that fit easily into a daily routine. Honey, cinnamon, ginger, lemon, turmeric, black pepper, and warm milk are commonly used in traditional wellness drinks because of their flavor, warmth, and naturally occurring plant compounds.

These recipes are not miracle cures, weight-loss treatments, or replacements for medical care. However, they can be enjoyable additions to a balanced lifestyle when used in sensible amounts.

Below are three easy natural wellness drinks you can prepare at home.

1. Raw Honey and Cinnamon Drink

This simple honey and cinnamon drink is warm, comforting, and easy to prepare before bedtime.

Honey adds natural sweetness, while cinnamon gives the drink a warm, aromatic flavor.

Ingredients

  • 1 teaspoon raw honey
  • 1/4 teaspoon Ceylon cinnamon
  • 1 cup warm water

Instructions

  1. Add the cinnamon to a cup.
  2. Pour in warm water and stir well.
  3. Allow the drink to cool slightly.
  4. Stir in the raw honey once the water is warm rather than very hot.
  5. Sip slowly.

Best Time to Drink

Many people enjoy this drink in the evening because it is warm and relaxing.

You can drink it about 30 minutes before bedtime if it fits comfortably into your routine.

Why People Like Honey and Cinnamon

Honey provides natural sweetness and contains small amounts of plant compounds.

Cinnamon contains naturally occurring antioxidants and has been widely used as a spice in traditional foods and drinks.

However, honey and cinnamon should not be considered a treatment for weight loss or any medical condition.

Helpful Tip

If you plan to use cinnamon regularly, Ceylon cinnamon is generally preferred because it contains less coumarin than Cassia cinnamon.

Avoid adding honey to boiling water. Let the water cool slightly first.

2. Fresh Ginger and Warm Lemon Water

Fresh ginger and lemon make a bright, refreshing morning drink.

Ginger adds a warming, slightly spicy flavor, while fresh lemon adds citrus flavor and vitamin C.

Ingredients

  • 1-inch piece fresh ginger
  • Juice of 1/2 fresh lemon
  • 1 cup warm filtered water
  • 1/2 teaspoon honey, optional

Instructions

  1. Peel the fresh ginger if desired.
  2. Slice or grate the ginger.
  3. Add it to a cup of warm water.
  4. Let the ginger steep for about 3–5 minutes.
  5. Strain the drink if you prefer a smoother texture.
  6. Add fresh lemon juice.
  7. Add a small amount of honey if you want extra sweetness.
  8. Stir and drink while warm.

Best Time to Drink

This drink can be enjoyed at any time of day.

Many people prefer it in the morning because its fresh citrus flavor can be a pleasant way to start the day.

You do not have to drink it on an empty stomach to receive enjoyment from it.

Why Ginger Is Popular

Ginger has a long history of use in cooking and traditional wellness practices.

It contains naturally occurring compounds such as gingerols and shogaols.

Some people find ginger soothing for occasional digestive discomfort or nausea, but individual responses vary.

Why Add Lemon?

Fresh lemon adds flavor and provides vitamin C.

It also makes plain warm water more enjoyable for people who struggle to drink enough fluids.

Helpful Tip

Fresh ginger usually provides a stronger, fresher flavor than powdered ginger.

Start with a smaller amount if you are not used to the spicy taste.

3. Turmeric, Black Pepper and Warm Milk

Turmeric milk, often called golden milk, is a warm drink made with turmeric, milk, and warming spices.

It has become popular because turmeric contains curcumin, a naturally occurring plant compound.

Ingredients

  • 1/2 teaspoon turmeric powder
  • A small pinch of black pepper
  • 1 cup dairy milk, almond milk, or oat milk
  • 1/2 teaspoon raw honey, optional
  • Small pinch of cinnamon, optional

Instructions

  1. Pour the milk into a small saucepan.
  2. Warm over low to medium heat.
  3. Add turmeric and black pepper.
  4. Whisk until everything is well combined.
  5. Let the mixture gently warm for about 2–3 minutes.
  6. Do not allow the milk to boil aggressively.
  7. Remove from the heat.
  8. Let it cool slightly.
  9. Add honey if desired.
  10. Serve warm.

Why Add Black Pepper to Turmeric?

Black pepper contains a compound called piperine.

Research has shown that piperine can increase the absorption of curcumin under certain conditions.

This is why turmeric and black pepper are often paired together.

However, this does not mean that turmeric milk will automatically treat joint pain or inflammation.

Best Time to Drink

Golden milk can be enjoyed in the evening as a warm, comforting drink.

Some people enjoy it a few times per week rather than every day.

Can You Have All Three in One Day?

It is possible for many healthy adults to enjoy these drinks in moderate amounts, but you do not need to drink all three every day.

A simple routine might look like this:

Morning: Ginger and warm lemon water

Evening: Honey and cinnamon drink or turmeric milk

Rotating them may be more practical than drinking several wellness drinks every day.

Important Safety Notes

Natural ingredients can still affect the body and may interact with medications.

Honey should not be given to children under 12 months of age.

People with diabetes should remember that honey contains sugar and may affect blood glucose levels.

Large amounts of cinnamon may not be appropriate for everyone, particularly when Cassia cinnamon is used frequently.

Ginger may interact with certain medications, including some blood-thinning medicines.

Turmeric and black pepper may also interact with medications or may not be suitable for people with certain digestive, gallbladder, bleeding, or other medical conditions.

If you are pregnant, breastfeeding, taking regular medication, preparing for surgery, or managing a medical condition, speak with a qualified healthcare professional before making concentrated herbal drinks part of your daily routine.

Storage Tips

Honey

Keep honey tightly sealed at room temperature in a dry place.

Refrigeration is not usually necessary.

Fresh Ginger

Store fresh ginger in the refrigerator.

For longer storage, ginger can also be frozen and grated directly from frozen.

Lemons

Fresh lemons can be stored in the refrigerator to help them stay fresh longer.

Turmeric and Cinnamon

Keep dried spices in tightly sealed containers away from heat, moisture, and direct sunlight.

Prepared Drinks

These drinks taste best when freshly prepared.

If necessary, ginger-infused water can be refrigerated for a short period, but add fresh lemon just before serving for better flavor.

Frequently Asked Questions

Can these drinks help me lose weight?

No single drink can cause meaningful fat loss by itself.

Weight management is influenced by overall calorie intake, nutrition, physical activity, sleep, stress, medical conditions, and other factors.

These drinks can be included as part of a balanced lifestyle, particularly when they replace high-sugar beverages.

Does honey and cinnamon burn fat while you sleep?

There is not strong evidence that a spoonful of honey and cinnamon causes the body to burn fat overnight.

Enjoy it as a warm drink rather than treating it as a weight-loss remedy.

Does ginger lemon water reduce inflammation immediately?

Ginger contains plant compounds that are being studied for several potential health effects, but a single drink should not be expected to produce immediate or dramatic changes in inflammation.

Does black pepper improve turmeric absorption?

Black pepper contains piperine, which has been shown in research to improve curcumin absorption under certain conditions.

The exact effect depends on the amount consumed and other factors.

How often can I drink golden milk?

For many people, a small serving a few times per week can fit comfortably into a normal diet.

Your individual needs may differ depending on medications and health conditions.

Can I add honey to all three drinks?

Yes, if desired, but remember that honey is still a source of added sugar.

A small amount is usually enough.

Simple Daily Wellness Routine

If you enjoy these drinks, keep your routine simple.

Start the morning with ginger and lemon water if you like something fresh and warming.

Later in the day, choose either cinnamon and honey water or golden milk as a comforting drink.

You do not need complicated detox routines or extreme ingredient combinations to support a healthy lifestyle.

Focus on balanced meals, vegetables, fruit, protein, whole grains, regular movement, adequate sleep, and good hydration.

These drinks can simply complement those habits.

Final Thoughts

Honey and cinnamon water, ginger lemon water, and turmeric golden milk are easy homemade drinks made with familiar kitchen ingredients.

Their biggest advantage is simplicity. They are inexpensive, easy to customize, and can be enjoyed as alternatives to heavily sweetened beverages.

Rather than expecting dramatic overnight results, use them as enjoyable additions to an overall healthy routine.

Consistency with balanced nutrition, regular activity, sufficient sleep, and appropriate medical care matters far more than any single ingredient or drink.

 

Creamy Tuscan Baked Chicken

Creamy Tuscan Baked Chicken

Description

Creamy Tuscan Baked Chicken is a rich, comforting, and incredibly flavorful dinner featuring tender chicken breasts baked in a creamy garlic Parmesan sauce with sun-dried tomatoes, spinach, and Italian herbs. The chicken is first seasoned and lightly seared to develop a beautiful golden crust, then finished in the oven while soaking up the creamy Tuscan-style sauce.

This recipe brings together some of the best Italian-inspired flavors in one easy dish. Garlic provides a fragrant base, sun-dried tomatoes add a slightly sweet and tangy flavor, spinach brings freshness and color, and Parmesan gives the sauce a savory depth. A touch of Italian seasoning and red pepper flakes adds warmth without overpowering the creamy sauce.

The finished chicken is tender, juicy, and surrounded by a velvety sauce that is perfect for spooning over pasta, rice, mashed potatoes, or crusty bread. It is elegant enough for a dinner party but simple enough for a busy weeknight.

Recipe Details

Prep Time: 15 minutes
Cook Time: 35–40 minutes
Total Time: About 55 minutes
Servings: 6
Course: Main Course
Cuisine: Italian-American inspired
Difficulty: Easy to Moderate

Ingredients

For the Chicken

  • 6 boneless, skinless chicken breasts
  • 2 tablespoons olive oil
  • 1 teaspoon Italian seasoning
  • 1 teaspoon garlic powder
  • ½ teaspoon paprika
  • ½ teaspoon salt
  • ½ teaspoon black pepper

For the Creamy Tuscan Sauce

  • 2 tablespoons unsalted butter
  • 5 garlic cloves, minced
  • ½ cup sun-dried tomatoes, thinly sliced
  • 1½ cups heavy cream
  • 1 cup chicken broth
  • ¾ cup freshly grated Parmesan cheese
  • 1 teaspoon Italian seasoning
  • ½ teaspoon black pepper
  • ¼ teaspoon red pepper flakes, optional
  • 3 cups fresh baby spinach
  • 1 tablespoon fresh lemon juice
  • 2 tablespoons fresh parsley, chopped

Optional Garnishes

  • Extra Parmesan cheese
  • Fresh parsley
  • Red pepper flakes
  • Lemon wedges
  • Fresh basil leaves

Choosing the Chicken

Boneless, skinless chicken breasts are ideal for this recipe because they provide a lean source of protein and cook beautifully in the creamy sauce.

Choose chicken breasts that are similar in size so they cook evenly. If some pieces are very thick, gently pound them to an even thickness using a meat mallet.

You can also substitute boneless, skinless chicken thighs. Thighs contain more fat than chicken breasts, which makes them particularly tender and flavorful.

For the best results, remove the chicken from the refrigerator about 10–15 minutes before cooking. This allows it to lose some of its chill and cook more evenly.

Preparing the Chicken

Pat the chicken breasts dry with paper towels.

If the breasts are very thick, carefully slice them horizontally or gently pound them until they are approximately the same thickness.

In a small bowl, combine Italian seasoning, garlic powder, paprika, salt, and black pepper.

Season both sides of each chicken breast generously.

The seasoning forms a flavorful crust when the chicken is seared.

Preheat your oven to 375°F (190°C).

Choose a large oven-safe skillet or baking dish that can comfortably hold the chicken and sauce.

Searing the Chicken

Heat olive oil in a large oven-safe skillet over medium-high heat.

Once the oil is hot, carefully place the seasoned chicken into the skillet.

Cook for approximately 3–4 minutes per side, or until the chicken develops a beautiful golden-brown crust.

The chicken does not need to be completely cooked through at this stage because it will finish cooking in the oven.

Transfer the chicken to a clean plate.

Do not clean the skillet.

The browned bits left behind will become part of the sauce and provide extra flavor.

Preparing the Tuscan Sauce

Reduce the skillet heat to medium.

Add the butter.

Once melted, add the minced garlic.

Cook for approximately 30–45 seconds, stirring constantly, until the garlic becomes fragrant.

Be careful not to brown or burn the garlic.

Add the sliced sun-dried tomatoes.

Cook for approximately 1–2 minutes.

The warm butter will soften the tomatoes and release their rich flavor.

Building the Creamy Sauce

Pour the chicken broth into the skillet.

Use a wooden spoon or spatula to scrape up the browned bits from the bottom of the pan.

These caramelized bits contain a tremendous amount of flavor.

Add the heavy cream and Italian seasoning.

Stir gently until the ingredients are combined.

Bring the sauce to a gentle simmer.

Avoid rapidly boiling the cream because high heat can cause the sauce to separate.

Allow it to simmer for approximately 3–5 minutes, stirring occasionally.

The sauce should begin to thicken slightly.

Adding Parmesan

Reduce the heat to low.

Gradually sprinkle in the freshly grated Parmesan cheese while stirring continuously.

Continue stirring until the cheese melts into the sauce.

Freshly grated Parmesan is strongly recommended because it melts more smoothly and creates a creamier texture than many pre-shredded cheeses.

Taste the sauce.

Add black pepper and red pepper flakes if desired.

Be careful with additional salt because Parmesan and chicken broth can already contain a significant amount.

Adding Spinach

Add the fresh baby spinach to the warm sauce.

Stir gently.

The spinach will begin to wilt within a minute or two.

Continue stirring until most of the spinach is incorporated into the sauce.

It may look like a lot of spinach at first, but it will reduce considerably as it wilts.

The spinach adds beautiful color while balancing the richness of the creamy sauce.

Returning the Chicken

Place the seared chicken breasts back into the skillet.

Spoon some of the creamy Tuscan sauce over the top of each piece.

Make sure the chicken is partially surrounded by sauce.

If you’re using a baking dish instead of an oven-safe skillet, transfer the sauce to the dish and arrange the chicken inside it.

The sauce should come at least partway up the sides of the chicken.

Baking the Chicken

Transfer the skillet to the preheated 375°F (190°C) oven.

Bake for approximately 18–25 minutes, depending on the thickness of the chicken breasts.

The chicken should be cooked through and reach an internal temperature of 165°F (74°C) in the thickest part.

Avoid relying solely on cooking time because chicken breasts vary significantly in size.

Once cooked, carefully remove the skillet from the oven.

Allow the chicken to rest for approximately 5 minutes.

This gives the juices time to redistribute and allows the sauce to settle.

Finishing the Sauce

Add fresh lemon juice to the sauce immediately before serving.

The acidity from the lemon cuts through the richness of the cream and butter.

Sprinkle the dish with fresh parsley.

Add extra Parmesan if desired.

For a little heat, add another pinch of red pepper flakes.

Fresh basil leaves can also be added for an attractive finishing touch.

Why This Recipe Works

The key to this recipe is layering flavor.

The chicken is seasoned before being seared, creating a golden crust.

The browned bits left in the skillet become part of the sauce.

Garlic and butter create the aromatic foundation.

Sun-dried tomatoes add concentrated sweetness and acidity.

Chicken broth provides savory depth.

Heavy cream creates richness.

Parmesan adds saltiness and umami.

Spinach provides freshness and color.

Finally, lemon juice brightens the entire dish.

Each ingredient has a purpose, creating a balanced sauce rather than simply a heavy cream-based gravy.

Important Recipe Notes

Don’t skip the searing step

Searing gives the chicken a much better flavor and color than simply placing raw chicken directly into the sauce.

Don’t boil the cream

A gentle simmer is enough. Aggressive boiling can cause the sauce to separate.

Use freshly grated Parmesan

It melts more smoothly and creates a better sauce.

Don’t overcook the chicken

Use a meat thermometer when possible. Remove the chicken once it reaches 165°F.

Let the chicken rest

Resting for several minutes helps keep the chicken juicy.

Add lemon at the end

Fresh lemon juice is most effective as a finishing ingredient.

Tips for Perfect Creamy Tuscan Chicken

Use similar-sized chicken breasts: This helps them finish cooking at approximately the same time.

Dry the chicken first: Removing excess moisture helps create a better sear.

Don’t overcrowd the skillet: Give each chicken breast enough space to brown.

Use a heavy skillet: Cast iron or another oven-safe heavy pan retains heat beautifully.

Don’t rush the sauce: Let the broth and cream simmer gently so the flavors develop.

Adjust the thickness: If the sauce becomes too thick, add a splash of chicken broth.

Add extra vegetables: Mushrooms, zucchini, or bell peppers can easily be incorporated.

Finish with fresh herbs: Fresh parsley or basil gives the dish a restaurant-style appearance.

Can You Use Chicken Thighs?

Absolutely.

Boneless, skinless chicken thighs are an excellent alternative.

Season and sear them exactly as you would the chicken breasts.

Because thighs vary in size, use an instant-read thermometer to determine when they are fully cooked.

The darker meat pairs particularly well with the rich Tuscan sauce.

You can also use bone-in chicken thighs, but the cooking time will be longer.

Can You Use Chicken Tenders?

Yes.

Chicken tenders cook much faster than full chicken breasts, so reduce the oven cooking time.

Sear them briefly and then bake them in the sauce until they reach 165°F internally.

Chicken tenders are especially useful when preparing smaller portions for children.

Variations

Creamy Tuscan Mushroom Chicken

Add 8 ounces of sliced mushrooms after searing the chicken. Cook until golden before preparing the sauce.

Tuscan Tomato Chicken

Add a few tablespoons of tomato paste to the sauce for a deeper tomato flavor.

Spicy Tuscan Chicken

Increase the red pepper flakes or add a pinch of cayenne pepper.

Tuscan Chicken with Artichokes

Add drained, chopped artichoke hearts along with the sun-dried tomatoes.

Tuscan Chicken with Mushrooms and Spinach

Use both mushrooms and spinach for an extra vegetable-rich version.

Lemon Tuscan Chicken

Increase the lemon juice and add one teaspoon of fresh lemon zest.

Dairy-Free Version

Use plant-based butter and a dairy-free cream alternative. Replace Parmesan with nutritional yeast or a dairy-free Parmesan substitute.

Lighter Version

Use half-and-half instead of heavy cream and reduce the amount of Parmesan.

What to Serve With Creamy Tuscan Baked Chicken

This chicken is extremely versatile.

Pasta

Serve the chicken and sauce over spaghetti, linguine, penne, or fettuccine.

The creamy sauce coats pasta beautifully.

Rice

Steamed white rice, brown rice, or lemon herb rice can absorb the sauce and turn the dish into a complete meal.

Mashed Potatoes

Creamy mashed potatoes are perfect for soaking up the Tuscan sauce.

Roasted Potatoes

Crispy roasted potatoes provide a delicious contrast to the creamy chicken.

Crusty Bread

A warm loaf of crusty Italian bread is one of the simplest and best ways to enjoy every drop of sauce.

Vegetables

Serve with roasted broccoli, green beans, zucchini, or asparagus for a vegetable-rich dinner.

Salad

A fresh green salad with lemon vinaigrette provides acidity and crunch to balance the creamy main course.

Make-Ahead Instructions

You can prepare the chicken and sauce several hours ahead of time.

For the best texture, however, bake the chicken close to serving.

If preparing ahead, sear the chicken and prepare the sauce. Store them covered in the refrigerator.

When ready to cook, combine everything in an oven-safe dish and bake until the chicken reaches 165°F.

Avoid leaving the prepared chicken at room temperature for extended periods.

Storage

Store leftover Creamy Tuscan Baked Chicken in an airtight container in the refrigerator for up to 3 days.

Keep the chicken and sauce together so the meat stays moist.

To reheat, place the chicken and sauce in a skillet over low to medium-low heat.

Add a splash of chicken broth or cream if the sauce has become too thick.

Heat gently until warmed through.

Avoid very high heat because it can cause the cream sauce to separate.

Freezing Instructions

Cream-based sauces can be frozen, although the texture may change slightly after thawing.

If you want to freeze the dish, allow it to cool completely before transferring it to a freezer-safe container.

Freeze for up to approximately 2 months for best quality.

Thaw overnight in the refrigerator.

Reheat slowly over low heat, stirring gently.

If the sauce looks slightly separated, whisk in a small amount of warm cream or chicken broth to bring it back together.

Nutritional Information

Estimated per serving and may vary according to ingredient brands and portion sizes.

  • Calories: Approximately 560
  • Protein: 48–52g
  • Carbohydrates: 10–14g
  • Fat: 34–38g
  • Fiber: 2–3g
  • Sugar: 4–6g
  • Sodium: Approximately 700–900mg
  • Calcium: Approximately 300–400mg

Serving the chicken with vegetables rather than pasta or bread can make the overall meal lighter.

Benefits of Creamy Tuscan Baked Chicken

Chicken provides a high-quality source of protein, making this meal particularly satisfying.

Spinach contributes fiber, folate, vitamin K, vitamin A, and other nutrients.

Sun-dried tomatoes add concentrated tomato flavor along with naturally occurring antioxidants.

Garlic and herbs provide plenty of flavor without requiring excessive amounts of salt.

If served with additional vegetables, this recipe can become part of a balanced meal containing protein, vegetables, and healthy fats.

For a lighter option, reduce the cream and serve the chicken with a large salad or roasted vegetables.

Frequently Asked Questions

Can I use chicken thighs instead of breasts?

Yes. Boneless, skinless chicken thighs are delicious and tend to stay especially juicy.

Can I make this recipe without sun-dried tomatoes?

Yes. You can replace them with halved cherry tomatoes, roasted red peppers, or simply omit them.

Can I use fresh tomatoes?

Yes. Cherry tomatoes work particularly well. Add them after the garlic and cook until they begin to soften.

Can I use frozen spinach?

Yes. Thaw it completely and squeeze out excess water before adding it to the sauce.

Can I use milk instead of heavy cream?

Yes, but the sauce will be thinner and less rich. For a creamy result, use half-and-half or combine milk with a small amount of cream.

Why did my sauce become too thick?

Cream sauces continue thickening as they cool. Add chicken broth or cream a little at a time to loosen it.

Why did my sauce separate?

High heat is usually the main cause. Keep the sauce at a gentle simmer and avoid boiling it aggressively.

Can I make this recipe in a baking dish?

Yes. Prepare the sauce on the stovetop, transfer it to a baking dish, add the seared chicken, and bake until cooked through.

Can I add mushrooms?

Absolutely. Mushrooms are one of the best additions to Tuscan-style chicken.

Can I make this recipe spicy?

Yes. Add red pepper flakes to the sauce or increase the amount according to your preference.

Is this recipe gluten-free?

The chicken and sauce are naturally gluten-free, but always check packaged ingredients such as chicken broth and seasonings if you need strict gluten-free preparation.

Can I serve it with pasta?

Yes. Pasta is one of the best options because the creamy sauce can be spooned directly over it.

How do I know when the chicken is done?

The safest method is to check the thickest part with an instant-read thermometer. Chicken should reach 165°F (74°C).


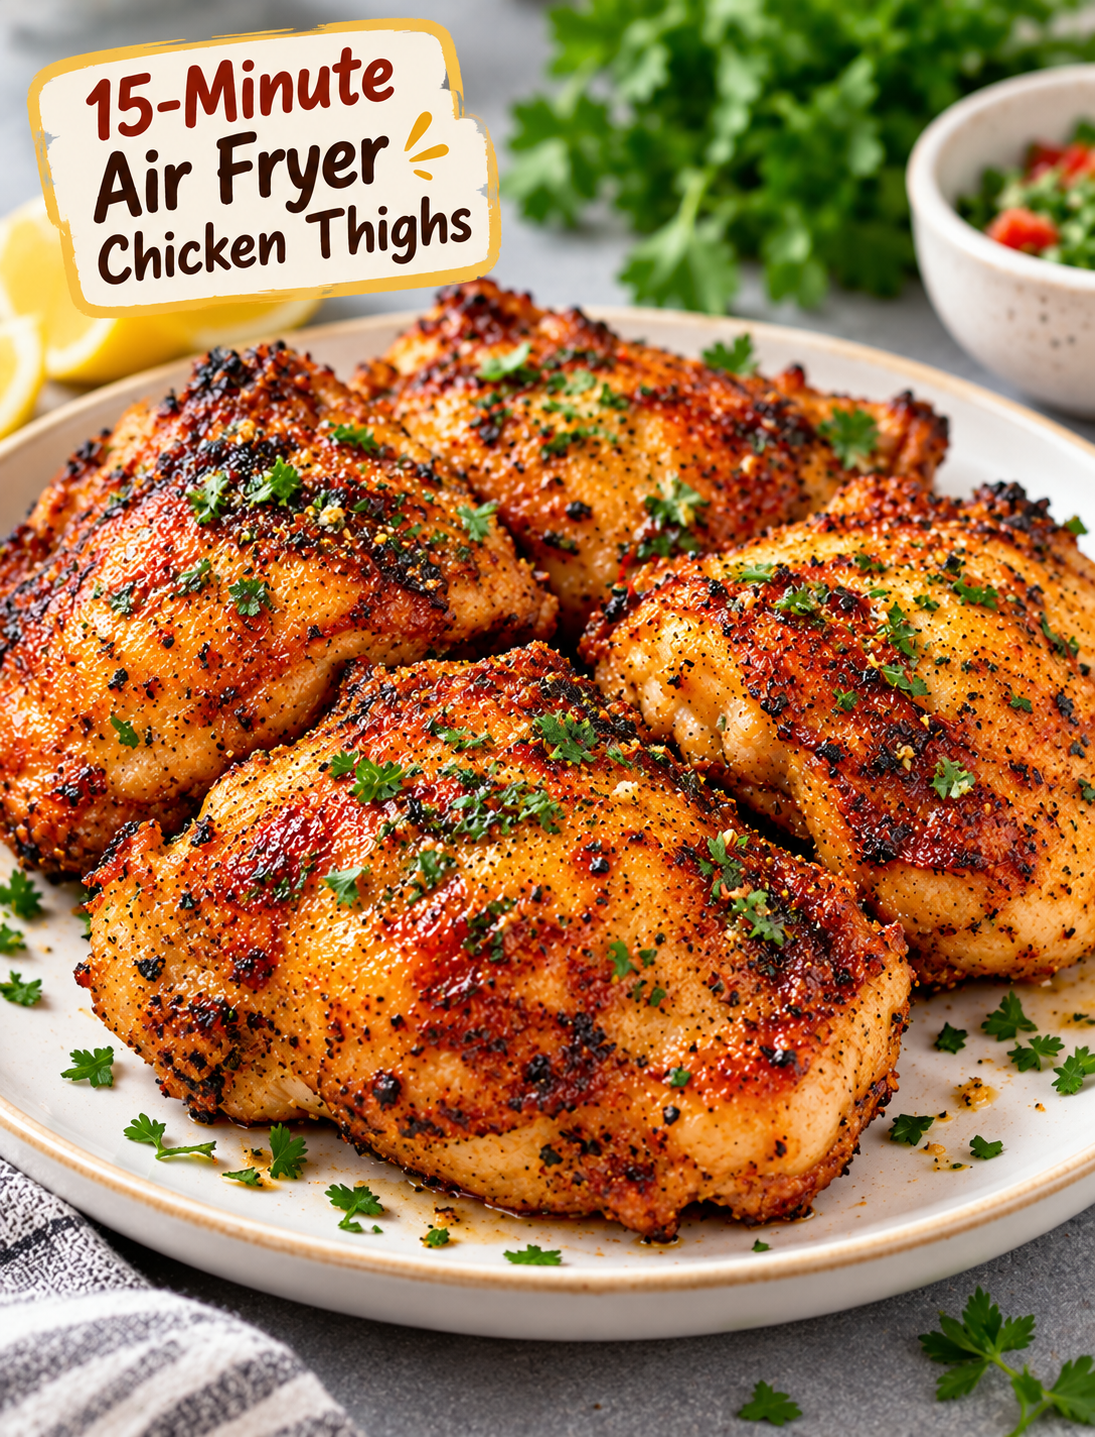
15-Minute Air Fryer Chicken Thighs

15-Minute Air Fryer Chicken Thighs with crispy seasoned exterior

15-Minute Air Fryer Chicken Thighs

These 15-Minute Air Fryer Chicken Thighs are a quick way to put juicy, flavorful chicken on the table without turning on the oven. The outside develops a seasoned, golden crust while the hot circulating air keeps the meat tender inside.

This recipe works well for busy weeknights because the ingredient list is short and the cooking process is simple. Boneless, skinless chicken thighs cook especially fast in an air fryer, making them a practical choice when dinner needs to be ready in minutes.

The seasoning uses common pantry ingredients, including paprika, garlic powder, onion powder, salt, and black pepper. You can serve the cooked chicken with rice, roasted vegetables, potatoes, salad, or your favorite dipping sauce.

Why You’ll Love These 15-Minute Air Fryer Chicken Thighs

There are plenty of reasons to keep this easy chicken thigh recipe in your weekly dinner rotation.

  • Fast cooking: Boneless chicken thighs can cook in about 15 minutes, depending on their thickness and your air fryer.
  • Simple ingredients: The recipe uses chicken, oil, and everyday seasonings.
  • Juicy texture: Chicken thighs contain more fat than chicken breasts, which helps them stay moist during high-heat cooking.
  • Minimal cleanup: You only need a bowl, tongs, and your air fryer basket.
  • Easy to customize: Change the spice blend to make the chicken smoky, spicy, herby, or mild.
  • Meal-prep friendly: Leftovers work well in salads, wraps, grain bowls, and sandwiches.
  • No oven required: The air fryer is useful when you want a quick meal without heating the whole kitchen.

The key is to avoid overcrowding the basket. Leaving space between each piece allows hot air to move around the chicken and promotes more even browning.

Ingredients for Air Fryer Chicken Thighs

You only need a few ingredients to prepare these juicy air fryer chicken thighs.

  • 1 1/2 pounds boneless, skinless chicken thighs: Choose pieces that are similar in size so they finish cooking at about the same time.
  • 1 tablespoon olive oil: A light coating helps the seasoning stick and encourages browning.
  • 1 teaspoon paprika: Adds mild flavor and gives the chicken a deeper golden color.
  • 1 teaspoon garlic powder: Provides savory garlic flavor without fresh garlic burning at high heat.
  • 1/2 teaspoon onion powder: Adds another layer of savory flavor.
  • 1/2 teaspoon dried oregano: Gives the chicken a light herbal note.
  • 3/4 teaspoon kosher salt: Seasons the chicken throughout.
  • 1/4 teaspoon ground black pepper: Adds mild heat and balances the other seasonings.
  • 1/4 teaspoon smoked paprika, optional: Use this if you prefer a slightly smoky flavor.

Best Chicken Thighs to Use

Boneless, skinless thighs are the best choice when the goal is a fast cooking time. Their smaller size and lack of bone allow heat to reach the center more quickly.

Try to buy thighs with a similar thickness. One very thick piece may need several extra minutes even when the smaller pieces are already cooked.

Bone-in, skin-on chicken thighs can also be prepared in an air fryer, but they usually require a longer cooking time. They should not be treated as a direct 15-minute substitute for boneless thighs.

How to Make 15-Minute Air Fryer Chicken Thighs

The exact cooking time can vary by air fryer model and the thickness of the meat. Always use the internal temperature rather than cooking time alone to decide when chicken is ready.

Step 1: Preheat the Air Fryer

Preheat the air fryer to 400°F for about 3 minutes.

Preheating gives the chicken immediate contact with high heat and can help the surface start browning sooner. If your air fryer does not require preheating, follow the manufacturer’s directions.

Step 2: Prepare the Chicken

Remove the chicken thighs from the package and pat them dry with paper towels.

Removing excess surface moisture helps the oil and dry seasonings coat the chicken more evenly. It also reduces steaming on the surface during cooking.

Trim away any large pieces of excess fat if needed.

Step 3: Season the Chicken Thighs

Place the chicken in a medium bowl.

Add olive oil, paprika, garlic powder, onion powder, oregano, salt, black pepper, and smoked paprika if using.

Toss until every piece has a thin, even coating of oil and seasoning. Check the folded areas of each thigh because seasoning can easily miss those spots.

Step 4: Arrange Chicken in the Air Fryer

Place the seasoned chicken thighs in the preheated basket in a single layer.

Leave a small amount of space between the pieces. Do not stack the chicken or pack the basket tightly.

If your air fryer is small, cook the chicken in two batches rather than overcrowding it.

Step 5: Air Fry for 15 Minutes

Air fry the chicken at 400°F for about 15 minutes.

Flip each thigh after about 7–8 minutes so both sides have a chance to brown.

Very small or thin thighs may finish sooner, while thick pieces may need a few additional minutes.

Step 6: Check the Internal Temperature

Insert an instant-read meat thermometer into the thickest part of the largest chicken thigh.

Chicken is considered safely cooked when it reaches a minimum internal temperature of 165°F, according to USDA food-safety guidance.

If the chicken has not reached 165°F, return it to the air fryer and cook for another 1–2 minutes before checking again.

Step 7: Rest and Serve

Transfer the cooked thighs to a clean plate and let them rest for about 3–5 minutes.

A short resting period allows the hot juices inside the meat to settle before slicing.

Slice the chicken or serve each thigh whole with your preferred side dishes.

Tips for Juicy and Crispy Air Fryer Chicken Thighs

Small preparation details can make a noticeable difference in the finished chicken.

Pat the Chicken Dry

Moisture on the surface can create steam. Patting the thighs dry before seasoning helps them brown more effectively.

Don’t Overcrowd the Basket

Hot air needs room to circulate around each piece. A tightly packed basket can lead to uneven cooking and less browning.

Use Similar-Sized Chicken Thighs

Pieces with similar thickness cook more evenly. If one thigh is much thicker than the others, check its internal temperature separately.

Flip Halfway Through Cooking

Turning the chicken helps expose both sides to the strongest circulating heat and promotes more even browning.

Use a Meat Thermometer

Air fryers vary in size, wattage, and airflow. A thermometer is more reliable than judging doneness by color or time alone.

Avoid Too Much Oil

Chicken thighs naturally contain some fat. A small amount of oil is enough to help the spices stick and promote browning.

Adjust the Time When Needed

Fifteen minutes is a useful target for average boneless thighs, not a guarantee for every piece. Thickness, starting temperature, and air fryer performance can change the total cooking time.

What to Serve With Air Fryer Chicken Thighs

These seasoned chicken thighs work with many familiar side dishes, so you can build a different meal each time.

For a simple weeknight dinner, serve the chicken with roasted broccoli, green beans, asparagus, or a mixed green salad.

For a more filling meal, pair it with mashed potatoes, air fryer potato wedges, brown rice, white rice, quinoa, or pasta.

You can also slice leftover chicken and use it in:

  • Chicken wraps
  • Caesar salads
  • Grain bowls
  • Tacos
  • Sandwiches
  • Meal-prep lunch boxes

For dipping, ranch dressing, garlic sauce, honey mustard, barbecue sauce, and buffalo sauce all pair well with the basic seasoning blend.

How to Store and Reheat Leftovers

Proper storage keeps leftover chicken useful for quick meals later in the week.

Allow the chicken to cool, then place it in an airtight container. Refrigerate cooked chicken within two hours of cooking and use it within 3–4 days.

For longer storage, place cooled thighs in a freezer-safe container or freezer bag. Remove as much excess air as possible before freezing.

Reheating in the Air Fryer

Preheat the air fryer to about 350°F.

Place the leftover chicken in a single layer and heat for a few minutes until it is hot throughout. The exact time depends on the size and temperature of the pieces.

Avoid reheating longer than necessary because already-cooked chicken can become dry.

Easy Seasoning Variations

The basic seasoning blend is flexible enough to match several different meals.

Spicy Chicken Thighs

Add cayenne pepper or crushed red pepper to the seasoning mixture. Start with a small amount and increase it based on your preferred heat level.

Garlic Parmesan Chicken

Add extra garlic powder before cooking, then sprinkle freshly grated Parmesan over the hot chicken after it leaves the air fryer.

BBQ Chicken Thighs

Season the chicken lightly with salt, pepper, garlic powder, and smoked paprika. Brush on a thin layer of barbecue sauce during the final few minutes so the sauce does not burn.

Lemon Herb Chicken

Use oregano, garlic powder, black pepper, and a little lemon zest. Add fresh lemon juice after cooking for a brighter flavor.

Frequently Asked Questions About 15-Minute Air Fryer Chicken Thighs

How long do chicken thighs take in the air fryer?

Boneless, skinless chicken thighs often take about 15 minutes at 400°F, but thick pieces may require additional cooking time.

What temperature should chicken thighs reach?

Chicken should reach a minimum internal temperature of 165°F at the thickest part before serving.

Do I need to flip chicken thighs in the air fryer?

Flipping halfway through cooking helps both sides brown and cook more evenly.

Can I cook frozen chicken thighs in the air fryer?

Yes, but frozen thighs require more time than this 15-minute method and should still reach 165°F internally before serving.

Can I use bone-in chicken thighs?

Yes, but bone-in thighs generally take longer to cook, so adjust the cooking time and verify doneness with a thermometer.

Why are my air fryer chicken thighs not crispy?

Excess moisture or an overcrowded basket can reduce browning. Pat the chicken dry and leave space around each piece.

Do I need to preheat the air fryer?

Preheating can help the chicken begin browning quickly, although requirements vary by air fryer model.

How do I keep chicken thighs juicy in the air fryer?

Avoid overcooking them, check the internal temperature with a thermometer, and let the cooked thighs rest for a few minutes before slicing.

Final Thoughts

These 15-Minute Air Fryer Chicken Thighs make a practical dinner when you need something fast, flavorful, and easy to pair with everyday sides. Boneless chicken thighs cook quickly, while a simple blend of paprika, garlic, onion, oregano, salt, and pepper provides plenty of flavor without a complicated marinade.

For the best results, pat the chicken dry, arrange it in one layer, flip it halfway through cooking, and check the thickest piece with an instant-read thermometer. The chicken should reach at least 165°F before serving.

Once you learn the basic method, you can change the seasoning to fit the rest of your meal. Serve the thighs with vegetables and rice for dinner, or slice leftovers for wraps, salads, sandwiches, and meal-prep bowls.

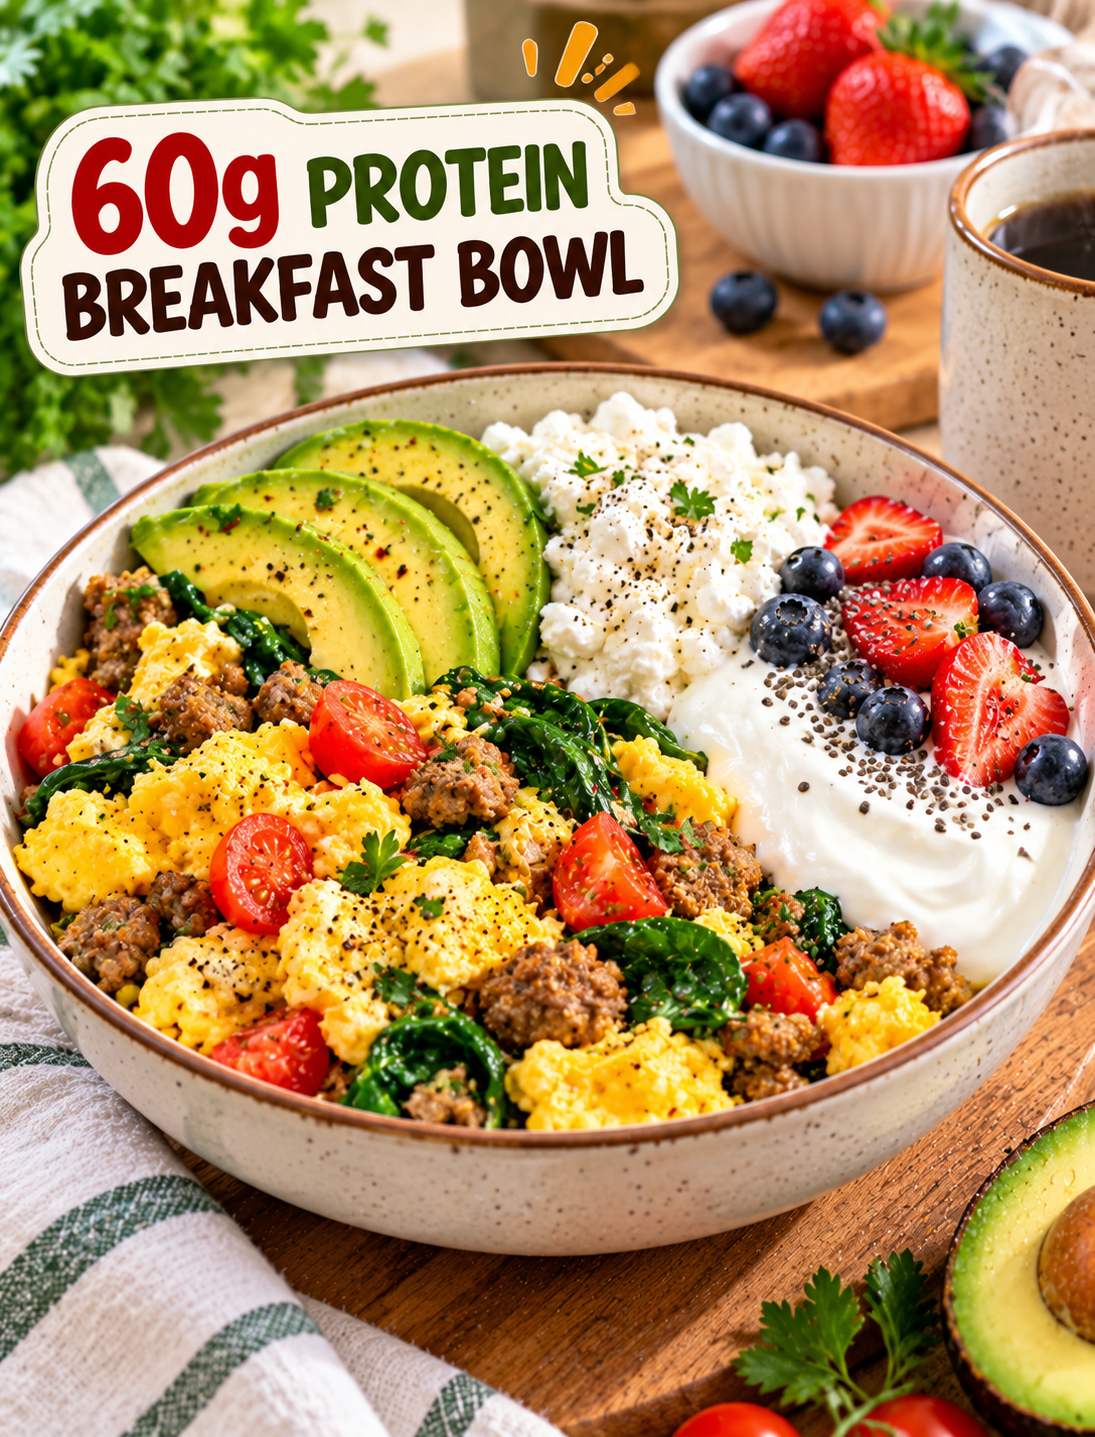
Tired on Monday Morning? Try This 60g-Protein Breakfast Bowl

60g-protein breakfast bowl with eggs, cottage cheese, Greek yogurt, turkey sausage, spinach, tomatoes, and avocado

Tired on Monday Morning? Try This 60g-Protein Breakfast: High-Protein Egg, Cottage Cheese & Turkey Breakfast Bowl

Feeling tired on Monday morning can make it hard to get into the day. A balanced breakfast can give you a practical start, especially when it includes protein, vegetables, and healthy fats.

This High-Protein Egg, Cottage Cheese & Turkey Breakfast Bowl combines eggs, cottage cheese, plain Greek yogurt, lean turkey sausage, spinach, tomatoes, and avocado. Depending on the brands and portions you use, the bowl provides about 60g of protein.

The recipe is designed for busy mornings. It takes about 5 minutes to prepare and 7–8 minutes to cook, making it a useful option for a weekday breakfast.

Why a High-Protein Breakfast Can Be Useful After 50

Protein is important for maintaining muscle, supporting normal body functions, and helping you stay satisfied after meals. Maintaining muscle becomes especially important with age because muscle mass and strength can gradually decline.

A protein-rich breakfast also gives you an easy way to spread protein across the day instead of trying to eat most of it at dinner.

This breakfast also includes vegetables and avocado, which add fiber, vitamins, minerals, and healthy fats.

However, protein is not a guaranteed fix for morning fatigue. Feeling tired can be related to poor sleep, stress, dehydration, medication effects, anemia, thyroid problems, or other health issues. Persistent or unexplained fatigue should be discussed with a healthcare professional.

Ingredients for the 60g-Protein Breakfast Bowl

The following amounts make one serving.

  • 2 large eggs — about 12g protein
  • ½ cup low-fat cottage cheese — about 14g protein
  • 1 cup plain nonfat Greek yogurt — about 23g protein
  • 2 ounces lean turkey breakfast sausage — about 12g protein
  • ½ cup fresh spinach
  • ¼ cup diced tomatoes
  • ¼ avocado
  • 1 teaspoon olive oil
  • ¼ teaspoon garlic powder
  • Black pepper to taste
  • Optional red pepper flakes

The estimated protein total is approximately 61g, but the exact amount depends on the nutrition labels of the products you buy.

For a lower-sodium version, compare turkey sausage labels and choose one with less sodium.

How to Make This High-Protein Breakfast Bowl

Step 1: Prepare the ingredients

Wash the spinach and tomatoes if needed. Dice the tomatoes and slice the avocado.

Measure the cottage cheese and Greek yogurt so the portions are ready before cooking.

Step 2: Cook the turkey sausage

Place a skillet over medium heat and add the turkey sausage.

Cook according to the package directions until it reaches the safe temperature recommended for the product. Break it into small pieces as it cooks.

Avoid relying only on color to judge whether meat is fully cooked.

Step 3: Add the vegetables

Add the spinach and diced tomatoes to the skillet.

Cook for about 1–2 minutes, stirring occasionally, until the spinach wilts and the tomatoes warm through.

Step 4: Add the eggs

Crack the eggs into a small bowl and whisk them with black pepper and garlic powder.

Pour the eggs into the skillet with the turkey and vegetables.

Gently stir until the eggs are fully cooked and no longer runny.

Step 5: Build the bowl

Transfer the cooked egg mixture to a serving bowl.

Add the cottage cheese on one side and sliced avocado on the other side.

Keeping the ingredients separate makes the bowl colorful and gives you different textures in each bite.

Step 6: Add the Greek yogurt

Serve the plain Greek yogurt alongside the savory bowl.

If you prefer, add a small serving of berries to the yogurt for natural sweetness.

This gives you a breakfast that combines protein-rich foods with produce instead of relying on a single ingredient.

How This Breakfast Reaches About 60g of Protein

The protein comes from several ingredients rather than one large portion of meat.

  • Eggs: approximately 12g
  • Cottage cheese: approximately 14g
  • Greek yogurt: approximately 23g
  • Turkey sausage: approximately 12g

That gives an estimated total of 61g of protein.

Because brands differ, always check the Nutrition Facts label on your specific cottage cheese, yogurt, and turkey sausage.

You do not need to reach exactly 60g at every breakfast. Your ideal protein intake depends on your body size, activity level, overall diet, and health needs.

Easy Ways to Adjust the Recipe

This breakfast is flexible, so you can change it based on your preferences.

For less sodium: Choose lower-sodium turkey sausage and cottage cheese.

For more fiber: Add berries to the yogurt or include extra vegetables such as bell peppers.

For a meat-free version: Replace the turkey sausage with another protein-rich food, such as additional eggs or a suitable plant-based protein.

For fewer calories: Use less avocado or choose lower-fat dairy products while keeping the vegetables.

For meal prep: Cook the turkey and vegetables ahead of time and prepare the eggs fresh in the morning.

Best Way to Serve It on a Busy Morning

You do not need to eat every ingredient separately.

Place the warm egg, turkey, spinach, and tomato mixture in the bowl first. Add cottage cheese and avocado beside it, then serve Greek yogurt on the side.

A glass of water can also be a simple addition to your morning routine, especially if you wake up thirsty.

Coffee or tea can fit into a balanced breakfast as well, but avoid using large amounts of added sugar to turn the meal into a dessert-like drink.

What Women 50+ Should Know About Protein

Protein needs are different for every person.

The basic adult protein recommendation is based on body weight, while some older adults may benefit from higher protein intake depending on their health, activity level, and muscle goals.

A 60g breakfast may be appropriate for some people but unnecessary for others.

If you have kidney disease or another condition that affects protein intake, do not substantially increase your protein intake without discussing it with your healthcare professional.

The same applies if you have been given a specific dietary plan or take medications that affect your nutrition needs.

Can This Breakfast Stop Monday Morning Fatigue?

No single breakfast can guarantee that you will feel energetic.

This bowl does provide protein, vegetables, healthy fats, and a substantial meal, which can make it a practical choice when you want a filling breakfast.

But ongoing tiredness should not automatically be blamed on a lack of protein.

If fatigue continues despite adequate sleep and regular meals, consider discussing it with a healthcare professional. Persistent tiredness can have many possible causes that require individual evaluation.

Simple Monday Morning Routine

You can make this breakfast easier by doing a few things the night before.

  • Wash and chop the vegetables.
  • Portion the cottage cheese and Greek yogurt.
  • Slice the avocado shortly before eating to reduce browning.
  • Keep the turkey sausage refrigerated until ready to cook.
  • Put your skillet and utensils where you can reach them quickly.

With the ingredients prepared, the cooking process becomes much easier on a busy morning.

Frequently Asked Questions

Is 60g of protein too much for breakfast?

Not necessarily, but individual protein needs vary by body size, health, activity level, and total daily intake.

How much protein is in two eggs?

Two large eggs provide about 12g of protein, although the exact amount varies slightly by egg size.

Can women over 50 eat a high-protein breakfast?

Yes, many women over 50 can include protein-rich foods at breakfast as part of a balanced diet.

Can I make this breakfast without turkey sausage?

Yes, you can replace turkey sausage with another protein-rich ingredient that fits your dietary preferences.

Is Greek yogurt good for a high-protein breakfast?

Plain Greek yogurt is a convenient protein source, but protein amounts vary significantly between brands, so check the label.

Can I prepare this breakfast ahead of time?

You can prepare the turkey and vegetables ahead of time, but freshly cooked eggs usually have the best texture.

What if I do not like cottage cheese?

Try a different protein-rich dairy food or another suitable protein source that fits your nutritional needs.

Does eating more protein cure tiredness?

No, fatigue has many possible causes, so increasing protein should not be treated as a cure for persistent tiredness.

Final Takeaway

A busy Monday morning does not require a complicated breakfast.

This High-Protein Egg, Cottage Cheese & Turkey Breakfast Bowl combines several protein sources with vegetables and avocado in one simple meal. With approximately 60g of protein, it can be a convenient option for people who want a substantial breakfast while supporting a balanced eating pattern.

The most important point is to look at the whole diet rather than one meal. Choose a variety of protein foods, vegetables, fruits, whole grains, and healthy fats throughout the week.

And if feeling tired every Monday becomes a regular problem—or fatigue continues throughout the week—look beyond breakfast and consider discussing the issue with a healthcare professional.

Creamy Mushroom and Asparagus Chicken Penne

Creamy Mushroom and Asparagus Chicken Penne

Description

Creamy Mushroom and Asparagus Chicken Penne is a comforting, flavorful pasta dinner that combines tender pieces of golden chicken, earthy mushrooms, crisp-tender asparagus, and perfectly cooked penne in a rich, creamy Parmesan sauce. Every bite brings together savory chicken, buttery mushrooms, fresh vegetables, and silky pasta for a satisfying meal that feels special while remaining easy enough for a weeknight dinner.

This recipe is perfect when you want something hearty without spending hours in the kitchen. Everything comes together in one main skillet after the pasta is cooked, making cleanup relatively simple. The combination of mushrooms and asparagus gives the creamy sauce plenty of texture and flavor, while garlic, Italian herbs, Parmesan, and a touch of lemon keep the dish from tasting overly heavy.

The penne is particularly good for this recipe because its ridges and hollow center capture the creamy sauce. If you prefer another pasta shape, you can easily substitute rigatoni, rotini, farfalle, fettuccine, or linguine.

This dish works beautifully for family dinners, casual entertaining, date-night meals, or meal preparation. Serve it with a crisp green salad and warm garlic bread for a complete and comforting dinner.

Recipe Details

Prep Time: 20 minutes
Cook Time: 30 minutes
Total Time: About 50 minutes
Servings: 6
Course: Main Course
Cuisine: Italian-American inspired
Difficulty: Easy to Moderate

Ingredients

For the Chicken

  • 1½ pounds boneless, skinless chicken breasts
  • 1 tablespoon olive oil
  • 1 tablespoon unsalted butter
  • 1 teaspoon Italian seasoning
  • ½ teaspoon garlic powder
  • ½ teaspoon paprika
  • ½ teaspoon salt
  • ¼ teaspoon freshly ground black pepper

For the Pasta

  • 12 ounces penne pasta
  • 1 tablespoon salt for the pasta water

For the Vegetables

  • 2 tablespoons olive oil
  • 8 ounces mushrooms, sliced
  • 1 pound fresh asparagus, trimmed and cut into 1-inch pieces
  • 1 small yellow onion, finely diced
  • 4 garlic cloves, minced

For the Creamy Sauce

  • 2 tablespoons unsalted butter
  • 2 cups heavy cream
  • 1 cup chicken broth
  • 1 cup freshly grated Parmesan cheese
  • ½ teaspoon Italian seasoning
  • ¼ teaspoon black pepper
  • ¼ teaspoon red pepper flakes, optional
  • ½ teaspoon salt, or to taste
  • 1 tablespoon fresh lemon juice
  • 2 tablespoons chopped fresh parsley

For Garnishing

  • Extra Parmesan cheese
  • Fresh parsley
  • Freshly cracked black pepper
  • Lemon wedges, optional
  • Red pepper flakes, optional

Choosing the Chicken

Boneless, skinless chicken breasts work wonderfully for this recipe because they cook quickly and provide lean protein.

You can also use boneless, skinless chicken thighs if you prefer darker meat. Chicken thighs are naturally more forgiving and remain juicy even when cooked slightly longer.

When using chicken breasts, avoid cutting them into extremely small pieces before cooking. Bite-sized pieces approximately 1 inch thick are ideal because they develop a beautiful golden exterior while remaining tender inside.

For the best flavor, season the chicken generously before it reaches the skillet.

Preparing the Chicken

Begin by patting the chicken breasts dry with paper towels.

Cut the chicken into bite-sized pieces.

Place the chicken in a bowl and add Italian seasoning, garlic powder, paprika, salt, and black pepper.

Toss well until every piece is evenly coated.

Heat a large, deep skillet over medium-high heat.

Add olive oil and butter.

Once the butter melts and begins to foam, add the seasoned chicken in a single layer.

Avoid overcrowding the skillet. If necessary, cook the chicken in two batches.

Cook for approximately 4–5 minutes per side, or until the chicken develops a golden-brown exterior and is cooked through.

Transfer the cooked chicken to a clean plate and set aside.

Do not wipe out the skillet. The browned bits left behind will add incredible flavor to the sauce.

Cooking the Penne

Bring a large pot of salted water to a boil.

Add the penne and cook according to the package instructions until al dente.

Al dente means the pasta should be tender but still have a slight firmness when bitten.

Before draining, reserve approximately 1 cup of pasta water.

This starchy water is extremely useful for adjusting the consistency of the creamy sauce later.

Drain the pasta and set it aside.

Avoid rinsing the pasta because the natural starch on the surface helps the sauce cling to the penne.

Preparing the Vegetables

While the pasta cooks, prepare the mushrooms and asparagus.

Clean the mushrooms and slice them evenly.

Trim the woody ends from the asparagus and cut the stalks into approximately 1-inch pieces.

Keep the asparagus tips intact because they cook quickly and look beautiful in the finished dish.

Dice the onion and mince the garlic.

Sautéing the Mushrooms

Return the skillet used for the chicken to medium-high heat.

Add two tablespoons of olive oil.

Add the sliced mushrooms in a relatively even layer.

Cook for approximately 5–7 minutes, stirring occasionally.

The mushrooms will initially release moisture. Continue cooking until the liquid evaporates and the mushrooms become golden brown.

This step is important because properly browned mushrooms have much more flavor than mushrooms that are simply steamed.

Season lightly with black pepper.

Adding the Asparagus and Onion

Add the diced onion to the skillet with the mushrooms.

Cook for approximately 3 minutes until the onion begins to soften.

Add the asparagus pieces.

Cook for another 3–4 minutes.

The asparagus should become bright green and tender while still retaining a slight bite.

Avoid overcooking the asparagus because you want some texture to contrast with the creamy pasta.

Add the minced garlic during the final minute of vegetable cooking.

Stir continuously so the garlic becomes fragrant without burning.

Making the Creamy Sauce

Reduce the heat to medium-low.

Add two tablespoons of butter to the skillet.

Once melted, pour in the heavy cream and chicken broth.

Stir gently, scraping the bottom of the pan to loosen the flavorful browned bits left from the chicken and mushrooms.

Add Italian seasoning, black pepper, and optional red pepper flakes.

Bring the sauce to a gentle simmer.

Do not allow it to boil aggressively because high heat can cause cream sauces to separate.

Simmer for approximately 4–6 minutes, stirring occasionally.

The sauce should begin to thicken slightly.

Adding Parmesan

Reduce the heat to low.

Gradually add the freshly grated Parmesan cheese while stirring continuously.

Continue stirring until the cheese melts into the sauce and creates a smooth, creamy consistency.

Freshly grated Parmesan melts much better than many pre-shredded varieties.

Taste the sauce before adding additional salt.

Parmesan is naturally salty, so you may need very little additional seasoning.

Add fresh lemon juice and stir.

The lemon juice may seem like a small addition, but it provides acidity that balances the richness of the cream and cheese.

Combining Everything

Return the cooked chicken to the skillet.

Add the drained penne.

Gently toss everything together until the pasta is thoroughly coated with the creamy sauce.

Add the cooked asparagus and mushrooms if they were temporarily removed from the pan.

If the sauce is too thick, add reserved pasta water one or two tablespoons at a time.

Continue tossing until the sauce reaches your preferred consistency.

The finished sauce should cling beautifully to the penne without becoming overly thick or dry.

Finishing the Dish

Turn off the heat.

Add chopped fresh parsley and another sprinkle of Parmesan.

Taste once more and adjust the seasoning.

If you enjoy heat, add a pinch of red pepper flakes.

For a brighter finish, serve with lemon wedges so everyone can add fresh lemon juice according to taste.

Allow the pasta to rest for approximately two minutes before serving. This gives the sauce a moment to settle and cling to the pasta.

Why This Recipe Works

The success of this dish comes from layering flavors.

The chicken is seasoned and browned first, leaving flavorful caramelized bits in the skillet.

The mushrooms are then cooked until golden, which concentrates their natural savory flavor.

Asparagus provides freshness, color, and a slightly crisp texture.

Garlic and onion build the aromatic base.

Heavy cream creates richness, while chicken broth adds savory depth without making the sauce excessively heavy.

Parmesan contributes saltiness and umami.

Finally, lemon juice and fresh parsley brighten everything.

The result is a creamy pasta that tastes rich and comforting while still having fresh vegetable flavors.

Important Recipe Notes

Don’t overcook the chicken

Chicken breast can become dry if cooked for too long. Remove it from the skillet as soon as it reaches a safe internal temperature and is no longer pink inside.

Brown the mushrooms properly

Don’t rush the mushrooms. Allow their moisture to evaporate so they can caramelize.

Keep asparagus slightly crisp

Overcooked asparagus becomes soft and loses its vibrant color.

Use freshly grated Parmesan

Fresh Parmesan creates a smoother sauce and provides better flavor.

Don’t boil the cream aggressively

A gentle simmer produces a smoother sauce.

Save pasta water

The starchy water can rescue a sauce that becomes too thick.

Tips for the Best Creamy Chicken Penne

Use a large skillet: A wide skillet gives the ingredients enough room to brown properly.

Don’t overcrowd the pan: Crowding causes chicken and mushrooms to steam instead of brown.

Season each component: Seasoning the chicken, vegetables, and sauce separately creates deeper flavor.

Use fresh garlic: Fresh garlic provides a stronger and more aromatic flavor than garlic powder in the sauce.

Choose good Parmesan: Parmigiano-Reggiano or another high-quality Parmesan gives the sauce a richer taste.

Cook pasta al dente: Slightly firm pasta holds up better when tossed in a creamy sauce.

Finish with lemon: A small amount of lemon juice keeps the finished dish balanced.

How to Make It Lighter

If you want a lighter version, there are several simple adjustments.

Replace half of the heavy cream with additional chicken broth or milk.

Use half the amount of butter.

Increase the amount of asparagus and mushrooms.

Use less Parmesan while still keeping enough for flavor.

You can also use whole-wheat penne for additional fiber.

The resulting dish will be less rich but still creamy and flavorful.

Variations

Spinach Chicken Penne

Add two large handfuls of fresh baby spinach during the final few minutes of cooking. Stir until wilted.

Sun-Dried Tomato Version

Add ½ cup chopped sun-dried tomatoes for a sweet, tangy Mediterranean-inspired flavor.

Spicy Chicken Penne

Increase the red pepper flakes and add a pinch of cayenne pepper.

Garlic Parmesan Chicken Penne

Double the fresh garlic and add additional Parmesan for an intensely savory dish.

Lemon Herb Chicken Penne

Add extra lemon zest, parsley, basil, and thyme for a brighter flavor.

Shrimp and Asparagus Penne

Replace the chicken with peeled shrimp. Cook the shrimp quickly until pink and opaque, then remove before making the sauce.

Vegetarian Version

Simply omit the chicken and add extra mushrooms, asparagus, spinach, or zucchini.

Bacon Chicken Penne

Add crispy chopped bacon for a smoky, savory variation.

What to Serve With Creamy Chicken Penne

This pasta is satisfying on its own, but a few simple sides can turn it into a complete meal.

Garlic Bread

Warm garlic bread is perfect for soaking up the creamy Parmesan sauce.

Green Salad

A crisp salad with lettuce, cucumber, tomatoes, and a lemon vinaigrette adds freshness.

Roasted Vegetables

Roasted broccoli, zucchini, or bell peppers complement the creamy pasta.

Bruschetta

Tomato and basil bruschetta provides acidity and freshness.

Steamed Green Beans

Simple green beans are an easy vegetable side that won’t compete with the creamy sauce.

Make-Ahead Instructions

You can prepare several components ahead of time.

The chicken can be cooked and refrigerated for up to one day.

The vegetables can also be sliced and stored in airtight containers.

However, the creamy pasta is best prepared close to serving time.

If you need to make the complete dish ahead, prepare it slightly looser than normal because the pasta will absorb sauce as it sits.

When reheating, add a splash of chicken broth, milk, or reserved pasta water to loosen the sauce.

Storage

Store leftover pasta in an airtight container in the refrigerator for up to 3 days.

Because the sauce contains dairy, keep it refrigerated promptly after the meal.

The pasta may thicken considerably once chilled.

When reheating, place a serving in a skillet over low heat.

Add a small splash of milk or chicken broth and stir gently until warmed through.

Avoid extremely high heat because it can cause the cream sauce to separate.

Can You Freeze Creamy Chicken Penne?

Freezing creamy pasta is possible, but the texture may change slightly after thawing.

Cream-based sauces can sometimes separate during freezing and reheating.

If you do freeze it, cool the pasta completely before transferring it to a freezer-safe container.

Use within approximately 1–2 months for the best quality.

Thaw overnight in the refrigerator and reheat gently with additional milk or broth.

For the best texture, however, this recipe is recommended fresh.

Nutritional Information

Estimated per serving and will vary depending on exact ingredients and portion sizes.

  • Calories: Approximately 680
  • Protein: 40–45g
  • Carbohydrates: 55–60g
  • Fat: 32–36g
  • Fiber: 5–7g
  • Sugar: 5–7g
  • Sodium: Approximately 700–900mg
  • Calcium: Approximately 300–400mg

For a lighter meal, reduce the cream and Parmesan or increase the vegetables.

Benefits of the Recipe

This dish combines protein, carbohydrates, vegetables, and fats in one satisfying meal.

Chicken provides a substantial amount of protein, which helps make the meal filling.

Asparagus contributes fiber and several vitamins and minerals.

Mushrooms provide additional nutrients and a naturally savory flavor.

Garlic and onions add aromatic flavor without requiring excessive seasoning.

Using vegetables alongside pasta also increases the overall variety of the meal.

For a more balanced plate, serve a moderate portion of pasta alongside a large green salad or additional roasted vegetables.

Frequently Asked Questions

Can I use chicken thighs?

Yes. Boneless, skinless chicken thighs are excellent in this recipe and tend to remain especially juicy.

Can I use frozen asparagus?

Fresh asparagus is preferable for texture, but frozen asparagus can be used. Add it closer to the end of cooking because it is already partially cooked.

Can I use another pasta?

Absolutely. Rigatoni, rotini, farfalle, shells, linguine, or fettuccine can all work.

Can I replace heavy cream?

Yes. Half-and-half or whole milk can be used, although the sauce will be lighter and less rich.

Why is my sauce too thick?

Add reserved pasta water, chicken broth, or milk a little at a time until the desired consistency is reached.

Why is my sauce too thin?

Allow it to simmer gently for a few additional minutes. Parmesan will also help thicken the sauce.

Can I use pre-shredded Parmesan?

You can, but freshly grated Parmesan generally melts more smoothly.

Can I add spinach?

Yes. Add fresh spinach during the final few minutes and stir until wilted.

Can I make this without mushrooms?

Definitely. Replace the mushrooms with additional asparagus, spinach, zucchini, or broccoli.

Can I make it gluten-free?

Yes. Use your favorite gluten-free penne and verify that all packaged ingredients are certified gluten-free if necessary.

Is this recipe good for meal prep?

Yes. Store individual portions in airtight containers and reheat gently with a splash of milk or broth.

Can I make this dish spicy?

Yes. Add red pepper flakes, cayenne, or a small amount of diced chili pepper.

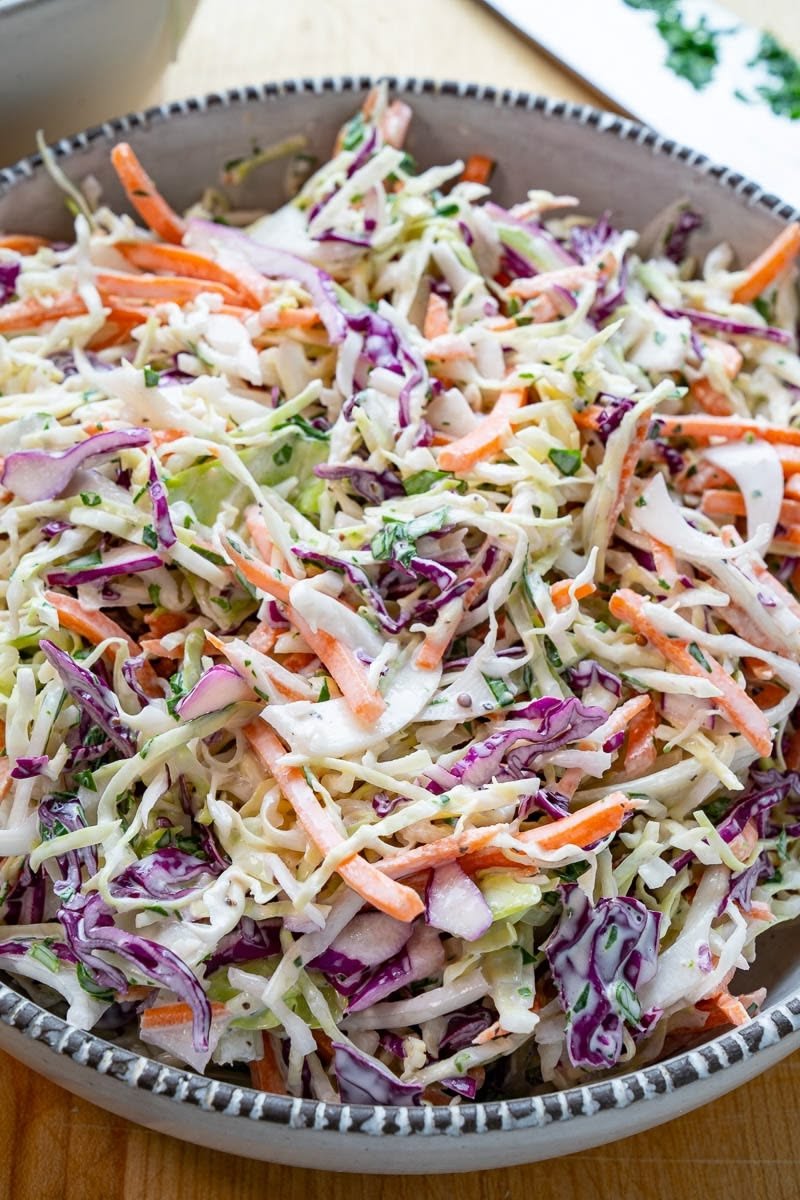
Traditional Coleslaw

Traditional Coleslaw

Description

Traditional Coleslaw is a classic creamy cabbage salad made with crisp shredded cabbage, sweet carrots, and a smooth, tangy dressing. It is simple, refreshing, crunchy, and incredibly versatile. The combination of fresh vegetables with a creamy mayonnaise-based dressing creates the perfect balance of sweetness, acidity, and richness.

This traditional coleslaw is an excellent side dish for summer barbecues, family dinners, picnics, potlucks, and holiday gatherings. It pairs especially well with grilled chicken, burgers, pulled pork, fried chicken, barbecue ribs, sandwiches, and seafood.

One of the best things about homemade coleslaw is that it tastes fresher and brighter than many store-bought versions. You can control the sweetness, acidity, creaminess, and seasoning according to your preference.

For the best texture, prepare the dressing separately and combine it with the vegetables shortly before serving. Chilling the finished coleslaw allows the flavors to blend while keeping the vegetables pleasantly crisp.

Recipe Details

Prep Time: 20 minutes
Chilling Time: 30–60 minutes
Total Time: About 1 hour
Servings: 8
Course: Side Dish
Cuisine: American
Difficulty: Easy

Ingredients

For the Coleslaw

  • 6 cups finely shredded green cabbage
  • 2 cups finely shredded red cabbage
  • 1 large carrot, peeled and grated
  • ¼ cup finely sliced green onions, optional
  • 2 tablespoons chopped fresh parsley, optional

For the Creamy Dressing

  • 1 cup mayonnaise
  • 2 tablespoons apple cider vinegar
  • 1 tablespoon fresh lemon juice
  • 1½ tablespoons granulated sugar
  • 1 teaspoon Dijon mustard
  • ½ teaspoon celery seed
  • ½ teaspoon salt
  • ¼ teaspoon freshly ground black pepper
  • 2 tablespoons milk or buttermilk, as needed

Choosing the Right Cabbage

The cabbage is the foundation of traditional coleslaw, so choosing fresh, firm cabbage makes a noticeable difference.

Look for a green cabbage that feels heavy for its size and has tightly packed leaves. The leaves should look crisp and fresh rather than wilted.

Red cabbage adds beautiful color and a slightly stronger flavor. While traditional recipes can be made entirely with green cabbage, combining green and red cabbage creates an attractive presentation.

You can also use a bag of pre-shredded coleslaw mix if you need to save time. However, freshly shredded cabbage generally has a better texture and a more vibrant flavor.

Preparing the Vegetables

Begin by removing any damaged outer cabbage leaves.

Cut the cabbage into quarters and remove the tough central core.

Using a sharp knife, slice the cabbage into thin, even strips. You can also use a food processor with a shredding attachment.

Place the shredded cabbage in a large mixing bowl.

Peel the carrot and grate it using the large holes of a box grater. Add the carrot to the cabbage.

If using red cabbage, shred it into thin strips and add it to the bowl.

Add sliced green onions and fresh parsley if desired.

Toss the vegetables gently so the colors and ingredients are evenly distributed.

Preparing the Creamy Dressing

The dressing is what gives traditional coleslaw its signature creamy, tangy flavor.

In a medium bowl, combine the mayonnaise, apple cider vinegar, lemon juice, sugar, Dijon mustard, celery seed, salt, and black pepper.

Whisk until completely smooth.

Taste the dressing.

If you prefer sweeter coleslaw, add another teaspoon of sugar.

For a tangier flavor, add a little more vinegar or lemon juice.

If you want a thinner dressing, whisk in milk or buttermilk one tablespoon at a time.

The finished dressing should be creamy but pourable enough to coat the cabbage without becoming heavy.

Combining the Coleslaw

Pour approximately three-quarters of the dressing over the shredded vegetables.

Using large salad spoons or tongs, toss everything together until the cabbage and carrots are evenly coated.

Add more dressing as needed.

Avoid adding all of the dressing immediately because cabbage can vary in size, and you may not need the entire amount.

The goal is a creamy coating rather than a pool of dressing at the bottom of the bowl.

Once combined, cover the bowl and refrigerate for at least 30 minutes.

For even better flavor, allow the coleslaw to chill for approximately one hour.

Why Chilling Matters

Freshly mixed coleslaw tastes good, but allowing it to rest in the refrigerator makes it even better.

During chilling, the dressing has time to move throughout the cabbage and carrots. The sugar, vinegar, mustard, and seasonings become more balanced.

The cabbage also softens slightly while maintaining its pleasant crunch.

Avoid leaving the coleslaw at room temperature for long periods, especially during warm weather.

Keep it refrigerated until you’re ready to serve.

Perfect Texture

Traditional coleslaw should have a combination of creamy dressing and crunchy vegetables.

One common mistake is shredding the cabbage too finely. Extremely thin cabbage can become soft quickly after being mixed with dressing.

Aim for thin but distinct strips.

The carrot should also be grated rather than pureed.

If you prefer extra-crunchy coleslaw, you can lightly salt the cabbage before mixing it with the dressing. Let it sit for about 10–15 minutes, then drain and gently pat it dry.

This removes some excess moisture and helps prevent watery coleslaw.

How to Prevent Watery Coleslaw

Watery coleslaw is one of the most common problems when making this salad.

Cabbage naturally contains a lot of water. Once salt and dressing are added, the vegetables can release additional moisture.

To minimize this problem:

  • Use fresh, firm cabbage.
  • Avoid adding too much dressing.
  • Don’t oversalt the vegetables.
  • Drain and dry cabbage if necessary.
  • Add dressing shortly before serving.
  • Keep the coleslaw chilled.

If your coleslaw becomes slightly watery after chilling, simply stir it well and add a small amount of fresh mayonnaise to restore the creamy texture.

Flavor Balance

A great traditional coleslaw is all about balance.

The mayonnaise provides richness.

The vinegar and lemon juice add acidity.

Sugar provides a gentle sweetness.

Dijon mustard adds depth.

Celery seed contributes a distinctive classic coleslaw flavor.

Salt enhances all the ingredients, while black pepper provides mild warmth.

If your coleslaw tastes flat, it usually needs a little more acidity or salt rather than additional mayonnaise.

If it tastes too sharp, add a small amount of sugar or mayonnaise.

Taste the dressing before mixing it with the vegetables so you can adjust it easily.

Tips for the Best Traditional Coleslaw

Use fresh vegetables

Fresh cabbage and carrots provide the best crunch and flavor.

Slice evenly

Uniform cabbage strips create a better texture and ensure that every bite contains a balanced amount of dressing.

Don’t drown the vegetables

Start with less dressing and add more as needed.

Chill before serving

At least 30 minutes of refrigeration allows the flavors to develop.

Taste before serving

Cabbage can vary in size and sweetness, so adjust the dressing according to your taste.

Use celery seed

Celery seed gives traditional coleslaw its familiar deli-style character.

Add dressing gradually

You can always add more dressing, but removing excess dressing is difficult.

Make-Ahead Instructions

Traditional coleslaw is an excellent make-ahead side dish.

You can shred the cabbage and carrots up to one day in advance. Store them in an airtight container in the refrigerator.

The dressing can also be prepared one or two days ahead and stored separately.

For the freshest texture, combine the vegetables and dressing approximately 30–60 minutes before serving.

If you’re preparing the entire salad several hours ahead, keep it refrigerated and stir gently before serving.

For a party, it is better to make the coleslaw earlier in the day rather than the night before if you want maximum crunch.

Storage

Store leftover coleslaw in a covered airtight container in the refrigerator.

For best quality, consume it within 3–4 days.

The vegetables will gradually soften as they sit in the dressing, so the texture is best during the first two days.

Always refrigerate coleslaw promptly after serving.

If it has been sitting at room temperature for an extended period, especially in hot weather, it is safer to discard it.

Can You Freeze Coleslaw?

Traditional mayonnaise-based coleslaw is not recommended for freezing.

Freezing can cause the cabbage and carrots to lose their crisp texture. The mayonnaise-based dressing may also separate when thawed.

For the best results, make only as much coleslaw as you expect to eat within several days.

Variations

Although this is a traditional recipe, there are many easy ways to customize it.

Southern-Style Coleslaw

Use a slightly sweeter dressing with additional sugar and a little extra vinegar.

Buttermilk Coleslaw

Replace some of the milk with buttermilk for a tangier, richer dressing.

Apple Coleslaw

Add one crisp apple, thinly sliced or julienned. Apples provide natural sweetness and extra crunch.

Raisin Coleslaw

Add a small handful of raisins for a sweet contrast.

Spicy Coleslaw

Add finely chopped jalapeño or a pinch of cayenne pepper to the dressing.

Herb Coleslaw

Increase the amount of fresh parsley and add a little fresh dill.

Light Coleslaw

Replace part of the mayonnaise with plain Greek yogurt.

Honey Coleslaw

Replace some or all of the sugar with honey for a slightly different sweetness.

What to Serve With Traditional Coleslaw

Traditional coleslaw is one of the most versatile side dishes.

Serve it with:

  • Pulled pork sandwiches
  • Barbecue chicken
  • Grilled burgers
  • Fried chicken
  • BBQ ribs
  • Grilled steak
  • Fish and chips
  • Fried fish
  • Grilled shrimp
  • Chicken sandwiches
  • Hot dogs
  • Bratwurst
  • Baked potatoes
  • Cornbread
  • Sandwiches and wraps

Its cool, creamy texture works especially well with smoky, spicy, crispy, or grilled foods.

Coleslaw for a Barbecue

Coleslaw is practically made for summer barbecues.

Its creamy, tangy flavor cuts through the richness of grilled meats and barbecue sauces.

For a barbecue buffet, serve it alongside pulled pork, grilled chicken, baked beans, corn on the cob, potato salad, and cornbread.

If you’re serving outdoors, keep the coleslaw chilled in a bowl placed over ice whenever possible.

Serving Suggestions

For an attractive presentation, transfer the chilled coleslaw to a large serving bowl.

Sprinkle a little fresh parsley or finely sliced green onion over the top.

You can also reserve a few strands of red cabbage and carrot to scatter across the surface.

Serve cold or slightly chilled.

A small squeeze of fresh lemon juice immediately before serving can brighten the flavors.

Nutrition Information

Estimated per serving and may vary depending on the mayonnaise and exact ingredients used.

  • Calories: Approximately 220
  • Protein: 1–2g
  • Carbohydrates: 12–15g
  • Fat: 18–20g
  • Fiber: 3–4g
  • Sugar: 8–10g
  • Sodium: Approximately 350–500mg
  • Vitamin C: High
  • Vitamin K: High

For a lighter version, use reduced-fat mayonnaise or replace half of the mayonnaise with plain Greek yogurt.

Benefits of Traditional Coleslaw

Cabbage is a nutrient-rich vegetable that provides vitamin C, vitamin K, fiber, and various plant compounds.

Carrots contribute beta-carotene and additional fiber.

Red cabbage adds color as well as a variety of naturally occurring antioxidant compounds.

The recipe can also be adjusted to suit different dietary preferences. Using Greek yogurt instead of some mayonnaise increases the protein content while reducing the overall richness.

Because coleslaw is vegetable-based, it can be a simple way to add more vegetables to a meal.

Remember that the dressing contributes most of the calories and fat, so portion size and dressing quantity can be adjusted according to your dietary needs.

Frequently Asked Questions

Can I make coleslaw without red cabbage?

Absolutely. Traditional coleslaw is commonly made entirely with green cabbage. Red cabbage is included here mainly for color and additional texture.

Can I use bagged coleslaw mix?

Yes. A pre-shredded coleslaw mix is a convenient shortcut. Simply check the amount you have and prepare enough dressing to coat it lightly.

How long should coleslaw sit before serving?

At least 30 minutes is recommended. One hour usually provides an excellent balance between flavor development and crunch.

Can I make coleslaw the night before?

Yes, but the vegetables will be softer the next day. For maximum crunch, keep the dressing separate and combine it closer to serving time.

Why does my coleslaw taste too sweet?

Add a little apple cider vinegar or lemon juice to balance the sweetness. Add it gradually and taste after each addition.

Why is my coleslaw too acidic?

Add a little more mayonnaise or a small amount of sugar to balance the acidity.

Can I use Miracle Whip instead of mayonnaise?

Yes. Keep in mind that Miracle Whip has a sweeter and tangier flavor, so you may want to reduce the sugar and vinegar.

Can I use Greek yogurt?

Yes. Replace up to half of the mayonnaise with plain Greek yogurt for a lighter dressing with extra protein.

Can I make it dairy-free?

Yes. The basic mayonnaise dressing can be made dairy-free by using dairy-free mayonnaise and replacing the milk with a plant-based alternative or simply omitting it.

Is traditional coleslaw gluten-free?

The ingredients in this recipe are naturally gluten-free, but always check packaged mayonnaise, mustard, and other ingredients if you need to avoid gluten strictly.

Can I add onions?

Yes. Finely sliced green onions or a small amount of finely diced red onion works beautifully.

Can I add celery?

Definitely. Finely chopped celery provides extra crunch and complements the celery seed in the dressing.

Common Mistakes to Avoid

Adding too much dressing: Creamy does not mean swimming in dressing.

Skipping the chill: Freshly mixed coleslaw can taste less balanced than chilled coleslaw.

Using wet vegetables: Excess water can dilute the dressing.

Over-salting: Salt draws moisture from cabbage, so use it carefully.

Shredding too finely: Extremely thin cabbage can become limp.

Not tasting the dressing: The dressing should be balanced before it reaches the vegetables.

Leaving it unrefrigerated: Creamy coleslaw should remain properly chilled, especially during warm weather.