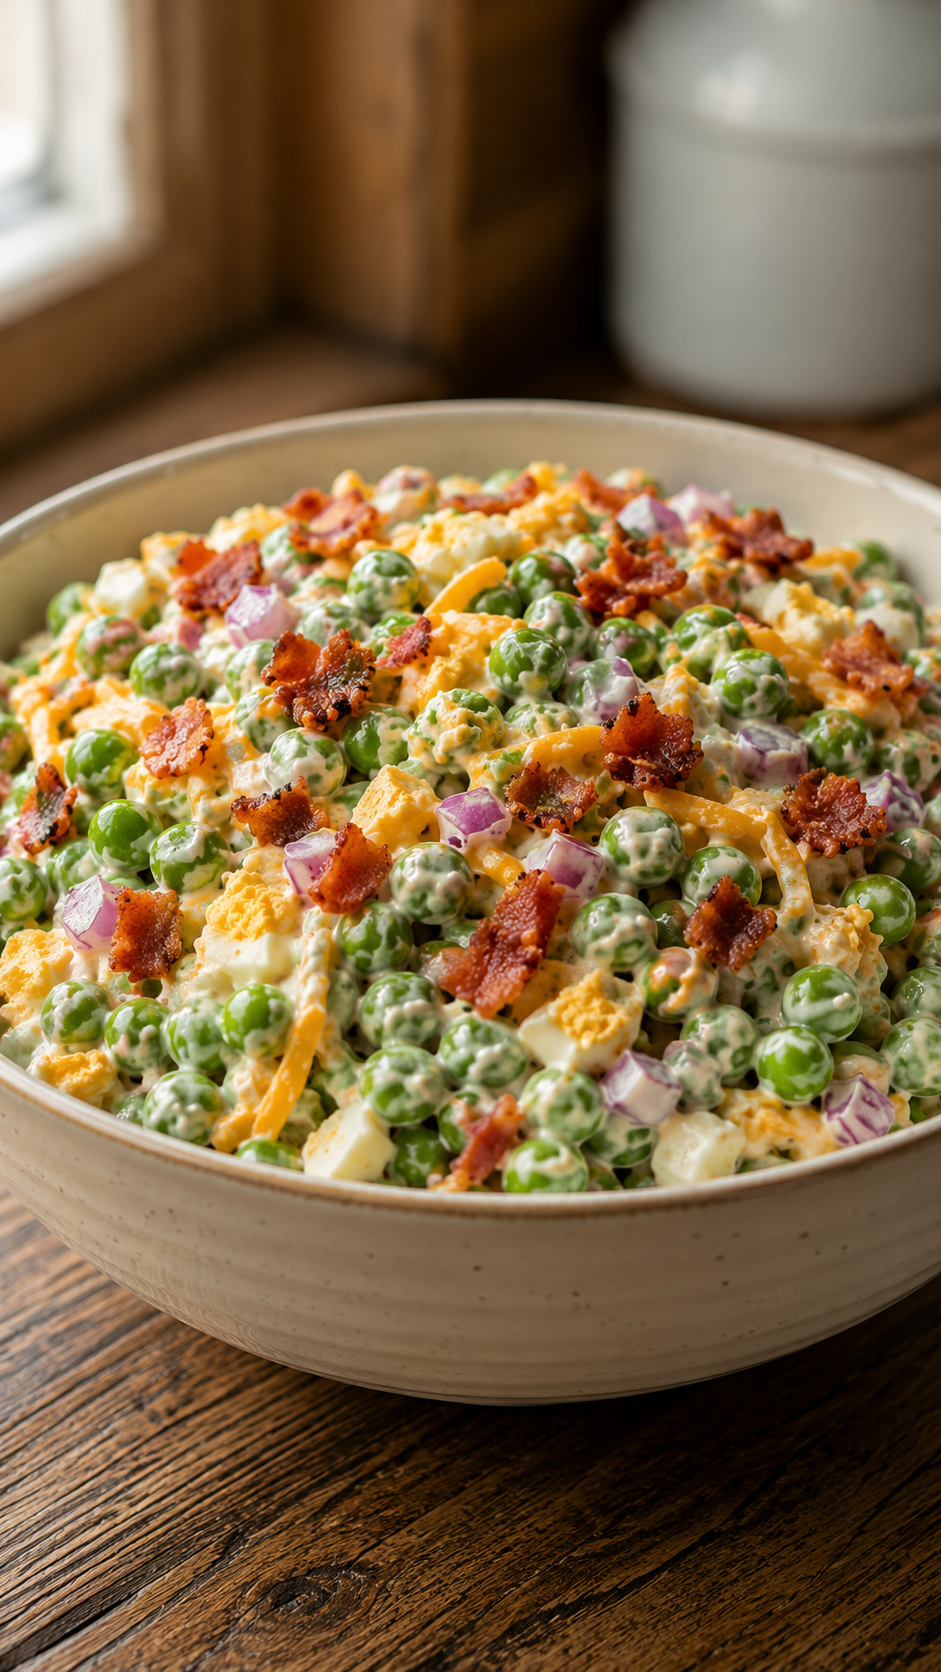
Creamy Pea Salad with Bacon & Cheddar

Creamy Pea Salad with Bacon & Cheddar

Description
This Creamy Pea Salad is a classic side dish loaded with sweet green peas, crispy bacon, cheddar cheese, red onions, and hard-boiled eggs, all tossed in a rich and creamy dressing. It’s perfect for potlucks, BBQs, picnics, family gatherings, or an easy make-ahead side dish. Fresh, flavorful, and incredibly easy to prepare, this salad is always a crowd favorite.

Ingredients

For the Salad

  • 4 cups frozen peas, thawed
  • 6 slices bacon, cooked and crumbled
  • 1 cup shredded cheddar cheese
  • ½ cup red onion, diced
  • 3 hard-boiled eggs, chopped

For the Dressing

  • ¾ cup mayonnaise
  • 2 tbsp sour cream
  • 1 tbsp apple cider vinegar
  • ½ tsp garlic powder
  • ½ tsp salt
  • ¼ tsp black pepper

Instructions

Step 1: Prepare the Ingredients

  1. Cook bacon until crispy and crumble into small pieces.
  2. Hard-boil the eggs, peel, and chop them.
  3. Finely dice the red onion.
  4. Allow frozen peas to thaw completely and drain excess moisture.

Step 2: Make the Dressing

  1. In a large bowl, combine mayonnaise, sour cream, apple cider vinegar, garlic powder, salt, and black pepper.
  2. Whisk until smooth and creamy.

Step 3: Assemble the Salad

  1. Add peas, cheddar cheese, red onion, chopped eggs, and bacon to the bowl.
  2. Gently fold everything together until evenly coated with the dressing.

Step 4: Chill

  1. Cover the bowl and refrigerate for at least 1 hour.
  2. This allows the flavors to blend and improves the texture.

Step 5: Serve

  1. Garnish with extra bacon, cheese, and chopped parsley if desired.
  2. Serve chilled and enjoy.

Tips & Notes

  • Use sharp cheddar cheese for the best flavor.
  • Make the salad a day ahead for even better taste.
  • Drain peas well to prevent a watery dressing.
  • Add diced celery for extra crunch.

Q&A

Q: Can I make this salad ahead of time?
A: Yes, it can be prepared up to 24 hours in advance.

Q: Can I use canned peas?
A: Frozen peas are recommended for the best texture and flavor.

Q: How long does it last in the refrigerator?
A: Store in an airtight container for up to 3 days.

Servings & Nutrition

Servings: 8

Approximate Nutrition Per Serving

  • Calories: 280
  • Protein: 10g
  • Carbohydrates: 12g
  • Fat: 21g
  • Fiber: 3g
  • Sugar: 5g
  • Sodium: 420mg

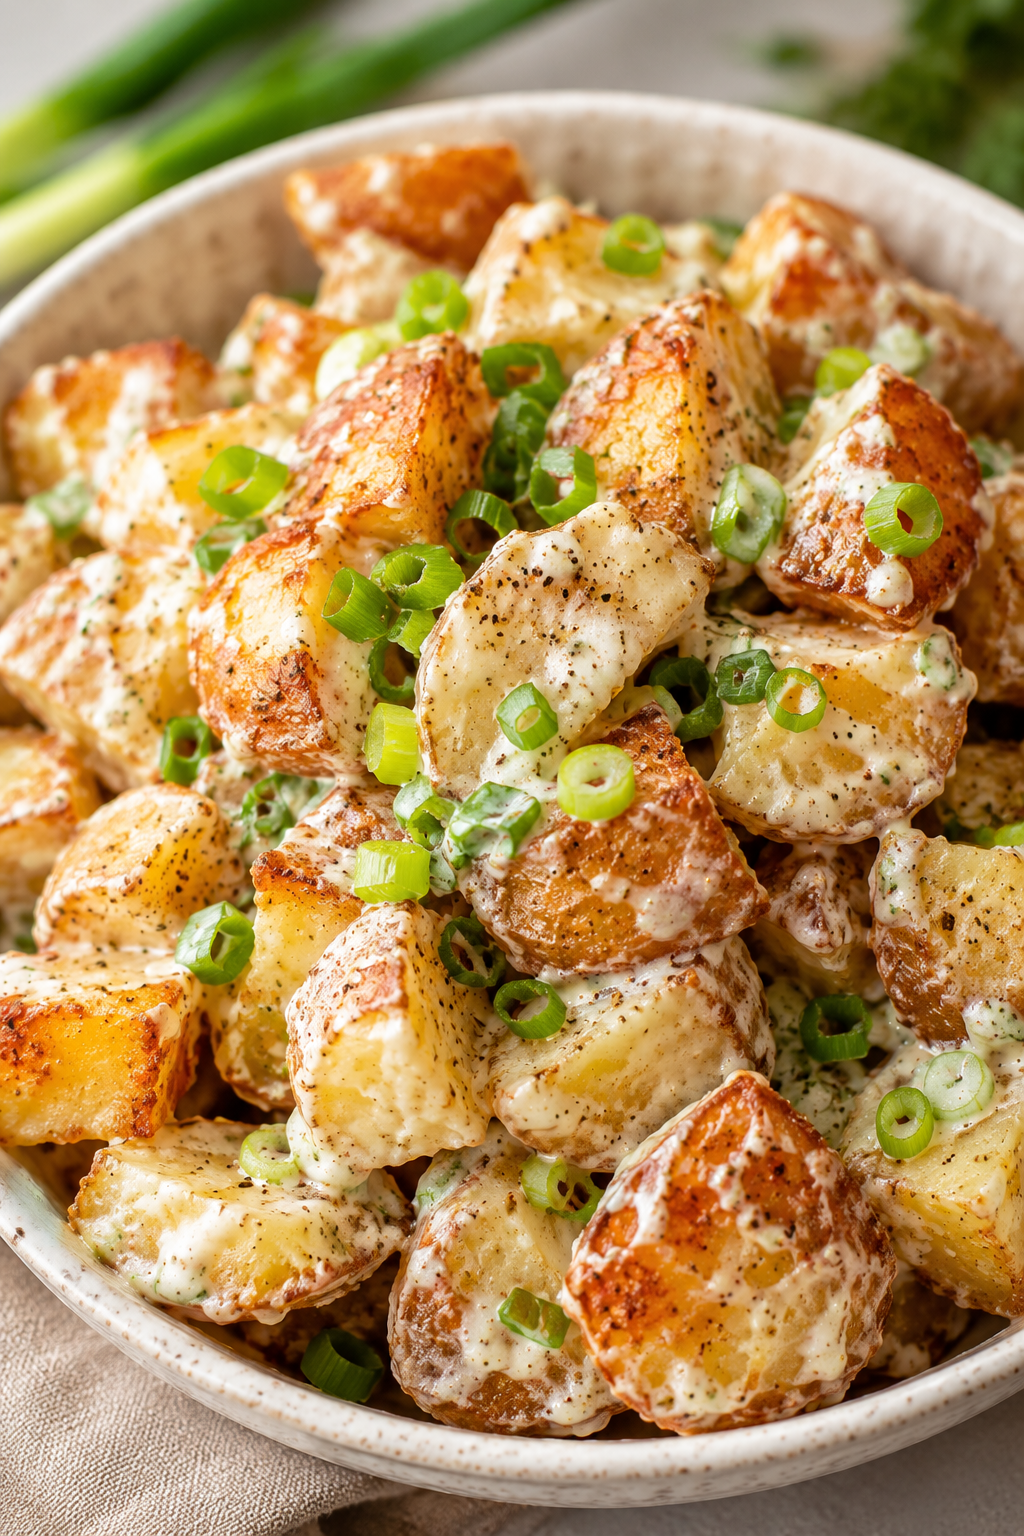
Creamy Crispy Potato Salad

Creamy Crispy Potato Salad

Description
This Creamy Crispy Potato Salad combines crispy roasted potatoes with a rich, creamy dressing for the perfect balance of crunch and flavor. It’s an easy side dish that’s ideal for BBQs, picnics, potlucks, or weeknight dinners. The golden potatoes pair beautifully with the tangy yogurt dressing and fresh spring onions, creating a dish everyone will love.

Ingredients

For the Potatoes

  • 4 medium potatoes, boiled and chopped
  • 1 tbsp olive oil
  • ½ tsp paprika
  • Salt and black pepper to taste

For the Creamy Dressing

  • ½ cup Greek yogurt or mayonnaise
  • 2 tbsp spring onions, finely chopped
  • 1 tsp lemon juice
  • ½ tsp garlic powder
  • Salt and black pepper to taste

Instructions

Step 1: Crisp the Potatoes

  1. Preheat the oven to 425°F (220°C).
  2. Place the boiled potato chunks on a baking tray.
  3. Drizzle with olive oil and season with paprika, salt, and pepper.
  4. Roast for 20–25 minutes until golden brown and crispy.
  5. Remove from the oven and allow to cool slightly.

Step 2: Make the Dressing

  1. In a large bowl, combine Greek yogurt or mayonnaise.
  2. Add spring onions, lemon juice, garlic powder, salt, and pepper.
  3. Mix until smooth and creamy.

Step 3: Assemble the Salad

  1. Add the crispy potatoes to the bowl with the dressing.
  2. Gently toss until all potatoes are evenly coated.
  3. Garnish with extra spring onions if desired.

Step 4: Serve

  1. Serve immediately for maximum crispiness.
  2. Enjoy warm or chilled.

Tips

  • For extra crunch, air-fry the potatoes instead of roasting.
  • Add crispy bacon bits for more flavor.
  • Fresh parsley or dill makes a great garnish.
  • Use mayonnaise for a richer salad or Greek yogurt for a lighter version.

Q&A

Can I make this ahead of time?
Yes, but keep the potatoes separate and mix just before serving to maintain their crispiness.

Can I use sweet potatoes?
Absolutely! Sweet potatoes work wonderfully in this recipe.

How do I store leftovers?
Store in an airtight container in the refrigerator for up to 3 days.

Servings

4–6 servings

Nutrition (Approximate Per Serving)

  • Calories: 220
  • Protein: 5g
  • Carbohydrates: 28g
  • Fat: 10g
  • Fiber: 3g

This Creamy Crispy Potato Salad is creamy, crunchy, and incredibly satisfying—perfect for any meal! 🥔✨

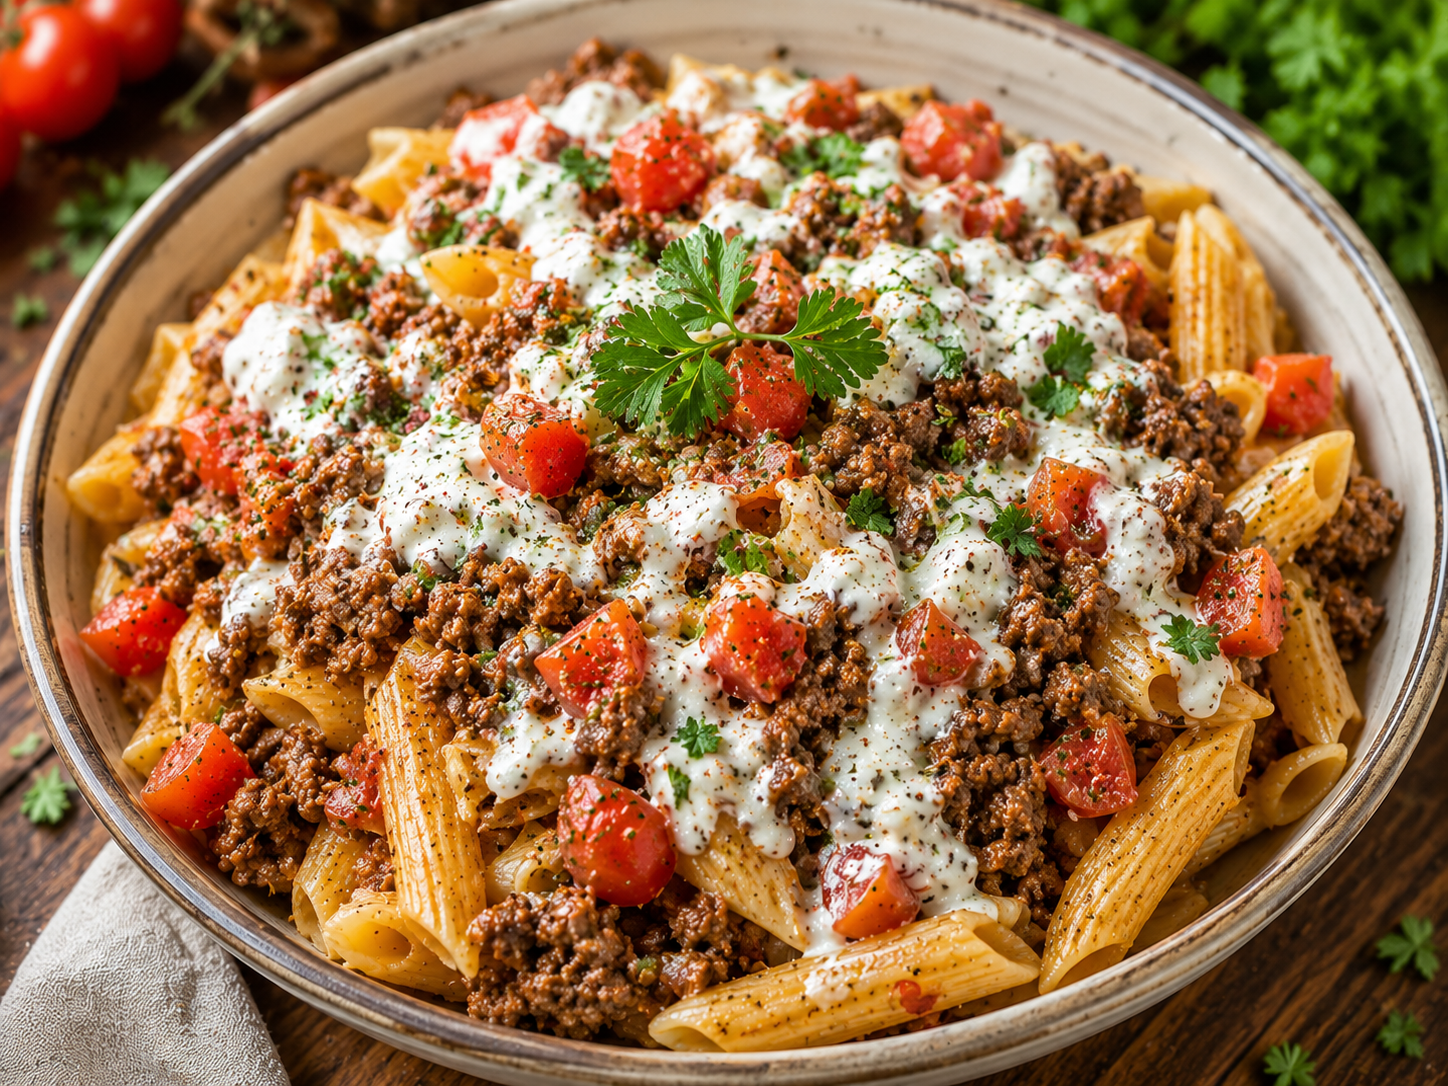
Beef Pasta Bowl with Yogurt &

🍝 Beef Pasta Bowl with Yogurt & Tomatoes
✅ Ingredients
2 cups pasta shells
300g minced beef
1 small onion, chopped
1 tsp garlic paste
1 tbsp tomato paste
½ cup cherry tomatoes
½ cup Greek yogurt
1 tbsp olive oil
1 tsp paprika
½ tsp black pepper
Salt to taste
Fresh parsley
👩‍🍳 Step-by-Step Recipe
Boil Pasta 🍝
→ Cook pasta in salted water until soft.
→ Drain and keep aside.
Cook Beef 🥩
→ Heat olive oil in a pan.
→ Add onion and cook for 2–3 minutes.
→ Add garlic paste and minced beef.
→ Cook until beef changes color and becomes tender.
Add Flavor 🍅
→ Add tomato paste, paprika, salt, and black pepper.
→ Mix well and cook for 4–5 minutes.
Prepare Yogurt Base 🥣
→ Add Greek yogurt to serving bowls.
→ Spread warm pasta on top.
Assemble Bowl 🍽️
→ Add cooked beef over the pasta.
→ Top with cherry tomatoes and fresh parsley.
Serve ✨
→ Add a little olive oil on top.
→ Serve warm and mix before eating.
🌿 Nutritional Benefits
Beef gives protein and iron.
Pasta provides energy.
Greek yogurt adds creaminess and protein.
Tomatoes add freshness and vitamins.
Parsley adds fresh flavor and color.
❓ Q/A
Q: Can I use chicken instead of beef?
A: Yes, minced chicken works well.
Q: Can I use regular yogurt?
A: Yes, but Greek yogurt gives a thicker texture.
Q: Can I make it spicy?
A: Yes, add chili flakes or extra paprika.
Q: Can I store leftovers?
A: Yes, keep in the fridge for up to 2 days.

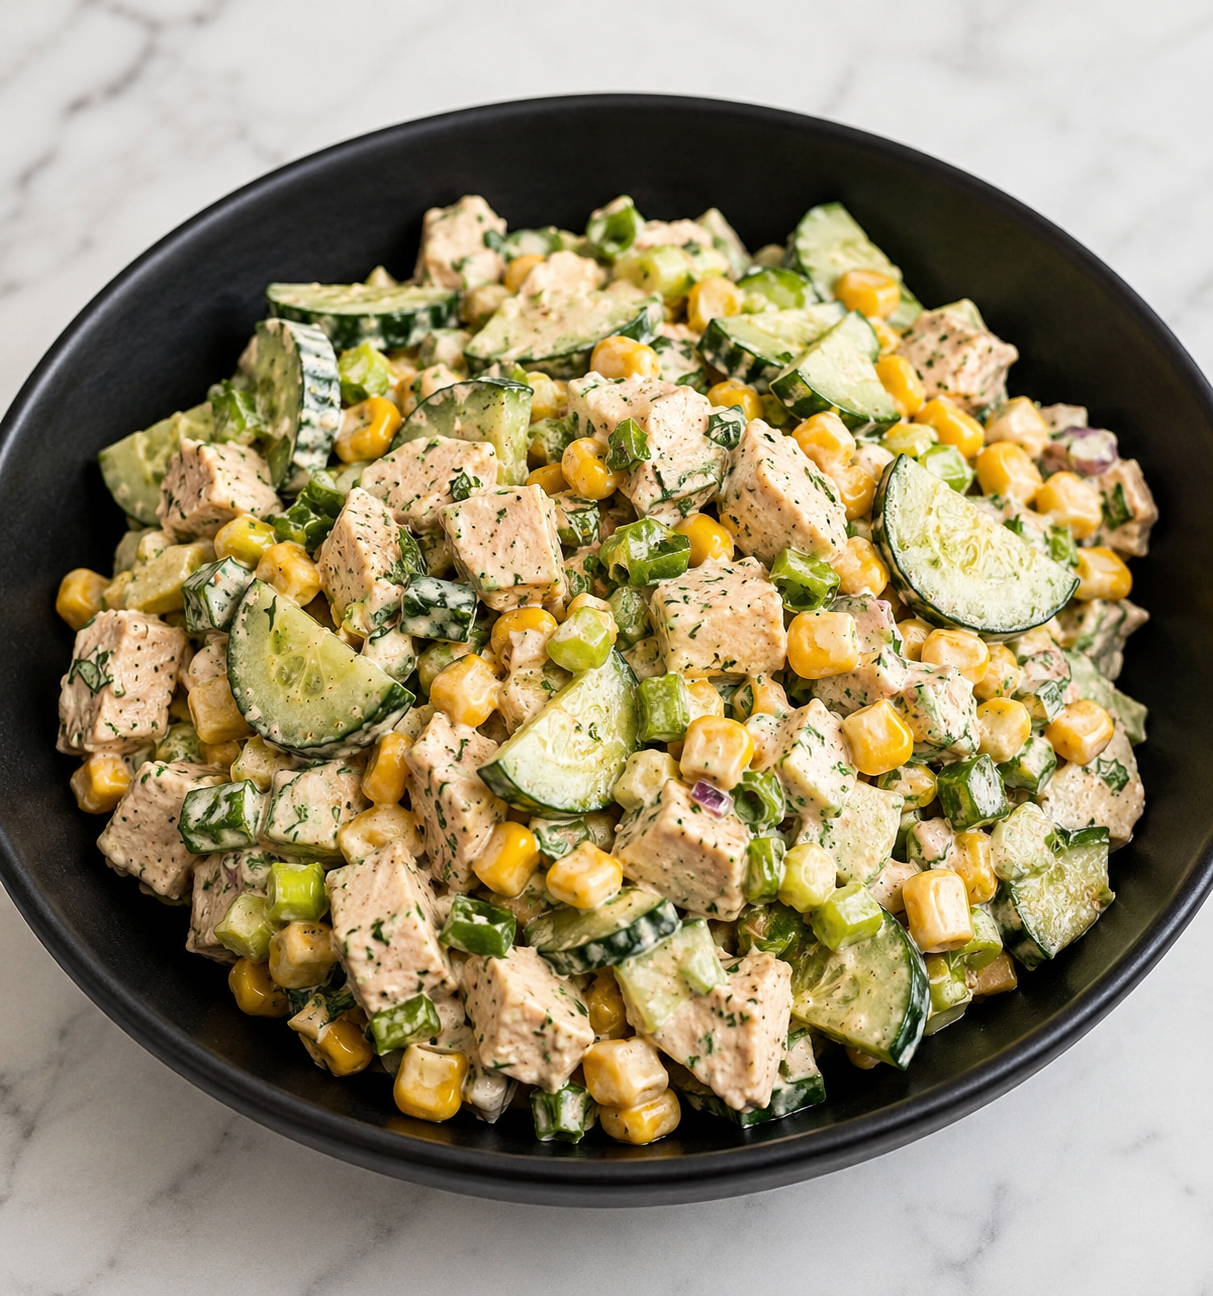
Creamy Chicken Cucumber Corn Salad

Creamy Chicken Cucumber Corn Salad

This Creamy Chicken Cucumber Corn Salad is a refreshing, protein-packed dish loaded with tender chicken, crisp cucumbers, sweet corn, and a creamy herb dressing. Perfect for lunch, meal prep, picnics, potlucks, or a light dinner, this salad combines fresh vegetables with juicy chicken for a satisfying meal that comes together in minutes. The combination of crunchy cucumbers, sweet corn kernels, and creamy dressing creates a delicious balance of textures and flavors that everyone will enjoy.

Ingredients

For the Salad

  • 2 cups cooked chicken breast, diced
  • 2 medium cucumbers, sliced and quartered
  • 1½ cups sweet corn kernels
  • 3 green onions, sliced
  • 2 tbsp red onion, finely diced
  • 2 tbsp fresh parsley, chopped

For the Creamy Dressing

  • ½ cup mayonnaise
  • ¼ cup Greek yogurt
  • 1 tbsp lemon juice
  • 1 tsp garlic powder
  • ½ tsp dried dill
  • ½ tsp salt
  • ¼ tsp black pepper

Optional Garnishes

  • Fresh dill
  • Extra green onions
  • Cracked black pepper

Step-by-Step Instructions

Step 1: Prepare the Chicken

  • Cook and cool the chicken breast if not already prepared.
  • Dice into bite-sized cubes.
  • Place in a large mixing bowl.

Step 2: Prepare the Vegetables

  • Wash the cucumbers and cut them into thin slices, then quarter the slices.
  • Slice the green onions.
  • Finely dice the red onion.
  • Add all vegetables to the bowl with the chicken.

Step 3: Add the Corn

  • If using canned corn, drain well.
  • If using frozen corn, thaw completely.
  • Add the corn to the salad mixture.

Step 4: Make the Dressing

  • In a separate bowl, whisk together mayonnaise, Greek yogurt, lemon juice, garlic powder, dill, salt, and pepper.
  • Stir until smooth and creamy.

Step 5: Combine Everything

  • Pour the dressing over the chicken and vegetables.
  • Toss gently until everything is evenly coated.

Step 6: Chill

  • Cover the bowl and refrigerate for at least 30 minutes.
  • This allows the flavors to blend beautifully.

Step 7: Taste and Adjust

  • Before serving, taste the salad.
  • Add additional salt, pepper, or lemon juice if desired.

Step 8: Garnish and Serve

  • Sprinkle with fresh parsley, dill, or green onions.
  • Serve chilled.

Tips & Notes

  • Rotisserie chicken works perfectly for this recipe.
  • English cucumbers are ideal because they contain fewer seeds.
  • For extra crunch, add diced celery.
  • For a lighter version, replace mayonnaise with additional Greek yogurt.
  • This salad tastes even better after a few hours in the refrigerator.

Q&A

Q: Can I make this salad ahead of time?
A: Yes. It can be prepared up to 24 hours in advance and stored in the refrigerator.
Q: How long does it last?
A: Store in an airtight container for up to 3 days.
Q: Can I use canned chicken?
A: Yes, although freshly cooked chicken provides the best flavor and texture.
Q: What can I serve with this salad?
A: Serve with crackers, pita bread, lettuce wraps, or as a sandwich filling.

Servings

  • Serves: 6

Nutrition (Approximate Per Serving)

  • Calories: 285
  • Protein: 23g
  • Carbohydrates: 12g
  • Fat: 16g
  • Saturated Fat: 3g
  • Fiber: 2g
  • Sugar: 4g
  • Sodium: 420mg

This Creamy Chicken Cucumber Corn Salad is a fresh and flavorful recipe that’s perfect for warm weather and busy days. Packed with protein, crunchy vegetables, and a creamy herb dressing, it’s filling enough for a complete meal while remaining light and refreshing. Whether you’re making it for meal prep, a family gathering, or a quick lunch, this easy salad is sure to become a favorite.

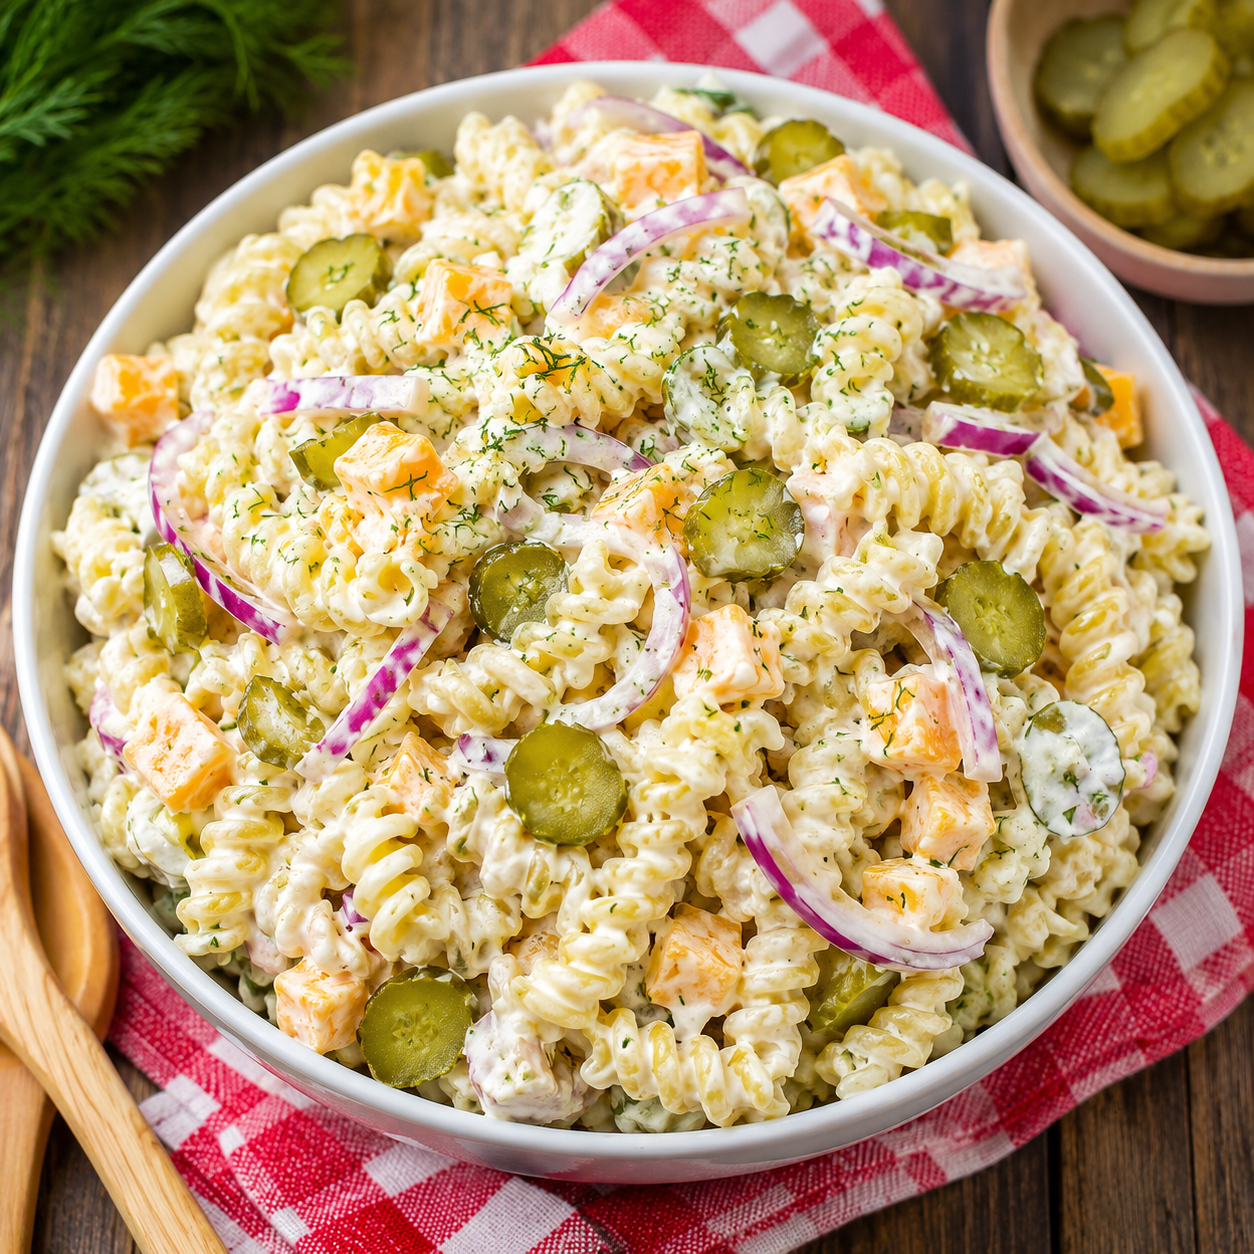
🥗 Creamy Dill Pickle Pasta Salad

Creamy Dill Pickle Pasta Salad

📝 Description

This creamy Dill Pickle Pasta Salad is loaded with tender rotini pasta, cheddar cheese, crunchy pickles, red onion, and a tangy homemade dressing. It’s the perfect side dish for BBQs, potlucks, picnics, or family dinners.

🥒 Ingredients

For the Salad

  • 12 oz (340g) rotini pasta
  • 1½ cups dill pickles, sliced
  • 1 cup cheddar cheese, cubed
  • ½ small red onion, thinly sliced
  • 2 tbsp fresh dill, chopped

For the Dressing

  • 1 cup mayonnaise
  • ½ cup sour cream
  • ¼ cup pickle juice
  • 1 tsp garlic powder
  • ½ tsp black pepper

👩‍🍳 Instructions

1️⃣ Cook the Pasta

  • Bring a large pot of salted water to a boil.
  • Cook rotini according to package directions until al dente.
  • Drain and rinse under cold water.
  • Let cool completely.

2️⃣ Prepare the Ingredients

  • Slice the dill pickles.
  • Cube the cheddar cheese.
  • Thinly slice the red onion.
  • Chop the fresh dill.

3️⃣ Make the Dressing

  • In a large bowl, whisk together:
    • Mayonnaise
    • Sour cream
    • Pickle juice
    • Garlic powder
    • Black pepper
  • Mix until smooth and creamy.

4️⃣ Assemble the Salad

  • Add cooled pasta to the dressing.
  • Stir in pickles, cheese, red onion, and dill.
  • Toss gently until everything is evenly coated.

5️⃣ Chill

  • Cover and refrigerate for at least 1 hour.
  • This allows the flavors to blend together.

6️⃣ Serve

  • Give the salad a quick stir before serving.
  • Garnish with extra dill and pickle slices if desired.

💡 Tips

  • Add diced cooked bacon for extra flavor.
  • Use sharp cheddar cheese for a richer taste.
  • If the salad thickens after chilling, stir in a splash of pickle juice.

❓ Q&A

Q: Can I make this ahead of time?
A: Yes! It tastes even better after chilling overnight.

Q: How long does it last?
A: Store in an airtight container in the refrigerator for up to 3 days.

Q: Can I use Greek yogurt instead of sour cream?
A: Absolutely! Greek yogurt works great.

🍽️ Servings

  • Serves: 6–8

🥗 Nutrition (Approx. Per Serving)

  • Calories: 340
  • Protein: 10g
  • Carbohydrates: 28g
  • Fat: 21g
  • Fiber: 2g

✨ Creamy, tangy, cheesy, and packed with pickle flavor—this pasta salad is always a crowd favorite! 🥒🧀🍝

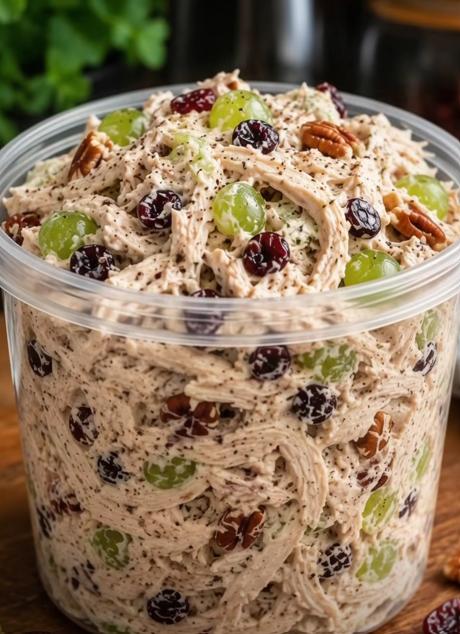
Creamy Chicken Salad with Grapes, Cranberries & Pecans

Creamy Chicken Salad with Grapes, Cranberries & Pecans

🛒 Ingredients

  • 4 cups cooked chicken, shredded
  • 1 cup green grapes, halved
  • ½ cup dried cranberries
  • ¾ cup pecans, chopped
  • ¾ cup mayonnaise
  • ¼ cup Greek yogurt or sour cream
  • 1 tbsp lemon juice
  • ½ tsp garlic powder
  • ½ tsp salt
  • ½ tsp black pepper
  • 1 tbsp fresh parsley, chopped

👩‍🍳 Instructions

🍗 Step 1: Prepare the Chicken

  • Place the shredded cooked chicken in a large mixing bowl.
  • Break up any large pieces for an even texture.

🍇 Step 2: Add the Mix-Ins

  • Add the halved grapes, dried cranberries, chopped pecans, and fresh parsley.
  • Toss lightly to distribute the ingredients evenly.

🥣 Step 3: Make the Creamy Dressing

  • In a separate bowl, combine:
    • Mayonnaise
    • Greek yogurt (or sour cream)
    • Lemon juice
    • Garlic powder
    • Salt
    • Black pepper
  • Whisk until smooth and creamy.

🥗 Step 4: Combine Everything

  • Pour the dressing over the chicken mixture.
  • Gently stir until all ingredients are evenly coated.

❄️ Step 5: Chill

  • Cover the bowl and refrigerate for at least 30 minutes.
  • This allows the flavors to blend together.

🍽️ Step 6: Serve

  • Serve chilled as:
    • Sandwich filling
    • Wrap filling
    • Salad topping
    • Protein-packed lunch

💪 Nutritional Benefits

  • 🍗 High in protein from chicken.
  • 🌰 Pecans provide healthy fats and crunch.
  • 🍒 Cranberries contain antioxidants.
  • 🍇 Grapes add natural sweetness and freshness.
  • 🥗 Great for meal prep and quick lunches.

❓ Q&A

Q: Can I make this ahead of time?
A: Yes, it stays fresh in the refrigerator for up to 3 days.

Q: Can I use rotisserie chicken?
A: Absolutely! Rotisserie chicken works perfectly and saves time.

Q: Can I substitute the pecans?
A: Yes, walnuts or almonds are excellent alternatives.

Q: Can I make it lighter?
A: Replace some or all of the mayonnaise with Greek yogurt.

⏱️ Prep Time: 15 minutes
❄️ Chill Time: 30 minutes
⌛ Total Time: 45 minutes
🍽️ Servings: 6 servings