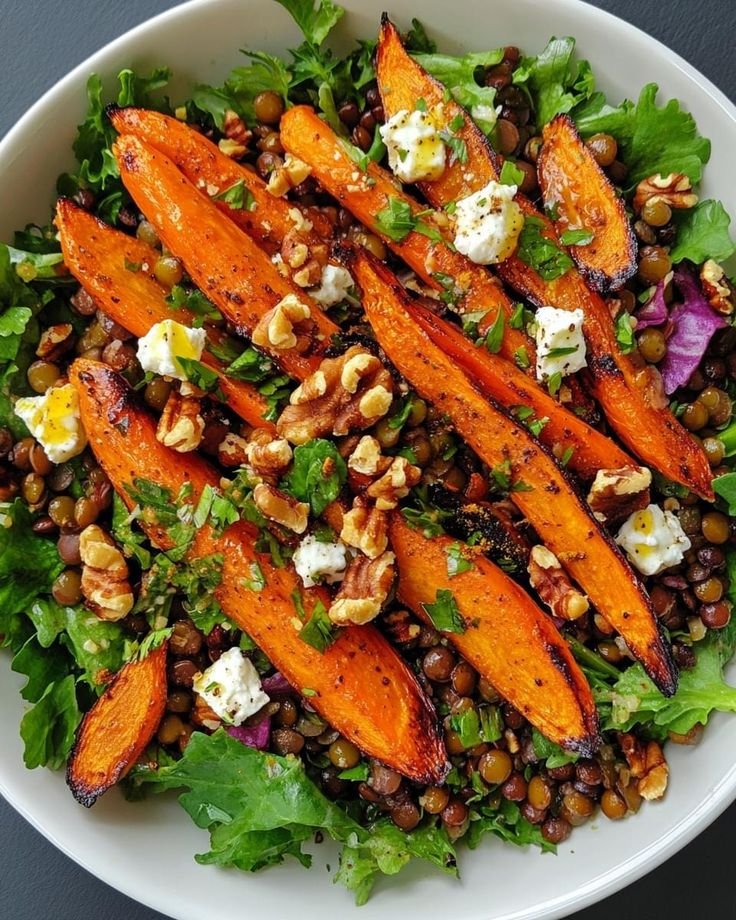
Easy roasted carrots and lentil salad with honey dijon dressing

Easy Roasted Carrots & Lentil Salad with Honey Dijon Dressing

This roasted carrot and lentil salad is warm, hearty, and full of fresh flavor. Sweet roasted carrots, tender lentils, fresh herbs, and crunchy vegetables are tossed in a simple honey Dijon dressing that makes everything taste bright and balanced.

It’s healthy, filling, and perfect for lunch, meal prep, or an easy Mediterranean-style dinner.

Prep Time & Servings

Prep Time: 15 minutes

Cook Time: 30 minutes

Total Time: 45 minutes

Servings: 4

Ingredients

For the Salad

5–6 carrots, peeled and sliced

1 cup cooked lentils

1 cucumber, diced

¼ red onion, thinly sliced

¼ cup parsley, chopped

2 tablespoons olive oil

1 teaspoon paprika

Salt and black pepper

For the Honey Dijon Dressing

2 tablespoons olive oil

1 tablespoon Dijon mustard

1 tablespoon honey

Juice of 1 lemon

1 garlic clove, minced

Salt and pepper to taste

Optional Add-Ins

Feta cheese

Avocado

Pumpkin seeds

Arugula

Roasted chickpeas

Instructions

1. Roast the Carrots

Preheat the oven to 425°F (220°C).

Spread the carrots on a baking sheet and toss with:

olive oil

paprika

salt

pepper

Roast for about 25–30 minutes until tender and slightly caramelized.

2. Make the Dressing

In a small bowl, whisk together:

olive oil

Dijon mustard

honey

lemon juice

garlic

salt

pepper

The dressing should taste sweet, tangy, and fresh.

3. Build the Salad

In a large bowl, combine:

cooked lentils

cucumber

red onion

parsley

Add the roasted carrots on top.

4. Toss Everything Together

Drizzle the honey Dijon dressing over the salad and gently toss.

Add any optional toppings you like.

5. Serve

Serve warm or chilled.

It tastes even better after sitting for a little while.

Helpful Tips

Roast the carrots until the edges get slightly golden for the best flavor

Use fresh lemon juice for a brighter dressing

French green lentils hold their shape best in salads

Add feta for a creamy salty finish

Nutritional Information

Calories: 340

Protein: 11g

Carbohydrates: 35g

Fiber: 10g

Fat: 18g

Saturated Fat: 2g

Sodium: 320mg
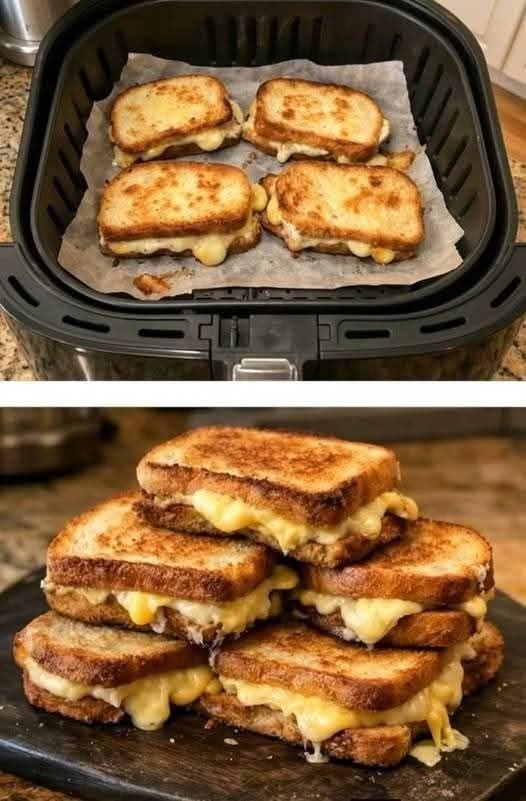
Air Fryer Grilled Cheese Sandwiches

Air Fryer Grilled Cheese Sandwiches

🛒 Ingredients

  • 8 slices bread 🍞
  • 4 slices cheddar or mozzarella cheese 🧀
  • 2 tbsp butter

👩‍🍳 Step-by-Step Recipe

🧈 Step 1: Butter the Bread

➡️ Spread butter on one side of each bread slice.
➡️ This helps make the sandwiches crispy and golden ✨


🧀 Step 2: Add Cheese

➡️ Place cheese slices between two pieces of bread.
➡️ Keep buttered sides facing outward.


🔥 Step 3: Prepare Air Fryer

➡️ Line air fryer basket with parchment paper.
➡️ Place sandwiches in a single layer.


🍞 Step 4: Air Fry

➡️ Cook at 370°F (188°C) for 4–5 minutes.
➡️ Flip sandwiches carefully.
➡️ Cook another 3–4 minutes until golden brown and melty 🤤


🌟 Serving Tips

✅ Serve hot with tomato soup 🍅
✅ Add ham or cooked chicken for extra flavor
✅ Use thick bread for extra crunch


❓Q/A

❓Can I use different cheese?

✅ Yes! Cheddar, mozzarella, provolone, or Swiss work great.

❓Why use parchment paper?

✅ It helps prevent cheese from sticking and makes cleanup easier.

Cheesy Green Onion Patties

Cheesy Green Onion Patties 🧀🌿

Ingredients 🍴

  • 2 cups shredded potatoes
  • 1 cup shredded cheese
  • 2 green onions (chopped)
  • 1 egg
  • 3 tbsp flour
  • Salt & black pepper
  • Oil for frying

Detailed Procedure 👩‍🍳

Step 1: Prepare the Potatoes 🥔

➡️ Peel and wash the potatoes very well.
➡️ Grate them using the large side of a grater.
➡️ Place the grated potatoes in a clean towel and squeeze out as much water as possible.
➡️ This step is very important because dry potatoes make crispy patties.


Step 2: Mix the Ingredients 🥣

➡️ Add the potatoes to a large bowl.
➡️ Add shredded cheese and chopped green onions.
➡️ Crack in the egg.
➡️ Sprinkle flour, salt, and black pepper.
➡️ Mix everything very well until the mixture sticks together.


Step 3: Shape the Patties ✋

➡️ Take a small amount of mixture in your hands.
➡️ Shape into thick finger-like rolls or oval patties.
➡️ Press gently so they stay firm and do not break while cooking.


Step 4: Heat the Pan 🔥

➡️ Add a little oil to a non-stick pan.
➡️ Heat over medium flame for 2 minutes.
➡️ The pan should be hot but not smoking.


Step 5: Fry the Patties 🧈

➡️ Carefully place the patties into the pan.
➡️ Do not overcrowd the pan.
➡️ Cook for about 4–5 minutes on one side until deep golden brown.
➡️ Flip gently using a spatula.
➡️ Cook the other side for another 4 minutes until crispy and fully cooked inside.


Step 6: Remove Extra Oil ✨

➡️ Place cooked patties on paper towels for 1 minute.
➡️ This helps remove extra oil and keeps them crispy.


Step 7: Serve Hot 🍽️

➡️ Serve warm with ketchup, yogurt dip, or garlic sauce.
➡️ Best enjoyed fresh and crispy.


Quick Q&A ❓

Why are my patties breaking?

✅ The potatoes may have too much water. Squeeze them well before mixing.

Can I bake them instead?

✅ Yes! Bake at 200°C (400°F) for about 20–25 minutes.

Can I add extra vegetables?

✅ Absolutely. Finely chopped spinach or carrots work great.

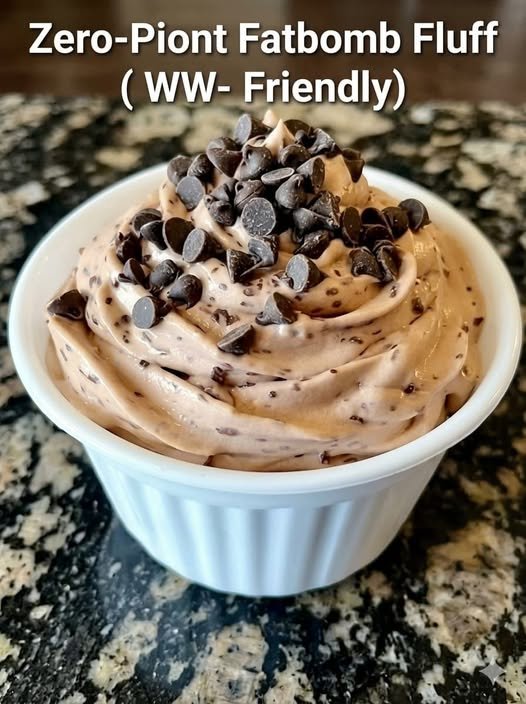
Zero Point Fatbomb Fluff

Zero Point Fatbomb Fluff 🍫✨

Ingredients 🍴

  • 1 cup Greek yogurt
  • 2 tbsp cocoa powder
  • 2 tbsp sugar-free sweetener or honey
  • 2 tbsp mini chocolate chips

Detailed Procedure 👩‍🍳

Step 1: Prepare the Mixing Bowl 🥣

➡️ Take a medium bowl and make sure it is clean and dry.
➡️ Cold bowls help the fluff stay thick and creamy.


Step 2: Add the Yogurt 🍦

➡️ Spoon the Greek yogurt into the bowl.
➡️ Stir it slowly for a few seconds to make it smooth.


Step 3: Mix the Chocolate Flavor 🍫

➡️ Add cocoa powder to the yogurt.
➡️ Add the sweetener or honey.
➡️ Mix very well using a whisk or spoon until the color becomes fully chocolatey with no dry powder left.


Step 4: Make It Fluffy ✨

➡️ Whisk the mixture for about 2–3 minutes.
➡️ The more you whisk, the lighter and fluffier it becomes.
➡️ Scrape the sides of the bowl while mixing so everything blends evenly.


Step 5: Add Chocolate Chips 🍪

➡️ Fold in half of the chocolate chips gently.
➡️ Do not overmix or the fluff may lose some airiness.


Step 6: Chill the Fluff ❄️

➡️ Place the bowl in the fridge for 15–20 minutes.
➡️ Chilling helps the texture become thicker and creamier.


Step 7: Serve & Decorate 🍴

➡️ Spoon the fluff into a serving bowl or ramekin.
➡️ Sprinkle the remaining chocolate chips on top.
➡️ Serve cold and enjoy the creamy chocolate texture.


Quick Q&A ❓

Can I freeze it?

✅ Yes, freeze for 1–2 hours for an ice-cream-like texture.

Can I use regular yogurt?

✅ Yes, but Greek yogurt makes it thicker and creamier.

How long does it last?

✅ Store in the fridge for up to 2 days.

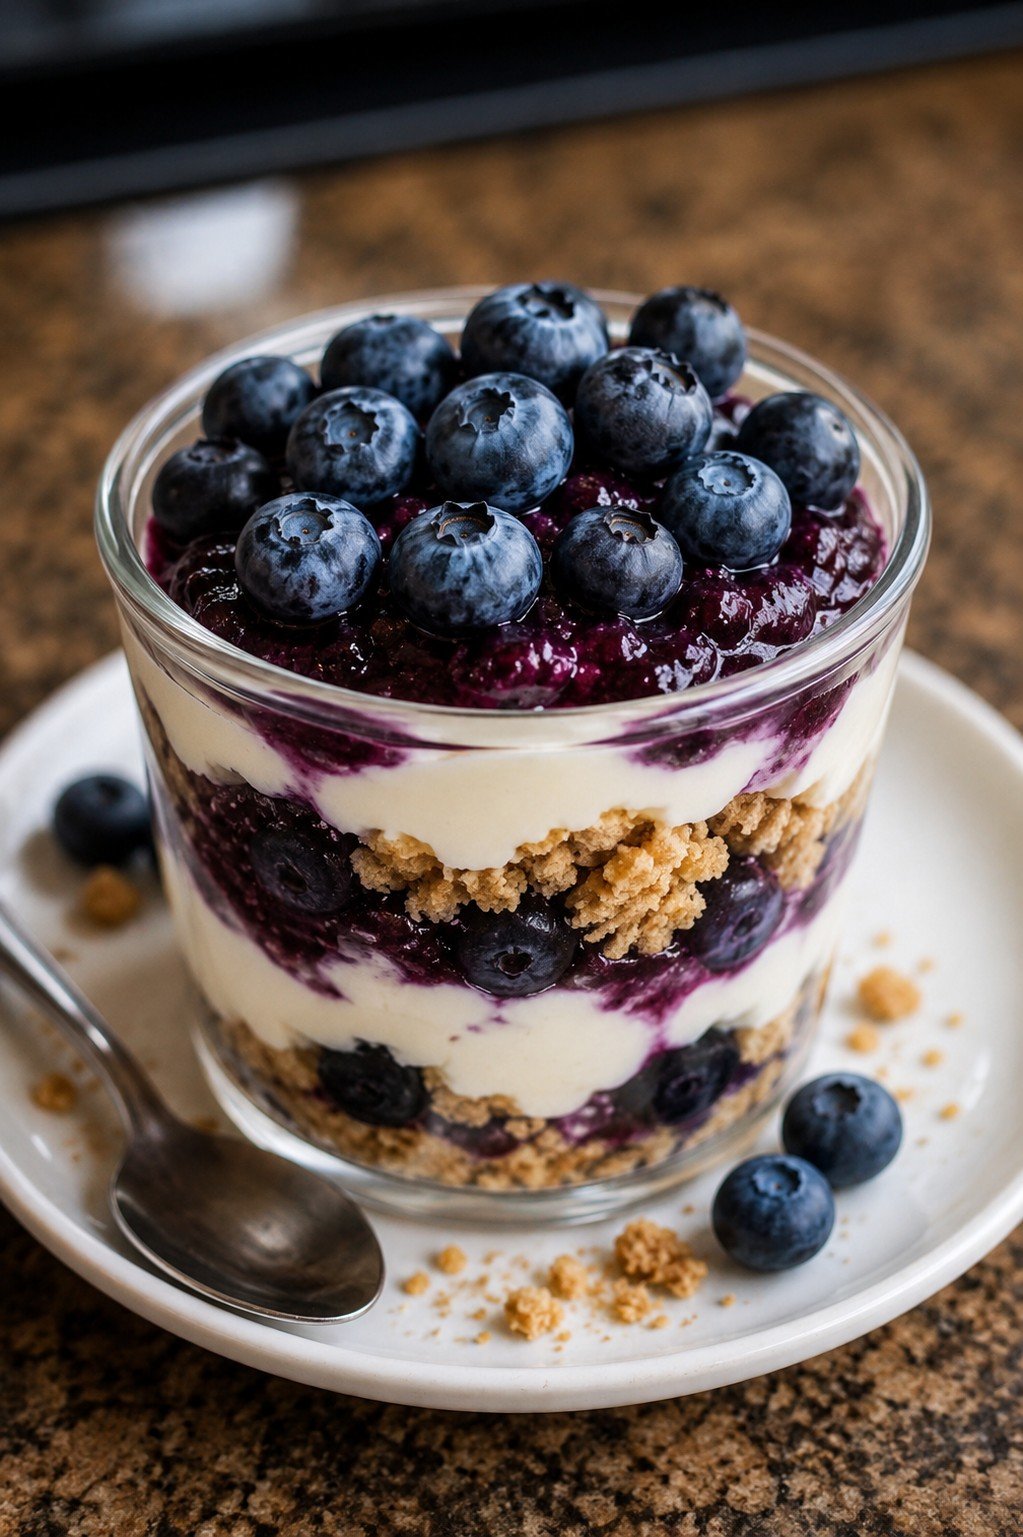
Blueberry Yogurt Parfait

Blueberry Yogurt Parfait 🫐🥄

Ingredients 🍴

  • 2 cups Greek yogurt
  • 1 cup fresh blueberries
  • 1 cup granola
  • 2 tbsp honey

Detailed Procedure 👩‍🍳

Step 1: Prepare the Blueberries 🫐

➡️ Wash the blueberries very well under cold water.
➡️ Let them dry for a few minutes using a clean towel.
➡️ Keep a few whole blueberries aside for the topping.


Step 2: Make the Blueberry Sauce 🍯

➡️ Add half of the blueberries to a small pan.
➡️ Add 1 tablespoon honey.
➡️ Cook on low heat for about 4–5 minutes while stirring gently.
➡️ The blueberries will become soft and juicy like a jam.
➡️ Turn off the heat and let the sauce cool slightly.


Step 3: Prepare the Glass 🥛

➡️ Take a clear glass or dessert cup for beautiful layers.
➡️ Add 2 tablespoons granola at the bottom.
➡️ Press lightly with a spoon to make the base even.


Step 4: Add the Yogurt Layer 🍦

➡️ Spoon a thick layer of Greek yogurt over the granola.
➡️ Spread gently so the layers look clean from the sides.


Step 5: Add Blueberries 🫐

➡️ Add some fresh blueberries over the yogurt.
➡️ Spoon a little blueberry sauce on top.


Step 6: Repeat the Layers ✨

➡️ Repeat the layers again:

  • Granola
  • Yogurt
  • Fresh blueberries
  • Blueberry sauce

➡️ Finish with extra blueberries on top for a fresh look.


Step 7: Chill & Serve ❄️

➡️ Place the parfait in the fridge for 10–15 minutes before serving.
➡️ Serve cold with a spoon and enjoy the creamy crunchy texture.


Quick Q&A ❓

Can I use frozen blueberries?

✅ Yes, just thaw them before making the sauce.

How do I keep granola crunchy?

✅ Add granola just before serving for the best crunch.

Can I make it healthier?

✅ Use unsweetened yogurt and skip extra honey.

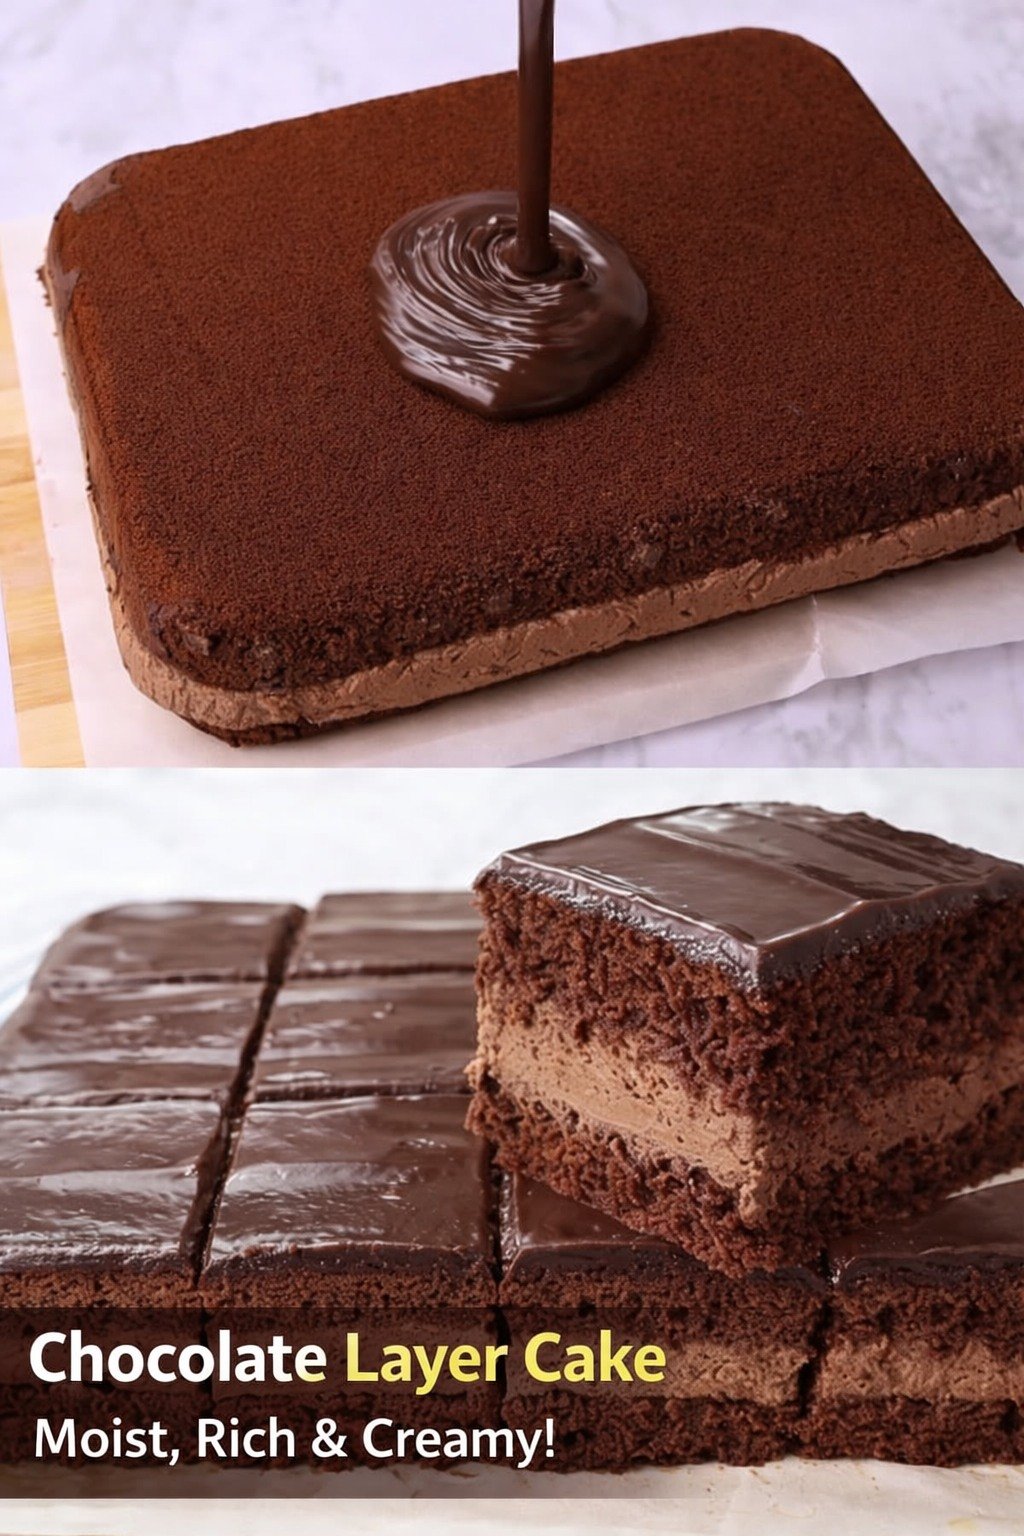
Decadent Chocolate Layer Cake

Decadent Chocolate Layer Cake

🛒 Ingredients

For the Cake

  • 2 eggs 🥚
  • 1 cup sugar
  • 1/2 cup oil
  • 1 cup milk 🥛
  • 1 1/2 cups all-purpose flour
  • 1/3 cup cocoa powder 🍫
  • 1 tsp baking powder

For the Cream Layer

  • 1 cup whipped cream
  • 2 tbsp cocoa powder
  • 2 tbsp powdered sugar

For the Ganache

  • 1/2 cup chocolate chips 🍫
  • 1/4 cup warm milk

👩‍🍳 Detailed Step-by-Step Recipe

🍰 Step 1: Make the Chocolate Cake Batter

➡️ In a large bowl, crack the eggs and add sugar.
➡️ Beat for 2–3 minutes until light and slightly fluffy.

➡️ Add oil and milk. Mix well.

➡️ Add flour, cocoa powder, and baking powder.
➡️ Gently mix until smooth and lump-free.

💡 Do not overmix or the cake can become dense.


🔥 Step 2: Bake the Cake

➡️ Grease a square baking tray or line it with baking paper.

➡️ Pour the batter evenly into the tray.

➡️ Bake at 180°C (350°F) for about 25–30 minutes.

➡️ Insert a toothpick in the center. If it comes out clean, the cake is ready.

➡️ Let the cake cool completely. ❄️


🍫 Step 3: Prepare the Chocolate Cream

➡️ In a bowl, add whipped cream, cocoa powder, and powdered sugar.

➡️ Beat until thick and creamy.

➡️ Place in the fridge for 10 minutes for a firmer texture.


✂️ Step 4: Assemble the Layers

➡️ Slice the cake carefully into 2 thin layers.

➡️ Spread the chocolate cream evenly over the bottom layer.

➡️ Place the second cake layer on top gently.


🍮 Step 5: Make the Ganache

➡️ Add chocolate chips to a bowl.

➡️ Pour warm milk over them.

➡️ Stir slowly until smooth and glossy. ✨


🍫 Step 6: Final Touch

➡️ Pour the ganache over the cake.

➡️ Spread evenly with a spoon or spatula.

➡️ Chill for 20–30 minutes before slicing.

➡️ Cut into squares and enjoy! 😍


❓Quick Q&A

❓Can I use dark chocolate?

➡️ Yes! It gives a richer chocolate flavor.

❓How should I store it?

➡️ Keep in the fridge for up to 4 days.

❓Can I freeze it?

➡️ Yes, freeze slices in an airtight container for up to 1 month.