Peanut Butter & Blueberry Yogurt Oat Bowl

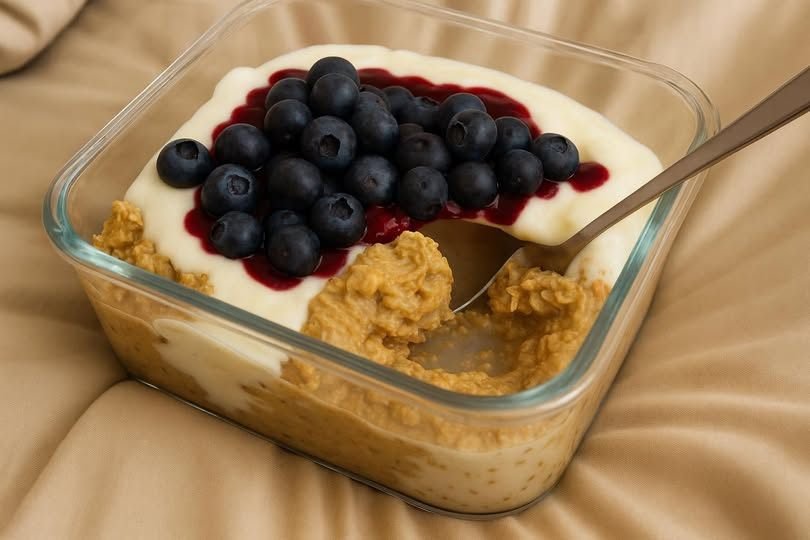
Peanut Butter & Blueberry Yogurt Oat Bowl

A high-protein, fiber-rich breakfast that tastes like a peanut butter and jelly sandwich but keeps you full for hours.

  • Prep time: 5 minutes

  • Chill time: 20 minutes (optional)

  • Yields: 1–2 servings

  • WW Points: 8 (or 3 for the lower-point version)

Ingredients

The Creamy Oat Layer:

  • 1 cup Oats, cooked or soaked overnight

  • 2 tbsp Natural peanut butter

  • 1 tbsp Honey or maple syrup (optional)

  • 2 tbsp Milk or almond milk

  • 1/4 tsp Cinnamon

The Protein Yogurt Layer:

  • 3/4 cup Plain Greek yogurt (low-fat or zero-fat)

  • 1–2 tsp Honey or zero-calorie sweetener

  • 1/4 tsp Vanilla extract

The Fresh Topping:

  • 1/2 cup Fresh blueberries

  • 1 tbsp Berry compote or jam (optional drizzle)


Instructions

  1. Prepare the Base: In a small mixing bowl, combine your warm oats with the peanut butter, milk, cinnamon, and sweetener. Stir vigorously until the peanut butter is fully incorporated and the oats are creamy.

  2. Prep the Yogurt: In a separate bowl, whisk together the Greek yogurt, vanilla, and your choice of sweetener until smooth.

  3. Assemble the Bowl: In a glass jar or breakfast bowl, layer the peanut butter oats at the bottom. Spread the sweetened yogurt layer directly over the oats.

  4. Add the Fruit: Top the yogurt with the fresh blueberries and a drizzle of berry compote or jam if you’re using it.

  5. Serve or Set: You can enjoy this immediately while the oats are still warm, or let it sit in the refrigerator for 20–30 minutes to let the flavors meld into a chilled treat.


💡 Flavor Variations & Tips

  • The Nut Swap: This is equally delicious with almond butter or cashew butter if you want a milder flavor.

  • Make it Overnight: If you’re in a rush in the mornings, prep the oat layer the night before with cold milk and let it soften in the fridge. Layer the yogurt and berries on top just before you leave the house.

  • Sugar-Free Note: To keep this in line with your Sugar-Free Strawberry Cheesecake goals, stick to the zero-calorie sweetener and ensure your peanut butter has no added sugar or oils.


Quick Nutrition Guide (Approx. per serving)

  • Calories: ~320

  • Protein: 18g

  • Fiber: 6 g

Homemade Chocolate Hazelnut Truffles


Homemade Chocolate Hazelnut Truffles

Prep time: 30 minutes | Chill time: 1 hour | Yields: Approx. 20–24 truffles

Ingredients

The Filling:

  • 1 cup Chocolate hazelnut spread (like Nutella)

  • 1 cup Toasted hazelnuts, finely chopped (plus 20–24 whole toasted hazelnuts for the centers)

  • 1 cup Crushed wafer cookies (vanilla or hazelnut flavored work best)

The Coating:

  • 1 ½ cups Semi-sweet or milk chocolate chips

  • 1 tsp Coconut oil (helps the chocolate flow smoothly)

  • ½ cup Hazelnuts, very finely chopped (for that signature bumpy texture)


Detailed Instructions

  1. Prepare the Base: In a medium mixing bowl, combine the chocolate hazelnut spread, the 1 cup of finely chopped hazelnuts, and the crushed wafer cookies. Stir until the mixture is uniform and holds its shape when pressed.

  2. Chill to Set: Place the mixture in the refrigerator for about 20–30 minutes. This makes it much easier to roll into balls without it sticking to your hands.

  3. Form the Truffles: Scoop about a tablespoon of the chilled mixture. Press one whole toasted hazelnut into the center, then roll the mixture between your palms to form a smooth ball.

  4. Second Chill: Place the rolled balls on a parchment-lined tray and freeze for 15 minutes. This ensures they don’t melt when you dip them in the warm chocolate.

  5. Melt the Coating: In a microwave-safe bowl, combine the chocolate chips and coconut oil. Microwave in 30-second intervals, stirring in between, until completely smooth. Stir in the remaining ½ cup of finely chopped hazelnuts.

  6. The Dip: Using a fork or a dipping tool, submerge each chilled truffle into the chocolate-nut mixture. Tap the fork against the side of the bowl to let excess chocolate drip off.

  7. Final Set: Place the truffles back on the parchment paper. Let them sit at room temperature until firm, or pop them in the fridge for 10 minutes for a quick set.


Tips for Success

  • Toast Your Nuts: Even if you buy pre-roasted hazelnuts, giving them a quick 5-minute toast in a dry pan over medium heat brings out the oils and makes them much more fragrant.

  • Wafer Texture: Don’t pulverize the wafers into a powder; leave some tiny shards for that authentic “crunch” when you bite into the center.

Bay Leaf & Clove Herbal Tea

Bay Leaf & Clove Herbal Tea

A warm, aromatic, caffeine-free beverage

Bay Leaf and Clove Herbal Tea is a simple, comforting drink made by gently simmering dried bay leaves and whole cloves in water. The result is a lightly golden infusion with a warm, earthy aroma and subtle spice. This tea is appreciated for its soothing character, pleasant fragrance, and ease of preparation.

Bay leaves bring a mild herbal depth with hints of eucalyptus and mint, while cloves add a gentle warmth and soft spice. Together, they create a balanced cup that can be enjoyed plain or customized with natural flavor additions like lemon, honey, ginger, or cinnamon.

This herbal tea contains no caffeine and can be enjoyed at any time of day. It is especially comforting during cool weather or quiet moments when a warm, aromatic drink is desired.


🧺 Ingredients

Base Ingredients

  • 3 dried bay leaves (whole)

  • 5–6 whole cloves

  • 2 cups water

Optional Flavor Add-Ins (choose as desired)

  • 1 teaspoon honey (for gentle sweetness)

  • 1 slice fresh ginger

  • 1 small cinnamon stick

  • 1 teaspoon lemon juice or a lemon wedge

  • 1 mint leaf


🧑‍🍳 Instructions

Step 1: Prepare Ingredients

Ensure the bay leaves and cloves are clean and free of dust.
If using ginger or cinnamon, prepare them by slicing or breaking them into small pieces.

Step 2: Heat the Water

Pour 2 cups of water into a small saucepan.
Place over medium heat and bring to a gentle boil.

Step 3: Add Spices

Once the water begins to boil, add the bay leaves and cloves.
Add any optional ingredients at this stage if using.

Step 4: Simmer

Reduce the heat to low and allow the mixture to simmer gently for 7–10 minutes.
The liquid will gradually take on a light golden color and release a pleasant aroma.

Step 5: Strain

Remove the saucepan from heat and let it rest for 1–2 minutes.
Strain the tea into a cup using a fine mesh strainer, removing all solids.

Step 6: Serve

Serve warm. Stir in honey or lemon juice if desired.
Garnish with a mint leaf or lemon slice for presentation.


🍽️ Servings

Makes 1 large mug or 2 small cups.
The recipe can be doubled or tripled as needed.


📝 Helpful Notes

  • Bay Leaves: Dried whole bay leaves are best. Avoid crushed or powdered leaves, which are difficult to strain.

  • Cloves: Use whole, aromatic cloves for best flavor.

  • Simmering: Gentle simmering preserves aroma and prevents bitterness.

  • Flavor Strength: Adjust steeping time to taste—shorter for mild, longer for stronger flavor.

  • Sweeteners: Honey complements the spice naturally without overpowering.

  • Serving: Best enjoyed warm, but may also be served chilled.

  • Storage: Prepared tea can be refrigerated for up to 24 hours and reheated gently.


🌿 Serving Ideas

  • Enjoy on its own as a calming beverage

  • Pair with light snacks or fruit

  • Serve in a clear glass mug to highlight the golden color

  • Add cinnamon and ginger for a richer, spiced version


Bay Leaf and Clove Herbal Tea is a simple drink made with care and intention. Its warm aroma, gentle flavor, and minimal ingredients make it a pleasant addition to any daily routine. Whether enjoyed alone or shared, this tea celebrates simplicity, tradition, and mindful preparation.

Egg Muffins – Quick & Nutritious Breakfast

Egg Muffins – Quick & Nutritious Breakfast

High in protein, low in carbs, and fully customizable

Prep Time: 10 minutes
Cook Time: 18–22 minutes
Total Time: 30 minutes
Yield: 6 muffins

Egg muffins are a versatile breakfast or snack option. You can add your favorite vegetables, meats, or cheeses, making them ideal for low-carb, keto, or meal-prep-friendly diets.


Ingredients

  • 6 large eggs

  • ¼ cup (60 ml) milk (or unsweetened almond/oat milk for dairy-free)

  • ½ cup shredded cheese (cheddar, feta, or your choice; optional for dairy-free)

  • ½ cup chopped vegetables (bell peppers, spinach, green onions, mushrooms, zucchini, etc.)

  • ¼ cup cooked bacon or ham (optional)

  • Salt and pepper to taste

  • ½ teaspoon garlic powder (optional)

  • ½ teaspoon paprika (optional)


Step-by-Step Instructions

1. Preheat the Oven

Preheat your oven to 375°F (190°C).
Lightly grease a 6-cup muffin tin with cooking spray, oil, or butter. Silicone muffin cups can also be used.


2. Prepare Ingredients

  • Chop your vegetables into small pieces.

  • Dice cooked bacon or ham if using.

  • Pre-sauté watery vegetables (like mushrooms or spinach) for 2–3 minutes to prevent soggy muffins.


3. Whisk the Eggs

In a large bowl, whisk together the eggs, milk, salt, pepper, garlic powder, and paprika until smooth and slightly frothy.
This ensures fluffy muffins with evenly distributed seasoning.


4. Assemble the Muffins

  • Divide the chopped vegetables and cooked meat evenly among the muffin cups.

  • Pour the egg mixture over the fillings, filling each cup about ¾ full.

  • Top each with shredded cheese, if using.


5. Bake

Place the muffin tin in the preheated oven.
Bake for 18–22 minutes, or until the egg muffins are set and lightly golden on top.
A toothpick inserted in the center should come out clean.


6. Cool and Serve

  • Allow the muffins to cool for a few minutes before removing them from the tin.

  • Serve warm, or store for meal prep.


Tips for Perfect Egg Muffins

  • Grease Well: Prevents sticking; silicone cups work best.

  • Whisk Thoroughly: Ensures light, fluffy muffins.

  • Do Not Overfill: Fill ¾ full to prevent overflow.

  • Cool Slightly Before Removing: Prevents breaking.

  • Storage & Reheating: Refrigerate in an airtight container for up to 5 days; microwave for 30–45 seconds to reheat.

  • Freezing: Let muffins cool completely, then freeze in airtight containers or freezer bags for up to 3 months. Reheat 1–2 minutes in the microwave.

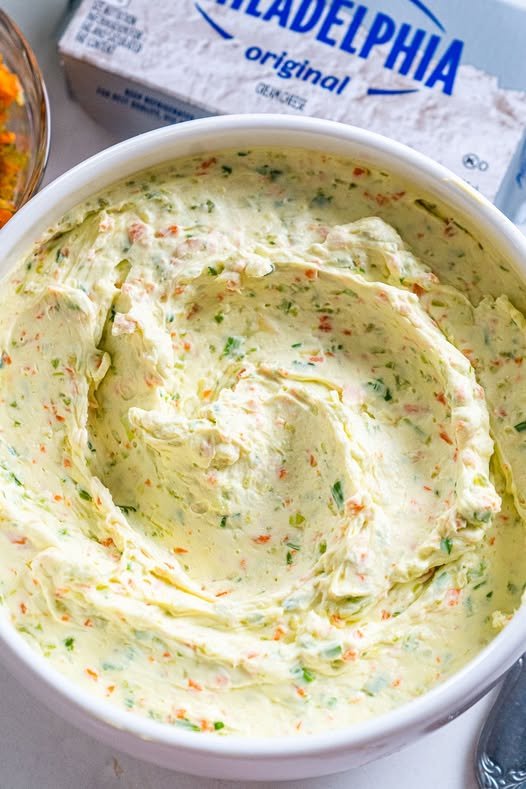
Homemade Garden Vegetable Spread

Homemade Garden Vegetable Spread

This creamy, tangy spread is packed with crunchy carrots, celery, and zesty green onions. It’s the perfect companion for toasted bagels, crackers, or even as a dip for fresh bell pepper strips.

  • Prep time: 15 minutes

  • Inactive time: 1–2 hours (chilling)

  • Yields: Serves 8

  • Dietary Info: Vegetarian, Contains Milk

Ingredients

  • 2 (8 oz) packages cream cheese, softened to room temperature

  • ¼ cup carrots, chopped

  • ½ cup celery, chopped

  • 2 green onions, chopped

  • ½ tsp salt

  • ½ tsp garlic powder

  • ¼ tsp onion powder

Preparation

  1. Prep the Veggies: Place the chopped carrots, celery, and green onions into a food processor. Pulse several times until the vegetables are broken down into very small bits.

    Tip: Be careful not to over-process; you want distinct texture, not a watery paste.

  2. Mix: In a medium-sized mixing bowl, combine the softened cream cheese, the pulsed vegetable mixture, salt, garlic powder, and onion powder. Stir vigorously until the vegetables and seasonings are evenly distributed throughout the cream cheese.

  3. Chill: Spoon the spread into an airtight container or a glass jar. Place it in the refrigerator for at least 1 to 2 hours. This allows the cream cheese to firm back up and the flavors from the onion and garlic to meld.

  4. Serve: Spread generously on toasted bagels or crusty bread.

Storage

Keep the spread refrigerated in an airtight container. It will stay fresh and delicious for 7–10 days.

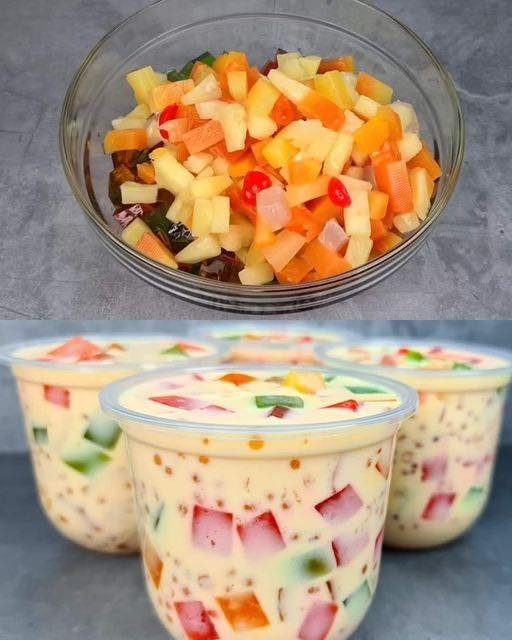
Tropical Delight: Fruity Tapioca Jelly Drink

Tropical Delight: Fruity Tapioca Jelly Drink

A colorful, creamy chilled drink with fruit, jelly cubes, and soft tapioca pearls

Introduction

Tropical Delight is a vibrant and refreshing dessert-style drink made with creamy milk, tender tapioca pearls, fruity jelly cubes, and mixed fruit. It’s visually beautiful, lightly sweet, and wonderfully textured—perfect for warm days, gatherings, or as a fun treat for the whole family.


🧾 Ingredients

For the Jelly

  • 4 cups water

  • ¼ cup white sugar

  • 25 grams white unflavored jelly powder

  • Red food coloring

  • Yellow food coloring

  • Green food coloring

For the Drink Base

  • 835 grams fruit cocktail, well-drained
    (or an equal amount of chopped fresh fruits such as mango, pineapple, papaya, grapes, or strawberries)

  • 250 ml all-purpose cream or heavy cream

  • 300 ml condensed milk

  • 2 cups evaporated milk or fresh milk

  • 1 cup cooked small tapioca pearls


⏱️ Time Breakdown

  • Preparation Time: 20 minutes

  • Cooking Time: 15 minutes

  • Chilling Time: 1 hour

  • Total Time: 1 hour 35 minutes


👩‍🍳 Step-by-Step Instructions

1. Prepare the Jelly

In a medium pot, bring 4 cups of water to a full boil.
Add the ¼ cup white sugar and 25 grams jelly powder, stirring continuously until fully dissolved and clear.

Remove from heat and carefully divide the hot jelly mixture evenly into three separate heat-safe bowls.

Add:

  • Red food coloring to the first bowl

  • Yellow food coloring to the second bowl

  • Green food coloring to the third bowl

Stir each bowl until the color is evenly mixed.

Pour each colored mixture into separate shallow containers.
Allow them to cool at room temperature, then refrigerate until completely set.

Once firm, cut the jelly into small, even cubes. Set aside.


2. Prepare the Creamy Milk Base

In a large mixing bowl, combine:

  • All-purpose cream (or heavy cream)

  • Condensed milk

  • Evaporated milk (or fresh milk)

Whisk gently until smooth and well blended.


3. Assemble the Drink

Add the drained fruit cocktail (or fresh fruit mixture) into the milk base. Stir gently.

Fold in:

  • Cooked tapioca pearls

  • Colored jelly cubes

Mix carefully to avoid breaking the jelly pieces.


4. Chill and Serve

Transfer the mixture into serving glasses or a large pitcher.

Refrigerate for at least 1 hour to allow the flavors and textures to come together.

Serve well chilled.


🍹 Serving Suggestions

  • Serve as a cold dessert drink or sweet snack

  • Garnish with fresh fruit pieces or mint leaves for presentation

  • Best enjoyed cold with a spoon or wide straw


💡 Helpful Tips

  • Ensure the jelly is fully set before cutting for clean cubes

  • Drain canned fruits well to prevent excess liquid

  • Adjust sweetness by adding more or less condensed milk

  • Stir gently to keep the jelly cubes intact


🥛 Dietary Notes

  • Contains dairy

  • Can be prepared gluten-free by using certified gluten-free ingredients


🧊 Storage

Store leftovers in a covered container in the refrigerator and enjoy within 2 days. Stir gently before serving again.

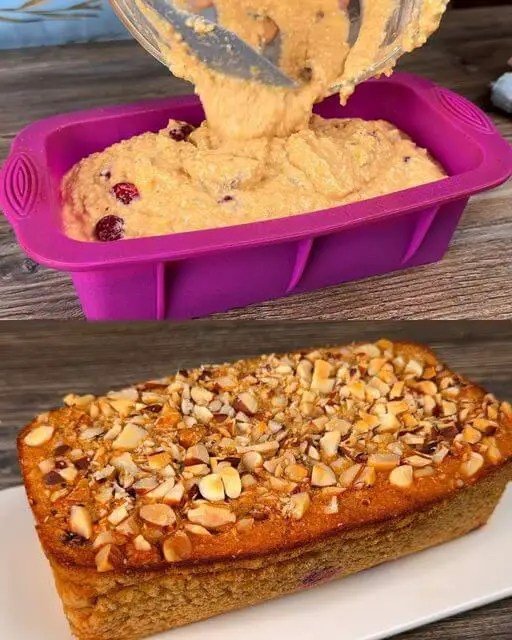
Apple & Banana Oatmeal Breakfast Loaf

Apple & Banana Oatmeal Breakfast Loaf

A moist, naturally sweet loaf perfect for breakfast or a snack

This wholesome breakfast loaf combines the fiber of oats with the natural sweetness of apples and banana. Raisins, cherries, and a crunchy nut topping make it a satisfying treat for mornings or anytime you want a nutritious snack.


Recipe Overview

  • Prep Time: 15 minutes

  • Bake Time: 45–50 minutes

  • Total Time: About 1 hour 5 minutes

  • Yield: 1 loaf


Ingredients

  • 1 cup (100 g) rolled oats or oatmeal

  • 2 medium apples, peeled and grated

  • 1 ripe banana, mashed

  • 2 large eggs

  • 100–120 ml water

  • 100 g raisins (or sultanas)

  • 100 g pitted cherries

  • 1 teaspoon baking powder

  • 50 g Brazil nuts, chopped (for topping)

  • Vegetable oil (for greasing the pan)


Step-by-Step Instructions

1. Hydrate the Oats

  • In a large mixing bowl, combine the oats with 100–120 ml of water.

  • Let the mixture sit for about 10 minutes so the oats soften and absorb moisture.


2. Prepare the Fruit

  • Peel and grate the apples.

  • In a small bowl, mash the banana with a fork until smooth.


3. Mix the Batter

  • Add the mashed banana and eggs to the soaked oatmeal. Whisk together until fully incorporated.

  • Stir in the grated apples, raisins, and cherries. Mix gently to combine.


4. Add Baking Powder

  • Sprinkle the baking powder over the mixture.

  • Fold everything together carefully with a spatula until evenly distributed. Avoid overmixing, which can make the loaf dense.


5. Prepare the Pan

  • Preheat your oven to 350°F (180°C).

  • Grease a loaf pan with vegetable oil.

  • Optional: Line a standard metal pan with parchment paper for easier removal.


6. Top and Bake

  • Pour the batter into the prepared pan and smooth the surface.

  • Evenly sprinkle the chopped Brazil nuts on top.

  • Bake for 45–50 minutes, or until the loaf is golden brown and a toothpick inserted into the center comes out clean.


7. Cool and Serve

  • Allow the loaf to cool in the pan for at least 10 minutes.

  • Remove from the pan and slice.

  • Serve warm or at room temperature.


Tips for Success

  • Smoother texture: Pulse the oats in a blender for a few seconds before hydrating to create a finer, cake-like crumb.

  • Storage: Store leftovers in an airtight container in the refrigerator for 3–4 days.

  • Nut swaps: Use walnuts, almonds, or pecans instead of Brazil nuts for a different flavor.

  • Optional additions: Add a pinch of cinnamon or nutmeg for extra warmth, or a handful of sunflower seeds for extra texture.

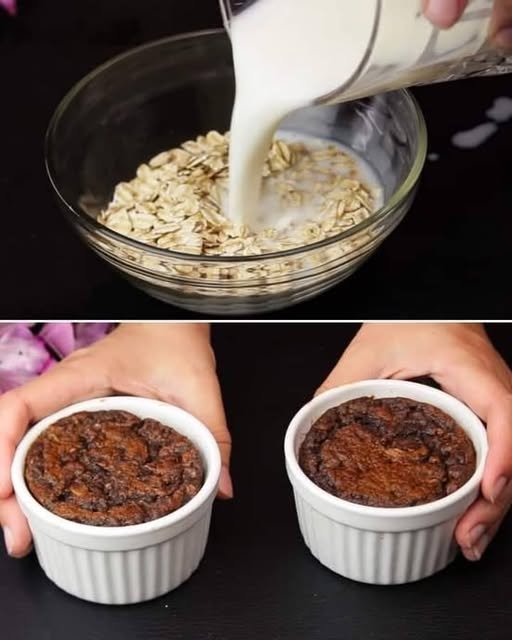
Oatmeal & Cocoa Breakfast Cake

Oatmeal & Cocoa Breakfast Cake

A soft, lightly sweet breakfast-style cake made with oats, banana, and cocoa. Suitable for a quick morning meal or a light snack.


Preparation Overview

  • Preparation time: 10 minutes

  • Soaking time: 10 minutes

  • Cooking time: 20–25 minutes (oven) or 2–3 minutes (microwave)

  • Total time: About 40 minutes

Yield

  • Makes 1 large serving or 2 small portions


Ingredients

  • 40 g oatmeal (about ½ cup rolled oats or quick oats)

  • 120 ml milk (dairy or plant-based)

  • 1 large egg

  • 1 ripe banana

  • 8 g cocoa powder (about 1 tablespoon, unsweetened)

  • 5 g baking powder (about 1 teaspoon)

Optional

  • A small pinch of ground cinnamon

  • A few dark chocolate chips or fresh fruit for topping


Step-by-Step Instructions

1. Soak the Oats

Place the oatmeal in a mixing bowl. Pour in the milk and stir gently.

Let the mixture rest for 10 minutes so the oats absorb the liquid and soften evenly.


2. Prepare the Banana

Peel the banana and place it in a separate bowl.

Mash thoroughly with a fork until smooth and free of large lumps.


3. Mix the Batter

Add the mashed banana and the egg to the soaked oats.

Whisk until the mixture is evenly combined.

Sift in the cocoa powder and baking powder. Add cinnamon if using.

Stir gently until the batter looks smooth and evenly colored, with no dry patches.


4. Prepare the Cooking Dish

Lightly grease two small oven-safe ramekins or one microwave-safe mug or bowl.

Pour the batter into the container(s), filling no more than three-quarters full.


5. Cook

Oven Method

  • Preheat the oven to 180°C (350°F)

  • Place the ramekins on a baking tray

  • Bake for 20–25 minutes, until the center is set

Microwave Method

  • Cook on high for 2–3 minutes

  • Let stand for 1 minute before serving


6. Serve

Enjoy warm directly from the dish or turn out onto a plate.

Optional toppings include yogurt, fruit, or a light drizzle of honey.


Storage

  • Best enjoyed fresh

  • Can be stored covered in the refrigerator for up to 24 hours

  • Reheat gently before serving


Helpful Notes

  • Riper bananas provide more natural sweetness

  • Texture will be soft and moist, similar to a baked oatmeal

  • Cooking time may vary slightly depending on dish size and appliance

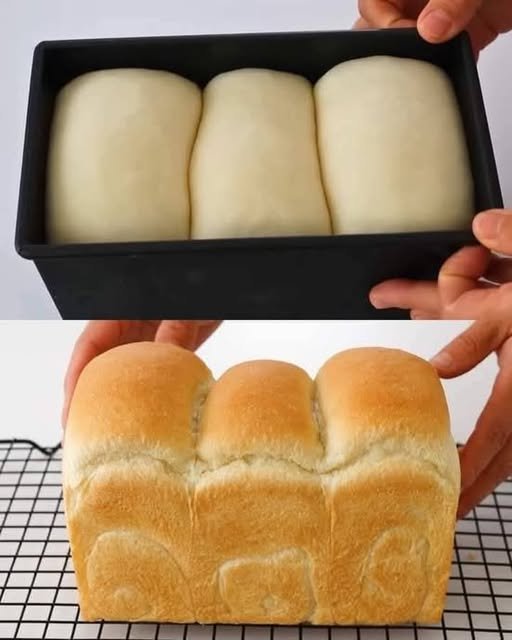
Simple No-Knead Homemade Bread

Simple No-Knead Homemade Bread

A soft, everyday loaf made with basic pantry ingredients and minimal handling.


Preparation Overview

  • Preparation time: 10 minutes

  • First resting time: 1½–2 hours

  • Second resting time: 30–45 minutes

  • Baking time: 25–30 minutes

  • Cooling time: 20 minutes

  • Total time: About 3 hours

Yield

  • Makes 1 standard loaf


Ingredients

  • 200 ml warm water (comfortably warm, not hot)

  • 25 g sugar (about 2 tablespoons)

  • 3 g active dry yeast (about 1 teaspoon)

  • 300 g bread flour or all-purpose wheat flour (about 2 cups)

  • 3 g salt (about ½ teaspoon)

  • 20 g olive oil (about 2 tablespoons)


Step-by-Step Instructions

1. Prepare the Yeast Mixture

Pour the warm water into a large mixing bowl. Add the sugar and yeast, then stir gently until dissolved.

Let the mixture stand for about 5 minutes. A light foam on the surface indicates the yeast is ready to use.


2. Mix the Dough

Add the olive oil and salt to the yeast mixture and stir briefly.

Gradually add the flour, mixing with a spoon or spatula until all the flour is evenly moistened.

The dough will look soft and sticky, which is expected. Ensure there are no dry patches of flour.


3. First Resting Period

Cover the bowl with a clean kitchen towel or lid.

Place it in a warm, draft-free area and let the dough rest for 1½ to 2 hours, or until it has noticeably increased in volume.


4. Shape the Dough

Lightly coat your hands with a small amount of oil.

Gently press down the dough to release excess air.

Divide the dough into three equal portions and shape each portion into a smooth ball or short log.

Place the pieces side by side into a lightly greased loaf pan.


5. Second Resting Period

Cover the loaf pan and let the dough rest for 30–45 minutes.

During this time, the dough should rise and fill the pan evenly.


6. Bake

Preheat the oven to 180°C (350°F).

If desired, lightly brush the surface of the dough with a little milk or water for an even finish.

Bake for 25–30 minutes, until the top is lightly browned and the loaf is fully baked.


7. Cool

Remove the bread from the pan and place it on a wire rack.

For a softer surface, you may lightly brush the top with a small amount of olive oil while the bread is warm.

Allow the bread to cool for at least 20 minutes before slicing. This helps maintain the structure of the loaf.


Serving Suggestions

  • Slice and serve with butter, jam, or cheese

  • Suitable for sandwiches or toast

  • Enjoy warm or at room temperature


Storage

  • Store wrapped at room temperature for up to 2 days

  • Refrigeration is not recommended, as it may affect texture

  • Can be frozen once cooled and sliced


Helpful Notes

  • Longer resting times help improve texture

  • Avoid adding extra flour, as the dough should remain soft

  • Suitable for loaf pans or free-form shaping

Cheese-Stuffed Flatbread (Quick Yeast Dough)

Cheese-Stuffed Flatbread (Quick Yeast Dough)

Soft baked flatbreads filled with melted cheese, prepared with a simple yeast dough and baked until lightly golden.


Preparation Overview

  • Preparation time: 15 minutes

  • Resting time: 40 minutes

  • Baking time: 15–20 minutes

  • Total time: About 1 hour 15 minutes

Yield

  • Makes 4 large flatbreads


Ingredients

For the Dough

  • 480 g wheat flour (about 4 cups)

  • 400 ml milk, warm (comfortably warm, not hot)

  • 10 g dry yeast

  • 15 g sugar

  • 20 g olive oil

  • 8 g salt

For the Filling & Topping

  • 200 g mozzarella or cheddar cheese, shredded

  • 1 egg yolk (for brushing)

  • Optional: sesame seeds or nigella seeds

For Handling

  • A small amount of vegetable oil (for greasing the bowl and hands)


Step-by-Step Instructions

1. Prepare the Yeast Mixture

Pour the warm milk into a large mixing bowl. Add the sugar and dry yeast, then stir gently to combine.

Set the bowl aside for 5–10 minutes, until the surface shows light bubbles. This indicates the yeast has activated properly.


2. Form the Dough

Add the olive oil and salt to the milk mixture. Stir briefly.

Gradually add the flour, mixing with a spoon or spatula until a rough dough forms.

Transfer the dough to a clean work surface and knead gently for about 5 minutes, until smooth and flexible.

If the dough feels sticky, lightly oil your hands instead of adding extra flour to maintain a soft texture.


3. Rest the Dough

Lightly grease a bowl with vegetable oil. Place the dough inside and turn it once so the surface is lightly coated.

Cover with a clean cloth and place in a warm, draft-free area. Let it rest for about 30 minutes, or until it has increased in volume.


4. Divide and Fill

Turn the rested dough onto a lightly floured surface and divide it into 4 equal portions. Shape each portion into a smooth ball.

Flatten each ball into a small round disc using your hands or a rolling pin.

Place a portion of shredded cheese in the center of each disc.

Bring the edges of the dough up and over the filling, pinching them together to seal completely.

Gently flatten each filled ball into a thick disc, taking care not to tear the dough.


5. Final Rest and Topping

Line a baking tray with parchment paper and place the shaped flatbreads on it.

Using your fingertips, gently press small indentations across the surface of each disc. This helps maintain an even shape during baking.

Cover and let rest for 10 minutes.

Brush the tops lightly with egg yolk and sprinkle with seeds if desired.


6. Bake

Preheat the oven to 200°C (400°F).

Bake the flatbreads for 15–20 minutes, until evenly baked and lightly golden on top.

Remove from the oven and allow them to cool slightly before serving.


Serving Suggestions

  • Serve warm as a snack or alongside soups and salads

  • Optional: lightly brush with melted butter and sprinkle with chopped parsley before serving


Storage

  • Best enjoyed fresh

  • Leftovers can be stored covered at room temperature for up to 1 day or refrigerated for 2 days

  • Reheat gently in the oven or on a pan before serving


Optional Notes

  • Cheese can be mixed (mozzarella and cheddar together) for balanced flavor

  • Dough can be divided into smaller portions for mini flatbreads

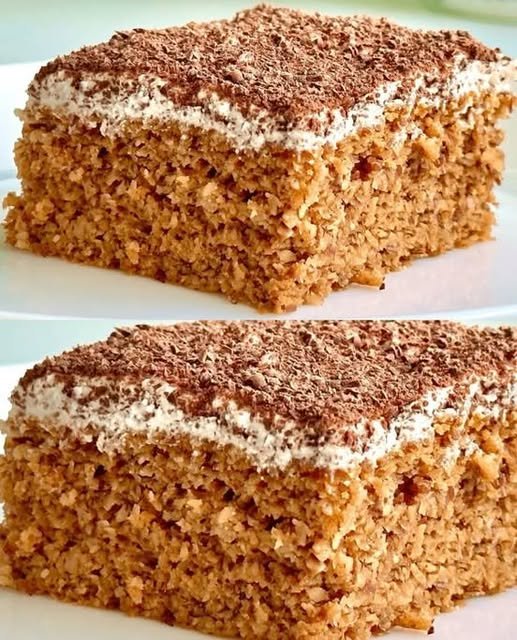
Flourless Almond Carrot Cake (Low-Carb Style)

Flourless Almond Carrot Cake (Low-Carb Style)

A naturally sweetened cake made without wheat flour, using ground almonds and fresh carrots for a moist, gently textured result.


Preparation Overview

  • Preparation time: 15 minutes

  • Baking time: 30–35 minutes

  • Cooling time: 30 minutes

  • Total time: About 1 hour 20 minutes

Yield

  • Makes 8–10 small slices


Ingredients

Base Ingredients

  • 200 g carrots, peeled and finely grated

  • 200 g ground almonds (almond flour)

Wet Ingredients

  • 2 large eggs (room temperature)

  • 2–3 tablespoons honey (adjust to taste)

Leavening & Flavoring

  • 1 teaspoon baking soda

  • 2–3 drops mild vinegar (such as wine or apple vinegar)

  • A small pinch of ground cinnamon

  • A small pinch of salt

Optional Topping

  • Low-fat Greek yogurt or cream cheese, lightly sweetened with honey

  • A light dusting of cocoa powder or finely grated dark chocolate


Step-by-Step Instructions

1. Prepare the Carrots

Peel and finely grate the carrots using a fine grater.

If the carrots release a lot of liquid, gently press them with a paper towel or clean cloth to remove excess moisture. This helps maintain a balanced texture in the finished cake.

Set aside.


2. Mix the Wet Ingredients

In a large mixing bowl, crack in the eggs. Add the honey and salt.

Whisk until the mixture looks smooth and slightly airy. This helps distribute the sweetness evenly throughout the batter.


3. Prepare the Leavening

In a small spoon or cup, combine the baking soda with the vinegar. The mixture will foam briefly.

Immediately add this mixture to the egg mixture and stir gently until combined.


4. Combine All Ingredients

Add the grated carrots and cinnamon to the bowl with the egg mixture. Stir gently.

Gradually fold in the ground almonds, mixing slowly until everything is evenly combined.

The batter should be thick but spreadable. The almonds will absorb moisture as the mixture rests.


5. Prepare for Baking

Preheat the oven to 180°C (350°F).

Line a small square or rectangular baking dish with parchment paper, or lightly grease it.

Transfer the batter into the prepared dish and smooth the surface with a spatula.


6. Bake

Place the dish on the middle rack of the oven.

Bake for 30–35 minutes, or until:

  • The top looks lightly golden

  • A wooden skewer inserted into the center comes out clean

If the top browns too quickly, loosely cover with parchment paper for the remaining baking time.


7. Cooling and Finishing

Remove the cake from the oven and allow it to cool completely in the pan.

Once cooled, spread a thin layer of sweetened Greek yogurt or cream cheese on top, if desired.

Finish with a light sprinkle of cocoa powder, cinnamon, or finely grated dark chocolate.


Serving Suggestions

  • Slice and serve at room temperature or chilled

  • Pairs well with herbal tea, coffee, or almond milk

  • Suitable as a light dessert or afternoon snack


Storage

  • Store covered in the refrigerator for up to 3 days

  • Bring to room temperature before serving for best texture


Optional Notes

  • Honey can be adjusted based on preference

  • Cinnamon may be replaced or combined with nutmeg

  • The cake has a naturally dense texture due to the almond base

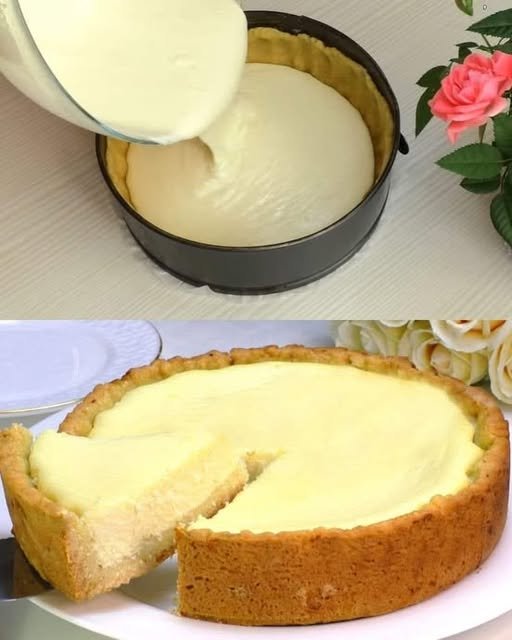
Cottage Cheese Tart with Sour Cream Filling

Cottage Cheese Tart with Sour Cream Filling

A gently baked dessert with a soft, buttery crust and a smooth cottage cheese–sour cream filling. Suitable for dessert, tea time, or light gatherings.


Preparation Overview

  • Preparation time: 20 minutes

  • Resting time (dough): 20 minutes

  • Baking time: 35–45 minutes

  • Cooling & chilling: 2 hours (recommended)

  • Total time: About 3 hours

Yield

  • Serves 8–10 slices


Ingredients

For the Crust

  • 1 large egg (room temperature)

  • 40 g sugar

  • 80 g butter, softened at room temperature

  • 200 g all-purpose flour (about 1½ cups)

  • 1 teaspoon baking powder

  • A small pinch of salt

For the Creamy Filling

  • 400 g cottage cheese (smooth or pressed through a sieve)

  • 200 g sour cream (Greek yogurt may be used as an alternative)

  • 2 large eggs

  • 60 g sugar (adjust to taste)

  • 1 teaspoon vanilla extract

  • 1 tablespoon cornstarch


Step-by-Step Instructions

1. Prepare the Crust Dough

In a medium mixing bowl, add the egg, sugar, and salt. Whisk gently until the mixture becomes pale and well combined.

Add the softened butter and mix until smooth and evenly incorporated. The mixture should look creamy without visible butter pieces.

In a separate bowl, combine the flour and baking powder. Gradually add this to the wet mixture, mixing gently with a spoon or your hands.

Knead lightly just until a soft dough forms. Avoid overmixing, as this helps keep the crust tender rather than firm.

Shape the dough into a flat disc, wrap it, and place it in the refrigerator for 20 minutes. This resting step helps the dough hold its shape during baking.


2. Prepare the Filling

If the cottage cheese has a coarse texture, blend it briefly or press it through a fine sieve until smooth. This step is important for achieving a uniform filling.

In a large bowl, combine the cottage cheese, sour cream, eggs, sugar, vanilla extract, and cornstarch.

Whisk or blend until the mixture is smooth and evenly mixed. The filling should be pourable and free of lumps.


3. Assemble the Tart

Lightly grease a 9-inch (22 cm) springform pan or tart tin.

Remove the chilled dough from the refrigerator. Press it evenly into the bottom of the pan and gently up the sides, forming an edge about 3–4 cm high.

Make sure the base and sides are even in thickness to ensure uniform baking.

Carefully pour the prepared filling into the crust and gently level the surface.


4. Bake the Tart

Preheat the oven to 180°C (350°F).

Place the tart on the center rack and bake for 35–45 minutes.

The crust should turn lightly golden, and the filling should appear set around the edges with a slight softness in the center.


5. Cooling and Setting

Once baked, remove the tart from the oven and allow it to cool completely in the pan at room temperature.

After cooling, refrigerate the tart for at least 2 hours before slicing. This step helps the filling achieve its best texture and makes cutting cleaner and easier.


Serving Suggestions

  • Serve chilled or lightly cool

  • Pairs well with fresh fruit, fruit compote, or a light dusting of powdered sugar

  • Can be served plain or with tea or coffee


Optional Variation

For added flavor, gently place a small handful of blueberries, raspberries, or sliced strawberries over the filling before baking. Press them lightly into the surface without stirring.


Storage

  • Store covered in the refrigerator for up to 3 days

  • Best enjoyed within the first 48 hours for optimal texture

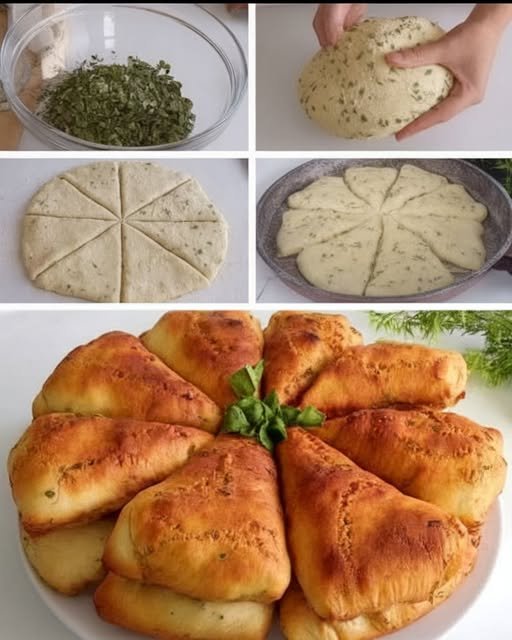
Yeast-Free Savory Cheese & Herb Triangles

Yeast-Free Savory Cheese & Herb Triangles

Soft, pan-cooked or baked cheese-filled bread triangles made without yeast. Ideal for breakfast, tea time, or a light savory snack.

Preparation Time

  • Prep: 15 minutes

  • Resting: 5 minutes

  • Cooking: 10–12 minutes (pan) or 20–25 minutes (oven)

  • Total: About 30–35 minutes

Yield

  • Makes 8 medium triangles


Ingredients

Dairy & Eggs

  • 2 large eggs (room temperature)

  • 90 ml milk (about 1 tea glass)

  • 80 g feta cheese or white cheese, crumbled

  • 80 g cheddar or mozzarella cheese, grated

Fresh Herbs

  • 3 green onions, finely chopped

  • 5–6 sprigs fresh parsley, finely chopped

Dry Ingredients

  • 3 cups all-purpose flour (approximately 360 g)

  • 1 packet baking powder (10 g)

  • 1 teaspoon salt (adjust depending on cheese saltiness)

For Cooking

  • 1–2 tablespoons olive oil or vegetable oil (for greasing the pan or tray)


Step-by-Step Instructions

1. Prepare the Wet Mixture

In a large mixing bowl, crack the eggs and whisk lightly until the yolks and whites are combined. Add the milk and mix until smooth.

Add the crumbled white cheese and grated cheese. Stir gently so the cheeses are evenly distributed throughout the mixture.


2. Add Herbs and Seasoning

Add the finely chopped green onions and parsley to the bowl. Sprinkle in the salt. Mix well to ensure the herbs are spread evenly.


3. Form the Dough

Sift the baking powder into the flour. Add the flour gradually to the bowl, one cup at a time, mixing with a spoon or your hand.

Once the mixture begins to come together, knead gently until a soft, smooth dough forms.

Dough texture guide:

  • If the dough feels sticky, add 1 tablespoon of flour at a time.

  • If the dough feels dry or crumbly, add 1–2 teaspoons of milk.

The dough should be soft and easy to handle, not stiff.


4. Shape the Dough

Lightly flour your work surface. Place the dough on it and gently press or roll it into a round shape about 1 cm (½ inch) thick.

Using a knife or pizza cutter, divide the dough into 8 equal triangles, similar to slicing a pizza.


5. Cooking Options

Pan Method

  • Lightly grease a non-stick pan with oil.

  • Place the triangles in the pan, leaving a little space between them.

  • Cover with a lid and cook over medium-low heat for about 5 minutes.

  • Turn the triangles carefully and cook the other side for another 4–5 minutes until both sides are evenly cooked.

Keep the heat moderate so the inside cooks properly without browning too quickly.

Oven Method

  • Preheat the oven to 180°C (350°F).

  • Line a baking tray with parchment paper or lightly grease it.

  • Arrange the triangles on the tray.

  • Bake for 20–25 minutes, turning once if needed, until cooked through.


6. Serving

Serve warm for the best texture and flavor. These cheese and herb triangles pair well with:

  • Fresh tomatoes or cucumbers

  • Olives

  • Yogurt or labneh

  • A light salad


Helpful Tips

  • You may replace parsley with dill or cilantro if preferred.

  • A small pinch of black pepper or mild paprika can be added for extra flavor.

  • These can be prepared ahead and reheated gently in a pan or oven.


Storage

  • Store leftovers in an airtight container in the refrigerator for up to 2 days.

  • Reheat on a pan over low heat or in the oven until warm.

Nut and Date Bars

Nut and Date Bars

These bars are made from dates, nuts, and seeds. The dates provide binding and mild sweetness, while the nuts and seeds add texture. The mixture is pressed into a pan and chilled until firm before slicing.

Preparation Time

15 minutes

Cooking Time

10 minutes

Chilling Time

1 hour

Total Time

Approximately 1 hour 25 minutes

Yield

About 10–12 bars (depending on size)


Ingredients

  • 150 g dates, pitted and soaked in cold water for 15 minutes

  • 70 g cashews

  • 70 g walnuts

  • 70 g almonds

  • 70 g hazelnuts

  • 70 g pumpkin seeds

  • 40 g pine nuts


Instructions

1. Prepare the Dates

Drain the soaked dates thoroughly.
Place them in a blender or food processor and blend until a thick, smooth paste forms. Set aside.


2. Toast the Nuts and Seeds

Place the cashews, walnuts, almonds, hazelnuts, pumpkin seeds, and pine nuts into a large dry skillet.
Heat over medium heat and toast for 5–8 minutes, stirring frequently to prevent burning, until lightly browned and aromatic.

Remove from the heat and allow to cool slightly. If desired, roughly chop the larger nuts for a more even texture.


3. Combine the Mixture

Transfer the toasted nuts and seeds to a large mixing bowl.
Add the date paste and mix thoroughly using a sturdy spatula or lightly oiled hands until all components are evenly combined.


4. Press Into a Pan

Line a small rectangular pan or loaf tin with parchment paper, leaving excess paper over the edges for easy removal.

Transfer the mixture into the pan and press it down firmly using the back of a spoon or a flat-bottomed glass to create a compact, even layer.


5. Chill and Slice

Place the pan in the refrigerator for at least 1 hour, or until the mixture is firm.
Once set, lift the mixture out using the parchment paper and place it on a cutting board.

Slice into bars or squares using a sharp knife.


Storage Notes

  • Store the bars in an airtight container in the refrigerator for up to 2 weeks.

  • For longer storage, they may be frozen for up to 3 months and thawed as needed.

Apple and Cinnamon Oat Breakfast Bake

Apple and Cinnamon Oat Breakfast Bake

This baked oat dish combines apples, cinnamon, eggs, milk, and nuts to create a soft, lightly spiced breakfast option that can be served warm or at room temperature.

Preparation Time

15 minutes

Baking Time

30–35 minutes

Servings

4–6


Ingredients

  • 1 cup (90 g) rolled oats or quick oats

  • 240 ml milk (dairy or unsweetened plant-based milk)

  • 3 medium apples (about 400 g), peeled and cored

  • 2 large eggs

  • 30 g butter, divided

  • 1 teaspoon ground cinnamon

  • 1 teaspoon vanilla extract or a small pinch of vanillin

  • 1 cup (100 g) chopped nuts (walnuts, almonds, or pecans)

  • ½ cup (75 g) blueberries (optional)

  • A small pinch of salt


Instructions

1. Soak the Oats

Place the oats in a mixing bowl and pour in the milk. Stir until evenly combined.
Allow the mixture to rest for 10 minutes so the oats absorb the liquid and soften.


2. Prepare the Apples

Cut the peeled and cored apples into small pieces.
Transfer them to a blender or food processor and pulse until a thick, slightly textured puree forms. Do not overblend; a small amount of texture is desirable.


3. Mix the Batter

Melt 1 tablespoon of the butter and allow it to cool slightly.
Add the apple puree, eggs, vanilla extract, cinnamon, salt, and melted butter to the soaked oats.
Stir until all ingredients are evenly incorporated.


4. Add Nuts and Fruit

Fold in the chopped nuts and blueberries, if using. Mix gently to distribute them evenly throughout the batter.


5. Prepare the Baking Dish

Preheat the oven to 180°C (350°F).
Use the remaining 1 tablespoon of butter to grease a medium-sized baking dish.

Pour the batter into the prepared dish and smooth the surface.


6. Bake

Bake for 30–35 minutes, or until the center is set and the top is lightly browned.
Remove from the oven and allow to rest for 5–10 minutes before serving.


Helpful Notes

  • For a smoother texture, the apples can be grated instead of blended.

  • The bake firms up as it cools, making it easier to slice.

  • Store leftovers in an airtight container in the refrigerator for up to 3 days.

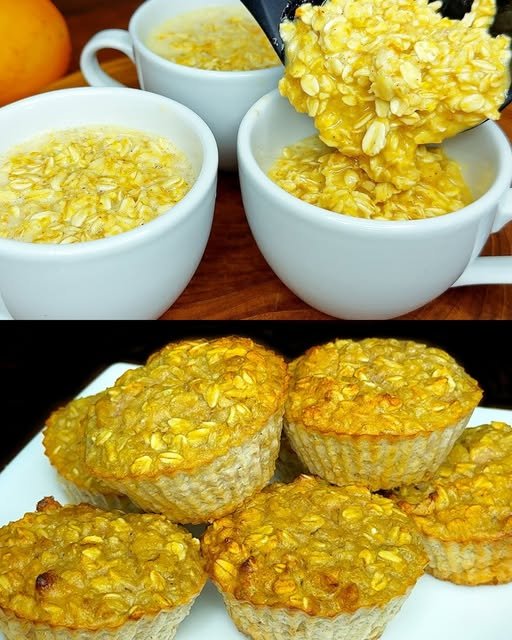
Orange Oat Muffins

Orange Oat Muffins

These muffins are made with oats, fresh orange juice, and eggs, resulting in a moist and lightly citrus-flavored baked product. They are suitable for breakfast or as a small snack.

Preparation Time

10 minutes

Baking Time

20–25 minutes

Yield

6–8 muffins


Ingredients

  • 1 large orange (zest and juice)

  • 1½ cups (120 g) oat flakes (quick oats or rolled oats)

  • 1 cup (240 ml) water or unsweetened plant-based milk

  • 2 large eggs

  • 1 teaspoon baking powder

  • 1 teaspoon vanilla extract (optional)

  • A small pinch of salt

Optional Add-ins

  • Raisins

  • Chopped nuts


Instructions

1. Prepare the Orange

Wash the orange thoroughly. Finely grate approximately 1 tablespoon of the outer zest, avoiding the white pith underneath.
Cut the orange in half and squeeze out the juice. Remove any seeds.


2. Soak the Oats

Place the oat flakes in a large mixing bowl.
Add the freshly squeezed orange juice and the water (or plant-based milk).
Stir well and let the mixture rest for 10 minutes, allowing the oats to absorb liquid and soften.


3. Mix the Batter

Add the eggs, orange zest, baking powder, vanilla extract (if using), and salt to the soaked oats.
Stir until the eggs are fully incorporated and the batter is evenly mixed.
If using raisins or nuts, fold them in gently at this stage.


4. Prepare the Muffin Pan

Preheat the oven to 180°C (350°F).
Line a muffin tin with paper or silicone liners, or lightly grease the cups.

Divide the batter evenly among the muffin cups, filling them almost to the top.


5. Bake

Place the muffin tin in the preheated oven and bake for 20–25 minutes, or until the tops are set and lightly colored.
Allow the muffins to cool in the pan for a few minutes before transferring them to a wire rack.


Helpful Notes

  • For a finer texture, the oats can be blended briefly before soaking.

  • The flavor depends on the natural sweetness of the orange used.

  • Store baked muffins in an airtight container in the refrigerator for up to 3 days.

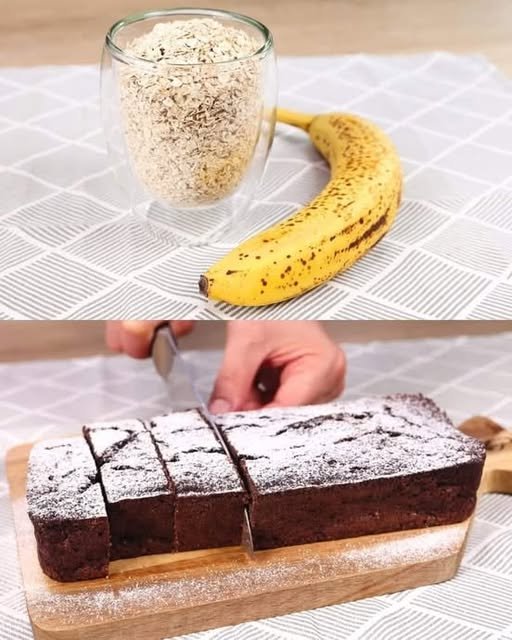
Banana Chocolate Oat Cake

Banana Chocolate Oat Cake

This baked oat-based cake combines bananas, yogurt, cocoa, and chocolate for a soft, dense texture. It is suitable for a small baking dish and can be served warm or at room temperature.

Preparation Time

10 minutes

Baking Time

35–40 minutes

Yield

1 small square or rectangular cake (8–10 slices)


Ingredients

  • 2 ripe bananas, mashed

  • ¾ cup (70 g) oat flakes

  • ½ cup (150 g) plain or Greek yogurt

  • ¼ cup (50 g) condensed milk

  • 3 tablespoons unsweetened cocoa powder

  • 1 teaspoon baking powder

  • 40 g (1.4 oz) chocolate, chopped or chocolate chips

  • Walnuts, roughly chopped (optional)


Instructions

1. Prepare the Wet Mixture

Place the bananas in a medium mixing bowl and mash thoroughly with a fork until mostly smooth.
Add the yogurt and condensed milk. Stir until the mixture is evenly combined and creamy in consistency.


2. Add the Dry Ingredients

Add the oat flakes, cocoa powder, and baking powder to the bowl.
Mix gently with a spatula until the batter is evenly blended and no dry cocoa remains.


3. Incorporate the Chocolate and Nuts

Fold in about half of the chopped chocolate and walnuts, if using.
Mix just until distributed to avoid overworking the batter.


4. Prepare the Baking Dish

Preheat the oven to 180°C (350°F).
Line a small square or rectangular baking dish with parchment paper or lightly grease it.

Pour the batter into the prepared dish and spread it evenly.
Scatter the remaining chocolate and walnuts over the surface.


5. Bake

Place the dish in the preheated oven and bake for 35–40 minutes, or until the edges are set and a toothpick inserted into the center comes out mostly clean with a few moist crumbs.


6. Cool and Serve

Remove the cake from the oven and allow it to cool in the pan for at least 15 minutes before slicing. This resting time helps the oats firm up and improves the final texture.


Helpful Notes

  • For a smoother texture, the oats can be blended briefly before mixing.

  • The cake will become firmer as it cools.

  • Store leftovers in an airtight container in the refrigerator for up to 3 days.

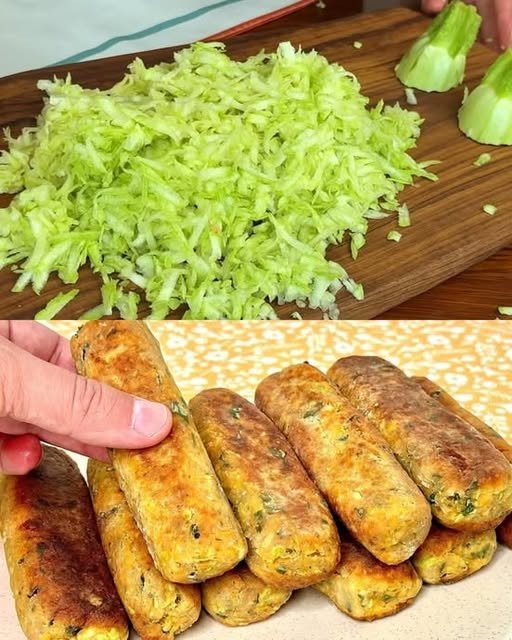
Crispy Zucchini and Oatmeal Patties

Crispy Zucchini and Oatmeal Patties

These savory vegetable patties are crisp on the outside and tender on the inside. Made with grated vegetables, oats, eggs, and cheese, they are simple to prepare and can be baked or pan-cooked depending on your preference. They work well as a snack, side dish, or light meal.

Prep Time

15 minutes

Cook Time

20–25 minutes

Yield

Makes approximately 8–10 patties


Ingredients

  • 1 large zucchini, grated

  • 1 medium potato, grated

  • 1 medium carrot, grated

  • 2 large eggs, lightly beaten

  • 5 tablespoons quick oats (rolled oats can be used but should be finely crushed)

  • 100 g (3.5 oz) cheese, grated (cheddar, mozzarella, or feta all work well)

  • 2 tablespoons fresh parsley, finely chopped

  • ½ teaspoon sweet paprika

  • ½ teaspoon dried Italian herbs

  • ½ teaspoon garlic powder

  • Salt, to taste

  • Black pepper, to taste

  • Olive oil, for brushing or light frying


Instructions

1. Prepare and Drain the Vegetables

Grate the zucchini, potato, and carrot using a box grater or food processor. Transfer the grated vegetables to a clean kitchen towel or fine-mesh strainer. Sprinkle lightly with salt and let them rest for about 5 minutes.
After resting, firmly squeeze out as much liquid as possible. Removing excess moisture helps the patties hold their shape and cook evenly.


2. Combine the Base Ingredients

Place the drained vegetables into a large mixing bowl. Add the beaten eggs and oatmeal. Stir well until everything is evenly combined.
Let the mixture rest for 5–10 minutes so the oats soften and absorb moisture, helping bind the mixture without additional flour.


3. Add Seasonings and Cheese

Add the grated cheese, chopped parsley, paprika, dried Italian herbs, and garlic powder. Season with salt and black pepper to taste.
Mix thoroughly until the ingredients are evenly distributed and the mixture holds together when pressed.


4. Shape the Patties

Using your hands or a spoon, portion the mixture evenly. Shape into short logs or flatten into round patties, depending on your preference. Press gently to ensure they are compact but not overly dense.


5. Cooking Methods

Oven Method (Most Even Cooking)

  • Preheat the oven to 200°C (400°F).

  • Line a baking tray with parchment paper.

  • Arrange the patties with space between them.

  • Lightly brush or spray the tops with olive oil.

  • Bake for 20–25 minutes, turning halfway through, until both sides are golden and firm to the touch.

Pan Method

  • Heat a small amount of olive oil in a non-stick skillet over medium heat.

  • Cook the patties for 4–5 minutes per side, turning carefully, until golden brown and cooked through.


Serving Ideas

  • Serve warm with a garlic yogurt sauce, plain yogurt, or sour cream

  • Pair with a fresh green salad

  • Enjoy as a sandwich filling or wrap component


Helpful Tips

  • If the mixture feels too loose, add 1–2 extra tablespoons of oats and rest for a few minutes

  • For extra crispness, brush both sides lightly with oil

  • These patties can be refrigerated (uncooked) for up to 24 hours

Cheesy Beef Puff Pastry Rolls – Easy Recipe

Cheesy Beef Puff Pastry Rolls—Easy Recipe

✅ Ingredients (8 pieces)

  • 2 sheets puff pastry, thawed
  • 300 g ground beef
  • 1 small onion, finely chopped
  • 2 cloves garlic, minced
  • 1 cup shredded cheese (cheddar or mozzarella)
  • 2 tbsp chopped green onions
  • 1 tsp paprika
  • ½ tsp black pepper
  • ½ tsp salt
  • ½ tsp cumin (optional)
  • 1 tbsp oil
  • 1 egg yolk + 1 tsp milk (for brushing)

✅ Instructions

  1. Cook the filling
    Heat oil in a pan, sauté onion until soft. Add garlic and beef. Cook until browned.
    Season with salt, pepper, paprika, and cumin. Let cool slightly.
  2. Prepare the pastry
    Cut each puff pastry sheet into 4 rectangles.
  3. Fill
    Add beef mixture, cheese, and green onions on one side of each rectangle.
  4. Fold & seal
    Fold over, seal edges with a fork.
  5. Brush
    Brush tops with egg wash for a shiny golden finish.
  6. Bake
    Bake at 200°C (400°F) for 18–22 minutes until golden and puffed.

✅ Serving Ideas

  • With garlic sauce
  • With ketchup or chili sauce
  • As party snacks
  • For dinner with salad

🔁 Variations

  • Add mushrooms
  • Use chicken instead of beef
  • Add jalapeños for spicy version

🥩 Steak & Creamy Mushroom Duo

🥩 Steak & Creamy Mushroom Duo

The Ultimate Comfort Plate

A satisfying trio of juicy steak in creamy mushroom sauce, fluffy mashed potatoes, and a fresh crunchy chicken salad—restaurant-style comfort made at home.


🥩 1. Juicy Steak with Creamy Mushroom Sauce

Ingredients

  • 2 steaks (sirloin, ribeye, or striploin)

  • 1 tbsp olive oil

  • 1 tbsp butter

  • 1 cup mushrooms, sliced

  • 1 garlic clove, minced

  • ½ cup beef broth

  • ¼ cup cooking cream

  • Salt & black pepper, to taste

Instructions

  1. Season steaks generously with salt and pepper.

  2. Heat olive oil and butter in a hot pan.

  3. Sear steaks for 2–4 minutes per side (depending on thickness). Remove and rest.

  4. In the same pan, sauté mushrooms until golden. Add garlic and cook briefly.

  5. Pour in beef broth and simmer for 2–3 minutes.

  6. Add cream and cook until the sauce thickens.

  7. Return steaks to the pan and coat them well in the sauce. Simmer 1 minute, then turn off heat.


🥔 2. Fluffy Mashed Potatoes

Ingredients

  • 4 medium potatoes, boiled and peeled

  • 2 tbsp butter

  • ¼ cup warm milk

  • Salt & black pepper

  • Fresh parsley, chopped

Instructions

  1. Mash potatoes while hot.

  2. Add butter and warm milk gradually.

  3. Season with salt and pepper.

  4. Finish with fresh parsley for flavor and color.


🥗 3. Crunchy Chicken Salad

Ingredients

  • 1 cup cooked chicken, diced

  • Chopped lettuce

  • Grated carrots

  • Shredded cabbage

Dressing

  • 2 tbsp mayonnaise

  • 1 tbsp yogurt

  • Salt & black pepper

Instructions

  1. Combine chicken and vegetables in a bowl.

  2. Mix dressing ingredients separately.

  3. Toss everything together until lightly coated.


🍽️ To Serve

Plate the creamy steak beside a generous scoop of mashed potatoes and a refreshing chicken salad. Serve warm and enjoy a complete comfort meal.

Classic Sponge Cake

Classic Sponge Cake

A light, airy cake made with whipped eggs and minimal fat

This sponge cake relies on properly beaten eggs to create structure and volume. The result is a soft, fine-crumb cake that can be served plain or paired with fruit, cream, or light glazes.

Prep Time: 15 minutes
Bake Time: 30–35 minutes
Cooling Time: 15 minutes
Servings: 8–10
Pan Size: 8-inch (20 cm) square or round pan
Oven Temperature: 325°F (165°C)


Ingredients

  • 4 large eggs, room temperature

  • ¾ cup (150 g) granulated sugar

  • ¾ cup (90 g) cake flour, sifted

  • ¼ teaspoon salt

  • 1 teaspoon vanilla extract

  • 2 tablespoons milk, warm (optional, for extra moisture)


Step-by-Step Instructions

1. Prepare the Pan and Oven

  • Preheat the oven to 325°F (165°C).

  • Line the bottom of the baking pan with parchment paper.

  • Do not grease the sides; this helps the cake rise evenly.


2. Whip the Eggs and Sugar

  • In a large heat-safe bowl, combine the eggs and granulated sugar.

  • Place the bowl over a pot of gently simmering water.

  • Whisk constantly until the mixture is warm to the touch (about 100–105°F / 38–40°C).
    This helps the eggs whip to a higher volume.

  • Remove from heat and beat with an electric mixer on high speed for 5–7 minutes, until:

    • The mixture becomes pale

    • It triples in volume

    • It forms thick ribbons when lifted


3. Add Flavoring

  • Gently mix in the vanilla extract.

  • If using milk, stir it in carefully at this stage.


4. Fold in Dry Ingredients

  • Sift the cake flour and salt together.

  • Add the dry ingredients in 2–3 additions, folding gently with a spatula.

  • Use a light hand and a folding motion to avoid deflating the batter.


5. Transfer to Pan

  • Pour the batter into the prepared pan.

  • Smooth the top gently.

  • Tap the pan lightly once to release large air bubbles.


6. Bake

  • Bake in the center of the oven for 30–35 minutes, or until:

    • The top is lightly golden

    • The cake springs back when touched

    • A toothpick inserted in the center comes out clean


7. Cool

  • Remove the cake from the oven.

  • Let it cool in the pan for 10–15 minutes.

  • Run a knife around the edges and turn out onto a wire rack to cool completely.


Serving Suggestions

  • Slice and serve plain with tea or coffee

  • Dust lightly with powdered sugar

  • Serve with fruit and whipped cream

  • Use as a base for layered or filled cakes


Helpful Tips

  • Room-Temperature Eggs: Essential for proper volume.

  • Gentle Folding: Prevents the batter from losing air.

  • Accurate Measuring: Use spoon-and-level method for flour.

  • Pan Size: A deeper pan may require a slightly longer bake time.

Hash Brown Breakfast Casserole

Hash Brown Breakfast Casserole

A make-ahead baked dish with potatoes, sausage, eggs, and cheese

This baked breakfast casserole combines shredded potatoes, cooked sausage, eggs, and cheese into a single dish that can be assembled ahead of time and baked when needed. It works well for family breakfasts, guests, or occasions where advance preparation is helpful.

Prep Time: 20 minutes
Bake Time: 45–55 minutes
Optional Chill Time: Up to 24 hours
Servings: 8–10
Pan Size: 9 × 13 inch (23 × 33 cm)


Ingredients

Main Ingredients

  • 1 lb (450 g) frozen hash browns, thawed
    (shredded or diced both work)

  • 1 lb (450 g) breakfast sausage

  • 8 large eggs

  • 1½ cups milk (whole or 2%)

  • 2 cups shredded cheese
    (cheddar, Colby-Jack, or a blend)

Seasonings

  • 1 teaspoon salt

  • ½ teaspoon black pepper

  • ½ teaspoon garlic powder (optional)

  • ½ teaspoon onion powder (optional)

Optional Add-Ins

  • ½ cup chopped bell peppers

  • ¼ cup finely chopped onion

  • ½ cup cooked mushrooms

  • ¼ teaspoon paprika or dried herbs


Step-by-Step Instructions

1. Prepare the Pan

  • Lightly grease a 9×13 inch baking dish with oil or butter.

  • Set aside.


2. Cook the Sausage

  • Heat a skillet over medium heat.

  • Add the sausage and cook, breaking it into small pieces.

  • Cook until fully browned and no longer pink.

  • Drain excess fat and let cool slightly.


3. Layer the Hash Browns

  • Spread the thawed hash browns evenly across the bottom of the prepared baking dish.

  • Press lightly to form an even layer.


4. Add Sausage and Cheese

  • Sprinkle the cooked sausage evenly over the potatoes.

  • Spread 1½ cups of the shredded cheese over the sausage layer.


5. Mix the Egg Custard

  • In a large bowl, whisk together:

    • Eggs

    • Milk

    • Salt

    • Pepper

    • Optional seasonings

  • Whisk until fully blended and smooth.


6. Assemble the Casserole

  • Pour the egg mixture evenly over the layered ingredients.

  • Gently tap the dish on the counter to help the mixture settle.

  • Sprinkle the remaining ½ cup cheese evenly over the top.


7. Bake or Chill

To bake immediately:

  • Preheat oven to 350°F (175°C).

  • Bake uncovered for 45–55 minutes, until:

    • Center is set

    • Top is lightly golden

    • A knife inserted in the center comes out clean

To prepare ahead:

  • Cover tightly and refrigerate for up to 24 hours.

  • When ready to bake, remove from the refrigerator 15–20 minutes before baking.

  • Bake as directed, adding 5–10 minutes if needed.


8. Rest and Serve

  • Let the casserole rest for 10 minutes before slicing.

  • Cut into squares and serve warm.


Helpful Tips

  • Even Cooking: Thaw and drain hash browns well to avoid excess moisture.

  • Cheese Choices: A mix of sharp and mild cheese adds balanced flavor.

  • Clean Slices: Use a sharp knife and wipe between cuts.

  • Pan Depth: A deeper dish may need slightly longer baking time.


Storage

  • Refrigerate leftovers in a covered container for up to 3 days.

  • Reheat individual portions in the oven or microwave.

  • Freezing is possible, though texture may soften slightly after reheating.

Texas Toast Sloppy Joes

A hearty, open-faced upgrade to the classic American sandwich. Thick, buttery garlic toast provides the perfect sturdy base for a tangy, savory beef filling.

  • Prep time: 15 minutes

  • Cook time: 20 minutes

  • Servings: 6

Ingredients

The Filling:

  • 1 lb (450g) ground beef (80/20 is recommended for flavor)

  • 1 small onion, finely diced

  • 1 small green bell pepper, diced

  • 2 cloves garlic, minced

  • 1 cup tomato sauce (or canned crushed tomatoes)

  • 1/4 cup ketchup

  • 1/4 cup tomato paste (optional, for a richer sauce)

  • 2 tbsp Worcestershire sauce

  • 1 tbsp brown sugar

  • 1 tsp mustard (yellow or Dijon)

  • 1/2 tsp salt (or to taste)

  • 1/2 tsp black pepper

  • 1/2 tsp chili powder & 1/2 tsp smoked paprika (optional spices)

The Base & Topping:

  • 6 slices frozen Texas toast garlic bread

  • 1 ½ cups shredded cheese (Cheddar, Mozzarella, or Colby Jack)

  • Optional garnish: Chopped fresh parsley or green onions


Instructions

  1. Bake the Toast: Preheat your oven according to the Texas toast package directions (usually 425°F / 220°C). Bake the bread for about 6–8 minutes per side until golden and slightly crisp.

  2. Brown the Beef: While the bread bakes, heat a large skillet over medium-high heat. Add the ground beef and cook until fully browned, breaking it up with a spoon. Drain any excess grease.

  3. Sauté the Aromatics: Add the diced onion, green pepper, and garlic to the skillet. Cook for 3–5 minutes until the vegetables are softened and the garlic is fragrant.

  4. Simmer the Sauce: Stir in the tomato sauce, ketchup (tomato paste if using), Worcestershire sauce, brown sugar, mustard, salt, and pepper. Reduce the heat to medium-low and let it simmer for 10–12 minutes, stirring occasionally, until the sauce has thickened to your liking.

  5. Assemble: Arrange the baked Texas toast slices on a baking sheet. Spoon a generous amount of the beef mixture onto each slice.

  6. Melt the Cheese: Top each slice with a handful of shredded cheese. Return the baking sheet to the oven (or under a broiler) for 2–4 minutes until the cheese is melted, bubbly, and slightly browned.

  7. Serve: Garnish with parsley or green onions and serve immediately.


Pro-Tips for Success

  • Make it Ahead: You can prepare the beef filling up to 2 days in advance. Just reheat it on the stove with a splash of water before assembling it on fresh toast.

  • Spice it Up: For a kick, add diced jalapeños with the onions or a few dashes of your favorite hot sauce into the simmering mixture.

  • Custom Proteins: This recipe works excellently with ground turkey or chicken for a lighter version, or even cooked lentils for a vegetarian option.

Baked Oatmeal Apple Circles

Baked Oatmeal Apple Circles

Naturally Sweet • Soft-Baked • Simple Ingredients

These apple oatmeal circles are lightly sweet, tender, and satisfying. Made with oats, almonds, and fresh apples, they’re ideal as a breakfast bite, snack, or light dessert—and they store well for easy planning ahead.

Prep Time: 15 minutes
Bake Time: 20–25 minutes
Yield: 6–8 circles


Ingredients

  • 1 cup (90 g) rolled oats or quick oats

  • 50 g raw almonds (about ½ cup)

  • 2 large apples, peeled and cut into chunks

  • 50 ml water (about 3 tablespoons)

  • ½ teaspoon vanilla extract (or a small pinch of vanillin)

  • Optional: a light sprinkle of cinnamon


Step-by-Step Instructions

1. Make the Dry Base

Add the oats and almonds to a blender or food processor.

Blend until the mixture becomes fine and flour-like, with no large pieces remaining.

Transfer this dry mixture to a mixing bowl and set aside.


2. Prepare the Apple Purée

Without washing the blender, add the apple chunks, water, and vanilla extract.

Blend until the mixture becomes smooth and pourable, similar to applesauce.

This purée provides natural sweetness and moisture.


3. Combine and Rest

Pour the apple purée into the bowl with the oat–almond mixture.

Stir until a thick, soft dough forms.

Let the mixture rest for about 5 minutes.
This allows the oats to absorb moisture and makes the dough easier to shape.


4. Shape the Circles

Preheat the oven to 180°C (350°F).

Line a baking tray with parchment paper.

Scoop about 2 tablespoons of dough onto the tray for each piece.

Gently flatten into a round disc about ½ inch (1–1.5 cm) thick.

Using your finger or the handle of a wooden spoon, press a small hole into the center to form a ring shape.

If using cinnamon, lightly sprinkle it over the tops.


5. Bake

Place the tray in the preheated oven.

Bake for 20–25 minutes, until:

  • The circles feel set to the touch

  • The bottoms are lightly golden

Remove from the oven and let them cool completely on the tray.
They will become firmer as they cool.


Helpful Tips for Best Results

  • Apple Variety: Naturally sweet apples (such as Gala or Fuji) give the best flavor without added sweeteners.

  • Optional Sweetness: If you prefer a sweeter treat, add 1 tablespoon honey or maple syrup to the apple purée before mixing.

  • Texture Choice: For extra texture, sprinkle a few chopped almonds on top before baking.

  • Cooling Time: Allow full cooling for the best structure and easy handling.

Homemade Mussel-Shaped Butter Bread

Homemade Mussel-Shaped Butter Bread

Soft Crumb • Rich Buttery Flavor • Beautiful Golden Finish

This tender bread is light, fluffy, and delicately shaped to resemble a shell. It’s perfect for breakfast, sandwiches, or serving warm with butter and tea.

Prep Time: 20 minutes
Rising Time: About 1½ hours
Bake Time: 20–30 minutes
Yield: 2 small loaves or 10–12 rolls


Ingredients

  • 80 g butter, melted and slightly cooled

  • 500 g bread flour (about 4 cups)

  • 250 ml warm milk (comfortably warm to the touch)

  • 1 large egg, at room temperature

  • 2 tablespoons granulated sugar

  • 7 g dry yeast (1 standard packet)

  • 1 teaspoon salt

For the Topping

  • 1 egg yolk

  • 1 tablespoon milk


Step-by-Step Instructions

1. Activate the Yeast

Pour the warm milk into a large mixing bowl.

Add the sugar and dry yeast, then whisk gently to combine.

Let the mixture rest for 5–10 minutes, until it looks foamy and slightly bubbly.
This shows the yeast is active and ready.


2. Mix the Dough

Add the melted butter, egg, and salt to the yeast mixture. Stir until well blended.

Gradually add the bread flour, mixing with a spoon or spatula until a soft, shaggy dough forms.

Once the dough begins to come together, it’s ready for kneading.


3. Knead and First Rise

Transfer the dough to a lightly floured surface.

Knead for 8–10 minutes, pushing the dough away with the heel of your hand, then folding it back over itself.

The dough should become smooth, stretchy, and pleasant to handle.

Place the dough in a lightly greased bowl, turning once to coat the surface.

Cover with a clean cloth and let it rest in a warm place for about 1 hour, or until it has noticeably increased in size.


4. Shape the Bread

Gently press the dough to release excess air.

Divide it into 2 equal portions for small loaves, or into smaller pieces if making rolls.

For the mussel (shell) shape:

  • Roll each piece into a ball

  • Flatten gently into an oval

  • Fold one side over the other to create a layered shell look

Place the shaped dough on a lined baking tray or into greased pans.

Cover lightly and let rest for 30 minutes, allowing the shapes to puff slightly.


5. Bake

Preheat your oven to 180°C (350°F).

Mix the egg yolk with 1 tablespoon of milk.

Brush the tops of the bread gently with this mixture to give a glossy, golden finish.

Bake:

  • 25–30 minutes for loaves

  • 15–20 minutes for rolls

The bread is ready when the tops are golden and the loaf feels light when lifted.


6. Cool and Serve

Remove the bread from the pans promptly and place on a wire rack.

Allow it to cool slightly before slicing to keep the texture soft and even.


Helpful Tips for Best Results

  • Milk Temperature: Milk should feel warm but comfortable to the touch to support yeast activity.

  • Butter Choice: A good-quality butter adds extra richness and softness to the crumb.

  • Even Baking: If the top browns too quickly, loosely cover with foil for the final minutes.

  • Storage: Store at room temperature in a sealed container for up to 2 days, or freeze once fully cooled.


Serving Ideas

This bread is delicious:

  • Warm with butter or honey

  • As sandwich bread

  • Served alongside soups or stews

  • Lightly toasted the next day