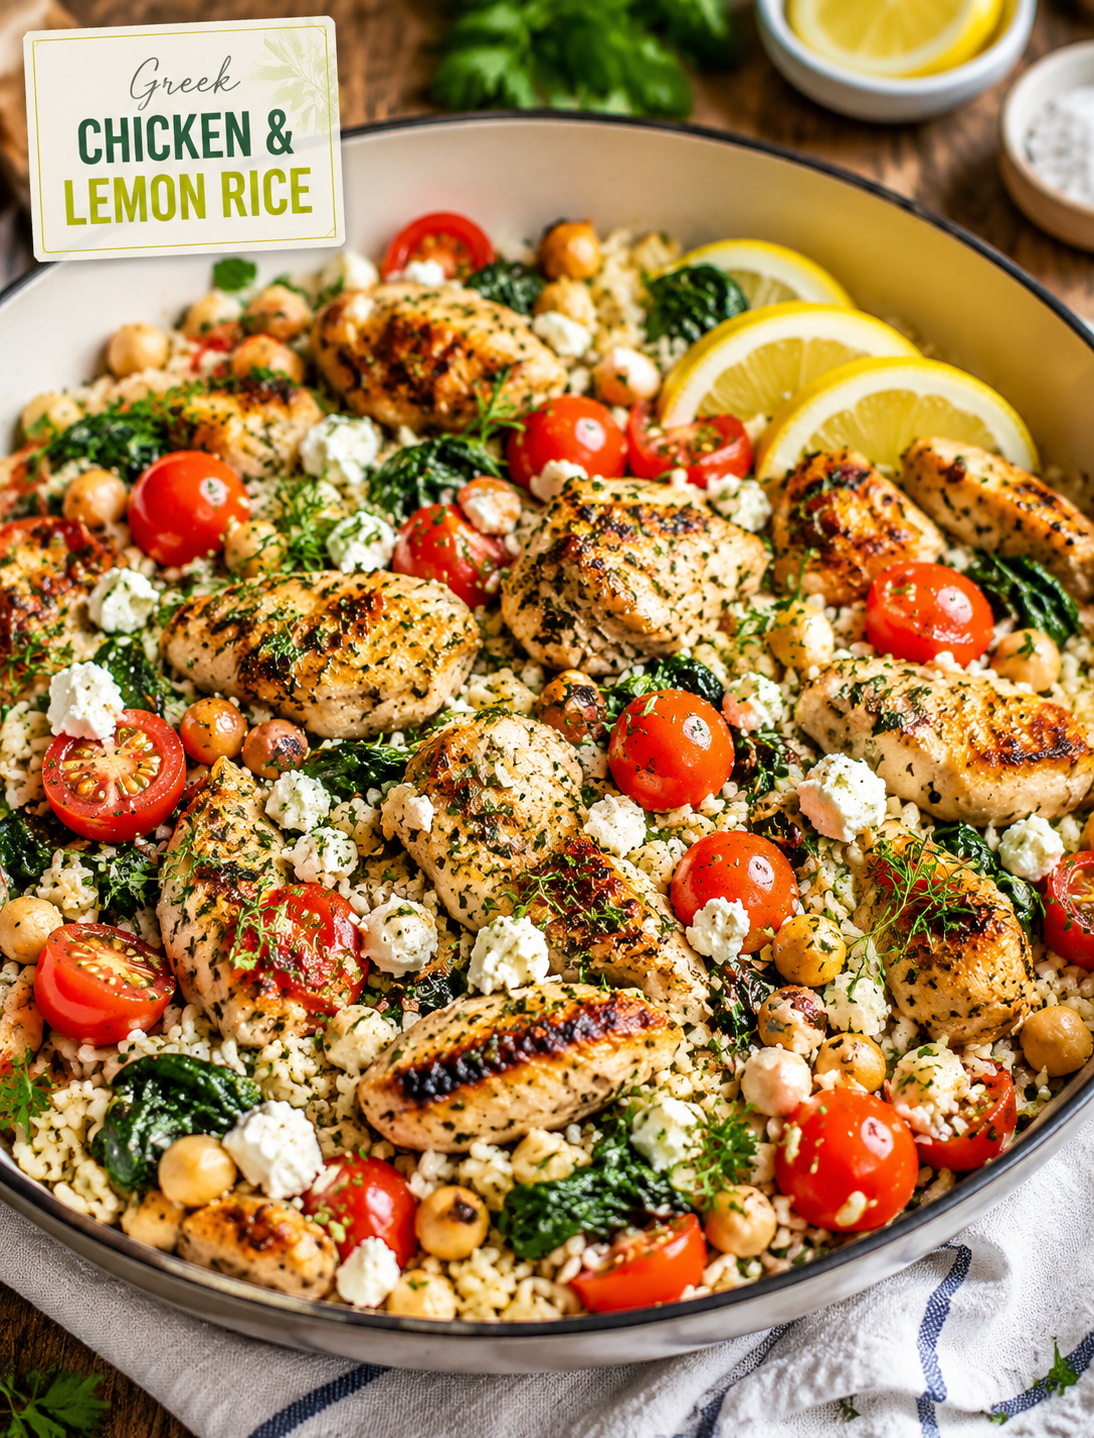
Greek Chicken and Lemon Rice (One-Pot Dinner)

Greek Chicken and Lemon Rice (One-Pot Dinner)

What is Greek Chicken and Lemon Rice?

This Mediterranean dinner recipe is a bright, flavorful, and comforting Mediterranean-inspired one-pot dinner that brings together juicy seasoned chicken, fluffy lemon-infused rice, fresh vegetables, herbs, and classic Greek flavors. This easy homemade meal is perfect for busy weeknights because everything cooks together in one skillet, creating incredible layers of flavor with minimal cleanup.

What Makes this recipe Special?

Inspired by traditional Greek cuisine, this recipe combines tender chicken with aromatic garlic, fresh lemon juice, oregano, olive oil, and perfectly cooked rice. The rice absorbs all the delicious chicken juices and Mediterranean seasonings while cooking, making every bite flavorful and satisfying. The addition of colorful cherry tomatoes, spinach, chickpeas, and creamy feta cheese gives this dish a restaurant-quality finish while keeping it wholesome and family-friendly.

The Recipe is ideal for meal prep, healthy family dinners, or entertaining guests. It is packed with protein, fresh ingredients, and comforting flavors that appeal to both adults and kids. Serve it straight from the skillet with extra lemon wedges, fresh herbs, and a side of Greek yogurt or a simple salad for a complete Mediterranean dinner.

Ingredients:

For the Chicken

1½ pounds boneless, skinless chicken thighs or chicken breasts, cut into bite-sized pieces

2 tablespoons extra virgin olive oil

3 cloves garlic, minced

1 tablespoon fresh lemon juice

1 tablespoon lemon zest

2 teaspoons dried oregano

1 teaspoon paprika

1 teaspoon dried thyme

1 teaspoon salt (adjust to taste)

½ teaspoon black pepper

½ teaspoon garlic powder

For the Lemon Rice

2 cups long-grain white rice or basmati rice

3½ cups chicken broth

½ cup fresh lemon juice

1 tablespoon lemon zest

1 medium yellow onion, finely chopped

3 cloves garlic, minced

2 tablespoons olive oil

1 teaspoon dried oregano

½ teaspoon salt

¼ teaspoon black pepper

Greek Vegetable Toppings

1 cup cherry tomatoes, halved

1 cup cooked chickpeas

2 cups fresh spinach

½ cup crumbled feta cheese

¼ cup chopped fresh parsley

2 tablespoons fresh dill (optional)

Extra lemon wedges for serving

How to make Greek Chicken Lemon Rice?

Step-by-Step Instructions:

1. Prepare the Chicken Marinade

Start by seasoning the chicken to build the Mediterranean flavor. In a large bowl, combine olive oil, minced garlic, lemon juice, lemon zest, oregano, paprika, thyme, salt, black pepper, and garlic powder.

Add the chicken pieces and toss until every piece is evenly coated. Allow the chicken to marinate for at least 15–20 minutes. If you have extra time, letting it sit for a few hours in the refrigerator will create even deeper flavor.

2. Sear the Chicken

Heat a large oven-safe skillet or Dutch oven over medium-high heat. Add olive oil and place the seasoned chicken pieces into the hot pan.

Cook the chicken for about 4–5 minutes per side until golden brown. The chicken does not need to be fully cooked at this stage because it will continue cooking with the rice.

Remove the chicken from the skillet and set aside. Keep the flavorful browned bits in the pan because they will add amazing taste to the rice.

3. Cook the Aromatic Base

Reduce heat to medium. Add two tablespoons of olive oil to the same skillet.

Add chopped onion and sauté for 3–4 minutes until soft and slightly golden. Stir in minced garlic and cook for another 30 seconds until fragrant.

The combination of onion, garlic, and chicken juices creates the perfect Mediterranean flavor foundation.

4. Prepare the Lemon Rice

Add uncooked rice to the skillet and stir for 1–2 minutes. Toasting the rice lightly helps create a nuttier flavor and prevents the grains from becoming mushy.

Add chicken broth, lemon juice, lemon zest, oregano, salt, and black pepper. Stir everything together and scrape the bottom of the pan to release all the flavorful browned pieces.

Bring the mixture to a gentle boil.

5. Add Chicken and Cook Together

Return the cooked chicken pieces back into the skillet. Arrange them evenly over the rice.

Cover the skillet with a lid and reduce heat to low. Allow everything to simmer for 20–25 minutes, or until the rice is tender and has absorbed the liquid.

Avoid opening the lid frequently because the steam is important for perfectly cooked rice.

6. Add Vegetables and Finish

Once the rice is cooked, gently fluff it with a fork.

Add cherry tomatoes, chickpeas, and fresh spinach. Cover again for 2–3 minutes until the spinach wilts and the tomatoes warm through.

Sprinkle generously with crumbled feta cheese, fresh parsley, and dill.

Finish with a drizzle of olive oil and fresh lemon juice before serving.

Tips for the Best Greek Chicken and Lemon Rice

Use Chicken Thighs for Extra Juiciness:
Chicken thighs stay tender and flavorful during cooking, making them an excellent choice for one-pot meals. Chicken breast can also be used, but avoid overcooking.

Do Not Skip the Lemon Zest:
Fresh lemon zest adds a stronger Mediterranean citrus flavor than lemon juice alone.

Toast the Rice:
Cooking the rice briefly in olive oil before adding liquid improves texture and gives it a delicious nutty taste.

Use Fresh Herbs When Possible:
Fresh parsley and dill bring brightness and make the dish taste fresh and authentic.

Make It Creamier:
Serve with a spoonful of Greek yogurt mixed with lemon juice and herbs for a creamy topping.

Meal Prep Friendly:
Store leftovers in an airtight container in the refrigerator for up to 4 days. Reheat with a splash of chicken broth to keep the rice moist.

Recipe Variations

Greek Chicken and Brown Rice

Replace white rice with brown rice for extra fiber. Increase cooking time because brown rice takes longer to become tender.

Vegetarian Version

Skip the chicken and add extra chickpeas, roasted vegetables, or white beans for a protein-rich vegetarian meal.

Spicy Greek Chicken Rice

Add crushed red pepper flakes or a pinch of cayenne pepper to the chicken seasoning for a spicy twist.

Low-Carb Option

Replace rice with cauliflower rice and reduce the cooking time for a lighter version.

Frequently Asked Questions (Q&A)

Can I use chicken breast instead of thighs?
Yes. Chicken breast works well, but cook carefully because it can dry out faster than thighs.

Can I make this recipe ahead of time?
Absolutely. This dish reheats beautifully and is perfect for weekly meal preparation.

Can I freeze Greek Chicken and Lemon Rice?
Yes. Store it in freezer-safe containers for up to 3 months. Thaw overnight and reheat gently.

What can I serve with this dish?
It pairs wonderfully with Greek salad, cucumber tzatziki, roasted vegetables, pita bread, or a simple side salad.

Can I use another type of rice?
Yes, basmati or jasmine rice works well. Cooking time may vary depending on the rice variety.

Servings & Nutrition Information

Servings: 6 servings

Approximate Nutrition Per Serving:

Calories: 520 kcal

Protein: 38g

Carbohydrates: 55g

Fat: 18g

Fiber: 7g

Sugar: 5g

Health Benefits

This Greek Chicken and Lemon Rice is a balanced meal that provides high-quality protein from chicken, fiber from chickpeas and vegetables, and healthy fats from olive oil and feta cheese.

The Mediterranean ingredients used in this recipe are rich in nutrients and antioxidants. Olive oil provides heart-healthy fats, spinach adds vitamins and minerals, and lemon provides vitamin C and fresh flavor without extra calories.

This one-pot dinner proves that healthy food can also be comforting, flavorful, and easy to prepare. Whether you are cooking for your family, preparing weekday meals, or looking for a Mediterranean-inspired dinner, this Greek Chicken and Lemon Rice is a recipe everyone will enjoy.
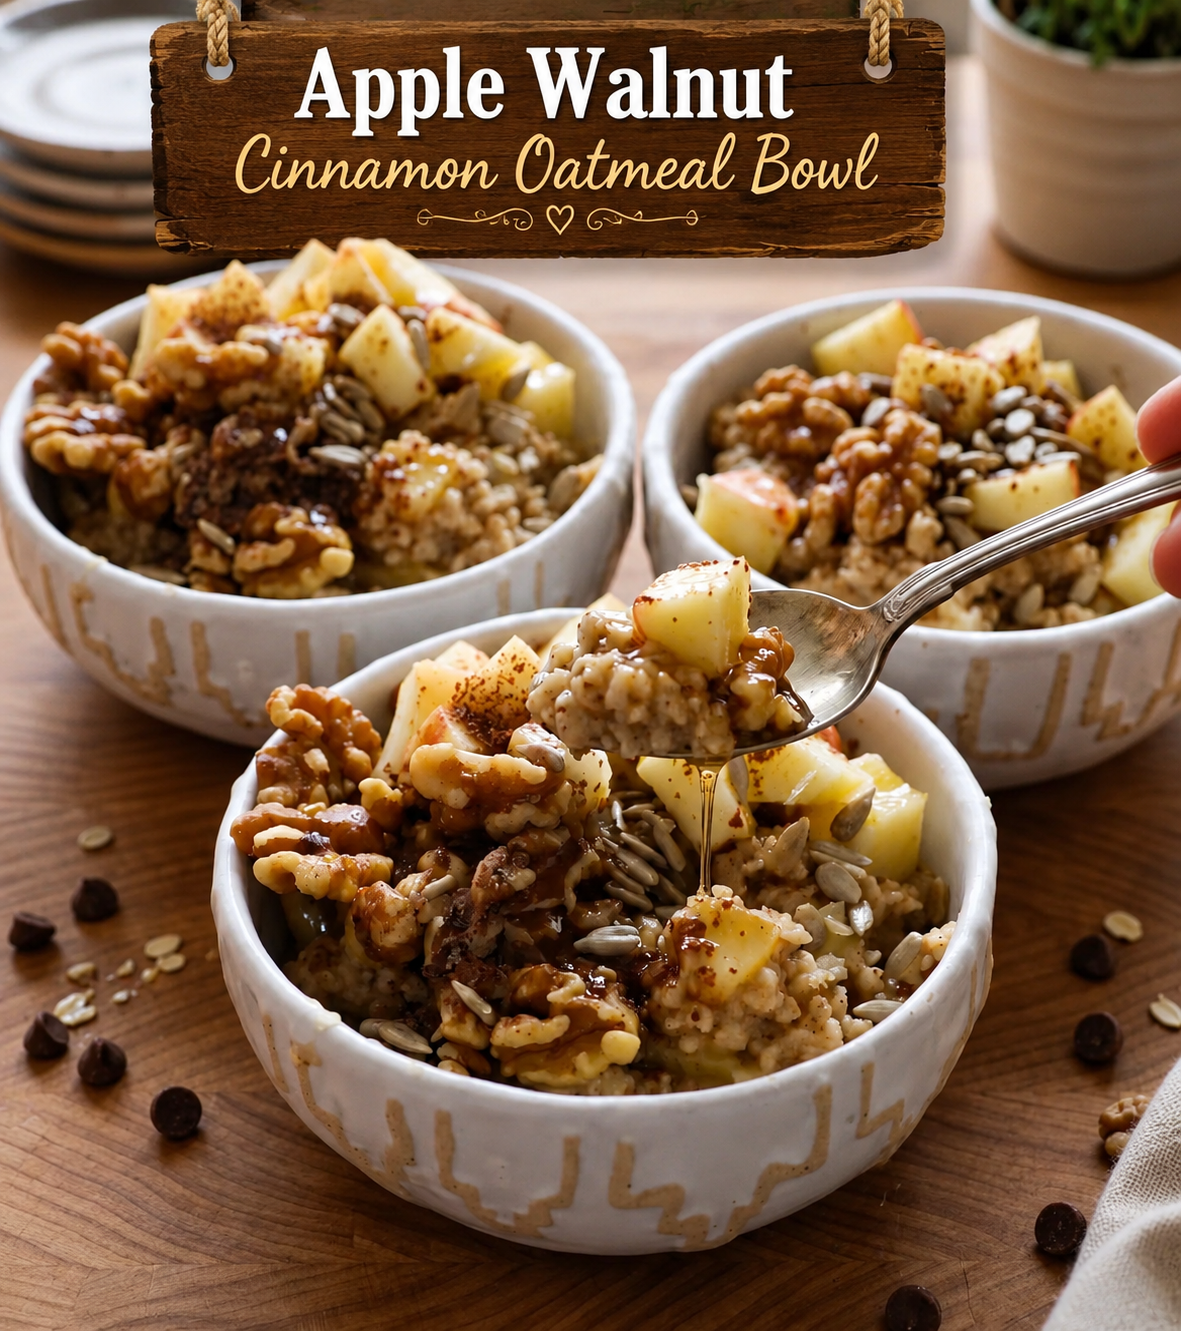

Apple Walnut Cinnamon Oatmeal Bowl

🍎 Apple Walnut Cinnamon Oatmeal Bowl


This warm and cozy oatmeal is packed with tender apples, crunchy walnuts, sunflower seeds, cinnamon, and a touch of honey or maple syrup. Perfect for a wholesome breakfast!


Ingredients

For the oatmeal:

  • 1 cup rolled oats
  • 2 cups milk or water
  • 1 medium apple, peeled and diced
  • 1/2 teaspoon cinnamon
  • 1/4 teaspoon vanilla extract
  • Pinch of salt
  • 1–2 tablespoons honey or maple syrup

For the toppings:

  • 1/3 cup walnuts, roughly chopped
  • 2 tablespoons sunflower seeds
  • 1/2 apple, diced or thinly sliced
  • 1 tablespoon raisins or dried cranberries, optional
  • 1 teaspoon chia seeds or flaxseeds, optional
  • Extra cinnamon
  • 1 teaspoon honey or maple syrup
  • 1 tablespoon peanut or almond butter, optional

Instructions

1. Cook the apples:

Add the diced apple, cinnamon, and 1 tablespoon of water to a saucepan. Cook over medium heat for 3–4 minutes until the apple starts to soften.

2. Add the oats:

Stir in the rolled oats, milk or water, vanilla, and a pinch of salt.

3. Simmer:

Bring to a gentle boil, then reduce the heat. Cook for about 5–7 minutes, stirring occasionally, until the oats become creamy and the apples are tender.

4. Sweeten:

Remove from the heat and stir in honey or maple syrup according to your taste.

5. Prepare the toppings:

Toast the walnuts and sunflower seeds in a dry skillet for 2–3 minutes over low-medium heat. Watch carefully so they don’t burn.


6. Assemble:

Spoon the warm oatmeal into bowls. Top with diced apple, toasted walnuts, sunflower seeds, raisins or dried cranberries, and a sprinkle of cinnamon.


7. Finish:

Drizzle with honey or maple syrup. Add a spoonful of almond or peanut butter if desired.


🍯 Serving Tip


For the same beautiful presentation as the photo, arrange the apple pieces and walnuts generously on top, sprinkle with sunflower seeds and cinnamon, then drizzle a little honey over everything just before serving.


Prep Time: 10 minutes

Cook Time: 7 minutes

Total Time: 17 minutes

Servings: 2

Best for: Breakfast / Healthy Snack

Fluffy Japanese Soufflé Pancakes ✨

🥞✨ Fluffy Japanese Soufflé Pancakes ✨🥞


These thick, soft, and fluffy pancakes are golden on the outside and wonderfully tender inside. Perfect for breakfast or a sweet brunch! ❤️


🛒 Ingredients

For the Pancakes:

  • 2 large eggs, separated
  • 2 tbsp whole milk
  • ½ tsp vanilla extract
  • ¼ cup all-purpose flour
  • 1 tbsp cornstarch
  • 1½ tbsp granulated sugar
  • ½ tsp baking powder
  • Pinch of salt
  • ½ tsp lemon juice
  • Butter or oil, for cooking

For Serving:

  • Powdered sugar
  • Maple syrup or honey
  • Fresh berries
  • Whipped cream
  • Butter, optional

👩‍🍳 Instructions

1. Separate the eggs

Carefully separate the egg whites from the yolks. Place the whites in a clean, dry mixing bowl.

2. Make the yolk mixture

Whisk the egg yolks with milk and vanilla until smooth.

Add the flour, cornstarch, baking powder, and salt. Mix just until combined. Don’t overmix.

3. Whip the egg whites

Add lemon juice to the egg whites and beat until foamy. Gradually add the sugar while continuing to beat.

Whip until you have stiff, glossy peaks. This is the secret to getting tall, fluffy pancakes.

4. Fold gently

Add about one-third of the whipped egg whites to the yolk batter and gently fold.

Add the remaining egg whites in two additions. Fold carefully with a spatula until just combined. Avoid stirring or overmixing, as this will deflate the air.

5. Heat the pan

Lightly grease a nonstick skillet with butter or oil. Place it over very low heat.


6. Shape the pancakes

Spoon the batter into tall, thick rounds. You can use metal ring molds for perfectly round pancakes, or simply mound the batter carefully with a spoon.


Add a few drops of water to the empty area of the pan and immediately cover with a lid. The steam helps the pancakes cook gently and stay fluffy.


7. Cook slowly

Cook for about 4–6 minutes on low heat. Carefully check the bottom— it should be golden brown.


Flip gently using a spatula. Cover again and cook for another 4–6 minutes, or until the pancakes are cooked through.


8. Serve immediately

Transfer the pancakes to a plate and dust with powdered sugar. Serve with butter, maple syrup, honey, fresh berries, or whipped cream.


💡 Tips for Extra-Fluffy Pancakes


Use room-temperature eggs for better volume.


Make sure your mixing bowl is completely clean and dry before whipping the whites.


Don’t overmix the batter after adding the meringue.


Keep the pan on very low heat so the outside doesn’t brown before the center cooks.


Always cook with the lid on to create gentle steam.


Serve immediately for the best height and texture.

🥞 Serving Idea

Stack 2–3 fluffy pancakes on a plate, add a small pat of butter, drizzle generously with maple syrup, and finish with powdered sugar and fresh berries. 😍


Save this recipe and share it with someone who loves fluffy pancakes! ❤️


#JapanesePancakes #SoufflePancakes #FluffyPancakes #PancakeRecipe #BreakfastIdeas #BrunchRecipes #EasyBreakfast #HomemadePancakes #FluffyPancakesRecipe #Foodie #BreakfastRecipe #SweetBreakfast

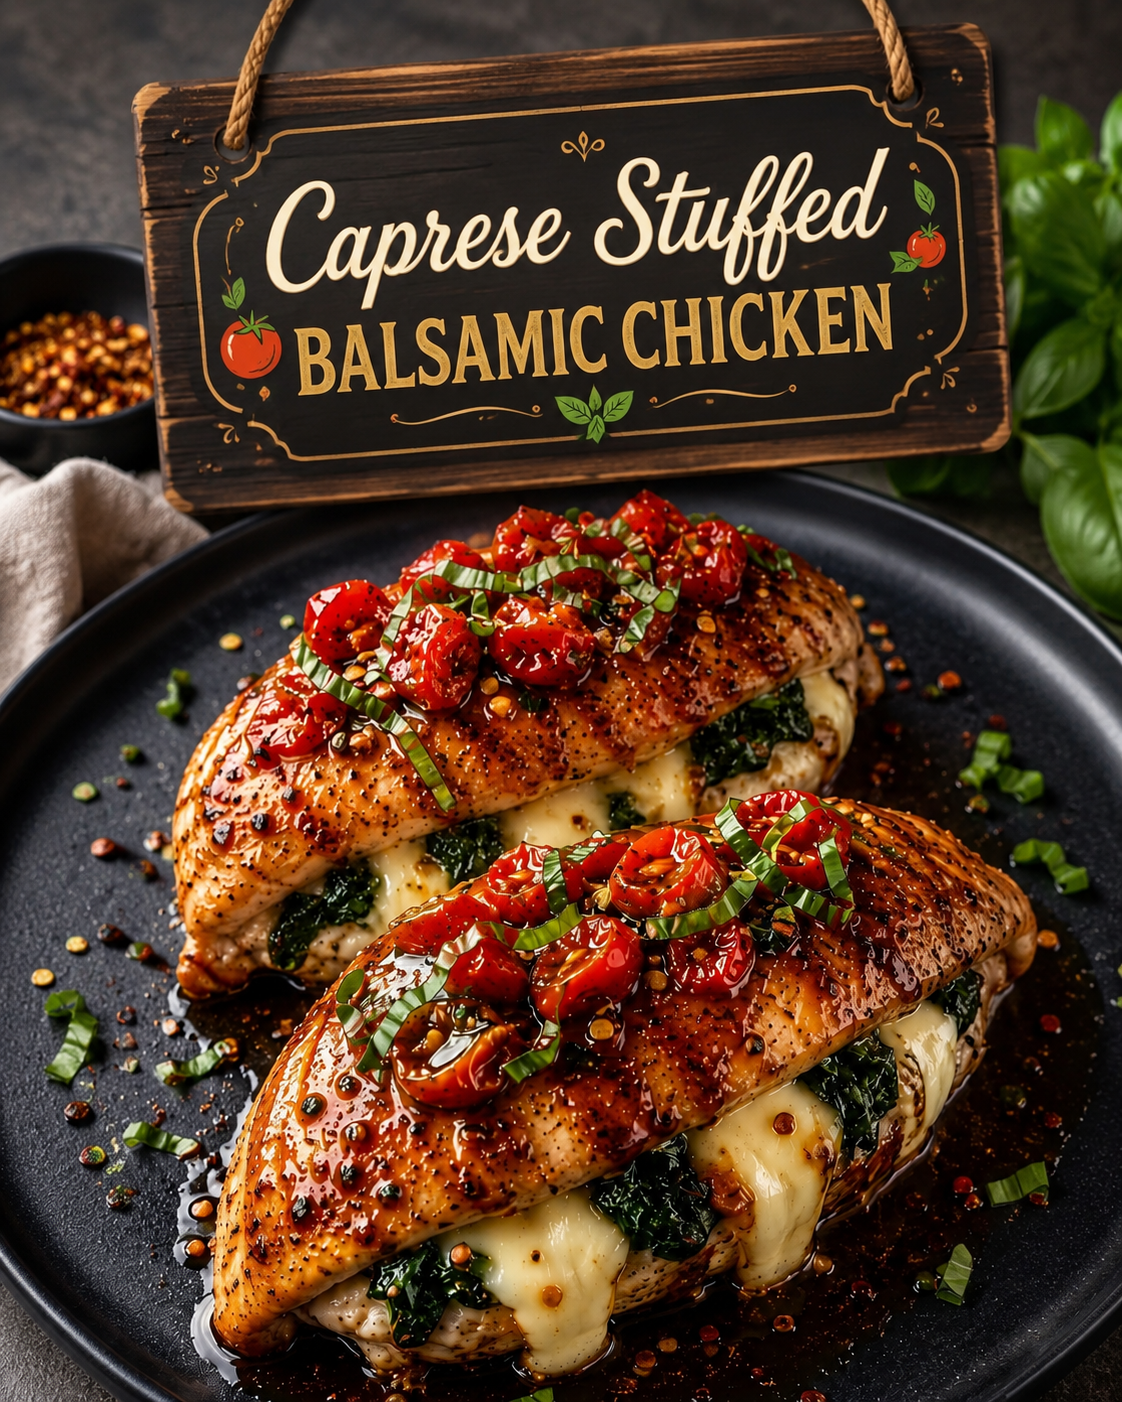
Caprese Stuffed Balsamic Chicken

🍅🧀 Caprese Stuffed Balsamic Chicken 🧀🍅


Juicy chicken breasts stuffed with creamy mozzarella, fresh spinach, and tomatoes, then finished with a sweet-tangy balsamic glaze and fresh basil. A delicious restaurant-style dinner you can easily make at home! 😍


🛒 Ingredients


For the Chicken:

  • 4 boneless, skinless chicken breasts
  • 1 tsp salt
  • 1 tsp black pepper
  • 1 tsp Italian seasoning
  • 1 tsp garlic powder
  • 1 tbsp olive oil

For the Filling:

  • 1 cup fresh spinach
  • 1 cup shredded or sliced mozzarella cheese
  • ½ cup cherry tomatoes, halved
  • ¼ cup fresh basil leaves, chopped
  • 2 cloves garlic, minced
  • 1 tbsp olive oil
  • ¼ tsp salt
  • ¼ tsp black pepper

For the Balsamic Glaze:

  • ½ cup balsamic vinegar
  • 1–2 tbsp honey or brown sugar
  • 1 tbsp olive oil
  • 1 garlic clove, minced


For Topping:

  • Extra cherry tomatoes
  • Fresh basil
  • Red pepper flakes, optional
  • Parmesan cheese, optional

👩‍🍳 Instructions


1. Prepare the chicken

Preheat your oven to 400°F (200°C). Pat the chicken breasts dry. Carefully cut a pocket horizontally into the thickest part of each chicken breast, making sure not to cut all the way through.


2. Season

Rub the chicken with olive oil, salt, black pepper, Italian seasoning, and garlic powder. Set aside while you prepare the filling.

3. Make the filling

Heat 1 tablespoon olive oil in a skillet over medium heat. Add minced garlic and spinach. Cook for 1–2 minutes, just until the spinach wilts. Remove from heat and let it cool slightly.


Mix the spinach with mozzarella, cherry tomatoes, fresh basil, salt, and pepper.


4. Stuff the chicken

Generously fill each chicken pocket with the mozzarella-spinach mixture. Secure the openings with toothpicks if needed.


5. Sear the chicken

Heat an oven-safe skillet over medium-high heat with a little olive oil. Sear the stuffed chicken for about 2–3 minutes per side, until beautifully golden brown.


6. Bake

Transfer the skillet to the preheated oven and bake for approximately 15–20 minutes, depending on the thickness of the chicken. Cook until the internal temperature reaches 165°F (74°C).


7. Make the balsamic glaze

While the chicken cooks, add balsamic vinegar, honey or brown sugar, olive oil, and minced garlic to a small saucepan. Bring to a gentle simmer and cook for 5–8 minutes, stirring occasionally, until slightly thickened.


8. Finish & serve

Remove the chicken from the oven and let it rest for 5 minutes. Drizzle generously with the balsamic glaze. Top with fresh tomatoes, basil, and a sprinkle of red pepper flakes.


❤️ Serving Suggestion


Serve with roasted vegetables, garlic mashed potatoes, pasta, rice, or a crisp green salad. The melted mozzarella and balsamic glaze make every bite irresistible!


🔥 Pro Tip: Don’t overcook the chicken. Use a meat thermometer and remove it from the oven once the thickest part reaches 165°F (74°C).


Save this recipe for your next easy dinner! 🍅🧀🌿


#CapreseChicken #StuffedChicken #BalsamicChicken #ChickenRecipes #EasyDinner #DinnerIdeas #ItalianInspired #MozzarellaChicken #HealthyDinner #HomeCooking #Foodie #RecipeOfTheDay #EasyRecipes

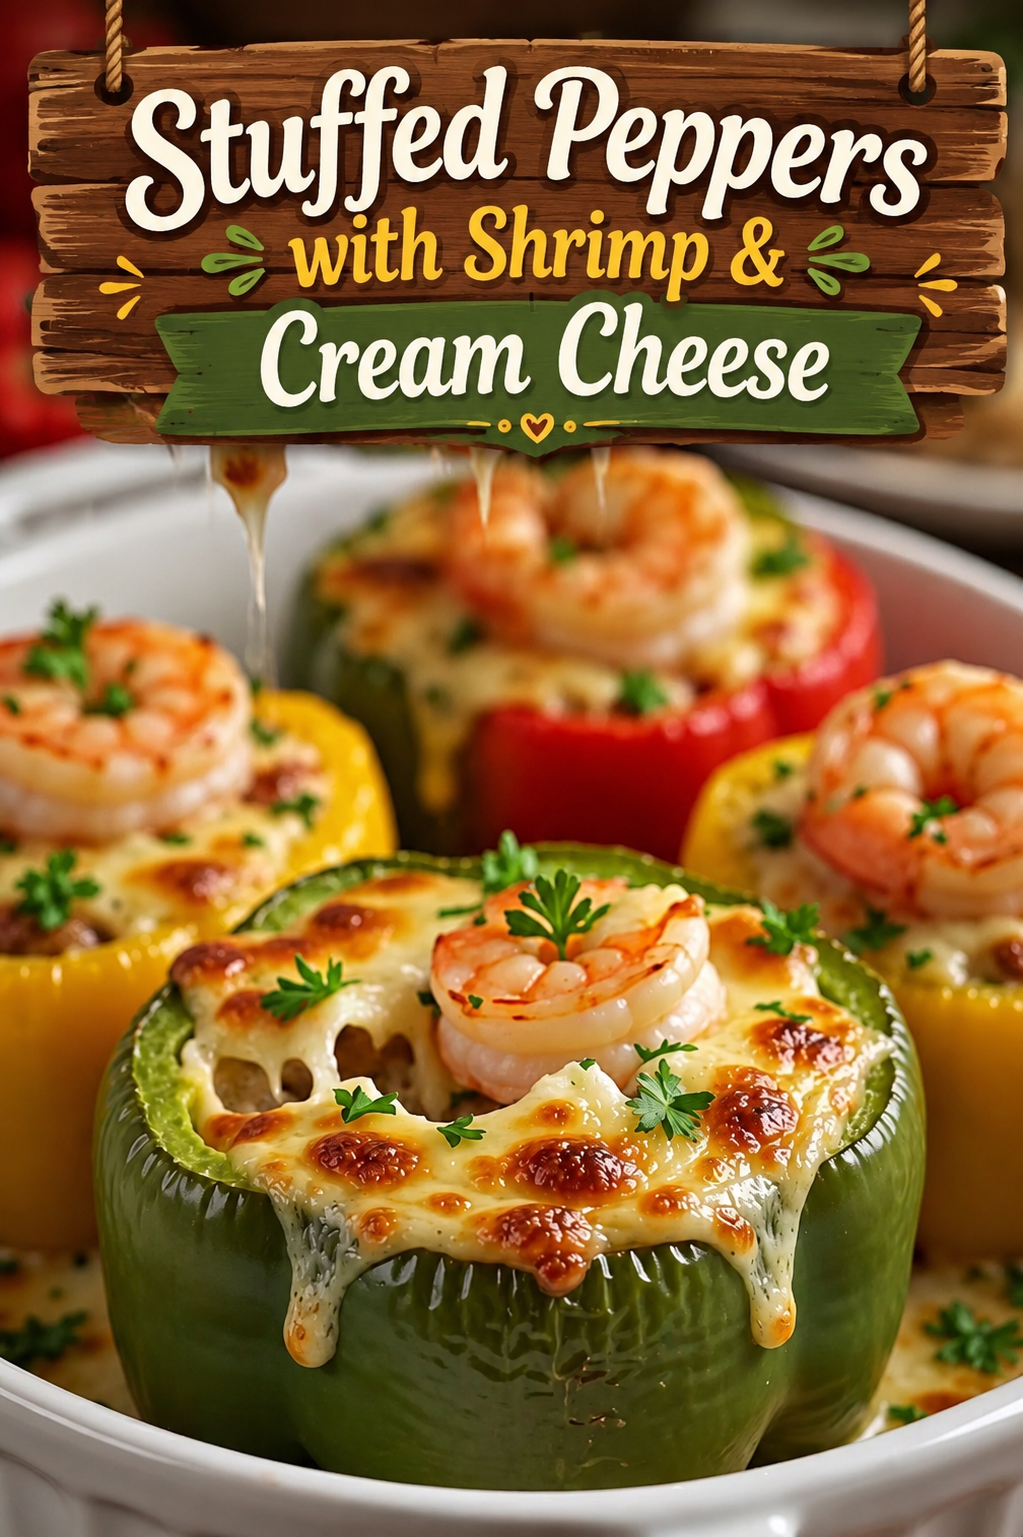
Stuffed Peppers with Shrimp & Cream Cheese

🦐🫑 Stuffed Peppers with Shrimp & Cream Cheese


These Shrimp & Cream Cheese Stuffed Peppers are creamy, cheesy, flavorful, and so easy to make! Sweet bell peppers are filled with tender seasoned shrimp, creamy cheese, herbs, and plenty of melted mozzarella. Perfect for a delicious dinner or an impressive weekend meal. 😍


🛒 Ingredients


For the Peppers:

  • 4 large bell peppers — green, red, yellow, or mixed
  • 1 tbsp olive oil
  • ½ tsp salt
  • ¼ tsp black pepper

For the Shrimp Filling:

  • 1 lb (450 g) medium shrimp, peeled, deveined and chopped
  • 1 tbsp olive oil or butter
  • 3 cloves garlic, minced
  • 4 oz (115 g) cream cheese, softened
  • ½ cup shredded mozzarella cheese
  • ¼ cup grated Parmesan cheese
  • ½ small onion, finely chopped
  • ½ tsp paprika
  • ½ tsp Italian seasoning
  • ¼ tsp red pepper flakes, optional
  • Salt and black pepper, to taste
  • 2 tbsp fresh parsley, chopped
  • 1 tbsp lemon juice

For Topping:

  • ½ cup shredded mozzarella
  • 2 tbsp Parmesan
  • Fresh parsley, for garnish

👩‍🍳 Instructions

1. Prepare the peppers:

Preheat your oven to 375°F (190°C). Wash the bell peppers, cut off the tops, and remove the seeds and membranes. Place them upright in a lightly greased baking dish.

2. Season and pre-bake:

Brush the peppers lightly with olive oil and sprinkle with a little salt and pepper. Bake for 10 minutes to soften them slightly.

3. Cook the shrimp:

Heat 1 tablespoon olive oil or butter in a skillet over medium heat. Add the chopped onion and cook for 2–3 minutes. Add garlic and cook for about 30 seconds.

4. Add the shrimp, paprika, Italian seasoning, red pepper flakes, salt, and black pepper. Cook for 2–3 minutes, just until the shrimp turn pink. Don’t overcook them.

5. Make it creamy:

Reduce the heat to low. Stir in the softened cream cheese until smooth and creamy. Add mozzarella, Parmesan, parsley, and lemon juice. Mix until everything is well combined.

6. Stuff the peppers:

Spoon the creamy shrimp mixture evenly into the partially baked peppers.

7. Add cheese:

Sprinkle the tops generously with mozzarella and Parmesan.

8. Bake:

Return the peppers to the oven and bake for 15–20 minutes, until the peppers are tender and the cheese is melted, bubbly, and golden brown.

9. Garnish & serve:

Sprinkle with fresh parsley and let them rest for 5 minutes before serving.

⭐ Tips

Use large, firm bell peppers so they hold their shape while baking.

Don’t overcook the shrimp before baking—they’ll continue cooking in the oven.

For extra flavor, add a little Old Bay seasoning or Cajun seasoning to the shrimp.

You can add cooked rice, spinach, or finely chopped mushrooms to make the filling more substantial.


🍽️ Serving Suggestion

Serve these creamy stuffed peppers with a fresh green salad, roasted vegetables, garlic bread, or steamed rice.


Prep Time: 15 minutes

Cook Time: 30–35 minutes

Servings: 4

Cuisine: American-inspired

Calories: Approximately 400–450 per serving, depending on the cheese and shrimp used.


❤️ If you love creamy, cheesy seafood recipes, save this recipe and share it with someone who would enjoy it!

Sunrise Citrus Scones

Sunrise Citrus Scones


These Sunrise Citrus Scones are buttery, tender, golden-brown scones filled with juicy raisins and bright citrus flavor. Fresh orange zest gives the dough a fragrant, sunny taste, while a little orange juice adds just the right amount of freshness. The tops bake up beautifully golden and slightly crisp, while the centers remain soft and flaky.


They are perfect for breakfast, brunch, afternoon tea, or a cozy weekend treat. Serve them warm with butter, orange marmalade, honey, or a simple citrus glaze.


Sunrise Citrus Scones Recipe


Prep Time: 20 minutes

Chill Time: 15 minutes

Bake Time: 18–22 minutes

Total Time: About 55 minutes

Servings: 8 scones


Ingredients

For the Scones

  • 2 ½ cups (315 g) all-purpose flour
  • ⅓ cup (67 g) granulated sugar
  • 1 tablespoon baking powder
  • ½ teaspoon salt
  • ½ cup (113 g) cold unsalted butter, cut into small cubes
  • 1 tablespoon finely grated orange zest
  • ½ cup raisins
  • 1 large egg
  • ½ cup (120 ml) cold heavy cream
  • 2 tablespoons fresh orange juice
  • 1 teaspoon vanilla extract

For the Topping

  • 1 tablespoon heavy cream or milk
  • 1 tablespoon coarse sugar, optional
  • A little extra orange zest, optional
  • Optional Orange Glaze
  • 1 cup (120 g) powdered sugar
  • 1–2 tablespoons fresh orange juice
  • ½ teaspoon finely grated orange zest

Instructions

1. Prepare the Oven

Preheat your oven to 400°F (200°C). Line a large baking sheet with parchment paper.

Keeping the oven properly preheated is important because scones need a good initial burst of heat to rise and develop their beautiful golden tops.

2. Combine the Dry Ingredients

In a large mixing bowl, whisk together the flour, granulated sugar, baking powder, and salt.

Add the finely grated orange zest and gently mix it through the flour. Rubbing the zest into the sugar or flour with your fingertips helps release the natural orange oils and gives the finished scones an even brighter citrus aroma.

3. Cut in the Butter

Add the cold cubed butter to the flour mixture.

Using a pastry cutter, fork, or your fingertips, work the butter into the flour until the mixture resembles coarse crumbs with a few pea-sized pieces of butter remaining.

Don’t completely blend the butter into the flour. Those small pieces of cold butter are what help create flaky layers as the scones bake.

4. Add the Raisins

Stir in the raisins until they are evenly distributed throughout the mixture.

If your raisins are particularly dry, you can soak them in warm water for about 5–10 minutes. Drain them very well and pat them dry before adding them to the dough.

5. Mix the Wet Ingredients

In a separate bowl or measuring jug, whisk together:

  • Egg
  • Heavy cream
  • Fresh orange juice
  • Vanilla extract

Pour the wet mixture into the bowl with the dry ingredients.

6. Make the Dough

Gently stir everything together with a wooden spoon or spatula.

Mix only until the dough starts coming together. It should look slightly shaggy and soft rather than smooth.

If the dough seems very dry, add 1 tablespoon of cream at a time until it holds together. Avoid adding too much liquid because overly wet dough can produce heavy scones.

7. Shape the Scones

Lightly flour your work surface and turn the dough onto it.

Gently bring the dough together with your hands. Avoid kneading it like bread.

Pat it into a round about 1 inch (2.5 cm) thick.

Using a sharp knife or bench scraper, cut the dough into 8 wedges.

For especially flaky scones, gently fold the dough in half once or twice before shaping, being careful not to overwork it.


8. Chill the Dough

Arrange the scones on the prepared baking sheet, leaving a little space between each one.

Place the baking sheet in the refrigerator for about 15 minutes.

This short chilling step helps firm up the butter and allows the scones to hold their shape better during baking.

9. Brush the Tops

Brush the tops lightly with heavy cream or milk.

For a slightly crisp, bakery-style finish, sprinkle a little coarse sugar over the tops.

You can also add a tiny amount of fresh orange zest for extra citrus fragrance.

10. Bake

Bake the scones in the preheated oven for approximately 18–22 minutes, or until the tops are puffed and beautifully golden brown.

The edges should look set and lightly browned.

Try not to overbake them. Once the centers are cooked and the tops are golden, remove them from the oven.

11. Cool Slightly

Allow the scones to cool on the baking sheet for about 5 minutes, then transfer them to a wire rack.

They are especially delicious while still warm.

Optional Orange Glaze

For an extra citrusy finish, prepare a simple orange glaze.

Whisk the powdered sugar with 1 tablespoon of fresh orange juice. Add a little more orange juice, a few drops at a time, until you reach a thick but pourable consistency.

Stir in the orange zest.

Drizzle the glaze over the cooled or slightly warm scones.

Let the glaze sit for several minutes before serving.

Tips for Perfect Citrus Scones

Keep the butter cold.

Cold butter is one of the most important secrets to flaky scones. If your kitchen is warm, return the shaped dough to the refrigerator whenever the butter begins to soften.

Don’t overmix the dough.

Overworking develops gluten and can make the scones tough. Mix just until the ingredients come together.

Use fresh orange zest.

Freshly grated zest provides much more fragrance and flavor than bottled orange flavoring.

Measure flour carefully.

Too much flour can make the scones dry and dense. For the most accurate results, use a kitchen scale. If using measuring cups, spoon the flour into the cup and level it rather than scooping directly from the flour container.

Don’t flatten the dough too much.

A dough thickness of around 1 inch gives the scones enough height to rise beautifully.

Bake immediately after chilling.

Once the scones are shaped and chilled, get them into the hot oven while the butter is still firm.


Variations


Cranberry Orange Scones


Replace the raisins with dried cranberries for a tart, festive variation. Cranberries pair especially well with fresh orange zest.


Lemon Raisin Scones


Use finely grated lemon zest instead of orange zest and replace the orange juice with fresh lemon juice. Add a lemon glaze after baking.


Orange Chocolate Chip Scones


Replace half or all of the raisins with mini chocolate chips. Dark chocolate works particularly well with the bright citrus flavor.


Almond Citrus Scones


Add ½ teaspoon almond extract and a handful of sliced almonds. Sprinkle additional almonds over the tops before baking.


Mixed Citrus Scones


For a more complex citrus flavor, combine orange zest with a little lemon or lime zest.


How to Store


Store completely cooled scones in an airtight container at room temperature for up to 2 days.


For longer storage, place the scones in an airtight freezer-safe container or bag and freeze for up to 2–3 months.


To serve, thaw at room temperature and warm them in a 300°F (150°C) oven for several minutes.

Serving Suggestions

These Sunrise Citrus Scones are wonderful served warm with:

Salted or unsalted butter

Orange marmalade

Strawberry or raspberry jam

Honey

Lemon curd

Whipped cream

Clotted cream

Orange glaze

For brunch, serve them alongside fresh fruit, yogurt, tea, or coffee.

Nutrition Estimate

Per scone, based on 8 servings and without optional glaze.

Calories: Approximately 330

Carbohydrates: 43 g

Protein: 6 g

Fat: 15 g

Saturated Fat: 9 g

Sugar: 14 g

Fiber: 2 g

Sodium: 230 mg

Nutrition values are estimates and will vary depending on the specific ingredients and brands used.

Final Thoughts

These Sunrise Citrus Scones are everything a homemade scone should be: golden on the outside, tender and flaky inside, lightly sweet, buttery, and filled with bright orange flavor. The raisins add little bursts of sweetness throughout, while fresh orange zest keeps the flavor fresh and vibrant.

For the best result, remember the three most important rules: keep your butter cold, don’t overwork the dough, and bake in a fully preheated oven. Serve them warm with butter or orange marmalade for an easy breakfast or beautiful brunch treat.