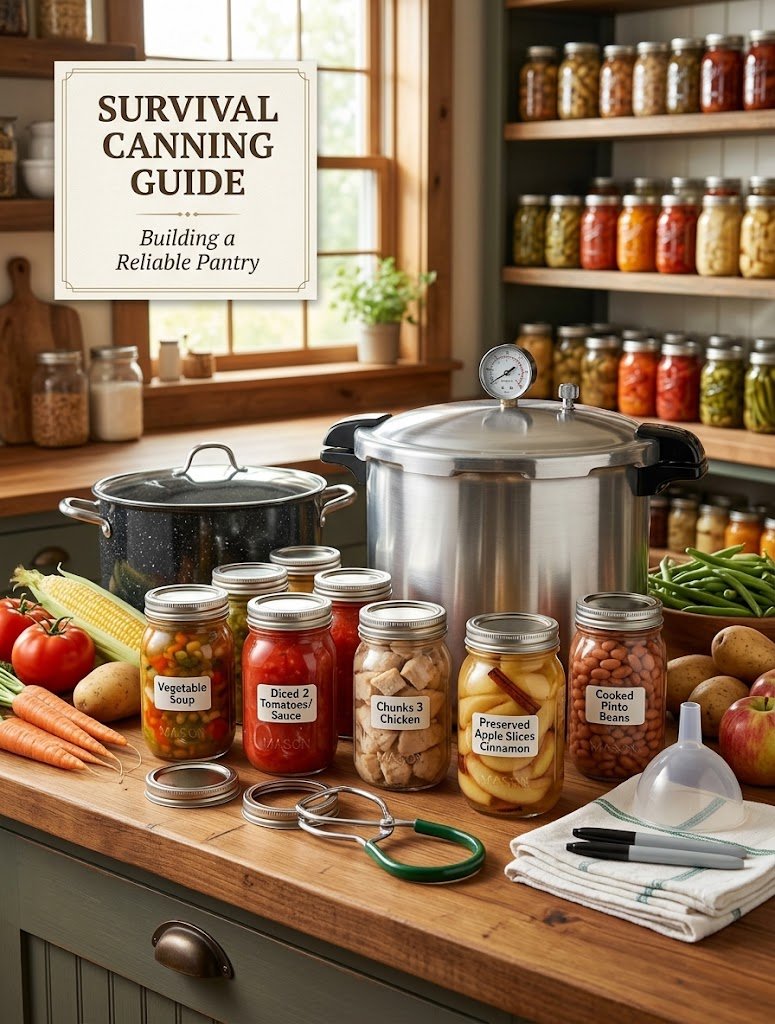
Canning Recipes That Will Help You Survive

Canning Recipes That Will Help You Survive

A Complete Guide to Preserving Food for Emergencies, Homesteading & Everyday Life

Canning has been a trusted food preservation method for generations, especially among families who value self-sufficiency, emergency preparedness, and having a well-stocked pantry. In uncertain times, a shelf full of homemade canned foods can provide comfort, nutrition, and security. Whether you are preparing for storms, power outages, economic challenges, or simply want to reduce grocery costs, learning how to can food is a valuable skill.

Unlike store-bought canned products, homemade canned foods allow you to control the ingredients, reduce preservatives, save money, and preserve seasonal produce when it is at its freshest. From hearty soups and savory meats to garden vegetables, fruits, sauces, and jams, there are countless recipes that can help you build a long-lasting food supply.

This guide covers essential survival canning recipes that are practical, delicious, and perfect for American households looking to create a reliable pantry.

Why Canning Is an Essential Survival Skill

Food shortages, natural disasters, supply chain problems, and unexpected emergencies can happen at any time. Having preserved food at home gives you independence and peace of mind.

Canned foods can:

Last for months or even years when stored properly

Reduce dependence on grocery stores

Help save money by buying seasonal ingredients in bulk

Provide quick meals during emergencies

Reduce food waste by preserving extra produce

A properly prepared canning pantry is like having a personal grocery store at home.

Essential Canning Equipment

Before starting, it is important to have the right tools:

Water Bath Canner

Used for high-acid foods such as:

Fruits

Pickles

Jams

Jellies

Salsa

Tomato products with added acid

Pressure Canner

Required for low-acid foods including:

Meat

Poultry

Beans

Vegetables

Soups and stews

Pressure canning reaches higher temperatures needed to safely preserve foods that can support harmful bacteria.

Other Supplies

Mason jars

New canning lids

Jar rings

Jar lifter

Funnel

Bubble remover tool

Clean towels

Labels and markers

Always follow tested food safety guidelines when preserving foods.

Recipe 1: Survival Vegetable Soup (Pressure Canned)

A homemade vegetable soup is one of the most useful foods to have stored. It provides a complete meal option that can be heated quickly during emergencies.

Ingredients

6 cups chopped tomatoes

4 cups diced carrots

4 cups chopped potatoes

3 cups green beans

3 cups corn kernels

2 cups chopped celery

2 cups chopped onions

8 cups vegetable broth

2 teaspoons salt

1 teaspoon black pepper

2 teaspoons dried Italian seasoning

Instructions

Wash and prepare all vegetables by cutting them into similar-sized pieces.

Combine vegetables, broth, and seasonings in a large stockpot.

Simmer for approximately 10 minutes until vegetables slightly soften.

Fill sterilized jars, leaving proper headspace.

Remove air bubbles and clean jar edges.

Apply lids and process using a pressure canner according to tested guidelines.

Allow jars to cool completely before checking seals.

This soup can become the base for quick dinners by adding rice, pasta, shredded chicken, or beans.

Recipe 2: Homemade Canned Tomato Sauce

A pantry staple, tomato sauce can transform simple ingredients into comforting meals.

Ingredients

20 pounds ripe tomatoes

4 tablespoons lemon juice per quart jar

2 tablespoons olive oil

4 cloves garlic

2 tablespoons dried basil

1 tablespoon oregano

Salt to taste

Instructions

Wash tomatoes and remove damaged areas.

Cook tomatoes until soft.

Blend or strain tomatoes to create a smooth sauce.

Simmer sauce until desired thickness.

Add herbs and seasoning.

Add lemon juice to jars for safe acidity.

Fill jars and process using a water bath canner following approved times.

This sauce is perfect for:

Pasta dishes

Pizza

Soups

Casseroles

Slow cooker meals

Recipe 3: Canned Chicken for Emergency Meals

Canned chicken is one of the most versatile survival foods. It can quickly become sandwiches, soups, casseroles, or protein-packed meals.

Ingredients

Fresh boneless chicken

Salt

Optional herbs

Instructions

Cut chicken into chunks.

Pack raw chicken into clean jars.

Add salt if desired.

Leave recommended headspace.

Remove air bubbles.

Process jars using a pressure canner.

Store canned chicken in a cool, dark pantry.

Recipe 4: Sweet Survival Apple Canning

Preserved apples are excellent for breakfasts and desserts.

Ingredients

Fresh apples

Sugar

Cinnamon

Lemon juice

Water

Instructions

Peel and slice apples.

Prepare a light syrup using water and sugar.

Add apples and lemon juice.

Pack into jars.

Process using a water bath canner.

Use canned apples for:

Apple pie filling

Oatmeal toppings

Pancakes

Desserts

Recipe 5: Canned Pinto Beans

Beans are affordable, nutritious, and extremely valuable for long-term food storage.

Ingredients

Dry pinto beans

Water

Salt

Instructions

Wash beans thoroughly.

Soak overnight or use a quick soak method.

Cook beans until partially tender.

Fill jars with beans and cooking liquid.

Process using a pressure canner.

Beans provide:

Protein

Fiber

Long-lasting energy

Building a Survival Canning Pantry

A balanced emergency pantry should include different food categories.

Protein Sources

Store:

Chicken

Beef

Beans

Chili

Fish

Vegetables

Include:

Green beans

Corn

Carrots

Potatoes

Mixed vegetables

Fruits

Examples:

Peaches

Apples

Pears

Berries

Ready Meals

Prepare:

Soups

Stews

Pasta sauces

Chili

A variety of foods prevents meal boredom and ensures better nutrition.

Storage Tips for Long-Term Canned Foods

Proper storage is important for maintaining quality.

Keep Jars Cool

Store canned foods away from heat sources and sunlight.

Label Everything

Write:

Food name

Date canned

Batch information

Use older jars first.

Check Before Eating

Do not use jars that show:

Bulging lids

Strange smells

Leakage

Mold

Broken seals

Food safety should always come first.

Beginner Canning Mistakes to Avoid

Many beginners make simple mistakes that affect quality.

Avoid:

Using damaged jars

Reusing old lids

Skipping proper processing times

Guessing measurements

Ignoring acidity requirements

Storing jars before they cool completely

Successful canning requires patience and attention to detail.

Conclusion

Canning is more than a cooking method; it is a valuable life skill that provides independence, savings, and security. A well-prepared pantry filled with homemade canned foods can help families handle emergencies while still enjoying comforting, nutritious meals.

Whether you are starting with a few jars of tomato sauce or creating a full survival pantry, every batch brings you one step closer to self-reliance. With fresh ingredients, proper equipment, and safe preservation practices, you can create a food supply that supports your family through every season.

A strong pantry is not built overnight. Start small, learn the process, and gradually build a collection of homemade canned foods that your future self will appreciate.
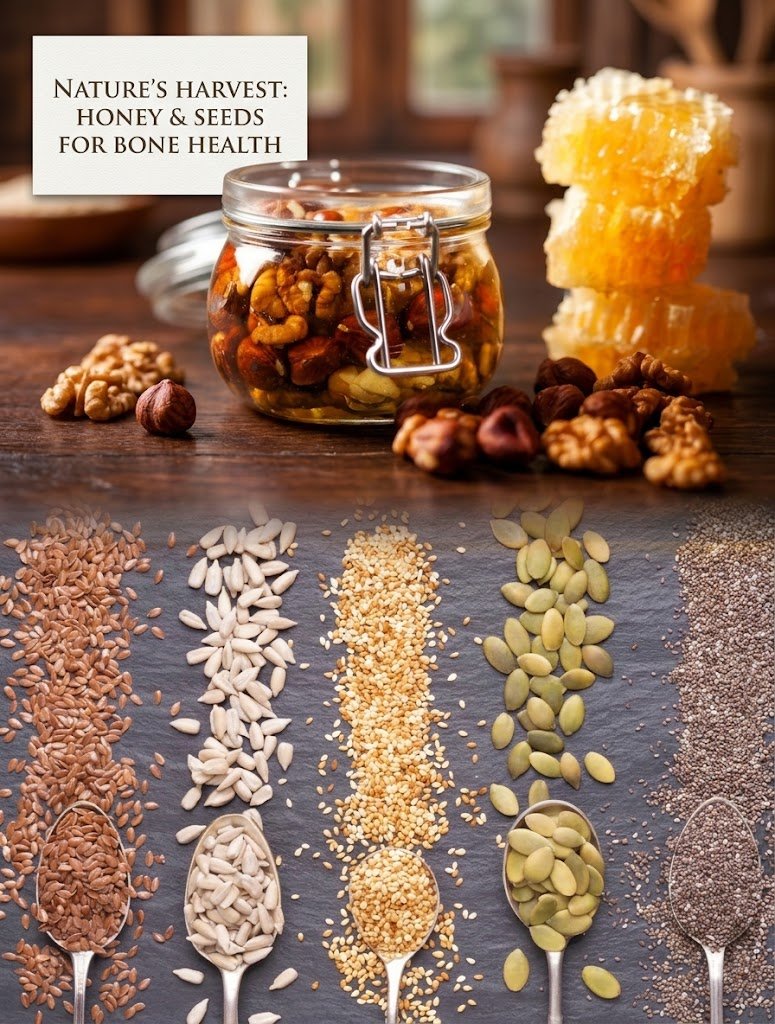

Natural Seed & Honey Bone Health Elixir

Natural Seed & Honey Bone Health Elixir

This traditional folk-remedy mixture pairs calcium-rich seeds, healthy fats, and minerals with raw honey to create a shelf-stable daily tonic designed to support overall bone density and joint function.

Prep Time: 10 minutes

Cook Time: 0 minutes

Yield: Approx. 2 cups (32 tablespoons)

Serving Size: 1 tablespoon daily

Ingredients & US Measurements:

Ingredient Metric Weight US Standard Volume US Weight (Avoirdupois)
Flax seeds (whole or ground) 30 grams ~3.5 tablespoons ~1.05 ounces
Pumpkin seeds (raw pepitas) 30 grams ~1/4 cup ~1.05 ounces
Sunflower seeds (raw hulled) 30 grams ~1/4 cup ~1.05 ounces
Sesame seeds (raw or unhulled) 30 grams ~3 tablespoons ~1.05 ounces
Raw organic honey 500 grams ~1.5 cups ~17.6 ounces (1.1 lbs)

Note: You can optionally add 30g (~1/4 cup) of chia seeds or raw walnuts, as pictured, to increase omega-3 content.

Comprehensive Nutritional Profile

Each seed in this mixture offers specific minerals essential for bone formation, maintenance, and structural integrity:

Sesame Seeds: Exceptionally high in plant-based calcium, copper, and zinc. Unhulled sesame seeds provide the highest concentration of calcium per gram.

Pumpkin Seeds (Pepitas): A rich source of magnesium, phosphorus, and zinc. Magnesium plays a critical structural role in bone matrix mineralization and assists in activating Vitamin D.

Flax Seeds: Packed with alpha-linolenic acid (ALA), a plant-based omega-3 fatty acid that helps reduce systemic inflammation and protects bone tissue from excessive resorption.

Sunflower Seeds: High in Vitamin E, manganese, and copper, which act as cellular antioxidants and support connective tissue formation within the bone joint matrix.

Raw Honey: Functions as a natural preservative and binding base while providing trace enzymatic compounds that aid digestion and mineral uptake.

Step-by-Step Preparation

Grind the Seeds (Recommended for Absorption): Whole flax seeds often pass through the digestive tract unabsorbed. Place the flax, pumpkin, sunflower, and sesame seeds into a clean coffee grinder, spice grinder, or food processor. Pulse a few times until crushed into a coarse meal. (If you prefer texture, you may leave pumpkin and sunflower seeds whole).

Combine Dry Ingredients: Transfer the ground or whole seed mixture into a clean, dry, wide-mouth glass Mason jar (16 oz or 24 oz capacity).

Add the Honey: Pour 500 grams (1.5 cups) of raw liquid honey slowly over the seeds.

Mix Thoroughly: Using a non-metallic spoon (wooden, silicone, or plastic is ideal when handling raw honey), stir the mixture continuously until all seeds are completely coated and suspended within the honey.

Seal & Settle: Secure the jar lid tightly. Let the jar sit at room temperature for 12 to 24 hours to allow the seed oils and honey to integrate fully.

Daily Dosage & How to Consume

Standard Dosage: Take 1 tablespoon (approx. 15–20 grams) every morning on an empty stomach, or 30 minutes prior to breakfast.

Serving Suggestions:

Eat directly off the spoon followed by a glass of warm water.

Stir into warm oatmeal or overnight oats.

Swirl into plain Greek yogurt for added protein and calcium synergy.

Spread onto a slice of whole-grain toast.

Storage, Shelf-Life & Safety Precautions

Storage: Store the sealed glass jar in a cool, dark pantry or cupboard away from direct sunlight and heat. Refrigeration is not strictly required due to honey’s low moisture content, but chilling will thicken the texture and extend seed freshness.

Shelf Life: Keeps well for up to 6 to 9 months at room temperature, or up to 12 months if refrigerated. If seeds begin to smell sour or rancid, discard the mixture.

Dietary Precautions:

Diabetes & Blood Sugar: Honey is high in simple sugars; consult your physician regarding carbohydrate intake if managing diabetes or insulin resistance.

Infants: Do not give raw honey to children under 1 year of age due to the risk of infant botulism.

General Medical Care: While rich in essential minerals, dietary supplements and folk remedies do not replace targeted medical therapy for advanced osteoporosis or severe osteopenia. Always consult with a primary healthcare provider for regular bone density scans (DEXA) and comprehensive bone health strategies.

Fluffy Japanese Soufflé Pancakes ✨

🥞✨ Fluffy Japanese Soufflé Pancakes ✨🥞


These thick, soft, and fluffy pancakes are golden on the outside and wonderfully tender inside. Perfect for breakfast or a sweet brunch! ❤️


🛒 Ingredients

For the Pancakes:

  • 2 large eggs, separated
  • 2 tbsp whole milk
  • ½ tsp vanilla extract
  • ¼ cup all-purpose flour
  • 1 tbsp cornstarch
  • 1½ tbsp granulated sugar
  • ½ tsp baking powder
  • Pinch of salt
  • ½ tsp lemon juice
  • Butter or oil, for cooking

For Serving:

  • Powdered sugar
  • Maple syrup or honey
  • Fresh berries
  • Whipped cream
  • Butter, optional

👩‍🍳 Instructions

1. Separate the eggs

Carefully separate the egg whites from the yolks. Place the whites in a clean, dry mixing bowl.

2. Make the yolk mixture

Whisk the egg yolks with milk and vanilla until smooth.

Add the flour, cornstarch, baking powder, and salt. Mix just until combined. Don’t overmix.

3. Whip the egg whites

Add lemon juice to the egg whites and beat until foamy. Gradually add the sugar while continuing to beat.

Whip until you have stiff, glossy peaks. This is the secret to getting tall, fluffy pancakes.

4. Fold gently

Add about one-third of the whipped egg whites to the yolk batter and gently fold.

Add the remaining egg whites in two additions. Fold carefully with a spatula until just combined. Avoid stirring or overmixing, as this will deflate the air.

5. Heat the pan

Lightly grease a nonstick skillet with butter or oil. Place it over very low heat.


6. Shape the pancakes

Spoon the batter into tall, thick rounds. You can use metal ring molds for perfectly round pancakes, or simply mound the batter carefully with a spoon.


Add a few drops of water to the empty area of the pan and immediately cover with a lid. The steam helps the pancakes cook gently and stay fluffy.


7. Cook slowly

Cook for about 4–6 minutes on low heat. Carefully check the bottom— it should be golden brown.


Flip gently using a spatula. Cover again and cook for another 4–6 minutes, or until the pancakes are cooked through.


8. Serve immediately

Transfer the pancakes to a plate and dust with powdered sugar. Serve with butter, maple syrup, honey, fresh berries, or whipped cream.


💡 Tips for Extra-Fluffy Pancakes


Use room-temperature eggs for better volume.


Make sure your mixing bowl is completely clean and dry before whipping the whites.


Don’t overmix the batter after adding the meringue.


Keep the pan on very low heat so the outside doesn’t brown before the center cooks.


Always cook with the lid on to create gentle steam.


Serve immediately for the best height and texture.

🥞 Serving Idea

Stack 2–3 fluffy pancakes on a plate, add a small pat of butter, drizzle generously with maple syrup, and finish with powdered sugar and fresh berries. 😍


Save this recipe and share it with someone who loves fluffy pancakes! ❤️


#JapanesePancakes #SoufflePancakes #FluffyPancakes #PancakeRecipe #BreakfastIdeas #BrunchRecipes #EasyBreakfast #HomemadePancakes #FluffyPancakesRecipe #Foodie #BreakfastRecipe #SweetBreakfast

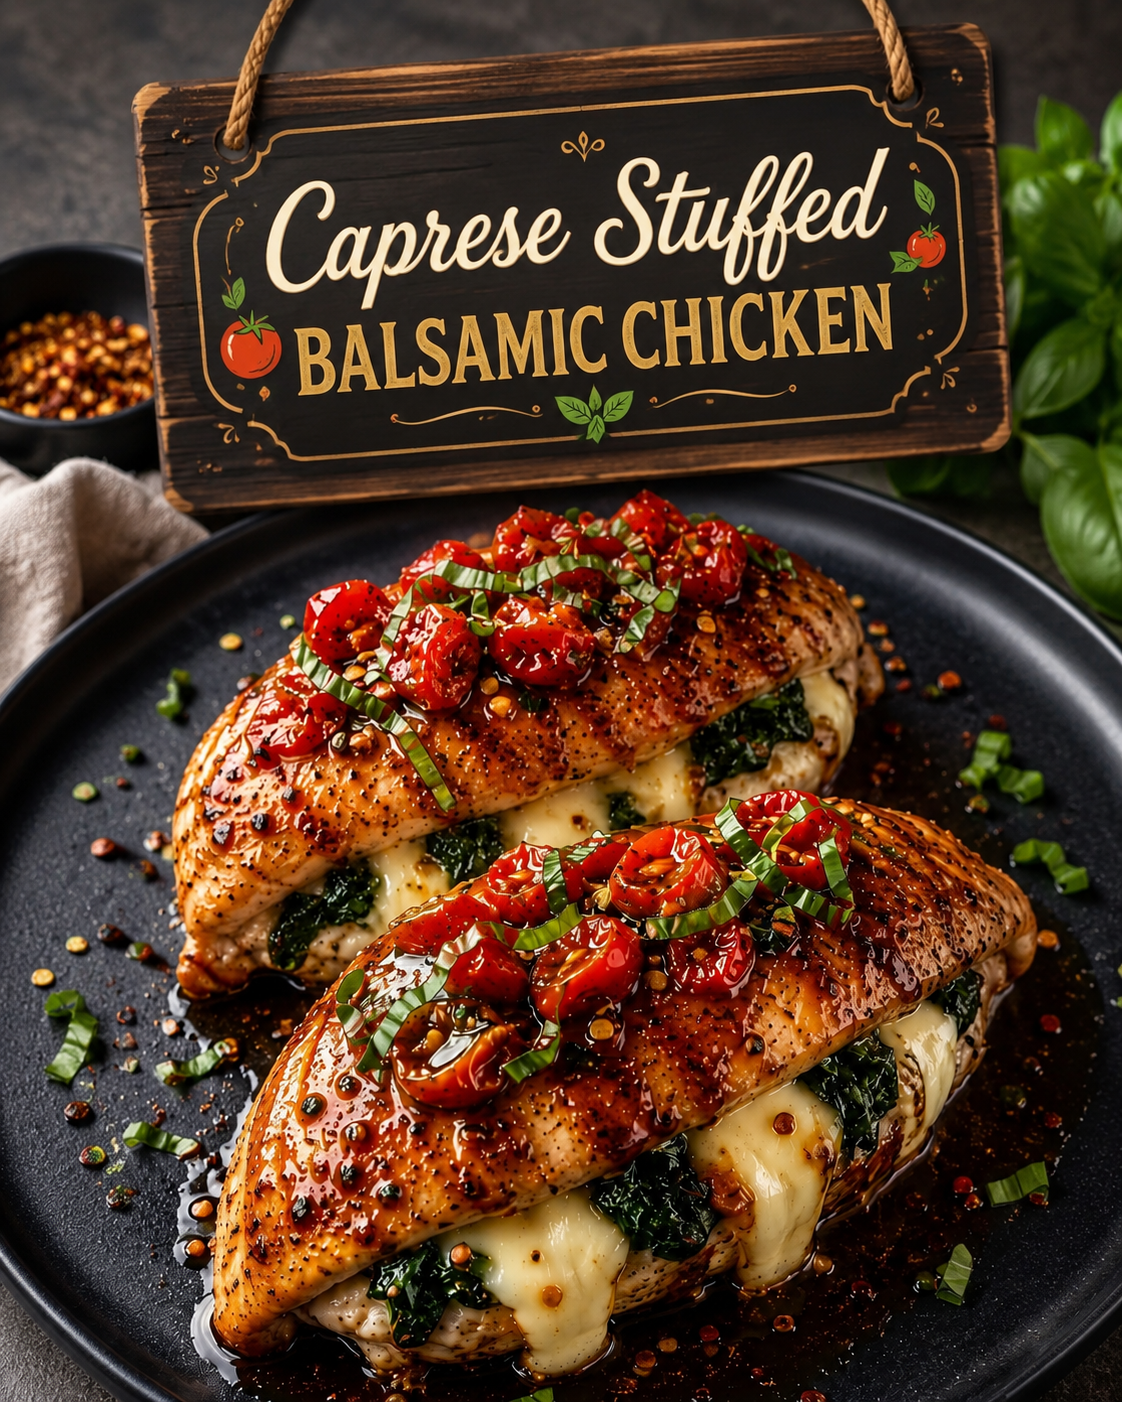
Caprese Stuffed Balsamic Chicken

🍅🧀 Caprese Stuffed Balsamic Chicken 🧀🍅


Juicy chicken breasts stuffed with creamy mozzarella, fresh spinach, and tomatoes, then finished with a sweet-tangy balsamic glaze and fresh basil. A delicious restaurant-style dinner you can easily make at home! 😍


🛒 Ingredients


For the Chicken:

  • 4 boneless, skinless chicken breasts
  • 1 tsp salt
  • 1 tsp black pepper
  • 1 tsp Italian seasoning
  • 1 tsp garlic powder
  • 1 tbsp olive oil

For the Filling:

  • 1 cup fresh spinach
  • 1 cup shredded or sliced mozzarella cheese
  • ½ cup cherry tomatoes, halved
  • ¼ cup fresh basil leaves, chopped
  • 2 cloves garlic, minced
  • 1 tbsp olive oil
  • ¼ tsp salt
  • ¼ tsp black pepper

For the Balsamic Glaze:

  • ½ cup balsamic vinegar
  • 1–2 tbsp honey or brown sugar
  • 1 tbsp olive oil
  • 1 garlic clove, minced


For Topping:

  • Extra cherry tomatoes
  • Fresh basil
  • Red pepper flakes, optional
  • Parmesan cheese, optional

👩‍🍳 Instructions


1. Prepare the chicken

Preheat your oven to 400°F (200°C). Pat the chicken breasts dry. Carefully cut a pocket horizontally into the thickest part of each chicken breast, making sure not to cut all the way through.


2. Season

Rub the chicken with olive oil, salt, black pepper, Italian seasoning, and garlic powder. Set aside while you prepare the filling.

3. Make the filling

Heat 1 tablespoon olive oil in a skillet over medium heat. Add minced garlic and spinach. Cook for 1–2 minutes, just until the spinach wilts. Remove from heat and let it cool slightly.


Mix the spinach with mozzarella, cherry tomatoes, fresh basil, salt, and pepper.


4. Stuff the chicken

Generously fill each chicken pocket with the mozzarella-spinach mixture. Secure the openings with toothpicks if needed.


5. Sear the chicken

Heat an oven-safe skillet over medium-high heat with a little olive oil. Sear the stuffed chicken for about 2–3 minutes per side, until beautifully golden brown.


6. Bake

Transfer the skillet to the preheated oven and bake for approximately 15–20 minutes, depending on the thickness of the chicken. Cook until the internal temperature reaches 165°F (74°C).


7. Make the balsamic glaze

While the chicken cooks, add balsamic vinegar, honey or brown sugar, olive oil, and minced garlic to a small saucepan. Bring to a gentle simmer and cook for 5–8 minutes, stirring occasionally, until slightly thickened.


8. Finish & serve

Remove the chicken from the oven and let it rest for 5 minutes. Drizzle generously with the balsamic glaze. Top with fresh tomatoes, basil, and a sprinkle of red pepper flakes.


❤️ Serving Suggestion


Serve with roasted vegetables, garlic mashed potatoes, pasta, rice, or a crisp green salad. The melted mozzarella and balsamic glaze make every bite irresistible!


🔥 Pro Tip: Don’t overcook the chicken. Use a meat thermometer and remove it from the oven once the thickest part reaches 165°F (74°C).


Save this recipe for your next easy dinner! 🍅🧀🌿


#CapreseChicken #StuffedChicken #BalsamicChicken #ChickenRecipes #EasyDinner #DinnerIdeas #ItalianInspired #MozzarellaChicken #HealthyDinner #HomeCooking #Foodie #RecipeOfTheDay #EasyRecipes

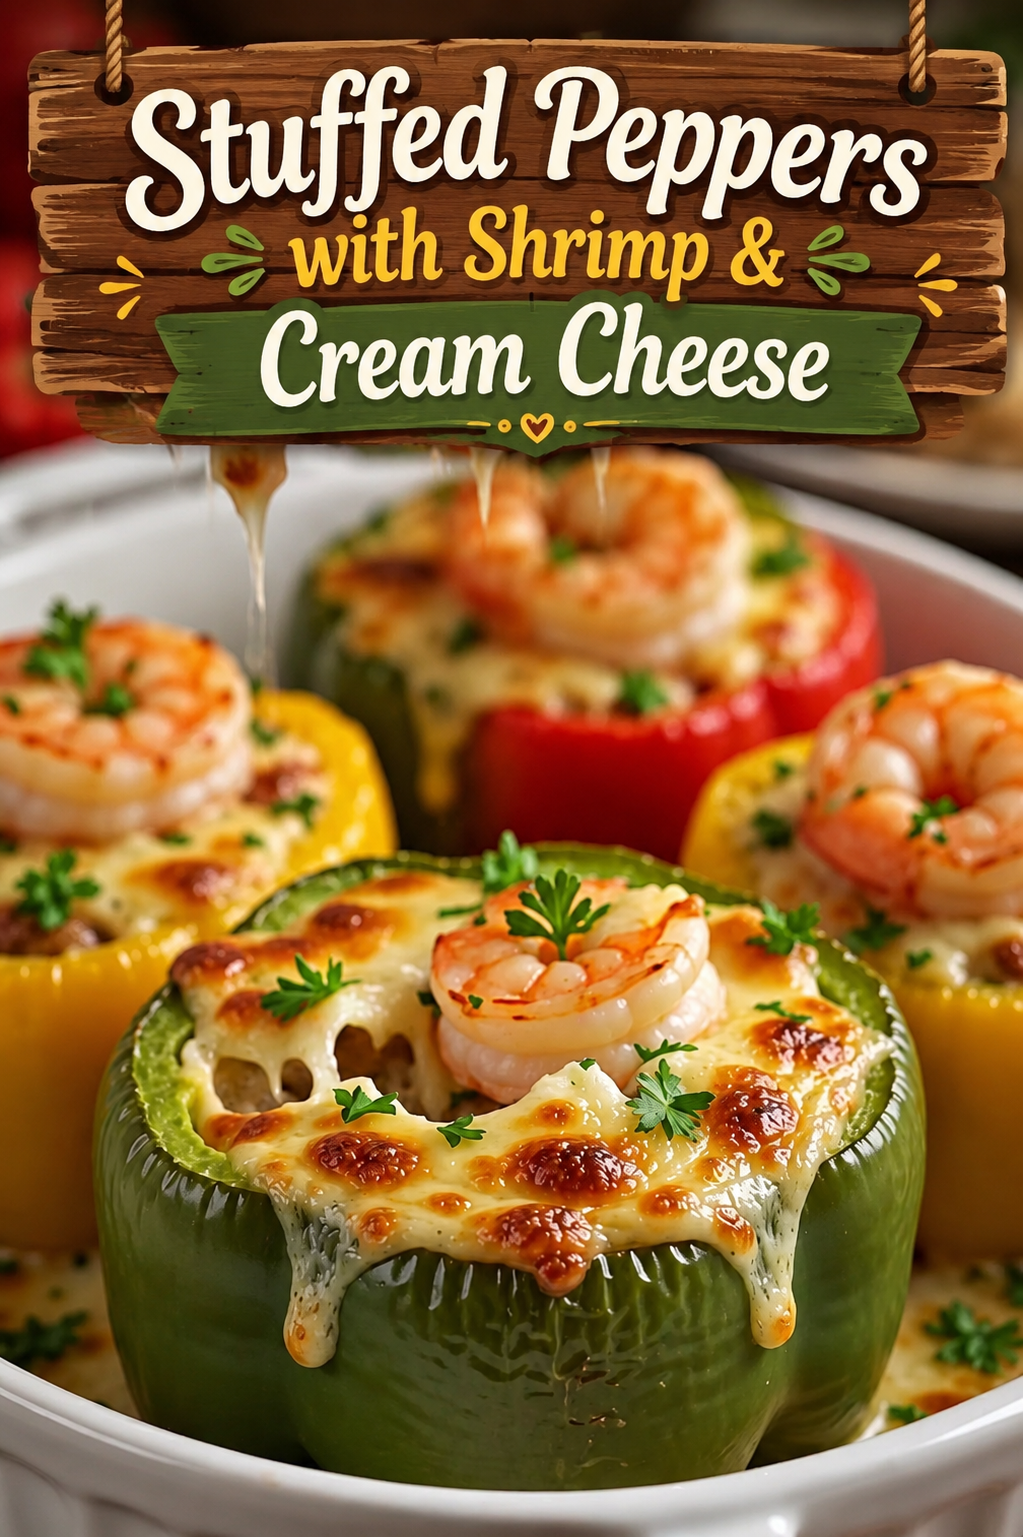
Stuffed Peppers with Shrimp & Cream Cheese

🦐🫑 Stuffed Peppers with Shrimp & Cream Cheese


These Shrimp & Cream Cheese Stuffed Peppers are creamy, cheesy, flavorful, and so easy to make! Sweet bell peppers are filled with tender seasoned shrimp, creamy cheese, herbs, and plenty of melted mozzarella. Perfect for a delicious dinner or an impressive weekend meal. 😍


🛒 Ingredients


For the Peppers:

  • 4 large bell peppers — green, red, yellow, or mixed
  • 1 tbsp olive oil
  • ½ tsp salt
  • ¼ tsp black pepper

For the Shrimp Filling:

  • 1 lb (450 g) medium shrimp, peeled, deveined and chopped
  • 1 tbsp olive oil or butter
  • 3 cloves garlic, minced
  • 4 oz (115 g) cream cheese, softened
  • ½ cup shredded mozzarella cheese
  • ¼ cup grated Parmesan cheese
  • ½ small onion, finely chopped
  • ½ tsp paprika
  • ½ tsp Italian seasoning
  • ¼ tsp red pepper flakes, optional
  • Salt and black pepper, to taste
  • 2 tbsp fresh parsley, chopped
  • 1 tbsp lemon juice

For Topping:

  • ½ cup shredded mozzarella
  • 2 tbsp Parmesan
  • Fresh parsley, for garnish

👩‍🍳 Instructions

1. Prepare the peppers:

Preheat your oven to 375°F (190°C). Wash the bell peppers, cut off the tops, and remove the seeds and membranes. Place them upright in a lightly greased baking dish.

2. Season and pre-bake:

Brush the peppers lightly with olive oil and sprinkle with a little salt and pepper. Bake for 10 minutes to soften them slightly.

3. Cook the shrimp:

Heat 1 tablespoon olive oil or butter in a skillet over medium heat. Add the chopped onion and cook for 2–3 minutes. Add garlic and cook for about 30 seconds.

4. Add the shrimp, paprika, Italian seasoning, red pepper flakes, salt, and black pepper. Cook for 2–3 minutes, just until the shrimp turn pink. Don’t overcook them.

5. Make it creamy:

Reduce the heat to low. Stir in the softened cream cheese until smooth and creamy. Add mozzarella, Parmesan, parsley, and lemon juice. Mix until everything is well combined.

6. Stuff the peppers:

Spoon the creamy shrimp mixture evenly into the partially baked peppers.

7. Add cheese:

Sprinkle the tops generously with mozzarella and Parmesan.

8. Bake:

Return the peppers to the oven and bake for 15–20 minutes, until the peppers are tender and the cheese is melted, bubbly, and golden brown.

9. Garnish & serve:

Sprinkle with fresh parsley and let them rest for 5 minutes before serving.

Tips

Use large, firm bell peppers so they hold their shape while baking.

Don’t overcook the shrimp before baking—they’ll continue cooking in the oven.

For extra flavor, add a little Old Bay seasoning or Cajun seasoning to the shrimp.

You can add cooked rice, spinach, or finely chopped mushrooms to make the filling more substantial.


🍽️ Serving Suggestion

Serve these creamy stuffed peppers with a fresh green salad, roasted vegetables, garlic bread, or steamed rice.


Prep Time: 15 minutes

Cook Time: 30–35 minutes

Servings: 4

Cuisine: American-inspired

Calories: Approximately 400–450 per serving, depending on the cheese and shrimp used.


❤️ If you love creamy, cheesy seafood recipes, save this recipe and share it with someone who would enjoy it!

Sunrise Citrus Scones

Sunrise Citrus Scones


These Sunrise Citrus Scones are buttery, tender, golden-brown scones filled with juicy raisins and bright citrus flavor. Fresh orange zest gives the dough a fragrant, sunny taste, while a little orange juice adds just the right amount of freshness. The tops bake up beautifully golden and slightly crisp, while the centers remain soft and flaky.


They are perfect for breakfast, brunch, afternoon tea, or a cozy weekend treat. Serve them warm with butter, orange marmalade, honey, or a simple citrus glaze.


Sunrise Citrus Scones Recipe


Prep Time: 20 minutes

Chill Time: 15 minutes

Bake Time: 18–22 minutes

Total Time: About 55 minutes

Servings: 8 scones


Ingredients

For the Scones

  • 2 ½ cups (315 g) all-purpose flour
  • ⅓ cup (67 g) granulated sugar
  • 1 tablespoon baking powder
  • ½ teaspoon salt
  • ½ cup (113 g) cold unsalted butter, cut into small cubes
  • 1 tablespoon finely grated orange zest
  • ½ cup raisins
  • 1 large egg
  • ½ cup (120 ml) cold heavy cream
  • 2 tablespoons fresh orange juice
  • 1 teaspoon vanilla extract

For the Topping

  • 1 tablespoon heavy cream or milk
  • 1 tablespoon coarse sugar, optional
  • A little extra orange zest, optional
  • Optional Orange Glaze
  • 1 cup (120 g) powdered sugar
  • 1–2 tablespoons fresh orange juice
  • ½ teaspoon finely grated orange zest

Instructions

1. Prepare the Oven

Preheat your oven to 400°F (200°C). Line a large baking sheet with parchment paper.

Keeping the oven properly preheated is important because scones need a good initial burst of heat to rise and develop their beautiful golden tops.

2. Combine the Dry Ingredients

In a large mixing bowl, whisk together the flour, granulated sugar, baking powder, and salt.

Add the finely grated orange zest and gently mix it through the flour. Rubbing the zest into the sugar or flour with your fingertips helps release the natural orange oils and gives the finished scones an even brighter citrus aroma.

3. Cut in the Butter

Add the cold cubed butter to the flour mixture.

Using a pastry cutter, fork, or your fingertips, work the butter into the flour until the mixture resembles coarse crumbs with a few pea-sized pieces of butter remaining.

Don’t completely blend the butter into the flour. Those small pieces of cold butter are what help create flaky layers as the scones bake.

4. Add the Raisins

Stir in the raisins until they are evenly distributed throughout the mixture.

If your raisins are particularly dry, you can soak them in warm water for about 5–10 minutes. Drain them very well and pat them dry before adding them to the dough.

5. Mix the Wet Ingredients

In a separate bowl or measuring jug, whisk together:

  • Egg
  • Heavy cream
  • Fresh orange juice
  • Vanilla extract

Pour the wet mixture into the bowl with the dry ingredients.

6. Make the Dough

Gently stir everything together with a wooden spoon or spatula.

Mix only until the dough starts coming together. It should look slightly shaggy and soft rather than smooth.

If the dough seems very dry, add 1 tablespoon of cream at a time until it holds together. Avoid adding too much liquid because overly wet dough can produce heavy scones.

7. Shape the Scones

Lightly flour your work surface and turn the dough onto it.

Gently bring the dough together with your hands. Avoid kneading it like bread.

Pat it into a round about 1 inch (2.5 cm) thick.

Using a sharp knife or bench scraper, cut the dough into 8 wedges.

For especially flaky scones, gently fold the dough in half once or twice before shaping, being careful not to overwork it.


8. Chill the Dough

Arrange the scones on the prepared baking sheet, leaving a little space between each one.

Place the baking sheet in the refrigerator for about 15 minutes.

This short chilling step helps firm up the butter and allows the scones to hold their shape better during baking.

9. Brush the Tops

Brush the tops lightly with heavy cream or milk.

For a slightly crisp, bakery-style finish, sprinkle a little coarse sugar over the tops.

You can also add a tiny amount of fresh orange zest for extra citrus fragrance.

10. Bake

Bake the scones in the preheated oven for approximately 18–22 minutes, or until the tops are puffed and beautifully golden brown.

The edges should look set and lightly browned.

Try not to overbake them. Once the centers are cooked and the tops are golden, remove them from the oven.

11. Cool Slightly

Allow the scones to cool on the baking sheet for about 5 minutes, then transfer them to a wire rack.

They are especially delicious while still warm.

Optional Orange Glaze

For an extra citrusy finish, prepare a simple orange glaze.

Whisk the powdered sugar with 1 tablespoon of fresh orange juice. Add a little more orange juice, a few drops at a time, until you reach a thick but pourable consistency.

Stir in the orange zest.

Drizzle the glaze over the cooled or slightly warm scones.

Let the glaze sit for several minutes before serving.

Tips for Perfect Citrus Scones

Keep the butter cold.

Cold butter is one of the most important secrets to flaky scones. If your kitchen is warm, return the shaped dough to the refrigerator whenever the butter begins to soften.

Don’t overmix the dough.

Overworking develops gluten and can make the scones tough. Mix just until the ingredients come together.

Use fresh orange zest.

Freshly grated zest provides much more fragrance and flavor than bottled orange flavoring.

Measure flour carefully.

Too much flour can make the scones dry and dense. For the most accurate results, use a kitchen scale. If using measuring cups, spoon the flour into the cup and level it rather than scooping directly from the flour container.

Don’t flatten the dough too much.

A dough thickness of around 1 inch gives the scones enough height to rise beautifully.

Bake immediately after chilling.

Once the scones are shaped and chilled, get them into the hot oven while the butter is still firm.


Variations


Cranberry Orange Scones


Replace the raisins with dried cranberries for a tart, festive variation. Cranberries pair especially well with fresh orange zest.


Lemon Raisin Scones


Use finely grated lemon zest instead of orange zest and replace the orange juice with fresh lemon juice. Add a lemon glaze after baking.


Orange Chocolate Chip Scones


Replace half or all of the raisins with mini chocolate chips. Dark chocolate works particularly well with the bright citrus flavor.


Almond Citrus Scones


Add ½ teaspoon almond extract and a handful of sliced almonds. Sprinkle additional almonds over the tops before baking.


Mixed Citrus Scones


For a more complex citrus flavor, combine orange zest with a little lemon or lime zest.


How to Store


Store completely cooled scones in an airtight container at room temperature for up to 2 days.


For longer storage, place the scones in an airtight freezer-safe container or bag and freeze for up to 2–3 months.


To serve, thaw at room temperature and warm them in a 300°F (150°C) oven for several minutes.

Serving Suggestions

These Sunrise Citrus Scones are wonderful served warm with:

Salted or unsalted butter

Orange marmalade

Strawberry or raspberry jam

Honey

Lemon curd

Whipped cream

Clotted cream

Orange glaze

For brunch, serve them alongside fresh fruit, yogurt, tea, or coffee.

Nutrition Estimate

Per scone, based on 8 servings and without optional glaze.

Calories: Approximately 330

Carbohydrates: 43 g

Protein: 6 g

Fat: 15 g

Saturated Fat: 9 g

Sugar: 14 g

Fiber: 2 g

Sodium: 230 mg

Nutrition values are estimates and will vary depending on the specific ingredients and brands used.

Final Thoughts

These Sunrise Citrus Scones are everything a homemade scone should be: golden on the outside, tender and flaky inside, lightly sweet, buttery, and filled with bright orange flavor. The raisins add little bursts of sweetness throughout, while fresh orange zest keeps the flavor fresh and vibrant.

For the best result, remember the three most important rules: keep your butter cold, don’t overwork the dough, and bake in a fully preheated oven. Serve them warm with butter or orange marmalade for an easy breakfast or beautiful brunch treat.

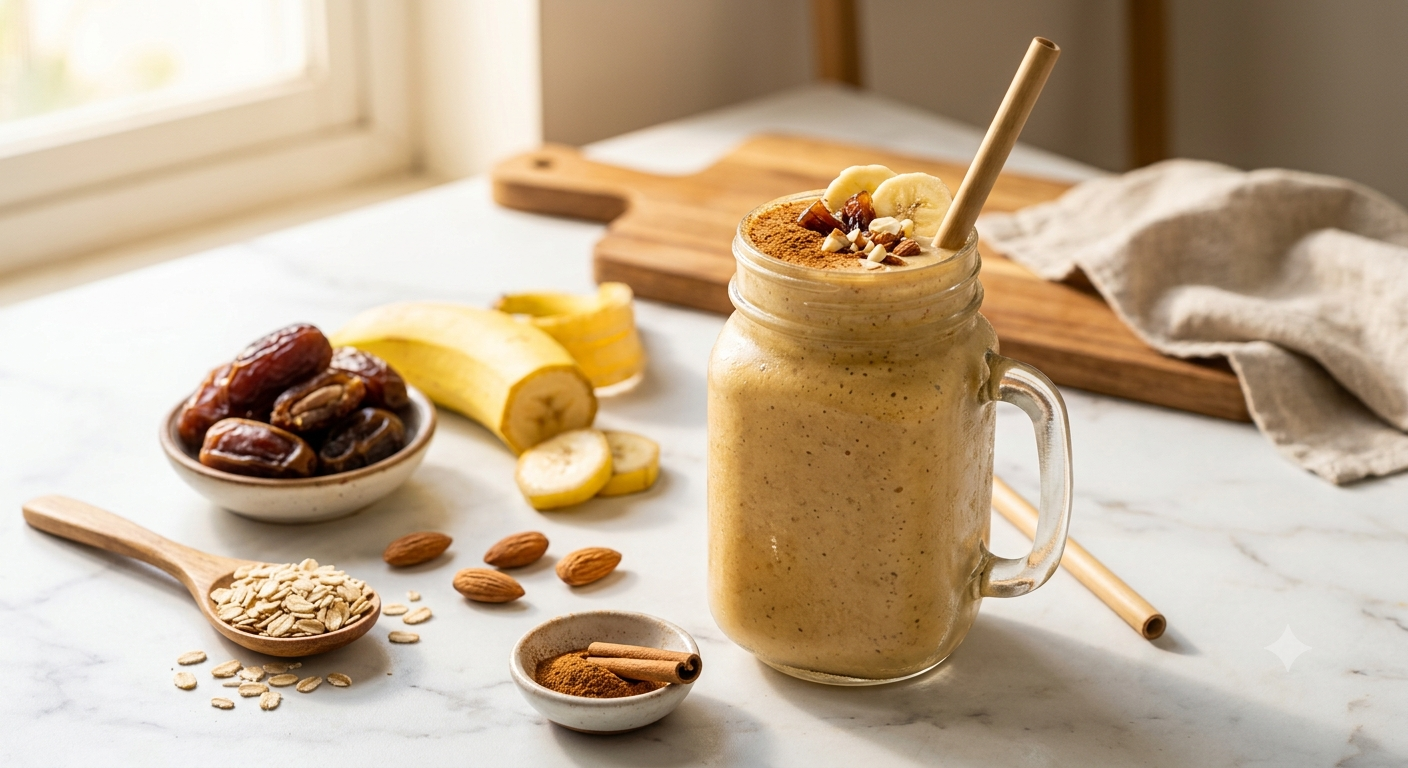
Creamy Oats and Dates Smoothie

Creamy Oats and Dates Smoothie

​This smoothie is perfect for those who struggle to find time for breakfast in the morning. The combination of oats and dates keeps you full until lunchtime, and it has a completely natural, sweet taste without any added sugar.

​Ingredients:

  • Oats: 3 tablespoons (You can use instant oats or rolled oats)
  • Soft Dates: 3 to 4 (Pitted/seeds removed)
  • Banana: 1 medium-sized (Frozen banana makes it extra creamy)
  • Milk: 1 large glass (You can use regular milk or any plant-based milk of your choice)
  • Cinnamon Powder: Just 1 pinch (For a warm, cozy aroma)
  • Almonds: 5 to 6 (Soaked and peeled)

​Instructions:

  1. Soak the Ingredients: First, add the oats and pitted dates to the blender. Pour a little bit of warm milk over them and let them sit for 5 minutes. This softens the oats and helps the dates blend easily.
  2. Add the Rest: After 5 minutes, add the banana, the remaining cold milk, peeled almonds, and a pinch of cinnamon powder into the blender.
  3. Blend Well: Run the blender on high speed until the oats and almonds are completely pulverized and the mixture turns into a rich, smooth, milkshake-like texture.
  4. Serve: Pour it into a large glass, dust a tiny pinch of cinnamon powder on top for garnish, and enjoy!

​Pro-Tips for the Perfect Smoothie

  • No Blender Rush: Always blend an oat-based smoothie for an extra 30–40 seconds. This ensures that any grainy texture from the oats is completely gone, leaving it velvety smooth.
  • Cold and Thick: If you prefer a thick and frosty smoothie, freeze your banana slices overnight and make sure your milk is ice-cold.
  • Peanut Butter Twist: If you love nutty flavors, add 1 tablespoon of peanut butter into the blender. It pairs beautifully with dates and banana while adding extra protein.

​Questions & Answers (Q&A)

Q1: Do I need to cook the oats before adding them to the smoothie?

A: No, there is absolutely no need to cook the oats. Soaking them in milk for just a few minutes before blending softens them enough to ensure there is no raw taste at all.

Q2: What should I do if the smoothie becomes too thick?

A: Oats naturally absorb liquid over time, which can make the smoothie thicken up if it sits for a while. If it gets too thick, simply stir in a splash of cold milk or water to adjust it to your preferred consistency.

Q3: Should I add extra sugar or honey to this recipe?

A: There is no need for added sugar. The natural sweetness from the ripe banana and the dates is more than enough to make this smoothie rich and sweet while keeping it completely healthy.

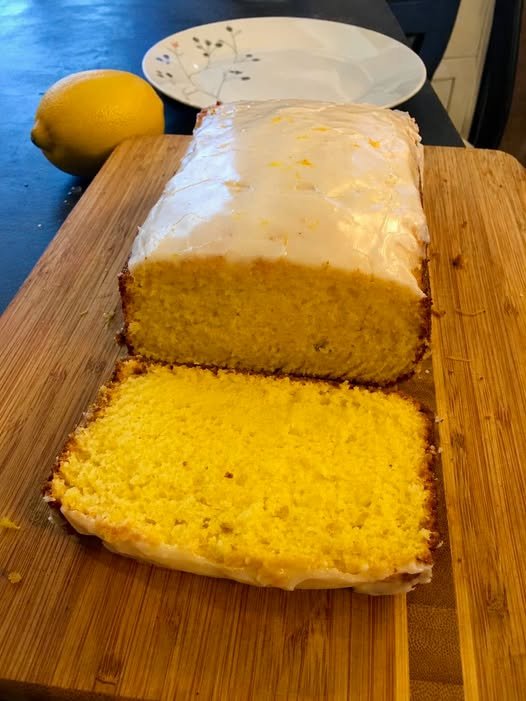
Glazed Lemon Loaf Cake

Glazed Lemon Loaf Cake

Description
This Glazed Lemon Loaf Cake is soft, buttery, and packed with fresh lemon flavor. The loaf has a tender, moist crumb thanks to yogurt and butter, while the sweet-tangy lemon glaze adds the perfect finishing touch. It’s an easy homemade cake that’s perfect for breakfast, brunch, afternoon tea, or dessert. Every slice is bursting with bright citrus flavor and melts in your mouth. Whether you’re baking for family or serving guests, this classic lemon loaf is always a crowd-pleaser.

Ingredients

For the Lemon Loaf

  • 2 cups all-purpose flour
  • 1½ teaspoons baking powder
  • ¼ teaspoon salt
  • 1 cup granulated sugar
  • ½ cup unsalted butter, softened
  • 2 large eggs
  • ½ cup plain Greek yogurt or sour cream
  • ¼ cup whole milk
  • 2 tablespoons fresh lemon juice
  • 1 tablespoon lemon zest
  • 1 teaspoon vanilla extract

For the Lemon Glaze

  • 1 cup powdered sugar
  • 2–3 tablespoons fresh lemon juice
  • 1 teaspoon lemon zest (optional)

Step-by-Step Instructions

Step 1: Prepare the Oven

Preheat your oven to 350°F (175°C). Grease and line a 9×5-inch loaf pan with parchment paper.

Step 2: Mix the Dry Ingredients

In a medium bowl, whisk together the flour, baking powder, and salt.

Step 3: Cream the Butter

In a large mixing bowl, beat the softened butter and sugar until light and fluffy, about 3–4 minutes.

Step 4: Add Eggs

Beat in the eggs one at a time, mixing well after each addition.

Step 5: Add Flavor

Mix in the vanilla extract, lemon zest, lemon juice, yogurt, and milk until smooth.

Step 6: Combine

Gradually fold the dry ingredients into the wet ingredients. Mix just until combined. Avoid overmixing to keep the loaf tender.

Step 7: Bake

Pour the batter into the prepared loaf pan and smooth the top.

Bake for 50–60 minutes, or until a toothpick inserted into the center comes out clean.

Step 8: Cool

Allow the loaf to cool in the pan for 10–15 minutes before transferring it to a wire rack.

Step 9: Make the Glaze

Whisk together the powdered sugar and lemon juice until smooth. Adjust the consistency with a little extra lemon juice if needed.

Step 10: Glaze & Serve

Once the loaf has cooled completely, drizzle the lemon glaze generously over the top. Let it set for about 15 minutes before slicing and serving.

Tips & Notes

  • Fresh lemons provide the best flavor.
  • Do not overmix the batter or the loaf may become dense.
  • Let the loaf cool completely before glazing.
  • Store in an airtight container for up to 4 days at room temperature.
  • Freeze individual slices for up to 2 months.

Frequently Asked Questions

Can I use bottled lemon juice?
Fresh lemon juice is recommended for the brightest flavor, but bottled can be used if necessary.

Can I make this ahead of time?
Yes! The flavor actually improves the next day.

Can I add blueberries?
Absolutely! Fold in 1 cup of fresh or frozen blueberries before baking.

How do I know when it’s done?
Insert a toothpick into the center. If it comes out clean or with a few moist crumbs, the loaf is ready.

Servings & Nutrition

Servings: 10 slices

Approximate Nutrition (Per Slice):

  • Calories: 290
  • Carbohydrates: 42g
  • Protein: 4g
  • Fat: 12g
  • Saturated Fat: 7g
  • Sugar: 26g
  • Fiber: 1g
  • Sodium: 140mg

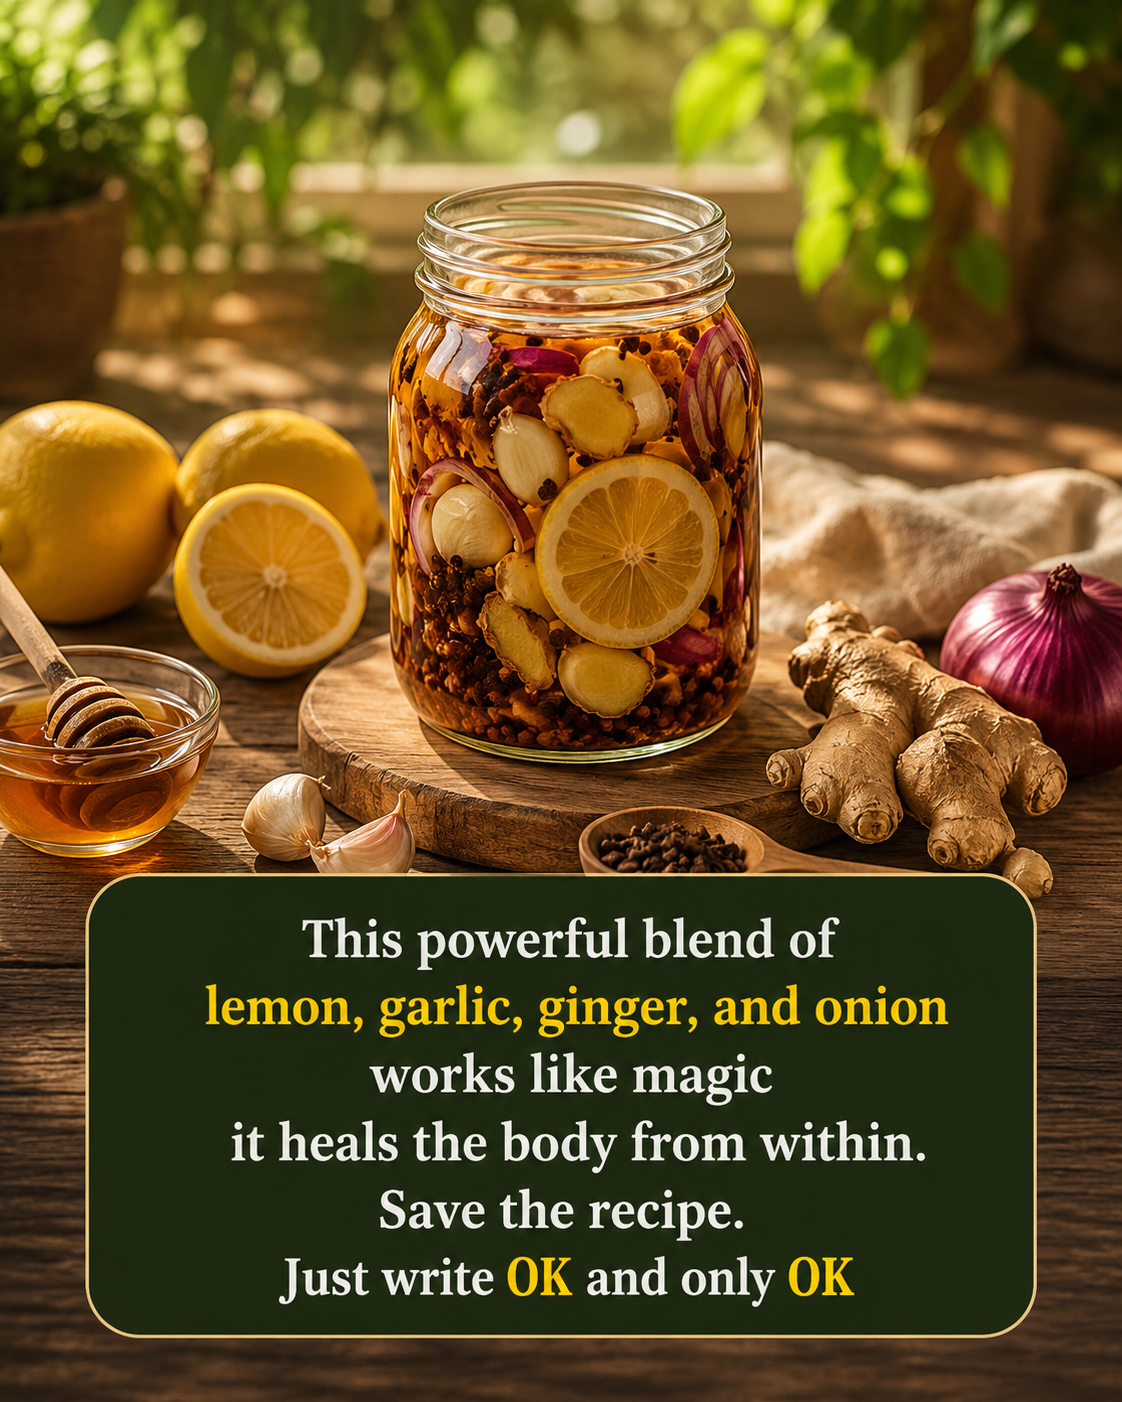
Lemon, Garlic, Ginger & Onion Wellness Blend

Lemon, Garlic, Ginger & Onion Wellness Blend

Description

This homemade wellness blend combines lemon, garlic, ginger, onion, honey, and warming spices into a flavorful infusion. It has a bold, tangy taste and can be enjoyed in small amounts as part of a balanced diet. While these ingredients are nutritious, there is no scientific evidence that this mixture cures diseases or “heals everything.” Think of it as a traditional wellness tonic rather than a medicine.

🛒 Ingredients

  • 🍋 2 medium lemons, thinly sliced
  • 🧄 1 whole garlic bulb, cloves peeled
  • 🫚 1 large piece fresh ginger (about 100 g), thinly sliced
  • 🧅 1 small red onion, thinly sliced
  • 🍯 1½ cups raw honey
  • 🌰 1 tbsp whole cloves
  • 🌿 2 cinnamon sticks
  • ⚫ 1 tsp whole black peppercorns (optional)

👩‍🍳 Step-by-Step Instructions

1️⃣ Prepare the Ingredients

➡️ Wash the lemons thoroughly and slice them thinly.

➡️ Peel the garlic cloves.

➡️ Peel and slice the ginger.

➡️ Slice the onion into thin rounds.

2️⃣ Sterilize the Jar

➡️ Wash a large glass jar with hot, soapy water.

➡️ Rinse well and allow it to dry completely.

3️⃣ Layer Everything

➡️ Add a layer of lemon slices.

➡️ Add some garlic, ginger, and onion.

➡️ Sprinkle in a few cloves and peppercorns.

➡️ Repeat the layers until all the ingredients are used.

➡️ Place the cinnamon sticks along the side of the jar.

4️⃣ Add the Honey

➡️ Slowly pour the honey over the layered ingredients until everything is fully covered.

➡️ Use a clean spoon to remove any trapped air bubbles if needed.

5️⃣ Infuse

➡️ Seal the jar tightly.

➡️ Let it sit in the refrigerator for 24–48 hours so the flavors blend together.

6️⃣ Enjoy

➡️ Stir gently before each use.

➡️ Take 1–2 teaspoons of the infused honey or mix a spoonful into warm (not boiling) water or herbal tea.


💡 Tips

✅ Always use clean utensils when serving.

✅ Keep refrigerated after opening.

✅ For the best flavor, enjoy within 3–4 weeks.

✅ Do not give honey to children under 1 year of age.


❓Frequently Asked Questions

Q: Does this cure illnesses?
➡️ No. There is no reliable scientific evidence that this blend cures diseases. It can be enjoyed as a flavorful homemade wellness infusion.

Q: Can I drink it every day?
➡️ Most healthy adults can enjoy a small amount occasionally, but moderation is best.

Q: Can I use lime instead of lemon?
➡️ Yes. Lime provides a similar citrus flavor.

Q: Should I eat the ingredients too?
➡️ Yes, if you enjoy the taste, the infused lemon, ginger, garlic, and onion are edible.


🍽️ Servings

Makes: About 2½ cups
Serving Size: 1–2 teaspoons


🥗 Approximate Nutrition (Per 1 Tablespoon)

  • 🔥 Calories: 55
  • 🍯 Carbohydrates: 14 g
  • 🍋 Vitamin C: Small amount
  • 🫚 Naturally contains plant compounds from ginger, garlic, onion, and lemon

Guava Leaf Mouth Rinse for Oral Hygiene

Guava Leaf Mouth Rinse for Oral Hygiene

Description

Guava leaves have traditionally been used in some cultures as part of oral hygiene routines because they contain natural plant compounds with antibacterial and anti-inflammatory properties. While a guava leaf rinse may help support a clean mouth and fresh breath, it is not a substitute for brushing, flossing, or professional dental care, and it should not be expected to whiten teeth dramatically or repair dental disease.

🛒 Ingredients

  • 🌿 10–12 fresh guava leaves (washed well)
  • 💧 2 cups water
  • 🧂 ¼ teaspoon salt (optional)

👩‍🍳 Instructions

1️⃣ Clean the Leaves

➡️ Rinse the guava leaves thoroughly under running water to remove any dirt.

2️⃣ Boil

➡️ Add the leaves and 2 cups of water to a saucepan.

➡️ Bring to a gentle boil.

➡️ Reduce the heat and simmer for 10–15 minutes.

3️⃣ Cool

➡️ Remove from the heat.

➡️ Let the mixture cool until it is lukewarm.

4️⃣ Strain

➡️ Strain the liquid into a clean glass or bottle.

➡️ Stir in the salt if using.

5️⃣ Use

➡️ Swish about 2–3 tablespoons around your mouth for 30–60 seconds.

➡️ Spit it out. Do not swallow the rinse.

➡️ Use once daily after brushing if desired.


💡 Tips

✅ Always prepare the rinse with clean, fresh leaves.

✅ Store any leftover rinse in the refrigerator for up to 2 days.

✅ Make a fresh batch regularly for the best quality.

✅ Continue brushing twice a day with fluoride toothpaste and flossing daily.


❓Q&A

Q: Does guava leaf rinse whiten teeth?
➡️ There is no strong scientific evidence that it can significantly whiten teeth. Removing some surface debris may make teeth look cleaner, but it is not a replacement for whitening treatments.

Q: Can it help with bad breath?
➡️ It may help freshen breath temporarily when used alongside good oral hygiene.

Q: Can it remove plaque?
➡️ It is not proven to remove established plaque or tartar. Regular brushing, flossing, and professional dental cleanings remain the most effective methods.

Q: Can I use dried guava leaves?
➡️ Yes. Use about 1 tablespoon of dried guava leaves in place of fresh leaves.

🌱 Possible Benefits

  • 🌿 May help freshen breath.
  • 🦷 May support overall oral hygiene when used with brushing and flossing.
  • 💚 Contains natural antioxidants and plant compounds.
  • ✨ May provide a soothing effect for healthy gums.

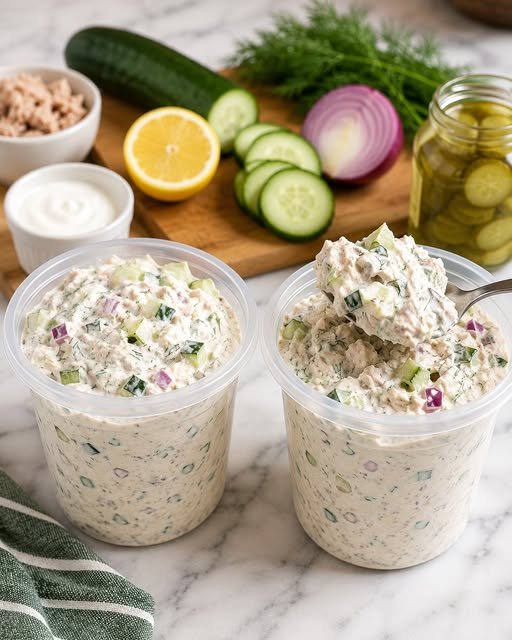
Creamy Dill Tuna Cucumber Salad

Description

This Creamy Dill Tuna Cucumber Salad is a light, protein-packed salad made with tuna, crunchy cucumbers, red onions, fresh dill, and a creamy Greek yogurt dressing. It’s refreshing, low in carbs, and perfect for meal prep, sandwiches, lettuce wraps, or a healthy lunch. The combination of tangy lemon, fresh herbs, and tender tuna creates a delicious salad that’s both satisfying and nutritious.

Servings

Serves: 4–6 people

Prep Time: 15 minutes
Cook Time: None
Total Time: 15 minutes

Ingredients

  • 2 cans (5 oz each) tuna, drained
  • 1 cup plain Greek yogurt
  • 1 medium cucumber, diced
  • ¼ cup red onion, finely diced
  • 2 tablespoons fresh dill, chopped
  • 1 tablespoon lemon juice
  • 1 teaspoon Dijon mustard
  • ½ teaspoon garlic powder
  • Salt and black pepper to taste
  • Optional: 2 tablespoons chopped pickles

Instructions

Step 1

Drain the tuna and place it in a large mixing bowl.

Step 2

Add diced cucumber, red onion, dill, and pickles if using.

Step 3

In a small bowl, whisk together Greek yogurt, lemon juice, Dijon mustard, garlic powder, salt, and pepper.

Step 4

Pour the dressing over the tuna mixture and gently stir until everything is evenly coated.

Step 5

Taste and adjust seasoning if needed.

Step 6

Cover and refrigerate for 20–30 minutes before serving for the best flavor.

Serve chilled with crackers, lettuce wraps, sandwiches, or enjoy on its own.

Notes

  • Greek yogurt keeps the salad creamy while adding extra protein.
  • Fresh dill gives the salad its bright, refreshing flavor.
  • Cucumbers add crunch and freshness.

Tips

 Use canned chicken instead of tuna for variation.
 Add celery for extra crunch.
 Store in an airtight container for up to 3 days.
 Serve in lettuce cups for a low-carb meal.

Nutritional Information (Per Serving)

  • Calories: 190
  • Protein: 23g
  • Carbohydrates: 4g
  • Fat: 8g
  • Fiber: 1g
  • Sodium: 320mg

Approximate values.

Health Benefits

  • High in lean protein for muscle support and satiety.
  • Rich in omega-3 fatty acids from tuna.
  • Greek yogurt provides probiotics and calcium.
  • Low-carb and meal-prep friendly.
  • Fresh vegetables provide vitamins and antioxidants.

Q&A

Q: Can I use mayonnaise instead of Greek yogurt?
Yes, but Greek yogurt is lighter and higher in protein.

Q: Can I make it ahead?
Absolutely! It tastes even better after chilling.

Q: Can I freeze this salad?
No, freezing changes the texture of the yogurt and cucumbers.

Q: What can I serve it with?
Crackers, toast, lettuce wraps, stuffed avocados, or sandwiches.

Final Thoughts

This Creamy Dill Tuna Cucumber Salad is fresh, creamy, and incredibly easy to make. Packed with protein and crunchy vegetables, it’s the perfect healthy lunch, meal-prep recipe, or light dinner.

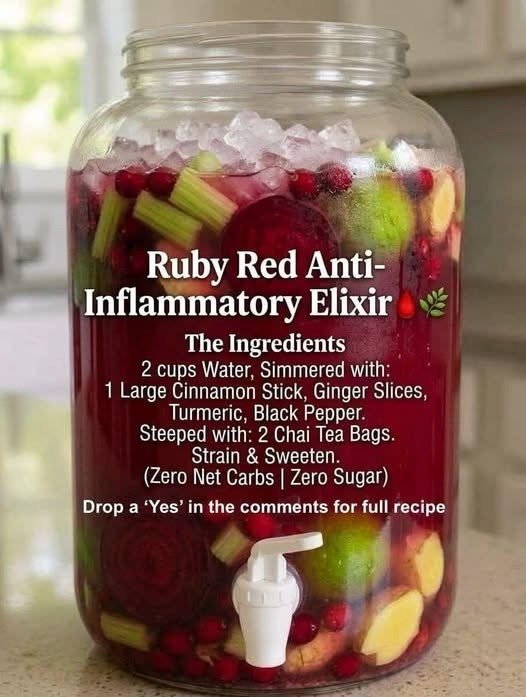
Ruby Red Anti-Inflammatory Elixir

This vibrant Ruby Red Anti-Inflammatory Elixir is a warm, comforting herbal drink made with natural spices, fresh ginger, turmeric, chai tea, and colorful fruits and vegetables. It delivers a bold, cozy flavor that is perfect for chilly mornings or relaxing evenings. While ingredients like ginger, turmeric, and cinnamon are commonly included in wellness drinks, it’s important to note that no drink can prevent or cure inflammation or disease on its own. Enjoy this elixir as part of a balanced diet and healthy lifestyle.

🛒 Ingredients

For the Herbal Base

  • 2 cups water
  • 1 large cinnamon stick
  • 1-inch fresh ginger, sliced
  • 1-inch fresh turmeric, sliced (or 1 teaspoon ground turmeric)
  • 8–10 whole black peppercorns
  • 2 chai tea bags

Optional Flavor Additions

  • 1 small beet, peeled and sliced
  • 1 stalk celery, chopped
  • ½ cup fresh cranberries
  • ½ green apple, sliced
  • 1 tablespoon fresh lemon juice
  • 1–2 teaspoons honey or maple syrup (optional)

👩‍🍳 Step-by-Step Instructions

Step 1: Prepare the Base

Pour 2 cups of water into a small saucepan. Add the cinnamon stick, sliced ginger, turmeric, and black peppercorns.

Step 2: Simmer

Bring the mixture to a gentle boil. Reduce the heat and simmer for 10–15 minutes so the spices infuse the water.

Step 3: Steep the Tea

Remove the saucepan from the heat. Add the chai tea bags and let them steep for 5 minutes.

Step 4: Strain

Remove the tea bags and strain the liquid into a heat-safe pitcher or large jar.

Step 5: Add Optional Ingredients

If using beet, celery, cranberries, and apple for extra flavor and presentation, add them to the serving jar. Pour the strained tea over the fruit and vegetables.

Step 6: Sweeten

Stir in honey or maple syrup if desired. Add a squeeze of fresh lemon juice for brightness.

Step 7: Serve

Enjoy warm, or let it cool and serve over ice for a refreshing herbal drink.

💡 Tips

  • Fresh turmeric gives the brightest color and freshest flavor.
  • Black pepper enhances the absorption of compounds in turmeric.
  • Adjust the sweetness to your taste.
  • Refrigerate leftovers for up to 3 days.
  • Reheat gently without boiling to preserve the delicate tea flavors.

❓Frequently Asked Questions

Can I drink this every day?
Yes, most healthy adults can enjoy it in moderation as part of a balanced diet.

Can I use powdered ginger and turmeric?
Yes. Use about 1 teaspoon of each if fresh is unavailable.

Can I make it caffeine-free?
Absolutely. Replace the chai tea bags with caffeine-free herbal chai or rooibos tea.

Can I drink it cold?
Yes. Chill it in the refrigerator and serve over ice.

🍽️ Servings

  • Makes: 2–3 servings

🥤 Approximate Nutrition (Per Serving)

  • Calories: 25–45 (without added sweetener)
  • Carbohydrates: 6–10g
  • Protein: 0g
  • Fat: 0g
  • Fiber: 1–2g
  • Sugar: 2–5g (varies with fruit and sweetener)

🌿 Wellness Note

This drink contains ingredients that are commonly used in traditional herbal beverages, such as ginger, turmeric, cinnamon, and tea. Although these ingredients have been studied for potential health benefits, no single drink can treat or cure inflammation or medical conditions. If you have a medical condition, are pregnant, or take blood-thinning medications, consult your healthcare provider before consuming large amounts of ginger or turmeric regularly.

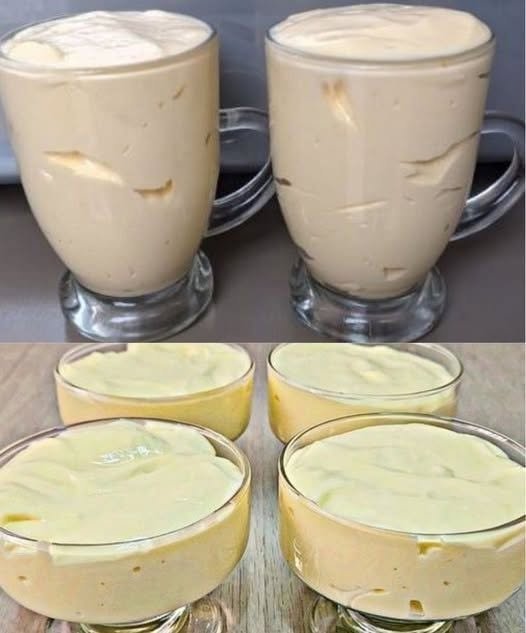
Creamy 3-Ingredient Passion Fruit Dessert

Creamy 3-Ingredient Passion Fruit Dessert

Description

If you’re looking for a quick, budget-friendly dessert that tastes incredibly creamy, this 3-ingredient Passion Fruit Dessert is the perfect choice. It requires no gelatin, no condensed milk, and only takes a few minutes to prepare in a blender. The powdered milk creates a rich, mousse-like texture while the passion fruit drink mix adds a delicious sweet-tangy flavor. Simply blend, chill, and enjoy! It’s an ideal dessert for busy weekdays, family gatherings, or whenever you’re craving something sweet without much effort.

Ingredients

For the Dessert

  • 10 tablespoons powdered milk
  • 1 packet (25 g / 0.88 oz) passion fruit flavored powdered drink mix
  • ¾ cup (200 ml) ice-cold water

Optional Garnish

  • Fresh passion fruit pulp
  • Whipped cream
  • Mint leaves
  • White chocolate shavings

Instructions

Step 1: Blend the Base

Pour the ice-cold water into a blender.

Step 2: Add Flavor

Add the passion fruit powdered drink mix and blend for about 30 seconds until completely dissolved.

Step 3: Add the Powdered Milk

With the blender running on low speed, gradually add the powdered milk one spoonful at a time. This helps prevent lumps and creates a smooth texture.

Step 4: Blend Until Creamy

Continue blending for 2–3 minutes until the mixture becomes thick, creamy, and fluffy.

Step 5: Transfer

Pour the dessert into individual serving glasses or one medium glass serving dish.

Step 6: Chill

Refrigerate for at least 2 hours, or until the dessert is firm and well chilled.

Step 7: Serve

Top with fresh passion fruit pulp, whipped cream, or chocolate shavings if desired, and enjoy cold.

Tips

  • Use very cold water for the thickest consistency.
  • Blend a little longer for an extra light and airy texture.
  • Refrigerating overnight makes the dessert even creamier.
  • Add a few ice cubes while blending for an even fluffier result.

Storage

  • Store covered in the refrigerator for up to 3 days.
  • Not recommended for freezing, as the texture may become grainy after thawing.

Frequently Asked Questions

Can I use another drink mix flavor?
Yes! Strawberry, lemon, pineapple, grape, and mango all work well.

Can I use warm water?
No. Ice-cold water helps the dessert become thick and creamy.

Can I make it sweeter?
If you prefer a sweeter dessert, add 1–2 tablespoons of sugar or your favorite sweetener before blending.

Can I prepare it ahead of time?
Absolutely! It’s a great make-ahead dessert for parties and family dinners.

Servings

  • Makes: 4 servings

Approximate Nutrition (Per Serving)

  • Calories: 140
  • Protein: 7 g
  • Carbohydrates: 19 g
  • Fat: 3 g
  • Sugar: 17 g
  • Calcium: Good source from powdered milk

This simple no-bake dessert is creamy, refreshing, and perfect whenever you need a fast sweet treat with minimal ingredients.

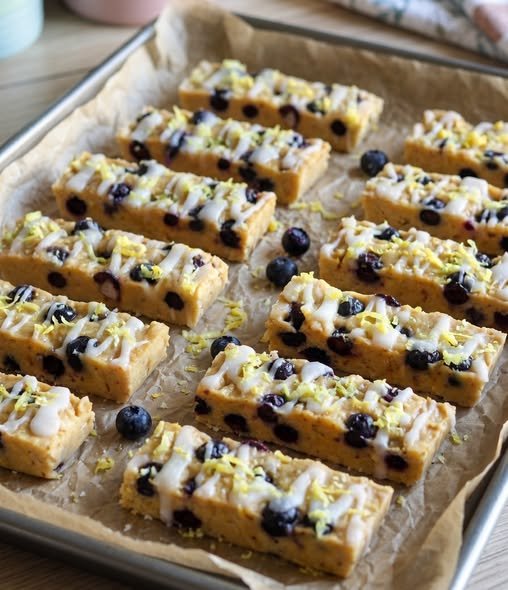
Blueberry Lemon Cookie Bars

These soft and buttery Blueberry Lemon Cookie Bars are bursting with juicy blueberries, bright lemon flavor, and finished with a sweet lemon glaze. They’re easy to make in one pan and perfect for brunch, afternoon snacks, summer gatherings, or dessert. Every bite is tender, fruity, and refreshing!

🛒 Ingredients

For the Cookie Bars

  • 2 cups all-purpose flour
  • 1 tsp baking powder
  • ¼ tsp salt
  • ½ cup unsalted butter, softened
  • ¾ cup granulated sugar
  • 1 large egg
  • 1 tsp vanilla extract
  • 2 tbsp fresh lemon juice
  • 1 tbsp lemon zest
  • 1½ cups fresh blueberries (or frozen, not thawed)

For the Lemon Glaze

  • 1 cup powdered sugar
  • 2–3 tbsp fresh lemon juice
  • 1 tsp lemon zest

👩‍🍳 Instructions

Step 1: Prepare the Pan

  • Preheat your oven to 350°F (175°C).
  • Line an 8×8-inch baking pan with parchment paper.

Step 2: Mix Dry Ingredients

  • In a bowl, whisk together the flour, baking powder, and salt.
  • Set aside.

Step 3: Make the Batter

  • In a large bowl, beat the softened butter and sugar until light and fluffy.
  • Add the egg, vanilla extract, lemon juice, and lemon zest.
  • Mix until smooth.

Step 4: Combine

  • Gradually add the dry ingredients to the wet mixture.
  • Stir just until combined.
  • Gently fold in the blueberries without crushing them.

Step 5: Bake

  • Spread the batter evenly into the prepared pan.
  • Bake for 28–35 minutes, or until the edges are lightly golden and a toothpick inserted in the center comes out mostly clean.

Step 6: Cool

  • Let the bars cool completely in the pan before glazing.

Step 7: Make the Glaze

  • Whisk together powdered sugar, lemon juice, and lemon zest until smooth.
  • Drizzle generously over the cooled bars.

Step 8: Slice & Serve

  • Cut into bars or squares.
  • Garnish with extra lemon zest if desired and enjoy!

💡 Tips

  • Toss blueberries with 1 teaspoon flour before folding them into the batter to prevent sinking.
  • Fresh lemon juice gives the best flavor.
  • Allow the glaze to set for 15–20 minutes before slicing for neat bars.
  • Store in an airtight container for up to 4 days, or refrigerate for up to 1 week.

❓Q&A

Can I use frozen blueberries?
Yes! Use them straight from the freezer without thawing.

Can I make these ahead of time?
Absolutely. They taste even better the next day after the flavors meld together.

Can I freeze them?
Yes. Freeze (without glaze if possible) for up to 2 months. Thaw overnight in the refrigerator before serving.

🍽️ Servings

  • Makes: 16 bars

🥣 Nutrition (Approx. Per Bar)

  • Calories: 185
  • Protein: 2g
  • Carbohydrates: 28g
  • Fat: 7g
  • Fiber: 1g
  • Sugar: 16g

Ginger Lemon Wellness Shot

Ginger Lemon Wellness Shot

Description

This homemade Ginger Lemon Wellness Shot is a refreshing drink made with fresh ginger, lemon juice, apple cider vinegar, and a touch of honey. It has a bold, zesty flavor and can be enjoyed as part of a balanced diet. While these ingredients are commonly used in wellness drinks, no single beverage can replace healthy eating, regular exercise, or medical care.

Prep Time

10 minutes

Servings

8–10 shots

Ingredients

For the Wellness Shot

  • 1 large fresh ginger root (about 150g), peeled and chopped
  • Juice of 2 large lemons
  • 2 tablespoons apple cider vinegar (with the mother, optional)
  • 1 tablespoon honey (optional)
  • 1 cup cold water

Instructions

Step 1: Prepare the Ingredients

Wash and peel the ginger. Cut it into small pieces for easier blending. Squeeze the juice from the lemons and remove any seeds.

Step 2: Blend

Add the chopped ginger, lemon juice, water, apple cider vinegar, and honey (if using) to a blender. Blend on high speed for about 1 minute until smooth.

Step 3: Strain

Pour the mixture through a fine mesh strainer or cheesecloth into a bowl or measuring jug. Press with the back of a spoon to extract as much liquid as possible.

Step 4: Bottle

Transfer the strained liquid into clean glass bottles or jars with lids.

Step 5: Chill

Refrigerate for at least 1 hour before serving.

Step 6: Serve

Shake well before each use. Pour about 1–2 tablespoons into a small glass and enjoy chilled.

Tips

  • Fresh ginger gives the best flavor.
  • Adjust the amount of honey to suit your taste.
  • Add a pinch of turmeric or black pepper for extra flavor if desired.
  • Store in the refrigerator for up to 5 days.
  • Shake before serving, as natural separation is normal.

Frequently Asked Questions

Can I drink this every day?
Yes, many people enjoy a small serving daily as part of a balanced diet. If you have a medical condition or take medications, consult your healthcare provider first.

Can I skip the apple cider vinegar?
Absolutely. The drink is still delicious with just ginger, lemon, water, and honey.

Can I freeze it?
Yes. Freeze in ice cube trays or small containers for up to 2 months.

Can I make it sweeter?
Add more honey or use a natural sweetener of your choice.

Nutrition (Per Shot – Approximate)

  • Calories: 12
  • Carbohydrates: 3g
  • Protein: 0g
  • Fat: 0g
  • Fiber: 0g
  • Sugar: 2g
  • Vitamin C: Good source
  • Sodium: 2mg

Note: This wellness shot may be a flavorful addition to a healthy lifestyle, but it is not a proven treatment for belly fat or a substitute for medical care. Sustainable weight management comes from a balanced diet, regular physical activity, good sleep, and overall healthy habits.

Ginger, Garlic, Onion & Lemon Wellness Drink

Ginger, Garlic, Onion & Lemon Wellness Drink

🌟 Description

This homemade wellness drink combines fresh ginger, garlic, onion, and lemon juice into a simple daily tonic. Ginger is known for supporting digestion, garlic contains natural sulfur compounds, onion provides antioxidants, and lemon adds vitamin C and a refreshing citrus flavor. While many people enjoy this drink as part of a healthy lifestyle, it is not a cure or guaranteed treatment for any disease. Pair it with a balanced diet, regular exercise, and adequate hydration for the best overall wellness.

⏱️ Prep Time

10 minutes

🍽️ Servings

About 10 servings (1 teaspoon per serving)

🛒 Ingredients

  • 1 medium fresh ginger root (about 100g), peeled
  • 1 small onion, peeled
  • 4 garlic cloves, peeled
  • Juice of 2 fresh lemons
  • 2–3 tablespoons water (if needed for blending)

👩‍🍳 Instructions

  1. Wash and peel the ginger, onion, and garlic.
  2. Chop everything into small pieces.
  3. Add the ginger, onion, garlic, and lemon juice to a blender.
  4. Blend until smooth, adding a little water if needed.
  5. Pour the mixture through a fine strainer or cheesecloth to remove the pulp if you prefer a smoother liquid.
  6. Transfer to a clean glass jar with a lid.
  7. Refrigerate for up to 5 days.

🥄 How to Use

  • Take 1 teaspoon once daily.
  • If the flavor is too strong, mix it into a small glass of warm water.
  • It can be taken after a meal if consumed on an empty stomach causes discomfort.

💡 Tips

  • Use fresh ingredients for the best flavor.
  • Shake or stir before each use.
  • Make small batches to keep it fresh.
  • Avoid adding sugar to maintain the natural taste.

❓Frequently Asked Questions

Can I drink it every day?
Many people do, but moderation is important. If you have any medical conditions or take medications, consult a healthcare professional before using it regularly.

Can I add honey?
Yes, 1 teaspoon of honey can help balance the strong flavor.

How long does it last?
Store refrigerated and use within 5 days.

Can I freeze it?
Yes. Freeze in ice cube trays and thaw one portion as needed.

🥗 Approximate Nutrition (Per 1 Teaspoon)

  • Calories: 3
  • Carbohydrates: 1g
  • Fat: 0g
  • Protein: 0g
  • Vitamin C: Small amount
  • Naturally contains plant compounds from ginger, garlic, onion, and lemon.

Note: Claims that this drink can “clean the gut,” “cure disease,” or provide guaranteed health benefits are not supported by strong scientific evidence. Enjoy it as a flavorful wellness drink rather than a medical treatment.

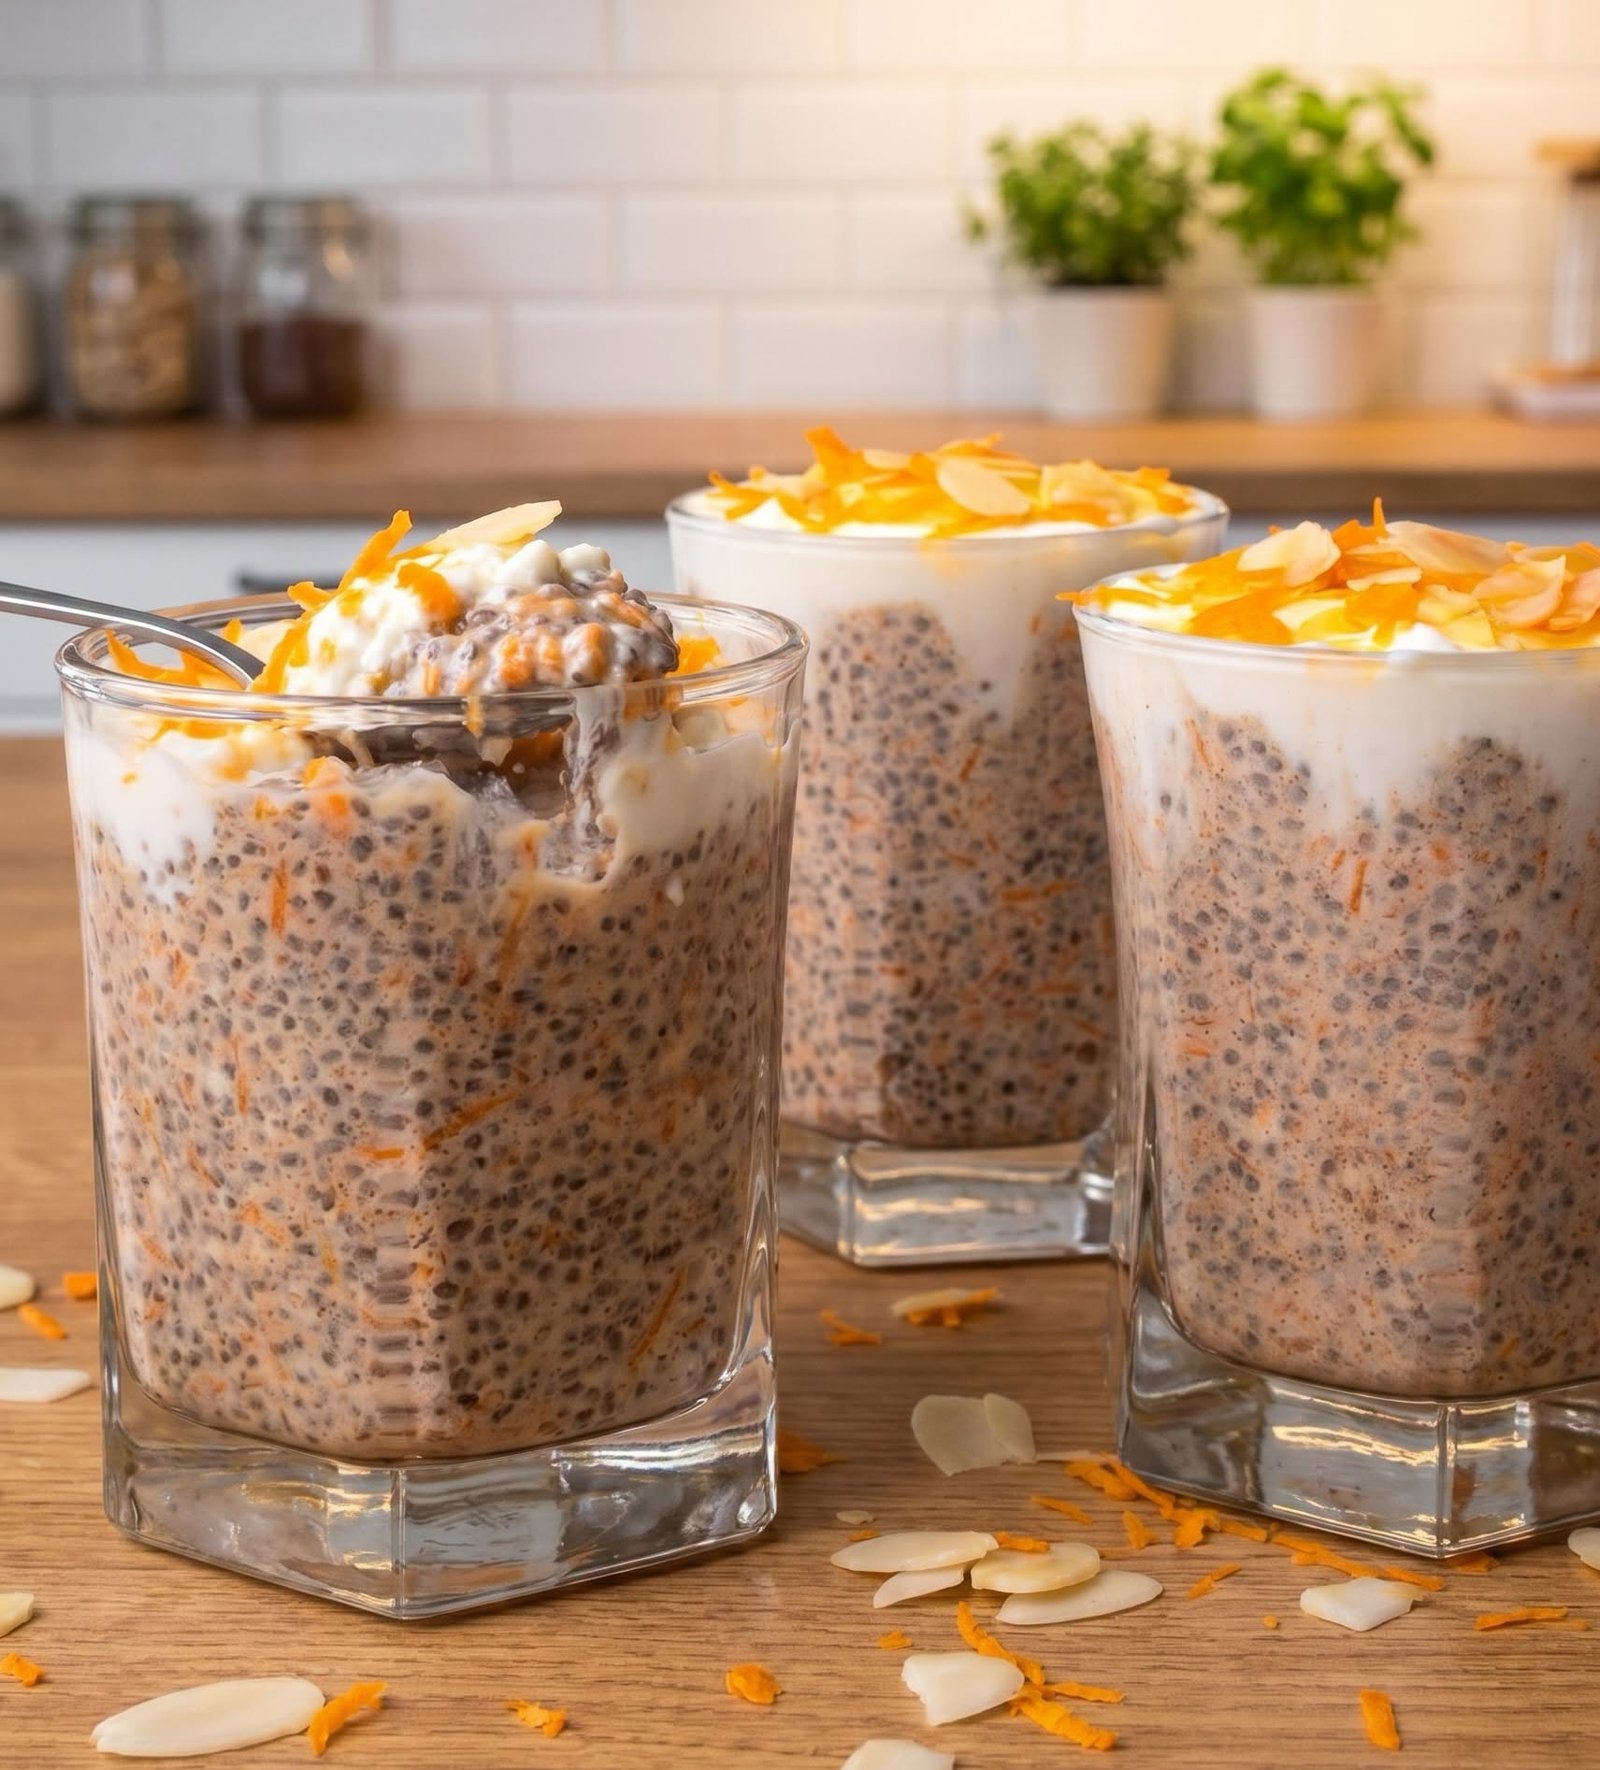
Carrot Cake Chia Pudding with Cottage Cheese

Description
This Carrot Cake Chia Pudding with Cottage Cheese is a creamy, high-protein breakfast or snack that tastes just like carrot cake. Made with wholesome ingredients like grated carrots, chia seeds, cottage cheese, cinnamon, and maple syrup, it’s naturally satisfying, packed with fiber and protein, and perfect for meal prep.

🛒 Ingredients

Chia Pudding

  • 1 cup cottage cheese
  • 1 cup milk (dairy or unsweetened almond milk)
  • ¼ cup chia seeds
  • 1 medium carrot, finely grated
  • 2 tbsp maple syrup or honey
  • 1 tsp vanilla extract
  • 1 tsp ground cinnamon
  • ¼ tsp ground nutmeg
  • Pinch of salt

Toppings

  • 2 tbsp chopped walnuts or pecans
  • 1 tbsp shredded coconut (optional)
  • Extra grated carrot
  • A pinch of cinnamon

👩‍🍳 Instructions

  1. Add the cottage cheese, milk, maple syrup, vanilla, cinnamon, nutmeg, and salt to a blender.
  2. Blend until completely smooth and creamy.
  3. Pour the mixture into a bowl or jar.
  4. Stir in the chia seeds and grated carrot until evenly combined.
  5. Let the mixture sit for 10 minutes, then stir again to prevent the chia seeds from clumping.
  6. Cover and refrigerate for at least 4 hours, preferably overnight.
  7. Before serving, stir well and add a splash of milk if you prefer a thinner consistency.
  8. Top with chopped walnuts, shredded coconut, extra grated carrot, and a light sprinkle of cinnamon.

💡 Tips

  • Finely grate the carrots for the best texture.
  • For extra sweetness, add a few raisins.
  • Store in airtight jars in the refrigerator for up to 4 days.
  • Add a scoop of vanilla protein powder for even more protein.

❓Frequently Asked Questions

Can I make it dairy-free?
Yes. Use dairy-free cottage cheese and your favorite plant-based milk.

Can I use quick oats?
Yes. Stir in 2–3 tablespoons for a thicker, heartier pudding.

Can I freeze it?
Freezing isn’t recommended, as the texture may change after thawing.

🍽️ Servings

Serves: 2

🥗 Approximate Nutrition (Per Serving)

  • Calories: 320
  • Protein: 20g
  • Carbohydrates: 24g
  • Fat: 15g
  • Fiber: 8g
  • Sugar: 13g

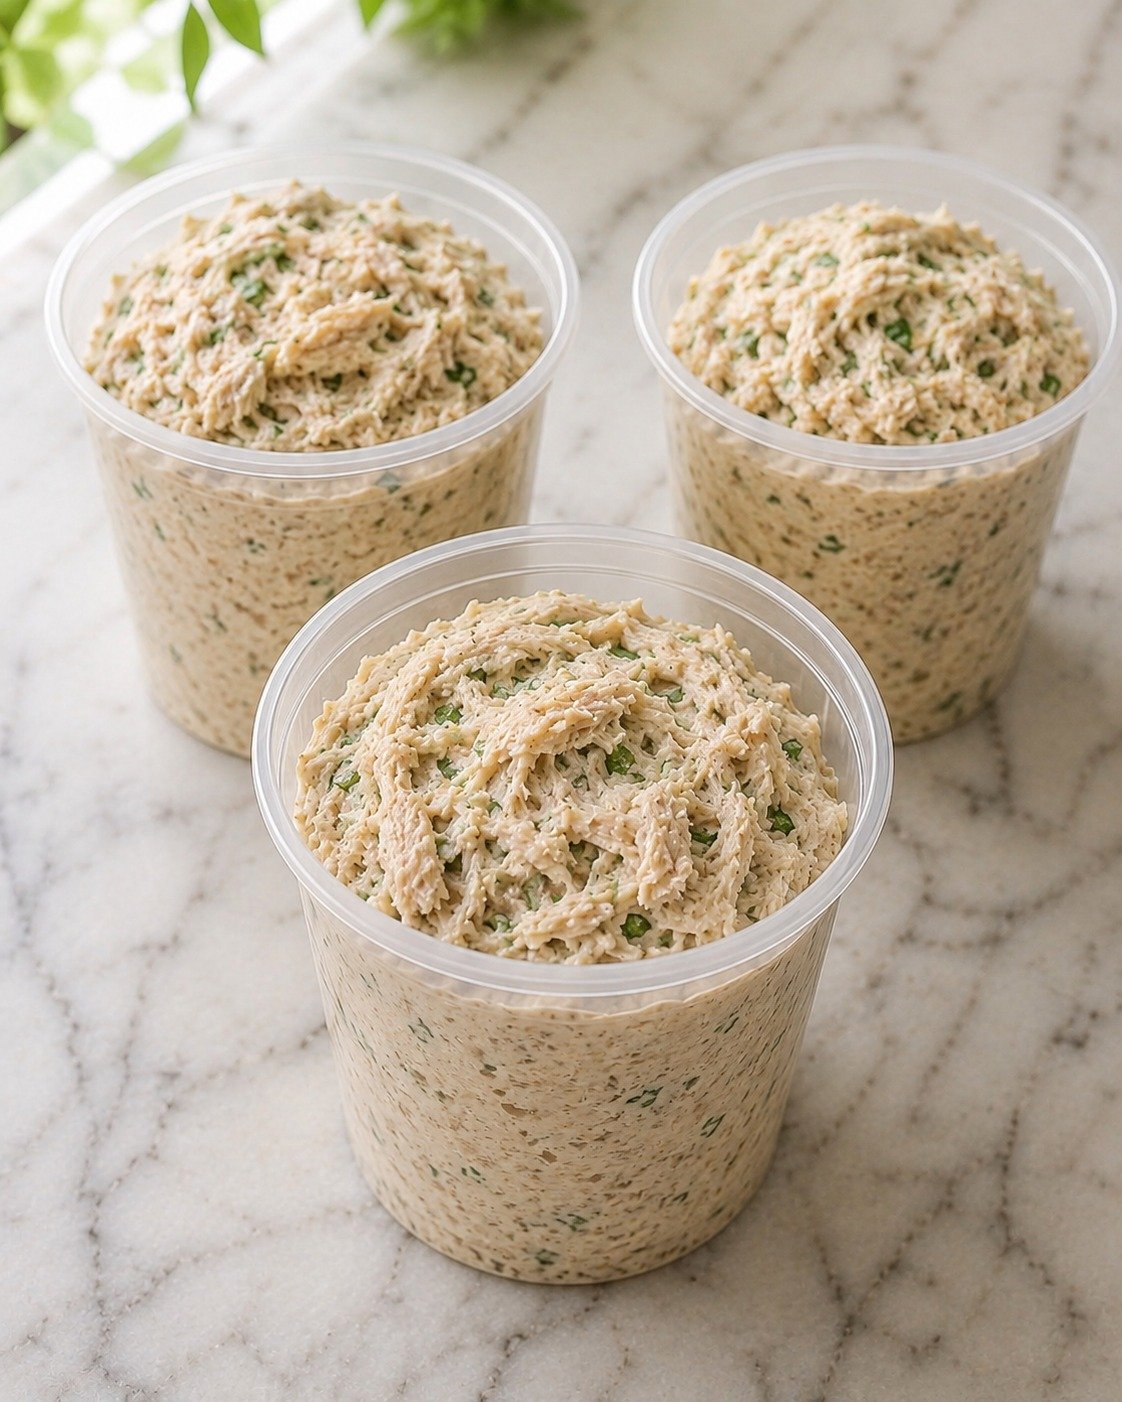
🥗 Classic Creamy Chicken Salad

🥗 Classic Creamy Chicken Salad

Description
This Classic Creamy Chicken Salad is packed with tender shredded chicken, a rich and creamy dressing, and fresh herbs for the perfect balance of flavor and texture. It’s ideal for sandwiches, wraps, crackers, lettuce cups, or meal prep. Ready in just minutes, this protein-packed recipe is perfect for lunch, picnics, or quick family meals.

🛒 Ingredients

Chicken Salad

  • 4 cups cooked shredded chicken
  • ¾ cup mayonnaise
  • ¼ cup sour cream or Greek yogurt
  • 2 celery stalks, finely diced
  • 2 green onions, finely sliced
  • 2 tbsp fresh parsley, chopped
  • 1 tsp Dijon mustard
  • 1 tsp garlic powder
  • ½ tsp onion powder
  • ½ tsp dried dill
  • ½ tsp salt
  • ¼ tsp black pepper
  • 1 tbsp fresh lemon juice

👩‍🍳 Instructions

  1. Place the shredded chicken into a large mixing bowl.
  2. Add the mayonnaise, sour cream, Dijon mustard, and lemon juice.
  3. Sprinkle in the garlic powder, onion powder, dried dill, salt, and black pepper.
  4. Add the diced celery, green onions, and chopped parsley.
  5. Mix everything together until the chicken is evenly coated in the creamy dressing.
  6. Cover and refrigerate for 30 minutes to allow the flavors to blend.
  7. Stir once before serving.
  8. Serve in sandwiches, wraps, croissants, lettuce cups, or with crackers.

💡 Tips

  • Rotisserie chicken works perfectly for this recipe.
  • Add chopped grapes or dried cranberries for a touch of sweetness.
  • Chopped pecans or almonds add a delicious crunch.
  • Store in an airtight container in the refrigerator for up to 4 days.

❓Frequently Asked Questions

Can I make it ahead of time?
Yes! It actually tastes even better after chilling for a few hours.

Can I freeze it?
Freezing isn’t recommended because mayonnaise can separate after thawing.

Can I use canned chicken?
Yes, just drain it well before mixing.

🍽️ Servings

6 servings

🥗 Approximate Nutrition (Per Serving)

  • Calories: 340
  • Protein: 31g
  • Carbohydrates: 3g
  • Fat: 22g
  • Fiber: 0.5g
  • Sugar: 1g

Classic Butter Cookies

Classic Butter Cookies

Description
These Classic Butter Cookies are soft, buttery, and lightly crisp around the edges with a tender melt-in-your-mouth center. Made with simple pantry ingredients, they’re perfect for afternoon tea, holiday cookie trays, or anytime you’re craving a homemade treat. The dough comes together quickly, making these cookies easy enough for beginners and delicious enough for everyone.

🛒 Ingredients

  • 1 cup (225g) unsalted butter, softened
  • ¾ cup (150g) granulated sugar
  • 1 large egg
  • 1 tsp vanilla extract
  • 2½ cups (315g) all-purpose flour
  • 1 tsp baking powder
  • ¼ tsp salt

👩‍🍳 Instructions

  1. Preheat your oven to 350°F (175°C) and line a baking sheet with parchment paper.
  2. In a large bowl, beat the softened butter and sugar together for 3–4 minutes until light and fluffy.
  3. Mix in the egg and vanilla extract until fully incorporated.
  4. In a separate bowl, whisk together the flour, baking powder, and salt.
  5. Gradually add the dry ingredients to the butter mixture, mixing until a soft dough forms. Avoid overmixing.
  6. Scoop about 2 tablespoons of dough and roll into smooth balls.
  7. Place the dough balls on the prepared baking sheet, leaving about 2 inches of space between each cookie.
  8. Gently flatten each ball slightly using the bottom of a glass or your hand.
  9. Bake for 12–15 minutes, or until the edges are lightly golden while the tops remain pale.
  10. Remove from the oven and let the cookies cool on the baking sheet for 5 minutes before transferring them to a wire rack to cool completely.

💡 Tips

  • Use room-temperature butter for the best texture.
  • Don’t overbake; the cookies will continue to firm up as they cool.
  • Add lemon zest, almond extract, or mini chocolate chips for a fun variation.
  • Sprinkle coarse sugar on top before baking for a sparkling finish.

❓Frequently Asked Questions

Can I freeze the dough?
Yes. Freeze the dough balls for up to 2 months and bake directly from frozen, adding 1–2 extra minutes.

How should I store the cookies?
Store them in an airtight container at room temperature for up to 1 week.

Can I make them gluten-free?
Yes. Substitute a 1:1 gluten-free baking flour blend.

🍽️ Servings

  • Makes: 12 cookies

🥗 Approximate Nutrition (Per Cookie)

  • Calories: 190
  • Protein: 2g
  • Carbohydrates: 21g
  • Fat: 11g
  • Fiber: 0.5g
  • Sugar: 9g

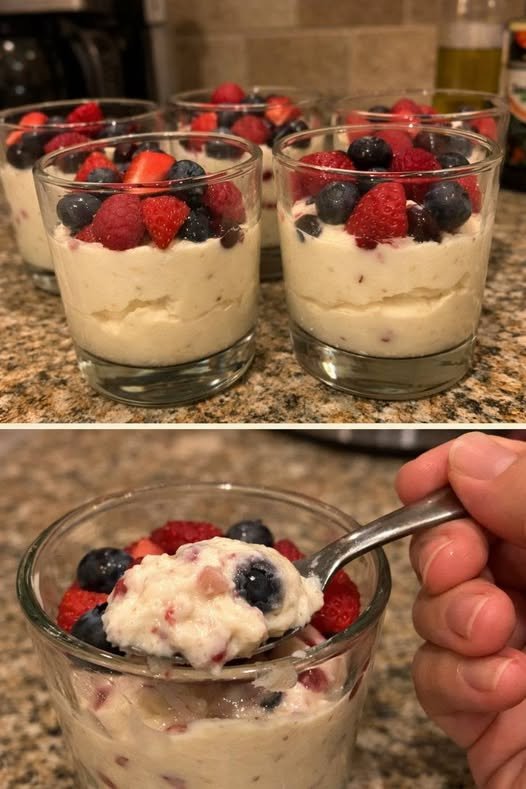
No-Bake Mixed Berry Cheesecake Cups

No-Bake Mixed Berry Cheesecake Cups

Description
These No-Bake Mixed Berry Cheesecake Cups are creamy, light, and loaded with fresh strawberries, blueberries, and raspberries. The silky cheesecake filling is made with cream cheese and whipped cream, then layered with juicy berries for a refreshing dessert that’s perfect for summer gatherings, holidays, or an easy make-ahead treat. No oven required, and every spoonful is rich, fruity, and delicious.

🛒 Ingredients

For the Cheesecake Filling

  • 8 oz (225 g) cream cheese, softened
  • 1 cup (240 ml) heavy whipping cream
  • ⅓ cup powdered sugar
  • 1 tsp vanilla extract
  • 1 tbsp lemon juice
  • ½ tsp lemon zest (optional)

For the Berry Mix

  • 1 cup strawberries, diced
  • ¾ cup blueberries
  • ¾ cup raspberries

Optional Crust

  • 1 cup graham cracker crumbs
  • 3 tbsp melted butter

👩‍🍳 Instructions

  1. If using a crust, combine the graham cracker crumbs with melted butter until evenly moistened. Divide among 4–6 serving glasses and press down gently with the back of a spoon.
  2. In a large mixing bowl, beat the softened cream cheese until smooth and creamy.
  3. Add the powdered sugar, vanilla extract, lemon juice, and lemon zest. Beat until fully combined.
  4. In a separate bowl, whip the heavy cream until stiff peaks form.
  5. Gently fold the whipped cream into the cream cheese mixture using a spatula until light and fluffy.
  6. Fold about half of the mixed berries into the cheesecake filling, leaving the remaining berries for the topping.
  7. Spoon or pipe the cheesecake mixture evenly into the prepared dessert glasses.
  8. Top generously with the remaining strawberries, blueberries, and raspberries.
  9. Refrigerate for at least 2–3 hours before serving so the filling can set.
  10. Serve chilled and enjoy every creamy, fruity bite!

💡 Tips

  • Use full-fat cream cheese for the creamiest texture.
  • Chill overnight for the best flavor and consistency.
  • Garnish with fresh mint leaves or white chocolate shavings for an elegant finish.
  • Fresh berries are recommended, but well-drained thawed frozen berries can also be used.

❓Frequently Asked Questions

Can I make these ahead of time?
Yes! They can be made up to 2 days in advance and stored covered in the refrigerator.

Can I substitute the berries?
Absolutely. Blackberries, cherries, peaches, or mangoes work wonderfully.

How do I store leftovers?
Cover each dessert cup and refrigerate for up to 3 days.

🍽️ Servings

  • Serves: 4–6

🥗 Approximate Nutrition (Per Serving)

  • Calories: 330
  • Protein: 5g
  • Carbohydrates: 22g
  • Fat: 25g
  • Fiber: 3g
  • Sugar: 17g

Blood Sugar Support Herbal Tea

Blood Sugar Support Herbal Tea

Description

This soothing herbal tea combines cinnamon, fenugreek seeds, and fresh mint for a warm, flavorful drink. Some of these ingredients have been studied for their potential role in supporting healthy blood sugar levels, but they are not a replacement for diabetes medication or medical care. Enjoy this tea as part of a balanced diet and healthy lifestyle.

Ingredients

  • 2 cups water
  • 1 cinnamon stick (or ½ tsp ground cinnamon)
  • 1 tsp fenugreek seeds
  • 8–10 fresh mint leaves
  • 1 tsp fresh grated ginger (optional)
  • 1 tsp lemon juice (optional)
  • Honey or a sugar-free sweetener (optional)

Instructions

  1. Pour the water into a small saucepan and bring it to a gentle boil.
  2. Add the cinnamon stick, fenugreek seeds, and ginger (if using).
  3. Reduce the heat and simmer for 8–10 minutes.
  4. Add the fresh mint leaves and simmer for another 2 minutes.
  5. Remove from the heat and let the tea steep for 5 minutes.
  6. Strain into a mug.
  7. Add lemon juice if desired and stir well.
  8. Enjoy warm.

Tips

  • Drink 1 cup once daily if it agrees with you.
  • Avoid adding sugar if you’re trying to manage blood sugar.
  • Pair this tea with a balanced diet, regular physical activity, and adequate hydration.
  • If you take diabetes medication or have a medical condition, talk to your healthcare provider before using herbal remedies regularly, as ingredients like fenugreek may affect blood sugar.

Frequently Asked Questions

Can this cure diabetes?
No. There is no evidence that this tea cures diabetes. It may be a pleasant beverage, but it should not replace prescribed treatment.

Can I drink it every day?
Many people enjoy it daily, but check with your healthcare provider if you have diabetes, are pregnant, or take medications.

Can I use powdered cinnamon?
Yes. Use about ½ teaspoon in place of one cinnamon stick.

Nutrition (Approximate Per Serving)

  • Calories: 5–10
  • Carbohydrates: 2g
  • Fat: 0g
  • Protein: 0g
  • Fiber: Less than 1g
  • Sugar: 0g (without honey)

Note: This tea may complement a healthy lifestyle, but it is not proven to lower blood sugar on its own. If you have diabetes or prediabetes, continue following your prescribed treatment plan and monitor your blood sugar as recommended by your healthcare provider.

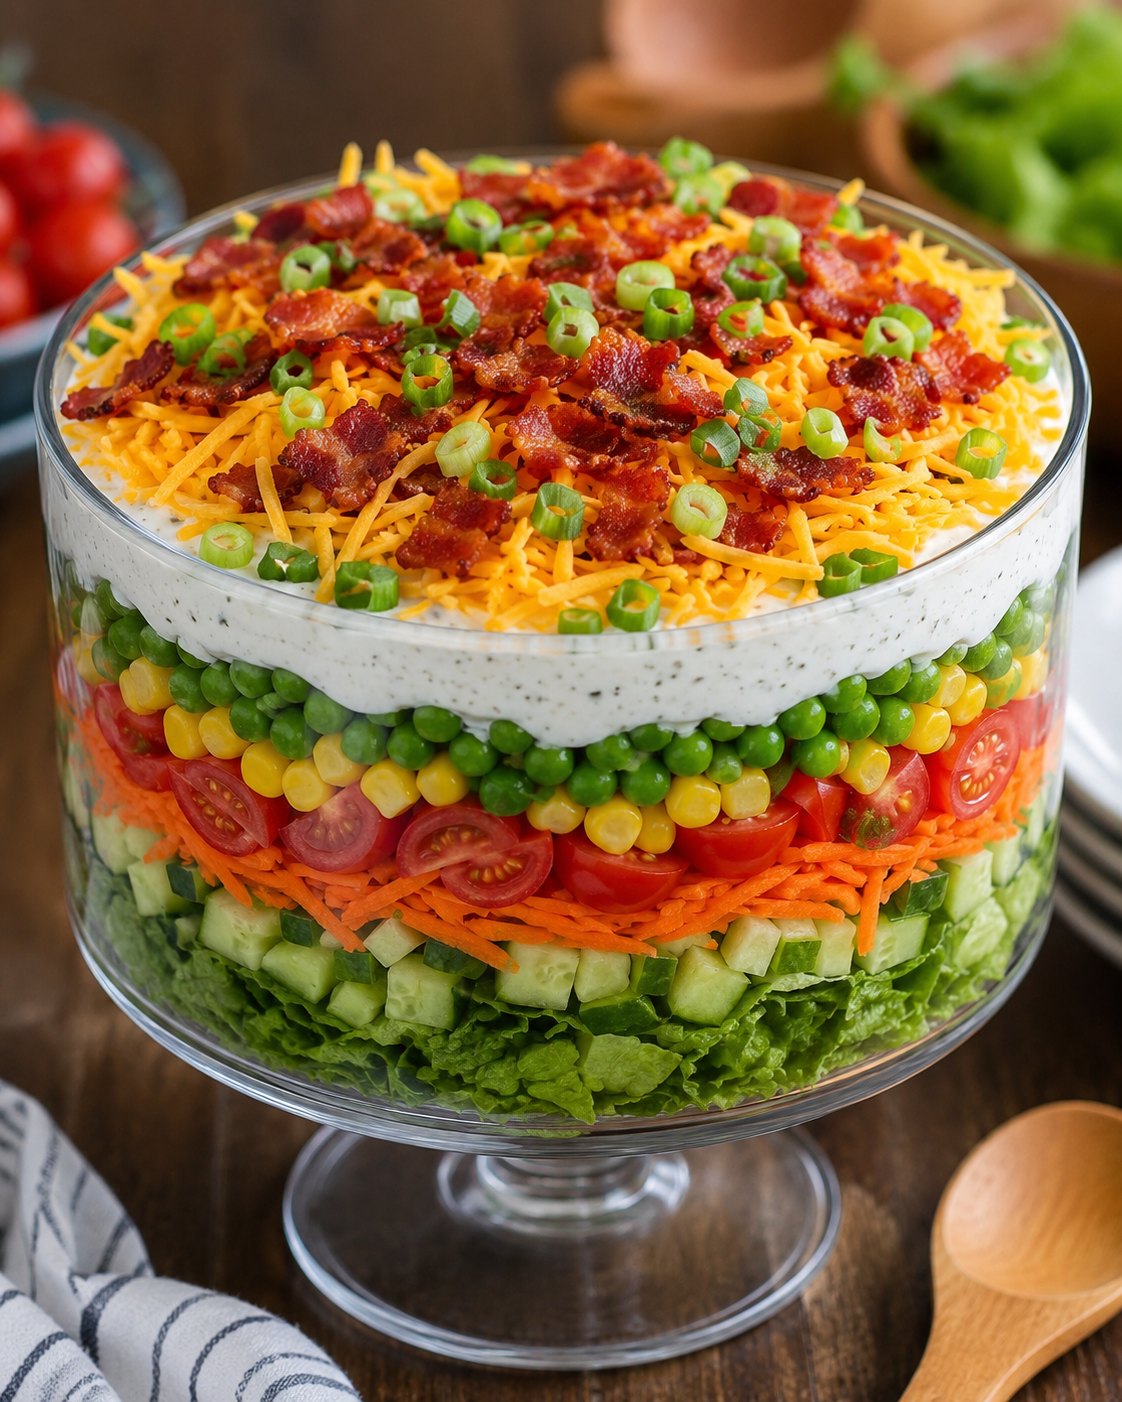
Healthy Layered Snack Salad

Healthy Layered Snack Salad
This looks like a healthier version of a classic layered salad packed with fresh vegetables, protein, and flavor.
🛒 Ingredients
1 head romaine lettuce, chopped
2 cucumbers, diced
2 cups sweet corn kernels
4 hard-boiled eggs, chopped
6 slices turkey bacon or regular bacon, cooked and crumbled
1½ cups shredded reduced-fat cheddar cheese
4 green onions, sliced
Creamy Dressing
1 cup plain Greek yogurt
2 tbsp light mayonnaise
1 tbsp lemon juice
½ tsp garlic powder
Salt and black pepper to taste
👩‍🍳 Instructions
Spread chopped lettuce evenly in the bottom of a large glass dish.
Add diced cucumbers as the second layer.
Sprinkle corn evenly over the cucumbers.
Add chopped hard-boiled eggs.
Mix Greek yogurt, mayonnaise, lemon juice, garlic powder, salt, and pepper.
Spread the dressing evenly over the salad to seal the layers.
Top with shredded cheddar cheese.
Sprinkle crumbled bacon and sliced green onions on top.
Cover and chill for at least 1 hour before serving.
💪 Nutrition Benefits
✅ High in protein from eggs and Greek yogurt
✅ Rich in fiber from vegetables
✅ Lower in calories than traditional layered salads
✅ Great for meal prep and healthy snacking
🍽 Servings
6–8 servings

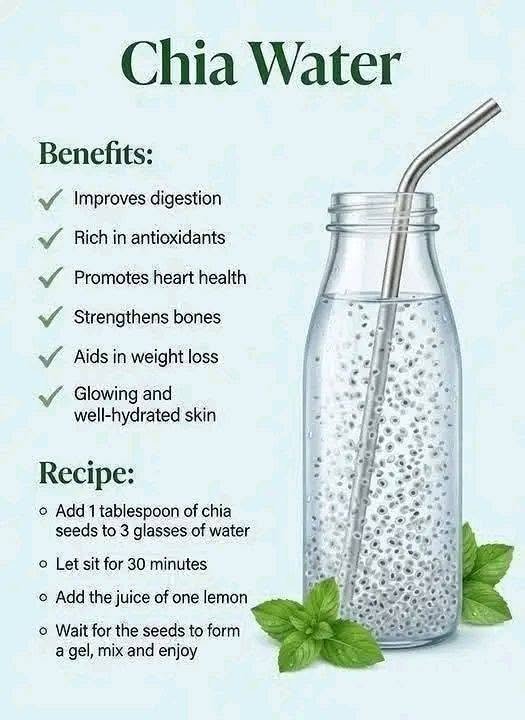
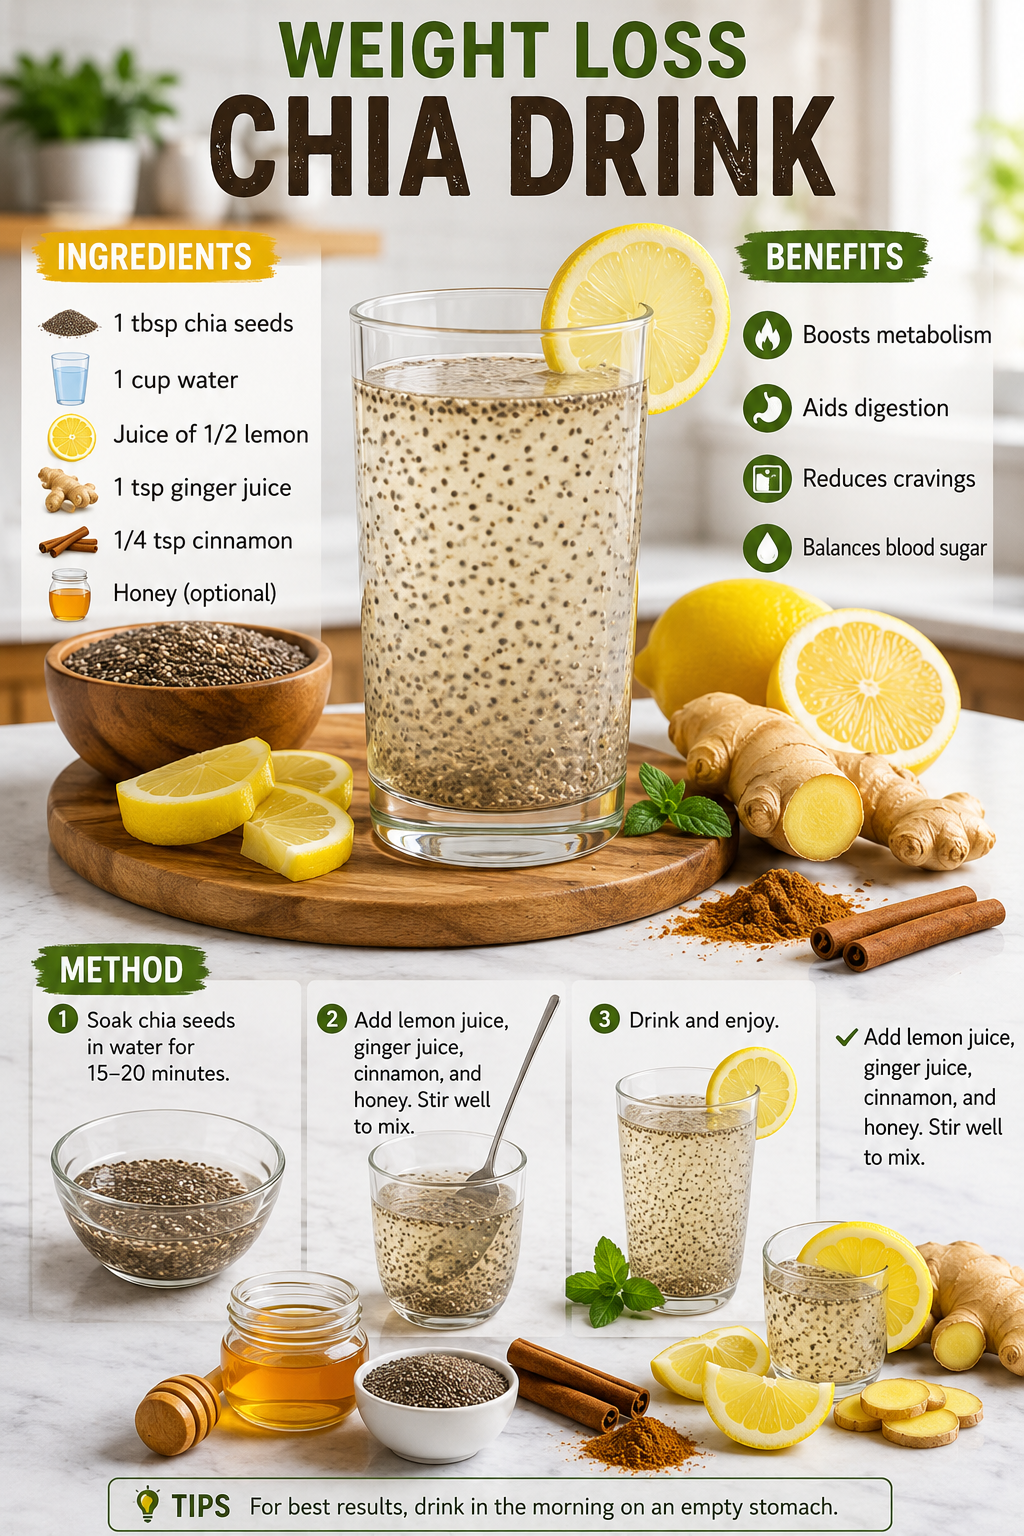
Chia Lemon Water

Chia Lemon Water

Description

Chia Lemon Water is a refreshing, hydrating drink made with chia seeds, fresh lemon juice, and water. Chia seeds absorb water and form a natural gel, creating a satisfying beverage that’s rich in fiber and plant-based omega-3 fats. This drink can be a great addition to a balanced diet, especially on warm days or after exercise. While it’s often promoted for weight loss, its main benefits come from helping you stay hydrated and feel fuller as part of an overall healthy lifestyle—not as a miracle solution.

Ingredients

  • 1 tablespoon chia seeds
  • 3 cups water
  • Juice of 1 fresh lemon
  • 1–2 teaspoons honey or maple syrup (optional)
  • Ice cubes (optional)
  • Fresh mint leaves (optional, for garnish)

Instructions

  1. Pour 3 cups of water into a large pitcher or bottle.
  2. Add 1 tablespoon of chia seeds and stir well for about 1 minute to prevent clumping.
  3. Let the mixture sit for 30 minutes, stirring once or twice during the first 10 minutes.
  4. Once the chia seeds have absorbed the water and formed a gel-like texture, squeeze in the juice of one fresh lemon.
  5. Add honey or maple syrup if you’d like a sweeter taste, then stir until fully dissolved.
  6. Add ice cubes and fresh mint leaves if desired.
  7. Stir once more before serving and enjoy immediately, or refrigerate for a chilled drink.

Tips

  • Shake or stir before each serving, as the chia seeds naturally settle.
  • Refrigerate for up to 2 days in a sealed container.
  • Drink plenty of water throughout the day, as chia seeds contain a high amount of fiber.
  • If you’re new to chia seeds, start with a smaller amount and gradually increase your intake.

Frequently Asked Questions

Can I make it the night before?
Yes! Store it in the refrigerator overnight and stir well before drinking.

Can I use lime instead of lemon?
Absolutely. Lime provides a slightly different but equally refreshing flavor.

Is honey necessary?
No. It’s completely optional and can be omitted if you prefer a sugar-free drink.

Can I drink it every day?
Yes, in moderation. One serving a day can fit into a balanced diet for most people.

Approximate Nutrition (Per Serving)

  • Calories: 60–80
  • Carbohydrates: 6–10g
  • Protein: 2g
  • Fat: 4g
  • Fiber: 5g
  • Omega-3 Fatty Acids: Approximately 2.5g

Note: Chia Lemon Water can support hydration and increase fiber intake, but it is not a guaranteed weight-loss drink. For the best results, enjoy it alongside a nutritious diet, regular physical activity, adequate sleep, and good hydration habits.

Spinach & Artichoke Stuffed Chicken Breasts

Spinach & Artichoke Stuffed Chicken Breasts

Description

Spinach & Artichoke Stuffed Chicken Breasts are juicy, golden-brown chicken breasts filled with a rich, creamy mixture of spinach, artichokes, cream cheese, mozzarella, and Parmesan. The chicken is perfectly seasoned, seared until golden, then baked until tender and finished with a creamy garlic Parmesan sauce. This restaurant-quality meal is perfect for family dinners, special occasions, or meal prep and pairs wonderfully with mashed potatoes, roasted vegetables, or a fresh salad.

Prep Time: 20 minutes
Cook Time: 30 minutes
Total Time: 50 minutes
Servings: 4

Ingredients

For the Chicken

  • 4 large boneless, skinless chicken breasts
  • 2 tablespoons olive oil
  • 1 teaspoon paprika
  • 1 teaspoon garlic powder
  • 1 teaspoon onion powder
  • 1 teaspoon Italian seasoning
  • 1 teaspoon salt
  • ½ teaspoon black pepper

For the Filling

  • 4 oz (115g) cream cheese, softened
  • 1 cup chopped cooked spinach (well drained)
  • 1 cup chopped canned artichoke hearts, drained
  • 1 cup shredded mozzarella cheese
  • ¼ cup grated Parmesan cheese
  • 2 cloves garlic, minced
  • ½ teaspoon crushed red pepper flakes (optional)

For the Cream Sauce

  • 2 tablespoons butter
  • 2 cloves garlic, minced
  • 1 cup heavy cream
  • ½ cup grated Parmesan cheese
  • Salt and black pepper to taste
  • Chopped fresh parsley for garnish

Instructions

Step 1: Prepare the Chicken

Using a sharp knife, carefully cut a pocket into the side of each chicken breast without slicing all the way through. Pat the chicken dry with paper towels.

Step 2: Season

Mix paprika, garlic powder, onion powder, Italian seasoning, salt, and pepper together. Rub the seasoning evenly over both sides of each chicken breast.

Step 3: Make the Filling

In a bowl, combine cream cheese, spinach, chopped artichokes, mozzarella, Parmesan, minced garlic, and red pepper flakes. Stir until smooth and well combined.

Step 4: Stuff the Chicken

Divide the filling evenly among the chicken breasts, gently spooning it into each pocket. Secure the opening with toothpicks if necessary.

Step 5: Sear

Preheat the oven to 375°F (190°C).

Heat olive oil in a large oven-safe skillet over medium-high heat. Sear the chicken for about 3–4 minutes per side until golden brown.

Step 6: Bake

Transfer the skillet to the oven and bake for 18–22 minutes, or until the internal temperature reaches 165°F (74°C).

Step 7: Make the Sauce

While the chicken bakes, melt butter in a saucepan over medium heat. Add garlic and cook for about 30 seconds until fragrant.

Pour in the heavy cream and simmer for 2–3 minutes.

Whisk in the Parmesan cheese until smooth and creamy. Season with salt and pepper to taste.

Step 8: Finish

Remove the chicken from the oven and let it rest for 5 minutes.

Spoon the creamy Parmesan sauce over the chicken and garnish with fresh parsley before serving.

Tips & Notes

  • Squeeze as much moisture as possible from the spinach to keep the filling thick.
  • Toothpicks help keep the filling from leaking while cooking.
  • Fresh mozzarella can be used for an even cheesier filling.
  • Add chopped sun-dried tomatoes or cooked bacon for extra flavor.
  • Store leftovers in an airtight container in the refrigerator for up to 3 days.

Frequently Asked Questions

Can I prepare this ahead of time?
Yes. Stuff and season the chicken up to one day ahead, then refrigerate until ready to cook.

Can I freeze it?
Yes. Freeze the uncooked stuffed chicken for up to 2 months. Thaw overnight before cooking.

What sides go well with it?
Mashed potatoes, roasted asparagus, steamed broccoli, green beans, rice, or a crisp Caesar salad pair perfectly.

How do I know it’s done?
Use a meat thermometer. The thickest part of the chicken should read 165°F (74°C).

Servings & Nutrition (Approximate Per Serving)

  • Calories: 560
  • Protein: 47g
  • Fat: 37g
  • Carbohydrates: 8g
  • Fiber: 2g
  • Sugar: 2g
  • Sodium: 720mg

Chia Lemon Ginger Drink

Chia Lemon Ginger Drink

Description

This Chia Lemon Ginger Drink is a refreshing beverage made with chia seeds, fresh lemon juice, ginger, and a touch of cinnamon. It’s naturally hydrating, provides fiber from chia seeds, and is easy to prepare in just a few minutes. While many people enjoy it as part of a balanced diet, it is not a weight-loss cure. Pair it with healthy eating and regular physical activity for the best results.

Ingredients

  • 1 tablespoon chia seeds
  • 1 cup (240 ml) water
  • Juice of ½ fresh lemon
  • 1 teaspoon fresh ginger juice (or ½ teaspoon grated ginger)
  • ¼ teaspoon ground cinnamon
  • 1 teaspoon honey (optional)
  • Ice cubes (optional)

Instructions

  1. Pour the water into a glass or jar.
  2. Add the chia seeds and stir well.
  3. Let the chia seeds soak for 15–20 minutes, stirring once or twice so they don’t clump together.
  4. Add the fresh lemon juice.
  5. Stir in the ginger juice and ground cinnamon.
  6. Add honey if you prefer a sweeter drink.
  7. Mix everything thoroughly until well combined.
  8. Add ice cubes if desired.
  9. Serve immediately and enjoy.

Tips & Notes

  • Stir again just before drinking since chia seeds naturally settle.
  • Fresh lemon juice gives the best flavor.
  • Adjust the honey to your taste or omit it entirely.
  • Drink plenty of water throughout the day, as chia seeds absorb liquid.

Frequently Asked Questions

Can I make it ahead of time?
Yes. Store it in the refrigerator for up to 24 hours and stir well before drinking.

Can I drink it every day?
Most people can enjoy it daily in moderation. If you have digestive conditions, difficulty swallowing, or take medications that may interact with high-fiber foods, consult your healthcare provider.

Does this drink cause weight loss?
No single drink causes weight loss. Chia seeds may help you feel full because they contain fiber, but lasting weight loss depends on your overall eating pattern, physical activity, sleep, and other lifestyle factors.

Servings

1 serving

Nutrition (Approx. Per Serving, without honey)

  • Calories: 65
  • Protein: 2g
  • Carbohydrates: 6g
  • Fat: 4g
  • Fiber: 5g
  • Sugar: 0g