No-Bake Vanilla Wafer Icebox Cake

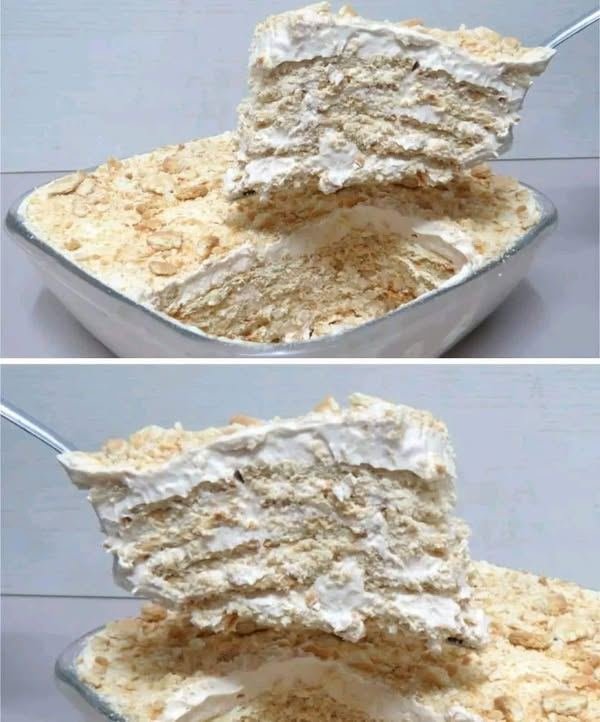
No-Bake Vanilla Wafer Icebox Cake

A dreamy, creamy dessert made with layers of sweet vanilla wafers and whipped cream. Chill it in the fridge and watch the wafers transform into a soft, cake-like texture. Perfect for summer, parties, or any time you want an easy, indulgent treat.

Ingredients

  • 3 cups heavy whipping cream

  • 1/2 cup powdered sugar (adjust to taste)

  • 1 teaspoon vanilla extract

  • 2–3 sleeves vanilla wafers (about 300–350 wafers depending on dish size)

Optional Add-ins:

  • Sliced bananas or strawberries between layers for extra flavor

  • Crushed nuts for garnish

Instructions

  1. Whip the Cream:

    • In a large mixing bowl, beat the heavy cream with powdered sugar and vanilla extract until stiff peaks form.

  2. Prepare the Dish:

    • Use a 9×13 inch baking dish or similar shallow dish.

  3. Layer the Wafers and Cream:

    • Spread a thin layer of whipped cream at the bottom of the dish.

    • Place a layer of vanilla wafers over the cream.

    • Spread a layer of whipped cream over the wafers.

    • Repeat layers until the dish is full, ending with a thick layer of whipped cream on top.

  4. Crush Topping:

    • Crush some extra vanilla wafers and sprinkle over the top for a crunchy garnish.

  5. Chill:

    • Cover with plastic wrap and refrigerate for at least 4–6 hours or overnight. This allows the wafers to soften and absorb the cream, creating a cake-like texture.

  6. Serve:

    • Cut into squares and serve chilled.

Notes & Tips

  • Soft Wafers: For extra softness, lightly brush wafers with milk or coffee before layering.

  • Fruit Layer: Add sliced bananas or berries between layers for a fruity twist.

  • Make Ahead: This cake improves if made the day before serving.

  • Storage: Keep refrigerated, up to 3 days.


Servings

  • Makes 12–16 servings depending on portion size.

Nutritional Info (Approximate per serving)

  • Calories: 250–300 kcal

  • Carbohydrates: 25–30 g

  • Sugar: 18–22 g

  • Protein: 2–3 g

  • Fat: 18–20 g

  • Fiber: <1 g

Benefits

  • Quick & Easy: No baking required, perfect for last-minute desserts.

  • Customizable: Add fruits, chocolate, or nuts for flavor and texture variety.

  • Crowd-Pleaser: Creamy and sweet, a hit with kids and adults alike.

Common Q/A

Q: Can I use low-fat cream?
A: Heavy cream works best for structure. Low-fat may be too soft and not hold layers.

Q: How long should it chill?
A: At least 4 hours; overnight gives the best texture.

Q: Can I freeze it?
A: Yes, but the texture may become slightly watery when thawed.

Q: Can I use chocolate wafers instead?
A: Absolutely! Chocolate or even graham crackers can be layered for a twist.
Fluffy Whipped Cream Frosting

🧁 Fluffy Whipped Cream Frosting

📝 Ingredients

  • 1 cup cold heavy whipping cream
  • 3–4 tablespoons powdered sugar
  • 1 teaspoon vanilla extract
  • 1 tablespoon cornstarch or cream stabilizer (optional, helps it hold shape)

👩‍🍳 Step-by-Step Instructions

1️⃣ Chill the bowl

Place your mixing bowl and beaters in the fridge for 10–15 minutes. Cold tools help the cream whip better.

2️⃣ Add the cream

Pour 1 cup cold heavy whipping cream into the chilled bowl.

3️⃣ Start whipping

Using a hand mixer or whisk, beat on medium speed for about 1 minute until the cream becomes slightly thick.

4️⃣ Add sugar and vanilla

Add powdered sugar and vanilla extract. If using cornstarch/stabilizer, add it now.

5️⃣ Whip until fluffy

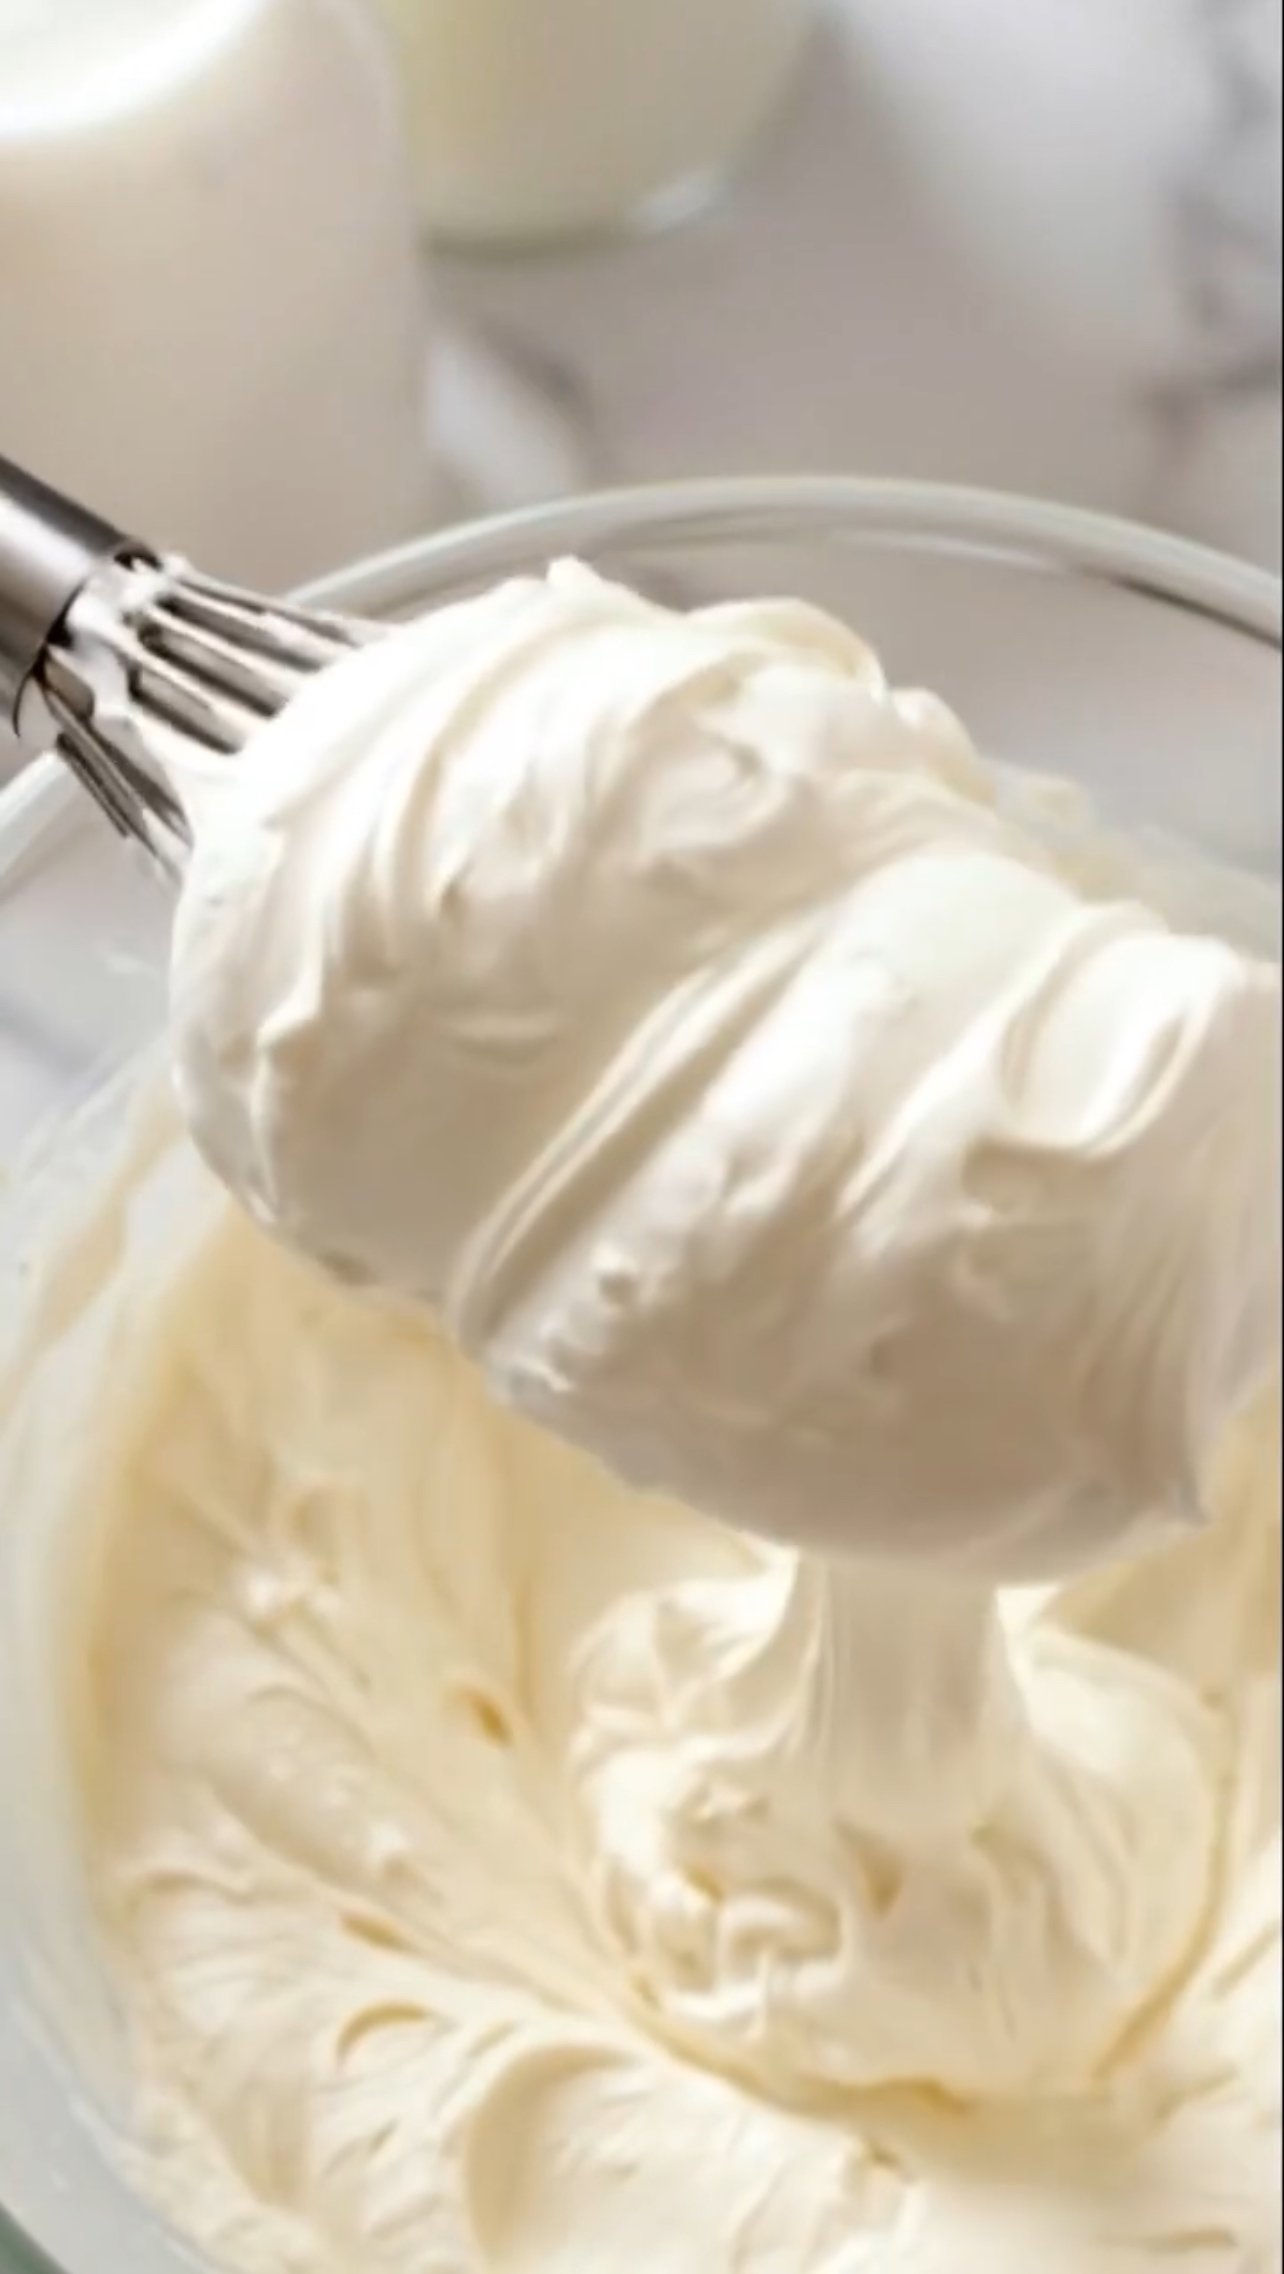
Continue beating for 2–3 minutes until soft peaks form. The cream should look thick and hold its shape like the frosting in the picture.

6️⃣ Check the texture

Lift the whisk — if the cream forms a soft peak that holds shape, your frosting is ready. Do not overmix or it can turn grainy.

7️⃣ Use immediately

Spread or pipe it on cakes, cupcakes, pancakes, or desserts.

✨ Tip: Keep the frosting refrigerated if not using right away. It stays fresh for 1–2 days in the fridge.

Secret Fruit Salad

The Ingredients

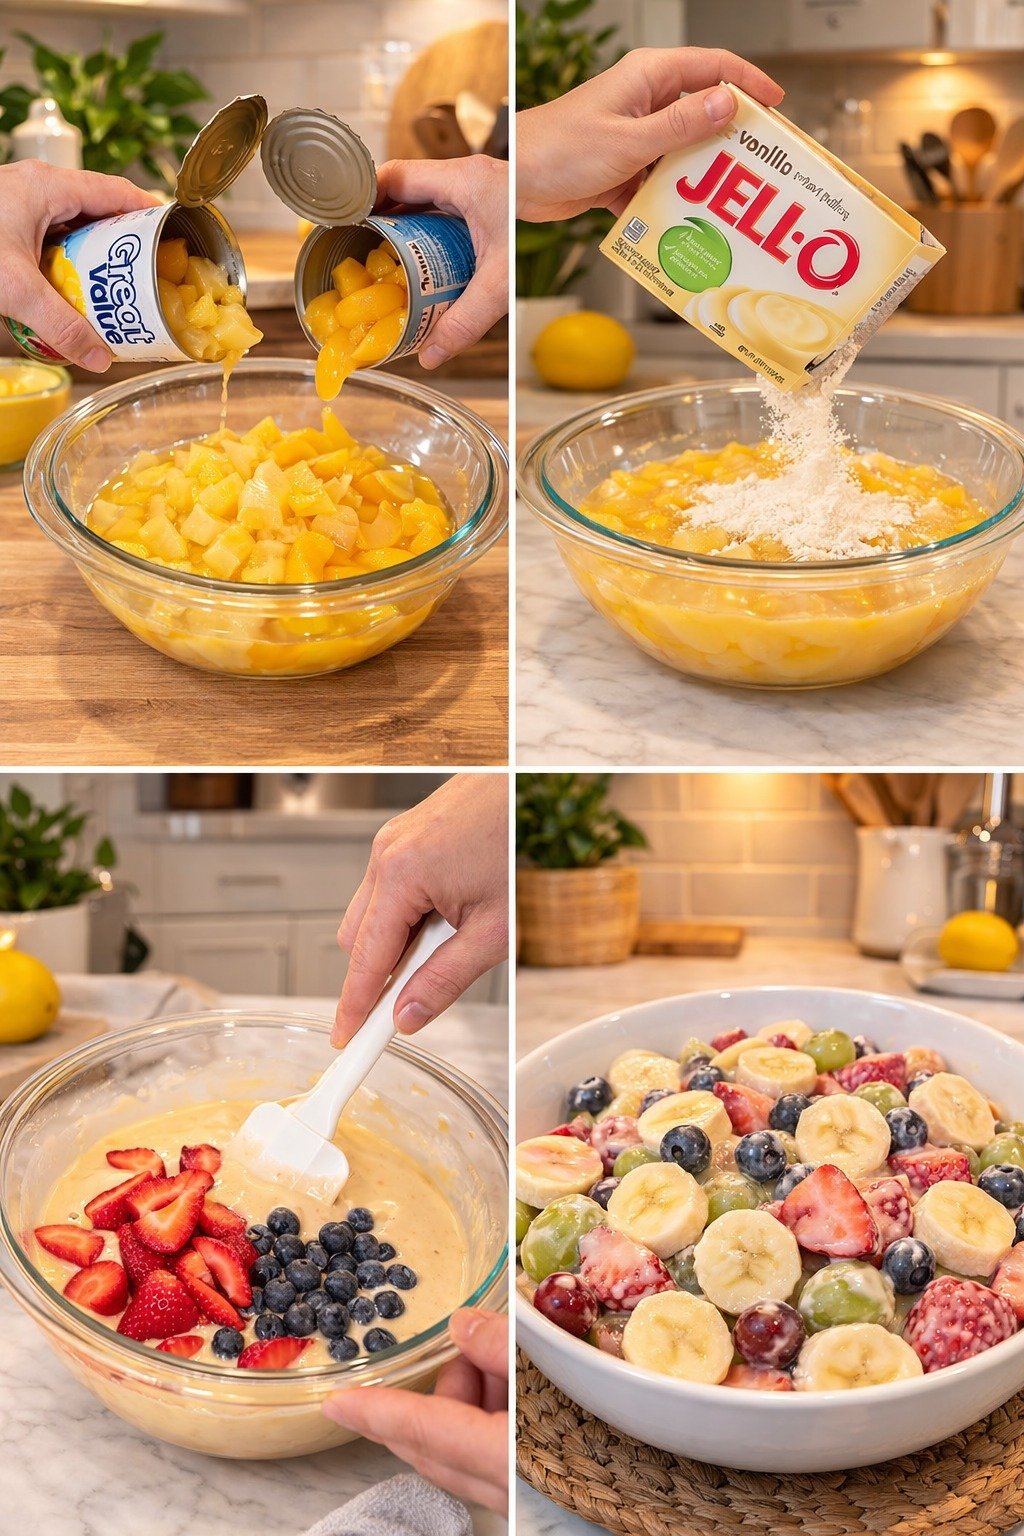
  • Canned Fruit: 1 can Pineapple Tidbits and 1 can Mandarin Oranges (keep the juices!).

  • The “Secret” Thickener: 1 box (3.4 oz) Instant Vanilla Pudding mix (dry).

  • Fresh Fruit: Strawberries, Blueberries, Bananas, and Grapes (red and green).


Instructions

  1. Create the Base: In a large bowl, combine the pineapple tidbits and mandarin oranges. Do not drain them—the pudding mix needs the juice from the cans to dissolve and thicken into a glaze.

  2. Add the Pudding: Sprinkle the dry Instant Vanilla Pudding mix directly over the canned fruit and juice.

  3. Mix and Set: Stir well until the pudding mix is completely dissolved and the liquid has thickened into a creamy, golden sauce.

  4. Fold in Fresh Fruit: Gently fold in your sliced strawberries, blueberries, grapes, and sliced bananas.

  5. Chill: Let it sit in the fridge for at least 30 minutes before serving to allow the flavors to meld and the sauce to fully set.


Pro-Tips for Success

  • Banana Timing: If you aren’t serving this immediately, wait to add the bananas until right before you eat so they don’t turn brown or get mushy.

  • The Pudding: Make sure you use Instant pudding, not the “cook and serve” kind, or it won’t thicken with the cold juice.

  • Variations: Some people like to fold in a tub of whipped topping (like Cool Whip) at the very end for a fluffier texture.

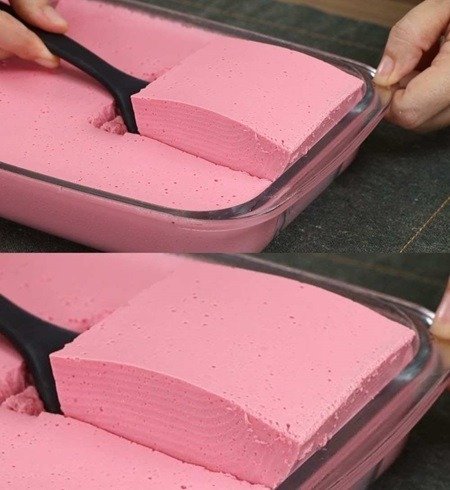
🍓 Quick Strawberry Milk Delight

🍓 Quick Strawberry Milk Delight

Prep time: 5 minutes | Chill time: 60 minutes | Servings: 2-4

Ingredients

Ingredient Amount (Metric) Amount (US)
Water 300 ml 10.1 fl oz
Powdered Milk 200 grams 7.05 oz
Strawberry Drink Mix 25 grams 0.9 oz (1 packet)

Preparation Method

  1. Blend: Add the water, powdered milk, and strawberry drink mix into a blender.

  2. Emulsify: Blend on high speed until the mixture is completely smooth and starts to thicken into a homogeneous texture.

  3. Set: Pour the mixture into a glass dish or individual ramekins.

  4. Chill: Place in the refrigerator for approximately 60 minutes. This allows the proteins in the milk to set, giving it a mousse-like consistency.

  5. Serve: Once firm, remove and enjoy!

Pro Tip: To make it even fancier, you can top it with a few fresh strawberry slices or a sprig of mint before serving.

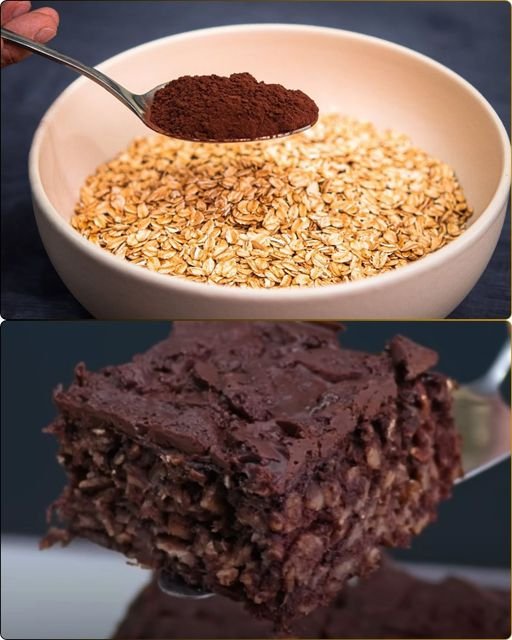
Chocolate Banana Oat Bake

Chocolate Banana Oat Bake

This “Classic Dessert” with a healthy twist creates a dense, fudgy cake that feels incredibly indulgent while using wholesome ingredients. By blending oats and bananas, you achieve a moist texture that pairs perfectly with a rich chocolate finish.

Ingredients

  • 150g oatmeal

  • 250ml milk

  • 2 bananas

  • 2 eggs

  • 40g sugar (or other sweetener, optional)

  • 2 tbsp cocoa powder

  • 1 tsp baking powder

  • 1/2 tsp vanilla extract

  • 1 pinch of salt

  • Dark chocolate (1 bar or as needed for topping)


Step-by-Step Instructions

  1. Prepare the Base: Place the 150g oatmeal in a blender and pulse until it reaches a fine, flour-like consistency.

  2. Mix Wet Ingredients: In a large bowl, mash the 2 bananas until smooth. Whisk in the 2 eggs, 250ml milk, and 1/2 tsp vanilla extract.

  3. Combine: Add the blended oat flour, 2 tbsp cocoa powder, 1 tsp baking powder, 40g sweetener, and a pinch of salt to the wet ingredients. Stir until the batter is well-combined and smooth.

  4. Add Chocolate: Roughly chop your dark chocolate bar. You can stir half of it into the batter and save the rest for the top, or simply sprinkle it all over the surface before baking.

  5. Bake: Pour the batter into a greased baking dish. Bake at 180°C for approximately 35–40 minutes. The bake is ready when the center is set and a toothpick comes out mostly clean.

  6. Cool and Serve: Allow the dish to cool for at least 10 minutes before slicing. The texture will continue to firm up as it cools, resulting in a perfect brownie-like consistency.


Cooking Tip

For the best results, use overripe bananas with plenty of brown spots; they provide the most natural sweetness and the best texture for this flourless bake.

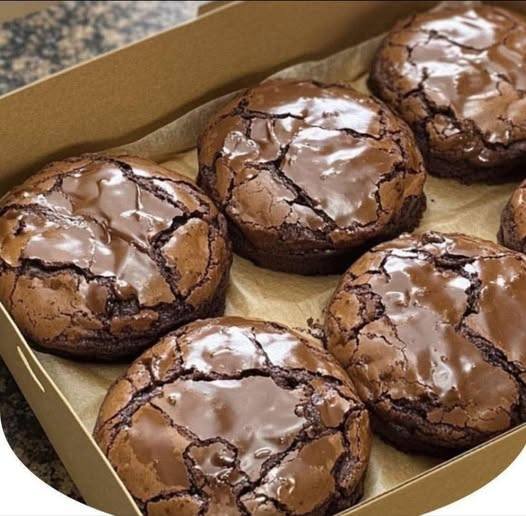
Brownie Cookies

Brownie Cookies

These cookies are a dream for any chocolate lover, combining the rich, fudgy interior of a brownie with the slightly crisp edges of a perfect cookie. They develop a beautiful “crackle” top and a glossy finish that looks professional but is incredibly easy to achieve.

Ingredients

  • 1 cup (120g) all-purpose flour

  • 1/3 cup (35g) unsweetened cocoa powder

  • 1/2 tsp baking soda

  • 1/2 tsp fine salt

  • 200g dark chocolate, chopped

  • 1/2 cup butter, unsalted

  • 2 large eggs

  • 3/4 cup sweetener (or sugar substitute)

  • 1 tsp vanilla extract


Step-by-Step Instructions

  1. Preparation: Preheat your oven to 175°C. Line two large baking sheets with parchment paper.

  2. Combine Dry Ingredients: In a medium bowl, whisk together the 120g flour, 35g cocoa powder, 1/2 tsp baking soda, and 1/2 tsp salt. Set this aside.

  3. Melt Chocolate and Butter: Using a double boiler or a microwave (in 30-second bursts), melt the 200g dark chocolate and 1/2 cup butter together until completely smooth. Let it cool slightly so it doesn’t cook the eggs.

  4. Whisk Eggs and Sweetener: In a separate large bowl, beat the 2 eggs, 3/4 cup sweetener, and 1 tsp vanilla with an electric mixer for about 5 minutes. The mixture should become pale, thick, and nearly double in volume. This step is the secret to getting that shiny, crackly brownie top!

  5. Merge Mixtures: Fold the melted chocolate mixture into the egg mixture until just combined. Gently fold in the dry ingredients using a spatula. Do not overmix; stop as soon as you see no more streaks of flour.

  6. Scoop and Bake: Drop rounded tablespoons of dough onto the prepared baking sheets, spacing them about 2 inches apart as they will spread. Bake for 10–12 minutes.

  7. Cooling: The cookies will be very soft when they first come out of the oven. Let them firm up on the baking sheet for at least 10 minutes before moving them to a wire rack.


Serving Tip

For an extra touch of indulgence, sprinkle a tiny pinch of flaky sea salt over the cookies while the chocolate is still warm.