Creamy Avocado & Banana Green Smoothie

Creamy Avocado & Banana Green Smoothie

This recipe yields one large serving or two smaller ones.

Ingredients

Category Ingredient Quantity
Base Frozen Banana (sliced) 1 medium
Creaminess Ripe Avocado 1/2 small
Greens Fresh Baby Spinach 1 packed cup
Liquid Unsweetened Almond or Oat Milk 1 to 1.5 cups
Sweetener Honey or Maple Syrup (Optional) 1 tsp
Protein Boost Greek Yogurt or Protein Powder 1/4 cup
Toppings Banana slices & Bee Pollen As desired

Instructions

  1. Prep the Greens: Place your spinach and liquid base (milk) into the blender first. Blend these two alone for 20 seconds to ensure the greens are completely liquefied—this prevents leafy “bits” in your straw.

  2. Add the Solids: Add the frozen banana, avocado, and your choice of protein (yogurt or powder).

  3. Blend: Blend on high speed until the texture is velvety smooth. If it’s too thick, splash in a little more milk.

  4. Taste Test: Give it a sip. If you want it sweeter, add your honey or maple syrup and pulse again.

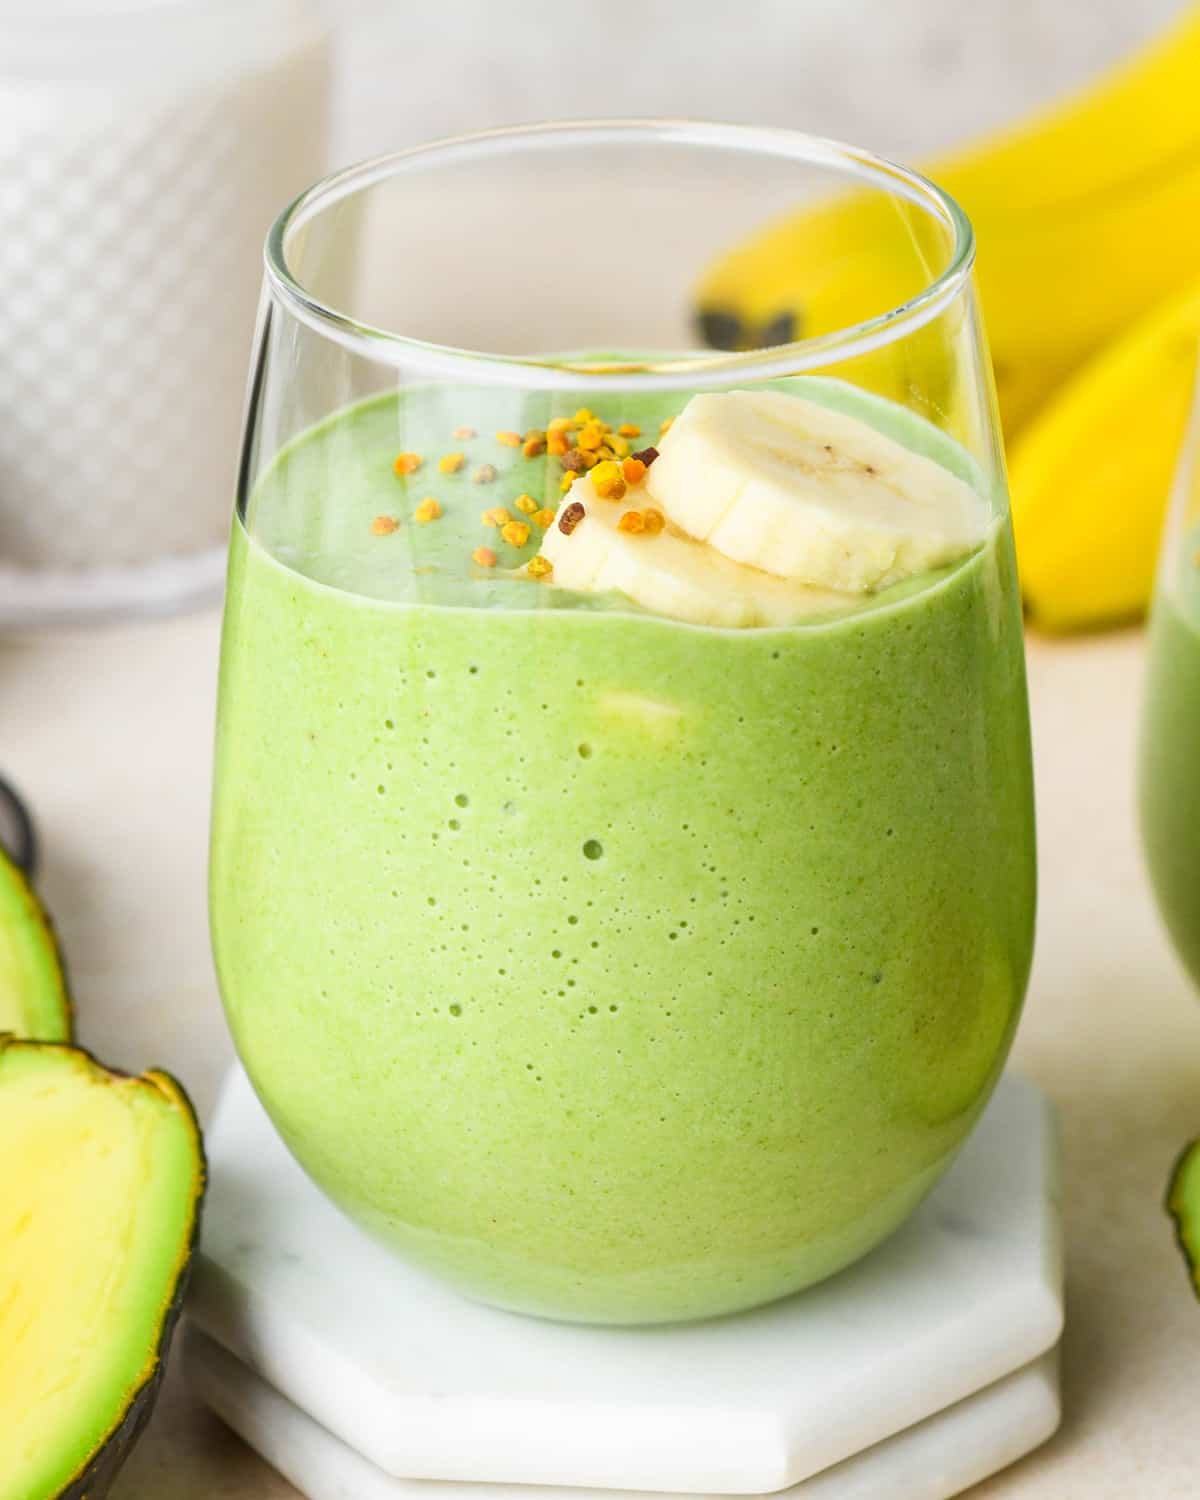
  5. Garnish: Pour into a glass and top with fresh banana slices and a sprinkle of bee pollen (those little yellow granules in the photo) for a boost of antioxidants.


Pro Tips for the Best Texture

  • Freeze your Bananas: Using a frozen banana instead of ice keeps the flavor intense and the texture like soft-serve ice cream.

  • The Avocado Factor: Half an avocado provides healthy fats that make the smoothie incredibly filling, keeping you energized for much longer than a fruit-only blend.
Creamy 2-Ingredient Vanilla Whip

Creamy 2-Ingredient Vanilla Whip

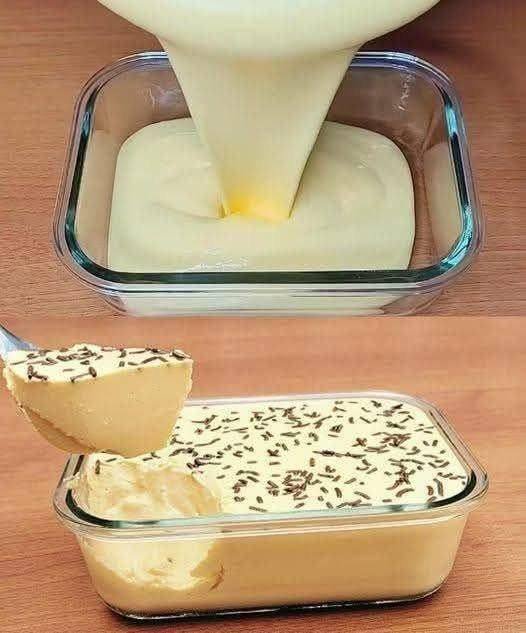
This dessert is a total game-changer when you need something sweet and sophisticated in minutes. It creates a silky, mousse-like texture that melts in your mouth using just two pantry staples. It’s light, airy, and looks beautiful served in a glass dish.

Ingredients

  • 2 cups heavy whipping cream (very cold)

  • 1 cup condensed milk (or a sugar-free condensed milk alternative)

  • Optional: Chocolate sprinkles or cocoa powder for the top


Step-by-Step Instructions

  1. Prepare for Success: Place a large mixing bowl and your whisk beaters in the freezer for 10 minutes before starting. Having your tools and the heavy cream ice-cold is the secret to getting a thick, stable whip.

  2. Whip the Cream: Pour the 2 cups of cold heavy whipping cream into the chilled bowl. Using an electric mixer, start on low speed and gradually increase to high. Beat until stiff peaks form—this means when you lift the beaters, the cream stands straight up without drooping.

  3. Combine the Ingredients: Pour the 1 cup of condensed milk over the whipped cream.

  4. Fold Gently: Using a large spatula, very gently fold the condensed milk into the cream. Move in a slow, circular motion, lifting from the bottom of the bowl to the top. Do not stir vigorously, or you will lose the air that makes the dessert fluffy.

  5. Pour and Smooth: Transfer the mixture into a glass serving dish or individual ramekins. Use the back of a spoon to smooth out the surface.

  6. Set and Chill: Place the dish in the refrigerator for at least 2 hours. This allows the flavors to meld and the texture to firm up into a perfect scoopable consistency.

  7. Final Flourish: Right before serving, decorate the top with chocolate sprinkles or a light dusting of cocoa powder as shown in the photo.


Serving Suggestion

For a fruity twist, place a layer of fresh raspberries or sliced strawberries at the bottom of the dish before pouring in the cream mixture.

Creamy 3-Ingredient Whipped Delight

Creamy 3-Ingredient Whipped Delight

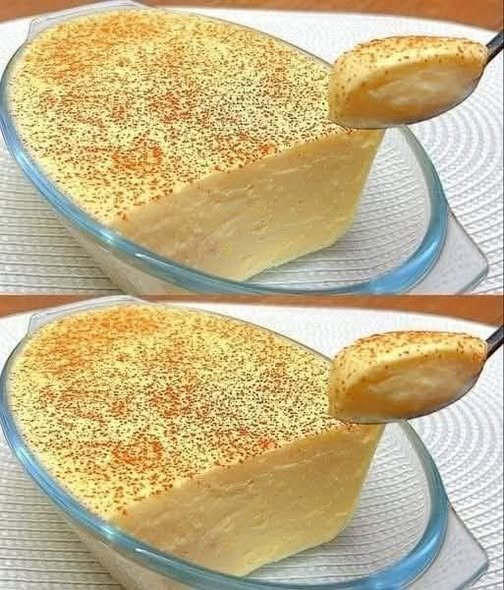
This incredibly smooth and airy dessert is the perfect solution for a quick sweet fix. It requires no baking and no gelatin, relying on the natural thickness of the ingredients to create a melt-in-your-mouth texture that feels like a gourmet mousse.

Ingredients

  • 2 cups heavy whipping cream (chilled)

  • 1 cup condensed milk (or a sugar-free condensed milk alternative)

  • 1 tsp vanilla extract

  • Optional: Ground cinnamon or cocoa powder for dusting the top


Step-by-Step Instructions

  1. Chill Your Tools: For the best results, place your mixing bowl and whisk attachment in the freezer for about 10 minutes before starting. This helps the cream whip faster and creates a more stable texture.

  2. Whip the Cream: Pour the 2 cups of heavy whipping cream into the chilled bowl. Using an electric mixer, beat the cream on medium-high speed until stiff peaks form. Be careful not to over-beat, or it will turn into butter.

  3. Combine: Gently pour the 1 cup of condensed milk and 1 tsp vanilla extract into the whipped cream.

  4. Fold Gently: Using a spatula, fold the ingredients together very gently. Use a circular motion, lifting from the bottom to the top, to keep as much air in the mixture as possible. This ensures the dessert stays light and creamy.

  5. Set: Transfer the mixture into a glass serving dish or individual ramekins. Smooth the top with the back of a spoon or a spatula.

  6. Chill: Place the dish in the refrigerator for at least 2 hours (or the freezer for 30 minutes) to let it set and become firm.

  7. Serve: Just before serving, lightly dust the top with ground cinnamon or cocoa powder to add a beautiful finish and a hint of extra flavor.


Serving Suggestion

This dessert is wonderful on its own, but it also tastes amazing when served with fresh sliced strawberries or a handful of crushed nuts for a bit of crunch.

No-Bake Chocolate Layer Bars

No-Bake Chocolate Layer Bars

These delicious bars are the perfect quick treat when you want something decadent without the oven. They combine a crunchy, nutty base with a smooth chocolate finish, creating a beautiful layered look that is sure to impress.

Ingredients

  • 300g crushed biscuits (sugar-free or digestive style)

  • 1 cup roasted peanuts or walnuts, finely chopped

  • 2 tbsp cocoa powder

  • 1/2 cup almond butter (or peanut butter)

  • 1/4 cup sugar-free syrup (or honey)

  • 150g dark chocolate chips (melted)

  • 1 tbsp coconut oil


Step-by-Step Instructions

  1. Prepare the Base: In a large bowl, mix the 300g crushed biscuits, 1 cup chopped nuts, and 2 tbsp cocoa powder until well combined.

  2. Bind the Mixture: Add the 1/2 cup almond butter and 1/4 cup syrup. Stir well until a thick, sticky dough forms. If it feels too dry, add a small splash of milk or extra syrup.

  3. Press into Pan: Line a square baking dish with parchment paper. Transfer the mixture into the dish and press it down firmly and evenly using the back of a spoon or a flat glass. This ensures the bars hold their shape.

  4. Melt the Chocolate: In a microwave-safe bowl, combine the 150g dark chocolate chips and 1 tbsp coconut oil. Heat in 30-second intervals, stirring in between, until completely smooth and glossy.

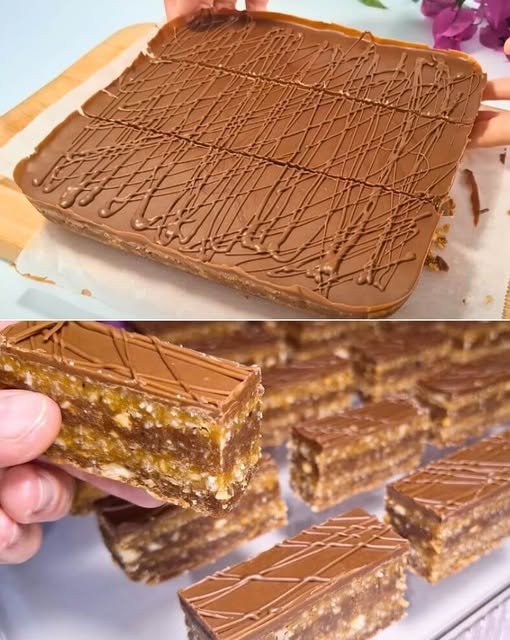
  5. Layer and Decorate: Pour the melted chocolate over the base and spread it evenly to the edges. For the drizzled effect seen in the photo, set aside a small spoonful of melted chocolate and zigzag it over the top once the first layer has slightly set.

  6. Chill and Serve: Place the tray in the refrigerator for about 30–60 minutes until the chocolate is firm.

  7. Slicing: Use a sharp knife to cut into even rectangles. For clean edges, dip your knife in hot water and wipe it dry before each cut.


Storage Tip

Store these bars in an airtight container in the fridge for up to a week. They are best served chilled!

Sweet Yogurt Butter Cake

Sweet Yogurt Butter Cake

This yogurt butter cake is incredibly tender and moist, with a delicate crumb that melts in your mouth. Using yogurt adds a slight tang that balances the richness of the butter perfectly.

Ingredients

  • 245g (2 cups) plain flour (or a low-carb flour blend)

  • 1 ½ tsp baking powder

  • 175g butter (room temperature)

  • 130g sweetener (or sugar substitute)

  • 3 large eggs

  • 4 tbsp plain yogurt

  • 1/4 tsp salt


Step-by-Step Instructions

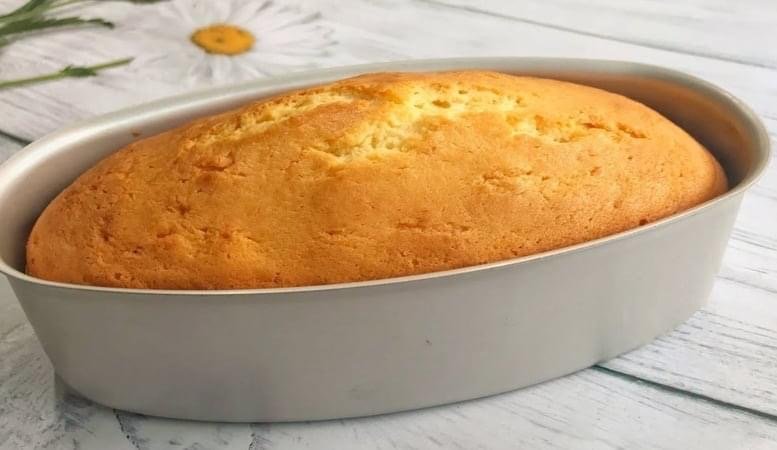
  1. Preparation: Preheat your oven to 170°C. Grease a loaf pan or an oval baking dish thoroughly with butter or line it with parchment paper.

  2. Cream the Butter and Sweetener: In a large bowl, beat the 175g room-temperature butter and 130g sweetener together until the mixture is light, pale, and fluffy.

  3. Add Eggs: Add the eggs one at a time, beating well after each addition. This ensures the batter stays emulsified and smooth.

  4. Mix in Yogurt: Stir in the 4 tbsp plain yogurt and 1/4 tsp salt. Mix until just combined.

  5. Combine Dry Ingredients: Sift the 245g flour and 1 ½ tsp baking powder into the wet mixture. Use a spatula to gently fold everything together until no streaks of flour remain. Avoid overmixing to keep the cake light.

  6. Bake: Pour the batter into your prepared pan and smooth the top. Bake for 40–50 minutes, or until the top is golden brown and a toothpick inserted into the center comes out clean.

  7. Cooling: Let the cake sit in the pan for about 15 minutes before removing it. Place it on a wire rack to cool completely before slicing.


Serving Suggestion

This cake is delicious on its own, but it also pairs wonderfully with a dollop of extra yogurt and fresh lemon zest for a bright finish.

Italian 12-Spoon Cake

Italian 12-Spoon Cake

This fluffy and moist Italian sponge cake is famous for its simplicity, using a standard tablespoon as the primary measuring tool. It creates a light, golden crumb that is perfect for any occasion.

Ingredients

  • 3 large eggs (room temperature)

  • 12 tbsp granulated sweetener (or sugar substitute)

  • 1 tsp vanilla extract

  • A pinch of salt

  • 12 tbsp milk

  • 12 tbsp vegetable oil (or melted coconut oil)

  • 12 tbsp almond flour (or your preferred low-carb flour blend)

  • 1 tsp baking powder

  • Powdered sweetener (for dusting)


Step-by-Step Instructions

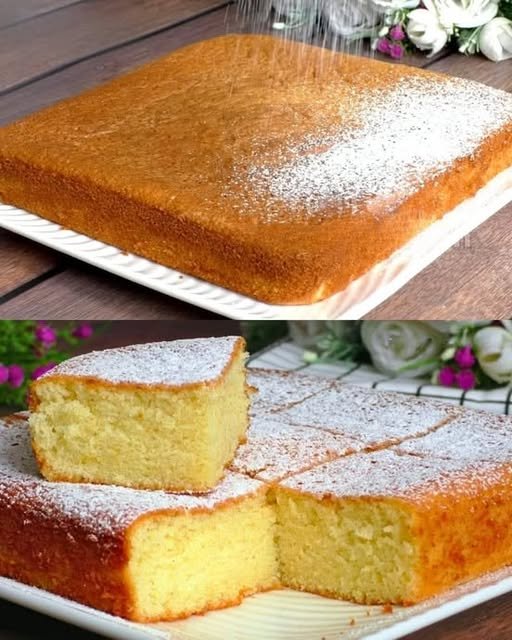
  1. Preparation: Preheat your oven to 180°C. Grease a 21×21 cm baking tray or line it with parchment paper to ensure easy removal.

  2. Whisk the Eggs: In a large mixing bowl, combine the 3 eggs, 12 tbsp sweetener, vanilla, and a pinch of salt. Use an electric mixer to beat the mixture for about 5 minutes until it becomes pale, thick, and doubles in volume.

  3. Add Liquids: Pour in the 12 tbsp milk and 12 tbsp vegetable oil. Whisk on a low speed for a few seconds just until the liquids are fully incorporated.

  4. Incorporate Dry Ingredients: Sift in the 12 tbsp flour and 1 tsp baking powder. Gently fold the dry ingredients into the wet mixture using a spatula. Be careful not to overmix, as you want to keep the air in the batter for a fluffy texture.

  5. Bake: Pour the smooth batter into your prepared baking tray. Bake for 25–30 minutes. You can check if it is ready by inserting a toothpick into the center; it should come out clean.

  6. Finishing Touches: Allow the cake to cool in the pan for 10 minutes before transferring it to a wire rack. Once completely cooled, dust the top generously with powdered sweetener.