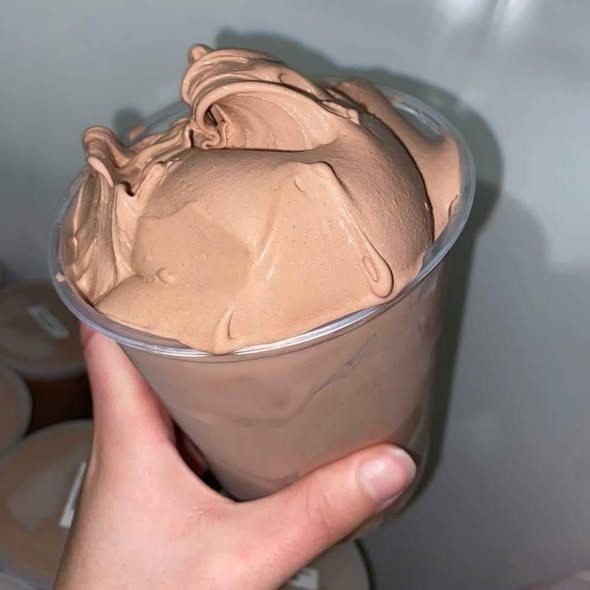
Velvety Chocolate Protein Frostie

Velvety Chocolate Protein Frostie

Prep time: 5 minutes

Freezing time: 4–6 hours (for the base)

Servings: 1 large frostie


Ingredients

  • 2 cups Fairlife Chocolate Milk (or any high-protein chocolate milk of your choice)

  • 1 scoop Chocolate Protein Powder (High-quality whey or plant-based)

  • 1 tablespoon Sugar-Free Chocolate Pudding Mix (This is the secret to the thick, “frostie” texture)

  • Optional: A splash of unsweetened almond milk if needed for blending.


Detailed Step-by-Step Instructions

  1. Mix the Base: In a large jar or blender bottle, combine the chocolate milk, protein powder, and sugar-free chocolate pudding mix. Shake or whisk vigorously until there are no clumps and the mixture is completely smooth.

  2. The First Freeze: Pour the mixture into a pint-sized container compatible with a high-power creamer machine or simply into an airtight container. Place it in the freezer for at least 4–6 hours (overnight is best) until it is frozen solid.

  3. The Transformation: * If using a specialized creamery machine: Process on the “Lite Ice Cream” or “Milkshake” setting.

    • If using a standard high-speed blender: Let the container sit on the counter for 10 minutes to soften slightly. Scrape the frozen block into the blender. Add 1–2 tablespoons of extra milk and pulse until it reaches a thick, swirlable consistency.

  4. The Re-Spin: If the texture looks a bit crumbly after the first blend, add a tiny splash of liquid and blend one more time. This creates that professional, soft-serve peak seen in the photo.

  5. Serve: Spoon the frostie into a chilled glass and enjoy immediately while it’s at its thickest!
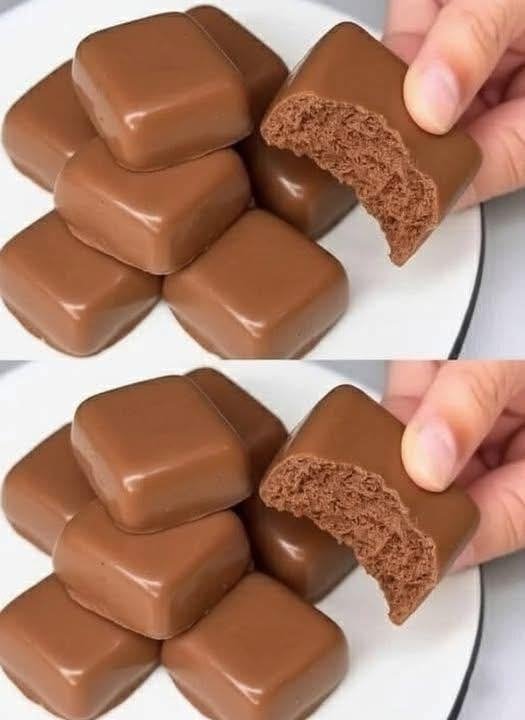
3-Ingredient Chocolate Mousse Bites

3-Ingredient Chocolate Mousse Bites

Prep time: 15 minutes

Chilling time: 2–4 hours

Yields: 12–15 bites


Ingredients

  • 1 ½ cups Egg Whites (You can use liquid egg whites from a carton for convenience)

  • ½ cup Cocoa Powder (Unsweetened, high-quality)

  • ½ cup Sugar-Free Sweetener (Granulated monk fruit or erythritol works best)

  • Optional: A pinch of salt or a splash of vanilla extract for depth.


Detailed Step-by-Step Instructions

  1. Whip the Egg Whites: In a large, clean glass or metal bowl, beat the egg whites on high speed using a hand mixer or stand mixer. Continue until they form stiff peaks. This is the secret to that airy, “bitten” texture shown in the image.

  2. Sift and Fold: Gently sift the cocoa powder and sweetener over the whipped egg whites. Using a rubber spatula, slowly fold the dry ingredients into the foam. Do not stir aggressively, or you will deflate the air bubbles.

  3. Prepare the Mold: Lightly grease a silicone square mold or a mini-muffin tin with a tiny bit of coconut oil spray.

  4. Fill and Smooth: Spoon the mixture into the molds, smoothing the tops with the back of a spoon.

  5. Setting the Bites:

    • Option A (Frozen): Place the mold in the freezer for about 2–3 hours until firm. This gives them a fudge-like, “ice cream” consistency.

    • Option B (Baked): For a more cake-like sponge texture, bake at 150°C (300°F) for about 12–15 minutes until set, then let them cool completely.

  6. The Chocolate Coating (Optional): If you want the smooth exterior seen in the photo, melt a small amount of sugar-free chocolate chips with a teaspoon of coconut oil and dip the chilled bites into the glaze.

  7. Serve: Keep these stored in the refrigerator or freezer until you are ready to enjoy them.


A Quick Tip for Success

To get that perfectly smooth, glossy look on the outside, using a silicone mold is highly recommended. It allows you to “pop” the bites out without breaking the delicate mousse structure inside.

Creamy Chocolate Biscuit Dessert Cups

Creamy Chocolate Biscuit Dessert Cups

📝 Ingredients

  • 2 cups milk
  • 2 tbsp vanilla custard powder
  • 4 tbsp sugar (or according to taste)
  • 1 cup fresh cream
  • 1 cup crushed chocolate biscuits (like Oreo or any similar biscuits)
  • ½ cup chocolate chips or chopped chocolate
  • 1 tsp vanilla essence (optional)

👩‍🍳 Step-by-Step Instructions

Step 1: Prepare Custard Mixture

  1. Take a small bowl.
  2. Add 2 tbsp custard powder and 4–5 tbsp milk from the 2 cups milk.
  3. Mix well until there are no lumps.

Step 2: Heat the Milk

  1. Pour the remaining milk into a saucepan.
  2. Add sugar and heat on medium flame.
  3. Stir until the sugar completely dissolves.

Step 3: Cook the Custard

  1. Slowly pour the custard mixture into the hot milk.
  2. Keep stirring continuously so it does not form lumps.
  3. Cook until the mixture becomes thick and creamy.

Step 4: Cool the Custard

  1. Turn off the flame.
  2. Let the custard cool completely at room temperature.

Step 5: Add Cream

  1. In a separate bowl, lightly whisk the fresh cream.
  2. Add the cooled custard into the cream.
  3. Mix gently until smooth and creamy.

Step 6: Add Biscuit and Chocolate

  1. Roughly crush the chocolate biscuits.
  2. Add them into the cream mixture.
  3. Add chocolate chips or chopped chocolate and mix well.

Step 7: Fill the Cups

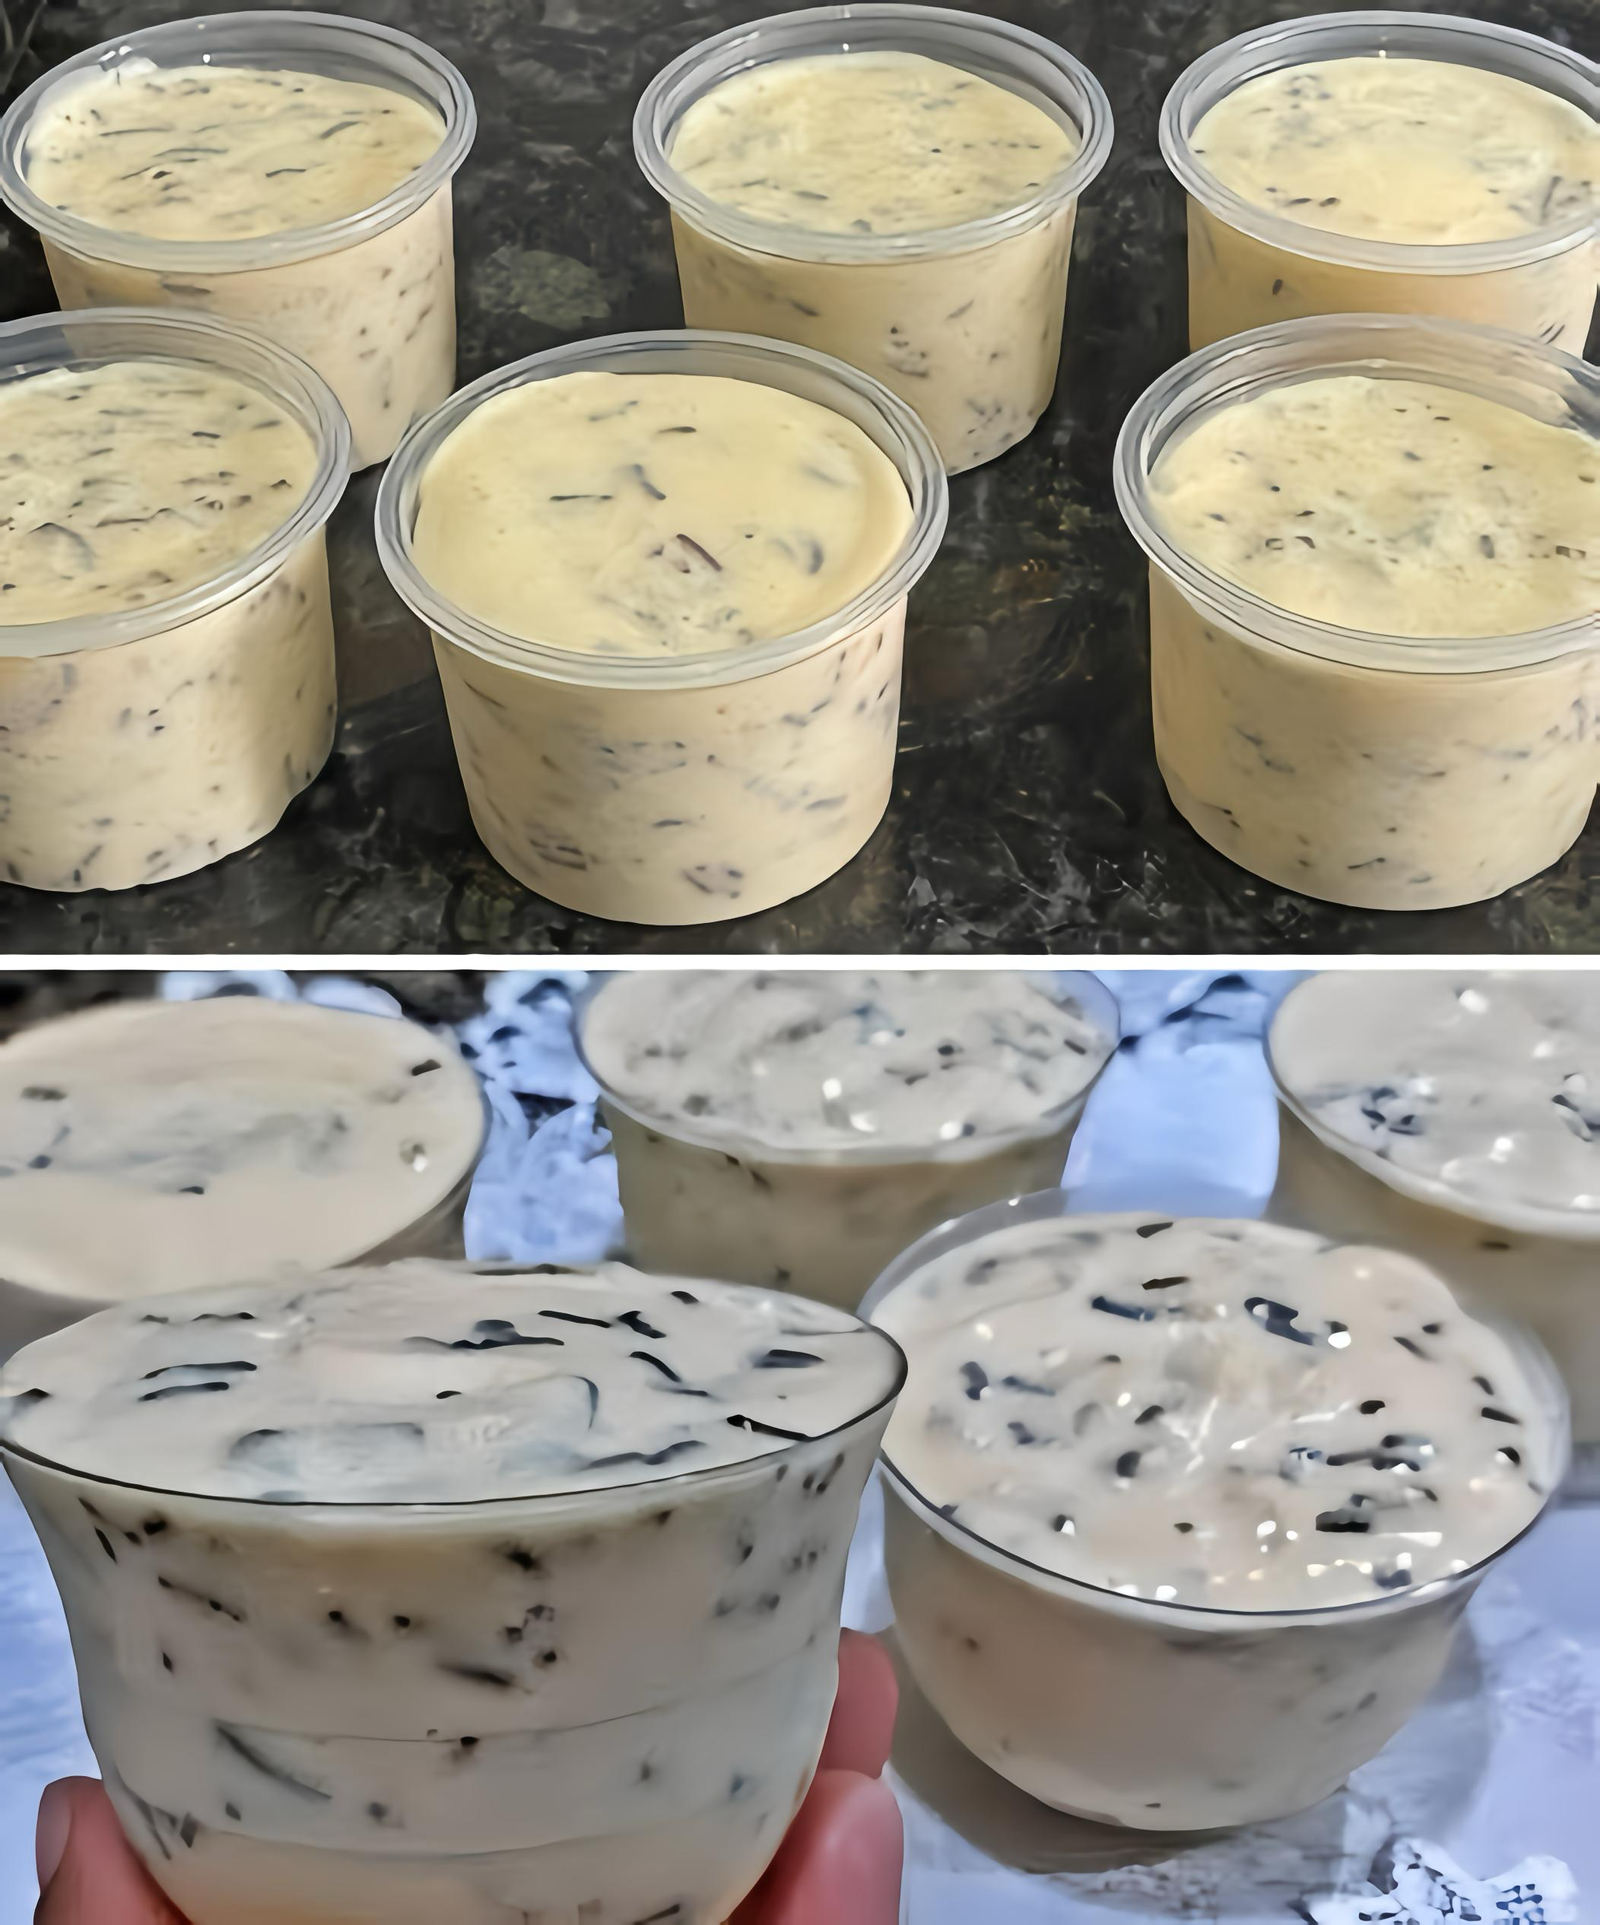
  1. Pour the prepared mixture into small dessert cups like shown in the picture.
  2. Smooth the top with a spoon.

Step 8: Chill

  1. Cover the cups with plastic wrap or lids.
  2. Refrigerate for 3–4 hours until nicely chilled and set.

🍫 Serving

Serve cold. The dessert will be creamy with soft chocolate biscuit pieces, making it rich and delicious.

❓ Frequently Asked Questions (Q/A)

Q1: Can I make this dessert without custard powder?

Yes. You can use cornflour with vanilla flavor as a substitute.

Q2: Which biscuits are best for this recipe?

Chocolate biscuits like Oreo, Bourbon, or any cocoa biscuits work well.

Q3: How long can I store this dessert?

You can store it in the refrigerator for 2–3 days in a covered container.

Q4: Can I freeze this dessert?

Yes, but it is best enjoyed chilled from the fridge, not frozen.

Q5: Can I add fruits to this recipe?

Yes, fruits like banana or strawberries can be added for extra flavor.

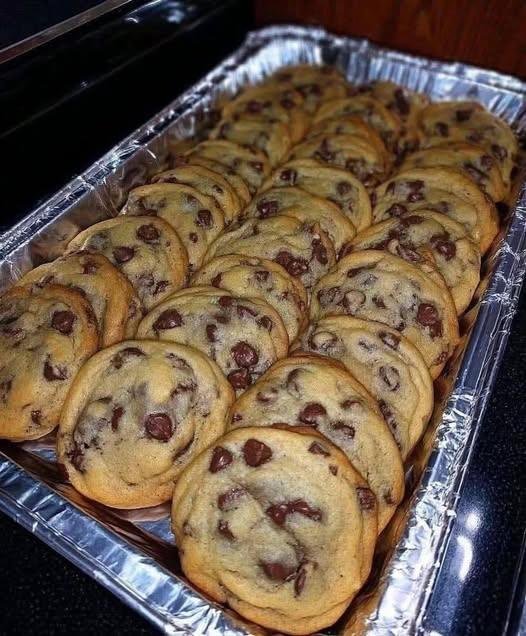
3-Ingredient Sugar-Free Chocolate Chip Cookies

3-Ingredient Sugar-Free Chocolate Chip Cookies

Ingredients

  • 1 cup Smooth Peanut Butter (ensure it is the “no sugar added” variety)

  • 1 large Egg

  • 1/2 cup Sugar-free Chocolate Chips (or dark chocolate chunks)

  • Optional: 1/4 cup Erythritol or Stevia blend (if you prefer a much sweeter cookie)


Step-by-Step Instructions

  1. Preheat and Prep: Preheat your oven to 350°F (175°C). Line a large baking sheet with parchment paper or a silicone baking mat to prevent sticking.

  2. Mix the Base: In a medium mixing bowl, combine the smooth peanut butter and the egg. If you are using an extra sweetener, add it now. Stir with a spatula until the mixture becomes a thick, cohesive dough.

  3. Add the Chocolate: Gently fold in the sugar-free chocolate chips until they are evenly distributed throughout the dough.

  4. Scoop and Shape: Using a tablespoon or a small cookie scoop, drop rounded mounds of dough onto the prepared baking sheet, leaving about 2 inches of space between them.

  5. Flatten: These cookies do not spread much on their own. Use the back of a spoon or your palm to gently press down on each ball to reach your desired thickness.

  6. Bake: Bake for 8 to 10 minutes. The edges should be just slightly golden, but the centers will still look very soft. Do not overbake, as they will continue to firm up as they cool.

  7. Cooling (Important): Let the cookies sit on the hot baking sheet for at least 10 minutes before moving them. Because there is no flour, they need this time to set their structure.

  8. Serve: Enjoy these warm or store them in an airtight container for up to 5 days.

3-Ingredient Creamy Protein Pudding

3-Ingredient Creamy Protein Pudding

Ingredients

  • 2 cups Non-fat Greek Yogurt (plain and thick)

  • 1 box (1.5 oz) Sugar-free instant vanilla pudding mix (or white chocolate flavor)

  • 1/2 cup Skim milk or unsweetened almond milk

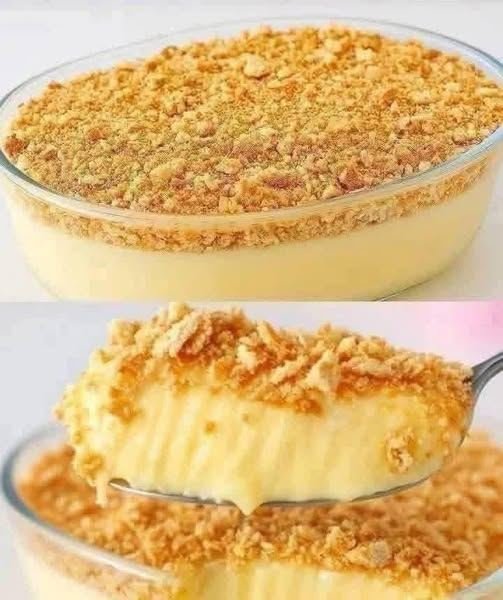
  • Optional Topping: Crushed sugar-free biscuits or graham crackers (as seen in the image)


Step-by-Step Instructions

  1. Prepare the Base: In a large mixing bowl, pour in the milk and add the sugar-free instant pudding mix. Whisk vigorously for about 2 minutes until the mixture begins to thicken and the powder is fully dissolved.

  2. Fold in the Yogurt: Add the Greek yogurt to the pudding base. Use a spatula to gently fold the yogurt in until the mixture is completely smooth and uniform in color. This combination gives the dessert its high protein content and a tangy, cheesecake-like flavor.

  3. Layer the Dessert: Pour the creamy mixture into a glass serving dish or individual ramekins. Smooth out the top with the back of a spoon.

  4. Add the Crunch: Sprinkle a generous layer of crushed sugar-free biscuits or graham crackers over the top. This provides a perfect textural contrast to the smooth cream.

  5. Chill: Place the dish in the refrigerator for at least 1 to 2 hours. This allows the pudding to set firmly and the flavors to meld.

  6. Serve: Serve chilled directly from the refrigerator. It stays fresh for up to 3 days when covered.

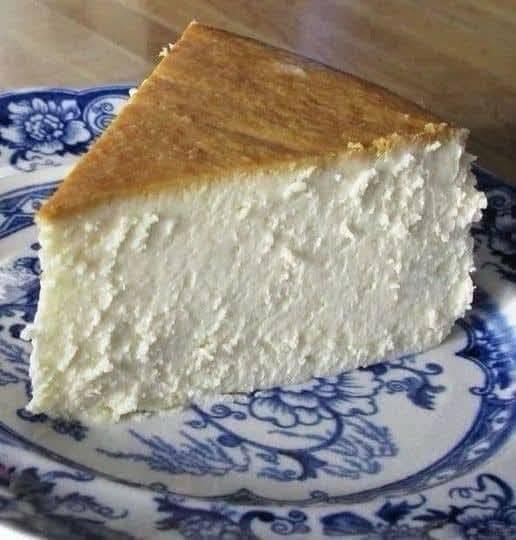
High-Protein Crustless Yogurt Cake

High-Protein Crustless Yogurt Cake

Ingredients

  • 2 cups Non-fat Greek Yogurt (plain)

  • 4 large Eggs

  • 1/2 cup Stevia or your preferred granulated sugar substitute

  • 4 tbsp Cornstarch (or arrowroot powder for a smoother finish)

  • 1 tsp Vanilla extract

  • 1/2 tsp Lemon zest (optional, for a bright flavor)

  • A pinch of salt


Step-by-Step Instructions

  1. Preheat and Prep: Preheat your oven to 350°F (175°C). Lightly grease a 6-inch or 7-inch round cake pan and line the bottom and sides with parchment paper. This cake is delicate, so the paper helps it release easily.

  2. Mix the Base: In a large mixing bowl, whisk the eggs and your sugar substitute together until the mixture is slightly frothy.

  3. Incorporate Yogurt: Add the Greek yogurt, vanilla extract, lemon zest, and a pinch of salt. Whisk until the batter is completely smooth and there are no yogurt lumps remaining.

  4. Add Thickener: Sift in the cornstarch. Gently whisk it into the batter until just combined. Be careful not to over-mix at this stage; you want to keep the air in the eggs.

  5. Bake: Pour the batter into your prepared pan. Bake for 45 to 50 minutes. The cake should be set around the edges but still have a slight “jiggle” in the center. The top should be a light golden brown.

  6. Cooling (Crucial Step): Turn off the oven and leave the door slightly ajar. Let the cake cool inside the oven for about 10 minutes to prevent it from collapsing too quickly.

  7. Chill: Remove from the oven and let it cool completely at room temperature. For the best texture, refrigerate the cake for at least 2 hours (or overnight) before slicing. This allows the protein to set and the flavors to deepen.