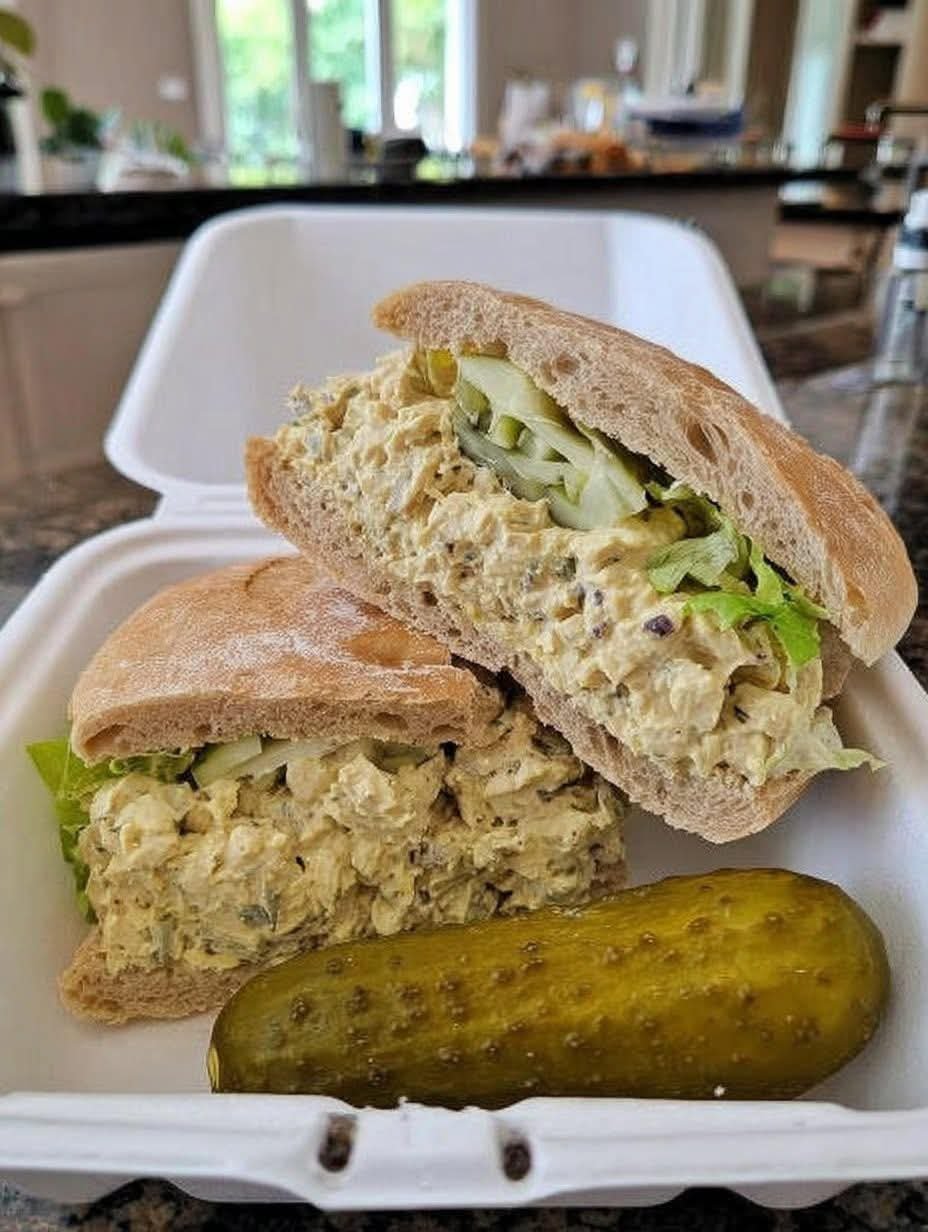
🥒 Healthy Dill Pickle Chicken Salad (WW-Friendly)

🥒 Healthy Dill Pickle Chicken Salad (WW-Friendly)

Ingredients

2 cups cooked chicken breast, chopped or shredded

½ cup fat-free Greek yogurt

1–2 tbsp light mayo (optional but adds richness)

⅓ cup dill pickles, finely chopped

1–2 tbsp pickle juice (to taste)

Âź cup celery, finely chopped

1–2 tbsp red onion or scallions (optional)

1 tsp dill (fresh or dried)

½ tsp garlic powder

Salt & black pepper to taste


Directions

In a bowl, mix Greek yogurt, light mayo, pickle juice, and seasonings.

Fold in chicken, pickles, celery, and onion.

Chill 20–30 minutes if you can (flavor gets better 👌).

Taste and adjust pickle juice or dill.


WW Points (Approximate)

💙 Blue / Purple: 0–1 points per serving

💚 Green: 2–3 points per serving

(Assumes fat-free Greek yogurt + light mayo; points depend on exact brands and portion size.)


Serving Ideas (Low Point)

On lettuce wraps 🥬

With cucumber slices or bell pepper boats

On 647 bread or light sandwich thins

Stuffed in a tomato or low-carb wrap


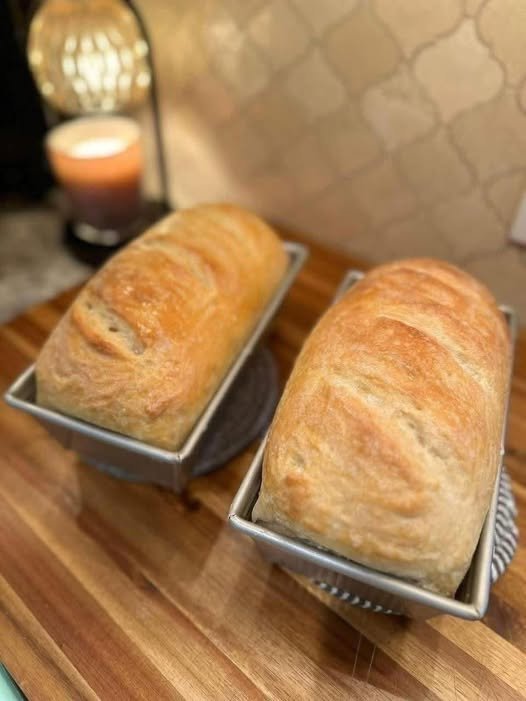
Sourdough Sandwich Bread

This soft sourdough sandwich bread recipe is made with all-purpose flour, olive oil, honey, salt, and sourdough starter in a stand mixer. It has a light, fluffy texture with a tight crumb, perfect for sandwiches and toast.

Are you searching for an easy sourdough sandwich bread recipe? Look no further because this is the only one you’ll ever need.

You don’t need to be a professional baker to make delicious sourdough bread for your family. Trust me, the kids will be begging for more.

INGREDIENTS

INGREDIENTS TO MAKE Âź CUP (50 G) OF ACTIVE SOURDOUGH STARTER

  • 2 teaspoons (10 g) sourdough starter
  • 3 tablespoons (25 g) all-purpose flour
  • 5 teaspoons (25 g) water

DOUGH INGREDIENTS

  • Ÿ cup (50 g) sourdough starter (active)
  • 1 cup + 2 ½ tablespoons (275 g) water
  • 4 tablespoons (60 g) olive oil
  • 1 tablespoon honey (maple syrup or sugar)
  • 4 cups + 2 tablespoons (500 g) all-purpose flour
  • 2 teaspoons (10 g) sea salt

INSTRUCTIONS

DAY 1

  • 7 AM – Feed your sourdough starter: 12 hours before you mix the dough, feed your sourdough starter. Add the ingredients to a clean jar, stir, cover loosely, and let rise at room temperature, 68-72°F (20-22°C), until doubled. 2 teaspoons (10 g) sourdough starter 3 tablespoons (25 g) all-purpose flour 5 teaspoons (25 g) water
  • 7 PM—Mix the dough: Add the dough ingredients to the bowl of a stand mixer. Use a dough whisk or a stiff spatula to get the dough started. Switch to your hands and mix the dough until it resembles a shaggy mess and there are no dry bits in the bowl. Cover the bowl and let the dough rest for 1 hour for the flour to fully absorb the water. Âź cup (50 g) sourdough starter1 cup + 2 ½ tablespoons (275 g) water 4 tablespoons (60 g) olive oil1 tablespoon honey 4 cups + 2 tablespoons (500 g) all-purpose flour 2 teaspoons (10 g) sea salt
  • 8 PM – Knead and First Rise: Mix the dough on LOW speed (3) for 8-10 minutes, using the dough hook attachment. Remove the dough hook, cover the bowl, and allow the dough to rise at room temperature, 68-72°F (20-22°C), for 10-12 hours or until it has doubled in size.

DAY 2

  • 6 AM – Shape and second rise: Turn the dough out onto a lightly floured work surface and gently press it into a rectangle with the short end closest to you. Fold the left and right sides of the dough into the middle. Starting from the end farthest from you, roll the dough towards yourself into a log shape. Use your hands to gently cup the dough and pull it towards yourself to create tension on the outside. Pinch the ends to seal any edges. Transfer the dough, seam-side down, into a lightly greased bread pan. For easier removal, you can also line the pan with parchment paper. Allow the dough to rest at room temperature, uncovered until the dough has risen 1 inch above the rim of the pan, about 2-3 hours depending on the temperature of your kitchen.
  • 9 AM – Bake: Preheat the oven to 450°F (232°C). Transfer the pan to the oven and turn the oven down to 375°F (190°C). Bake for 45-50 minutes. Allow the bread to cool in the pan for 10-15 minutes before transferring the loaf to a cooling rack.

NOTES

Consider your kitchen’s temperature and humidity, especially in warm climates, as these factors can affect the final product.

Cooler kitchens (below 68°F / 20°C): The first and second rises will take longer than outlined in the sample timeline. If the dough takes too long to rise, you can adjust the recipe by using 100 g of active starter and 255 g of water. The extra starter will help the dough ferment faster.

Warmer kitchens (above 72°F / 22°C): The first and second rises will be shorter than outlined in the sample timeline. If the dough rises too quickly overnight, mix the dough in the morning and monitor it closely to avoid over-proofing.

If you wake up to a dough that’s over-proofed and too sticky to work with, don’t discard it. Use it to make sourdough focaccia bread.

Storage tips: Keep the bread in a bread bag, beeswax wrap, or kitchen towel at room temperature. It will stay fresh for a few days. To freeze, wrap individual loaves or slices in plastic wrap and place them in a freezer-safe container. Ensure they are fully cooled before wrapping to avoid condensation.

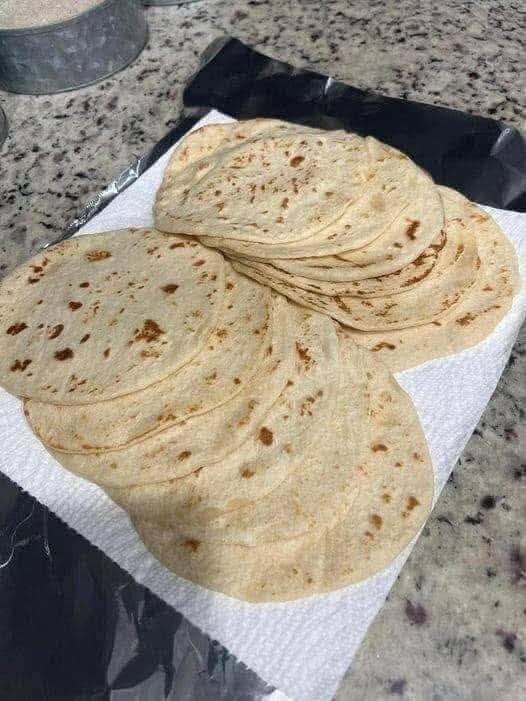
Mediterranean Low-Carb Tortillas

Mediterranean Low-Carb Tortillas (Flexible, Strong & Grain-Free)

These Mediterranean-style low-carb tortillas are soft, bendable, and shockingly sturdy—without flour, starches, or sugar. Made with just eggs and cheese (plus one secret ingredient), they’re perfect for wraps, gyros, quesadillas, or breakfast roll-ups while staying low-carb and protein-rich.

Unlike eggy flatbreads that crack or tear, these tortillas cool into a flexible, almost wheat-like texture. The key is gentle heat, full blending, and allowing them to rest after cooking. Simple ingredients. Smart technique. Big payoff.

Ingredients (Makes 4 Tortillas)

  • 2 large eggs
  • ½ cup shredded mozzarella (low-moisture works best)
  • 1 tablespoon cream cheese (the secret to flexibility)

Optional (still carnivore, improves strength):

  • ½ tablespoon beef gelatin

Equipment

  • Blender or food processor
  • Non-stick skillet (8–10 inch)
  • Silicone spatula

Instructions

1️⃣ Blend Until Silky

Add eggs, shredded mozzarella, cream cheese, and gelatin (if using) to a blender or food processor.
Blend until completely smooth—no cheese bits, no streaks. This step is crucial for even cooking and flexibility.

2️⃣ Heat the Pan Gently

Place a non-stick skillet over medium-low heat.
Lightly grease with butter or beef tallow.
The pan should be warm, not hot—too much heat causes rubbery tortillas.

3️⃣ Cook Thin & Even

Pour Ÿ of the batter into the center of the pan.
Immediately swirl to form a thin, even circle.

Cook for 60–90 seconds, until:

  • The edges lift easily
  • The surface looks set with no wet spots
See also  Mediterranean Cleansing Green Detox Soup

4️⃣ Flip Carefully

Flip gently using a silicone spatula.
Cook the second side for 30–40 seconds, then remove to a plate or cooling rack.

👉 Do not overcook — they continue to firm up as they cool.

Cooling = Flexibility

Let tortillas cool for 2–3 minutes before using.
This resting phase is where the magic happens—they become bendable, strong, and tear-resistant.

Texture Troubleshooting

  • Too eggy?  Use 1 whole egg + 1 egg white
  • Breaking?  Add a little more cream cheese or gelatin
  • Rubbery?  Heat was too high

Storage

  • Fridge: 3–4 days (store with parchment between)
  • Freezer: Up to 1 month

Simple, clean, and endlessly versatile—these tortillas prove low-carb doesn’t mean low-satisfaction. 💪🌯

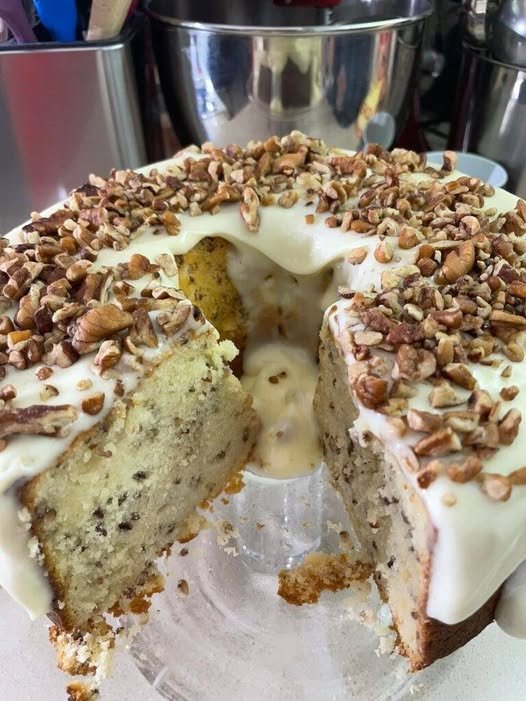
OLD SCHOOL BUTTER PECAN POUND CAKE

This buttery pecan cake is rich, tender, moist, and filled with chopped pecans. It is topped with a delicious cream cheese frosting that pairs perfectly with the easy cake. It’s a pecan lover’s dream.
Pecan desserts are a Southern tradition. From adding them to layered desserts to making them the stars of the show in cakes and pies, pecans are a classic addition to many different desserts. Over the years, pecans have been put into all kinds of recipes.
Of course, Hummingbird Cake is a classic dessert with pecans in it, as we like to call it “Pink Stuff” here. It’s a kind of pudding and whipped cream. Also, you better believe I’ve made my fair share of pecan pie. There is one pecan dessert that I love to make more than anything else: this delicious pecan cake.
Pecan Butter Pound Cake is a super easy cake recipe even for beginners. Just a few simple ingredients, a little mixing, a little baking, and frosting—that’s it. There are no fancy layers or build methods. It’s just good old-fashioned cake, and it’s delicious.

Ingredients:

3 cups of cake flour
°2 cups of sugar
°1 cup packed brown sugar
°3 sticks of butter (room temperature)
°5 eggs (room temperature)
°1 c whole milk (at room temperature)
°1/2 teaspoon baking powder
° 1/4 teaspoon salt
° 1 tablespoon of vanilla extract
°1 tablespoon pound extract
°2 cups of roasted American nuts
thick snow
°2 cups of powdered sugar
°4 ounces of butter
°4 ounces of cream cheese
°4 teaspoons half-and-half

*Directions:

Cream the butter and sugar together until smooth (about 3-7 minutes).
Slowly add eggs 1 at a time
Add flavors
Add flour and milk (alternately)
Start with flour and end with flour
stir in chopped pecans
Pour into a greased tube bowl
Bake at 325 degrees for 1 hour and 10 minutes. Check out after 45 minutes. Mine was ready in 1 hour.
Place a toothpick in the center of the cake, and if the toothpick comes out of the batter, leave the cake in it while baking.
Leave to cool in the pan on a wire rack for 20 minutes. Then put it on a cake plate. Make sure to cover it so the cake doesn’t dry out. A snugly fitting cake pan will be perfect.

Enjoy!

Home Made Beef Taco Soup

prep time: 5 MINS

cook time: 40 MINS

total time: 45 MINS

calories: 253KCAL

This Beef Taco Soup is a filling, flavorful and super satisfying one-pot meal!

yield: 8 (GENEROUS 1 CUP) SERVINGS

Table of Contents

Ingredients

1 ½ tablespoons chili powder

½ teaspoon garlic powder

½ teaspoon onion powder

½ teaspoon crushed red pepper flakes

½ teaspoon dried oregano

ž teaspoon paprika

2 Âź teaspoon ground cumin

1 teaspoon salt

1 ½ teaspoons black pepper

1 teaspoon canola oil

½ cup chopped onion

2 garlic cloves, minced

1 ½ lbs raw 95% lean ground beef

3 cups low sodium beef broth

1 (28 oz) can crushed tomatoes

3 oz 1/3 less fat cream cheese, cut into cubes

1 cup frozen corn kernels

1 ½ cups drained and rinsed canned black beans

Optional toppings (not included in nutrition info or points calculations): chopped cilantro, avocado, shredded cheese, sour cream, tortilla strips or chips, sliced scallions, etc.

Instructions

Combine the chili powder, garlic powder, onion powder, crushed red pepper, oregano, paprika, cumin, salt and pepper in a bowl and stir to combine. Set aside.

Pour the canola oil into a soup pot or Dutch oven and bring over medium-high heat. Add the onions and stir to coat. Cook, stirring occasionally, for a few minutes until the onions are softened. Add the minced garlic, stir together and cook for another 30-60 seconds. Add the ground beef and stir together. Cook, breaking the meat up into small pieces, until the beef is cooked through and fully broken up. Add the spice mixture from step 1 to the meat and stir to coat.

Add the broth and crushed tomatoes, increase the heat and bring to a boil. Once boiling, reduce the heat to low and simmer, covered, for 20 minutes. Uncover the pot and add the cream cheese. Whisk the cream cheese in while simmering until the cheese is dissolved. Add the corn and black beans and stir together. Cover the pot and simmer for an additional 10 minutes.

Notes

Nutrition Information per (generous 1 cup*) serving:


253 calories, 22 g carbs, 3 g sugars, 8 g fat, 3 g saturated fat, 25 g protein, 6 g fiber


MyW-W SmartPoints per (generous 1 cup*) serving:


Green: 5 SmartPoints/ Blue: 4 SmartPoints/ Purple: 4 SmartPoints


W-W Points Plus:


6 per (generous 1 cup*) serving


*When I measured the finished soup I got 9 cups, so I made it into 8 servings at around 1 1/8 cups each

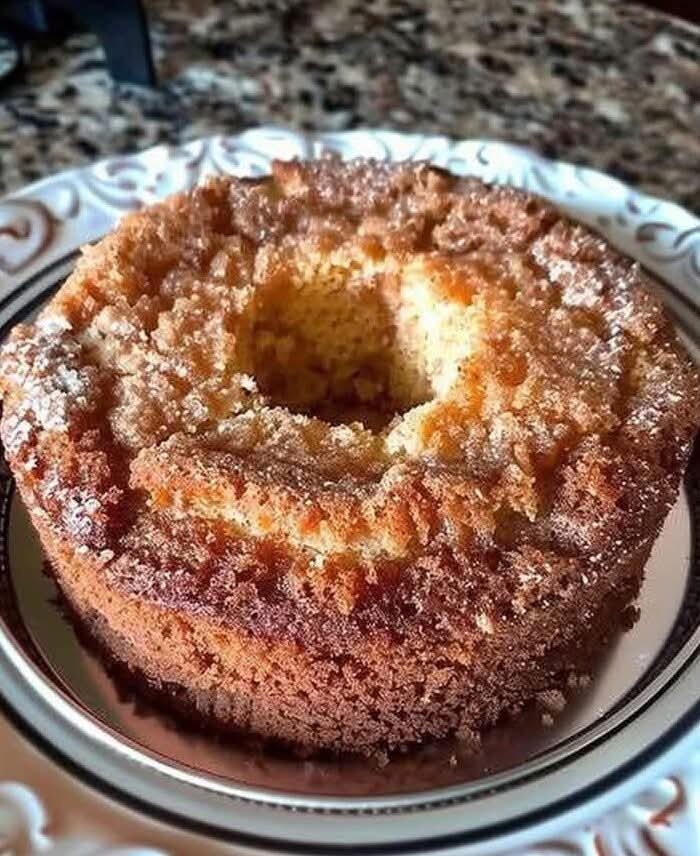
Best Mother’s Crack Cake

🍰 Best Mother’s Crack Cake (Full Recipe)🧺 Ingredients

Cake


1 box yellow cake mix


1 small box (3.4 oz) instant vanilla pudding mix


4 large eggs


½ cup cold water


½ cup vegetable oil


½ cup brown sugar


½ cup white sugar


1 teaspoon ground cinnamon


½ cup chopped pecans or walnuts (optional but recommended)

  • Âź cup butter

  • ½ cup white sugar

  • Âź cup water

  • Âź cup vanilla extract (yes, a full Âź cup)


👩‍🍳 Instructions

  1. Preheat oven to 350°F (175°C).

  2. Grease a Bundt pan generously (this cake will stick if you don’t).


  3. In a large bowl, mix:

    • Cake mix

    • Pudding mix

    • Eggs

    • Water

    • Oil

  4. Beat until smooth (about 2 minutes).

  5. In a separate bowl, mix:

    • Brown sugar

    • White sugar

    • Cinnamon

    • Nuts (if using)

  6. Layering time:

    • Sprinkle half of the sugar mixture into the bottom of the Bundt pan.

    • Pour in the batter.

    • Sprinkle the remaining sugar mixture on top.

    1. Bake for 45–50 minutes, until a toothpick comes out mostly clean.

    2. Let cake cool 10 minutes—don’t skip this.


    🍯 Glaze Magic

    1. In a saucepan, combine:

      • Butter

      • Sugar

      • Water

    2. Bring to a boil, then simmer 2–3 minutes.

    3. Remove from heat and stir in vanilla.

    4. Poke holes all over the cake (use a skewer or fork).

    5. Slowly pour glaze over the cake while it’s still warm.

    6. Let it soak for 10–15 minutes, then invert onto a plate.


❓ Q & A (Because Everyone Asks)

Q: Why is it called “Crack Cake”?

A: Because it’s addictively good. Sweet, buttery, moist, and impossible to stop eating.

Q: Can I make it without nuts?

A: Absolutely. Still amazing without them.

Q: Can I use a different cake mix?

A: Yellow is best, but butter cake or vanilla also work. Avoid chocolate—it changes the whole vibe.

Q: Is Âź cup of vanilla really correct?

A: YES. Trust the process. The alcohol cooks out and leaves insane flavor.

Q: Can I make it ahead?

A: Yes! It’s even better the next day once the glaze fully settles in.

Q: How do I store it?

A: Cover tightly and keep at room temperature up to 3 days, or refrigerate up to 5 days.

Q: Can I freeze it?

A: Yep. Wrap slices tightly and freeze up to 3 months. Thaw at room temp.

Q: What makes this cake so moist?

A: The pudding mix + oil + glaze combo = unstoppable moisture.