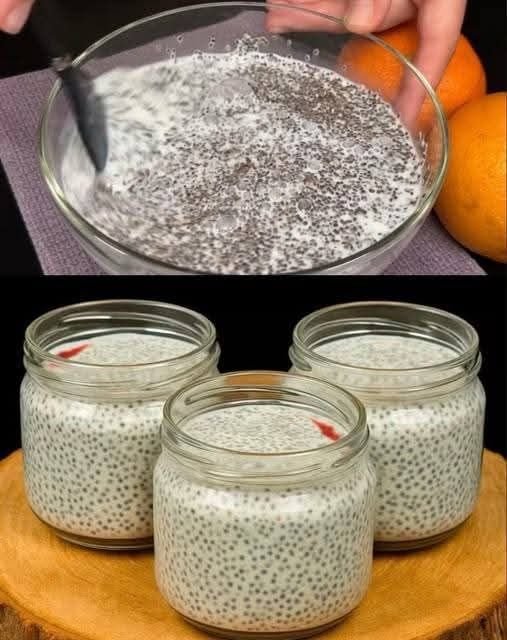
Orange Creamsicle Chia Seed Pudding

Orange Creamsicle Chia Seed Pudding

Yields: 2 servings Prep time: 10 mins | Set time: 4+ hours (or overnight)

Ingredients

  • 1 ¼ cups unsweetened coconut milk: for ultimate creaminess.

  • ¼ cup Chia Seeds: Black or white seeds work equally well.

  • 1 large Naval Orange: You will need both the zest (approx. ¼ tsp) and the juice/segments.

  • 1 tsp Honey or Maple Syrup: Optional, adjust based on the sweetness of your orange.

  • ⅛ tsp Vanilla Extract: For that classic “creamsicle” flavor profile.


Instructions

  1. Prepare the Base: In a medium bowl or large mason jar, whisk together the coconut milk, vanilla extract, and your chosen sweetener until well combined.

  2. Incorporate the Citrus: Grate approximately ¼ teaspoon of orange zest into the mixture. If you prefer a smoother texture, you can puree the orange segments with the milk in a blender first.

  3. Add the Seeds: Stir in the chia seeds.

  4. The Two-Stir Method: This is crucial to prevent clumping. Let the mixture sit for 5–10 minutes, then give it a second vigorous stir or shake to ensure the seeds are evenly distributed as they begin to gel.

  5. Refrigerate: Cover the container tightly and refrigerate for at least 4 hours, though overnight is best for a thick, pudding-like consistency.

  6. Serve: Before eating, give the pudding one final stir. Top with fresh orange segments, extra zest, or a few crushed nuts for crunch.


Why It Works for Beginners

  • High Fiber & Protein: Chia seeds are “powerhouse” ingredients packed with omega-3 fatty acids and fiber, which help keep you full and support heart health.

  • Meal Prep Friendly: You can store this in an airtight container in the fridge for up to 5 days, making it an easy grab-and-go option for busy mornings.

  • Customizable: If the pudding is too thick for your liking after setting, simply stir in a splash of extra milk to reach your desired consistency.

Lemon Butter Baked Cod

This Lemon Butter Baked Cod recipe is a delightful dish that combines the freshness of lemon with the richness of butter to create a flavorful and tender cod fillet. The cod is coated in a buttery lemon mixture, then lightly breaded and baked to perfection. It’s a simple yet elegant dish that is perfect for a weeknight dinner or a special occasion.

Why You’ll Love This Recipe:

  • Quick and easy to prepare
  • Bright and refreshing flavors
  • Versatile and can be paired with various side dishes

Ingredients:

  • 2 lb cod fillet (any white fish)
  • 1/4 cup butter or margarine
  • 2 tablespoons lemon juice
  • 1/4 cup all-purpose flour
  • Dash(es) of paprika
  • Salt & pepper to taste

Directions:

  • Cut the cod fillets into serving sizes.
  • Melt the butter in a saucepan or microwave. Add lemon juice to the melted butter.
  • In another dish, mix together flour, salt, and pepper.
  • Dip each fish fillet into the butter and lemon mixture, coating well on all sides.
  • Then dip the buttered fish into the flour mixture, coating well on all sides.
  • Place the coated fillets in an ungreased baking dish.
  • Drizzle the remaining butter mixture over the fillets.
  • Sprinkle the entire dish with paprika.
  • Bake the dish, uncovered, in a 350°F oven for 25-30 minutes or until the fish flakes easily with a fork.
  • Garnish with parsley and lemon wedges before serving.
  • Prep Time: 15 minutes
  • Cooking Time: 25-30 minutes
  • Total Time: 40-45 minutes
  • Servings: 4
  • Kcal: 320 per serving

Storage:

  • Store any leftovers in an airtight container in the refrigerator for up to 2 days. Reheat in the oven or microwave until heated through.

Recipe Tips:

  • For added flavor, you can squeeze some extra lemon juice over the baked cod before serving.
  • Serve this dish with a side of steamed vegetables or a fresh salad for a complete meal.

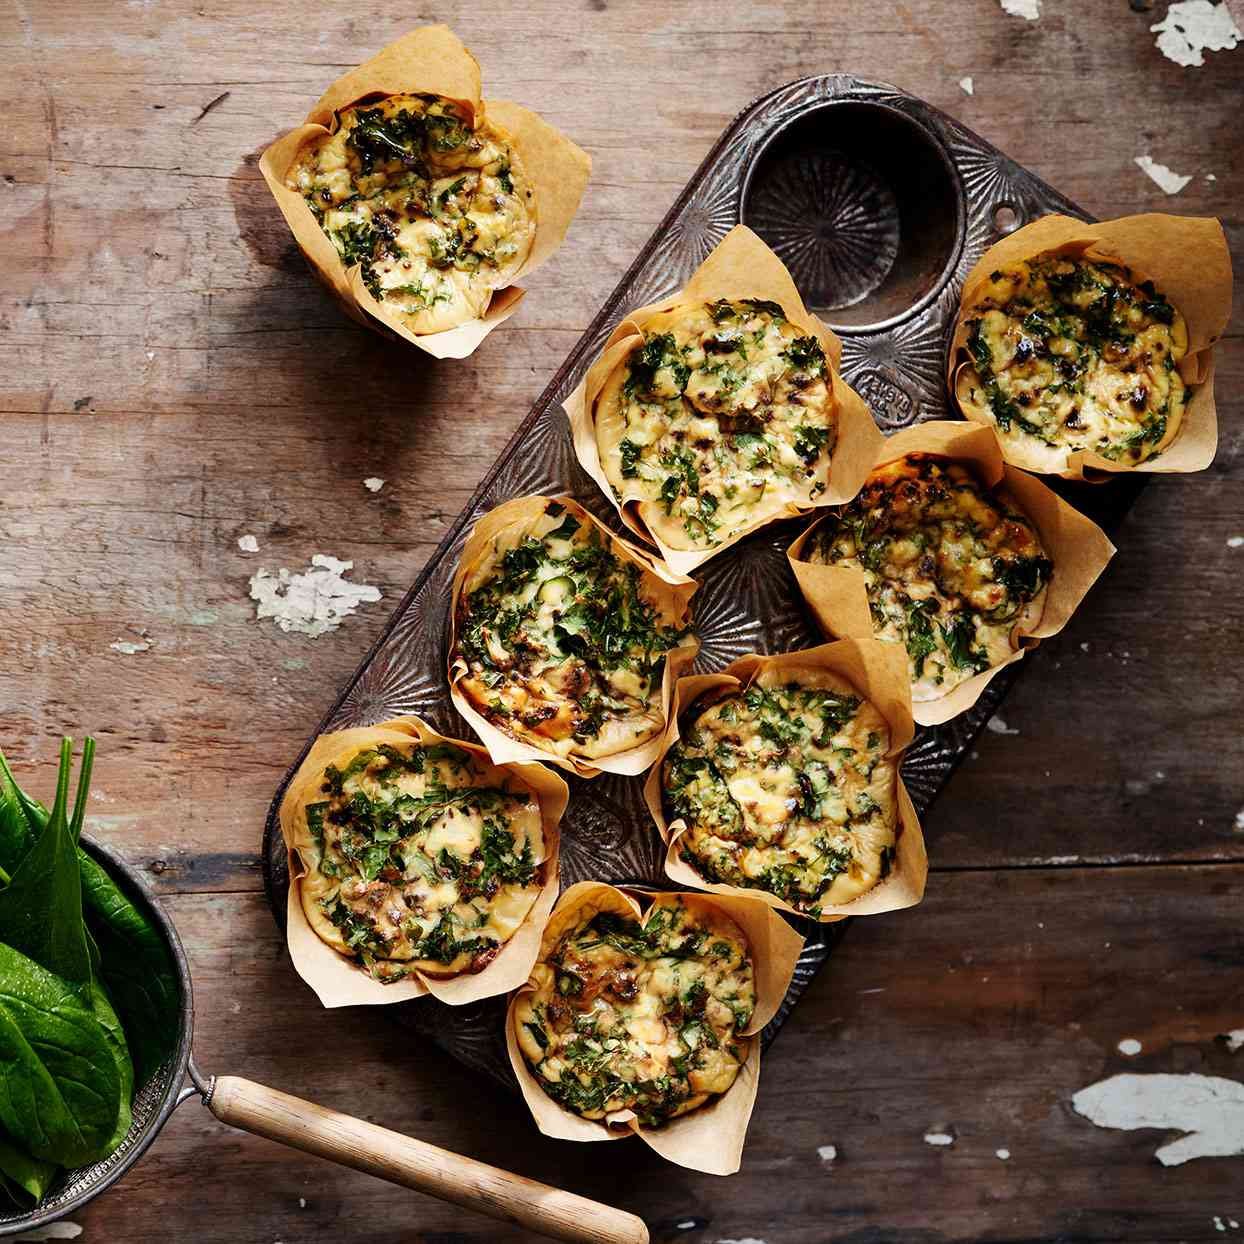
Spinach & Feta Egg Bites


Spinach & Feta Egg Bites

Prep time: 10 mins | Cook time: 20–25 mins | Yields: 12 muffins


Ingredients

8 Large Eggs


1/2 cup Milk (whole or 2% works best)


2 cups Fresh Spinach, roughly chopped


1/2 cup Feta Cheese, crumbled


1/4 cup Parmesan Cheese, shredded


1/4 tsp Salt (feta is salty, so don’t overdo it!)


1/4 tsp Black Pepper


Optional: 1/2 tsp Garlic powder or a pinch of red pepper flakes for heat.


Instructions

Prep the Oven: Preheat your oven to 375°F (190°C).


Line the Tin: As seen in your photo, use squares of parchment paper pushed into the muffin tin cups. This prevents sticking and gives them that “rustic” bakery look. Alternatively, grease the tin very well with olive oil or butter.


Whisk: In a large bowl, whisk together the eggs, milk, salt, pepper, and any extra spices until the mixture is frothy.


Distribute Fillings: Evenly divide the chopped spinach and crumbled feta into the bottom of the 12 muffin cups.


Pour: Carefully pour the egg mixture over the fillings in each cup until they are about 3/4 full. Sprinkle the Parmesan cheese on top.


Bake: Place in the oven and bake for 20–25 minutes, or until the tops are golden brown and the centers are set (they shouldn’t jiggle when you move the pan).


Cool: Let them sit for 5 minutes before removing. The parchment paper makes them easy to lift right out!


Pro-Tips for Success

Avoid Sogginess: If you use frozen spinach instead of fresh, make sure to squeeze out every drop of water first, otherwise the egg bites will become watery.


Add-ins: Feel free to add sautéed mushrooms or sundried tomatoes to match the rich colors in your photo.


Storage: These keep beautifully in an airtight container in the fridge for up to 4 days. Reheat for 30 seconds in the microwave.

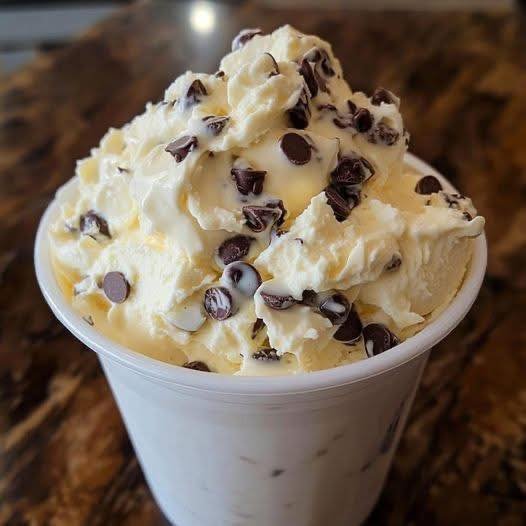
No-Churn Chocolate Chunk Ice CreamRich, Easy, and Diet-Friendly Homemade Treat in Minutes

Servings: 6
Total Time: 15 minutes prep + 4 hours freezing
Difficulty: Easy
Calories per Serving: ~180 kcal (varies by diet)
Macros per Serving (approx):
  • WW: Protein: 5g | Carbs: 15g | Fat: 10g | Fiber: 2g | SmartPoints: 5
  • Keto: Protein: 5g | Carbs: 6g | Fat: 15g | Fiber: 2g
  • Slimming : Syns: 0–2 (depending on chocolate choice)
  • Mediterranean: Protein: 5g | Carbs: 12g | Fat: 12g | Fiber: 2g

Introduction

Creamy, chocolatey, and unbelievably simple—this No-Churn Chocolate Chunk Ice Cream is a dessert you can enjoy any day of the week without an ice cream machine. It’s a multi-diet-friendly treat for Weight Watchers, Keto, Slimming World, and Mediterranean lifestyles, allowing you to indulge without guilt.

The combination of rich chocolate chunks and smooth, velvety ice cream makes each bite irresistible. Best of all, this recipe requires just a few wholesome ingredients and minimal prep. Whether it’s a hot summer day or a quick dessert after dinner, this ice cream is your answer to guilt-free, homemade indulgence.


Why You’ll Love This Recipe

  • Sensory Appeal: Smooth, creamy base studded with chocolate chunks for the perfect bite.
  • Flavor Highlight: Deep chocolate flavor balanced with subtle vanilla notes.
  • Diet-Friendly Benefit: Low-carb for Keto, SmartPoints-conscious for WW, Syn-free for Slimming World, and clean, nutrient-rich ingredients for Mediterranean eaters.

Ingredients Needed

Base Ingredients:

  • 2 cups heavy whipping cream (or coconut cream for Keto/Mediterranean)
  • 1 can (14 oz / 400 g) sweetened condensed milk (use sugar-free for WW/Keto)
  • 1 tsp pure vanilla extract

Chocolate Chunks:

  • 1/2 cup dark chocolate chunks (sugar-free for WW/Keto, or high-quality dark for Mediterranean/Slimming World)

Optional Enhancements:

  • 1–2 tbsp cocoa powder for extra chocolate richness
  • Pinch of sea salt

How to Make Our No-Churn Chocolate Chunk Ice Cream

  1. Whip the cream in a large bowl until stiff peaks form.
  2. Gently fold in condensed milk and vanilla extract until smooth and uniform.
  3. Fold in chocolate chunks, keeping the mixture airy.
  4. Pour the mixture into a freezer-safe loaf pan or container. Smooth the top.
  5. Freeze for at least 4 hours or until firm.
  6. Serve chilled, optionally garnished with extra chocolate chunks or a drizzle of sugar-free chocolate sauce.

Storage & Serving Suggestions

  • Storing: Freeze in an airtight container for up to 2 weeks.
  • Serving: Let ice cream sit 5 minutes at room temperature before scooping for creamier texture.
  • Freezing: No special preparation needed.
  • Serving Pairings: Fresh berries, chopped nuts, or a drizzle of sugar-free chocolate or caramel sauce.

Tips & FAQs

Q1: Can I make this dairy-free?
Yes! Use coconut cream and dairy-free chocolate chunks.

Q2: How can I reduce WW SmartPoints?
Use sugar-free condensed milk and chocolate chunks to keep points low.

Q3: Can I add mix-ins?
Yes! Add nuts, low-carb cookies, or dried fruit while folding in the chocolate chunks.

Q4: Do I need an ice cream machine?
No! This is a true no-churn recipe, perfect for quick homemade ice cream.

Q5: How do I get a creamier texture?
Whip the cream thoroughly and fold in the milk gently to maintain airiness.

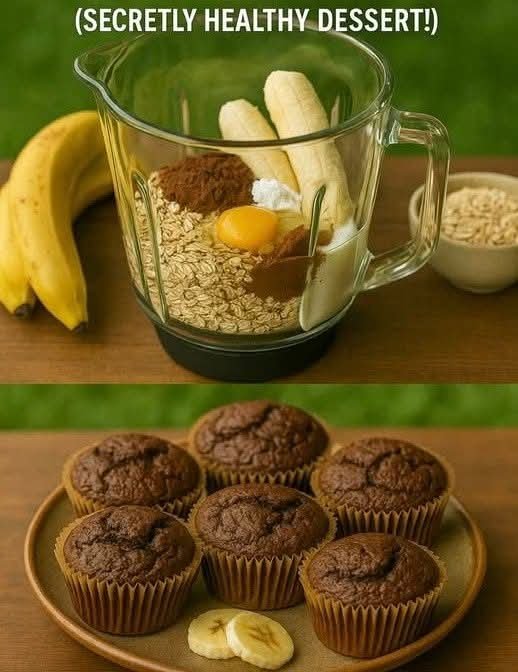
No sugar! No flour! Healthy Banana Oatmeal Muffins

Full recipe>>> Ingredients


Makes 10–12 muffins


2 large ripe bananas (the spottier, the better)


2 cups rolled oats (old‑fashioned or quick oats)


2 large eggs


1/3 cup milk of choice (almond, oat, dairy, etc.)


1 teaspoon baking powder


1/2 teaspoon baking soda


1 teaspoon vanilla extract


1 teaspoon cinnamon (optional but recommended)


1/4 teaspoon salt


Optional Add‑Ins (choose 1–2)


1/4 cup chopped nuts (walnuts or almonds)


1/4 cup dark chocolate chips (no‑sugar if preferred)


2 tablespoons chia seeds or flaxseeds


1/4 cup blueberries or raisins


Instructions


Preheat oven to 350°F (175°C). Line a muffin tin with paper liners or lightly grease it.


Blend the oats in a blender or food processor until they resemble coarse flour.


Add bananas, eggs, milk, vanilla, cinnamon, and salt to the blender. Blend until smooth.


Add baking powder and baking soda, then pulse briefly to combine.


Fold in any add‑ins by hand if using.


Divide batter evenly among muffin cups (about 3/4 full).


Bake for 18–22 minutes, or until a toothpick inserted in the center comes out clean.


Cool for 5 minutes in the pan, then transfer to a wire rack.


Tips for Best Results


Use very ripe bananas for maximum natural sweetness.


Do not over‑blend after adding baking soda/powder—this keeps muffins light.


For extra moisture, add 1 tablespoon nut butter or coconut oil.


Want jumbo muffins? Bake 24–26 minutes.

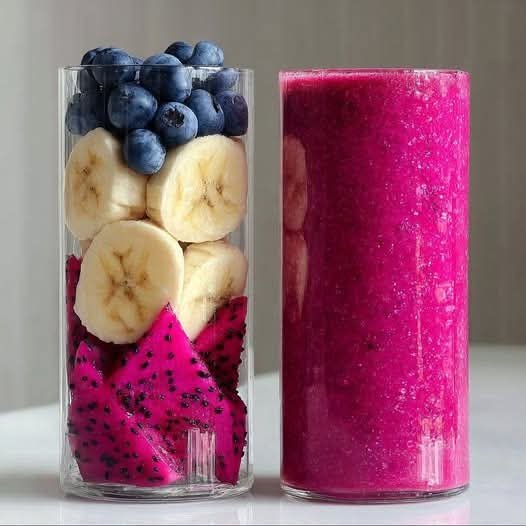
Vibrant Dragon Fruit & Blueberry Smoothie

Vibrant Dragon Fruit & Blueberry Smoothie

Ingredients

1 cup Red Dragon Fruit: Fresh or frozen (cubed).


1 medium Banana: Best if frozen to get that thick, creamy texture shown.


1/2 cup Blueberries: Fresh for topping, or frozen for the blend.


1/2 to 3/4 cup Liquid: Use coconut water for a light taste, or almond milk for extra creaminess.


Optional sweetener: A drizzle of honey or agave if your fruit isn’t quite sweet enough.


Instructions

Prep the Fruit: Peel the dragon fruit and cut it into cubes. Slice the banana. If you want the smoothie to be very thick (like the one in the glass), use frozen fruit.


Blend: Place the dragon fruit, banana, and half of the blueberries into a high-speed blender.


Add Liquid: Pour in your choice of liquid. Start with 1/2 cup and add more only if the blender is struggling.


Process: Blend on high until completely smooth and the color is uniform.


Assemble: To mimic the photo’s “deconstructed” look for a guest or a photo, you can layer fresh slices of banana and dragon fruit against the inside of a glass before pouring the smoothie in, or simply top the finished drink with the extra blueberries.


Why this works

Dragon Fruit: High in fiber and antioxidants.


Banana: Provides the base “creaminess” without needing dairy.


Blueberries: Adds a deep, tart complexity to the sweet tropical flavor.