Vegan Cherries in the Snow Dessert

Vegan Cherries in the Snow Dessert with a fluffy vanilla cream layer and glossy cherry topping served chilled

Vegan Cherries in the Snow Dessert

Description

Vegan Cherries in the Snow Dessert is a creamy, no-bake treat made with vegan cream cheese, fluffy whipped topping, and a bright cherry layer. It has a soft vanilla “snow” base with a sweet and slightly tart cherry topping that makes every spoonful refreshing.

This easy dessert is a great choice when you want something special without turning on the oven. It works well for holiday dinners, family gatherings, potlucks, birthdays, and simple weeknight treats. You can prepare it in one dish or serve it in individual glasses for a more elegant presentation.

The recipe takes about 15 minutes to prepare, but it needs at least 2 hours in the refrigerator to set and chill. For the best texture, keep it cold until you are ready to serve.

Time Required

  • Prep time: 15 minutes
  • Chilling time: 2 hours minimum
  • Total time: About 2 hours 15 minutes
  • Difficulty: Very easy
  • Servings: 6–8

There is no baking, complicated equipment, or advanced cooking technique needed for this dessert.

Ingredients (Serves 6–8)

Snow Layer (Base)

  • 1 cup vegan cream cheese, softened to room temperature
  • 1 cup coconut whipped cream or soy whipping cream
  • ½ cup powdered sugar
  • 1 teaspoon vanilla extract
  • 1 cup mini vegan marshmallows, optional

Cherry Layer (Top)

For a quick version:

  • 1 can (400 g) cherry pie filling

For a homemade cherry topping:

  • 2 cups pitted cherries
  • ¼ cup granulated sugar
  • 1 tablespoon cornstarch
  • ¼ cup water

Room-temperature vegan cream cheese blends more smoothly and helps prevent lumps in the creamy layer. If using coconut whipped cream, choose a variety with a mild flavor so the vanilla and cherry flavors remain noticeable.

Instructions

Step 1: Make the Snow Layer

Place the softened vegan cream cheese in a large mixing bowl.

Beat the cream cheese until smooth and creamy. Scrape the sides of the bowl as needed so no firm pieces remain.

Add the powdered sugar and vanilla extract. Mix until the sugar is fully blended and the mixture looks smooth.

Gently fold in the coconut whipped cream or soy whipping cream. Use a spatula and fold slowly to keep the mixture light and fluffy.

Add the mini vegan marshmallows if you want the traditional soft, chewy texture. Stir gently until they are evenly distributed.

Spread the finished mixture into a glass baking dish or serving bowl. Smooth the top with a spatula so the cherry layer can sit evenly over the surface.

Step 2: Prepare the Cherry Topping

If you are using canned cherry pie filling, simply open the can and set it aside.

For homemade cherry topping, place the pitted cherries, sugar, cornstarch, and water in a saucepan.

Cook over medium heat while stirring often. Continue cooking until the mixture becomes thick and glossy.

Remove the saucepan from the heat and allow the cherry mixture to cool completely. Do not spread hot cherries over the creamy layer because the heat can soften the base.

Step 3: Assemble the Dessert

Spoon the cooled cherry topping evenly over the snow layer.

Use the back of a spoon or a spatula to spread the cherries from edge to edge.

Cover the dish tightly and place it in the refrigerator.

Chill for at least 2 hours before serving. A longer chilling time can give the dessert a firmer texture and allow the vanilla and cherry flavors to blend.

Step 4: Serve Chilled

Remove the dessert from the refrigerator just before serving.

Spoon it directly from the dish or portion it into individual dessert glasses.

For a simple finishing touch, add a fresh cherry or a small mint leaf to each serving.

Serving Suggestions

Vegan Cherries in the Snow Dessert looks especially attractive when served in clear glass cups. The white creamy layer and red cherry topping create a simple layered effect without extra decoration.

For holidays, serve it in small dessert glasses so guests can enjoy individual portions. This also makes the recipe convenient for parties and family gatherings.

Fresh cherries can add color and a slightly firmer fruit texture. A small mint leaf provides a fresh contrast and makes each serving look more polished.

This chilled dessert pairs nicely with coffee, black tea, or herbal tea. Since it is rich and creamy, small portions are usually enough after a full meal.

Storage

Cover leftover dessert tightly and keep it refrigerated.

For the best texture and flavor, enjoy it within 3 days. Keep the dessert cold between serving times and return it to the refrigerator as soon as possible.

If you are preparing it ahead for a gathering, make it the day before. The extra chilling time allows the layers to firm up and the flavors to develop.

Nutritional Information

Approximate nutrition per serving:

  • Calories: 240–270 kcal
  • Carbohydrates: 30 g
  • Fat: 12 g
  • Protein: 3 g
  • Sugar: 20 g
  • Fiber: 2 g

Nutrition values can change depending on the vegan cream cheese, whipped topping, marshmallows, and cherry filling used. Check individual product labels when exact nutrition information is important.

Questions & Answers

Can I make Vegan Cherries in the Snow Dessert ahead of time?

Yes. Prepare it the day before and keep it covered in the refrigerator for a convenient make-ahead dessert.

Can I skip the vegan marshmallows?

Yes. The marshmallows are optional, and the dessert will still have a creamy, fluffy texture without them.

What can I use instead of coconut whipped cream?

Soy whipping cream or oat-based whipping cream can replace coconut whipped cream while keeping the dessert dairy-free.

Can I use homemade cherry topping?

Yes. Cook pitted cherries with sugar, cornstarch, and water until thick, then cool the topping completely before assembling.

Is this dessert gluten-free?

It can be gluten-free, but check every package, especially the marshmallows, whipped topping, cream cheese, and cherry filling.

Can I use frozen cherries?

Yes. Thaw frozen pitted cherries first and drain excess liquid before cooking the homemade topping.

Can I use other fruit instead of cherries?

Yes. Blueberries, strawberries, raspberries, or mixed berries can replace the cherries for a different fruit flavor.

How long does this dessert last in the refrigerator?

Store it covered in the refrigerator and enjoy it within 3 days for the best taste and texture.
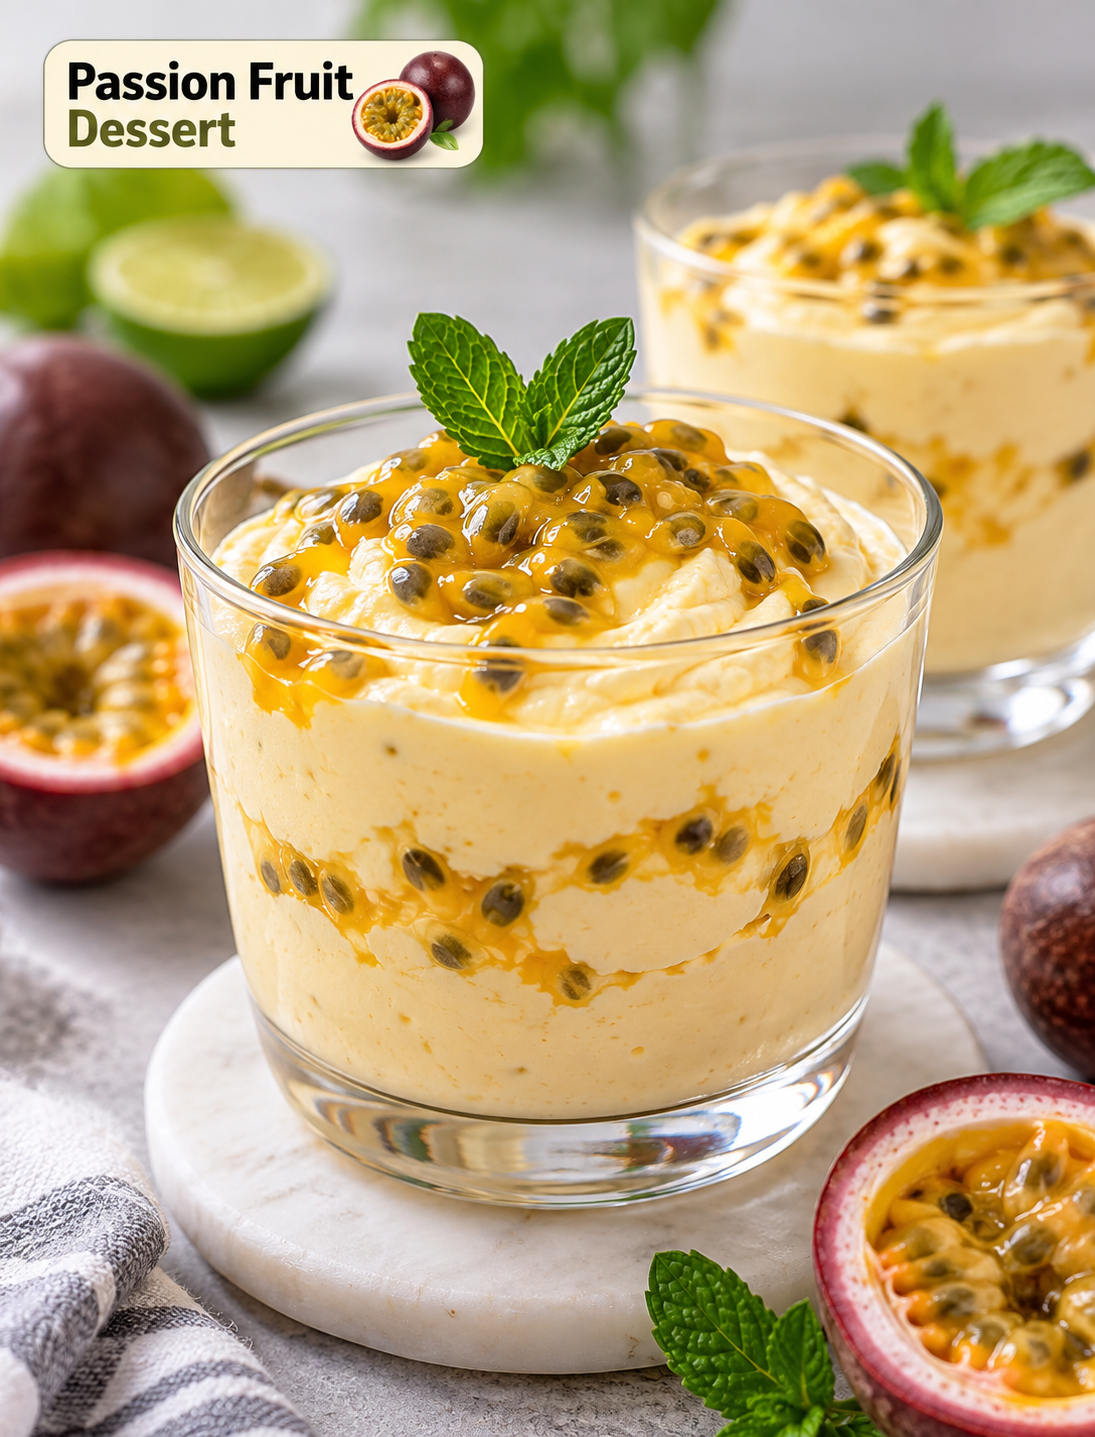
Passion Fruit Dessert

Creamy passion fruit dessert topped with fresh passion fruit pulp in a clear serving glass

Passion Fruit Dessert

This Passion Fruit Dessert is a creamy, chilled treat made with passion fruit puree, whipped cream, and sweetened condensed milk. Fresh lime juice adds a light citrus note that balances the sweetness, while vanilla gives the dessert a smooth, warm flavor.

The texture is soft, airy, and silky, with fresh passion fruit pulp adding tiny bursts of tropical flavor. Since there is no baking involved, this easy dessert is a great choice for summer gatherings, family dinners, potlucks, and make-ahead treats.

You can serve it in small dessert glasses for an elegant presentation or chill it in one dish and scoop it into individual portions. Either way, the bright fruit flavor makes this a refreshing finish to a meal.

Ingredients

You only need a few simple ingredients to prepare this creamy tropical dessert.

  • Frozen passion fruit puree: 3/4 cup, completely thawed
  • Heavy cream: 1 1/2 cups, cold
  • Sweetened condensed milk: 3/4 cup
  • Fresh lime juice: 1 teaspoon
  • Pure vanilla extract: 1 teaspoon
  • Kosher salt: A small pinch
  • Fresh passion fruit pulp: From 3 ripe passion fruits

For the best flavor, use ripe passion fruits with fragrant skin and a fresh, tangy aroma. If using frozen puree, thaw it fully before mixing so the ingredients combine evenly.

Instructions

Follow these simple steps to make a smooth and fluffy passion fruit treat at home.

Step 1: Prepare the passion fruit puree

Thaw the frozen passion fruit puree completely. Stir it well until the texture is smooth and evenly blended.

If you prefer a seed-free dessert, strain the puree before using it. Keep the fresh passion fruit pulp separate because it will be added later for texture and garnish.

Step 2: Whip the heavy cream

Place the cold heavy cream in a large chilled bowl. Using a hand mixer or stand mixer, beat it until soft peaks form.

Stop mixing as soon as the cream holds soft peaks. Overwhipping can make the cream grainy and affect the smooth texture of the finished dessert.

Step 3: Make the passion fruit mixture

In a separate bowl, combine the passion fruit puree, sweetened condensed milk, lime juice, vanilla extract, and a small pinch of kosher salt.

Whisk until the mixture is completely smooth. Taste it and add a little more lime juice if you want a sharper citrus flavor.

Step 4: Fold in the whipped cream

Add half of the whipped cream to the passion fruit mixture. Gently fold it in with a spatula until the mixture becomes lighter.

Add the remaining whipped cream and fold carefully until combined. Avoid stirring too quickly because gentle folding helps keep the dessert airy.

Step 5: Add fresh passion fruit pulp

Stir half of the fresh passion fruit pulp into the mixture. The pulp adds natural texture and small bursts of bright fruit flavor.

Reserve the remaining pulp for the topping.

Step 6: Portion the dessert

Spoon the mixture into six small serving glasses or transfer it to one chilled serving dish.

Use clear glasses if you want to show the pale tropical color and fresh fruit topping.

Step 7: Add the topping

Spoon the reserved passion fruit pulp over each portion. Spread it lightly across the surface for a simple and colorful finish.

You can also add a small mint leaf or toasted coconut when serving.

Step 8: Chill before serving

Cover the dessert and refrigerate it for at least 4 hours. Chilling overnight gives it an even firmer texture and allows the flavors to blend.

Serve it cold for the best creamy texture and refreshing passion fruit flavor.

Tips

  • Chill your equipment: Cold bowls and beaters help the heavy cream whip more easily.
  • Do not overwhip: Stop when soft peaks form to keep the texture smooth.
  • Fold gently: Slow folding prevents the whipped cream from losing too much air.
  • Use ripe fruit: Fresh passion fruit provides a stronger aroma and better flavor.
  • Balance the sweetness: Add a little extra lime juice if the mixture tastes too sweet.
  • Strain the puree: Remove seeds from the puree if you prefer a completely smooth base.
  • Chill overnight: A longer chill produces a firmer, more spoonable consistency.
  • Use clear glasses: Individual glasses make the tropical dessert look more appealing for guests.
  • Serve very cold: The chilled temperature makes the citrus and fruit flavors more refreshing.
  • Prepare ahead: This recipe works well when made several hours before serving.

Variations

This recipe is easy to adjust with different flavors and textures.

  • Passion fruit parfait: Layer the creamy mixture with crushed graham crackers or vanilla biscuits.
  • Coconut version: Fold in a small amount of unsweetened shredded coconut for extra tropical flavor.
  • Mango twist: Add small pieces of ripe mango between the dessert layers.
  • Pineapple version: Add finely diced pineapple for a bright fruit combination.
  • Lemon variation: Replace lime juice with fresh lemon juice for a sharper citrus flavor.
  • Chocolate topping: Add a small amount of white chocolate shavings before serving.
  • Berry swirl: Add a thin raspberry puree swirl for a colorful contrast.
  • Tropical trifle: Layer the mixture with sponge cake cubes and fresh fruit.
  • Frozen treat: Freeze the mixture until firm for a creamy semifreddo-style dessert.
  • Tart filling: Spoon the chilled mixture into small prepared tart shells for an easy tropical tart.

Q&A

Can I use fresh passion fruit instead of frozen puree?

Yes. Scoop out the pulp and measure about 3/4 cup to replace the frozen puree.

How long does this dessert last in the refrigerator?

Keep it covered and refrigerated for up to 3 days for the best texture and flavor.

Can I freeze passion fruit dessert?

Yes. Freeze it in an airtight container for a creamy frozen treat, then let it soften slightly before serving.

Is this dessert very sweet?

The condensed milk makes it sweet, while passion fruit and lime add tartness that helps balance the flavor.

Can I make it dairy-free?

Yes. Use chilled coconut cream and a suitable dairy-free sweetened condensed milk alternative.

How can I make the dessert firmer?

Chill it longer for a firmer consistency, or use a small amount of unflavored gelatin if a mousse-like texture is preferred.

What toppings go well with passion fruit?

Fresh passion fruit pulp, toasted coconut, fresh berries, mango, or a few mint leaves pair well with the tropical flavor.

Can I prepare this dessert ahead of time?

Yes. Prepare it the day before and keep it covered in the refrigerator until you are ready to serve.

Nutrition

Approx. per serving

  • Calories: 320
  • Fat: 22g
  • Carbohydrates: 28g
  • Sugar: 24g
  • Protein: 4g
  • Fiber: 1–2g

Nutrition values are estimates and can vary depending on the brands and ingredients used.

Conclusion

This creamy Passion Fruit Dessert brings together tart tropical fruit, rich whipped cream, and sweet condensed milk in one simple chilled treat. Fresh lime juice keeps the flavor bright, while vanilla adds a smooth finish.

The no-bake preparation makes it practical for busy home cooks, summer parties, family dinners, and make-ahead desserts. Serving it in individual glasses also gives the recipe an elegant look without requiring complicated decorating.

For the best result, use cold heavy cream, ripe passion fruit, and gentle folding when combining the ingredients. Give the dessert at least four hours to chill so it can develop a firm, creamy texture.

Whether you make the classic version or add coconut, mango, berries, or a biscuit layer, this tropical dessert is an easy way to finish a meal with a bright and refreshing flavor.