Classic Italian Spaghetti Pasta Salad

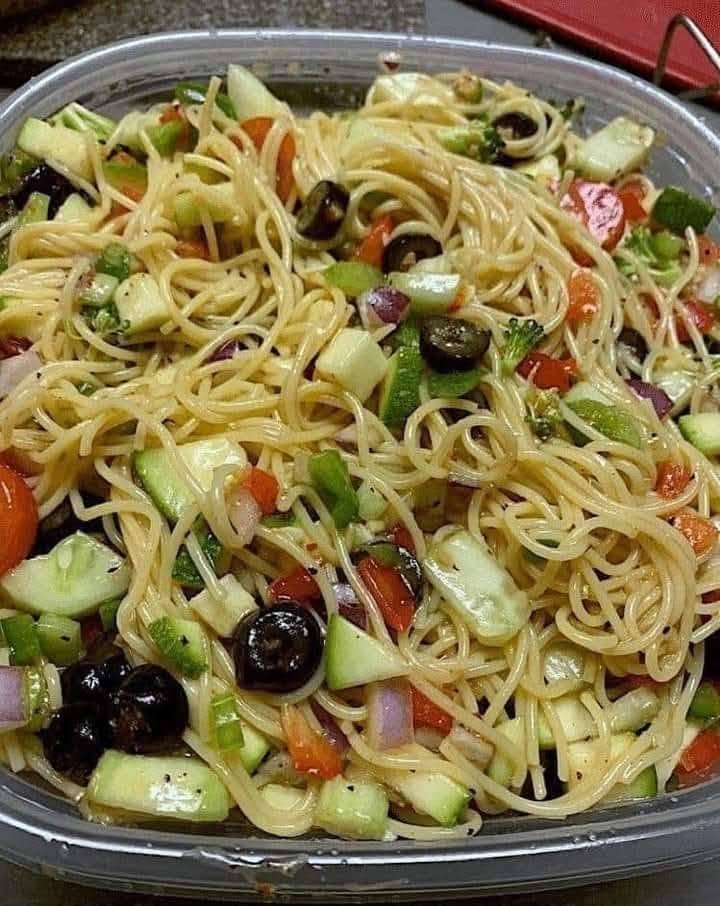
Spaghetti Pasta Salad with cucumber, tomatoes, bell peppers, black olives, red onion, Parmesan, and Italian dressing

Classic Italian Spaghetti Pasta Salad

Spaghetti Pasta Salad is a colorful, refreshing side dish made with tender spaghetti, crisp vegetables, black olives, fresh herbs, Parmesan, and a zesty Italian dressing. It is easy to prepare, travels well, and tastes even better after chilling, which makes it perfect for picnics, potlucks, barbecues, parties, and make-ahead lunches.

This Spaghetti Pasta Salad combines familiar pasta with crunchy cucumber, bell pepper, tomatoes, red onion, and olives for a bright dish that works alongside grilled meats, sandwiches, or other summer favorites.

Prep Time: 20 minutes
Cook Time: 10 minutes
Chill Time: 1 hour
Total Time: About 1 hour 30 minutes
Servings: 8

Ingredients

For the Pasta Salad

  • 12 ounces spaghetti
  • 1 cup cherry tomatoes, halved
  • 1 large cucumber, diced
  • 1 green bell pepper, diced
  • 1 red bell pepper, diced
  • 1/2 red onion, finely chopped
  • 1 cup black olives, sliced
  • 1/2 cup grated Parmesan cheese
  • 1/4 cup chopped fresh parsley
  • 2 tablespoons chopped fresh basil

For the Italian Dressing

  • 1/2 cup extra virgin olive oil
  • 1/4 cup red wine vinegar
  • 1 tablespoon fresh lemon juice
  • 1 teaspoon Dijon mustard
  • 1 teaspoon honey or sugar
  • 1 garlic clove, finely grated
  • 1 teaspoon dried oregano
  • 1/2 teaspoon dried basil
  • 1/2 teaspoon garlic powder
  • 1/2 teaspoon salt
  • 1/4 teaspoon black pepper
  • Pinch of red pepper flakes, optional

Why You’ll Love This Recipe

Spaghetti Pasta Salad is easy to assemble and packed with color, texture, and fresh flavor. The spaghetti gives the salad a familiar, satisfying base, while the vegetables keep it crisp and light.

Another reason to love Spaghetti Pasta Salad is that it is ideal for make-ahead meals. A little chilling time allows the pasta to absorb the dressing, so the flavor becomes more balanced and delicious.

It is also easy to customize with cheese, extra vegetables, salami, chickpeas, or different herbs depending on what you have available.

How to Make Spaghetti Pasta Salad

Step 1: Cook the Spaghetti

Bring a large pot of salted water to a boil.

Add the spaghetti and cook according to the package directions until al dente.

Avoid overcooking because pasta that is too soft can become mushy once mixed with dressing.

Step 2: Drain and Cool

Drain the spaghetti in a colander.

Rinse briefly under cool water to stop the cooking process and remove excess surface starch.

Shake off as much water as possible.

For the best Spaghetti Pasta Salad texture, let the pasta cool and drain well before adding the dressing.

Step 3: Prepare the Vegetables

While the pasta cools, halve the cherry tomatoes and dice the cucumber, green bell pepper, red bell pepper, and red onion.

Slice the black olives and chop the parsley and basil.

Try to cut the vegetables into small, similar-size pieces so every forkful contains a balanced mix of ingredients.

Step 4: Make the Dressing

In a jar or small bowl, combine olive oil, red wine vinegar, lemon juice, Dijon mustard, honey, garlic, oregano, dried basil, garlic powder, salt, black pepper, and optional red pepper flakes.

Whisk or shake until the dressing is well combined.

The dressing should taste bright, tangy, savory, and slightly sweet.

Step 5: Combine the Pasta and Vegetables

Place the cooled spaghetti in a large mixing bowl.

Add the tomatoes, cucumber, bell peppers, red onion, black olives, parsley, and basil.

Toss gently to distribute the ingredients.

Step 6: Add the Dressing

Pour about three-quarters of the dressing over the pasta mixture.

Toss until the pasta and vegetables are evenly coated.

The noodles in Spaghetti Pasta Salad should look glossy but not drenched.

Step 7: Add Parmesan

Sprinkle in the grated Parmesan.

Toss gently again.

Parmesan adds salty, savory flavor and helps the dressing cling to the spaghetti.

Step 8: Chill

Cover the bowl and refrigerate for at least 1 hour.

This gives the flavors time to blend and allows the pasta to absorb some of the dressing.

Step 9: Refresh Before Serving

Remove the salad from the refrigerator.

Toss it again and add the remaining dressing if the pasta looks dry.

Taste and adjust the salt, pepper, vinegar, or lemon juice if needed.

Step 10: Garnish and Serve

Transfer Spaghetti Pasta Salad to a large serving bowl.

Top with extra Parmesan, parsley, basil, black olives, or a few fresh tomato halves.

Serve chilled or slightly cool.

Serving Suggestions

Spaghetti Pasta Salad is an excellent side dish for grilled chicken, burgers, sandwiches, baked fish, or barbecue meals.

Serve Spaghetti Pasta Salad alongside roasted vegetables, garlic bread, corn on the cob, or a simple green salad.

It also works well as part of a picnic or buffet table because it can be made ahead and served cold.

For a heartier meal, add grilled chicken, turkey, salami, tuna, or chickpeas directly to the salad.

For another classic make-ahead side, try our Classic American Potato Salad with tender potatoes, creamy dressing, mustard, and a tangy homemade flavor.

Recipe Tips

Cook the spaghetti only until al dente so it stays firm after chilling.

Drain the pasta thoroughly. Excess water can dilute the Italian dressing.

Cut the vegetables into small, even pieces for easier mixing and serving.

Use freshly grated Parmesan for better flavor and texture.

Taste Spaghetti Pasta Salad after chilling because cold pasta often needs a little extra seasoning before serving.

Reserve some of the dressing instead of adding it all at once. The pasta will absorb dressing as it rests, and the reserved portion can freshen it before serving.

Easy Variations

Spaghetti Pasta Salad can be changed easily to suit different tastes.

Add pepperoni, salami, or diced cooked chicken for extra protein.

For a Mediterranean variation, add feta, artichoke hearts, pepperoncini, and Kalamata olives.

You can also add broccoli florets, shredded carrots, zucchini, celery, or spinach for extra vegetables.

For a creamy Spaghetti Pasta Salad, stir a few tablespoons of mayonnaise or Greek yogurt into the Italian dressing.

Add mozzarella pearls for a Caprese-inspired version.

A can of drained chickpeas or white beans can make the salad more filling while keeping it meatless.

You may also enjoy our Melt-in-Your-Mouth Butter Cookies for a soft, buttery dessert with delicate texture and simple homemade flavor.

Make-Ahead Instructions

Spaghetti Pasta Salad is one of the best dishes to make in advance.

Prepare the salad several hours or up to one day before serving.

Keep a small amount of dressing separate and add it shortly before serving to refresh the pasta.

For the best appearance, you can also reserve some fresh parsley, basil, tomatoes, and Parmesan for garnish.

Storage

Store leftover Spaghetti Pasta Salad in an airtight container in the refrigerator for up to 4 days.

Toss the salad before serving again because the dressing may settle at the bottom.

If the pasta seems dry after refrigeration, add a small splash of olive oil, vinegar, or reserved dressing.

Freezing is not recommended because the fresh vegetables lose their crisp texture after thawing.

Nutrition Information

Approximate nutrition per serving:

Calories: 360
Protein: 10 g
Carbohydrates: 45 g
Fat: 16 g
Saturated Fat: 4 g
Fiber: 4 g
Sugar: 6 g
Sodium: 480 mg

Nutrition values are estimates and may vary depending on the pasta, Parmesan, dressing, and serving size.

Frequently Asked Questions

Can I make this recipe the night before?

Yes. In fact, chilling overnight can improve the flavor. Save some dressing to toss with the salad before serving.

Should I rinse the spaghetti after cooking?

For this cold pasta salad, a quick rinse is helpful because it stops cooking and removes some surface starch.

Can I use another pasta shape?

Yes. Rotini, penne, farfalle, or shells also work, although long spaghetti gives the dish its classic look.

Can I use bottled Italian dressing?

Yes. Bottled dressing is a convenient shortcut, but homemade dressing gives you more control over the flavor.

Can I add meat?

Yes. Grilled chicken, salami, pepperoni, turkey, or tuna are all good additions.

Can I make it gluten-free?

Yes. Use your favorite gluten-free spaghetti and cook according to the package instructions.

Can I make it vegetarian?

Yes. The basic recipe is vegetarian. Simply check that the Parmesan you use meets your dietary preferences.

Final Thoughts

Spaghetti Pasta Salad is a simple way to turn everyday pasta and fresh vegetables into a colorful, make-ahead dish that works for almost any gathering.

Because Spaghetti Pasta Salad is easy to customize and tastes great chilled, it is especially useful for summer meals, picnics, potlucks, family dinners, and meal prep.

Keep this Spaghetti Pasta Salad recipe handy whenever you need a fresh side dish that is inexpensive, flexible, and easy to serve.

With tender spaghetti, crisp vegetables, black olives, Parmesan, fresh herbs, and zesty Italian dressing, Spaghetti Pasta Salad delivers classic flavor and satisfying texture in every serving.
Air Fryer Crispy Corn Ribs

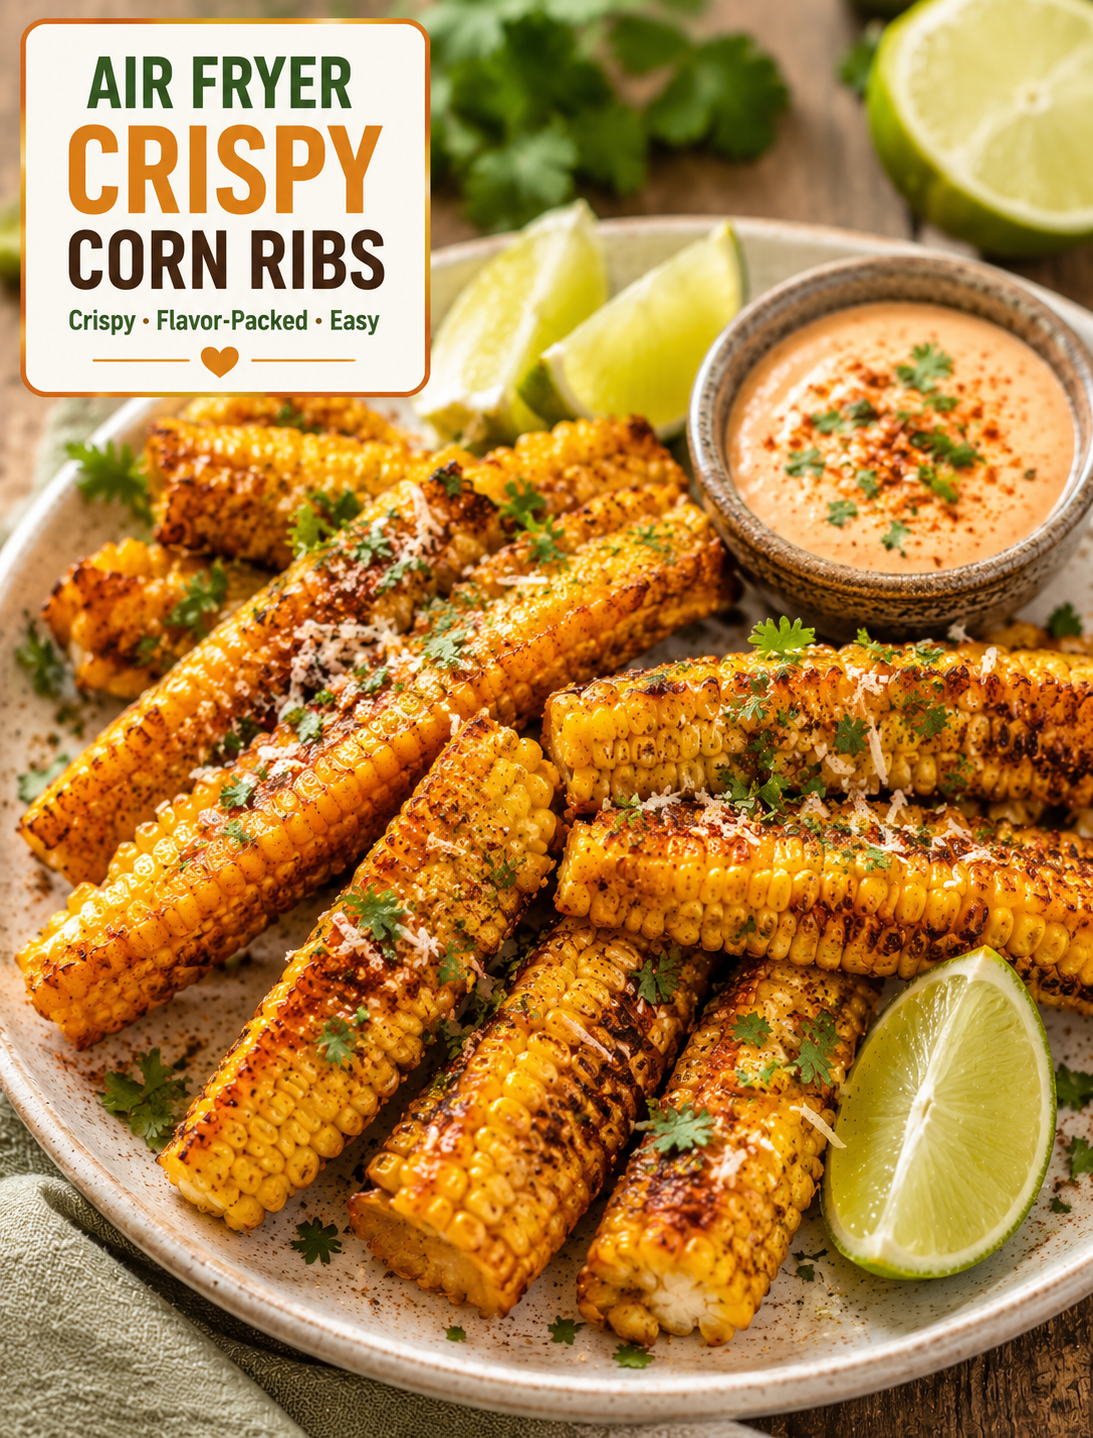
Crispy air fryer corn ribs seasoned with paprika and garlic, garnished with cilantro and lime on a rustic serving plate

Air Fryer Crispy Corn Ribs

If you love crispy snacks with big flavor, these Air Fryer Crispy Corn Ribs are worth trying. Fresh corn on the cob is cut into rib-style pieces, coated with a simple savory seasoning, and air-fried until the edges become golden and crisp.

The result is sweet, smoky, buttery, and slightly crunchy. The corn stays tender inside while the seasoned edges develop a delicious roasted texture.

This recipe is a fun alternative to traditional corn on the cob. It works as a quick appetizer, summer side dish, game-day snack, or easy addition to a family dinner.

Best of all, the air fryer gives the corn a roasted finish without requiring a large amount of oil. You can serve the finished corn with lime wedges, fresh herbs, ranch dip, chipotle mayo, or your favorite dipping sauce.

Why You’ll Love These Corn Ribs

These corn ribs are easy to customize and take only a few basic ingredients.

Fresh corn provides natural sweetness, while paprika, garlic, chili powder, and black pepper add savory depth. A little olive oil helps the seasoning stick and encourages browning in the air fryer.

The rib shape also makes the corn fun to eat. Each piece can be picked up like a small snack, making it especially useful for parties and casual gatherings.

Compared with deep-fried appetizers, air frying uses much less oil. That makes this recipe a practical option when you want something crispy without preparing a pot of frying oil.

You can also change the seasoning based on your taste. Make the ribs smoky, spicy, cheesy, buttery, or fresh with herbs and lime.

Ingredients You’ll Need

  • 4 fresh ears of corn
  • 2 tablespoons olive oil or melted butter
  • 1 teaspoon smoked paprika
  • 1 teaspoon garlic powder
  • ½ teaspoon chili powder
  • ½ teaspoon onion powder
  • ½ teaspoon black pepper
  • ½ teaspoon salt
  • ½ teaspoon dried oregano
  • 1 tablespoon grated Parmesan cheese, optional
  • 1 tablespoon chopped fresh parsley or cilantro
  • 1 lime, cut into wedges

For a milder version, leave out the chili powder. For extra heat, add a pinch of cayenne pepper or crushed red pepper flakes.

Fresh corn works best because it has a naturally juicy texture and firm structure. Choose ears with bright green husks and plump kernels when available.

How to Cut Corn Into Ribs Safely

Cutting whole corn cobs lengthwise requires care because the cob is hard and can cause a knife to slip.

Place the corn on a stable cutting board and use a sharp chef’s knife. Never hold the cob in your hand while trying to cut through it.

Trim the ends so the cob sits more securely. Stand the cob upright on the flat end and carefully cut downward through the center.

Once the cob is divided into two long sections, place the flat side down and carefully cut each section lengthwise again to create four rib-style pieces.

If the corn feels too hard to cut, do not force the knife. You can microwave the whole ears briefly for about 2–3 minutes to soften them slightly, then allow them to cool enough to handle safely before cutting.

Another option is to ask your grocery store produce department if they can cut the corn for you.

How to Make Air Fryer Crispy Corn Ribs

1. Prepare the Corn

Remove the husks and silk from each ear of corn.

Rinse the corn and pat it dry with a clean kitchen towel.

Cut each ear into four long rib-style pieces using the safe cutting method above.

Set the pieces aside while you prepare the seasoning.

2. Make the Seasoning

Add olive oil or melted butter to a small bowl.

Mix in smoked paprika, garlic powder, chili powder, onion powder, black pepper, salt, and oregano.

Stir until the mixture forms a smooth seasoned oil.

For a cheesy version, save the Parmesan for the end instead of mixing it into the coating.

3. Coat the Corn

Place the corn ribs in a large bowl.

Pour the seasoned oil over the pieces and toss gently until the kernels are evenly coated.

Try to spread the seasoning across the entire surface without soaking the corn in excess oil.

A light coating is enough because too much oil can make the finished ribs greasy rather than crisp.

4. Air Fry the Corn

Preheat your air fryer to 380°F if your model requires preheating.

Arrange the corn ribs in the basket with the kernels facing upward or positioned so the pieces have room for air to circulate.

Air fry for about 10–14 minutes, turning the pieces halfway through.

The exact cooking time depends on the size of the corn and your air fryer model.

The ribs are ready when the kernels are tender and the edges are lightly browned and crisp.

For deeper browning, add another 1–2 minutes of cooking time while watching them closely.

5. Finish and Serve

Transfer the hot corn ribs to a serving plate.

Sprinkle with Parmesan, fresh parsley, or cilantro if desired.

Finish with fresh lime juice just before serving.

Serve immediately while the edges are warm and crisp.

How to Get Extra Crispy Corn Ribs

Start with dry corn. Excess moisture can slow browning and make the exterior less crisp.

Avoid overcrowding the air fryer basket. The hot air needs room to circulate around each piece.

Use a light layer of oil rather than soaking the corn.

Turn the ribs halfway through cooking so both sides receive even heat.

For the crispiest finish, serve the ribs immediately after air frying.

If you are cooking several batches, keep finished pieces on a wire rack rather than stacking them because trapped steam can soften the crispy edges.

Best Seasonings for Corn Ribs

The classic garlic-paprika combination gives these corn ribs a savory and slightly smoky flavor.

For a Mexican-inspired version, use chili powder, cumin, lime, cilantro, and a little cotija or Parmesan cheese.

For spicy corn ribs, add cayenne pepper, smoked paprika, and crushed red pepper.

For a ranch-style version, toss the finished ribs with ranch seasoning and fresh parsley.

For a garlic butter version, brush the hot corn with melted butter mixed with minced garlic and parsley.

You can also add Parmesan, nutritional yeast, lemon pepper, or Cajun seasoning for a different flavor profile.

What to Serve With Corn Ribs

These crispy corn ribs work well with many meals.

Serve them alongside grilled chicken, burgers, steak, sandwiches, or tacos for a colorful side dish.

They also make a fun appetizer for backyard cookouts, summer parties, movie nights, and game-day gatherings.

For dipping, try ranch dressing, chipotle mayo, garlic aioli, cilantro-lime sauce, or a simple Greek yogurt dip.

A fresh cucumber salad or tomato salad can balance the smoky flavor of the corn.

For a larger meal, serve the ribs with grilled protein, beans, rice, or a fresh green salad.

Can You Use Frozen Corn?

Fresh corn is the easiest option for this recipe because whole ears hold their shape well.

Frozen corn kernels are not a direct substitute because they cannot be cut into rib-style pieces. If you only have frozen corn, you can air fry the kernels separately as a seasoned side dish.

Canned corn can also be roasted in the air fryer, but it will not create the same rib shape or eating experience.

For authentic corn ribs, use fresh ears of corn.

Can You Make Corn Ribs Ahead of Time?

These ribs taste best immediately after cooking because the edges are crispest when hot.

You can prepare the seasoning and cut the corn several hours ahead of time. Store the prepared corn covered in the refrigerator until you are ready to cook it.

For leftovers, place the cooked ribs in an airtight container and refrigerate them promptly.

Reheat them in the air fryer at about 350°F for 3–5 minutes until warmed through.

Avoid reheating them in the microwave if crispiness is important because microwave steam can make the exterior soft.

Tips for the Best Results

Choose fresh, firm ears of corn for easier cutting and better texture.

Use a sharp knife and a stable cutting board when preparing the cob.

Never try to cut a corn cob while holding it in your hand.

Keep the seasoning coating light so the corn can brown properly.

Leave space between pieces in the air fryer basket.

Turn the ribs halfway through cooking for even browning.

Add fresh lime juice after cooking instead of before air frying for a brighter flavor.

Serve immediately for the best crispy texture.

Storage and Food Safety

Store leftover corn ribs in a covered container in the refrigerator.

Refrigerate cooked corn promptly instead of leaving it at room temperature for an extended period.

When reheating, heat the ribs thoroughly and use the air fryer if you want to restore some of the crisp texture.

Discard leftovers if they develop an unusual smell, appearance, or texture.

Always wash fresh produce before preparation and use clean utensils and surfaces when handling food.

The Bottom Line

Air Fryer Crispy Corn Ribs turn simple fresh corn into a fun, flavorful snack with golden edges and tender kernels.

The combination of garlic, paprika, chili, herbs, and lime gives the sweet corn a bold finish without requiring complicated ingredients. The air fryer makes the process quick and helps create a roasted texture with a modest amount of oil.

These corn ribs are perfect for summer cookouts, family dinners, parties, appetizers, and casual snacking. You can also change the seasoning to create spicy, cheesy, smoky, or herb-filled versions.

For the best results, cut the corn carefully, avoid overcrowding the air fryer, and serve the ribs immediately after cooking.

Frequently Asked Questions

1. How long do corn ribs take in the air fryer?

Corn ribs usually take about 10–14 minutes at 380°F, with the pieces turned halfway through cooking.

2. Can I make corn ribs without oil?

Yes, but a small amount of oil helps the seasoning stick and promotes better browning and crispness.

3. Why are my corn ribs not crispy?

Overcrowding, excess moisture, or too much oil can reduce browning; leave space between pieces and cook until the edges are golden.

4. Can I use frozen corn for corn ribs?

Frozen corn kernels cannot create the rib shape, so fresh corn on the cob is the best choice for this recipe.

5. Are corn ribs vegetarian?

Yes, this recipe is vegetarian when prepared with olive oil and without Parmesan or other dairy-based toppings.

6. What sauce goes well with corn ribs?

Ranch, chipotle mayo, garlic aioli, cilantro-lime sauce, and Greek yogurt dips all pair well with crispy seasoned corn.

7. Can I reheat leftover corn ribs?

Yes, reheat them in an air fryer at about 350°F for 3–5 minutes to help restore their crisp texture.

8. Can I make spicy corn ribs?

Yes, add cayenne pepper, crushed red pepper, or extra chili powder to the seasoning for a hotter version.

Final Thoughts

Air Fryer Crispy Corn Ribs are proof that a simple ingredient can become something completely different with the right preparation. Sweet corn, smoky spices, garlic, and fresh lime create a snack that is colorful, crispy, and full of flavor.

The recipe is flexible enough for family dinners, weekend cookouts, parties, and quick snacks. Change the seasoning, add your favorite dipping sauce, or finish the ribs with cheese and fresh herbs to create your own version.

Most importantly, take care when cutting the corn and give each rib enough room in the air fryer to brown properly.

Serve them hot, squeeze over fresh lime, and enjoy them while those crispy edges are at their best.