
Grilled Zucchini & Feta Chickpea Wrap with Herbed Yogurt

Zucchini Chickpea Wrap with grilled zucchini, chickpeas, feta cheese, fresh vegetables, and herbed yogurt sauce

Grilled Zucchini & Feta Chickpea Wrap with Herbed Yogurt

Zucchini Chickpea Wrap is a fresh Mediterranean-inspired meal made with smoky grilled zucchini, seasoned chickpeas, creamy feta, crisp vegetables, and cool herbed yogurt sauce. Zucchini Chickpea Wrap combines plant-based protein, colorful vegetables, and bold herbs in a soft tortilla or flatbread, giving you a balanced meal that is easy to assemble.

Prep Time: 20 minutes

Cook Time: 15 minutes
Total Time: About 35 minutes
Servings: 4

Ingredients

For the Grilled Zucchini

  • 2 medium zucchini, sliced lengthwise into thin strips
  • 1 tablespoon olive oil
  • 1/2 teaspoon dried oregano
  • 1/2 teaspoon garlic powder
  • 1/4 teaspoon smoked paprika
  • 1/4 teaspoon salt
  • 1/4 teaspoon black pepper

For the Chickpeas

  • 1 can chickpeas, drained and rinsed
  • 1 tablespoon olive oil
  • 1/2 teaspoon ground cumin
  • 1/2 teaspoon smoked paprika
  • 1/4 teaspoon garlic powder
  • 1/4 teaspoon salt
  • 1 tablespoon fresh lemon juice

Ingredients For the Herbed Yogurt Sauce

  • 3/4 cup plain Greek yogurt
  • 1 tablespoon fresh lemon juice
  • 1 teaspoon lemon zest
  • 1 small garlic clove, finely grated
  • 2 tablespoons chopped fresh parsley
  • 1 tablespoon chopped fresh dill
  • 1 tablespoon chopped fresh mint
  • 1 tablespoon olive oil
  • 1/4 teaspoon salt
  • Pinch of black pepper

For Assembling the Wraps

  • 4 large whole-wheat tortillas or Mediterranean flatbreads
  • 3/4 cup crumbled feta cheese
  • 1 cup shredded romaine lettuce
  • 1 small tomato, diced
  • 1/2 cucumber, thinly sliced
  • 1/4 small red onion, thinly sliced
  • 2 tablespoons chopped parsley
  • Lemon wedges, for serving

Why You’ll Love This Recipe

Zucchini Chickpea Wrap is packed with texture and flavor. The zucchini becomes tender with lightly charred edges, while the chickpeas add a hearty bite.

Another reason to love Zucchini Chickpea Wrap is its flexibility. You can change the vegetables, herbs, flatbread, or toppings depending on what you have available.

How to Make Zucchini Chickpea Wrap

Step 1: Prepare the Zucchini

Wash and dry the zucchini. Trim the ends, then slice each zucchini lengthwise into strips about 1/4-inch thick.

Place the slices in a bowl and add olive oil, oregano, garlic powder, smoked paprika, salt, and black pepper. Toss gently until every piece is lightly coated.

Step 2: Grill the Zucchini

Heat a grill pan, outdoor grill, or heavy skillet over medium-high heat.

Arrange the zucchini in a single layer. Cook for 2 to 3 minutes on each side until tender and lightly charred.

Transfer the cooked zucchini to a plate and let it cool slightly. Properly grilled zucchini gives the filling a smoky flavor without making it watery.

Step 3: Season the Chickpeas

Pat the rinsed chickpeas dry with a clean kitchen towel.

Heat olive oil in a skillet over medium heat. Add the chickpeas, cumin, smoked paprika, garlic powder, and salt. Cook for 5 to 7 minutes, stirring occasionally, until warmed through and lightly golden.

Remove from the heat and add lemon juice. The seasoned chickpeas make the wrap more filling while adding a warm, savory contrast to the cool yogurt sauce.

Step 4: Make the Herbed Yogurt Sauce

Add Greek yogurt, lemon juice, lemon zest, garlic, parsley, dill, mint, olive oil, salt, and black pepper to a small bowl.

Stir until smooth and evenly combined.

Step 5: Prepare the Fresh Vegetables

Shred the lettuce, dice the tomato, slice the cucumber, and cut the red onion into very thin strips.

Step 6: Warm the Flatbreads

Warm each tortilla or flatbread for about 15 to 20 seconds per side in a dry skillet.

Step 7: Add the Yogurt Sauce

Lay one warm flatbread on a clean work surface.

Spread about 2 tablespoons of herbed yogurt sauce down the center, leaving space around the edges.

Step 8: Add the Main Fillings

Arrange grilled zucchini over the sauce. Spoon seasoned chickpeas on top, followed by feta, lettuce, tomato, cucumber, and red onion.

Do not overfill the wrap. A balanced amount of filling makes Zucchini Chickpea Wrap easier to fold and keeps the ingredients evenly distributed.

Step 9: Fold and Roll

Fold the left and right sides inward. Bring the bottom edge over the filling, then roll tightly toward the top.

Step 10: Serve

Cut each Zucchini Chickpea Wrap in half and serve with extra herbed yogurt sauce and lemon wedges.

Serving Suggestions

Zucchini Chickpea Wrap works well as a complete lunch on its own, but it can also be paired with a simple salad, roasted potatoes, lentil soup, or fresh fruit.

For a Mediterranean-style plate, serve Zucchini Chickpea Wrap with olives, hummus, cucumber tomato salad, or roasted red peppers.

If you want a healthier sweet option, try these Healthy Flourless Nut & Seed Cookies made with wholesome nuts and seeds for a naturally satisfying treat.

Recipe Tips

Slice the zucchini evenly so all pieces cook at the same rate.

Avoid using too much oil on the zucchini. Excess oil can make the wraps greasy.

Pat the chickpeas dry before cooking. This helps them develop better texture and allows the seasonings to stick.

Use thick Greek yogurt for the sauce. Thin yogurt can make Zucchini Chickpea Wrap soggy, especially if it sits for a long time.

If your red onion tastes very strong, soak the sliced onion in cold water for 10 minutes, then drain well before using.

Easy Variations

Zucchini Chickpea Wrap can be changed in many ways without losing its Mediterranean character.

Add roasted red peppers, baby spinach, shredded carrots, or sliced avocado. You can also replace feta with goat cheese or a dairy-free alternative.

To make Zucchini Chickpea Wrap spicier, add red pepper flakes to the chickpeas or stir a little hot sauce into the yogurt.

If you want more protein, grilled chicken can also be added.

For a creamy no-bake dessert, try this Blueberry Cheesecake Parfait with rich cheesecake filling, juicy blueberries, and buttery graham cracker layers.

Make-Ahead Instructions

Prepare the chickpeas, grilled zucchini, yogurt sauce, and chopped vegetables in advance. Store each component separately in airtight containers in the refrigerator.

For the best texture, assemble Zucchini Chickpea Wrap shortly before eating. If you need to pack it for lunch, keep the sauce slightly thicker and avoid adding too much tomato.

Storage and Reheating

An assembled Zucchini Chickpea Wrap can be refrigerated for about 24 hours, but the tortilla will gradually soften as it absorbs moisture from the vegetables and sauce.

To warm a prepared wrap, place it in a dry skillet over low to medium heat for a few minutes. Turn carefully until warmed through. Avoid microwaving for too long because it can make the bread chewy and the fresh vegetables soft.

Nutrition Information

Approximate nutrition per serving:

Calories: 430
Protein: 18 g
Carbohydrates: 52 g
Fat: 18 g
Saturated Fat: 6 g
Fiber: 10 g
Sugar: 8 g
Sodium: 760 mg

Nutrition values are estimates and may vary depending on the flatbread, feta, yogurt, and portion sizes used.

Frequently Asked Questions

Can I make Zucchini Chickpea Wrap vegan?

Yes. Replace Greek yogurt with a thick unsweetened plant-based yogurt and use dairy-free feta.

Can I roast the zucchini instead of grilling it?

Yes. Arrange the seasoned slices on a baking sheet and roast at 425°F or 220°C for about 15 to 18 minutes, turning once.

Can I use another type of bean?

Yes.

How do I prevent the wrap from becoming soggy?

Let the zucchini cool before assembling, drain juicy vegetables well, and avoid using too much sauce. These small steps help Zucchini Chickpea Wrap stay firm.

Can I use pita bread?

Yes. Fill pita pockets with the same ingredients instead of rolling them in tortillas.

Is this recipe good for meal prep?

Yes. Keep the ingredients separate and assemble the wraps just before serving for the best texture.

What can I substitute for feta?

You can use goat cheese, halloumi, mozzarella, or your favorite dairy-free cheese.

Final Thoughts

Zucchini Chickpea Wrap is a simple way to combine fresh vegetables, hearty chickpeas, salty feta, and a bright herbed yogurt sauce in one satisfying meal.

Because Zucchini Chickpea Wrap uses flexible ingredients, you can adjust it for different seasons, dietary preferences, or whatever vegetables you already have in your kitchen.

Keep this recipe handy for a Mediterranean-inspired lunch or easy meatless dinner. With grilled zucchini, seasoned chickpeas, fresh vegetables, and creamy yogurt in every bite, Zucchini Chickpea Wrap offers plenty of flavor without complicated preparation.
Cauliflower Pita Wraps

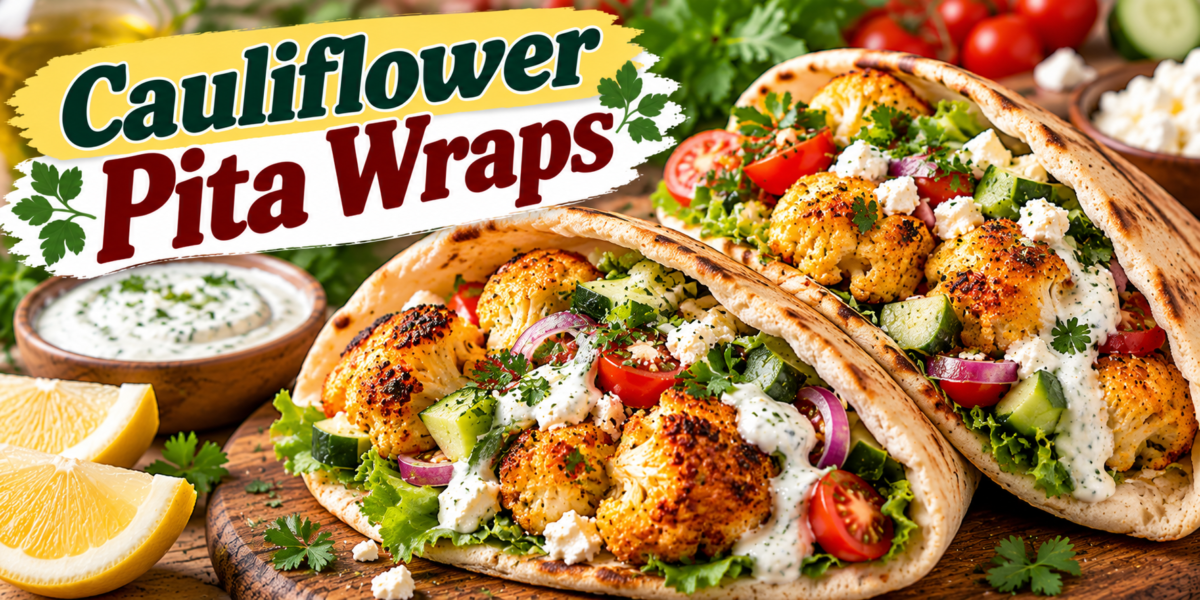
Cauliflower Pita Wraps filled with roasted cauliflower, cucumber, tomatoes, lettuce, feta, herbs, and creamy yogurt sauce

Cauliflower Pita Wraps

Cauliflower Pita Wraps are a fresh, flavorful Mediterranean-inspired meal made with roasted cauliflower, warm pita bread, crisp vegetables, creamy sauce, and herbs. The cauliflower is seasoned until golden and tender, then tucked into soft pita with cucumber, tomato, lettuce, red onion, and a tangy yogurt-based dressing.

These Cauliflower Pita Wraps are perfect for lunch, dinner, meal prep, or a casual family meal. They are easy to customize, naturally vegetarian, and satisfying without feeling too heavy.

Prep Time: 20 minutes
Cook Time: 25 minutes
Total Time: 45 minutes
Servings: 4

Ingredients

For the Roasted Cauliflower

  • 1 large head cauliflower, cut into small florets
  • 2 tablespoons extra virgin olive oil
  • 1 teaspoon smoked paprika
  • 1 teaspoon ground cumin
  • 1/2 teaspoon garlic powder
  • 1/2 teaspoon dried oregano
  • 1/2 teaspoon salt
  • 1/4 teaspoon black pepper
  • 1/4 teaspoon red pepper flakes, optional

Ingredients For the Yogurt Sauce

  • 3/4 cup plain Greek yogurt
  • 1 tablespoon tahini
  • 1 tablespoon fresh lemon juice
  • 1 small garlic clove, finely grated
  • 1 tablespoon chopped fresh parsley
  • 1 tablespoon chopped fresh dill
  • 1/4 teaspoon salt
  • Pinch of black pepper

For Assembly

  • 4 large pita breads
  • 1 cup chopped romaine lettuce
  • 1 small cucumber, diced
  • 1 cup cherry tomatoes, halved
  • 1/4 small red onion, thinly sliced
  • 1/3 cup crumbled feta cheese
  • 2 tablespoons chopped parsley
  • Lemon wedges, for serving

Why You’ll Love This Recipe

Cauliflower Pita Wraps are simple, colorful, and packed with texture. Roasted cauliflower adds warm, savory flavor while cool vegetables and creamy yogurt sauce keep each bite fresh.

Another reason to love Cauliflower Pita Wraps is how flexible they are. You can add hummus, chickpeas, avocado, olives, or extra herbs, and you can make the filling mild or spicy depending on your taste.

They are also convenient for meal prep because the cauliflower and sauce can be prepared ahead and assembled when needed.

How to Make Cauliflower Pita Wraps

Step 1: Preheat the Oven

Preheat the oven to 425°F or 220°C.

Line a large baking sheet with parchment paper for easier cleanup.

A hot oven helps Cauliflower Pita Wraps develop deeply roasted cauliflower with crisp edges instead of soft, steamed florets.

Step 2: Season the Cauliflower

Place the cauliflower florets in a large bowl.

Add olive oil, smoked paprika, cumin, garlic powder, oregano, salt, black pepper, and optional red pepper flakes.

Toss until every piece is evenly coated.

Spread the cauliflower in a single layer on the prepared baking sheet.

Step 3: Roast Until Golden

Roast for 22 to 25 minutes, turning once halfway through.

The cauliflower should be tender inside with browned, caramelized edges.

Well-roasted vegetables give Cauliflower Pita Wraps more flavor and better texture than lightly cooked cauliflower.

Step 4: Make the Yogurt Sauce

While the cauliflower roasts, combine Greek yogurt, tahini, lemon juice, garlic, parsley, dill, salt, and black pepper in a small bowl.

Stir until smooth.

If the sauce is too thick, add 1 to 2 teaspoons of water.

The creamy sauce balances the smoky spices and adds a cool, tangy finish.

Step 5: Prepare the Fresh Vegetables

Chop the lettuce and cucumber, halve the cherry tomatoes, and thinly slice the red onion.

Keep the vegetables chilled until assembly so they stay crisp.

Step 6: Warm the Pita Bread

Warm the pita in a dry skillet for about 30 seconds per side, or wrap the pita in foil and heat it briefly in the oven.

Soft, warm bread makes Cauliflower Pita Wraps easier to fold without cracking.

Step 7: Add the Sauce

Spread a spoonful of yogurt sauce inside each pita.

You can also add hummus at this stage for extra creaminess and protein.

Step 8: Fill the Pitas

Divide the roasted cauliflower among the pita breads.

Add lettuce, cucumber, tomatoes, red onion, feta, and parsley.

Do not overfill Cauliflower Pita Wraps, or they may be difficult to fold and eat neatly.

Step 9: Add More Sauce

Drizzle additional yogurt sauce over the filling.

For extra brightness, squeeze a little fresh lemon juice over each wrap.

Step 10: Fold and Serve

Fold the pita around the filling or tuck everything into pita pockets.

Serve Cauliflower Pita Wraps immediately while the roasted cauliflower is still warm and the vegetables are crisp.

Serving Suggestions

Cauliflower Pita Wraps are satisfying on their own, but simple side dishes can turn them into a larger meal.

Serve them with hummus, baba ganoush, tabbouleh, cucumber salad, Greek salad, or roasted potatoes.

For additional protein, pair the wraps with chickpeas, lentil salad, grilled chicken, or falafel.

A side of olives, pickled vegetables, or fresh fruit also works well for lunch.

For extra freshness, add a handful of chopped mint or dill just before serving. A few pickled onions can also add brightness and contrast. If you are serving a crowd, arrange all the fillings in separate bowls so everyone can build their own wrap with the toppings they enjoy most.

For another easy and cheesy family meal, try our Crustless Pizza Bake loaded with savory pizza flavor.

Recipe Tips

Cut the cauliflower into similar-size florets so everything roasts evenly.

Do not crowd the baking sheet. Space allows the cauliflower to brown instead of steam.

Use full-fat Greek yogurt if you prefer a thicker, richer sauce.

Warm the pita before filling so it stays flexible.

Pat watery vegetables dry before assembling.

For the best texture, assemble Cauliflower Pita Wraps just before serving.

If making them for meal prep, store the roasted cauliflower, sauce, vegetables, and pita separately.

Easy Variations

Cauliflower Pita Wraps are easy to customize with different Mediterranean-inspired ingredients.

Add chickpeas to the roasting pan during the final 10 minutes for extra protein.

You can also add hummus, avocado, roasted red peppers, Kalamata olives, pickled onions, or shredded carrots.

For a spicy version, mix harissa, sriracha, or hot sauce into the yogurt sauce.

Replace feta with goat cheese or omit the cheese for a dairy-free version.

For extra crunch, add toasted sunflower seeds, pumpkin seeds, or chopped almonds.

You can also make the recipe with whole-wheat pita or soft flatbread.

If you enjoy Mediterranean-inspired zucchini recipes, you may also like our Baked Stuffed Round Zucchini with Meat & Rice.

Make-Ahead Instructions

The roasted cauliflower can be prepared up to 3 days ahead and stored in an airtight container in the refrigerator.

The yogurt sauce can also be made 2 to 3 days ahead.

Chop the vegetables one day in advance and store them separately.

For the best result, assemble Cauliflower Pita Wraps only when you are ready to eat so the pita does not become soggy.

Storage and Reheating

Store leftover components separately in airtight containers.

Keep roasted cauliflower in the refrigerator for up to 3 days.

Reheat it in a 375°F or 190°C oven for 8 to 10 minutes, or warm it in a skillet.

The yogurt sauce should remain refrigerated and is best used within 3 days.

Assembled Cauliflower Pita Wraps are best eaten fresh because the vegetables and sauce can soften the bread during storage.

Nutrition Information

Approximate nutrition per serving:

Calories: 390
Protein: 15 g
Carbohydrates: 49 g
Fat: 16 g
Saturated Fat: 5 g
Fiber: 8 g
Sugar: 8 g
Sodium: 650 mg

Nutrition values are estimates and may vary depending on the pita, yogurt, feta, and portion sizes.

Frequently Asked Questions

Can I make these vegan?

Yes. Use dairy-free yogurt and plant-based feta, or replace the sauce with hummus or tahini dressing.

Can I use frozen cauliflower?

Yes, but fresh cauliflower browns better. If using frozen cauliflower, roast it directly from frozen and allow extra cooking time.

Can I make them spicy?

Yes. Add cayenne or red pepper flakes to the cauliflower and stir harissa into the sauce.

Can I use flatbread instead of pita?

Yes. Naan-style flatbread, lavash, or another soft flatbread can work well.

What protein can I add?

Chickpeas, falafel, grilled chicken, lentils, or tofu all pair well with the filling.

How do I keep the pita from tearing?

Warm it before filling and avoid overstuffing.

Are these good for meal prep?

Yes. Cauliflower Pita Wraps work well for meal prep when the ingredients are stored separately and assembled just before eating.

Final Thoughts

Cauliflower Pita Wraps are an easy way to turn roasted vegetables into a flavorful Mediterranean-inspired meal. Smoky cauliflower, cool vegetables, feta, herbs, and creamy yogurt sauce create a satisfying combination of warm, crisp, tangy, and fresh flavors.

Because Cauliflower Pita Wraps are easy to customize, they work well for lunch, weeknight dinners, vegetarian meal prep, or casual entertaining.

Keep this Cauliflower Pita Wraps recipe handy whenever you want a colorful, meatless meal that is simple to prepare and packed with Mediterranean-style flavor.