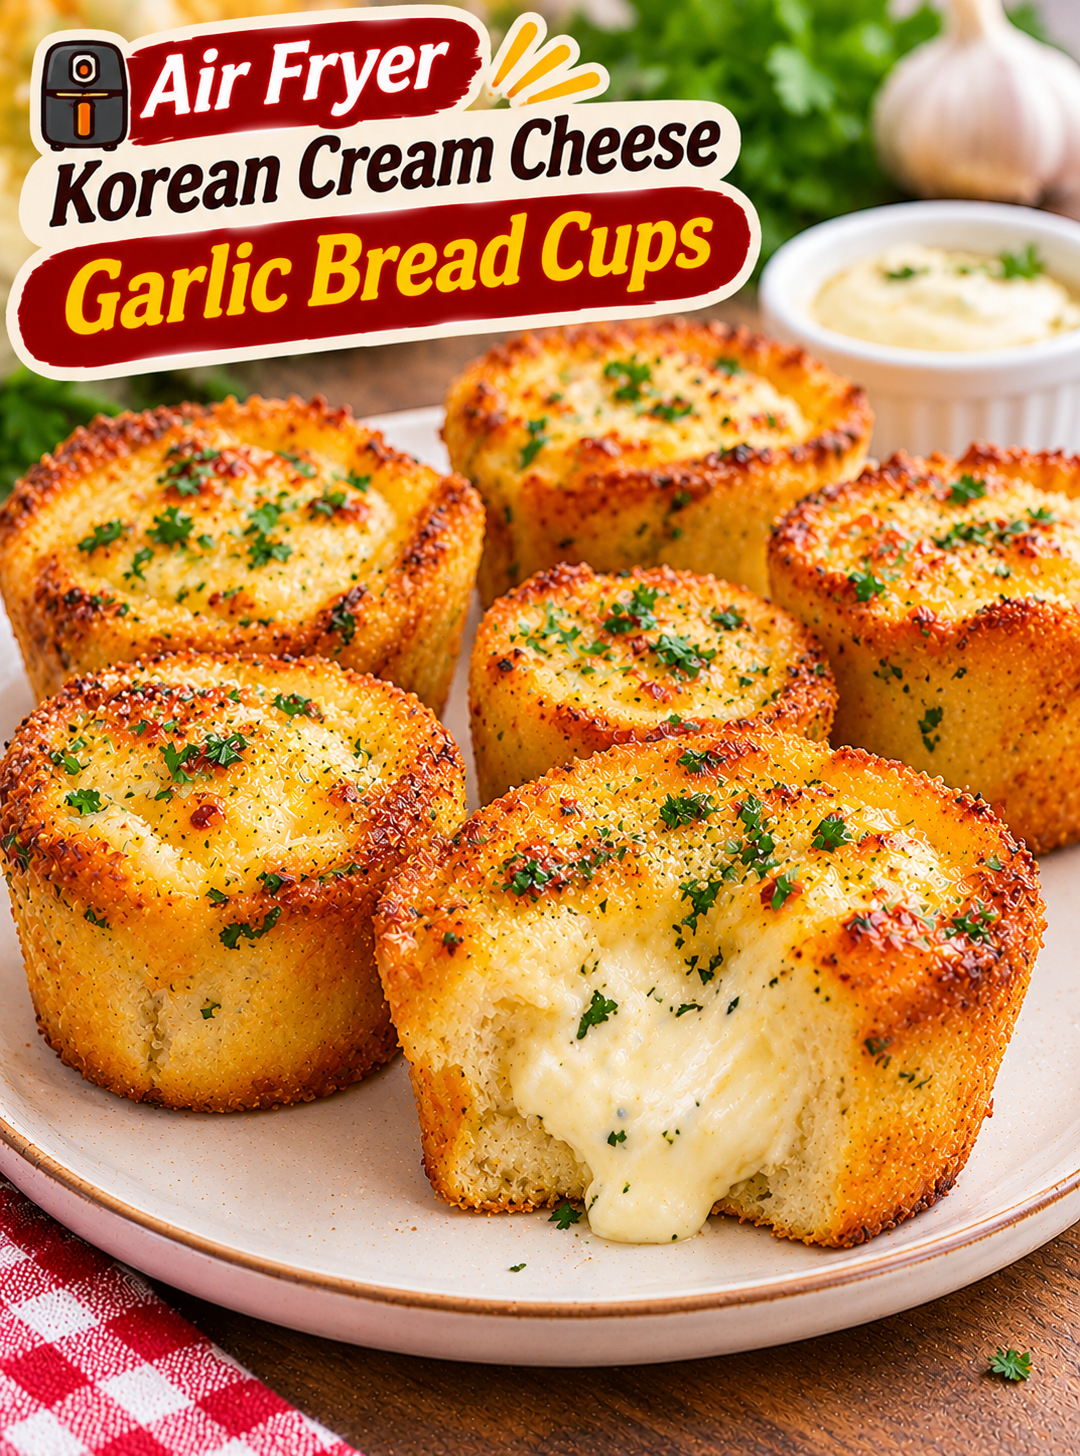
Air Fryer Korean Cream Cheese Garlic Bread Cups

Air Fryer Korean Cream Cheese Garlic Bread Cups

If you love garlic bread and creamy cheesecake-style fillings, these Air Fryer Korean Cream Cheese Garlic Bread Cups bring both flavors together in one delicious snack. Each cup has a golden, buttery bread shell filled with smooth, slightly sweet cream cheese and coated with rich garlic butter.

Inspired by popular Korean cream cheese garlic bread, this fun twist turns soft bread into individual cups instead of traditional stuffed rolls. The combination of sweet cream cheese, fresh garlic, butter, and herbs creates a delicious balance of sweet and savory flavors.

The air fryer makes these bread cups easy to prepare at home. You do not need a deep fryer or complicated baking equipment. With simple ingredients and a few easy steps, you can create a golden, flavorful snack for family gatherings, parties, brunch, or afternoon treats.

Serve them warm while the cream cheese filling is soft and creamy. These Korean-style garlic bread cups are especially delicious with coffee, tea, or a simple dipping sauce.

Why You Will Love These Korean Cream Cheese Garlic Bread Cups

  • Sweet and savory flavor: Creamy cheese filling balances the rich garlic butter coating.
  • Crispy golden edges: The air fryer gives the bread a lightly toasted exterior.
  • Individual portions: Each cup is easy to serve at parties and family gatherings.
  • Simple ingredients: Bread, cream cheese, butter, garlic, and a few seasonings create the recipe.
  • Easy to customize: Add Parmesan, parsley, honey, or chili flakes to change the flavor.
  • Air fryer friendly: You can prepare these delicious bread cups without deep frying.
  • Great for sharing: Serve them as appetizers, brunch bites, or a sweet-savory snack.

Ingredients You Need

This recipe makes approximately 8 bread cups, depending on the size of your bread slices and molds.

For the Bread Cups

  • 8 slices thick white bread: Soft sandwich bread works well because it can be flattened and shaped.
  • 1 tablespoon melted butter: Helps grease the molds and adds flavor.
  • 1 tablespoon milk: Optional, for lightly moistening the bread if it feels dry.

Cream Cheese Filling

  • 8 ounces cream cheese: Use softened, full-fat cream cheese for a smooth filling.
  • 2 tablespoons powdered sugar: Adds the mild sweetness found in Korean-style cream cheese garlic bread.
  • 1 tablespoon honey: Provides extra sweetness and a smooth flavor.
  • ½ teaspoon vanilla extract: Adds a gentle sweet aroma.
  • 1 tablespoon heavy cream or milk: Helps loosen the filling if it is too thick.

Korean Garlic Butter Coating

  • ½ cup unsalted butter: Melted butter forms the rich garlic coating.
  • 3 cloves fresh garlic: Finely minced for a strong, savory flavor.
  • 1 tablespoon honey: Adds a light sweetness to balance the garlic.
  • 1 tablespoon sweetened condensed milk: Creates a creamy, slightly sweet Korean-inspired coating.
  • 1 tablespoon chopped fresh parsley: Adds color and freshness.
  • 1 tablespoon grated Parmesan cheese: Optional, for a savory cheese flavor.
  • 1 egg: Helps the garlic coating set on the bread.
  • ¼ teaspoon salt: Balances the buttery flavor.

How to Make Air Fryer Korean Cream Cheese Garlic Bread Cups

Follow these easy steps to create individual bread cups with a creamy center and flavorful garlic butter coating. Prepare the filling first so it has time to firm up before assembly.

Step 1: Prepare the Cream Cheese Filling

Start by making the sweet and creamy filling.

  1. Place the softened cream cheese in a mixing bowl.
  2. Add the powdered sugar.
  3. Mix in the honey and vanilla extract.
  4. Beat until the mixture becomes smooth and creamy.
  5. Add heavy cream or milk if the filling feels too thick.
  6. Transfer the filling to a piping bag or small food-safe plastic bag.
  7. Refrigerate for 15–20 minutes to make it easier to portion.

Helpful tip: Let the cream cheese soften at room temperature before mixing. This helps prevent lumps and creates a smooth filling.

Step 2: Shape the Bread Cups

Now prepare the bread shells that will hold the cream cheese.

  1. Remove the crusts from the bread slices if desired.
  2. Place one slice on a clean work surface.
  3. Flatten it gently with a rolling pin.
  4. Brush the bread lightly with melted butter.
  5. Press it into a lightly greased, air-fryer-safe silicone muffin cup or small ramekin.
  6. Fold the edges slightly to create a cup shape.
  7. Repeat with the remaining bread slices.

Make sure the bread covers the bottom and sides of each mold. Avoid pressing too hard because thin bread can tear.

Step 3: Prepare the Garlic Butter Mixture

The garlic butter coating gives these cups their signature sweet-savory Korean-inspired flavor.

  1. Melt the butter in a small saucepan or microwave-safe bowl.
  2. Add the finely minced garlic.
  3. Stir in the honey and sweetened condensed milk.
  4. Add the chopped parsley.
  5. Mix in the Parmesan cheese and salt.
  6. Let the mixture cool slightly.
  7. Whisk in the egg until fully combined.

Important: Allow the melted butter to cool before adding the egg. Hot butter can cook the egg and create lumps.

Step 4: Add the Cream Cheese Filling

Fill each bread cup with the prepared cream cheese mixture.

  1. Remove the filling from the refrigerator.
  2. Cut a small opening in the piping bag if using one.
  3. Pipe the cream cheese into the center of each bread cup.
  4. Fill each cup about halfway to two-thirds full.
  5. Smooth the top gently with a small spoon.
  6. Avoid overfilling because the cream cheese can spread during heating.

Keep the filling below the top edge so the bread can hold its shape.

Step 5: Brush with Korean Garlic Butter

Coat the bread cups with the garlic butter mixture for a rich, flavorful finish.

  1. Place the filled bread cups on a clean tray.
  2. Spoon or brush the garlic butter mixture over the exposed bread.
  3. Coat the edges and sides evenly.
  4. Add a little extra parsley if desired.
  5. Avoid pouring too much liquid directly into the cream cheese center.

The garlic butter should coat the bread without making it soggy.

Step 6: Preheat the Air Fryer

Preparing the air fryer helps the bread cups cook evenly.

  1. Set the air fryer to 320°F (160°C).
  2. Preheat for approximately 3 minutes if your model recommends it.
  3. Lightly grease the air-fryer-safe molds if needed.
  4. Arrange the filled bread cups in the basket.
  5. Leave enough space between them for hot air to circulate.

Use silicone molds or small ramekins specifically labeled as oven-safe and suitable for air fryer use. Do not use ordinary plastic cups.

Step 7: Air Fry Until Golden

Cook the bread cups until the edges are golden and the filling is hot.

  1. Place the basket inside the air fryer.
  2. Air fry at 320°F (160°C) for approximately 6–8 minutes.
  3. Check the bread after 5 minutes.
  4. Continue cooking until the edges are lightly golden.
  5. Make sure the egg-containing garlic butter coating is fully cooked.
  6. Add another 1–2 minutes if needed.

Cooking times can vary depending on your air fryer, bread thickness, and mold size. If the tops brown too quickly, lower the temperature slightly and continue until the centers are properly heated.

Step 8: Garnish and Serve

Finish the bread cups with a few simple toppings.

  1. Carefully remove the molds from the air fryer.
  2. Let the cups rest for 2–3 minutes.
  3. Remove them gently from the molds.
  4. Sprinkle with fresh parsley.
  5. Add a little Parmesan cheese if desired.
  6. Serve warm while the cream cheese filling is soft.

The finished cups should have buttery, golden edges and a smooth, creamy center.

Tips for the Best Korean Cream Cheese Garlic Bread Cups

Use these simple tips to improve the texture and flavor of your homemade bread cups.

  • Use thick bread: Thick slices are easier to shape and less likely to tear.
  • Flatten evenly: A consistent thickness helps the bread cook at the same rate.
  • Soften the cream cheese: Soft cream cheese creates a smooth filling without lumps.
  • Chill the filling: Slightly chilled filling is easier to pipe into the bread cups.
  • Do not overfill: Leave enough room for the filling to heat without spilling.
  • Cool the butter: Let melted butter cool before mixing in the egg.
  • Use suitable molds: Choose air-fryer-safe silicone cups or small ramekins.
  • Avoid excess coating: Too much garlic butter can make the bread soggy.
  • Check early: Smaller bread cups may cook faster than larger ones.

Easy Variations to Try

You can customize these garlic bread cups with different fillings and toppings.

Extra Cheesy Garlic Bread Cups

Add shredded mozzarella or cheddar on top of the cream cheese filling. The extra cheese creates a richer center and a more savory flavor.

Honey Garlic Cream Cheese Cups

Increase the honey slightly in the cream cheese filling and garlic butter coating. This version has a sweeter flavor that pairs well with coffee or tea.

Spicy Korean Garlic Bread Cups

Add chili flakes or a small amount of gochujang to the garlic butter mixture. Start with a little because gochujang has a strong, spicy-sweet flavor.

Herb and Parmesan Bread Cups

Mix extra parsley, dried oregano, and Parmesan into the garlic butter coating. This creates a more savory version with a strong herb flavor.

Mini Party Bread Cups

Cut bread slices into smaller portions and shape them in mini muffin molds. Reduce the cooking time and check frequently to prevent the smaller cups from overbrowning.

What to Serve with Korean Garlic Bread Cups

These sweet-savory bread cups work well with both drinks and simple sides.

  • Hot coffee: A warm cup of coffee balances the creamy filling.
  • Milk tea: Its mild flavor pairs well with the garlic butter coating.
  • Tomato soup: A savory soup makes these cups a satisfying lunch option.
  • Fresh fruit: Strawberries, grapes, or apple slices add a refreshing contrast.
  • Marinara sauce: A small serving of tomato sauce adds a savory dipping option.
  • Creamy ranch: Ranch dressing works well if you prefer a more savory snack.

For brunch or parties, serve the cups on a platter with coffee, fresh fruit, and a few dipping sauces.

How to Store and Reheat Leftovers

These bread cups taste best when freshly prepared, but you can store leftovers safely.

Refrigerator: Allow the cups to cool, then place them in an airtight container. Refrigerate within two hours and use within 3–4 days.

Freezer: For the best texture, freeze the shaped bread cups before adding the filling and garlic butter coating. Store them in a freezer-safe container and use within 1–2 months for best quality.

Reheating: Place refrigerated cups in the air fryer at 300°F (150°C) for approximately 3–4 minutes, checking that the center is hot before serving.

Avoid reheating for too long because the bread can become dry and the cream cheese filling may become overly soft.

Frequently Asked Questions

1. What makes Korean cream cheese garlic bread different?

It combines a slightly sweet cream cheese filling with a rich garlic butter coating for a sweet and savory flavor.

2. Can I use regular sandwich bread?

Yes. Thick white sandwich bread works well because it can be flattened and shaped into individual cups.

3. Can I make these bread cups without silicone molds?

Yes. Use small oven-safe ramekins that fit safely inside your air fryer basket.

4. Why are my bread cups soggy?

Too much garlic butter or a very wet filling can soften the bread. Use a light coating and avoid overfilling.

5. Can I prepare the cream cheese filling ahead of time?

Yes. Store it in an airtight container in the refrigerator for up to 2 days before assembling.

6. Can I make these Korean garlic bread cups spicy?

Yes. Add chili flakes or a small amount of gochujang to the garlic butter mixture.

7. Can I use low-fat cream cheese?

Yes, but the filling may be less rich and slightly softer than one made with full-fat cream cheese.

8. How do I know when the bread cups are ready?

The bread edges should be golden, and the egg-containing garlic butter coating should be fully cooked.

Final Thoughts

Air Fryer Korean Cream Cheese Garlic Bread Cups are a fun twist on a popular sweet-savory garlic bread flavor. Their golden bread shells, creamy cheese filling, and rich garlic butter coating make them a delicious choice for brunch, parties, or an afternoon snack.

You can keep them classic or add extra cheese, honey, herbs, or chili for a different flavor. Serve them warm and enjoy the combination of buttery garlic bread and smooth cream cheese in every bite.
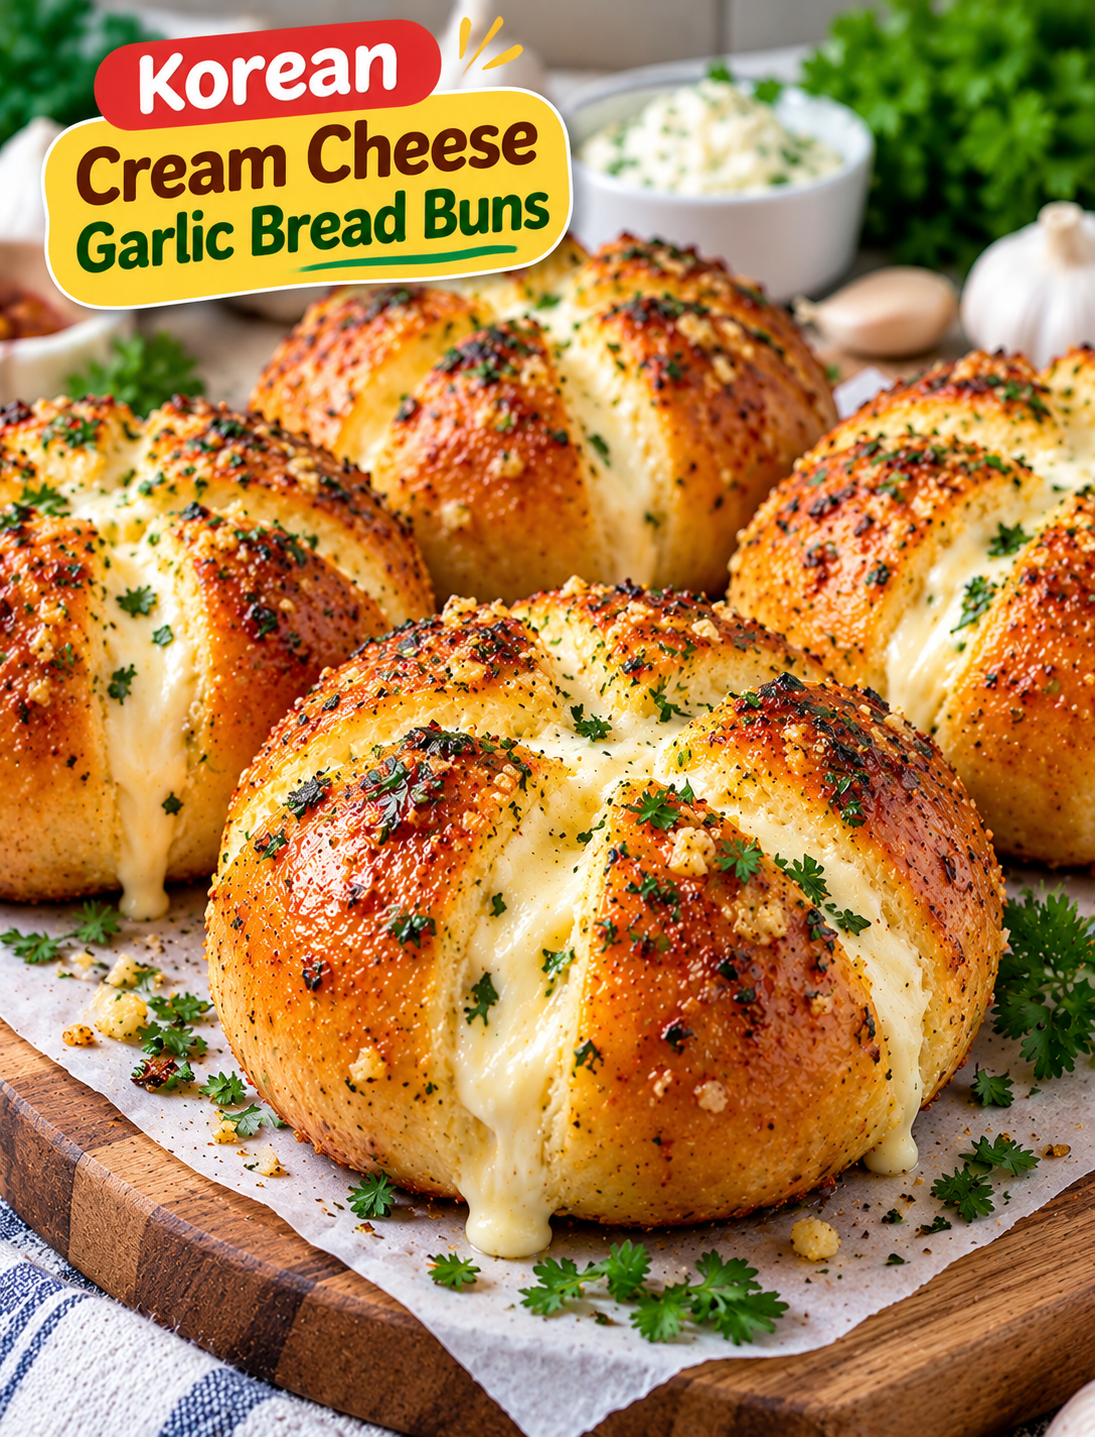
Korean Cream Cheese Garlic Bread Buns

Korean Cream Cheese Garlic Bread Buns

Korean Cream Cheese Garlic Bread Buns are soft, golden rolls filled with sweet and tangy cream cheese, then coated in a rich garlic butter sauce. The combination of fluffy bread, creamy filling, fresh garlic, and a hint of sweetness makes these buns a delicious bakery-style treat you can make at home.

This popular Korean-inspired snack combines the comfort of homemade bread with a flavorful garlic coating. Unlike traditional garlic bread, these buns are usually sliced into sections, filled with sweetened cream cheese, and brushed with a savory butter mixture. The result is a soft center, a creamy filling, and a golden, fragrant crust.

These cream cheese garlic buns are perfect for weekend baking, brunch, family gatherings, or an afternoon snack. You can use homemade bread rolls or good-quality store-bought buns to save time. With a few simple ingredients and clear steps, you can bring this bakery favorite to your own kitchen.

Why You Will Love These Korean Cream Cheese Garlic Bread Buns

  • Soft and fluffy bread: The rolls provide a tender base for the rich filling.
  • Creamy center: Sweetened cream cheese adds a smooth, tangy contrast to the garlic butter.
  • Sweet and savory flavor: A little sugar balances the garlic, butter, and cream cheese.
  • Golden garlic coating: Butter, garlic, and herbs create a fragrant finish.
  • Easy to customize: Adjust the sweetness, garlic, and herbs to match your taste.
  • Great for sharing: The individual buns work well for brunch, parties, and snack platters.
  • Homemade bakery style: You can make the buns from scratch or use ready-made rolls.

Ingredients for Korean Cream Cheese Garlic Bread Buns

This recipe makes 6 medium buns and serves about 6 people.

For the Bread Buns

  • 6 soft bread rolls or brioche-style buns
  • 1 tablespoon melted butter, for brushing if needed

Choose rolls that are soft but sturdy enough to hold the cream cheese filling. Slightly day-old rolls can be easier to cut without crushing.

For the Cream Cheese Filling

  • 8 ounces cream cheese, softened
  • 3 tablespoons powdered sugar
  • 2 tablespoons heavy cream or milk
  • 1 teaspoon vanilla extract, optional

The cream cheese should be soft enough to mix smoothly. Powdered sugar blends easily and helps keep the filling creamy.

For the Garlic Butter Coating

  • 1/2 cup unsalted butter, melted
  • 4 to 5 garlic cloves, finely minced
  • 2 tablespoons milk
  • 1 tablespoon honey or granulated sugar
  • 1 large egg, beaten
  • 1 tablespoon chopped fresh parsley
  • 1/2 teaspoon dried oregano, optional
  • 1/4 teaspoon salt, or to taste

The egg helps the coating cling to the bread and gives it a richer finish. Use pasteurized egg products if needed for your dietary or food-safety requirements.

How to Make Korean Cream Cheese Garlic Bread Buns

Follow these steps to make soft buns with a smooth filling and a flavorful garlic butter coating.

Step 1: Prepare the Cream Cheese

Place the softened cream cheese in a mixing bowl. Add the powdered sugar, heavy cream or milk, and optional vanilla extract.

Beat the mixture with a hand mixer or whisk until smooth and creamy. Scrape down the sides of the bowl to remove any lumps.

The filling should be thick enough to hold its shape when piped. If it feels too loose, refrigerate it for 10 to 15 minutes before using it.

Step 2: Fill a Piping Bag

Transfer the cream cheese mixture to a piping bag fitted with a medium round tip. If you do not have a piping bag, use a clean food-storage bag and cut a small corner.

Keep the filling chilled while you prepare the bread. A piping bag makes it easier to place the same amount of cream cheese into each section.

Step 3: Cut the Bread Buns

Place each bun on a cutting board. Use a serrated knife to make six deep cuts in a star pattern, stopping before you reach the bottom.

The bottom of each bun should remain connected so the filling stays inside. Avoid cutting too deeply, especially if the rolls are very soft.

Gently open the sections with your fingers to create space for the cream cheese. Work slowly to prevent the bread from tearing.

Step 4: Pipe the Cream Cheese Filling

Pipe the sweetened cream cheese into each cut section. Add a little filling near the center if space allows.

Use a similar amount in every section so the buns bake evenly. Avoid overfilling because excess cream cheese can spill onto the baking tray.

Place the filled buns on a parchment-lined baking sheet.

Step 5: Make the Garlic Butter Mixture

In a bowl, combine the melted butter, minced garlic, milk, honey or sugar, beaten egg, parsley, oregano, and salt.

Whisk until the ingredients are evenly mixed. Make sure the butter is warm rather than hot before adding the egg, so the egg does not begin to cook in the bowl.

Fresh garlic gives the coating a stronger flavor than garlic powder. For a milder taste, use three cloves instead of five.

Step 6: Coat the Buns

Spoon or brush the garlic butter mixture over each bun. Gently spread it across the top and into the cut sections.

Use enough coating to flavor the bread without leaving it swimming in butter. Pay attention to the outer edges because they become golden and fragrant during baking.

If you prefer a less rich result, reserve a little of the mixture rather than using every drop.

Step 7: Preheat the Oven

Preheat your oven to 350°F (175°C). Position a rack in the center so the buns receive even heat.

Line a baking sheet with parchment paper to make cleanup easier. Leave space between the buns so hot air can circulate.

Step 8: Bake Until Golden

Bake the buns for approximately 12 to 18 minutes, checking them after 10 minutes. The bread should look lightly golden, and the garlic coating should appear set rather than wet.

If the tops brown too quickly, loosely cover them with foil for the remaining baking time. Avoid baking too long because the bread can become dry and the cream cheese may soften excessively.

If you use a different type or size of roll, adjust the cooking time as needed.

Step 9: Check and Rest the Buns

Remove the tray from the oven when the buns are golden and heated through. Let them rest for 3 to 5 minutes before serving.

The filling will be very hot immediately after baking, so a short rest helps prevent burns and allows the cream cheese to settle.

Sprinkle with extra parsley if desired.

Step 10: Serve Warm

Serve the buns while they are still warm and fragrant. The soft bread, creamy center, and garlic butter coating taste best shortly after baking.

Pair them with coffee or tea for a snack, or serve them with soup or a fresh salad for a light meal. For a brunch spread, offer the buns alongside fruit and scrambled eggs.

Tips for the Best Korean Cream Cheese Garlic Bread

  • Use softened cream cheese: Room-temperature cream cheese creates a smoother filling.
  • Choose sturdy rolls: Soft bread works best when it can hold the filling without falling apart.
  • Do not cut through the bottom: Keeping the base intact helps prevent leakage.
  • Avoid overheating the butter: Hot butter can start cooking the egg in the coating.
  • Pipe the filling evenly: Consistent portions give every bun a balanced flavor.
  • Watch the oven closely: Smaller rolls may brown faster than larger buns.
  • Use fresh garlic: Freshly minced garlic provides a bold, savory flavor.
  • Let the buns rest: A short cooling period makes them easier to handle.

Flavor Variations to Try

Extra Garlic Cream Cheese Buns

Add another minced garlic clove to the butter mixture if you prefer a stronger garlic flavor. Keep the cream cheese filling mildly sweet to balance the extra garlic.

Honey Garlic Buns

Replace the granulated sugar in the coating with honey. This gives the bread a gentle sweetness and helps create a glossy finish.

Herb Cream Cheese Buns

Mix a teaspoon of finely chopped parsley or chives into the cream cheese filling. The herbs add freshness without overpowering the garlic.

Cheesy Garlic Buns

Sprinkle a little grated Parmesan over the buns during the final few minutes of baking. Watch closely so the cheese melts without becoming too dark.

Mild Garlic Buns

Use three garlic cloves and skip the oregano for a gentler flavor. This version works well for children or anyone who prefers less intense garlic.

Air Fryer Version

Arrange the prepared buns in a single layer in an air-fryer-safe pan or basket. Cook at 320°F (160°C) for about 6 to 10 minutes, checking frequently because air fryers vary in heat and airflow.

If the buns brown before the center is hot, lower the temperature slightly and continue cooking until heated through.

What to Serve with Korean Cream Cheese Garlic Bread Buns

These buns are rich and flavorful, so they pair well with lighter sides and drinks.

  • Tomato soup: The tangy tomato flavor balances the buttery bread.
  • Fresh green salad: Crisp lettuce, cucumber, and a light vinaigrette add freshness.
  • Scrambled eggs: Serve the buns as part of a weekend brunch.
  • Roasted vegetables: Add broccoli, carrots, or bell peppers for a simple meal.
  • Fresh fruit: Strawberries, grapes, or melon provide a refreshing contrast.
  • Coffee or tea: A warm drink works well with the sweet and savory filling.
  • Chicken soup: Serve one bun alongside a bowl of soup for a comforting lunch.

For a party platter, arrange the buns on a large plate and garnish with parsley. Serve them with fresh vegetables and keep extra napkins nearby because the garlic butter can be rich.

How to Store and Reheat Leftovers

Refrigeration: Because the filling contains cream cheese and the coating contains egg, refrigerate leftovers within two hours of baking. Store them in an airtight container at 40°F (4°C) or below and use within 3 to 4 days.

Oven reheating: Place the buns on a baking sheet and warm at 325°F (165°C) for about 5 to 8 minutes, checking that the filling is hot throughout.

Air fryer reheating: Reheat at 300°F (150°C) for about 3 to 5 minutes. Check early to prevent the bread from becoming too crisp.

Freezing: Freeze the cooled buns in a freezer-safe container for up to 2 months for best quality. Thaw them in the refrigerator before reheating, and check that the center is hot.

Make-ahead tip: Prepare the cream cheese filling and garlic butter mixture separately, then refrigerate them. Cut and fill the buns shortly before baking for the best texture.

Common Mistakes to Avoid

  • Cutting through the bottom: Deep cuts can let the filling escape.
  • Using cold cream cheese: Cold cream cheese is harder to mix and pipe smoothly.
  • Adding a hot butter mixture to the egg: Let the butter cool slightly before whisking in the egg.
  • Overloading the buns: Too much filling can spill during baking.
  • Baking at excessive heat: High heat may brown the outside before the filling warms.
  • Skipping the resting time: The filling can burn your mouth if served immediately.
  • Leaving leftovers at room temperature: The dairy and egg ingredients need prompt refrigeration.
  • Reheating for too long: Excess heat can dry out the bread and separate the filling.

Frequently Asked Questions

1. What are Korean Cream Cheese Garlic Bread Buns?

They are soft bread rolls filled with sweetened cream cheese and coated in a savory garlic butter mixture before baking.

2. Can I use store-bought bread rolls?

Yes. Soft dinner rolls or brioche-style buns work well as long as they are sturdy enough to hold the filling.

3. Can I make the buns ahead of time?

Yes. Prepare the filling and garlic butter separately, refrigerate them, and assemble the buns shortly before baking.

4. Why is my cream cheese filling runny?

The cream cheese may be too warm or contain too much liquid; chill the filling briefly until it becomes thick enough to pipe.

5. Can I make these buns in an air fryer?

Yes. Start at 320°F (160°C) for about 6 to 10 minutes and check frequently for even browning and a hot center.

6. Are Korean cream cheese garlic buns sweet or savory?

They have both flavors: the cream cheese filling is slightly sweet, while the garlic butter coating is rich and savory.

7. How do I keep the buns soft?

Avoid overbaking, and store cooled leftovers in an airtight container in the refrigerator.

8. Can I use garlic powder instead of fresh garlic?

Yes. Start with about 1 teaspoon of garlic powder in the butter mixture, then adjust to taste.

Final Thoughts

Korean Cream Cheese Garlic Bread Buns combine soft bread, sweet cream cheese, and a fragrant garlic butter coating in one satisfying snack. They are a fun way to bring a Korean-inspired bakery favorite into your home kitchen without complicated equipment.

Use fresh garlic, keep the filling thick, and watch the buns closely as they bake. Serve them warm for the best balance of creamy filling, tender bread, and golden garlic flavor.