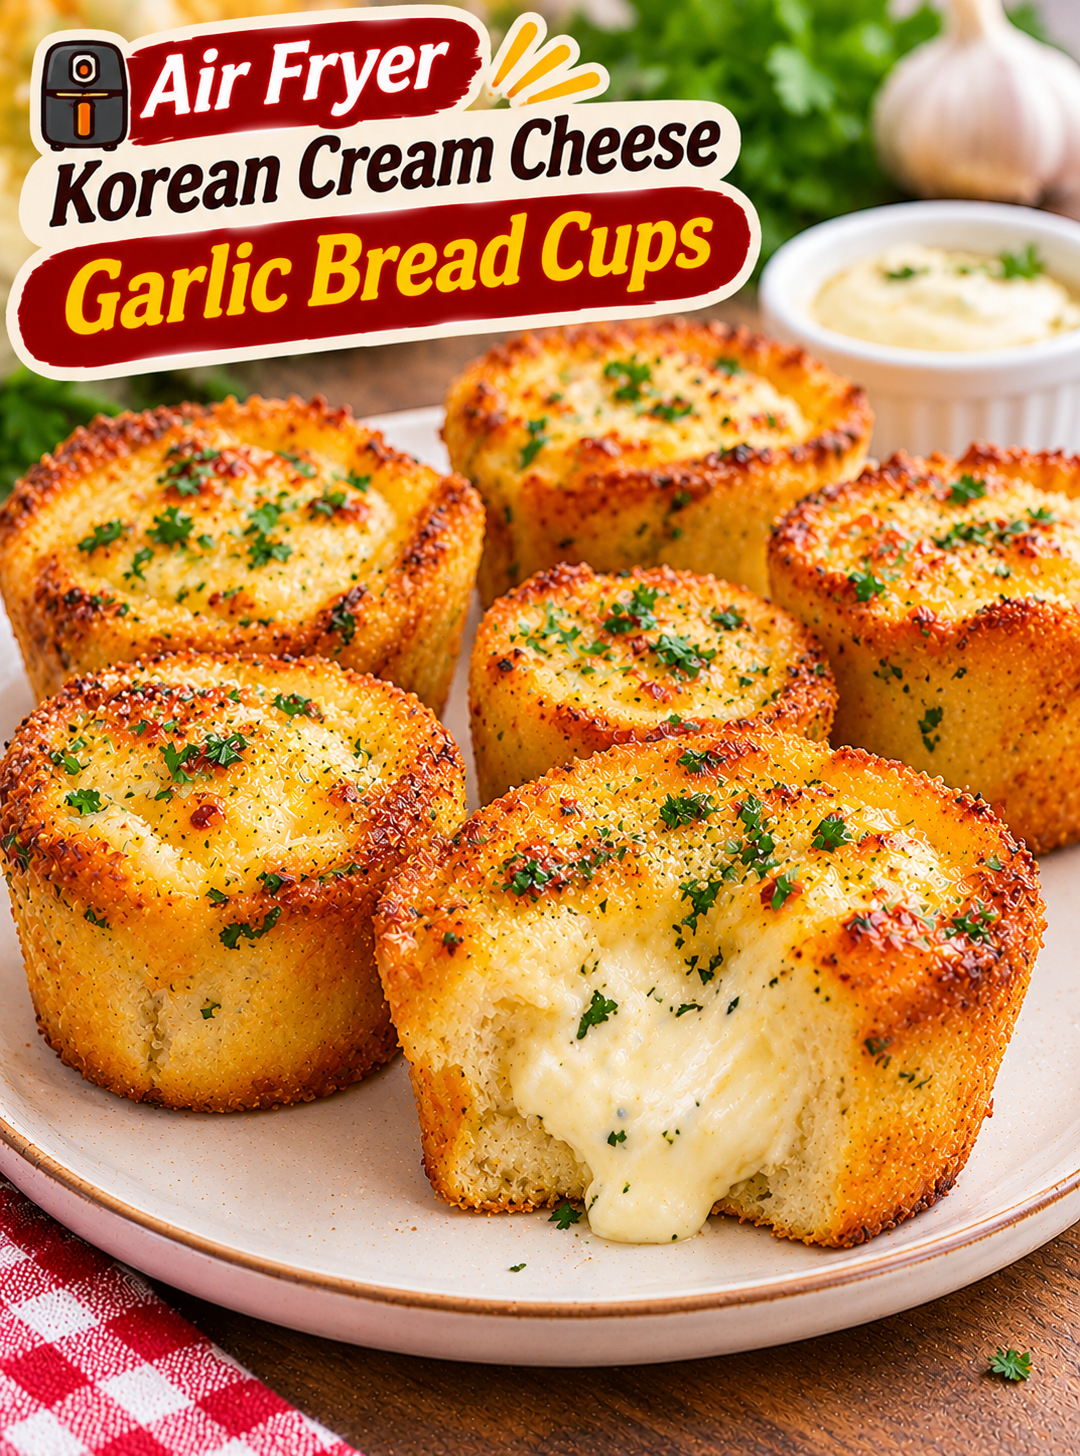
Air Fryer Korean Cream Cheese Garlic Bread Cups

Air Fryer Korean Cream Cheese Garlic Bread Cups

If you love garlic bread and creamy cheesecake-style fillings, these Air Fryer Korean Cream Cheese Garlic Bread Cups bring both flavors together in one delicious snack. Each cup has a golden, buttery bread shell filled with smooth, slightly sweet cream cheese and coated with rich garlic butter.

Inspired by popular Korean cream cheese garlic bread, this fun twist turns soft bread into individual cups instead of traditional stuffed rolls. The combination of sweet cream cheese, fresh garlic, butter, and herbs creates a delicious balance of sweet and savory flavors.

The air fryer makes these bread cups easy to prepare at home. You do not need a deep fryer or complicated baking equipment. With simple ingredients and a few easy steps, you can create a golden, flavorful snack for family gatherings, parties, brunch, or afternoon treats.

Serve them warm while the cream cheese filling is soft and creamy. These Korean-style garlic bread cups are especially delicious with coffee, tea, or a simple dipping sauce.

Why You Will Love These Korean Cream Cheese Garlic Bread Cups

  • Sweet and savory flavor: Creamy cheese filling balances the rich garlic butter coating.
  • Crispy golden edges: The air fryer gives the bread a lightly toasted exterior.
  • Individual portions: Each cup is easy to serve at parties and family gatherings.
  • Simple ingredients: Bread, cream cheese, butter, garlic, and a few seasonings create the recipe.
  • Easy to customize: Add Parmesan, parsley, honey, or chili flakes to change the flavor.
  • Air fryer friendly: You can prepare these delicious bread cups without deep frying.
  • Great for sharing: Serve them as appetizers, brunch bites, or a sweet-savory snack.

Ingredients You Need

This recipe makes approximately 8 bread cups, depending on the size of your bread slices and molds.

For the Bread Cups

  • 8 slices thick white bread: Soft sandwich bread works well because it can be flattened and shaped.
  • 1 tablespoon melted butter: Helps grease the molds and adds flavor.
  • 1 tablespoon milk: Optional, for lightly moistening the bread if it feels dry.

Cream Cheese Filling

  • 8 ounces cream cheese: Use softened, full-fat cream cheese for a smooth filling.
  • 2 tablespoons powdered sugar: Adds the mild sweetness found in Korean-style cream cheese garlic bread.
  • 1 tablespoon honey: Provides extra sweetness and a smooth flavor.
  • ½ teaspoon vanilla extract: Adds a gentle sweet aroma.
  • 1 tablespoon heavy cream or milk: Helps loosen the filling if it is too thick.

Korean Garlic Butter Coating

  • ½ cup unsalted butter: Melted butter forms the rich garlic coating.
  • 3 cloves fresh garlic: Finely minced for a strong, savory flavor.
  • 1 tablespoon honey: Adds a light sweetness to balance the garlic.
  • 1 tablespoon sweetened condensed milk: Creates a creamy, slightly sweet Korean-inspired coating.
  • 1 tablespoon chopped fresh parsley: Adds color and freshness.
  • 1 tablespoon grated Parmesan cheese: Optional, for a savory cheese flavor.
  • 1 egg: Helps the garlic coating set on the bread.
  • ¼ teaspoon salt: Balances the buttery flavor.

How to Make Air Fryer Korean Cream Cheese Garlic Bread Cups

Follow these easy steps to create individual bread cups with a creamy center and flavorful garlic butter coating. Prepare the filling first so it has time to firm up before assembly.

Step 1: Prepare the Cream Cheese Filling

Start by making the sweet and creamy filling.

  1. Place the softened cream cheese in a mixing bowl.
  2. Add the powdered sugar.
  3. Mix in the honey and vanilla extract.
  4. Beat until the mixture becomes smooth and creamy.
  5. Add heavy cream or milk if the filling feels too thick.
  6. Transfer the filling to a piping bag or small food-safe plastic bag.
  7. Refrigerate for 15–20 minutes to make it easier to portion.

Helpful tip: Let the cream cheese soften at room temperature before mixing. This helps prevent lumps and creates a smooth filling.

Step 2: Shape the Bread Cups

Now prepare the bread shells that will hold the cream cheese.

  1. Remove the crusts from the bread slices if desired.
  2. Place one slice on a clean work surface.
  3. Flatten it gently with a rolling pin.
  4. Brush the bread lightly with melted butter.
  5. Press it into a lightly greased, air-fryer-safe silicone muffin cup or small ramekin.
  6. Fold the edges slightly to create a cup shape.
  7. Repeat with the remaining bread slices.

Make sure the bread covers the bottom and sides of each mold. Avoid pressing too hard because thin bread can tear.

Step 3: Prepare the Garlic Butter Mixture

The garlic butter coating gives these cups their signature sweet-savory Korean-inspired flavor.

  1. Melt the butter in a small saucepan or microwave-safe bowl.
  2. Add the finely minced garlic.
  3. Stir in the honey and sweetened condensed milk.
  4. Add the chopped parsley.
  5. Mix in the Parmesan cheese and salt.
  6. Let the mixture cool slightly.
  7. Whisk in the egg until fully combined.

Important: Allow the melted butter to cool before adding the egg. Hot butter can cook the egg and create lumps.

Step 4: Add the Cream Cheese Filling

Fill each bread cup with the prepared cream cheese mixture.

  1. Remove the filling from the refrigerator.
  2. Cut a small opening in the piping bag if using one.
  3. Pipe the cream cheese into the center of each bread cup.
  4. Fill each cup about halfway to two-thirds full.
  5. Smooth the top gently with a small spoon.
  6. Avoid overfilling because the cream cheese can spread during heating.

Keep the filling below the top edge so the bread can hold its shape.

Step 5: Brush with Korean Garlic Butter

Coat the bread cups with the garlic butter mixture for a rich, flavorful finish.

  1. Place the filled bread cups on a clean tray.
  2. Spoon or brush the garlic butter mixture over the exposed bread.
  3. Coat the edges and sides evenly.
  4. Add a little extra parsley if desired.
  5. Avoid pouring too much liquid directly into the cream cheese center.

The garlic butter should coat the bread without making it soggy.

Step 6: Preheat the Air Fryer

Preparing the air fryer helps the bread cups cook evenly.

  1. Set the air fryer to 320°F (160°C).
  2. Preheat for approximately 3 minutes if your model recommends it.
  3. Lightly grease the air-fryer-safe molds if needed.
  4. Arrange the filled bread cups in the basket.
  5. Leave enough space between them for hot air to circulate.

Use silicone molds or small ramekins specifically labeled as oven-safe and suitable for air fryer use. Do not use ordinary plastic cups.

Step 7: Air Fry Until Golden

Cook the bread cups until the edges are golden and the filling is hot.

  1. Place the basket inside the air fryer.
  2. Air fry at 320°F (160°C) for approximately 6–8 minutes.
  3. Check the bread after 5 minutes.
  4. Continue cooking until the edges are lightly golden.
  5. Make sure the egg-containing garlic butter coating is fully cooked.
  6. Add another 1–2 minutes if needed.

Cooking times can vary depending on your air fryer, bread thickness, and mold size. If the tops brown too quickly, lower the temperature slightly and continue until the centers are properly heated.

Step 8: Garnish and Serve

Finish the bread cups with a few simple toppings.

  1. Carefully remove the molds from the air fryer.
  2. Let the cups rest for 2–3 minutes.
  3. Remove them gently from the molds.
  4. Sprinkle with fresh parsley.
  5. Add a little Parmesan cheese if desired.
  6. Serve warm while the cream cheese filling is soft.

The finished cups should have buttery, golden edges and a smooth, creamy center.

Tips for the Best Korean Cream Cheese Garlic Bread Cups

Use these simple tips to improve the texture and flavor of your homemade bread cups.

  • Use thick bread: Thick slices are easier to shape and less likely to tear.
  • Flatten evenly: A consistent thickness helps the bread cook at the same rate.
  • Soften the cream cheese: Soft cream cheese creates a smooth filling without lumps.
  • Chill the filling: Slightly chilled filling is easier to pipe into the bread cups.
  • Do not overfill: Leave enough room for the filling to heat without spilling.
  • Cool the butter: Let melted butter cool before mixing in the egg.
  • Use suitable molds: Choose air-fryer-safe silicone cups or small ramekins.
  • Avoid excess coating: Too much garlic butter can make the bread soggy.
  • Check early: Smaller bread cups may cook faster than larger ones.

Easy Variations to Try

You can customize these garlic bread cups with different fillings and toppings.

Extra Cheesy Garlic Bread Cups

Add shredded mozzarella or cheddar on top of the cream cheese filling. The extra cheese creates a richer center and a more savory flavor.

Honey Garlic Cream Cheese Cups

Increase the honey slightly in the cream cheese filling and garlic butter coating. This version has a sweeter flavor that pairs well with coffee or tea.

Spicy Korean Garlic Bread Cups

Add chili flakes or a small amount of gochujang to the garlic butter mixture. Start with a little because gochujang has a strong, spicy-sweet flavor.

Herb and Parmesan Bread Cups

Mix extra parsley, dried oregano, and Parmesan into the garlic butter coating. This creates a more savory version with a strong herb flavor.

Mini Party Bread Cups

Cut bread slices into smaller portions and shape them in mini muffin molds. Reduce the cooking time and check frequently to prevent the smaller cups from overbrowning.

What to Serve with Korean Garlic Bread Cups

These sweet-savory bread cups work well with both drinks and simple sides.

  • Hot coffee: A warm cup of coffee balances the creamy filling.
  • Milk tea: Its mild flavor pairs well with the garlic butter coating.
  • Tomato soup: A savory soup makes these cups a satisfying lunch option.
  • Fresh fruit: Strawberries, grapes, or apple slices add a refreshing contrast.
  • Marinara sauce: A small serving of tomato sauce adds a savory dipping option.
  • Creamy ranch: Ranch dressing works well if you prefer a more savory snack.

For brunch or parties, serve the cups on a platter with coffee, fresh fruit, and a few dipping sauces.

How to Store and Reheat Leftovers

These bread cups taste best when freshly prepared, but you can store leftovers safely.

Refrigerator: Allow the cups to cool, then place them in an airtight container. Refrigerate within two hours and use within 3–4 days.

Freezer: For the best texture, freeze the shaped bread cups before adding the filling and garlic butter coating. Store them in a freezer-safe container and use within 1–2 months for best quality.

Reheating: Place refrigerated cups in the air fryer at 300°F (150°C) for approximately 3–4 minutes, checking that the center is hot before serving.

Avoid reheating for too long because the bread can become dry and the cream cheese filling may become overly soft.

Frequently Asked Questions

1. What makes Korean cream cheese garlic bread different?

It combines a slightly sweet cream cheese filling with a rich garlic butter coating for a sweet and savory flavor.

2. Can I use regular sandwich bread?

Yes. Thick white sandwich bread works well because it can be flattened and shaped into individual cups.

3. Can I make these bread cups without silicone molds?

Yes. Use small oven-safe ramekins that fit safely inside your air fryer basket.

4. Why are my bread cups soggy?

Too much garlic butter or a very wet filling can soften the bread. Use a light coating and avoid overfilling.

5. Can I prepare the cream cheese filling ahead of time?

Yes. Store it in an airtight container in the refrigerator for up to 2 days before assembling.

6. Can I make these Korean garlic bread cups spicy?

Yes. Add chili flakes or a small amount of gochujang to the garlic butter mixture.

7. Can I use low-fat cream cheese?

Yes, but the filling may be less rich and slightly softer than one made with full-fat cream cheese.

8. How do I know when the bread cups are ready?

The bread edges should be golden, and the egg-containing garlic butter coating should be fully cooked.

Final Thoughts

Air Fryer Korean Cream Cheese Garlic Bread Cups are a fun twist on a popular sweet-savory garlic bread flavor. Their golden bread shells, creamy cheese filling, and rich garlic butter coating make them a delicious choice for brunch, parties, or an afternoon snack.

You can keep them classic or add extra cheese, honey, herbs, or chili for a different flavor. Serve them warm and enjoy the combination of buttery garlic bread and smooth cream cheese in every bite.
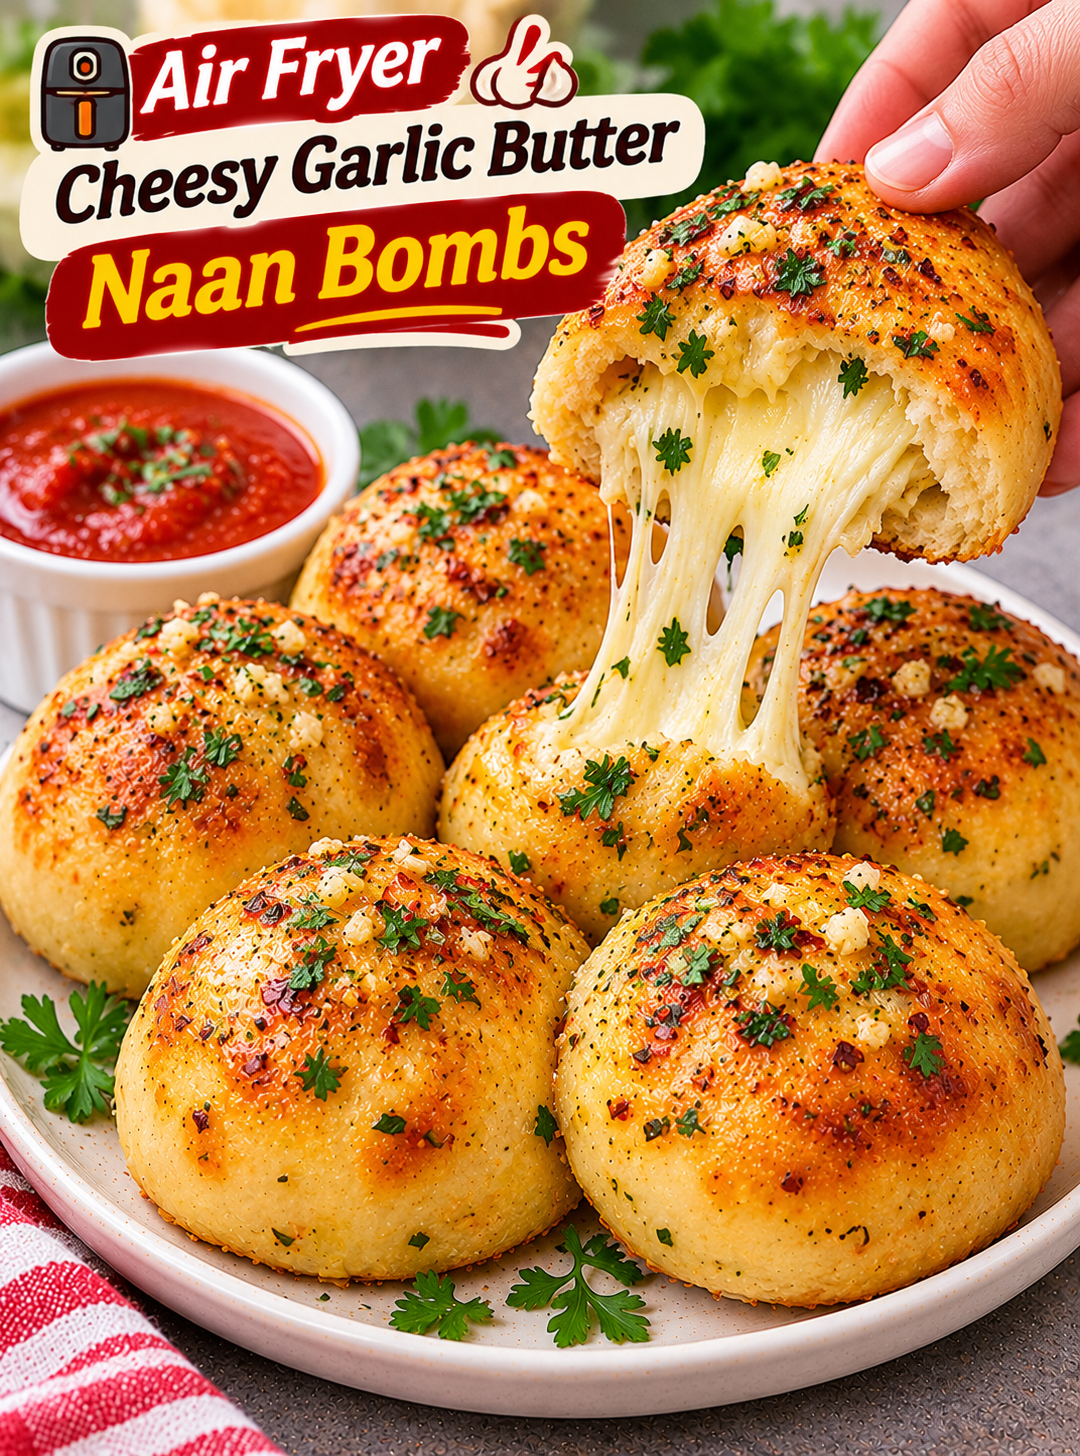
Air Fryer Cheesy Garlic Butter Naan Bombs

Air Fryer Cheesy Garlic Butter Naan Bombs

Imagine biting into a warm, golden naan ball filled with melted cheese and covered in rich garlic butter. These Air Fryer Cheesy Garlic Butter Naan Bombs are soft, flavorful, and packed with cheesy goodness in every bite.

This easy homemade snack combines soft naan-style dough, gooey mozzarella cheese, fresh garlic, and melted butter. The air fryer gives the outside a lightly golden finish while keeping the inside tender and delicious. You get all the comforting flavors of cheesy garlic bread in a fun, bite-sized shape.

These stuffed naan bites are perfect for family snack time, game-day gatherings, parties, or as a side dish with your favorite curry. You can prepare them with simple pantry ingredients and customize the filling with cheddar, herbs, or a little chili for extra flavor.

Serve them warm with marinara sauce, ranch dressing, or a creamy garlic dip. Once you break one open and see the melted cheese inside, these homemade naan bombs are hard to resist!

Why You Will Love These Cheesy Garlic Butter Naan Bombs

  • Gooey cheese filling: Every bite has a delicious melted mozzarella center.
  • Rich garlic butter flavor: Fresh garlic, butter, and herbs add a savory finish.
  • No deep frying: The air fryer creates a golden exterior with less oil.
  • Simple ingredients: The dough and filling use easy-to-find ingredients.
  • Easy to customize: Add cheddar, Parmesan, chili flakes, or fresh herbs.
  • Perfect for sharing: These bite-sized snacks are great for parties, family dinners, and game nights.
  • Versatile serving option: Enjoy them as an appetizer, snack, or side with soup and curry.

Ingredients You Need

This recipe makes approximately 8 medium-sized naan bombs.

For the Naan Dough

  • 2 cups all-purpose flour: Creates a soft, tender naan-style dough.
  • ½ cup plain Greek yogurt: Helps make the dough soft and easy to handle.
  • 1 teaspoon baking powder: Gives the dough a little lift.
  • ½ teaspoon salt: Adds flavor to the dough.
  • 1 tablespoon olive oil: Helps keep the dough smooth and flexible.
  • 2–4 tablespoons water: Add gradually if the dough feels too dry.

Cheese Filling

  • 1 cup shredded mozzarella cheese: Creates the classic stretchy, melted center.
  • ¼ cup shredded cheddar cheese: Adds a richer cheese flavor.
  • 1 tablespoon chopped fresh cilantro: Gives the filling a fresh herbal taste.
  • ¼ teaspoon garlic powder: Adds extra savory flavor.
  • ¼ teaspoon black pepper: Provides mild seasoning.
  • ¼ teaspoon chili flakes: Optional, for a little heat.

Garlic Butter Topping

  • 3 tablespoons unsalted butter: Creates a rich, buttery coating.
  • 3 cloves fresh garlic: Adds a strong, delicious garlic aroma.
  • 1 tablespoon chopped fresh parsley: Gives the topping a fresh finish.
  • ½ teaspoon dried Italian seasoning: Adds a blend of herbs.
  • 2 tablespoons grated Parmesan cheese: Optional, for extra savory flavor.
  • A pinch of salt: Adjust according to taste.

How to Make Air Fryer Cheesy Garlic Butter Naan Bombs

Follow these simple steps to prepare soft, golden naan bombs with a warm cheese filling. Keep the dough portions evenly sized so they cook at a similar rate.

Step 1: Prepare the Naan Dough

Start by making a soft dough that is easy to roll and shape.

  1. Add the all-purpose flour to a large mixing bowl.
  2. Mix in the baking powder and salt.
  3. Add the Greek yogurt and olive oil.
  4. Stir until the ingredients begin to form a dough.
  5. Add water one tablespoon at a time if the mixture feels dry.
  6. Knead for approximately 3–4 minutes until smooth.
  7. Cover the bowl and let the dough rest for 15–20 minutes.

Helpful tip: The dough should feel soft and flexible without sticking heavily to your hands. Add a little flour if it becomes too sticky.

Step 2: Prepare the Cheesy Filling

While the dough rests, prepare the cheese mixture.

  1. Place the shredded mozzarella in a small bowl.
  2. Add the cheddar cheese.
  3. Mix in the chopped cilantro.
  4. Add garlic powder and black pepper.
  5. Sprinkle in chili flakes if you want a spicy filling.
  6. Mix everything until evenly combined.

Keep the cheese mixture refrigerated until you are ready to fill the dough. Cold cheese is easier to portion and handle.

Step 3: Divide and Shape the Dough

Divide the rested dough into equal portions for evenly sized naan bombs.

  1. Lightly dust your work surface with flour.
  2. Transfer the dough to the surface.
  3. Divide it into 8 equal pieces.
  4. Roll each piece into a smooth ball.
  5. Flatten each ball into a small round disc.
  6. Keep the center slightly thicker than the edges.

Avoid making the dough discs too thin because they need to hold the cheese filling without tearing.

Step 4: Add the Cheese Filling

Now fill each dough portion with the prepared cheese mixture.

  1. Place one dough disc in your palm.
  2. Add approximately 1–2 tablespoons of cheese filling to the center.
  3. Keep the filling away from the outer edges.
  4. Bring the dough edges together over the cheese.
  5. Pinch the edges firmly to seal.
  6. Roll gently into a smooth ball.
  7. Place the sealed side facing down.

Repeat with the remaining dough portions.

Helpful tip: Make sure there are no open gaps in the dough. A secure seal helps prevent melted cheese from leaking during air frying.

Step 5: Prepare the Garlic Butter

The garlic butter topping gives these naan bites their signature flavor.

  1. Melt the butter in a small saucepan or microwave-safe bowl.
  2. Add the finely minced fresh garlic.
  3. Stir in the chopped parsley.
  4. Add the Italian seasoning.
  5. Mix in the grated Parmesan if desired.
  6. Add a small pinch of salt.
  7. Set the mixture aside.

Avoid browning the garlic. Gently warming it in melted butter gives the topping a pleasant flavor without making it bitter.

Step 6: Prepare the Air Fryer

Preparing the basket helps prevent the dough from sticking.

  1. Set the air fryer to 350°F (175°C).
  2. Preheat for approximately 3 minutes if recommended by your model.
  3. Lightly grease the basket with cooking spray or oil.
  4. Arrange the stuffed dough balls in a single layer.
  5. Leave space between each piece for hot air to circulate.

Cook in batches if necessary. Overcrowding can lead to uneven browning.

Step 7: Air Fry Until Golden

Cook the naan bombs until the dough is cooked through and the outside is lightly golden.

  1. Lightly brush the tops with olive oil or melted butter.
  2. Place the basket inside the air fryer.
  3. Air fry at 350°F (175°C) for approximately 10–12 minutes.
  4. Carefully turn the naan bombs halfway through cooking if needed for even browning.
  5. Check that the dough is cooked through.
  6. Add another 1–2 minutes if the centers need more time.

Cooking times can vary depending on the air fryer and the size of the dough balls. If the outside browns too quickly, reduce the temperature slightly and continue cooking until the dough is done.

Step 8: Brush with Garlic Butter

The final garlic butter coating adds aroma and flavor.

  1. Remove the cooked naan bombs carefully from the air fryer.
  2. Place them on a serving plate.
  3. Brush the warm tops generously with the prepared garlic butter.
  4. Sprinkle with extra parsley.
  5. Add a little Parmesan cheese if desired.
  6. Let them rest for 2–3 minutes before serving.

The cheese inside will be very hot, so allow a short cooling period before taking the first bite.

Step 9: Serve Warm

Arrange the naan bombs on a serving plate while they are still warm.

  • Serve with marinara sauce for a tomato-rich dip.
  • Add ranch dressing for a cool and creamy option.
  • Pair with garlic mayonnaise for extra garlic flavor.
  • Sprinkle with chili flakes for more heat.
  • Serve alongside tomato soup, curry, or grilled chicken.

For the best texture, enjoy them shortly after cooking while the dough is soft and the cheese is melted.

Tips for the Best Cheesy Garlic Butter Naan Bombs

A few small details can make a big difference in the final texture.

  • Use soft dough: Firm dough can produce dense naan bombs.
  • Rest the dough: Resting makes it easier to shape and seal.
  • Use shredded cheese: Shredded mozzarella melts smoothly inside the dough.
  • Do not overfill: Too much cheese can break the dough during cooking.
  • Seal carefully: Pinch every edge together to keep the filling inside.
  • Keep portions even: Similar-sized balls cook more consistently.
  • Leave space in the basket: Proper air circulation helps the dough brown evenly.
  • Check the center: Make sure the dough is fully cooked before serving.
  • Brush after cooking: Adding garlic butter at the end keeps its fresh flavor noticeable.

Easy Variations to Try

You can change the cheese and seasoning to create different versions of this recipe.

Extra Cheesy Naan Bombs

Add a little more mozzarella and cheddar to the filling. You can also sprinkle Parmesan over the garlic butter topping for a richer finish.

Spicy Garlic Naan Bombs

Mix chili flakes, paprika, and finely chopped jalapeños into the cheese filling. Add a pinch of chili powder to the garlic butter for extra heat.

Spinach and Cheese Naan Bombs

Mix finely chopped, cooked spinach into the mozzarella filling. Squeeze out excess water before adding it so the dough does not become soggy.

Pizza-Style Naan Bombs

Add finely chopped pepperoni, a small amount of thick pizza sauce, and mozzarella. Avoid using too much sauce because excess moisture can make the dough difficult to seal.

Herb and Parmesan Naan Bombs

Add dried oregano, basil, and Parmesan to the cheese filling. Brush with parsley garlic butter for a savory herb flavor.

What to Serve with Garlic Butter Naan Bombs

These cheesy bites work well with creamy dips, fresh sides, and hearty meals.

  • Marinara sauce: A classic tomato dip that complements melted cheese.
  • Garlic ranch: Adds a cool, creamy flavor.
  • Spicy mayo: Combines mayonnaise with hot sauce for a little heat.
  • Tomato soup: Makes a comforting combination for lunch or dinner.
  • Butter chicken: Serve the naan bombs as a cheesy side with a rich curry.
  • Fresh salad: Add a crisp salad with cucumber, tomatoes, and lettuce for balance.

For parties, serve them on a large platter with two or three dipping sauces.

How to Store and Reheat Leftovers

Proper storage helps keep leftover naan bombs fresh and enjoyable.

Refrigerator: Allow the cooked naan bombs to cool, then place them in an airtight container. Refrigerate within two hours and use within 3–4 days.

Freezer: Arrange unbaked, filled dough balls on a tray and freeze until firm. Transfer them to a freezer-safe container. For the best quality, use within 1–2 months. Cook from frozen at a slightly reduced temperature, adding time as needed, and check that the dough is fully cooked in the center.

Reheating: Place refrigerated naan bombs in the air fryer at 320°F (160°C) for approximately 3–5 minutes, or until warmed through.

Avoid using the microwave if you want to maintain a lightly crisp exterior. It can make the dough soft and chewy.

Frequently Asked Questions

1. Can I use store-bought naan dough?

Yes. You can use prepared naan or pizza dough, divided into small portions, to save preparation time.

2. Which cheese works best for naan bombs?

Mozzarella is ideal for a stretchy center, while cheddar and Parmesan add a stronger savory flavor.

3. Why is cheese leaking out of my naan bombs?

The dough may not be sealed properly or may contain too much filling. Pinch the edges firmly and avoid overfilling.

4. Can I make naan bombs without Greek yogurt?

Yes. Plain regular yogurt can work, but drain excess liquid first and adjust the flour until the dough becomes soft and manageable.

5. How do I know when the naan bombs are cooked?

The outside should be lightly golden, and the dough should be cooked through rather than raw or gummy in the center.

6. Can I prepare cheesy naan bombs ahead of time?

Yes. Shape and fill them in advance, then refrigerate in a covered container until you are ready to air fry.

7. Can I freeze uncooked naan bombs?

Yes. Freeze the sealed dough balls on a tray before transferring them to a freezer-safe container.

8. What is the best dipping sauce for cheesy garlic naan bombs?

Marinara, garlic ranch, spicy mayo, and garlic mayonnaise all pair well with the buttery dough and melted cheese.

Final Thoughts

Air Fryer Cheesy Garlic Butter Naan Bombs are a delicious way to enjoy soft homemade bread with a warm, cheesy center. The combination of mozzarella, cheddar, fresh garlic, butter, and herbs creates a flavorful snack that works for almost any occasion.

You can keep the filling classic or customize it with spinach, jalapeños, pepperoni, or extra cheese. Serve these golden bites warm with your favorite dipping sauce for a snack that is easy to share and satisfying to enjoy.