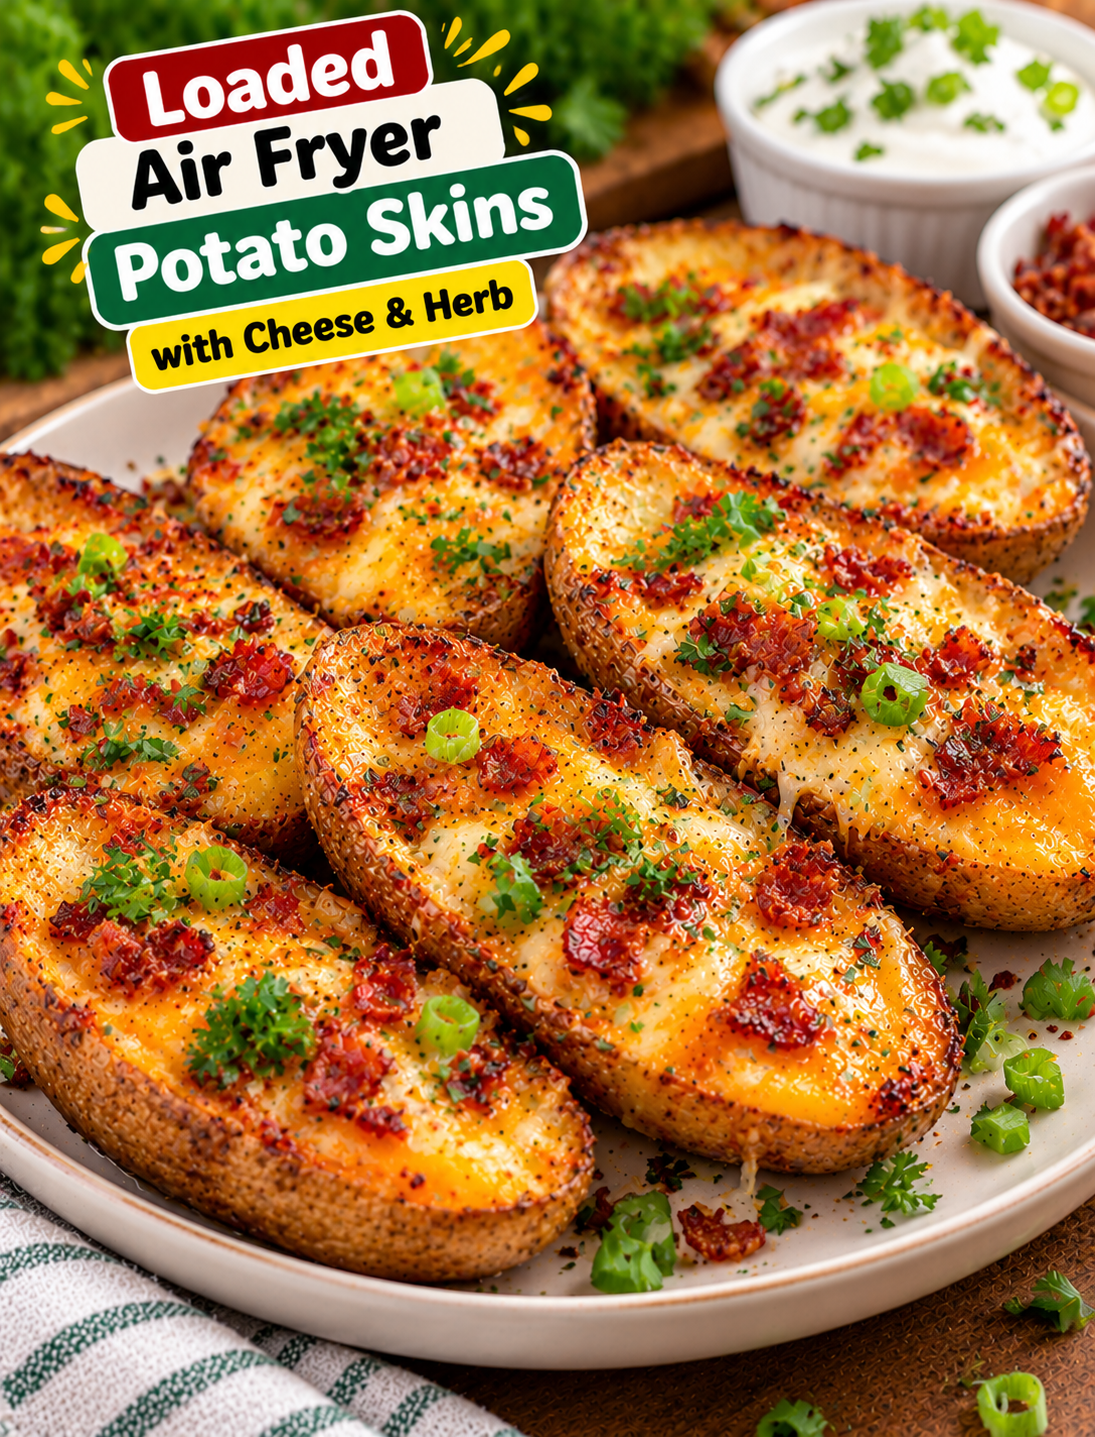
Crispy potato skins filled with melted cheese, fresh herbs, and savory toppings make an easy appetizer for game day, family movie night, or a casual weekend snack. These Loaded Air Fryer Potato Skins with Cheese & Herb have golden edges, tender potato centers, and a cheesy topping that melts beautifully in just a few minutes.
The air fryer helps crisp the potato shells without deep-frying them. You can prepare the potatoes ahead of time, customize the toppings, and serve them straight from the basket while the cheese is warm and gooey.
This recipe uses simple ingredients you can find at most U.S. grocery stores. Serve the potato skins with sour cream, Greek yogurt, salsa, or your favorite dipping sauce for an easy crowd-pleasing dish.
Recipe Overview
- Prep time: 15 minutes
- Cook time: 35–45 minutes, depending on potato size and whether the potatoes are already cooked
- Total time: About 50–60 minutes
- Servings: 4
- Course: Appetizer, snack, or side dish
- Cuisine: American-inspired
- Cooking method: Air fryer
- Main ingredients: Russet potatoes, cheddar cheese, olive oil, garlic powder, and fresh herbs
Why You’ll Love These Loaded Potato Skins
- Crispy texture: Air frying helps the potato shells develop golden, crisp edges.
- Simple ingredients: You only need a handful of everyday ingredients.
- Easy to customize: Add cooked bacon, green onions, jalapeños, or diced tomatoes.
- Great for sharing: Serve them on a platter for parties, game nights, and family gatherings.
- Flexible serving options: Enjoy them as an appetizer, snack, or side dish with burgers and grilled chicken.
- Fresh herb flavor: Chives and parsley add freshness that balances the rich cheese.
Ingredients for Loaded Air Fryer Potato Skins
Use medium russet potatoes for sturdy skins that hold the filling well. Choose potatoes that are similar in size so they cook at roughly the same rate.
Main Ingredients
- 4 medium russet potatoes: Their thick skins are ideal for crisping and holding toppings.
- 1 tablespoon olive oil: Helps the potato skins brown and turn crisp.
- 1/2 teaspoon kosher salt: Seasons the potato shells.
- 1/2 teaspoon garlic powder: Adds a savory garlic flavor without extra moisture.
- 1/4 teaspoon black pepper: Gives the potatoes a mild, peppery taste.
- 1 cup shredded sharp cheddar cheese: Provides a rich flavor and smooth, melted topping.
- 2 tablespoons chopped fresh chives: Add a mild onion flavor and bright color.
- 1 tablespoon chopped fresh parsley: Brings a fresh herbal finish.
- 1/4 teaspoon smoked paprika, optional: Adds a gentle smoky note and warm color.
Optional Toppings
Choose one or more toppings to make the recipe your own:
- 3 strips cooked bacon, crumbled
- 2 tablespoons sliced green onions
- 2 tablespoons sour cream
- 2 tablespoons plain Greek yogurt
- 2 tablespoons finely diced jalapeños
- 2 tablespoons salsa
- A small pinch of red pepper flakes
Tip: Pat washed potatoes completely dry before cooking. Excess water can slow browning and make the skins less crisp.
How to Make Loaded Air Fryer Potato Skins with Cheese & Herb
Follow these steps for potato skins with crisp edges, fluffy centers, and melted cheese.
Step 1: Wash and Dry the Potatoes
Scrub the potatoes under cool running water to remove dirt from the skins. Dry them thoroughly with a clean kitchen towel.
Pierce each potato several times with a fork to allow steam to escape during cooking. Do not wrap the potatoes in foil because the foil can trap moisture and interfere with crisp skin.
Step 2: Cook the Whole Potatoes
Preheat your air fryer to 400°F (200°C) if your model recommends preheating.
Place the potatoes in the basket in a single layer, leaving space around them for air to circulate. Cook for about 30–40 minutes, turning them halfway through.
Cooking time depends on potato size and air fryer performance. The potatoes are ready when a fork slides into the center easily. If they remain firm, continue cooking in 5-minute increments.
Step 3: Let the Potatoes Cool Slightly
Transfer the cooked potatoes to a heat-safe plate or cutting board. Allow them to cool for about 5–10 minutes so you can handle them safely.
Cut each potato lengthwise into two halves. Use a spoon to scoop out most of the soft center, leaving a layer of potato about 1/4 inch thick against the skin.
Save the scooped potato for mashed potatoes, potato cakes, or soup. Leaving a sturdy layer inside each shell helps prevent the skins from breaking.
Step 4: Season the Potato Shells
Brush the inside and outside of each potato skin lightly with olive oil. Sprinkle both sides with salt, garlic powder, black pepper, and smoked paprika if using.
Arrange the shells in the air fryer basket with the cut side facing up. Avoid stacking them because crowded shells may cook unevenly.
Step 5: Air Fry Until Crisp
Air fry the empty shells at 400°F (200°C) for 5–8 minutes. Check them near the end of cooking because thinner skins can brown quickly.
The edges should look golden and feel firmer. If you prefer extra-crispy potato skins, cook for another 1–2 minutes while watching closely.
Step 6: Add the Cheese
Remove the basket carefully. Divide the shredded cheddar evenly among the potato shells.
For a richer cheese topping, combine cheddar with a little Monterey Jack. Keep the filling level below the edges so the cheese does not spill over excessively.
If you are using fully cooked bacon, sprinkle it over the cheese now. Do not add sour cream or other cold toppings before air frying.
Step 7: Melt the Cheese
Return the filled potato skins to the air fryer. Cook at 350°F (175°C) for 2–4 minutes, or until the cheese has melted.
Check frequently during the final minute. Cheese can brown quickly, especially in air fryers with strong top heating elements.
Step 8: Finish with Fresh Herbs
Carefully transfer the hot potato skins to a serving plate. Sprinkle chopped chives and parsley over the melted cheese.
Add green onions, jalapeños, or red pepper flakes if desired. Serve immediately with sour cream, Greek yogurt, or salsa on the side.
For the best texture, add wet toppings just before serving rather than placing them in the air fryer.
Tips for Extra-Crispy Potato Skins
- Choose russet potatoes: Their thick skins and fluffy interiors work well for this recipe.
- Dry the potatoes thoroughly: Water left on the surface can slow browning.
- Leave a thin potato layer: Scooping too deeply can make the shells fragile.
- Avoid overcrowding: Arrange the shells in a single layer so hot air can circulate.
- Use freshly shredded cheese: It often melts more smoothly than some pre-shredded blends.
- Add herbs at the end: Fresh parsley and chives keep their color and flavor when added after cooking.
- Adjust for your air fryer: Basket size and heating strength vary, so use visual cues as well as the suggested times.
Best Cheese and Herb Combinations
Sharp cheddar gives these potato skins a bold, classic flavor, but other combinations work well too.
- Cheddar and chives: A familiar baked-potato flavor with a fresh finish.
- Cheddar and parsley: Rich cheese balanced by a clean herbal taste.
- Cheddar and Monterey Jack: A creamy, stretchy cheese topping.
- Mozzarella and parsley: A milder flavor with a soft, melty texture.
- Cheddar and green onions: A savory option that pairs well with cooked bacon.
- Pepper Jack and cilantro: A spicier variation with a bright herbal note.
For the most balanced flavor, use one main cheese and one or two herbs rather than adding every topping at once.
What to Serve with Cheesy Potato Skins
These potato skins pair well with simple sides and dips. Try serving them with:
- Sour cream or plain Greek yogurt
- Fresh salsa or pico de gallo
- A crisp green salad
- Air-fried chicken tenders
- Grilled chicken or turkey burgers
- Steamed broccoli or roasted vegetables
- A vegetable platter with ranch dip
For a game-day spread, serve the skins alongside vegetables, wings, and two dipping sauces. For a lighter meal, pair two potato skin halves with a salad and a yogurt-based dip.
Storage and Reheating Instructions
How to Store Leftovers
Let the potato skins cool, then place them in an airtight container. Refrigerate within two hours of cooking and use within 3–4 days.
For the best quality, store sour cream, salsa, and other cold toppings separately. This helps the potato shells stay firmer during storage.
How to Reheat Potato Skins
Place the refrigerated potato skins in the air fryer in a single layer. Reheat at 350°F (175°C) for about 3–5 minutes, checking that the centers are hot and the cheese has melted again.
Add fresh herbs after reheating. Avoid reheating them with sour cream or other toppings that can become watery.
Can You Freeze Potato Skins?
You can freeze the cooked shells before adding the cheese and fresh herbs for better texture. Cool them completely, freeze them in a single layer, and transfer them to a freezer-safe container.
For best quality, use within about 2–3 months. Reheat from frozen until hot, then add cheese and cook until melted; timing will vary by shell size and air fryer.
Common Mistakes to Avoid
- Scooping out too much potato: Thin shells can split when you add the toppings.
- Skipping the crisping step: Adding cheese too early can leave the skins soft.
- Using wet toppings during cooking: Moisture can make the shells soggy.
- Overloading the basket: Crowding blocks airflow and leads to uneven browning.
- Cooking at one temperature for the entire recipe: A slightly lower temperature for melting the cheese helps reduce over-browning.
- Ignoring size differences: Smaller potatoes cook faster, so check them before larger ones.
Frequently Asked Questions
1. What potatoes are best for air fryer potato skins?
Russet potatoes are ideal because they have thick skins and fluffy centers that are easy to scoop out.
2. How long do potato skins take in the air fryer?
Whole medium potatoes usually take 30–40 minutes at 400°F, followed by 5–8 minutes to crisp the shells and 2–4 minutes to melt the cheese.
3. Why are my potato skins not crispy?
They may be damp, overcrowded, or not crisped long enough before adding cheese. Dry the skins and cook them in a single layer.
4. Can I make potato skins ahead of time?
Yes. Cook and scoop the potatoes ahead, refrigerate the shells, then season, crisp, fill, and melt the cheese shortly before serving.
5. Can I use a different type of cheese?
Yes. Monterey Jack, mozzarella, Pepper Jack, or a cheddar blend can work, depending on the flavor and melt you prefer.
6. Can I make these potato skins vegetarian?
Yes. Leave out the bacon and use cheese, herbs, green onions, and vegetables such as jalapeños or diced tomatoes.
7. How do I know when the potato skins are done?
The shells should have golden, crisp edges, and the cheese should be fully melted. The original potatoes must also be fork-tender before you scoop them.
8. Can I reheat leftover loaded potato skins?
Yes. Reheat them in an air fryer at 350°F for about 3–5 minutes, checking that the filling is hot before serving.
Final Thoughts
Loaded Air Fryer Potato Skins with Cheese & Herb are a practical way to turn simple potatoes into a crisp, savory appetizer. The combination of cheddar, garlic seasoning, chives, and parsley creates a classic flavor, while optional toppings let you adapt the recipe to your family or guests.
For the best results, cook the potatoes until tender, leave enough potato inside each shell, crisp the shells before adding cheese, and finish with fresh herbs. Serve them hot with your favorite dip for a snack that fits game day, parties, or an easy weekend meal.