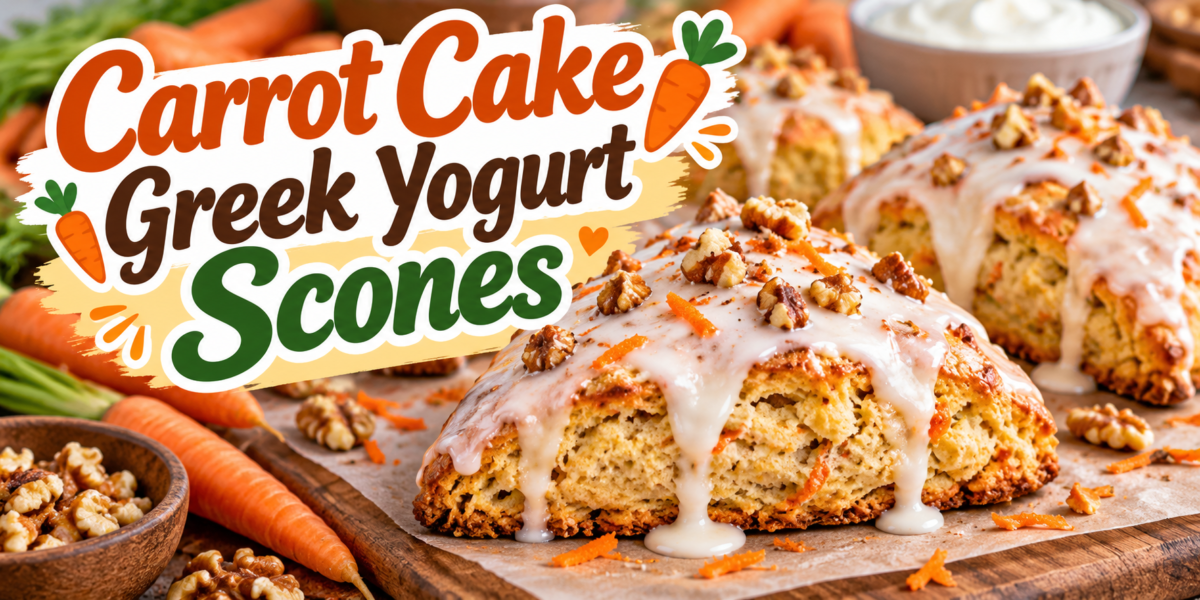
Carrot Cake Greek Yogurt Scones

Carrot Cake Scones

Carrot Cake Greek Yogurt Scones

Carrot Cake Scones combine the cozy flavor of classic carrot cake with the tender texture of homemade scones. Freshly grated carrots, warm cinnamon, Greek yogurt, chopped walnuts, and a light vanilla glaze create a delicious breakfast or snack. These scones are golden on the outside, soft inside, and easy to prepare.

The Greek yogurt adds moisture and a subtle tang while helping create a tender crumb. Fresh carrots bring natural sweetness, color, and texture. Cinnamon and vanilla provide the familiar flavor of carrot cake, while walnuts add a pleasant crunch.

These Carrot Cake Scones are perfect with coffee or tea. They also make a lovely addition to brunch, weekend breakfasts, bake sales, and family gatherings.

Prep Time: 20 minutes
Bake Time: 18–22 minutes
Total Time: About 42 minutes
Servings: 8 scones

Ingredients

For the Scones

2 cups all-purpose flour

1/3 cup granulated sugar

2 teaspoons baking powder

1/2 teaspoon baking soda

1/2 teaspoon salt

1 teaspoon ground cinnamon

1/4 teaspoon ground nutmeg

1/4 teaspoon ground ginger

6 tablespoons cold unsalted butter, cubed

3/4 cup finely grated carrots

1/2 cup plain Greek yogurt

1 large egg

1 teaspoon vanilla extract

1/3 cup chopped walnuts

For the Glaze

1/2 cup powdered sugar

1 tablespoon plain Greek yogurt

1 tablespoon milk

1/2 teaspoon vanilla extract

1/4 teaspoon cinnamon

Optional Toppings

Extra chopped walnuts

A little finely grated carrot

A pinch of cinnamon

Orange zest

Step-by-Step Instructions

Prepare the Oven and Baking Sheet

Preheat the oven to 400°F (200°C).

Line a baking sheet with parchment paper.

Set the tray aside while you prepare the dough.

A hot oven helps the scones rise quickly and develop a golden exterior. Proper oven temperature is important because a cooler oven can leave the centers heavy.

Prepare the Dry Ingredients

Add the flour, sugar, baking powder, baking soda, salt, cinnamon, nutmeg, and ginger to a large mixing bowl.

Whisk everything together until the spices are evenly distributed.

This dry mixture creates the flavorful base for the Carrot Cake Scones.

Make sure there are no large clumps of baking powder or baking soda.

Add the Cold Butter

Add the cold cubed butter to the flour mixture.

Use a pastry cutter or your fingertips to work the butter into the flour.

Stop when the mixture resembles coarse crumbs with a few small pieces of butter still visible.

Do not completely melt or soften the butter.

Cold butter creates small pockets of steam during baking. Those pockets help produce a tender and flaky texture.

This step is especially important when making Carrot Cake Scones because it keeps the finished pastry light instead of dense.

Prepare the Wet Mixture

In a separate bowl, whisk together the Greek yogurt, egg, and vanilla extract.

Mix until smooth.

Add the finely grated carrots and stir gently.

Use finely grated carrots rather than large shreds. Smaller pieces distribute more evenly through the dough and become tender during baking.

The yogurt mixture provides moisture without making the dough overly heavy.

Combine the Ingredients

Pour the wet mixture into the bowl containing the dry ingredients.

Add the chopped walnuts.

Use a wooden spoon or rubber spatula to gently combine everything.

Mix only until the dough begins to come together.

Do not overmix.

A few dry crumbs are fine at this stage.

Overworking the dough can develop too much gluten, which may make the finished scones tough.

The dough should be soft and slightly sticky.

These Carrot Cake Scones get their tender texture from gentle mixing and cold butter.

Shape the Dough

Lightly flour a clean work surface.

Transfer the dough to the surface.

Gently bring it together with your hands.

Avoid kneading it like bread dough.

Shape the mixture into a round disc about 1 inch thick.

If the dough feels very sticky, sprinkle a small amount of flour over the surface.

Do not add too much flour because excess flour can make the scones dry.

Use a sharp knife to cut the disc into 8 equal wedges.

Carefully separate the wedges and place them on the prepared baking sheet.

Leave some space between each piece.

Bake the Scones

Place the baking sheet in the preheated oven.

Bake for approximately 18 to 22 minutes.

The scones should become lightly golden around the edges.

The tops should look set and slightly golden.

Insert a toothpick into the center of one scone.

It should come out without wet dough attached.

Avoid overbaking.

Once the scones are finished, remove the tray from the oven.

Allow them to cool on the baking sheet for about 5 minutes.

Then transfer them to a wire rack.

The warm aroma of cinnamon and baked carrots makes these Carrot Cake Scones especially inviting.

Prepare the Glaze

While the scones cool, prepare the glaze.

Add powdered sugar to a small bowl.

Stir in Greek yogurt, milk, vanilla extract, and cinnamon.

Mix until smooth.

If the glaze is too thick, add a few drops of milk.

If it is too thin, add a little more powdered sugar.

The finished glaze should be thick enough to drizzle slowly from a spoon.

Allow the scones to cool for at least 10 minutes before glazing.

A slightly cooled surface helps the glaze stay visible instead of melting completely.

Decorate the Scones

Drizzle the glaze over the cooled scones.

Sprinkle chopped walnuts over the top.

Add a tiny amount of fresh carrot if desired.

A little cinnamon or orange zest also works beautifully.

Let the glaze sit for several minutes before serving.

The creamy topping adds sweetness while keeping the carrot cake flavor recognizable.

The finished Carrot Cake Scones should have a golden exterior, tender center, visible carrot pieces, and a light creamy drizzle.

Tips for the Best Results

Use cold butter for the best texture.

Finely grate the carrots so they blend naturally into the dough.

Do not squeeze the carrots completely dry because their moisture helps keep the scones tender.

Measure flour carefully.

Too much flour can produce dry scones.

Avoid overmixing the dough.

Handle it gently when shaping.

Keep the dough fairly thick before cutting.

A disc that is too thin can produce flat scones.

Bake immediately after shaping.

This allows the baking powder and baking soda to work effectively in the hot oven.

These simple techniques help make Carrot Cake Scones soft, golden, and flavorful.

Easy Variations

Pecan Version

Replace the walnuts with chopped pecans.

Pecans provide a buttery flavor that pairs well with carrots and cinnamon.

Raisin Version

Add 1/3 cup raisins to the dough.

Golden raisins provide extra sweetness and chewy texture.

Coconut Version

Add 1/4 cup unsweetened shredded coconut.

Coconut gives the scones a subtle tropical note.

Orange Carrot Version

Add 1 teaspoon finely grated orange zest to the dough.

You can also add a little orange zest to the glaze.

Cream Cheese Glaze

For a richer topping, combine softened cream cheese with powdered sugar, vanilla, and a small amount of milk.

The cream cheese flavor makes the scones taste even more like carrot cake.

Each variation gives the Carrot Cake Scones a slightly different flavor while keeping the basic recipe simple.

Serving Suggestions

Serve the scones slightly warm or at room temperature.

A cup of coffee pairs beautifully with the cinnamon and vanilla flavors.

Tea is another excellent choice.

For brunch, arrange the scones on a serving platter with fresh fruit.

You can also serve them with plain Greek yogurt and a little honey.

Fresh berries add color and a refreshing contrast.

For a special breakfast, serve one scone with scrambled eggs and fresh fruit.

These Carrot Cake Scones are sweet enough to feel like a treat without needing a heavy dessert.

Storage Instructions

Allow the scones to cool completely before storing.

Place them in an airtight container.

Keep them at room temperature for up to 2 days.

For longer storage, refrigerate them for up to 4 days.

The glaze may soften slightly during refrigeration.

For the best texture, allow refrigerated scones to come to room temperature before serving.

You can also warm them gently in the microwave for a few seconds.

Avoid overheating because the glaze can melt and the scone can become dry.

Freezing Instructions

These scones can be frozen successfully.

Place completely cooled scones in a freezer-safe container or bag.

Separate layers with parchment paper.

Freeze for up to 2 months for the best quality.

Thaw overnight in the refrigerator or at room temperature.

Add fresh glaze after thawing if you want the best presentation.

For even better results, freeze the unbaked wedges on a tray.

Once firm, transfer them to a freezer-safe container.

Bake from frozen with a few extra minutes added to the cooking time.

This makes Carrot Cake Scones convenient for future breakfasts and unexpected guests.

Common Mistakes to Avoid

Do not use warm butter.

Avoid adding too much flour.

Do not overmix the dough.

Do not make the dough too thin.

Avoid using large chunks of raw carrot.

Do not overbake the scones.

Wait until the scones cool before adding the glaze.

Avoid storing them while they are still warm because trapped steam can make them soggy.

Using fresh baking powder and baking soda also helps the scones rise properly.

Frequently Asked Questions

Can I use whole-wheat flour?

Yes. Replace part of the all-purpose flour with whole-wheat flour. Using all whole-wheat flour may create a denser texture.

Can I make these without walnuts?

Absolutely. Simply leave them out or replace them with pecans, almonds, or pumpkin seeds.

Can I use regular yogurt?

Yes. Plain yogurt can replace Greek yogurt, although the dough may be slightly softer.

Can I make the dough ahead of time?

Yes. Shape the dough, cover it well, and refrigerate it overnight. Bake it the next morning.

Why are my scones dry?

Too much flour, overmixing, or overbaking can cause dryness. Measure carefully and remove the scones as soon as they are fully baked.

Can I make smaller scones?

Yes. Divide the dough into 10 or 12 wedges instead of 8. Reduce the baking time slightly.

Can I skip the glaze?

Yes. The scones are delicious without it. A light dusting of powdered sugar can also work.

Can I add raisins and walnuts together?

Yes. The combination gives the scones extra texture and sweetness.

Can I use baby carrots?

Yes, but grate them finely before adding them to the dough.

Are these good for breakfast?

Yes. They work well as a breakfast pastry, snack, or brunch treat.

Nutrition Information

Approximate nutrition per scone, based on 8 servings:

Calories: 320 kcal

Protein: 7g

Carbohydrates: 42g

Fat: 14g

Fiber: 2g

Sugar: 16g

Sodium: 300mg

Nutrition values are estimates and can vary depending on the exact ingredients and brands used.

Why You Will Love This Recipe

These scones bring together two comforting favorites in one simple bake.

The carrots add natural color and moisture.

Greek yogurt creates a tender crumb.

Cinnamon provides warm spice.

Walnuts add crunch.

Vanilla gives the dough a sweet bakery-style aroma.

The glaze adds a creamy finish without requiring complicated decorating.

Another advantage is the simple preparation.

You do not need a stand mixer.

You can mix the dough by hand in one bowl and shape it on the counter.

The scones bake quickly, making them practical for weekend breakfasts.

They also look attractive enough for brunch tables and gatherings.

For anyone who enjoys carrot cake, these Carrot Cake Scones offer familiar flavors in an easy-to-serve format.

Final Thoughts

Carrot Cake Scones are a delicious way to enjoy the warm flavors of carrot cake in a tender, golden pastry.

Fresh carrots provide moisture and color.

Greek yogurt helps create a soft crumb.

Cinnamon, nutmeg, ginger, and vanilla build a warm flavor profile.

Walnuts add a satisfying crunch.

The simple yogurt glaze brings everything together with a creamy finish.

For the best results, keep the butter cold and avoid overworking the dough.

Use finely grated carrots and measure the flour carefully.

Bake until the edges are golden and the centers are cooked through.

Serve the scones warm with coffee, tea, fresh fruit, or Greek yogurt.

You can also prepare the dough ahead of time or freeze baked scones for later.

With their tender texture, warm spices, fresh carrots, and light glaze, Carrot Cake Scones are perfect for breakfast, brunch, afternoon tea, or a homemade snack.

Once you try these Carrot Cake Scones, they can become a favorite whenever you want something that combines the comforting flavor of carrot cake with the simple appeal of a freshly baked scone.
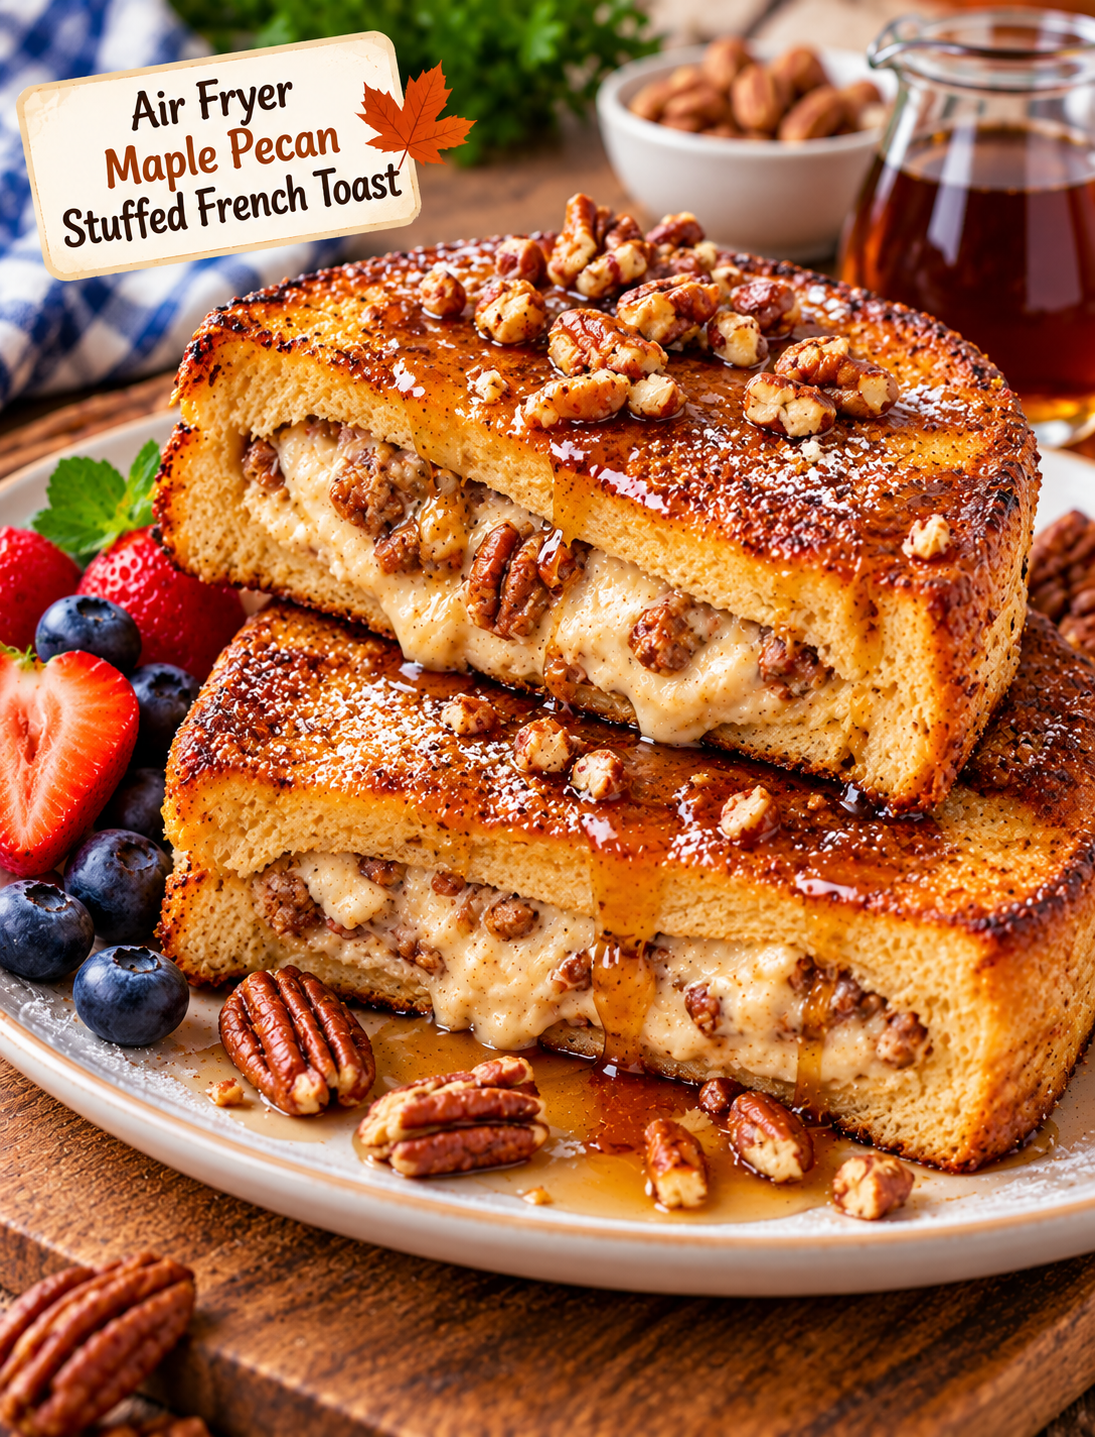
Air Fryer Maple Pecan Stuffed French Toast

Air fryer maple pecan stuffed French toast with golden brioche, maple syrup, and chopped pecans

Air Fryer Maple Pecan Stuffed French Toast

If you love warm French toast with crispy edges, sweet maple flavor, and crunchy pecans, this Air Fryer Maple Pecan Stuffed French Toast is worth trying. Thick slices of bread are filled with a creamy maple-pecan mixture, dipped in a cinnamon egg custard, and cooked in the air fryer until golden on the outside.

The center stays soft and rich while the edges become lightly crisp. A drizzle of warm maple syrup adds the perfect finishing touch.

This stuffed French toast is easy enough for a weekend breakfast but special enough for a holiday brunch. It also gives you the cozy flavors of maple, cinnamon, brown sugar, and toasted pecans in every bite.

Why You’ll Love This Recipe

  • Crispy outside: The air fryer creates golden edges without deep frying.
  • Creamy center: The maple pecan filling melts into the warm bread.
  • Easy ingredients: Most ingredients are common pantry and refrigerator staples.
  • Quick preparation: The filling and custard come together in minutes.
  • Perfect for brunch: It works well for weekend breakfasts, family brunches, and fall gatherings.
  • Customizable: You can add fruit, spices, or your favorite breakfast toppings.
  • Less mess: Air frying keeps the cooking process simple and contained.

Ingredients You’ll Need

For the Maple Pecan Filling

  • 4 oz cream cheese, softened
  • 2 tablespoons pure maple syrup
  • 1 tablespoon brown sugar
  • ½ teaspoon vanilla extract
  • ⅓ cup finely chopped pecans
  • ¼ teaspoon ground cinnamon
  • Pinch of salt

French Toast

  • 8 thick slices brioche or Texas toast
  • 2 large eggs
  • ½ cup whole milk
  • 1 tablespoon pure maple syrup
  • 1 teaspoon vanilla extract
  • ½ teaspoon ground cinnamon
  • ¼ teaspoon ground nutmeg
  • Pinch of salt
  • Cooking spray

Serving

  • Warm maple syrup
  • Chopped toasted pecans
  • Powdered sugar
  • Fresh berries, optional
  • Sliced banana, optional

Best Bread for Stuffed French Toast

Thick bread works best because it can hold the filling without becoming too soft. Brioche gives the French toast a rich, buttery texture, while Texas toast creates a sturdy, classic breakfast-style result.

Challah is another excellent choice because its slightly sweet flavor pairs well with maple and pecans.

Avoid very thin sandwich bread because it can tear when you add the filling or dip it into the egg mixture.

If your bread is very fresh and soft, leave the slices uncovered for 30 to 60 minutes before preparing the recipe. Slightly firm bread absorbs the custard better without falling apart.

How to Make Air Fryer Maple Pecan Stuffed French Toast

Step 1: Make the Maple Pecan Filling

Add the softened cream cheese, maple syrup, brown sugar, vanilla, cinnamon, and salt to a small bowl.

Mix until smooth and creamy.

Fold in the finely chopped pecans until evenly distributed.

The filling should be thick enough to spread without running out of the bread.

Step 2: Prepare the Bread

Lay the bread slices on a clean cutting board.

Spread about 1½ tablespoons of the maple pecan mixture over four slices.

Leave a small border around the edges so the filling does not squeeze out when the bread is pressed together.

Place another slice of bread on top of each filled slice.

Press the edges gently to help seal the sandwich.

Step 3: Make the Egg Custard

Whisk the eggs, milk, maple syrup, vanilla, cinnamon, nutmeg, and salt in a shallow bowl.

Mix until the eggs are completely blended and the spices are evenly distributed.

A shallow dish makes it easier to coat both sides of the stuffed bread evenly.

Step 4: Dip the Stuffed Bread

Dip each stuffed sandwich into the egg mixture.

Coat both sides quickly and evenly.

Do not soak the bread for too long because excess custard can make the sandwich difficult to handle and may cause the filling to leak.

Let any extra egg mixture drip back into the bowl.

Step 5: Preheat the Air Fryer

Preheat the air fryer to 350°F (175°C) for about 3 minutes.

Lightly spray the air fryer basket with cooking spray.

Preheating helps the bread begin crisping as soon as it enters the basket.

Step 6: Air Fry the French Toast

Place the stuffed French toast in the basket in a single layer.

Leave a little space between each piece so hot air can circulate around the bread.

Lightly spray the tops with cooking spray.

Air fry at 350°F for 8 to 10 minutes, flipping carefully halfway through.

Cook until both sides are golden brown and the center is hot.

Air fryer models can vary, so begin checking around the 8-minute mark.

Step 7: Add the Toppings

Transfer the French toast to serving plates.

Drizzle with warm maple syrup and sprinkle with chopped pecans.

Add a light dusting of powdered sugar if desired.

Fresh berries or sliced bananas also make a great topping.

Serve immediately while the outside is crisp and the maple pecan filling is warm.

Tips for Perfect Stuffed French Toast

Use softened cream cheese.
Soft cream cheese blends more easily with the maple syrup and prevents lumps in the filling.

Do not overfill the bread.
Too much filling can leak during cooking and make the outside difficult to crisp.

Use thick bread.
Brioche, challah, and Texas toast provide enough structure for stuffing.

Dip quickly.
A short dip gives the bread enough custard flavor without making it soggy.

Leave space in the basket.
Overcrowding blocks airflow and can prevent the bread from becoming evenly crisp.

Flip carefully.
Use a wide spatula or silicone turner to keep the stuffed slices intact.

Watch the final minutes.
The maple and brown sugar can brown quickly, so check the French toast near the end of cooking.

Easy Variations

Apple Maple Pecan

Add 2 tablespoons of finely diced, sautéed apple to the cream cheese filling. The apple adds a soft texture and pairs naturally with maple and cinnamon.

Cinnamon Roll Style

Add ½ teaspoon of extra cinnamon to the filling and drizzle the finished French toast with a simple powdered sugar glaze.

Chocolate Pecan

Mix 1 tablespoon of mini chocolate chips into the maple pecan filling for a richer dessert-style breakfast.

Banana Maple

Add thin banana slices inside the sandwich and serve with extra banana on top.

Holiday Version

Add a small pinch of ground ginger and cloves to the custard for a warmer holiday spice profile.

What to Serve With Maple Pecan Stuffed French Toast

This recipe is filling on its own, but a few simple sides can turn it into a complete brunch.

Serve it with:

  • Fresh strawberries or blueberries
  • Sliced bananas
  • Greek yogurt
  • Turkey sausage
  • Scrambled eggs
  • Crispy breakfast potatoes
  • Fresh orange slices
  • Hot coffee
  • Apple cider
  • Cinnamon tea

For a holiday breakfast, serve the French toast with fresh berries and warm maple syrup for a colorful presentation.

How to Store Leftovers

Allow leftover French toast to cool completely before storing.

Place the pieces in an airtight container and refrigerate for up to 3 days.

For the best texture, reheat them in the air fryer at 325°F for 3 to 5 minutes. This helps restore some of the crispness without drying out the center.

Avoid microwaving for too long because the bread can become soft and chewy.

Can You Freeze Stuffed French Toast?

Yes. Allow the cooked French toast to cool completely, then wrap each piece individually in parchment paper or plastic wrap.

Place the wrapped pieces in a freezer-safe bag or container and freeze for up to 2 months.

When ready to eat, reheat from frozen in a preheated air fryer at 325°F for about 8 to 10 minutes, checking the center before serving.

Common Mistakes to Avoid

Using thin bread: Thin slices can break when stuffed and dipped.

Adding too much filling: A thick layer can spill out during cooking.

Soaking the bread: Long soaking makes the bread fragile and can lead to a soggy texture.

Overcrowding the basket: Proper airflow is important for crisp edges.

Skipping the flip: Flipping helps both sides brown evenly.

Using too much syrup before cooking: Keep the maple syrup mainly for the filling and finishing drizzle so the bread can crisp properly.

Frequently Asked Questions

Can I use regular sandwich bread?

Yes, but thick-cut bread is better because it holds the filling and custard more securely.

What temperature should I use for air fryer French toast?

Cook stuffed French toast at 350°F (175°C) for about 8 to 10 minutes, flipping halfway through.

Can I make this recipe without cream cheese?

Yes. Mashed ricotta or a thick mascarpone-style filling can be used, although the texture will be slightly different.

Can I use walnuts instead of pecans?

Yes. Chopped walnuts work well and provide a similar crunchy texture.

Can I prepare the stuffed French toast ahead of time?

Yes. Assemble the sandwiches and refrigerate them covered for up to several hours before dipping and air frying.

How do I keep the filling from leaking?

Use a moderate amount of filling, leave a small border around the bread, and press the edges together firmly before dipping.

What is the best maple syrup for this recipe?

Pure maple syrup provides the strongest natural maple flavor and pairs especially well with pecans and cinnamon.

Final Thoughts

This Air Fryer Maple Pecan Stuffed French Toast combines everything that makes a cozy breakfast satisfying: crisp golden bread, creamy filling, toasted pecans, warm cinnamon, and real maple flavor.

The air fryer makes the cooking process simple while giving the outside a deliciously crisp finish. Serve it fresh with warm maple syrup and your favorite fruit for an easy breakfast that feels special without requiring complicated preparation.

If you enjoy classic French toast but want something more indulgent and fun, these stuffed slices are a delicious way to change up your breakfast routine.


Air Fryer French Toast Crunch Cups

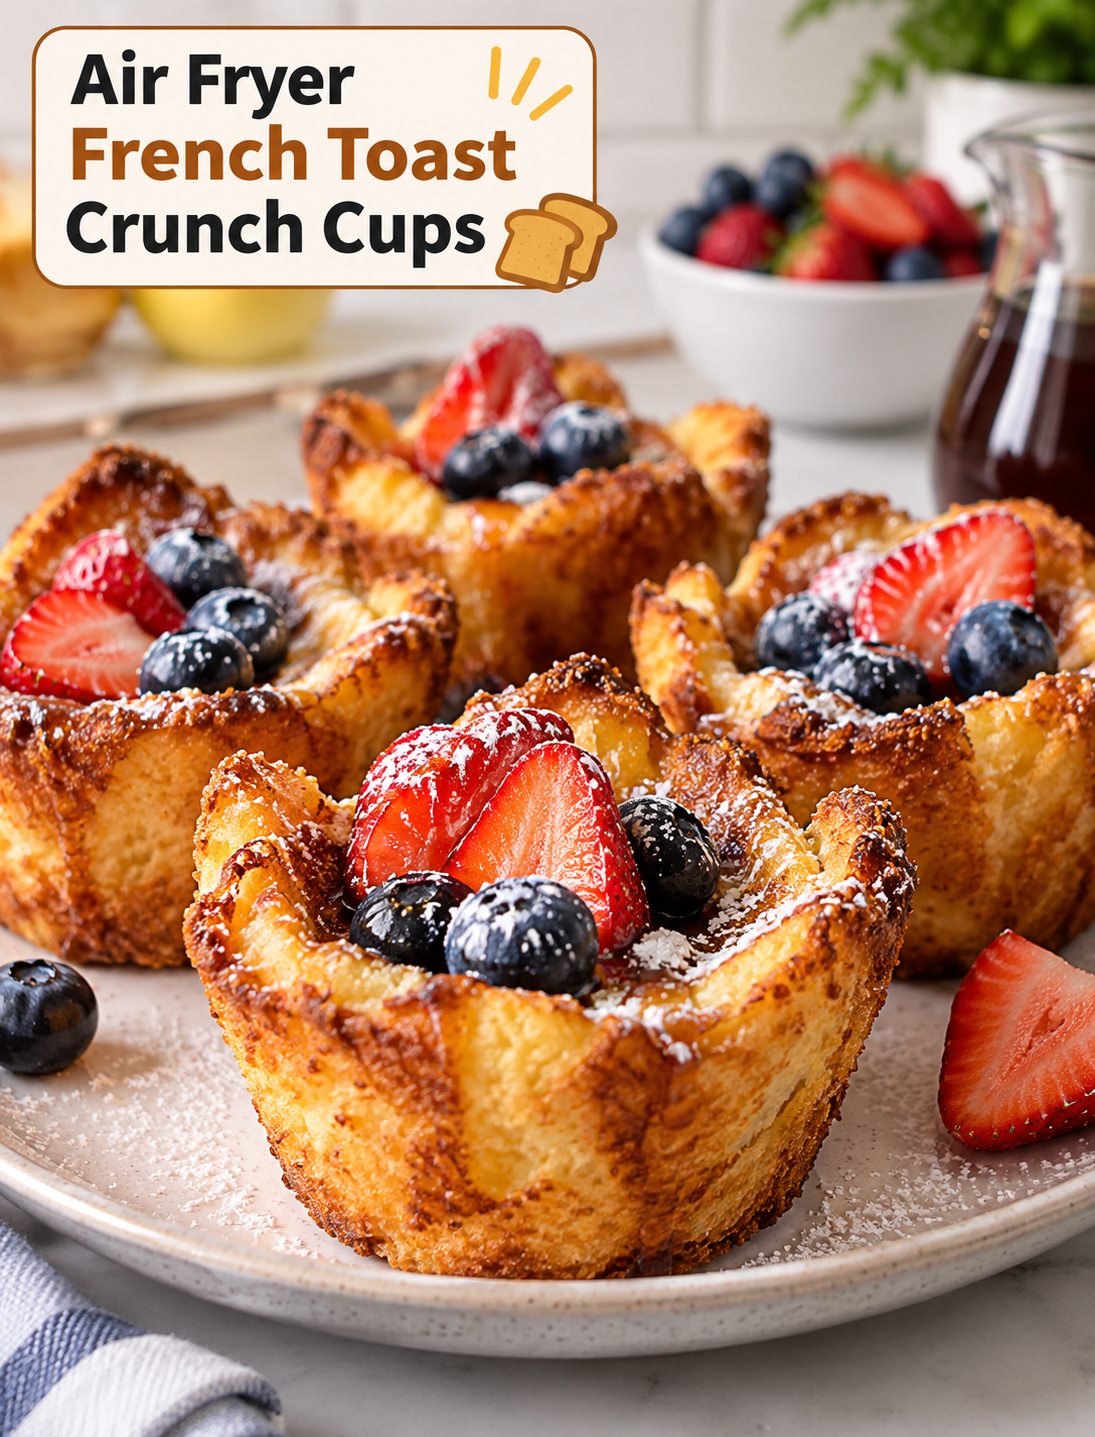
Golden crispy Air Fryer French Toast Crunch Cups topped with fresh berries and powdered sugar on a breakfast plate

Air Fryer French Toast Crunch Cups

Air Fryer French Toast Crunch Cups turn simple slices of bread into crisp, golden breakfast cups with a soft, sweet center. They combine the familiar flavor of French toast with a fun cup shape that makes breakfast easy to serve and enjoy.

This recipe uses basic ingredients such as bread, eggs, milk, cinnamon, vanilla, and a little sugar. The air fryer creates a lightly crisp outside while the egg mixture gives the center a tender French toast texture. Fresh berries, powdered sugar, maple syrup, or chopped nuts can be added before serving.

These breakfast cups are useful for busy mornings because they cook quickly and can be prepared in small batches. They also make a fun option for weekend brunch, family breakfasts, or holiday mornings.

Why You’ll Love These French Toast Cups

The best part of these French toast cups is their texture. The edges become crisp and lightly browned, while the center stays soft and custardy. Each cup holds its shape well enough to eat by hand or serve with a fork.

The recipe also works with common pantry ingredients. You do not need a complicated batter, deep frying, or a large skillet. An air fryer provides even circulating heat, which helps the bread develop a crunchy exterior.

The individual portions also make serving simple. Everyone can add their favorite toppings without changing the basic recipe.

Ingredients You’ll Need

Bread: Use soft sandwich bread, brioche, or thick-cut bread. Slightly stale bread can absorb the egg mixture without becoming too soggy.

Eggs: Eggs create the rich custard that gives French toast its classic texture.

Milk: Whole milk provides a creamy result, but 2% or other regular milk can also work.

Cinnamon: Ground cinnamon adds warm spice and a familiar French toast flavor.

Vanilla extract: A small amount gives the custard a sweeter bakery-style aroma.

Sugar: Granulated sugar lightly sweetens the mixture and helps the cups brown.

Butter or cooking spray: Use a small amount to grease the air fryer basket or molds and prevent sticking.

Toppings: Maple syrup, powdered sugar, fresh strawberries, blueberries, bananas, pecans, or walnuts are easy finishing options.

For a richer flavor, brioche or challah is an excellent choice. For a lighter breakfast, regular whole-wheat sandwich bread can be used.

How to Make Air Fryer French Toast Crunch Cups

Start by cutting the bread into pieces that can fit neatly into silicone muffin cups or another air-fryer-safe cup mold. Flatten each slice gently with a rolling pin or your hands. Flattening the bread makes it easier to shape without tearing.

Lightly grease the cups with cooking spray or melted butter. Press the bread into each cup, allowing the edges to rise slightly above the rim. Avoid pressing too hard because the bread needs enough space to hold the custard.

In a bowl, whisk the eggs, milk, cinnamon, vanilla, and sugar until the mixture is smooth. Whisking thoroughly helps distribute the cinnamon and sweetener evenly.

Pour a small amount of the egg mixture into each bread cup. Do not overfill the cups because the custard expands slightly while cooking and can spill over the sides.

Preheat the air fryer if your model requires preheating. Arrange the filled cups in the basket with enough space for hot air to circulate around them.

Air fry until the bread edges are crisp and golden and the egg mixture in the center is fully set. Cooking time can vary between air fryer models, so begin checking toward the end of the recommended cooking range.

Let the cups rest for a few minutes before removing them from the molds. Serve warm with your preferred toppings.

Tips for Crispy French Toast Cups

Use bread that is firm enough to hold its shape. Very fresh, thin bread can become soft when exposed to the custard.

Do not soak the bread before shaping it. Pressing the bread into the mold first and adding the custard afterward helps maintain a crisp outer layer.

Keep the egg mixture inside the bread cup rather than filling it to the top. A smaller amount cooks more evenly and reduces the chance of overflow.

Avoid overcrowding the air fryer basket. Proper airflow helps the exposed bread edges become crisp and evenly browned.

Check the cups early during the first batch. Air fryer temperatures and basket designs vary, so your cooking time may be shorter or longer than another model.

For extra crunch, sprinkle a small amount of finely chopped pecans or walnuts over the tops before cooking.

Best Toppings and Serving Ideas

Maple syrup is the classic topping for these breakfast cups, but there are many ways to change the flavor.

Fresh strawberries and blueberries add bright fruit flavor and natural sweetness. Sliced bananas pair well with cinnamon and maple syrup. Powdered sugar gives the cups a simple bakery-style finish.

For a crunchy topping, add chopped pecans, walnuts, or almonds after cooking. A spoonful of Greek yogurt can add a creamy contrast to the crisp bread.

For special occasions, serve the cups on a platter with several toppings in small bowls. This creates an easy breakfast bar where everyone can customize their own portion.

You can also serve them with scrambled eggs, turkey sausage, fresh fruit, or yogurt for a more complete breakfast.

How to Store and Reheat

Allow leftover cups to cool before placing them in an airtight container. Refrigerate them and use them within a few days for the best quality.

To reheat, place the cups back into the air fryer for a few minutes until warmed through. The circulating heat helps restore some of the crisp texture that can be lost during refrigeration.

Avoid adding syrup before storing the cups because moisture can make the bread softer. Add maple syrup and other wet toppings immediately before serving.

Easy Recipe Variations

For a cinnamon-sugar version, increase the cinnamon slightly and add a light sprinkle of cinnamon sugar before cooking.

For a berry version, place a few small pieces of blueberries or strawberries into the center before air frying. Keep the fruit pieces small so the custard cooks evenly.

For a banana-nut version, add thin banana slices and finely chopped pecans after cooking, then finish with a small drizzle of maple syrup.

For a chocolate breakfast treat, add a few mini chocolate chips to the custard before cooking. Use them sparingly because chocolate can melt quickly.

You can also make a less-sweet version by reducing the sugar and serving the cups with fresh fruit and plain Greek yogurt.

Common Mistakes to Avoid

Using too much liquid is one of the easiest ways to make French toast cups soggy. Add only enough custard to fill the bread without flooding the mold.

Overcrowding the basket can prevent the bread from becoming crisp. Cook in batches when necessary.

Using oversized bread pieces can make the cups difficult to shape. Trim the bread so it fits comfortably inside the molds.

Removing the cups immediately can cause them to break apart. Give them a short resting period so the custard can finish setting.

Finally, do not assume every air fryer cooks at the same speed. Start checking early and adjust the cooking time based on the appearance and texture of your first batch.

Frequently Asked Questions

Can I use regular sandwich bread?

Yes, regular sandwich bread works well, although brioche or thick-cut bread creates a richer and sturdier cup.

Do I need to preheat the air fryer?

Preheating can help the cups begin cooking evenly, but follow your air fryer manufacturer’s instructions because models differ.

Can I make these French toast cups ahead of time?

Yes, prepare and refrigerate the cooked cups, then reheat them in the air fryer before serving.

Why are my French toast cups soggy?

Too much custard, very fresh bread, or overcrowding the air fryer can prevent the cups from becoming crisp.

Can I use dairy-free milk?

Yes, unsweetened almond, oat, or soy milk can replace regular milk in the custard mixture.

What bread is best for this recipe?

Brioche, challah, thick-cut white bread, and sturdy sandwich bread all work well for individual French toast cups.

Can I add fruit to the cups?

Yes, small pieces of berries or banana can be added, but avoid overfilling the cups so the custard cooks properly.

How do I make them extra crunchy?

Use slightly stale bread, avoid overfilling with custard, leave space between the cups, and cook until the edges are deeply golden.

Final Thoughts

Air Fryer French Toast Crunch Cups are an easy way to give classic French toast a fun individual shape and crisp texture. With simple ingredients and flexible toppings, they can fit a quick weekday breakfast or a relaxed weekend brunch.

Keep the bread sturdy, use a moderate amount of custard, and allow enough air circulation around the cups for the best texture. Once you have the basic method down, you can switch up the bread, spices, fruit, nuts, and toppings to create a different breakfast every time.