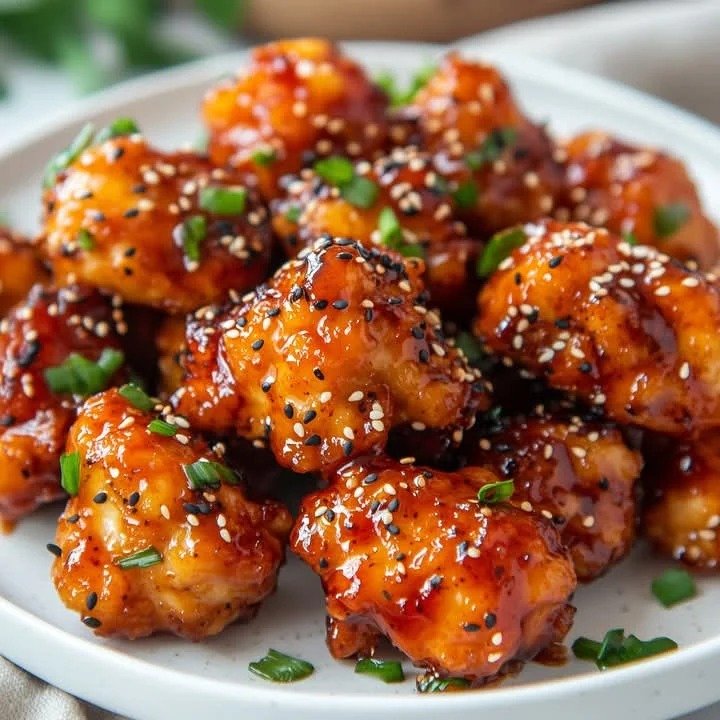
Spicy Honey Garlic Chicken Bites

Spicy Honey Garlic Chicken Bites

These Spicy Honey Garlic Chicken Bites are crispy on the outside, tender inside, and covered in an irresistible sticky glaze. The seasoned flour and cornstarch coating gives the chicken a golden crunch, while honey, garlic, soy sauce, hot sauce, and butter create a perfect balance of sweet, savory, spicy, and tangy flavors.

They make a fantastic quick dinner served with rice and vegetables, but they are equally delicious as a shareable appetizer for family gatherings or casual entertaining.

Prep Time: 15 minutes
Cook Time: 20 minutes
Total Time: 35 minutes
Servings: 4–6

Ingredients

For the Chicken & Coating

1.5 lbs (680g) boneless, skinless chicken breasts or thighs, cut into bite-sized chunks
1 cup all-purpose flour
½ cup cornstarch
1 large egg
Vegetable oil, for pan-searing or shallow frying
1 tsp salt
½ tsp black pepper
½ tsp garlic powder
½ tsp paprika

For the Spicy Honey Garlic Sauce

¼ cup honey
3–4 cloves garlic, finely minced
1–2 tbsp soy sauce
1–2 tbsp Sriracha or hot sauce
½ tsp crushed red pepper flakes
1 tbsp unsalted butter
1 tsp apple cider vinegar or rice vinegar

For the Garnish

1 tbsp toasted black and white sesame seeds
2 tbsp finely sliced scallions

Instructions

Prepare the Chicken

Pat the chicken pieces dry with paper towels. Cut them into evenly sized bite-sized chunks so they cook at the same rate.

Place the chicken in a bowl and season with salt, black pepper, garlic powder, and paprika. Toss well to coat every piece evenly.

Prepare the Coating

Place the flour and cornstarch in a shallow bowl and mix thoroughly.

In a separate bowl, whisk the egg until smooth.

Dip each seasoned chicken piece into the egg, allowing any excess to drip off. Then transfer it to the flour and cornstarch mixture, tossing and pressing lightly so the coating adheres well.

Shake off any excess coating and place the coated chicken pieces on a clean plate or tray.

The combination of flour and cornstarch helps create a lighter, crispier exterior than flour alone.

Heat the Oil

Pour enough vegetable oil into a large skillet to create a shallow layer. Heat over medium to medium-high heat.

The oil should be hot enough to make the chicken sizzle immediately when it touches the pan, but it should not be smoking.

For the best texture, avoid adding too many chicken pieces at once. Work in batches if necessary.

Cook the Chicken

Carefully place the coated chicken pieces into the hot oil, leaving some space between them.

Cook for approximately 3–5 minutes per side, turning as needed, until the coating is golden brown and crisp and the chicken is cooked through.

Transfer the cooked chicken to a wire rack or paper towel-lined plate to drain excess oil.

Continue cooking the remaining chicken in batches, adding a little more oil if needed.

Make the Spicy Honey Garlic Sauce

While the chicken is cooking, prepare the sauce.

Melt the butter in a clean skillet or saucepan over medium-low heat. Add the minced garlic and cook for about 30–60 seconds, stirring frequently, until fragrant.

Add the honey, soy sauce, Sriracha or hot sauce, crushed red pepper flakes, and vinegar.

Stir well and let the sauce gently simmer for about 2–3 minutes. It should become glossy and slightly thickened.

Avoid boiling the sauce aggressively because the honey can burn quickly.

Coat the Chicken

Add the crispy chicken bites to the warm sauce.

Toss gently until every piece is evenly coated in the sticky honey garlic glaze. Continue tossing for about 1–2 minutes over low heat so the sauce clings to the crispy coating.

Remove from the heat as soon as the chicken is thoroughly glazed.

Garnish and Serve

Transfer the chicken bites to a serving platter.

Sprinkle with toasted black and white sesame seeds and finely sliced scallions.

Serve immediately while the chicken is hot, crispy, and coated in the glossy spicy honey garlic sauce.

Tips

Cut the Chicken Evenly

Uniform bite-sized pieces cook more consistently and help prevent some pieces from becoming dry while others are still undercooked.

Pat the Chicken Dry

Removing excess moisture from the chicken helps the seasoned flour mixture adhere better and encourages a crispier coating.

Do Not Skip the Cornstarch

Cornstarch is an important part of the coating because it helps create a crisp, light texture that stays delicious beneath the sticky glaze.

Avoid Overcrowding the Pan

Adding too much chicken at once can lower the oil temperature and cause the coating to absorb more oil. Cook in batches when necessary.

Keep the Sauce Gentle

Honey can burn quickly over high heat. Keep the sauce at medium-low heat and stir frequently while it thickens.

Adjust the Spice Level

Use less Sriracha and fewer red pepper flakes for a milder sauce. For more heat, increase either ingredient gradually until you reach your preferred level.

Toss Right Before Serving

The chicken is crispiest immediately after cooking. Coat it in the sauce shortly before serving so the exterior maintains as much texture as possible.

Use a Wire Rack

If possible, place cooked chicken on a wire rack instead of stacking it directly on a plate. This allows excess oil to drain while keeping air circulating around the crispy coating.

Variations

Make It Milder

Reduce the Sriracha or hot sauce and omit the crushed red pepper flakes. The honey garlic sauce will still provide plenty of flavor without as much heat.

Make It Extra Spicy

Add additional Sriracha, red pepper flakes, or a small pinch of cayenne pepper to the sauce.

Use Chicken Thighs

Boneless, skinless chicken thighs can be used instead of chicken breasts. They are naturally juicy and work particularly well with the sticky glaze.

Add Fresh Ginger

Add 1 teaspoon of finely grated fresh ginger to the sauce with the garlic for a warm, aromatic flavor.

Add Lime

Replace the vinegar with fresh lime juice or add a small squeeze of lime juice at the end for a bright citrus finish.

Make It a Rice Bowl

Serve the chicken over steamed white rice, brown rice, or jasmine rice with vegetables and extra scallions.

Add Vegetables

Toss the finished chicken with lightly sautéed broccoli, bell peppers, snap peas, or carrots for a complete meal.

Make It an Appetizer

Serve the chicken bites on a platter with toothpicks and a small bowl of extra sauce for dipping.

Q&A

Can I bake these chicken bites instead of frying them?

Yes. Arrange the coated chicken on a lightly greased baking sheet and bake until golden and cooked through, turning once during cooking. The texture may be slightly less crisp than shallow-fried chicken.

Can I use an air fryer?

Yes. Arrange the coated chicken pieces in a single layer in an air fryer basket and cook until golden and cooked through, turning halfway through. Cooking time can vary depending on the air fryer and size of the chicken pieces.

How do I make the chicken extra crispy?

Pat the chicken dry, use the flour-cornstarch coating, avoid overcrowding the pan, and make sure the oil is properly heated before adding the chicken.

Can I prepare the sauce ahead of time?

Yes. The sauce can be prepared ahead and refrigerated in an airtight container. Gently warm it before tossing with freshly cooked chicken.

Why did my sauce become too thick?

Honey-based sauces naturally thicken as they cool. Warm the sauce gently and add a small splash of water if necessary to loosen it.

Can I use honey substitutes?

Maple syrup can be used as an alternative, although it will give the sauce a slightly different flavor and consistency.

How should I store leftovers?

Place cooled chicken bites in an airtight container and refrigerate for up to 3 days. For the best texture, reheat them in an air fryer, oven, or skillet rather than the microwave.

What should I serve with spicy honey garlic chicken?

Steamed rice, fried rice, roasted vegetables, broccoli, noodles, salad, or a simple cucumber slaw all pair well with these chicken bites.

Nutrition

Estimated Nutrition Per Serving:
Calories: 520 kcal
Protein: 38 g
Carbohydrates: 48 g
Fat: 20 g
Saturated Fat: 6 g
Cholesterol: 125 mg
Sodium: 850 mg
Fiber: 1 g
Sugar: 19 g

Nutrition values are estimates and can vary depending on the amount of oil absorbed during cooking, the specific ingredients used, and serving size.

Conclusion

Sweet, spicy, garlicky, and wonderfully crispy, these Spicy Honey Garlic Chicken Bites are an easy way to make an ordinary chicken dinner feel special. The combination of a crunchy coating and glossy honey sauce creates plenty of texture and flavor in every bite.

Pair them with fluffy rice and vegetables for dinner, or serve them as a crowd-friendly appetizer with extra sauce. The heat level can easily be adjusted, so everyone can enjoy these flavorful chicken bites their own way.
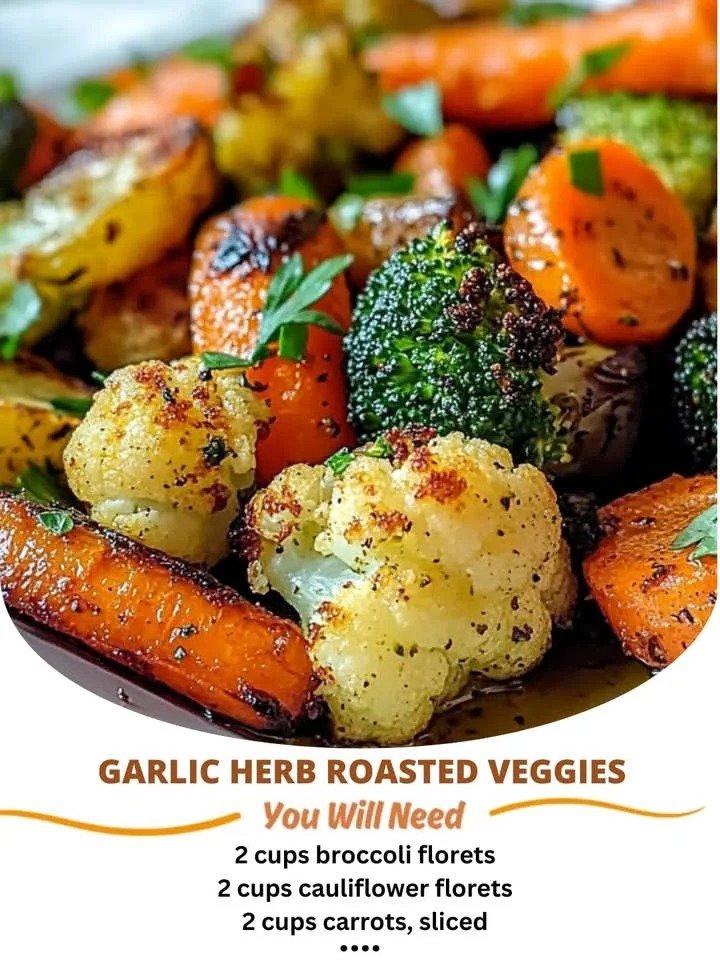

 

Grilled Herb-Roasted Vegetables

Grilled Herb-Roasted Vegetables

Bring vibrant color and fresh flavor to the dinner table with these Grilled Herb-Roasted Vegetables. A simple mixture of olive oil, garlic, oregano, and thyme coats crisp broccoli, cauliflower, carrots, and colorful bell peppers before they are grilled to tender, lightly charred perfection.

This versatile side dish works beautifully with everything from grilled meats and seafood to pasta, rice, and grain bowls. It is also an easy way to add more vegetables to everyday meals.

Prep Time: 15 minutes
Cook Time: 20–25 minutes
Total Time: 35–40 minutes
Servings: 6

Ingredients

Vegetables

2 cups broccoli florets
2 cups cauliflower florets
2 cups carrots, sliced
1 red bell pepper, chopped
1 yellow bell pepper, chopped

Oil & Aromatics

¼ cup olive oil
4 cloves garlic, minced

Herbs & Seasonings

1 tsp dried oregano
1 tsp dried thyme
Salt and black pepper, to taste

Instructions

Prepare the Vegetables

Wash and dry all the vegetables thoroughly. Cut the broccoli and cauliflower into similar-sized florets so they cook evenly.

Slice the carrots into relatively thin, even pieces. Chop the red and yellow bell peppers into medium-sized pieces.

Try to keep the vegetable pieces fairly uniform. Larger pieces will take longer to cook, while very small pieces may become too soft before the other vegetables are ready.

Make the Herb Garlic Oil

In a large bowl, combine the olive oil, minced garlic, dried oregano, dried thyme, salt, and black pepper.

Whisk or stir well to distribute the garlic and herbs throughout the oil.

Add the prepared broccoli, cauliflower, carrots, red bell pepper, and yellow bell pepper to the bowl. Toss thoroughly until all the vegetables are lightly coated with the seasoned olive oil.

Allow the vegetables to sit for about 5 minutes while you prepare the grill.

Preheat the Grill

Preheat the grill to medium-high heat, approximately 400–425°F.

If using a grill basket or grill pan, place it on the grill while it heats. A grill basket is especially helpful for smaller vegetables because it prevents pieces from falling through the grates.

If grilling directly on the grates, make sure they are clean and lightly oiled to help prevent sticking.

Grill the Vegetables

Arrange the vegetables in a single layer in a grill basket or across the grill grates.

Grill for approximately 20–25 minutes, turning or tossing the vegetables every few minutes so they cook evenly.

The vegetables should become tender while developing lightly charred and golden edges. The broccoli and cauliflower should be fork-tender, the carrots should soften, and the bell peppers should become slightly tender with some caramelized edges.

If some vegetables begin browning too quickly, move them to a cooler part of the grill and continue cooking until everything reaches the desired tenderness.

Check for Doneness

Test the thickest carrot pieces and the cauliflower with a fork. They should be tender but should still have enough structure to hold their shape.

If the vegetables need more time, continue grilling for a few additional minutes.

Avoid overcooking them, as the goal is to create vegetables that are tender on the inside while maintaining some texture and grilled character.

Serve

Transfer the grilled vegetables to a serving dish while they are still warm.

Taste and add a little more salt or black pepper if needed.

Serve immediately as a colorful side dish, or allow the vegetables to cool slightly and use them in salads, grain bowls, wraps, or meal-prep containers.

Tips

Dry the Vegetables Well

After washing the vegetables, dry them thoroughly before adding the oil. Excess water can create steam and make it harder for the vegetables to develop beautiful grilled edges.

Cut Vegetables Evenly

Uniform pieces help everything cook at approximately the same rate. Since carrots are naturally denser than bell peppers, slicing them relatively thin helps them finish at the same time.

Do Not Overcrowd the Grill

Arrange the vegetables in a single layer whenever possible. Too many vegetables packed together can trap moisture and reduce browning.

Use a Grill Basket

A grill basket makes this recipe especially easy. It keeps smaller broccoli and cauliflower pieces safely contained while still allowing heat and smoke to reach the vegetables.

Preheat Properly

A fully preheated grill helps the vegetables begin cooking immediately and encourages caramelization. Starting with a cold or barely warm grill can make the vegetables softer rather than nicely grilled.

Turn Frequently

Toss or turn the vegetables every few minutes. This prevents one side from becoming overly charred while allowing multiple surfaces to develop flavorful browned edges.

Watch the Garlic

Fresh minced garlic can burn if exposed directly to very high heat for too long. Tossing it thoroughly with the olive oil and vegetables helps distribute it and reduces the chance of concentrated burning.

Taste Before Serving

Vegetables can vary in sweetness and size, so always taste the finished dish before serving. A final pinch of salt and black pepper can bring all the herb and garlic flavors together.

Variations

Add Lemon Flavor

Finish the grilled vegetables with fresh lemon juice and a little lemon zest just before serving. The bright citrus flavor works especially well with oregano and thyme.

Mediterranean Vegetable Mix

Add sliced zucchini, yellow squash, red onion, or cherry tomatoes to create a larger Mediterranean-style vegetable platter.

Add Parmesan

Sprinkle freshly grated Parmesan over the hot vegetables immediately after grilling. The residual heat will soften the cheese slightly and add a savory finish.

Make It Spicy

Add a pinch of red pepper flakes or cayenne pepper to the olive oil mixture for a little heat.

Fresh Herb Finish

Replace some of the dried herbs with fresh parsley, basil, rosemary, or oregano. Add fresh herbs after grilling for the brightest flavor.

Add Balsamic Flavor

Drizzle a small amount of balsamic glaze over the finished vegetables for a sweet and tangy contrast.

Turn Them Into a Main Dish

Serve the vegetables over cooked quinoa, couscous, rice, or pasta. Add chickpeas, grilled chicken, or white beans for a more substantial meal.

Use as a Meal-Prep Side

Divide the cooled vegetables into individual containers and refrigerate them for easy lunches or dinners throughout the week.

Q&A

Can I roast these vegetables in the oven instead of grilling them?

Yes. Spread the seasoned vegetables on a large baking sheet and roast at about 425°F until tender and lightly browned, turning once during cooking.

Can I prepare the vegetables ahead of time?

Yes. The vegetables can be washed, cut, and seasoned ahead of time. Store them covered in the refrigerator until you are ready to grill.

How do I prevent grilled vegetables from becoming soggy?

Dry the vegetables well, avoid overcrowding the grill, and cook them over properly preheated medium-high heat. These steps encourage browning instead of steaming.

Can I use fresh herbs instead of dried herbs?

Yes. Fresh herbs can be used, although they are best added toward the end of cooking or after grilling to preserve their fresh flavor.

What can I serve with grilled vegetables?

They pair well with grilled chicken, salmon, steak, shrimp, burgers, roasted meats, pasta, rice, couscous, and grain bowls.

How long do leftovers last?

Store the cooked vegetables in an airtight container in the refrigerator and use them within about 3–4 days for the best quality.

Can I eat these vegetables cold?

Yes. They are delicious chilled or at room temperature and work particularly well in salads, wraps, sandwiches, and grain bowls.

Can I use frozen vegetables?

Fresh vegetables are recommended for the best grilled texture. If using frozen vegetables, thaw and drain them thoroughly first because excess moisture can interfere with browning.

Nutrition

Estimated Nutrition Per Serving:
Calories: 165 kcal
Protein: 4 g
Carbohydrates: 16 g
Fat: 11 g
Saturated Fat: 2 g
Cholesterol: 0 mg
Sodium: 85 mg
Fiber: 5 g
Sugar: 7 g

Nutrition values are estimates and may vary depending on the exact vegetables, olive oil, and portion sizes used.

Conclusion

A colorful vegetable platter can be one of the easiest parts of dinner, and these Grilled Herb-Roasted Vegetables make it especially delicious. Garlic and olive oil provide a savory base while oregano and thyme add an aromatic herb flavor, and grilling gives the vegetables beautifully browned edges.

Enjoy them fresh from the grill with your favorite main course, or save the leftovers for salads, wraps, bowls, and quick lunches. This flexible recipe makes healthy vegetables easy to enjoy in many different ways.


Wholesome Egg Salad Sandwich Recipe

Wholesome Egg Salad Sandwich Recipe

Creamy, fresh, and wonderfully simple, this Wholesome Egg Salad Sandwich makes an easy homemade meal with just a handful of everyday ingredients. Chopped hard-boiled eggs are combined with creamy Greek yogurt, Dijon mustard, and red onion before being layered with crisp lettuce on hearty multigrain bread.

Whether you need a quick lunch, an easy breakfast, or a make-ahead filling for busy days, this egg salad is a delicious and practical option.

Prep Time: 10 minutes
Cook Time: 10 minutes
Total Time: 20 minutes
Servings: 2 sandwiches

Ingredients

For the Egg Salad Filling

4 large eggs, hard-boiled, peeled, and chopped
2 tbsp plain Greek yogurt or light mayonnaise
1 tsp Dijon mustard
1 tbsp red onion, finely chopped
Salt, to taste
Black pepper, to taste
Finely chopped chives, optional
Finely chopped celery, optional
Fresh dill, optional

For the Sandwich Assembly

Whole grain or multigrain bread slices
Fresh lettuce leaves, such as romaine or green leaf lettuce

Instructions

Boil the Eggs

Place the eggs in a saucepan and cover them with enough water to keep them submerged. Bring the water to a boil over medium-high heat.

Once the water reaches a steady boil, reduce the heat slightly and cook the eggs for about 9–10 minutes for firm yolks.

Transfer the eggs immediately to a bowl of cold or ice water. Let them cool for several minutes before peeling.

Prepare the Eggs

Once cooled, gently peel the eggs and rinse away any small pieces of shell. Pat them dry and chop them into small, bite-sized pieces.

You can chop the eggs finely for a smoother egg salad or leave slightly larger pieces if you prefer more texture.

Place the chopped eggs in a medium mixing bowl.

Make the Egg Salad

Add the Greek yogurt and Dijon mustard to the chopped eggs. Gently fold the mixture together until the eggs are coated and creamy.

Add the finely chopped red onion and stir gently to distribute it throughout the filling.

Season with salt and black pepper according to your taste.

If using optional ingredients, fold in finely chopped chives, celery, or fresh dill. Taste the mixture and adjust the seasoning if needed.

Avoid overmixing the egg salad, as gently folding helps preserve some of the egg pieces and creates a more pleasant texture.

Prepare the Bread

Lay the whole-grain or multigrain bread slices on a clean surface.

For a softer sandwich, use the bread as it is. For additional texture, lightly toast the slices until they are just golden and crisp around the edges.

If desired, you can spread a very thin layer of Greek yogurt or light mayonnaise on the bread, although the creamy egg filling is usually enough.

Assemble the Sandwiches

Place fresh lettuce leaves over two slices of bread.

Spoon the egg salad evenly over the lettuce. Spread it gently toward the edges while leaving a small border around the sides.

Top with another lettuce leaf if desired, then place the remaining bread slices on top.

Gently press the sandwiches together and slice them in half before serving.

Tips

Use Fully Cooled Eggs

Allow the boiled eggs to cool completely before making the salad. Warm eggs can make the yogurt-based dressing softer than desired and may make the sandwich filling watery.

Do Not Overcook the Eggs

Cooking the eggs for too long can create dry yolks and a grayish ring around the yolk. A cooking time of about 9–10 minutes generally produces firm yolks suitable for egg salad.

Choose Good Bread

Whole-grain or multigrain bread gives the sandwich a hearty texture and pairs well with the creamy filling. Oat-topped bread can also add a pleasant nutty texture.

Keep the Onion Finely Chopped

Small pieces of red onion distribute more evenly throughout the egg salad. This gives you onion flavor and crunch without allowing one large piece to overpower a bite.

Adjust the Creaminess

Start with the recommended amount of Greek yogurt and add a little more if you prefer a softer, creamier filling. Adding too much at once can make the egg salad loose.

Add Fresh Herbs Carefully

Chives and dill both work beautifully with eggs, but they have strong flavors. Start with a small amount and increase according to your preference.

Toast the Bread Just Before Serving

If you plan to eat the sandwich immediately, lightly toasting the bread can add a delicious contrast between crisp bread, fresh lettuce, and creamy egg salad.

Prevent Soggy Bread

If preparing the sandwich ahead, place a layer of lettuce between the bread and egg salad. The lettuce can create a barrier that helps protect the bread from excess moisture.

Variations

Classic Mayonnaise Egg Salad

Replace the Greek yogurt with light mayonnaise for a more traditional creamy egg salad flavor.

Extra Crunchy Egg Salad

Add finely chopped celery along with the red onion. Celery provides a fresh, crisp texture that works especially well with creamy eggs.

Herb Egg Salad

Add fresh dill and chopped chives for a bright, herb-filled version. A small amount of fresh parsley can also be added.

Avocado Egg Salad

Mash a small amount of ripe avocado into the egg mixture for extra creaminess. Reduce the Greek yogurt slightly if needed to maintain the right consistency.

Spicy Egg Salad

Add a pinch of cayenne pepper, red pepper flakes, or a few drops of hot sauce for a spicy variation.

Pickle Egg Salad

Finely chop a small amount of dill pickle and mix it into the filling. The tangy pickle flavor pairs especially well with Dijon mustard.

Open-Faced Egg Salad Toast

Instead of making a traditional sandwich, spoon the egg salad over one toasted slice of whole-grain bread and top with lettuce and fresh herbs.

Lettuce Wraps

For a bread-free option, spoon the egg salad into large romaine or green leaf lettuce leaves and roll them gently into wraps.

Q&A

Can I make egg salad ahead of time?

Yes. The egg salad can be prepared ahead and stored in the refrigerator until you are ready to assemble the sandwiches.

How long does egg salad last in the refrigerator?

For best quality, keep the prepared egg salad refrigerated in an airtight container and use it within 3–4 days.

Can I use mayonnaise instead of Greek yogurt?

Yes. Light mayonnaise can replace the Greek yogurt in the same general amount and will provide a more classic egg salad flavor.

What type of bread is best for egg salad sandwiches?

Whole-grain, multigrain, oat-topped, sourdough, or sturdy sandwich bread all work well. Choose bread that can hold the creamy filling without becoming too soft.

How can I keep the sandwich from becoming soggy?

Keep the egg salad chilled and assemble the sandwich shortly before serving. Placing lettuce between the bread and egg salad can also help create a moisture barrier.

Can I add other vegetables?

Yes. Finely chopped celery, cucumber, bell pepper, or pickles can add extra crunch and flavor.

Can I make this recipe without mustard?

Yes. Simply leave out the Dijon mustard. You can add a little fresh dill, lemon juice, or black pepper for additional flavor.

Is this sandwich good for meal prep?

The egg salad is suitable for meal prep. For the best texture, store the filling separately from the bread and lettuce and assemble the sandwich shortly before eating.

Nutrition

Estimated Nutrition Per Sandwich:
Calories: 330 kcal
Protein: 19 g
Carbohydrates: 34 g
Fat: 13 g
Saturated Fat: 3 g
Cholesterol: 375 mg
Sodium: 520 mg
Fiber: 5 g
Sugar: 5 g

Nutrition values are estimates and can vary depending on the bread, yogurt or mayonnaise, and optional ingredients used.

Conclusion

A good egg salad sandwich does not need a long ingredient list to deliver plenty of flavor. The creamy egg filling gets its character from tangy Dijon, crunchy red onion, and optional fresh herbs, while whole-grain bread and crisp lettuce give the sandwich a satisfying finish.

Prepare the egg salad in advance for an easy lunch throughout the week, or assemble it fresh for a quick meal whenever you need something simple, wholesome, and delicious.

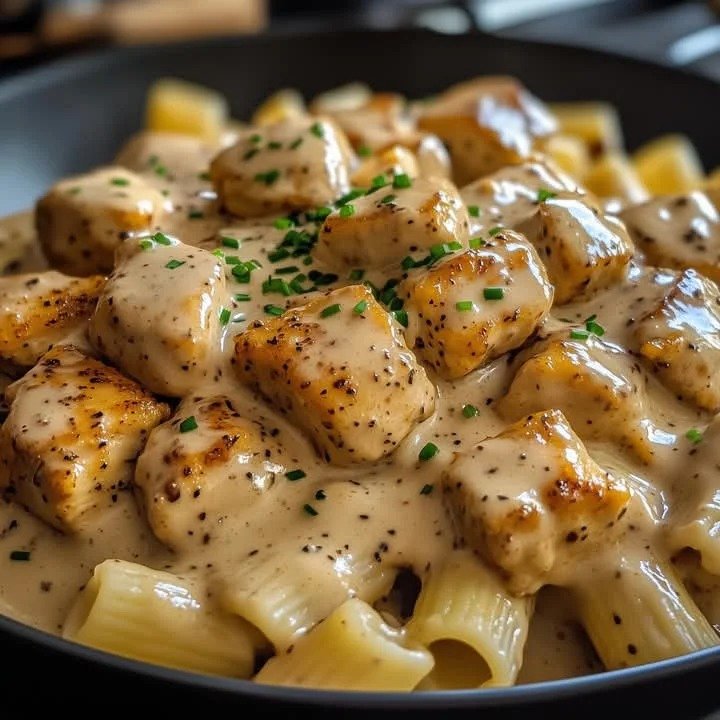
Creamy Garlic Butter Chicken Rigatoni

Creamy Garlic Butter Chicken Rigatoni

Creamy Garlic Butter Chicken Rigatoni combines juicy seasoned chicken and hearty rigatoni with a luxurious garlic Parmesan cream sauce. The buttery garlic flavor, savory chicken broth, and freshly grated Parmesan create a smooth sauce that clings perfectly to every bite of pasta.

With a quick preparation and straightforward cooking process, this comforting dish is ideal for family dinners and cozy evenings when you want a creamy homemade meal without complicated ingredients.

Prep Time: 10 minutes
Cook Time: 20–25 minutes
Total Time: 30–35 minutes
Servings: 4–6

Ingredients

For the Chicken

1 lb boneless, skinless chicken breasts, cut into bite-sized cubes
1 tbsp olive oil, for searing
1 tsp garlic powder
1 tsp Italian seasoning
½ tsp smoked paprika
Salt and black pepper, to taste

For the Pasta & Creamy Sauce

12 oz rigatoni pasta
3 tbsp unsalted butter
3–5 cloves garlic, finely minced
1 cup chicken broth or chicken stock
1 to 1½ cups heavy cream
1 cup freshly grated Parmesan cheese
½ cup reserved pasta water, optional, to loosen the sauce if needed

To Finish & Garnish

Fresh parsley or chives, finely chopped

Instructions

Season and Sear the Chicken

Place the cubed chicken in a bowl and season with garlic powder, Italian seasoning, smoked paprika, salt, and black pepper. Toss well so every piece is evenly coated.

Heat the olive oil in a large skillet over medium-high heat. Once hot, add the seasoned chicken in a single layer. Cook for about 5–7 minutes, turning occasionally, until the chicken is golden on the outside and cooked through.

Transfer the cooked chicken to a plate and set aside. Avoid overcrowding the skillet so the chicken can properly sear instead of steaming.

Cook the Rigatoni

While the chicken cooks, bring a large pot of salted water to a boil. Add the rigatoni and cook according to the package directions until al dente.

Before draining, reserve about ½ cup of the pasta water. Drain the pasta and set it aside.

The reserved pasta water contains starch that can help loosen and smooth the sauce if it becomes too thick.

Build the Garlic Butter Sauce

Reduce the skillet heat to medium and add the butter. Once melted, add the minced garlic and cook for about 30–60 seconds, stirring constantly, until fragrant.

Be careful not to brown or burn the garlic, as burnt garlic can make the sauce taste bitter.

Pour in the chicken broth and gently scrape the bottom of the skillet with a wooden spoon or spatula. Those browned bits left from the chicken add extra flavor to the sauce.

Allow the broth to simmer for 2–3 minutes so it can reduce slightly.

Add the Cream and Parmesan

Pour in 1 cup of heavy cream and stir gently. Allow the mixture to simmer over medium-low heat for several minutes until it begins to thicken.

Gradually add the freshly grated Parmesan cheese, stirring continuously until it melts into the sauce and creates a smooth, creamy consistency.

If the sauce is too thick, add a small amount of the reserved pasta water. Add it gradually, stirring after each addition, until the sauce reaches your preferred consistency.

If you prefer a richer sauce, you can use the full 1½ cups of heavy cream.

Combine Everything

Return the cooked chicken to the skillet and stir it into the creamy garlic Parmesan sauce.

Add the drained rigatoni and gently toss until the pasta is completely coated. Continue cooking for 1–2 minutes over low heat so the pasta can absorb some of the sauce and the flavors can come together.

Taste and adjust the seasoning with additional salt and black pepper if needed.

Finish and Serve

Remove the skillet from the heat and sprinkle the pasta with freshly chopped parsley or chives.

Serve immediately while the sauce is warm, creamy, and silky. For an extra Parmesan finish, add a little more freshly grated Parmesan just before serving.

Tips

Use Freshly Grated Parmesan

Freshly grated Parmesan melts more smoothly into the cream sauce than pre-shredded cheese. It helps create a silky texture without making the sauce unnecessarily heavy or grainy.

Do Not Overcook the Chicken

Chicken breast can become dry if cooked too long. Cut the chicken into evenly sized cubes and cook just until golden and cooked through.

Keep the Pasta Al Dente

Rigatoni should be cooked until al dente because it will continue cooking briefly when combined with the hot sauce. Slightly firm pasta also holds its shape better in a creamy sauce.

Reserve Pasta Water

Do not skip reserving the pasta water even if you think you will not need it. A small splash can loosen a thick sauce and help the creamy mixture cling beautifully to the rigatoni.

Control the Heat

Keep the sauce at a gentle simmer rather than allowing it to boil aggressively. High heat can cause the cream sauce to become too thick or affect the smooth texture of the Parmesan.

Let the Garlic Stay Fragrant

Garlic only needs a short time in the butter. Cooking it for too long can make it bitter and overpower the delicate creamy sauce.

Serve Immediately

Cream sauces naturally thicken as they cool. For the creamiest texture, serve the rigatoni immediately after combining everything.

Variations

Add Spinach

Stir in a few handfuls of fresh baby spinach after adding the cream. Cook until the spinach wilts, then continue with the Parmesan and pasta.

Add Mushrooms

Sliced mushrooms can be sautéed after cooking the chicken. Cook them until golden and tender before preparing the garlic butter sauce.

Make It Spicy

Add a pinch of red pepper flakes or a small amount of cayenne pepper to the sauce for a gentle kick.

Add Sun-Dried Tomatoes

Chopped sun-dried tomatoes add a slightly sweet, tangy flavor that pairs beautifully with the creamy Parmesan sauce.

Use Chicken Thighs

Boneless, skinless chicken thighs can replace chicken breasts. They provide a richer flavor and remain juicy during cooking.

Add Extra Herbs

Fresh basil, parsley, oregano, or chives can be used to add extra freshness to the finished dish.

Make It Extra Cheesy

For an even cheesier pasta, add a little shredded mozzarella along with the Parmesan. Stir until melted before adding the rigatoni.

Q&A

Can I use another pasta instead of rigatoni?

Yes. Penne, ziti, fusilli, or fettuccine can all work well. Rigatoni is especially good because its large shape holds plenty of creamy sauce.

Can I make this recipe without heavy cream?

Yes. Half-and-half can be used for a lighter sauce, although the final texture may be slightly less rich and creamy.

Why is my Parmesan sauce grainy?

The sauce may have been heated too aggressively or the Parmesan may not have melted evenly. Keep the heat low when adding the cheese and use freshly grated Parmesan whenever possible.

Can I make this pasta ahead of time?

Yes, but creamy pasta is best served fresh. If preparing it ahead, store it in an airtight container in the refrigerator and gently reheat it with a splash of milk, cream, broth, or pasta water.

How should I store leftovers?

Allow the pasta to cool and place it in an airtight container. Refrigerate for up to 3 days.

Can I freeze creamy chicken rigatoni?

It can be frozen, although cream-based sauces may change texture slightly after thawing. For the best quality, enjoy the pasta fresh or refrigerated.

What can I serve with chicken rigatoni?

Garlic bread, a simple green salad, roasted vegetables, steamed broccoli, or sautéed spinach all pair nicely with this creamy pasta.

Nutrition

Estimated Nutrition Per Serving:
Calories: 680 kcal
Protein: 38 g
Carbohydrates: 61 g
Fat: 32 g
Saturated Fat: 18 g
Cholesterol: 135 mg
Sodium: 620 mg
Fiber: 3 g
Sugar: 5 g

Nutrition values are estimates and may vary depending on the specific ingredients and portion sizes used.

Conclusion

If you love creamy, cheesy pasta dishes, this Creamy Garlic Butter Chicken Rigatoni is a recipe worth keeping in your regular dinner rotation. The golden chicken brings savory flavor while the garlic butter Parmesan sauce gives the rigatoni a rich and velvety finish.

Serve it straight from the skillet with fresh herbs and extra Parmesan for a cozy homemade dinner that feels indulgent, flavorful, and wonderfully satisfying.


Stuffed Pepper Soup

Stuffed Pepper Soup

Description

Stuffed Pepper Soup is a hearty, comforting one-pot meal inspired by classic stuffed peppers. It combines savory ground beef, tender rice, sweet bell peppers, tomatoes, onions, garlic, and flavorful herbs in a rich tomato-based broth. Every spoonful is packed with tender vegetables, seasoned beef, and perfectly cooked rice.

This cozy soup is ideal for chilly evenings, family dinners, meal prep, or whenever you want a filling homemade meal without the extra work of stuffing individual peppers. The combination of red and green bell peppers gives the soup beautiful color and a naturally sweet flavor, while Italian seasoning, paprika, and garlic add warmth and depth.

Serve it with crusty bread, garlic toast, or a simple green salad for a complete and satisfying dinner.

Ingredients

  • 1 pound ground beef
  • 1 tablespoon olive oil
  • 1 medium yellow onion, diced
  • 3 cloves garlic, minced
  • 1 green bell pepper, diced
  • 1 red bell pepper, diced
  • 1 can (14.5 ounces) diced tomatoes
  • 1 can (15 ounces) tomato sauce
  • 5 cups beef broth
  • 1/2 cup uncooked long-grain white rice
  • 1 tablespoon tomato paste
  • 1 teaspoon Italian seasoning
  • 1 teaspoon paprika
  • 1/2 teaspoon smoked paprika
  • 1/2 teaspoon dried oregano
  • 1/2 teaspoon salt, or to taste
  • 1/4 teaspoon black pepper
  • 1 tablespoon Worcestershire sauce
  • 1 teaspoon sugar, optional
  • 2 tablespoons fresh parsley, chopped
  • Shredded Parmesan or mozzarella cheese, for serving

Instructions

1. Brown the Ground Beef

Heat a large heavy-bottomed pot or Dutch oven over medium heat. Add the olive oil and ground beef.

Cook for approximately 6–8 minutes, breaking the beef apart with a wooden spoon as it cooks. Continue until the beef is browned and no longer pink.

If there is a large amount of excess fat, carefully drain some of it from the pot.

2. Add the Aromatics

Add the diced onion, green bell pepper, and red bell pepper to the browned beef.

Cook for about 4–5 minutes, stirring occasionally, until the vegetables begin to soften.

Add the minced garlic and cook for another 30–60 seconds, just until fragrant. Avoid burning the garlic because it can become bitter.

3. Build the Tomato Base

Stir in the tomato paste and cook for approximately 1 minute. This helps deepen its flavor.

Add the diced tomatoes, tomato sauce, beef broth, Worcestershire sauce, Italian seasoning, paprika, smoked paprika, oregano, salt, and black pepper.

If your tomatoes are particularly acidic, add a small amount of sugar to balance the flavors.

Stir everything thoroughly and bring the soup to a gentle boil.

4. Add the Rice

Once the soup begins simmering, stir in the uncooked rice.

Reduce the heat to low and cover the pot partially with a lid.

Allow the soup to simmer for approximately 20–25 minutes, stirring occasionally to prevent the rice from sticking to the bottom.

Cook until the rice is tender and the peppers are completely softened but still retain some texture.

5. Adjust the Soup

Taste the soup once the rice is cooked.

Add additional salt, black pepper, Italian seasoning, or paprika if needed. If you prefer a thinner soup, add another 1/2 to 1 cup of beef broth.

If you like a thicker, stew-like consistency, continue simmering uncovered for a few additional minutes.

Keep in mind that the rice will continue absorbing liquid as the soup sits, so you may need to add extra broth when reheating leftovers.

6. Finish and Serve

Remove the soup from the heat and stir in fresh chopped parsley.

Ladle the hot soup into bowls and garnish with shredded Parmesan or mozzarella cheese if desired.

Serve immediately with warm crusty bread, garlic bread, or crackers.

Recipe Tips

Use a combination of peppers: Red and green bell peppers provide a delicious balance of sweetness and savory flavor, but yellow or orange peppers can also be used.

Don’t overcook the rice: Keep an eye on the rice near the end of cooking. Overcooked rice can become very soft and make the soup excessively thick.

Use lean ground beef: Ground beef with moderate fat provides flavor while avoiding an overly greasy soup.

Make it spicy: Add crushed red pepper flakes, cayenne pepper, or diced jalapeño for some heat.

For deeper flavor: Brown the beef well before adding the vegetables. The browned bits at the bottom of the pot add extra richness to the broth.

Variations

You can easily customize this soup based on the ingredients you have available.

For a lighter version, substitute ground turkey or chicken for the beef.

Brown rice can be used instead of white rice, although it will require a longer cooking time and may need additional broth.

For a low-carb version, replace the rice with cauliflower rice. Add the cauliflower rice during the final 5–7 minutes of cooking so it doesn’t become mushy.

For extra vegetables, add diced zucchini, carrots, celery, or spinach.

You can also stir in shredded cheddar, mozzarella, or Parmesan cheese just before serving for an extra creamy and cheesy finish.

Serving Suggestions

Stuffed Pepper Soup is filling enough to serve as a complete meal, but it pairs especially well with crusty French bread, garlic bread, cornbread, or toasted sourdough.

A simple green salad with cucumber and a light vinaigrette provides a fresh contrast to the rich tomato-based soup.

For a cozy family dinner, serve the soup with warm bread and a little shredded cheese on top.

Servings

This recipe makes approximately 6 servings.

Nutritional Information

Approximate nutrition per serving:

  • Calories: 390
  • Protein: 25g
  • Carbohydrates: 38g
  • Fat: 16g
  • Fiber: 5g
  • Sugar: 9g
  • Sodium: 850mg

Nutrition values are estimates and will vary depending on the ground beef, broth, canned tomatoes, rice, and toppings used.

Benefits

This soup combines protein-rich ground beef with vegetables such as bell peppers, tomatoes, and onions. Rice provides carbohydrates that make the dish filling and satisfying, while the vegetables contribute fiber and a variety of nutrients.

Using homemade or lower-sodium broth can help reduce the overall sodium content. Adding extra peppers, tomatoes, or other vegetables is also an easy way to increase the vegetable content of each serving.

Storage

Allow leftover soup to cool slightly before transferring it to airtight containers. Refrigerate for up to 3–4 days.

Because the rice continues absorbing broth as it sits, the soup may become considerably thicker in the refrigerator. When reheating, add a splash of beef broth or water until it reaches your preferred consistency.

Reheat gently on the stovetop over medium-low heat or in the microwave until thoroughly hot.

Frequently Asked Questions

Can I use cooked rice?

Yes. If using cooked rice, prepare the soup without uncooked rice and simmer the tomato mixture for about 20 minutes. Stir in approximately 1½ cups cooked rice during the final 5 minutes.

Can I make this soup ahead of time?

Absolutely. The flavors often become even more developed after resting. If making it ahead, consider cooking the rice separately and adding it when reheating to maintain the best texture.

Can I freeze Stuffed Pepper Soup?

Yes, but the rice may become softer after freezing and thawing. For the best texture, freeze the soup without the rice and add freshly cooked rice when reheating.

Can I make it in a slow cooker?

Yes. Brown the ground beef first, then add it to the slow cooker with the vegetables, tomatoes, tomato sauce, broth, and seasonings. Cook on LOW for 6–7 hours. Add cooked rice near the end rather than leaving it in the slow cooker for the entire cooking time.

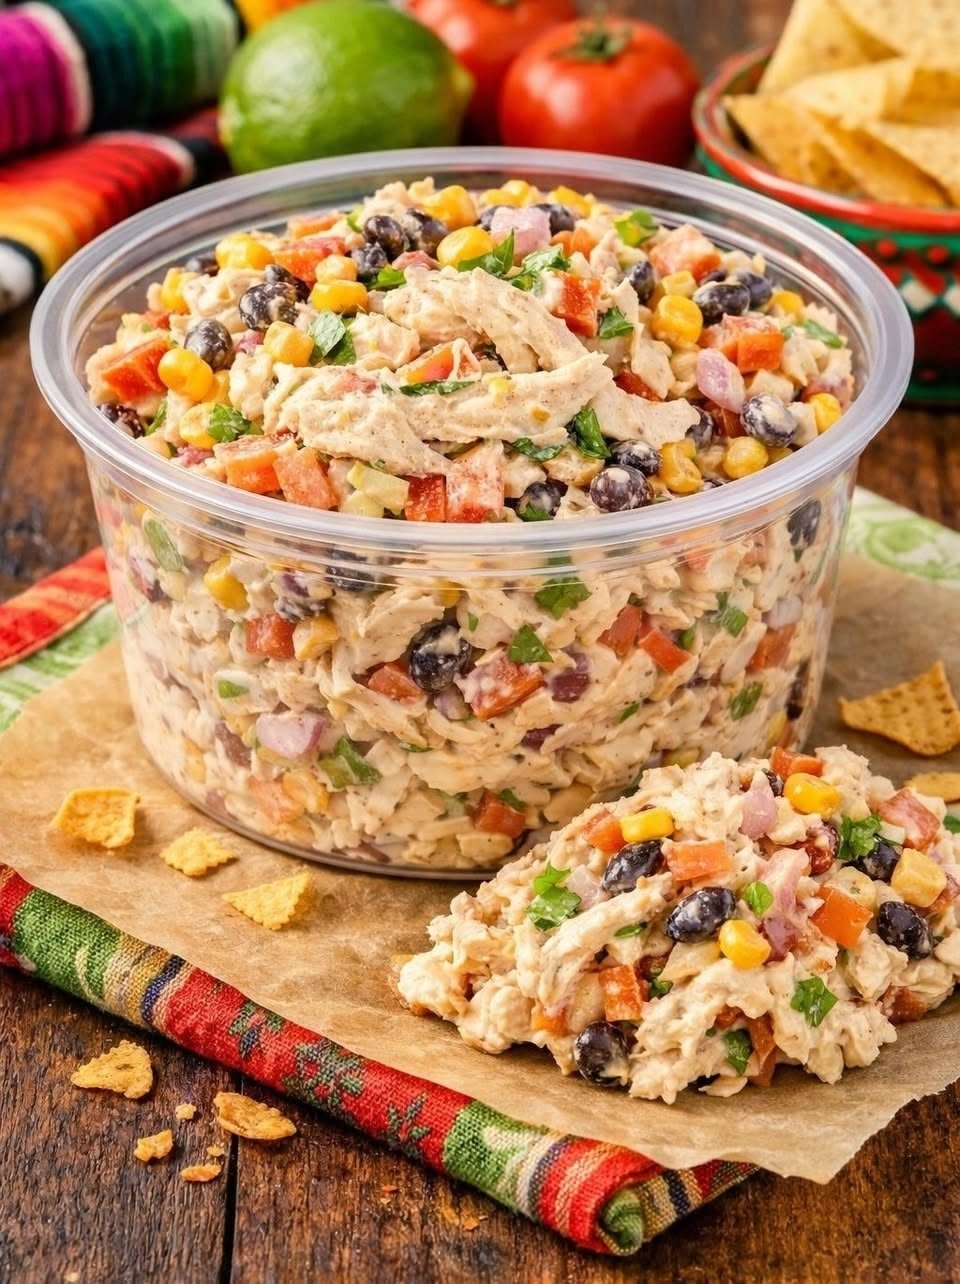
Creamy Southwest Chicken Salad

Creamy Southwest Chicken Salad

Description

Creamy Southwest Chicken Salad is a hearty, colorful, and flavorful dish made with tender shredded chicken, sweet corn, black beans, juicy tomatoes, crisp red onion, and fresh cilantro. Everything is coated in a creamy, zesty dressing seasoned with lime, garlic, chili, and a touch of spice.

This easy chicken salad is perfect for lunch, meal prep, picnics, potlucks, family gatherings, or a quick dinner. It can be served with tortilla chips, stuffed into wraps, spooned over lettuce, or enjoyed straight from the bowl. The combination of creamy chicken, sweet corn, savory black beans, crunchy vegetables, and fresh lime creates a delicious balance of textures and flavors.

Ingredients

For the Chicken Salad

  • 3 cups cooked chicken, shredded or chopped
  • 1 cup canned black beans, drained and rinsed
  • 1 cup sweet corn, drained
  • 1 cup diced tomatoes
  • 1/2 cup finely diced red onion
  • 1/2 cup diced red bell pepper
  • 1/4 cup fresh cilantro, chopped
  • 1 jalapeño, finely chopped, optional
  • 1/2 teaspoon chili powder
  • 1/2 teaspoon ground cumin
  • 1/4 teaspoon smoked paprika
  • 1/4 teaspoon black pepper
  • Salt to taste

For the Creamy Dressing

  • 1/2 cup mayonnaise
  • 1/2 cup sour cream or plain Greek yogurt
  • 2 tablespoons fresh lime juice
  • 1 teaspoon honey
  • 1 teaspoon Dijon mustard
  • 1 small garlic clove, finely minced
  • 1/2 teaspoon chili powder
  • 1/4 teaspoon cumin
  • 1/4 teaspoon salt
  • 2 tablespoons finely chopped cilantro

Instructions

1. Prepare the Chicken

Use cooked, completely cooled chicken for the best texture. You can use roasted, baked, grilled, or poached chicken.

Remove any skin and bones, then shred the chicken using two forks or chop it into small bite-sized pieces. Place the chicken in a large mixing bowl.

For extra flavor, leftover seasoned chicken works particularly well in this recipe.

2. Prepare the Vegetables

Drain and rinse the black beans thoroughly. Allow them to drain well so excess liquid does not make the salad watery.

Drain the corn if using canned corn. If using frozen corn, thaw it completely and pat it dry.

Dice the tomatoes, red onion, and red bell pepper into small, even pieces. Finely chop the cilantro and jalapeño.

Add the black beans, corn, tomatoes, red onion, bell pepper, cilantro, and jalapeño to the bowl with the chicken.

3. Make the Creamy Dressing

In a separate bowl, whisk together mayonnaise, sour cream or Greek yogurt, fresh lime juice, honey, Dijon mustard, minced garlic, chili powder, cumin, salt, and chopped cilantro.

Whisk until the dressing is smooth and creamy.

Taste the dressing and adjust the seasoning. Add more lime juice for extra brightness, additional chili powder for more spice, or a little honey if you prefer a sweeter flavor.

4. Combine the Salad

Pour the creamy dressing over the chicken and vegetable mixture.

Using a large spoon or spatula, gently fold everything together until the chicken, beans, corn, and vegetables are evenly coated.

Do not overmix, as the tomatoes can release too much liquid and make the salad watery.

5. Chill

Cover the bowl and refrigerate the salad for at least 30 minutes before serving.

Chilling allows the flavors to blend and gives the dressing time to season the chicken and vegetables. For an even deeper flavor, refrigerate for 1–2 hours.

Before serving, gently stir the salad and taste again. Adjust salt, lime juice, or chili seasoning if necessary.

Serving Suggestions

This creamy chicken salad is extremely versatile.

For a simple lunch, serve it with crispy tortilla chips. It also makes a delicious filling for wraps, sandwiches, croissants, or toasted bread.

For a lighter option, spoon the chicken salad over romaine lettuce, mixed greens, or crunchy lettuce cups.

You can also serve it alongside avocado slices, cucumber, fresh lime wedges, or additional tomatoes.

For a party or gathering, place the salad in a large serving bowl and surround it with tortilla chips or crackers for easy scooping.

Recipe Tips

Use chilled chicken: Warm chicken can make the dressing thin, so allow freshly cooked chicken to cool completely before mixing.

Drain ingredients well: Excess liquid from tomatoes, corn, or beans can make the salad watery.

Adjust the spice: Remove the jalapeño seeds and membranes for a milder salad. Keep some seeds if you enjoy more heat.

Use fresh lime: Fresh lime juice gives the dressing a much brighter flavor than bottled juice.

Toast the corn: For a deeper flavor, lightly sauté the corn in a dry skillet until it develops a few golden spots before cooling and adding it.

Don’t over-dress: If you prefer a less creamy salad, begin with about three-quarters of the dressing and add more as needed.

Variations

You can easily customize this chicken salad according to your taste.

Add diced avocado just before serving for extra creaminess. Shredded cheddar or Monterey Jack cheese can provide a delicious cheesy flavor.

For additional crunch, add chopped celery, cucumber, or bell pepper.

If you want more Southwest flavor, add a little chipotle powder or smoked paprika to the dressing.

You can also replace the chicken with shredded rotisserie chicken for a convenient shortcut.

For a lighter version, use mostly Greek yogurt with a smaller amount of mayonnaise.

Servings

This recipe makes approximately 6 servings.

Nutritional Information

Approximate nutrition per serving:

  • Calories: 360
  • Protein: 27g
  • Carbohydrates: 20g
  • Fat: 20g
  • Fiber: 5g
  • Sugar: 5g
  • Sodium: 550mg

Nutritional values are estimates and will vary depending on the specific ingredients, mayonnaise, chicken, and serving size used.

Benefits

This chicken salad provides a good amount of protein from the chicken and Greek yogurt, while black beans contribute fiber and additional plant-based protein. Corn and tomatoes add color, texture, and flavor, while fresh vegetables help make the dish more satisfying.

Using Greek yogurt in the dressing can also reduce the amount of mayonnaise while maintaining a creamy consistency and tangy flavor.

Storage

Store the chicken salad in an airtight container in the refrigerator.

For the best quality, consume it within 3–4 days. Keep the salad chilled and avoid leaving it at room temperature for extended periods.

If preparing it for meal prep, store tortilla chips, lettuce, avocado, and other toppings separately and add them immediately before serving.

Frequently Asked Questions

Can I use rotisserie chicken?

Yes. Rotisserie chicken is an excellent shortcut and adds plenty of flavor. Remove the skin and bones before shredding.

Can I make this salad ahead of time?

Absolutely. It can be prepared several hours ahead, and chilling actually allows the flavors to develop. For the freshest texture, add avocado or crunchy toppings just before serving.

Can I make it without mayonnaise?

Yes. Replace the mayonnaise with additional plain Greek yogurt or use a combination of Greek yogurt and sour cream.

Is this chicken salad spicy?

The basic recipe has a mild Southwestern flavor. The jalapeño and chili powder can be adjusted according to your preference.

What can I serve with it?

Serve it with tortilla chips, crackers, lettuce cups, wraps, sandwiches, rice, or a simple green salad.

Can I freeze this chicken salad?

Freezing is not recommended because the creamy dressing and fresh vegetables can change texture after thawing. It is best prepared fresh and refrigerated.