Fresh & Vibrant Juice Recipes for Daily Wellness
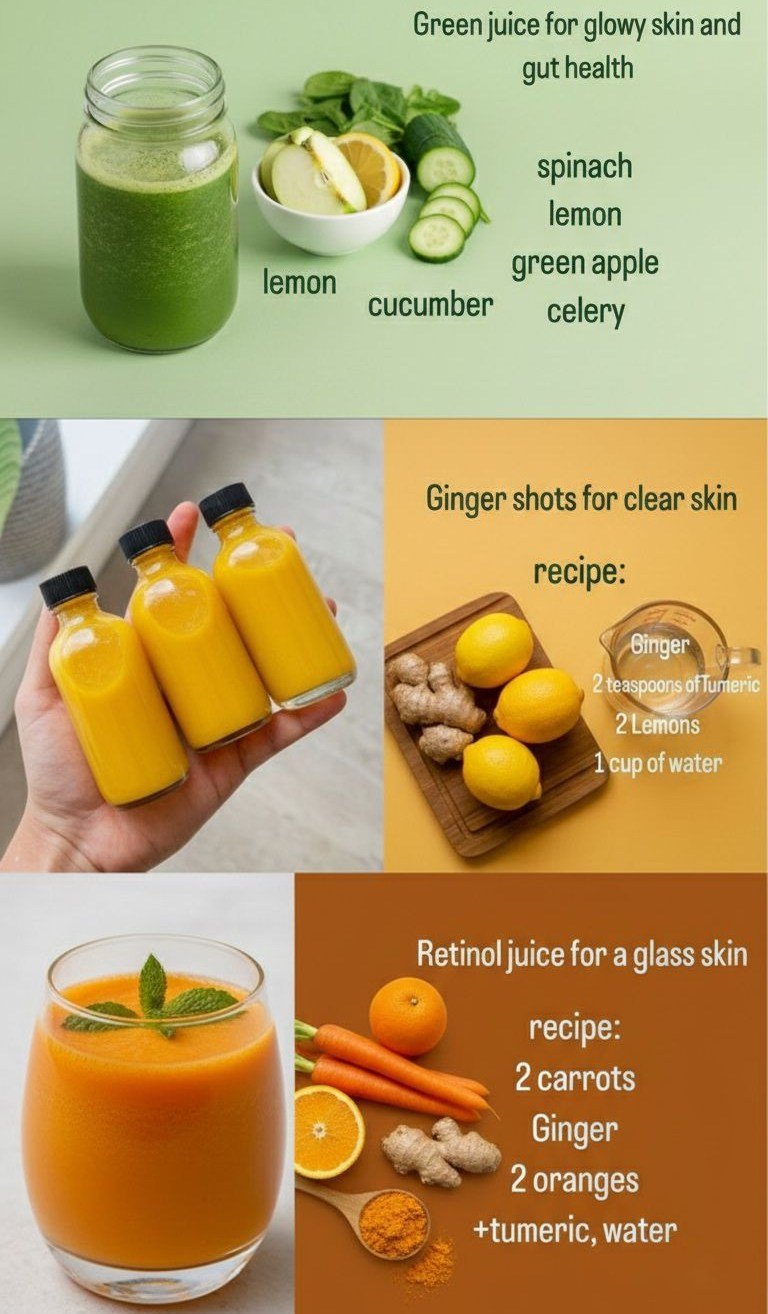
1. Refreshing Green Juice
A crisp and vibrant juice, perfect for hydration and a natural boost of nutrients.
Ingredients (Serves 1–2)
-
2 cups fresh baby spinach
-
1 large green apple, cored and sliced
-
½ large cucumber, sliced
-
2–3 celery stalks
-
½ lemon, peeled
Instructions
1. Prep the Produce:
-
Wash all ingredients thoroughly to remove dirt or residues.
-
Core and slice the apple, peel the lemon, and chop cucumber and celery to fit your juicer.
2. Juice the Ingredients:
-
Begin with the spinach, followed by celery, apple, cucumber, and lemon. This order helps extract maximum juice from leafy greens first.
3. Serve:
-
Stir the juice and pour into a glass over ice if desired.
-
Drink immediately to enjoy maximum freshness and nutrient content.
Tip: You can store leftover juice in a sealed jar in the refrigerator for up to 24 hours, but it tastes best fresh.
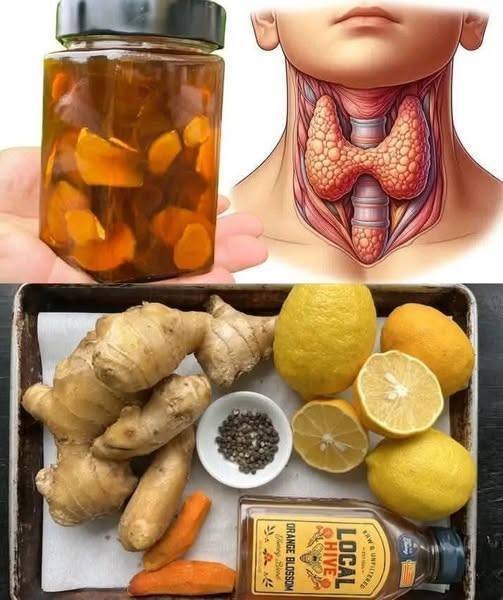
2. Zesty Ginger & Turmeric Shots
A concentrated, invigorating shot with ginger and turmeric for a flavorful pick-me-up.
Ingredients (Makes 2–3 small shots)
-
2-inch knob of fresh ginger, peeled
-
2 teaspoons turmeric powder or 1-inch fresh turmeric root, peeled
-
Juice of 2 fresh lemons
-
1 cup filtered water
Instructions
1. Blend:
-
Combine ginger, turmeric, lemon juice, and water in a high-speed blender. Blend until smooth.
2. Strain:
-
Pour the mixture through a fine-mesh strainer, nut milk bag, or cheesecloth into a jar to remove pulp for a smooth shot.
3. Portion & Store:
-
Pour into small shot glasses or airtight bottles.
-
Keep refrigerated for 3–5 days. Shake well before drinking.
Tip: Start with a small amount if you’re new to concentrated ginger or turmeric, as they have strong, warming flavors.
3. Vibrant Orange & Carrot Blend
A naturally sweet, nutrient-rich juice packed with beta-carotene and vitamin C.
Ingredients (Serves 1–2)
-
2 large carrots, washed and trimmed
-
2 oranges, peeled
-
1-inch knob of fresh ginger, peeled
-
A pinch of turmeric powder
-
½ cup water (adjust for desired consistency)
Instructions
1. Prep Ingredients:
-
Roughly chop carrots and ginger to make blending easier. Peel oranges completely.
2. Process:
-
If using a juicer: Juice the carrots, oranges, and ginger.
-
If using a blender: Combine chopped carrots, oranges, ginger, and water. Blend until smooth.
3. Add Turmeric:
-
Stir in a pinch of turmeric powder. Mix well.
4. Optional Straining:
-
For a smoother juice, strain through a fine-mesh sieve.
-
For added fiber, enjoy it as-is with the pulp.
Tip: Serve immediately over ice for a refreshing drink, or store in a sealed jar in the fridge for up to 24 hours.

 Introduction
 Ingredients
 Instructions
 Serving Suggestions
 Storage
 Nutrition (Per Serving – Approximate)


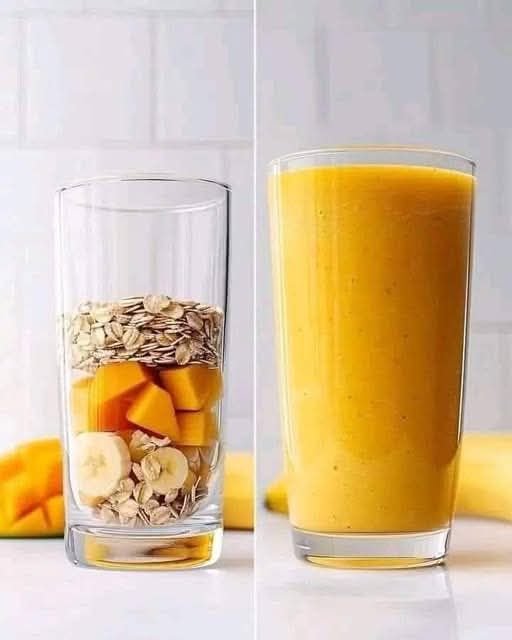
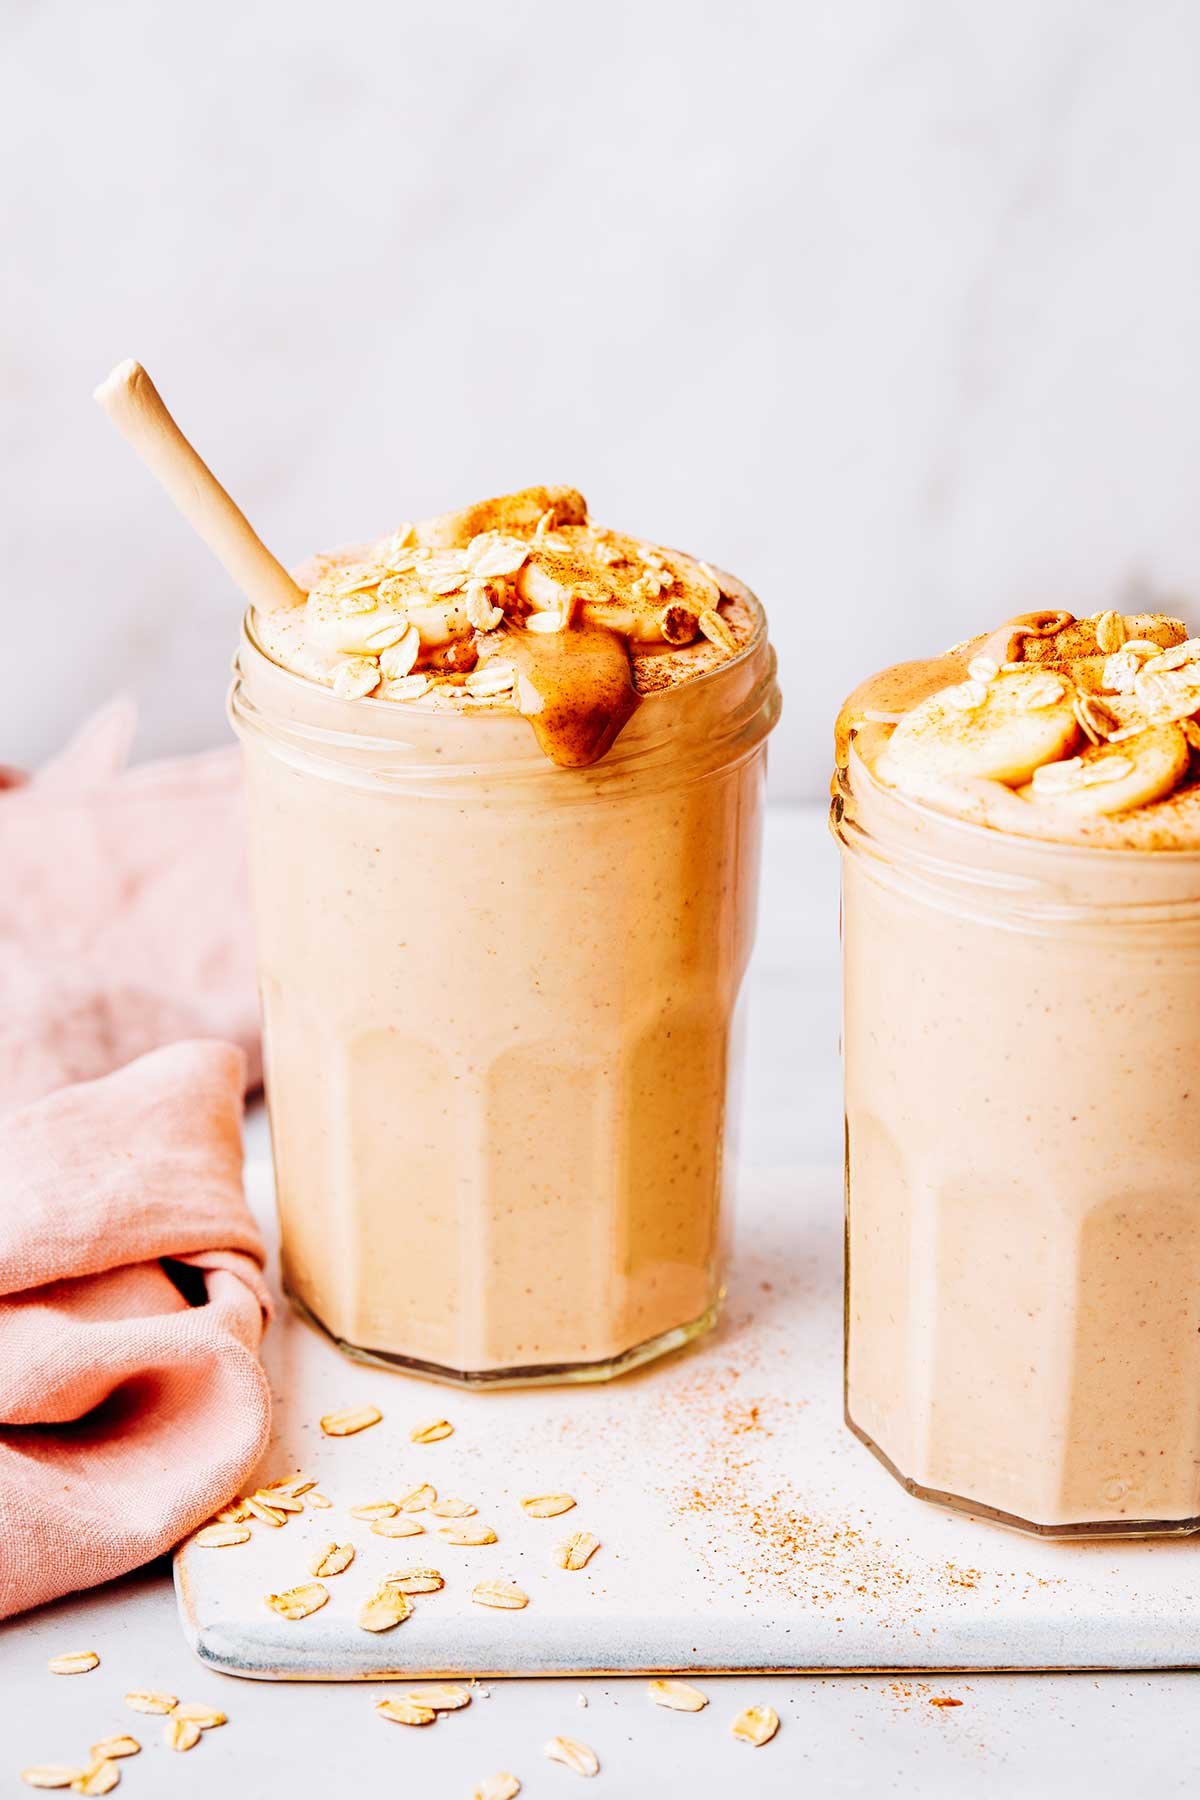
 Mango Banana Oat Breakfast Smoothie