Crispy Ham & Cheese Empanadas

Crispy Ham & Cheese Empanadas


*Makes 12-14 empanadas*


*1. Dough Ingredients 

– 3 cups (360g) all-purpose flour / maida

– 1/2 cup (120ml) warm milk

– 1 egg

– 60g cold butter, cubed (about 4 tbsp)

– 1 tsp salt

– 1 tsp sugar

– 1 tsp instant yeast (optional, for softer dough)


*2. Filling Ingredients:*

– 1 1/2 cups diced ham – you can use chicken ham / smoked chicken / beef salami for halal version

– 1 1/2 cups shredded mozzarella + cheddar mix – for that cheese pull in your photo

– 1 tsp dried oregano / mixed herbs

– 1/2 tsp black pepper

– 1 pinch chili flakes (optional)


*Method:*


*Step 1 – Make Dough:*

In a big bowl add flour, salt, sugar, egg, butter, and milk. Mix into a soft dough. Knead 8-10 mins until smooth like the 3rd photo. Cover and rest for 30-45 mins.


*Step 2 – Mix Filling:* In another bowl, mix diced ham, both cheeses, oregano, pepper. This is your filling – exactly like 4th photo. Don’t add salt, ham is already salty.


*Step 3 – Roll & Cut:* Roll dough thin – about 1/8 inch thick. Use a 4-5 inch round cutter or a bowl to cut circles like in the 5th photo.


*Step 4 – Fill:* Put 1.5 tbsp filling in center of each circle (don’t overfill or it will burst). Fold in half.


*Step 5 – Seal:* Press edges with a fork tightly like in photo 7. This is very important or cheese will leak in oil.


*Step 6 – Fry:* Heat oil on medium heat. Oil should be medium hot, not smoking. Fry 3 at a time for 3-4 mins each side until deep golden brown and crispy like photo 9 & 10. Or you can *Bake at 200°C / 400°F for 20-22 mins* with egg wash on top for less oil version.


*Step 7 – Serve hot:* Cut open – you get that super cheesy pull with ham pieces .

*Pro Tip:* Keep filling dry. If your ham is wet, pat it dry with tissue. Wet filling = burst empanadas.


*1. Dough thickness:*

Don’t roll too thick or too thin. 1/8 inch is perfect. Thick = raw inside, thin = bursts in oil.


*2. Seal is everything:*

Press with fork TWICE. First press with fingers, then fork. If even a tiny hole is left, cheese will leak out and oil will splash.


*3. Don’t overfill:*

1.5 tbsp max. I know you want more cheese like photo 6, but overfilling is why empanadas open while frying.


*4. Keep filling DRY:*

Pat your diced ham with tissue paper. If ham is wet, it creates steam inside and makes them soggy and burst. Mix cheese and ham just before filling.


*5. Cheese trick for pull:*

Use low-moisture mozzarella, not fresh mozzarella. Mix 70% mozzarella + 30% cheddar. Pure mozzarella = best stretch


6. Oil temperature:

Medium heat, not high. Test: drop a smalll piece of dough, it should rise slowly in 4-5 seconds. If oil is too hot, outside browns fast but dough inside stays raw. If too cold, they soak oil and become greasy.


*7. Want extra crispy?*

Add 1 tbsp cornstarch to your flour. And fry twice – first fry 2 mins light golden, take out, then fry again 1 min for that extra bubbly golden crust .


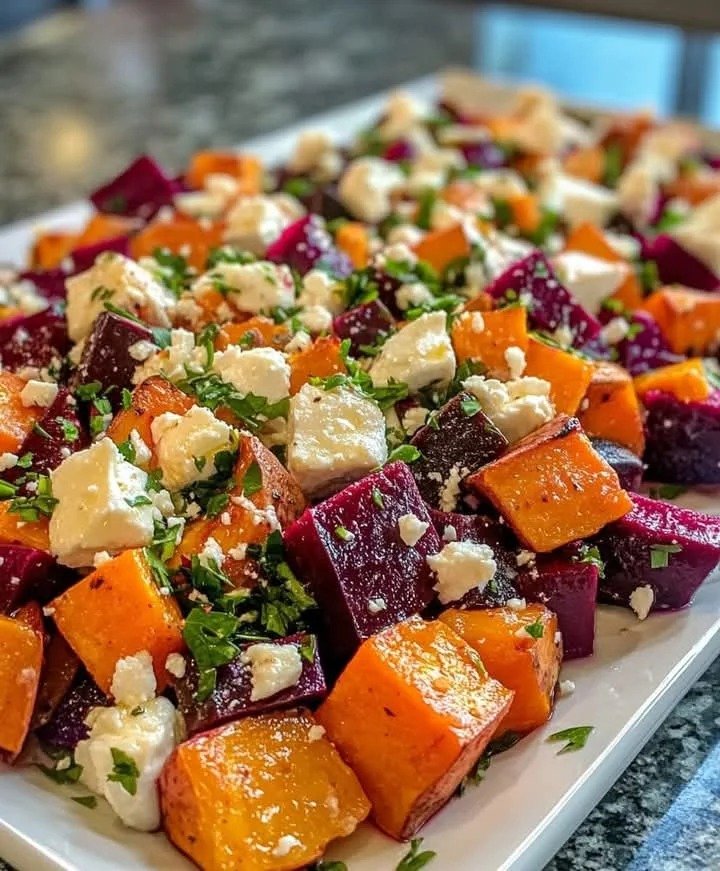
Roasted Pumpkin and Beetroot Salad

Roasted Pumpkin and Beetroot Salad

This Roasted Pumpkin and Beetroot Salad brings together sweet oven-roasted pumpkin, earthy beetroot, creamy feta, and fresh parsley in one vibrant dish. A homemade balsamic-lemon vinaigrette adds just the right amount of tanginess while toasted nuts provide an optional crunchy finish.

Perfect for lunch, dinner, holiday tables, or a Mediterranean-inspired gathering, this colorful salad is easy to prepare and can be served warm or at room temperature.

Prep Time: 15 minutes
Roasting Time: 35–45 minutes
Dressing Time: 5 minutes
Total Time: 55–65 minutes
Servings: 4–6

Ingredients

For the Roasted Vegetables

Pumpkin, such as Kent, Jap, sugar pumpkin, or butternut squash — 4 cups, peeled and cut into cubes

Fresh beetroot — 3 medium, peeled and cut into similar-sized cubes

Olive oil — 2 tablespoons

Sea salt — ½ teaspoon, or to taste

Cracked black pepper — ¼ teaspoon, or to taste

For the Salad

Feta cheese — ¾ to 1 cup, generously crumbled

Fresh flat-leaf parsley — ¼ cup, finely chopped

Baby spinach, rocket/arugula, or mixed salad greens — 3–4 cups, optional

For the Simple Vinaigrette

Extra virgin olive oil — 3 tablespoons

Balsamic vinegar — 1½ tablespoons

Honey or maple syrup — 1 teaspoon

Dijon mustard — 1 teaspoon

Lemon juice — 1 tablespoon

Sea salt — a small pinch

Cracked black pepper — to taste

Optional Toppings

Toasted walnuts — ½ cup

Pine nuts — ¼ cup

Pepitas or pumpkin seeds — ¼ cup

Instructions

Prepare the Vegetables

Preheat the oven to 425°F (220°C). Line a large baking sheet with parchment paper for easier cleanup.

Peel the pumpkin and beetroot, then cut both into fairly even cubes. Keeping the pieces similar in size helps them roast more evenly. Pat the vegetables dry if they are particularly moist.

Place the pumpkin and beetroot on the prepared baking sheet. Drizzle with olive oil and season with sea salt and cracked black pepper. Toss gently until all the pieces are lightly coated.

Roast the Pumpkin and Beetroot

Spread the vegetables into a single layer, leaving some space between the pieces. Avoid overcrowding the pan because this can cause the vegetables to steam instead of caramelize.

Roast for about 35–45 minutes, turning the vegetables once halfway through cooking. The pumpkin should be tender with lightly browned edges, while the beetroot should be fork-tender and caramelized around the edges.

If the pumpkin becomes tender before the beetroot, remove the pumpkin and continue roasting the beetroot for several additional minutes.

Allow the roasted vegetables to cool for about 5–10 minutes before assembling the salad.

Make the Dressing

While the vegetables roast, add the extra virgin olive oil, balsamic vinegar, honey or maple syrup, Dijon mustard, and lemon juice to a small bowl or jar.

Season with a little salt and cracked black pepper. Whisk well until the dressing becomes smooth and slightly emulsified.

Taste and adjust the balance if needed. Add a little more lemon juice for brightness, balsamic vinegar for tanginess, or honey/maple syrup for sweetness.

Assemble the Salad

Arrange the baby spinach, rocket, or mixed greens on a large serving platter if using. Spoon the warm roasted pumpkin and beetroot over the greens.

Scatter the crumbled feta generously over the top, followed by the chopped fresh parsley. Add toasted walnuts, pine nuts, or pepitas if desired.

Drizzle with the vinaigrette just before serving. You can gently toss the salad, or leave it layered on a platter for a more attractive presentation.

Serve

Serve the salad warm, slightly cooled, or at room temperature. For the best texture, add the dressing shortly before serving so the greens remain fresh and crisp.

Tips

Cut the Vegetables Evenly

Try to cut the pumpkin and beetroot into similar-sized cubes. Smaller pieces roast faster, while larger cubes take longer to become tender. Consistent sizing helps prevent some pieces from becoming overcooked while others remain firm.

Give the Vegetables Enough Space

A crowded baking sheet traps moisture and prevents proper browning. Use a large sheet pan and arrange the vegetables in a single layer. If necessary, divide them between two pans.

Use High Heat

Roasting at around 425°F (220°C) encourages caramelization and brings out the natural sweetness of both pumpkin and beetroot. Make sure the oven is fully preheated before the vegetables go in.

Keep the Feta Fresh

Add the feta after roasting rather than baking it with the vegetables. This keeps it creamy, salty, and pleasantly crumbly against the warm vegetables.

Toast the Nuts

If using walnuts, pine nuts, or pumpkin seeds, lightly toast them before adding them to the salad. A few minutes in a dry skillet can dramatically enhance their aroma and crunch.

Dress Just Before Serving

For the freshest salad, drizzle the vinaigrette over the vegetables and greens immediately before serving. This prevents the leafy greens from becoming soggy.

Control the Beetroot Color

Beetroot naturally releases a deep red-purple color. If you want the pumpkin and feta to remain more distinct in appearance, roast the beetroot on a separate section of the pan and combine everything during assembly.

Variations

Add More Greens

For a more substantial salad, serve the roasted vegetables over baby spinach, peppery rocket, or a combination of mixed greens. The fresh greens balance the sweetness of the roasted vegetables.

Try a Citrus Dressing

Replace some or all of the balsamic vinegar with fresh orange or lemon juice. Add a little orange zest for a bright, fresh variation that pairs especially well with beetroot.

Make It More Filling

Add cooked quinoa, couscous, lentils, or chickpeas to turn the salad into a satisfying vegetarian meal.

Add More Crunch

Use toasted walnuts, almonds, pecans, pine nuts, or pepitas. For a slightly sweet contrast, add a small handful of dried cranberries or raisins.

Use Goat Cheese

Replace the feta with soft goat cheese for a creamier and slightly tangy flavor. The goat cheese melts gently against the warm roasted vegetables.

Add Fresh Herbs

Parsley works beautifully, but fresh mint, dill, basil, or cilantro can also be added depending on the flavor profile you prefer.

Make It Spicy

Add a pinch of chili flakes, Aleppo pepper, or a little finely chopped fresh chili to the dressing for gentle heat.

Q&A

Can I prepare this salad ahead of time?

Yes. The roasted pumpkin and beetroot can be prepared up to a day ahead and refrigerated in an airtight container. For the best texture, allow them to come closer to room temperature before assembling the salad.

Can I serve Roasted Pumpkin and Beetroot Salad cold?

Absolutely. It can be served warm, at room temperature, or chilled. Room temperature is particularly good because the roasted vegetables have more flavor than when served directly from the refrigerator.

Can I use butternut squash instead of pumpkin?

Yes. Butternut squash is an excellent substitute and has a naturally sweet, creamy texture that works very well with beetroot and feta.

What greens work best in this salad?

Baby spinach and rocket are excellent choices. Mixed greens can also be used. Rocket adds a peppery flavor that contrasts nicely with the sweet roasted vegetables.

How should I store leftovers?

Store leftovers in an airtight container in the refrigerator for up to 3 days. If possible, keep the dressing and leafy greens separate until serving.

What can I serve with this salad?

It pairs well with grilled chicken, roasted fish, baked salmon, lamb, grilled halloumi, or crusty bread. It can also be served as part of a Mediterranean-style dinner.

Nutrition

Estimated nutrition per serving, based on 6 servings and without optional nuts or leafy greens:
Calories: 285 kcal
Protein: 7 g
Carbohydrates: 31 g
Fat: 16 g
Saturated Fat: 5 g
Fiber: 6 g
Sugar: 14 g
Sodium: 430 mg

Nutrition values are approximate and can vary depending on the exact pumpkin, beetroot, feta, dressing, and serving size used.

Conclusion

Bright, hearty, and full of contrasting textures, this Roasted Pumpkin and Beetroot Salad is an easy way to make vegetables the star of the meal. The roasted cubes develop beautiful caramelized edges while feta, parsley, and the homemade dressing add freshness and richness.

Whether served alongside a main course or enjoyed as a light vegetarian meal with added grains or legumes, this salad is a delicious combination of simple ingredients and bold natural flavors.

Homemade Peach Ice Cream

Homemade Peach Ice Cream

Nothing captures the flavor of summer quite like creamy Homemade Peach Ice Cream made with ripe, juicy peaches. This rich custard-style dessert combines fresh peach pieces with vanilla, cream, and milk, then finishes with colorful ribbons of raspberry or strawberry sauce.

The result is a smooth, refreshing frozen treat with sweet peach flavor, creamy richness, and a lightly tangy berry swirl in every scoop.

Prep Time: 30 minutes
Chill Time: 4–6 hours
Churn Time: 20–30 minutes
Freeze Time: 4–6 hours
Total Time: About 9–12 hours
Servings: 8

Ingredients

For the Peach Ice Cream Base

1 to 1½ pounds ripe fresh peaches, peeled, pitted, and finely diced

1 cup granulated white sugar, divided for macerating the fruit and sweetening the base

1½ to 2 cups heavy whipping cream

1 to 1½ cups whole milk

5–6 large egg yolks

1 teaspoon pure vanilla extract or 1 scraped vanilla bean

1 tablespoon lemon juice

A tiny pinch of kosher or fine salt

For the Pink Flecks/Swirl

½ to 1 cup fresh or frozen raspberries or strawberries

1–2 tablespoons sugar

1–2 teaspoons cornstarch, optional, if simmering the fruit into a thicker sauce

Instructions

Macerate the Peaches

Place the finely diced peaches in a medium bowl.

Add about ½ cup of the granulated sugar and the lemon juice. Gently toss everything together and allow the peaches to sit for approximately 20–30 minutes.

This process draws out the natural peach juices and intensifies their flavor.

After macerating, reserve the peaches and their juices separately if possible. You will use the fruit in the ice cream and can incorporate some of the flavorful juices into the base.

Prepare the Berry Swirl

Place the raspberries or strawberries in a small saucepan with 1–2 tablespoons of sugar.

Cook over medium-low heat, stirring occasionally, until the berries soften and release their juices.

If you want a thicker swirl, mix the cornstarch with a small amount of cold water to create a smooth slurry. Stir it into the berries and cook for another 1–2 minutes until slightly thickened.

Remove from the heat and allow the berry mixture to cool completely.

For a smoother swirl, strain the cooked berries through a fine-mesh sieve to remove the seeds. For a more rustic texture, leave the fruit as it is.

Prepare the Custard Base

Combine the heavy cream, whole milk, and remaining sugar in a medium saucepan.

Heat the mixture over medium heat until it is hot and steamy but not boiling. Stir occasionally to help dissolve the sugar.

While the dairy heats, whisk the egg yolks in a separate bowl until smooth.

Slowly pour a small amount of the hot cream mixture into the egg yolks while whisking continuously. This gradually raises the temperature of the yolks without scrambling them.

Continue adding the hot dairy little by little while whisking.

Cook the Custard

Pour the tempered egg mixture back into the saucepan.

Cook over low to medium-low heat, stirring constantly with a wooden spoon or heatproof spatula.

Continue cooking until the custard thickens enough to lightly coat the back of the spoon. Do not allow it to boil, as boiling can cause the eggs to curdle.

Remove the saucepan from the heat.

Stir in the vanilla and tiny pinch of salt.

Combine the Peaches and Custard

Add the macerated peaches and their juices to the custard base.

For a smoother peach ice cream, blend a portion of the peaches before adding them. For more noticeable fruit pieces, leave the peaches diced.

Pour the mixture into a clean container and cover it.

Refrigerate for at least 4–6 hours, or preferably overnight, until thoroughly chilled.

Churn the Ice Cream

Once the peach custard is completely cold, pour it into your ice cream maker.

Churn according to the manufacturer’s instructions, usually for approximately 20–30 minutes.

The ice cream should become thick and soft-serve-like in texture.

Add the Berry Swirl

Transfer about one-third of the churned ice cream into a freezer-safe container.

Drizzle some of the cooled berry sauce over the surface.

Repeat with another layer of ice cream and more berry sauce.

Continue layering until everything is used.

Use a knife or skewer to gently swirl the berry mixture through the ice cream. Do not overmix, or the pink swirl may disappear into the peach base.

Freeze Until Firm

Cover the container tightly and freeze for approximately 4–6 hours, or until the ice cream reaches your desired firmness.

For easier scooping, allow the ice cream to sit at room temperature for 5–10 minutes before serving.

Serve

Scoop the homemade peach ice cream into chilled bowls or cones.

Garnish with fresh peach slices, berries, or a small sprig of mint if desired.

Serve immediately and enjoy the creamy peach flavor with beautiful berry ribbons throughout.

Tips

Use Fully Ripe Peaches

The quality of the peaches makes a major difference. Choose ripe, fragrant peaches that are naturally sweet and juicy. Underripe peaches may produce a less flavorful ice cream.

Peel the Peaches

Removing the peach skins creates a smoother final texture. If you prefer a rustic ice cream, the skins can be left on, but they may remain slightly noticeable after freezing.

Do Not Boil the Custard

The custard should be cooked gently. If it reaches a vigorous boil, the egg yolks can scramble and create a grainy texture.

Strain the Custard

For an exceptionally smooth ice cream, pour the finished custard through a fine-mesh sieve before chilling. This catches any tiny pieces of cooked egg.

Chill Thoroughly

A completely cold base churns more efficiently and creates a smoother, creamier texture. Do not rush the chilling stage.

Cool the Berry Sauce Completely

Never add hot berry sauce to freshly churned ice cream. Allow it to cool completely so it does not melt the ice cream and create a watery swirl.

Do Not Over-Swirl

A few gentle swirls create attractive ribbons. Too much mixing will blend the berry sauce into the peach base instead of leaving distinct pink streaks.

Soften Before Scooping

Homemade ice cream freezes quite firmly. Allow it to sit at room temperature for several minutes before scooping for a smoother serving texture.

Variations

Peach-Only Ice Cream

Simply omit the berry swirl for a classic homemade peach ice cream. Increase the peach pieces slightly if you want more fruit throughout.

Peach and Raspberry Ice Cream

Use fresh raspberries for a bright, tangy contrast to the sweet peaches.

Peach and Strawberry Ice Cream

Strawberries create a sweeter, softer berry flavor and pair beautifully with ripe peaches.

Add Cinnamon

Add a small pinch of ground cinnamon to the custard for a warm peach-pie-inspired variation.

Add Almond Flavor

A tiny amount of almond extract can complement the peaches beautifully. Use it sparingly because almond extract is quite strong.

Add Crumble Pieces

Fold small pieces of cooled shortbread, graham crackers, or peach crumble into the finished ice cream before freezing.

Make It Extra Peachy

Blend some of the macerated peaches into a smooth puree and leave the rest diced. This gives the base a stronger peach flavor while maintaining pieces of fruit.

Q&A

Can I use frozen peaches?

Yes. Thaw them completely, drain excess liquid, and use them in the same way as fresh peaches. Fresh ripe peaches generally provide the brightest flavor.

Do I need an ice cream maker?

A traditional ice cream maker produces the smoothest texture, but the custard can also be frozen using a no-churn method. The texture may be somewhat different.

Why does homemade ice cream become hard in the freezer?

Homemade ice cream often contains fewer stabilizers than commercial ice cream, so it can freeze more firmly. Allowing it to sit at room temperature for several minutes makes scooping easier.

Can I make the custard a day ahead?

Yes. Preparing the custard the day before is actually helpful because a thoroughly chilled base churns better.

How long does homemade peach ice cream last?

For the best flavor and texture, enjoy it within about 1–2 weeks when stored tightly covered in the freezer.

Can I leave the peach pieces chunky?

Yes. Diced peaches provide a pleasant fruit texture. Just keep the pieces relatively small because large frozen fruit chunks can become hard.

Why did my berry swirl freeze too hard?

A very concentrated fruit sauce can freeze firmly. Keeping the swirl relatively thin and evenly distributed helps maintain a softer texture.

Nutrition

Estimated Nutrition Per Serving:
Calories: 365 kcal
Protein: 5 g
Carbohydrates: 39 g
Fat: 22 g
Saturated Fat: 13 g
Fiber: 2 g
Sugar: 34 g
Sodium: 75 mg

Nutrition values are approximate and can vary depending on the size and sweetness of the peaches, type of cream, amount of fruit swirl, and exact ingredients used.

Conclusion

This peach ice cream is a creamy, fruit-filled dessert that brings together everything wonderful about fresh summer produce. Juicy peaches create the signature flavor, while the vanilla custard adds richness and the berry swirl provides a beautiful sweet-tart contrast.

Serve it after a summer barbecue, scoop it into waffle cones, or pair it with your favorite fruit dessert for a homemade treat that is sure to disappear quickly.

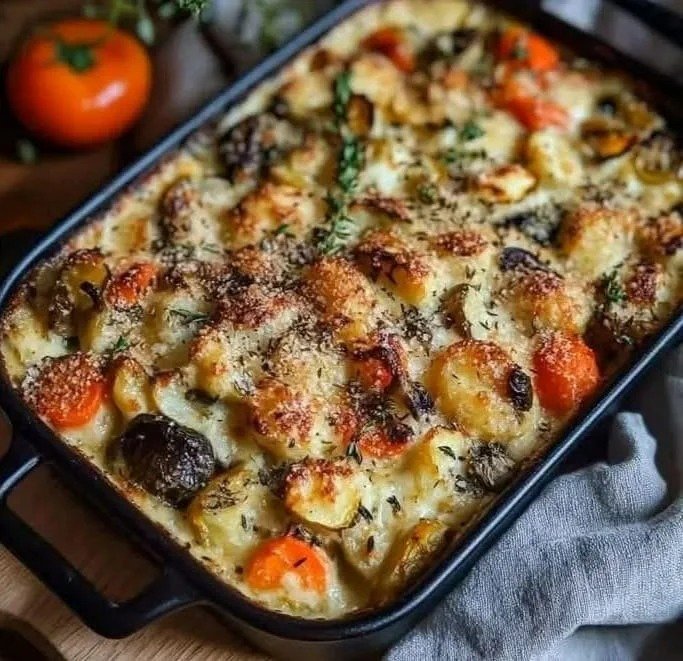
Mediterranean Winter Vegetable Gratin with Feta

Mediterranean Winter Vegetable Gratin with Feta

Warm, creamy, and packed with colorful vegetables, this Mediterranean Winter Vegetable Gratin with Feta is a comforting addition to any dinner table. Thinly sliced potatoes and carrots are layered with zucchini, onion, and garlic, then baked in a creamy feta mixture until tender and beautifully golden.

The combination of tangy feta, fragrant herbs, and roasted vegetables makes this gratin an easy way to turn everyday ingredients into an impressive family-style dish.

Prep Time: 20 minutes
Cook Time: 55–65 minutes
Total Time: 1 hour 15–25 minutes
Servings: 6

Ingredients

Base Ingredients

200 g feta cheese, crumbled

200 ml crème fraîche or heavy cream

2 tablespoons olive oil

Vegetables

3 medium potatoes, peeled and thinly sliced

2 carrots, peeled and thinly sliced

1 zucchini, washed and sliced

1 medium onion, thinly sliced

1 clove garlic, minced or finely chopped

Seasonings & Herbs

1–2 teaspoons Herbs de Provence, or a blend of dried thyme, rosemary, and oregano

Salt, to taste

Freshly cracked black pepper, to taste

Instructions

Prepare the Vegetables

Preheat the oven to 375°F (190°C).

Peel the potatoes and carrots, then slice them thinly and evenly. Thin slices are important because they allow the vegetables to cook at the same rate and create tender layers throughout the gratin.

Slice the zucchini and onion. Mince the garlic finely.

If the potato slices feel very starchy or wet, gently pat them dry with a clean kitchen towel. This helps prevent the gratin from becoming overly watery.

Prepare the Creamy Feta Mixture

Place the crème fraîche or heavy cream in a bowl. Add about half of the crumbled feta, the minced garlic, Herbs de Provence, a small pinch of salt, and freshly cracked black pepper.

Stir gently until the ingredients are well combined.

Reserve the remaining feta for the top of the gratin. Keeping some feta aside allows it to form a flavorful golden topping during baking.

Layer the Vegetables

Lightly grease a medium-sized baking dish with a little olive oil.

Arrange a layer of potato slices across the bottom of the dish. Add some carrots, zucchini, and onion over the potatoes.

Season lightly with black pepper and a small amount of salt. Be careful with the salt because feta is naturally salty.

Continue layering the remaining vegetables, trying to distribute them evenly throughout the dish.

Add the Cream and Feta

Pour the creamy feta mixture evenly over the layered vegetables. Gently spread it with the back of a spoon so that it reaches as many areas as possible.

Drizzle the remaining olive oil over the top.

Finish by scattering the remaining crumbled feta evenly across the surface.

Bake the Gratin

Cover the baking dish loosely with aluminum foil and place it in the preheated oven.

Bake for approximately 40 minutes. The foil helps the vegetables soften without allowing the top to brown too quickly.

Remove the foil and continue baking for another 15–25 minutes, or until the potatoes and carrots are completely tender and the top is lightly golden.

To check for doneness, insert a thin knife into the center. It should slide easily through the vegetables.

If the top needs additional browning, place the gratin under the broiler for 1–2 minutes at the end, watching carefully to prevent burning.

Rest and Serve

Remove the gratin from the oven and allow it to rest for about 10 minutes before serving.

This short resting period allows the creamy mixture to settle slightly and makes the gratin easier to portion.

Serve warm as a side dish with roasted chicken, grilled fish, baked meat, or a fresh Mediterranean salad.

Tips

Slice the Vegetables Evenly

Try to keep the potatoes and carrots thin and similar in thickness. If some pieces are much thicker than others, the thinner vegetables may become soft before the thicker pieces are fully cooked.

Choose the Right Baking Dish

A medium-depth baking dish works well for this recipe. Avoid using a dish that is extremely deep because the center may take much longer to cook.

Do Not Over-Salt

Feta provides plenty of salty flavor. Season the vegetables lightly and taste the cream mixture before adding additional salt.

Use Heavy Cream for Extra Richness

Crème fraîche gives the gratin a slightly tangy and luxurious flavor, while heavy cream creates a smoother and richer texture. Either works well.

Do Not Skip the Resting Time

Letting the gratin rest after baking gives the creamy sauce time to thicken slightly. Cutting into it immediately may cause more of the sauce to run to the bottom of the dish.

Check the Potatoes First

Potatoes are usually the best indicator of doneness. If a knife slides easily through the center potato slices, the other vegetables should generally be tender as well.

Watch the Final Browning

Feta can brown quickly under high heat. If using the broiler, stay close to the oven and remove the dish as soon as the top reaches the desired golden color.

Make It Ahead

The gratin can be assembled several hours before baking and kept covered in the refrigerator. Allow the dish to sit at room temperature briefly before placing it in the oven, then bake until completely hot and tender.

Variations

Add Mushrooms

Sliced mushrooms can be added between the vegetable layers for a deeper earthy flavor and extra texture.

Add Bell Peppers

Red or yellow bell peppers can add sweetness, color, and a slightly smoky Mediterranean character to the gratin.

Add Spinach

A handful of fresh spinach can be layered between the vegetables. It will wilt as the gratin bakes and adds extra greens to the dish.

Add Tomatoes

Thinly sliced tomatoes can be included for a brighter, more summery Mediterranean variation. Pat them lightly dry first to reduce excess moisture.

Add Parmesan

For a more deeply browned topping, sprinkle a small amount of Parmesan over the feta before baking.

Use Different Herbs

Instead of Herbs de Provence, try dried oregano, thyme, rosemary, basil, or a combination of your favorite Mediterranean herbs.

Make It More Garlicky

If you enjoy a stronger garlic flavor, increase the garlic slightly or add a small amount of roasted garlic to the cream mixture.

Q&A

Can I use heavy cream instead of crème fraîche?

Yes. Heavy cream works very well and creates a smooth, rich sauce. Crème fraîche adds a slightly tangy flavor.

Can I prepare this gratin ahead of time?

Yes. Assemble the gratin several hours ahead, cover it, and refrigerate it until ready to bake. Allow it to warm slightly before baking.

Why are my potatoes still firm?

The potato slices may be too thick, or the baking dish may be too deep. Slice the potatoes thinly and evenly, and make sure the dish is covered during the first stage of baking.

Can I use different vegetables?

Absolutely. Mushrooms, bell peppers, spinach, tomatoes, or other seasonal vegetables can be incorporated while keeping the same creamy feta base.

How do I store leftovers?

Allow the gratin to cool, then cover and refrigerate. Store leftovers for up to 3 days and reheat gently in the oven or microwave.

Can I freeze vegetable gratin?

It can be frozen, although the texture of the zucchini and cream sauce may change slightly after thawing. For the best texture, enjoy it fresh or refrigerated.

What should I serve with this gratin?

It pairs well with grilled or roasted chicken, fish, lamb, beef, or a simple green salad. It can also be served as a vegetarian main dish with crusty bread and additional salad.

Nutrition

Estimated Nutrition Per Serving:
Calories: 350 kcal
Protein: 11 g
Carbohydrates: 30 g
Fat: 21 g
Saturated Fat: 10 g
Fiber: 5 g
Sugar: 6 g
Sodium: 520 mg

Nutrition values are approximate and may vary depending on the exact type of feta, cream, vegetables, and portion sizes used.

Conclusion

This creamy vegetable gratin is a wonderful way to enjoy hearty seasonal vegetables with a Mediterranean twist. The combination of soft potatoes, sweet carrots, zucchini, aromatic onion and garlic, creamy feta, and fragrant herbs creates layers of flavor in every serving.

It works beautifully as a comforting side for a family meal, but it is substantial enough to enjoy as a vegetarian centerpiece with a crisp salad and warm bread.


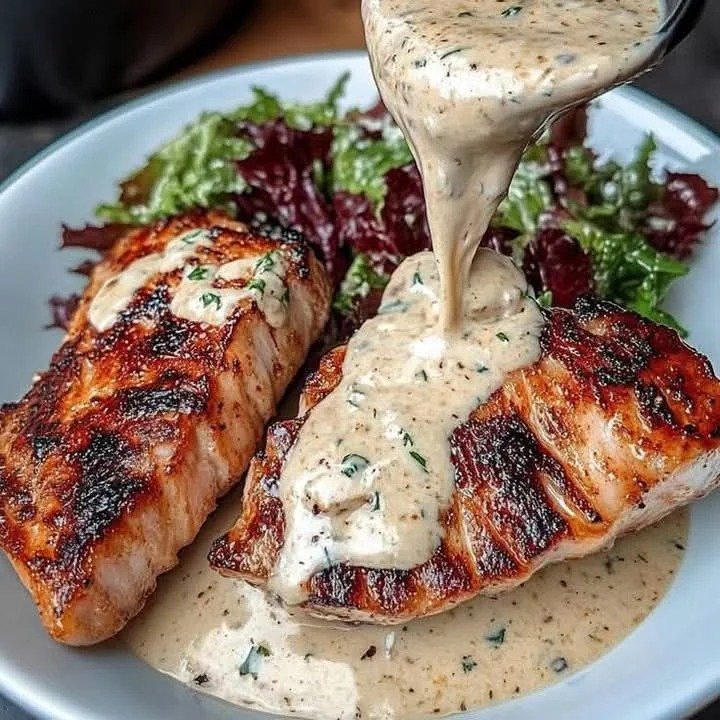
Mediterranean Seared Tuna with Creamy Garlic Veggie Salad

Mediterranean Seared Tuna with Creamy Garlic Veggie Salad

Bring restaurant-style flavor to your dinner table with this Mediterranean Seared Tuna with Creamy Garlic Veggie Salad. Golden-seared tuna is paired with crisp greens, juicy tomatoes, refreshing cucumber, and a simple garlic vinaigrette, then finished with a warm and creamy garlic sauce.

It is a quick, colorful, and satisfying recipe that makes the most of fresh ingredients while keeping preparation straightforward.

Prep Time: 15 minutes
Cook Time: 10 minutes
Total Time: 25 minutes
Servings: 2

Ingredients

For the Tuna

Tuna steaks: 2 fresh steaks, about 1½ inches thick

Olive oil: 1 tablespoon

Garlic powder: 1 teaspoon

Onion powder: ½ teaspoon

Dried oregano: ¼ teaspoon

Salt and black pepper: To taste

For the Creamy Garlic Sauce

Butter: 2 tablespoons

Garlic: 1 clove, minced; use 2 cloves for a stronger garlic flavor

Heavy cream: ¼ cup

Fresh parsley: 1 tablespoon, finely chopped, optional for garnish

Salt and black pepper: A pinch, to taste

For the Veggie Salad & Light Vinaigrette

Mixed greens: 1 large handful, such as arugula, spinach, or leaf lettuce

Cherry tomatoes: ¼ cup, halved

Cucumber: ¼ cup, diced or sliced

Olive oil: 1 tablespoon

Red wine vinegar: 1 tablespoon

Garlic: 1 clove, minced

Salt and black pepper: A pinch, to taste

Instructions

Prepare the Tuna

Pat the tuna steaks completely dry with paper towels. Removing excess moisture helps the tuna develop a beautiful golden-brown crust when seared.

In a small bowl, combine the garlic powder, onion powder, dried oregano, salt, and black pepper. Rub the seasoning mixture evenly over both sides of the tuna steaks.

Heat 1 tablespoon of olive oil in a heavy skillet over medium-high to high heat. The pan should be hot before adding the tuna.

Place the seasoned tuna steaks into the hot skillet. Sear for about 1½ to 2 minutes on the first side, then flip and cook for another 1½ to 2 minutes. For thicker steaks, sear the edges briefly as well.

The outside should be nicely browned while the center remains tender. For tuna that is preferred more well-done, continue cooking for another minute or two per side.

Transfer the tuna to a plate and allow it to rest for a few minutes while preparing the sauce and salad.

Make the Creamy Garlic Sauce

Reduce the heat to medium-low and add the butter to the same skillet.

Once the butter melts, add the minced garlic. Cook for about 30 seconds to 1 minute, stirring frequently, until fragrant. Avoid browning the garlic too much.

Pour in the heavy cream and gently stir, scraping up any flavorful browned bits from the bottom of the pan.

Allow the sauce to simmer gently for 2–3 minutes until slightly thickened. Season with a small pinch of salt and black pepper.

Stir in the chopped parsley if using. Keep the sauce warm over low heat.

Prepare the Veggie Salad

Add the mixed greens, halved cherry tomatoes, and cucumber to a bowl.

In a small separate bowl, whisk together the olive oil, red wine vinegar, minced garlic, salt, and black pepper.

Pour the vinaigrette over the vegetables and toss gently until everything is lightly coated. Avoid dressing the salad too far in advance so the greens remain crisp.

Assemble and Serve

Place the dressed veggie salad onto two serving plates.

Slice the rested tuna steaks into thick pieces or serve them whole, depending on your preference.

Arrange the tuna alongside or over the salad. Spoon the warm creamy garlic sauce over the tuna, allowing some of it to drizzle onto the vegetables.

Finish with fresh parsley and an optional sprinkle of freshly cracked black pepper. Serve immediately while the tuna and sauce are warm and the salad is fresh.

Tips

Choose Fresh Tuna

Look for tuna steaks with a firm texture and a fresh, clean appearance. Steaks around 1½ inches thick work particularly well because they can develop a flavorful crust without drying out too quickly.

Dry the Tuna Before Seasoning

Patting the tuna dry is an important step. Excess moisture can prevent proper browning and may cause the tuna to steam instead of sear.

Use a Very Hot Pan

A properly heated skillet helps create a flavorful crust quickly. Avoid moving the tuna around while it sears. Let it remain undisturbed until it is ready to flip.

Do Not Overcook the Tuna

Tuna can become dry when overcooked. If you enjoy a tender, steak-like center, keep the cooking time short. If you prefer tuna more thoroughly cooked, extend the cooking time gradually rather than cooking it aggressively from the beginning.

Control the Garlic Flavor

One garlic clove creates a balanced flavor in the sauce and vinaigrette. If you love garlic, you can use two cloves in the creamy sauce for a more pronounced taste.

Keep the Sauce Gentle

The cream sauce should simmer gently rather than boil rapidly. A low simmer helps it thicken smoothly while keeping the texture creamy.

Dress the Salad Just Before Serving

For the freshest texture, toss the greens with the vinaigrette shortly before serving. This keeps the cucumber crisp and prevents the greens from becoming soggy.

Let the Tuna Rest

Allowing the seared tuna to rest for a few minutes helps the juices settle and makes it easier to slice without losing too much moisture.

Variations

Add Mediterranean Herbs

Add fresh dill, basil, or a little extra oregano to the salad or creamy sauce for a stronger Mediterranean flavor.

Add Kalamata Olives

For a more traditional Mediterranean-inspired plate, add a small handful of sliced Kalamata olives to the veggie salad.

Add Feta Cheese

Crumbled feta can be scattered over the salad before serving. Its salty, tangy flavor pairs beautifully with tuna, cucumber, and tomatoes.

Make It Spicy

Add a pinch of crushed red pepper flakes to the tuna seasoning or creamy garlic sauce for gentle heat.

Use Lemon

A squeeze of fresh lemon juice over the finished tuna adds brightness and balances the richness of the cream sauce.

Lighten the Sauce

For a lighter sauce, replace part of the heavy cream with milk. The sauce will be slightly less rich but will still provide a creamy garlic flavor.

Change the Greens

Use arugula for a peppery bite, baby spinach for a milder flavor, or crisp romaine for extra crunch.

Q&A

Can I use frozen tuna steaks?

Yes. Thaw frozen tuna completely in the refrigerator before cooking, then pat it very dry with paper towels before seasoning and searing.

How long should I sear tuna steaks?

For approximately 1½-inch-thick steaks, about 1½–2 minutes per side gives a browned exterior with a tender center. Cooking time can be adjusted depending on your preferred doneness.

Can I make the creamy garlic sauce ahead of time?

Yes. The sauce can be prepared ahead and gently reheated over low heat. Add a small splash of cream if it becomes too thick.

Can I use Greek yogurt instead of heavy cream?

Yes, although the texture and flavor will be different. Greek yogurt creates a tangier sauce, while heavy cream produces a smoother and richer finish.

What can I serve with this tuna recipe?

The veggie salad makes a light side on its own. You can also serve the tuna with roasted potatoes, couscous, quinoa, rice, grilled vegetables, or warm Mediterranean flatbread.

How should leftover tuna be stored?

Store leftover tuna and salad separately in airtight containers in the refrigerator. For the best texture, enjoy the tuna within 1–2 days.

Nutrition

Estimated Nutrition Per Serving:
Calories: 520 kcal
Protein: 48 g
Carbohydrates: 8 g
Fat: 33 g
Saturated Fat: 13 g
Fiber: 2 g
Sugar: 4 g
Sodium: 420 mg

Nutrition values are approximate and can vary depending on the exact ingredients, tuna size, and portion amounts used.

Conclusion

If you are looking for a quick seafood dinner with plenty of flavor, this Mediterranean Seared Tuna with Creamy Garlic Veggie Salad is a delicious option. The seasoned tuna develops a beautiful seared crust, while the fresh salad adds crunch and brightness and the creamy garlic sauce brings everything together.

With simple ingredients and a short cooking time, this recipe is ideal for busy evenings when you want something fresh, colorful, and satisfying.


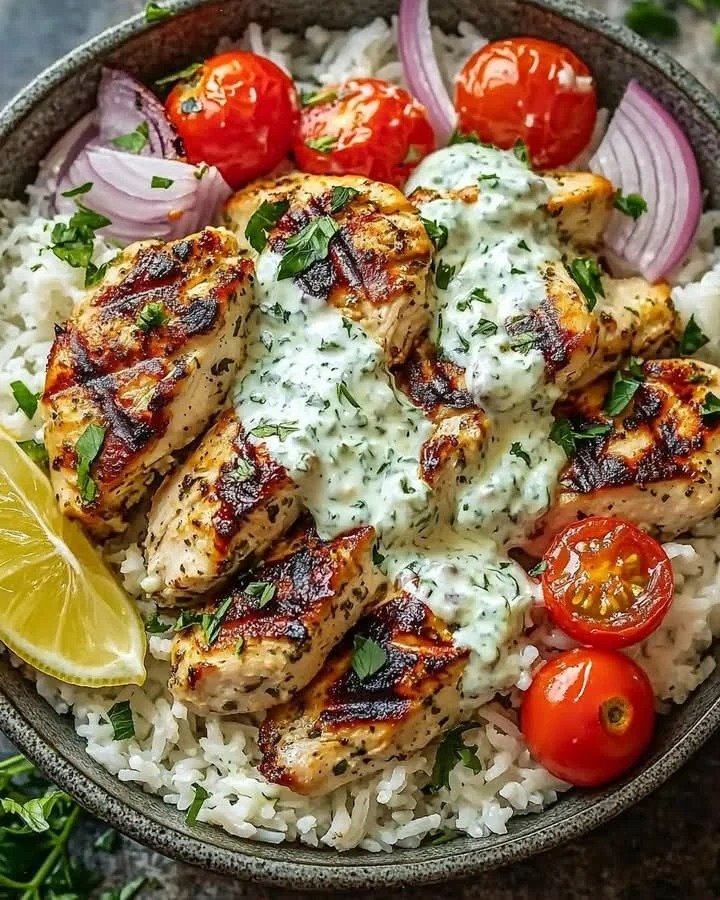
Baked Chicken Tzatziki Casserole Bowl

Baked Chicken Tzatziki Casserole Bowl

This Baked Chicken Tzatziki Casserole Bowl brings together tender seasoned chicken, fluffy rice, creamy homemade tzatziki, and fresh Mediterranean toppings in one comforting meal. Everything starts with a flavorful chicken and rice base that bakes together until tender and delicious.

Finished with cool cucumber tzatziki, juicy tomatoes, red onion, parsley, and fresh lemon, this easy casserole has a wonderful balance of warm, savory flavors and bright, refreshing toppings.

Prep Time: 20 minutes
Cook Time: 45–50 minutes
Total Time: 1 hour 5–10 minutes
Servings: 6

Ingredients

For the Chicken & Rice Base

1 lb boneless, skinless chicken breasts or thighs, cut into bite-sized cubes
2 cups uncooked long-grain white rice, such as Basmati or Jasmine
2½ cups chicken broth
1 tbsp olive oil
1 tsp garlic powder
1 tsp dried oregano
1 tsp salt
½ tsp black pepper

For the Homemade Tzatziki Sauce

1 cup Greek yogurt
½ cup cucumber, grated and squeezed dry with a paper towel
1 tbsp fresh lemon juice
1 tbsp olive oil
1 tbsp fresh dill, finely chopped
1 clove garlic, minced
Salt, to taste

Fresh Toppings & Garnish

1 cup cherry or grape tomatoes, halved
¼ cup red onion, thinly sliced
2 tbsp fresh parsley, chopped
1 lemon, cut into wedges or slices

Instructions

Prepare the Chicken and Rice

Preheat the oven to 375°F. Lightly grease a large baking dish with a little olive oil.

Add the uncooked rice and chicken broth to the baking dish. Stir gently to distribute the rice evenly across the bottom.

Add the bite-sized chicken pieces and drizzle with the olive oil. Sprinkle the garlic powder, dried oregano, salt, and black pepper over the chicken and rice.

Gently stir everything together so the chicken is evenly seasoned and the rice remains distributed throughout the dish.

Cover and Bake

Cover the baking dish tightly with aluminum foil. The tight seal is important because it helps trap steam and allows the rice to cook properly while the chicken becomes tender.

Place the covered dish in the preheated oven and bake for approximately 35–40 minutes.

Avoid opening the oven repeatedly during this stage because releasing the steam can interfere with the rice cooking evenly.

Check the Chicken and Rice

After about 35 minutes, carefully remove the foil because hot steam will escape.

Check the rice for tenderness and make sure the chicken is cooked through. The chicken should no longer be pink in the center and should reach a safe internal temperature of 165°F.

If the rice needs additional cooking, cover the dish again and return it to the oven for another 5–10 minutes.

If the rice is cooked but there is still excess liquid, leave the casserole uncovered for a few minutes to allow some moisture to evaporate.

Rest the Casserole

Once the chicken and rice are fully cooked, remove the casserole from the oven.

Let it rest uncovered for about 5 minutes. This gives the rice time to finish absorbing the remaining moisture and allows the flavors to settle.

Gently fluff the rice around the chicken with a fork.

Make the Homemade Tzatziki

While the casserole is baking, prepare the tzatziki.

Place the Greek yogurt in a bowl. Add the grated cucumber, making sure it has been squeezed thoroughly to remove excess moisture.

Add the lemon juice, olive oil, chopped fresh dill, minced garlic, and salt.

Stir everything together until smooth and creamy.

Taste the tzatziki and adjust the salt or lemon juice if needed. Cover and refrigerate until the casserole is ready to serve.

Prepare the Fresh Toppings

While the chicken and rice rest, halve the cherry or grape tomatoes and thinly slice the red onion.

Chop the fresh parsley and cut the lemon into wedges or slices.

Keep the toppings fresh and chilled until serving.

Assemble the Casserole Bowls

Spoon portions of the warm chicken and rice mixture into individual serving bowls.

Add a generous spoonful of homemade tzatziki over each portion.

Top with halved tomatoes, sliced red onion, and fresh parsley.

Finish with a squeeze of fresh lemon juice or serve with lemon wedges on the side.

Serve immediately while the chicken and rice are warm and the tzatziki is cool and refreshing.

Tips

Rinse the Rice

If preferred, rinse the rice under cool water until the water runs mostly clear. This removes some surface starch and can help produce fluffier rice.

Use a Tightly Covered Dish

A secure foil covering is important when baking rice. It traps the steam needed to cook the rice properly and prevents the liquid from evaporating too quickly.

Cut the Chicken Evenly

Cut the chicken into similar-sized bite-sized pieces so everything cooks at approximately the same rate.

Squeeze the Cucumber Well

This is one of the most important steps for creamy tzatziki. Excess cucumber water can make the sauce thin and watery, so squeeze the grated cucumber thoroughly before adding it to the yogurt.

Use Full-Fat Greek Yogurt for Richness

Full-fat Greek yogurt creates a particularly creamy tzatziki. Lower-fat Greek yogurt can also be used if preferred.

Let the Casserole Rest

Allowing the cooked casserole to rest for a few minutes helps the rice absorb remaining moisture and makes it easier to serve.

Keep the Tzatziki Cold

The contrast between warm chicken and rice and cool, creamy tzatziki makes this dish especially enjoyable. Refrigerate the sauce until you are ready to serve.

Add Toppings at the End

Fresh tomatoes, red onion, parsley, and lemon are best added after baking. This keeps their flavors bright and their textures fresh.

Variations

Add Feta Cheese

Crumble feta over the finished bowls for a salty, creamy Mediterranean touch.

Add Kalamata Olives

Sliced Kalamata olives pair beautifully with the chicken, tzatziki, and lemon flavors.

Add Roasted Vegetables

Serve the casserole with roasted zucchini, bell peppers, broccoli, or cauliflower for an extra vegetable-packed meal.

Make It Spicy

Add crushed red pepper flakes, chili flakes, or a drizzle of hot sauce over the finished bowl.

Use Brown Rice

Long-grain brown rice can be used, although it generally requires additional liquid and cooking time compared with white rice.

Add Mediterranean Herbs

Fresh oregano, mint, or extra dill can be sprinkled over the finished bowls for an even more herbaceous flavor.

Make a Meal-Prep Bowl

Divide the chicken and rice into meal-prep containers and keep the tzatziki and fresh toppings separate. Add them just before eating.

Add Chickpeas

Add drained and rinsed chickpeas to the finished bowls for extra texture and a more substantial Mediterranean-style meal.

Q&A

Can I use chicken thighs instead of chicken breasts?

Yes. Boneless, skinless chicken thighs work very well and can provide a slightly richer flavor and juicier texture.

Can I prepare the tzatziki ahead of time?

Yes. Tzatziki can be prepared several hours ahead and kept covered in the refrigerator. Chilling also allows the garlic and herbs to develop more flavor.

Why is my baked rice still hard?

Rice may remain firm if the dish was not covered tightly or if too much steam escaped during baking. Cover it again and continue baking until the rice becomes tender.

Can I use another type of rice?

Long-grain white rice such as Basmati or Jasmine is recommended for this recipe. Other varieties may require different liquid amounts and cooking times.

How do I know when the chicken is done?

The chicken should be fully opaque in the center and reach an internal temperature of 165°F.

Can I make this casserole ahead of time?

Yes. The baked chicken and rice can be prepared ahead and refrigerated. Reheat thoroughly and add the cold tzatziki and fresh toppings just before serving.

How long do leftovers last?

Store the cooked chicken and rice in an airtight container in the refrigerator and use within 3–4 days. Keep the tzatziki refrigerated separately when possible.

Can I freeze the chicken and rice?

The chicken and rice base can be frozen, although the texture of the rice may change slightly after thawing. Freeze without the tzatziki and fresh toppings and add those after reheating.

Nutrition

Estimated Nutrition Per Serving:
Calories: 520 kcal
Protein: 35 g
Carbohydrates: 58 g
Fat: 16 g
Saturated Fat: 4 g
Cholesterol: 75 mg
Sodium: 720 mg
Fiber: 3 g
Sugar: 5 g

Nutrition values are estimates and may vary depending on the specific ingredients, yogurt, chicken, and portion sizes used.

Conclusion

This Baked Chicken Tzatziki Casserole Bowl is a comforting way to enjoy fresh Mediterranean flavors in a simple baked meal. The tender chicken and fluffy seasoned rice create a satisfying base, while creamy tzatziki, juicy tomatoes, crisp red onion, herbs, and lemon bring freshness to every bite.

It is easy to customize with feta, olives, vegetables, or chickpeas and works especially well for family dinners and meal prep. Warm, creamy, fresh, and flavorful, this casserole bowl is a complete meal made with simple ingredients.