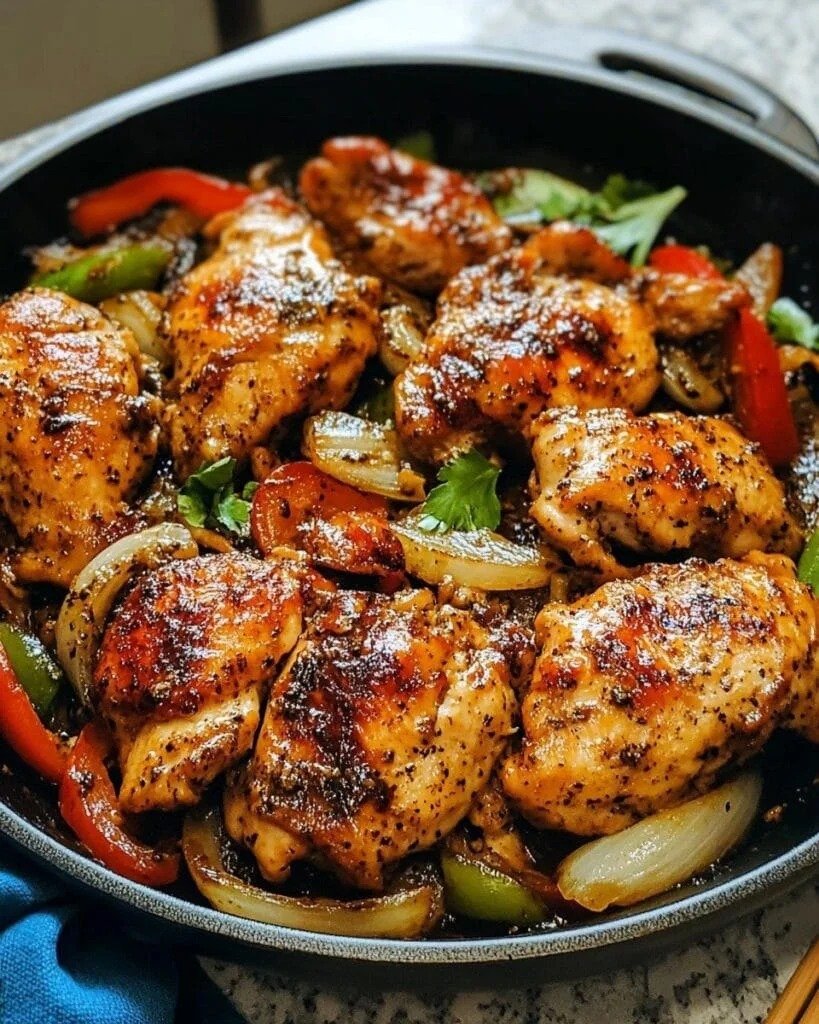
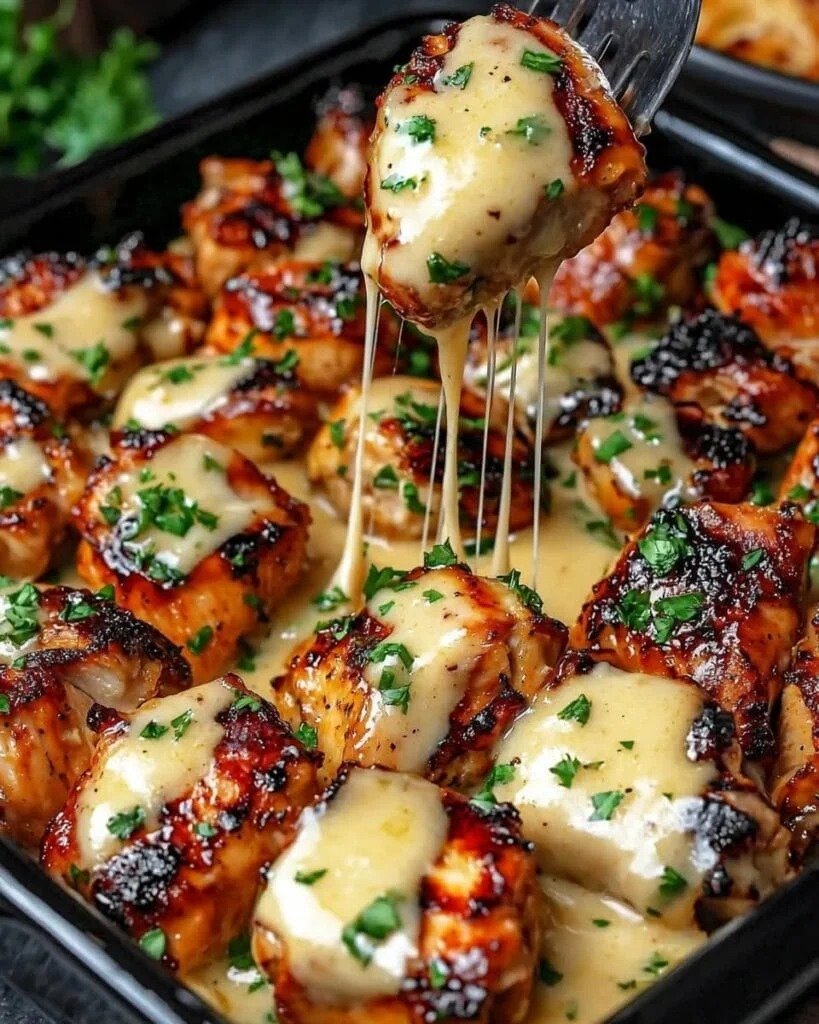
Hearty Chicken and Vegetable Stew

Hearty Chicken and Vegetable Stew

 Ingredients

• 1 lb chicken breast or thighs, cooked and shredded
• 2 tbsp olive oil
• 1 large onion, chopped
• 3 cloves garlic, minced
• 3 carrots, sliced
• 3 medium potatoes, cubed
• 2 celery stalks, chopped
• 1 cup green beans (fresh or frozen)
• 1 cup corn (optional)
• 4 cups chicken broth
• 1 cup water (or more as needed)
• 1 tsp dried thyme
• 1 tsp dried rosemary
• 1/2 tsp paprika
• Salt and pepper to taste
• 2 tbsp tomato paste (optional, for richness)
• 1–2 tbsp flour or cornstarch (optional, for thickening)
• Fresh parsley for garnish (optional)

 Instructions

1. Sauté the base
Heat olive oil in a large pot over medium heat.
Add chopped onion and cook for 3–4 minutes until soft.
Stir in garlic and cook another 30 seconds.
2. Add vegetables
Toss in carrots, celery, and potatoes. Cook for about 5 minutes, stirring occasionally.
3. Build flavor
Stir in tomato paste (if using), thyme, rosemary, paprika, salt, and pepper.
4. Add liquids
Pour in chicken broth and water. Bring to a boil, then reduce to a simmer.
5. Simmer
Cover and let cook for 15–20 minutes, until vegetables are tender.
6. Add chicken & remaining veggies
Stir in shredded chicken, green beans, and corn. Simmer another 8–10 minutes.
7. Thicken (optional)
• Mix 1–2 tbsp flour or cornstarch with a little cold water.
• Stir into stew and simmer until thickened.
8. Finish & serve
Taste and adjust seasoning. Garnish with parsley if desired.

Baked Cod with Lemon and Garlic Recipe

Baked Cod with Lemon and Garlic

Finding a healthy dinner that is quick, flavorful, and easy to prepare can be challenging, especially on busy days. This Baked Cod with Lemon and Garlic recipe is a simple solution for anyone looking for a nutritious meal without spending hours in the kitchen.

Tender cod fillets are seasoned with fresh garlic, lemon juice, herbs, and a delicious olive oil and butter mixture, then baked until perfectly flaky. The result is a light yet satisfying seafood dish with fresh flavors that the whole family can enjoy.

Cod is a mild white fish that works well with many seasonings. The combination of lemon and garlic enhances the natural flavor of the fish while keeping the recipe simple and refreshing.

Whether you are preparing a quick weeknight dinner, a healthy meal prep option, or a family seafood meal, this baked cod recipe is a great choice.

Why You’ll Love This Baked Cod with Lemon and Garlic Recipe

There are many reasons this recipe is perfect for everyday cooking:

Quick and Easy Preparation

This meal requires minimal preparation and cooks in less than 30 minutes, making it ideal for busy schedules.

Healthy and Protein-Rich

Cod is naturally high in protein and provides important nutrients while remaining a lighter meal option.

Simple Ingredients

You only need basic pantry ingredients, fresh lemon, garlic, and herbs to create a flavorful dish.

Family-Friendly Flavor

The mild taste of cod combined with lemon and garlic makes this recipe enjoyable even for people who are new to seafood.

Ingredients

For the Baked Cod

  • 4 fresh or thawed cod fillets (about 5–6 ounces each)
  • 2 tablespoons olive oil
  • 2 tablespoons melted butter
  • 4 garlic cloves, finely minced
  • 2 tablespoons fresh lemon juice
  • 1 teaspoon lemon zest
  • 1 teaspoon paprika
  • 1 teaspoon Italian seasoning
  • ½ teaspoon salt (adjust to taste)
  • ½ teaspoon black pepper
  • 2 tablespoons fresh parsley, chopped
  • Lemon slices for garnish

How to Make Baked Cod with Lemon and Garlic

Step 1: Prepare the Oven and Baking Dish

Preheat your oven to 400°F (200°C).

Lightly grease a baking dish with olive oil or cooking spray to prevent the fish from sticking.

If your cod fillets contain excess moisture, gently pat them dry using paper towels. Removing extra moisture helps the seasoning stick better and improves the final texture.

Step 2: Make the Lemon Garlic Sauce

In a small bowl, combine:

  • Melted butter
  • Olive oil
  • Minced garlic
  • Fresh lemon juice
  • Lemon zest
  • Paprika
  • Italian seasoning
  • Salt
  • Black pepper

Mix everything together until well combined.

This simple sauce creates the main flavor of the dish and keeps the cod moist while baking.

Step 3: Season the Cod Fillets

Place the cod fillets in the prepared baking dish.

Pour the lemon garlic mixture evenly over each piece of fish, making sure the surface is well coated.

Add fresh lemon slices around the fillets for extra citrus flavor.

Step 4: Bake the Cod

Place the baking dish in the preheated oven.

Bake for approximately 12–15 minutes, depending on the thickness of your cod fillets.

The fish is ready when:

  • It turns opaque in color
  • It flakes easily with a fork
  • The internal temperature reaches about 145°F (63°C)

Avoid overbaking because cod can become dry when cooked too long.

Step 5: Garnish and Serve

Remove the baked cod from the oven and sprinkle fresh parsley on top.

Serve immediately with your favorite healthy side dishes.

Best Side Dishes to Serve With Baked Cod

This lemon garlic cod pairs well with:

Roasted Vegetables

Roasted broccoli, carrots, zucchini, or asparagus create a balanced meal.

Rice or Quinoa

A simple rice or quinoa side absorbs the flavorful lemon garlic sauce.

Fresh Salad

A fresh green salad adds crunch and freshness to the meal.

Roasted Potatoes

Crispy potatoes make this recipe more filling for a family dinner.

Tips for Perfect Baked Cod

Choose Quality Fish

Fresh cod usually has a mild smell and firm texture. If using frozen cod, thaw it completely before cooking.

Dry the Fish Before Seasoning

Patting the fish dry helps the seasoning stick and prevents excess water from affecting the texture.

Do Not Overcook Cod

Cod cooks quickly. Start checking after 12 minutes to avoid making it dry.

Adjust Flavors

You can customize this recipe by adding:

  • Red pepper flakes for spice
  • Fresh dill for extra seafood flavor
  • Parmesan cheese for a richer taste
  • Extra garlic for stronger flavor

Fresh Cod vs Frozen Cod: Which Is Better?

Both fresh and frozen cod can work well for this recipe.

Fresh cod is convenient when available, but high-quality frozen cod is often a great option because it is usually frozen shortly after being caught.

The most important step is properly thawing frozen fish and removing excess moisture before cooking.

How to Store Leftover Baked Cod

If you have leftovers:

  • Store cooked cod in an airtight container.
  • Keep it refrigerated for up to 2 days.
  • Reheat gently to avoid drying out the fish.

You can also use leftover cod in salads, wraps, or rice bowls.

Common Mistakes to Avoid

Cooking at the Wrong Temperature

Very high heat can dry out delicate fish, while low heat may prevent proper cooking.

Using Too Much Salt

Cod has a mild flavor, so balanced seasoning works best.

Skipping the Drying Step

Wet fish may not absorb flavors properly.

Overloading With Ingredients

The natural flavor of cod works best with simple seasonings like lemon, garlic, and herbs.

Health Benefits of Baked Cod with Lemon and Garlic

High Protein Meal

Cod provides quality protein that supports muscle health and helps keep you satisfied.

Light and Balanced Option

This recipe uses simple ingredients and can fit into many balanced eating plans.

Garlic Benefits

Garlic contains natural compounds that are commonly associated with supporting overall wellness.

Lemon Flavor Boost

Fresh lemon adds vitamin C and bright flavor without needing heavy sauces.

Cod provides quality protein that supports muscle health and helps keep you satisfied.

Frequently Asked Questions

Can I use another fish instead of cod?

Yes. You can replace cod with haddock, tilapia, or another mild white fish. Cooking time may vary depending on thickness.

How long should cod be baked?

Most cod fillets cook in about 12–15 minutes at 400°F, but thicker pieces may require additional time.

Can I make this recipe without butter?

Yes. Replace butter with additional olive oil for a dairy-free version.

Is baked cod good for meal prep?

Yes. Cooked cod can be stored and enjoyed for quick lunches or dinners within a couple of days.

How do I know cod is fully cooked?

The fish should become opaque and separate easily with a fork.

Final Thoughts

This Baked Cod with Lemon and Garlic recipe is proof that healthy meals can be simple, delicious, and satisfying. With tender flaky fish, fresh lemon, aromatic garlic, and herbs, this dish delivers great flavor without complicated preparation.

It is an excellent choice for busy families, seafood lovers, and anyone looking for a nutritious dinner option that can be prepared quickly.

Add this easy baked cod recipe to your weekly meal plan for a fresh, healthy, and flavorful homemade dinner.

Air Fryer Crispy Pickle Chips

Air Fryer Crispy Pickle Chips served with creamy ranch dipping sauce

Air Fryer Crispy Pickle Chips

If you love crunchy snacks with a tangy bite, these Air Fryer Crispy Pickle Chips are worth making. They have a golden, crunchy coating on the outside while the pickle stays juicy and flavorful inside. Best of all, you can make them in the air fryer with very little oil.

This easy appetizer works well for game days, family movie nights, parties, or a quick afternoon snack. Serve the pickle chips with ranch dressing, spicy mayo, or your favorite dipping sauce for an extra layer of flavor.

The key to getting a crisp coating is simple: dry the pickle slices well before breading them and avoid overcrowding the air fryer basket.

Why You’ll Love These Crispy Pickle Chips

  • Quick to make: They cook in about 10 minutes.
  • Extra crunchy: Panko breadcrumbs create a crisp coating.
  • Less oil: The air fryer needs only a light spray of cooking oil.
  • Easy ingredients: Most of the ingredients are common pantry staples.
  • Great for sharing: They make an excellent party appetizer or snack.
  • Easy to customize: Add spices to make them mild, smoky, or spicy.

Ingredients You’ll Need

For the Pickle Chips

  • 1 jar dill pickle chips, about 16 ounces
  • ½ cup all-purpose flour
  • 2 large eggs
  • 1 cup panko breadcrumbs
  • ½ teaspoon garlic powder
  • ½ teaspoon smoked paprika
  • ½ teaspoon onion powder
  • ¼ teaspoon black pepper
  • ¼ teaspoon salt
  • Cooking spray

For Serving

  • Ranch dressing
  • Spicy ranch
  • Chipotle mayo
  • Buffalo sauce
  • Fresh chopped parsley or dill, optional

Ingredient tip: Use refrigerated dill pickle chips with a firm texture. Very thin or soft pickle slices can become less crisp during cooking.

How to Make Air Fryer Crispy Pickle Chips

Step 1: Drain and Dry the Pickles

Drain the pickle chips in a colander and let the excess liquid run off.

Place them between several layers of paper towels and gently press to remove as much moisture as possible.

This step matters because excess pickle juice can make the breading slide off and prevent it from becoming crisp.

Step 2: Prepare the Breading Stations

Set up three shallow bowls.

Add the flour to the first bowl.

Crack the eggs into the second bowl and whisk until smooth.

In the third bowl, combine the panko breadcrumbs, garlic powder, smoked paprika, onion powder, black pepper, and salt.

Mix the breadcrumb seasoning evenly so every bite gets the same flavor.

Step 3: Coat Each Pickle Slice

Take one dried pickle chip and coat it lightly in flour.

Shake off the excess flour, then dip it into the beaten egg.

Finally, press it gently into the seasoned panko mixture until both sides are covered.

Repeat with the remaining pickle slices.

Tip: Use one hand for the dry ingredients and the other hand for the egg mixture to keep your fingers from becoming coated with breading.

Step 4: Preheat the Air Fryer

Preheat your air fryer to 400°F (200°C) for about 3 minutes.

A properly heated basket helps the coating start crisping as soon as the pickle chips go in.

Lightly spray the basket with cooking spray.

Step 5: Arrange the Pickle Chips

Place the breaded pickle slices in a single layer inside the air fryer basket.

Leave a little space between each piece so hot air can circulate around them.

Do not stack or overcrowd the basket. Cook in batches if necessary.

Lightly spray the tops of the pickle chips with cooking spray.

Step 6: Air Fry Until Golden and Crispy

Air fry at 400°F (200°C) for 8–10 minutes.

After about 5 minutes, carefully flip the pickle chips.

Continue cooking until the coating becomes golden brown and crunchy.

Cooking time can vary slightly depending on the thickness of the pickle slices and the air fryer model.

Step 7: Serve Immediately

Remove the crispy pickle chips from the basket and let them cool for 1–2 minutes.

Serve them while they are still warm with ranch dressing, spicy mayo, Buffalo sauce, or another favorite dip.

For extra flavor, sprinkle a little chopped fresh dill or parsley over the top before serving.

Tips for Extra-Crispy Pickle Chips

Dry the Pickles Really Well

Moisture is the biggest enemy of crispy breading. Pat the pickle slices thoroughly with paper towels before coating them.

Use Panko Breadcrumbs

Panko creates a lighter and crunchier coating than regular fine breadcrumbs. It also holds up well during air frying.

Don’t Skip the Preheat

Starting with a hot air fryer helps the breading crisp quickly instead of slowly absorbing moisture.

Avoid Overcrowding

Air needs to move around every piece. A crowded basket can leave you with soft spots and uneven browning.

Spray Lightly With Oil

A quick mist of cooking spray helps the panko turn golden without requiring deep frying.

Flip Halfway Through

Turning the pickle chips halfway through cooking helps both sides develop an even crunchy texture.

How to Make Spicy Pickle Chips

If you enjoy extra heat, customize the breadcrumb mixture with ¼–½ teaspoon of cayenne pepper.

You can also add crushed red pepper flakes, Cajun seasoning, or a small amount of chili powder.

For a spicy dipping sauce, mix ranch dressing with a little hot sauce and smoked paprika.

What to Serve With Pickle Chips

These crispy bites are delicious on their own, but a good dipping sauce makes them even better.

Try serving them with:

  • Classic ranch dressing
  • Jalapeño ranch
  • Buffalo sauce
  • Spicy mayonnaise
  • Garlic aioli
  • Honey mustard
  • Chipotle sauce

They also pair nicely with burgers, sandwiches, grilled chicken, and other casual party foods.

How to Store Leftovers

Air-fried pickle chips are best when eaten immediately because the coating gradually loses its crunch.

If you have leftovers, place them in an airtight container and refrigerate for up to 2 days.

Avoid sealing them while they are still hot because trapped steam can make the coating soggy.

How to Reheat Pickle Chips

For the best texture, reheat leftover pickle chips in the air fryer.

Place them in a single layer and cook at 375°F (190°C) for about 3–5 minutes, checking frequently.

Avoid reheating them in the microwave because the breading can become soft.

Common Mistakes to Avoid

Using Wet Pickles

If the pickle slices are still covered with liquid, the breading may not stick properly.

Making the Coating Too Thick

A heavy coating can separate from the pickle while cooking. Use an even layer of flour, egg, and breadcrumbs.

Overcrowding the Basket

Too many pieces at once restrict airflow and can prevent proper browning.

Skipping the Flip

Flipping halfway through cooking helps the coating crisp more evenly.

Leaving Them in Too Long

Pickles contain a lot of moisture, so overcooking can make them chewy instead of crisp.

Recipe Summary

Prep Time: 15 minutes
Cook Time: 8–10 minutes
Total Time: About 25 minutes
Servings: 4
Temperature: 400°F (200°C)

These Air Fryer Crispy Pickle Chips are a simple way to turn everyday dill pickles into a crunchy snack. The combination of tangy pickle flavor, seasoned panko, and a creamy dipping sauce makes them perfect for casual gatherings or weekend snacking.

For the best results, remember three things: dry the pickles well, keep the pieces separated, and serve them fresh from the air fryer.

Frequently Asked Questions

Can I use pickle spears instead of pickle chips?

Yes. Cut pickle spears into smaller pieces, dry them well, and add a few extra minutes of cooking time if needed.

Why are my pickle chips not crispy?

The most common causes are excess moisture and overcrowding. Dry the pickles thoroughly and cook them in a single layer.

Can I make these without eggs?

Yes. You can use buttermilk or a thin milk-and-flour mixture to help the breadcrumbs adhere to the pickle slices.

Can I use regular breadcrumbs?

Yes, but panko usually gives a lighter and crunchier coating than traditional breadcrumbs.

Can I make these pickle chips spicy?

Yes. Add cayenne pepper, crushed red pepper flakes, Cajun seasoning, or chili powder to the breadcrumb mixture.

How long should I air fry pickle chips?

At 400°F (200°C), most pickle chips take about 8–10 minutes, with a flip halfway through cooking.

What is the best dipping sauce for pickle chips?

Ranch is a classic choice, but spicy ranch, Buffalo sauce, chipotle mayo, and garlic aioli also pair well with them.

Can I make these ahead of time?

They are best served immediately, but leftovers can be refrigerated and reheated in the air fryer for 3–5 minutes at 375°F.

Sure — add this Final Thoughts section at the end, just before the FAQs:

Final Thoughts

These Air Fryer Crispy Pickle Chips are an easy way to turn simple dill pickles into a crunchy, flavorful snack. The seasoned panko coating adds a satisfying crunch, while the pickle stays tangy and juicy inside.

For the crispiest results, dry the pickles thoroughly, avoid overcrowding the air fryer, and serve them soon after cooking. Pair them with ranch, spicy mayo, or your favorite dipping sauce for a snack that is perfect for game day, parties, or a quick family treat.

Once you try this recipe, you can easily adjust the seasonings to create your own favorite version. A little cayenne adds heat, smoked paprika gives a deeper flavor, and fresh dill adds a bright finish.

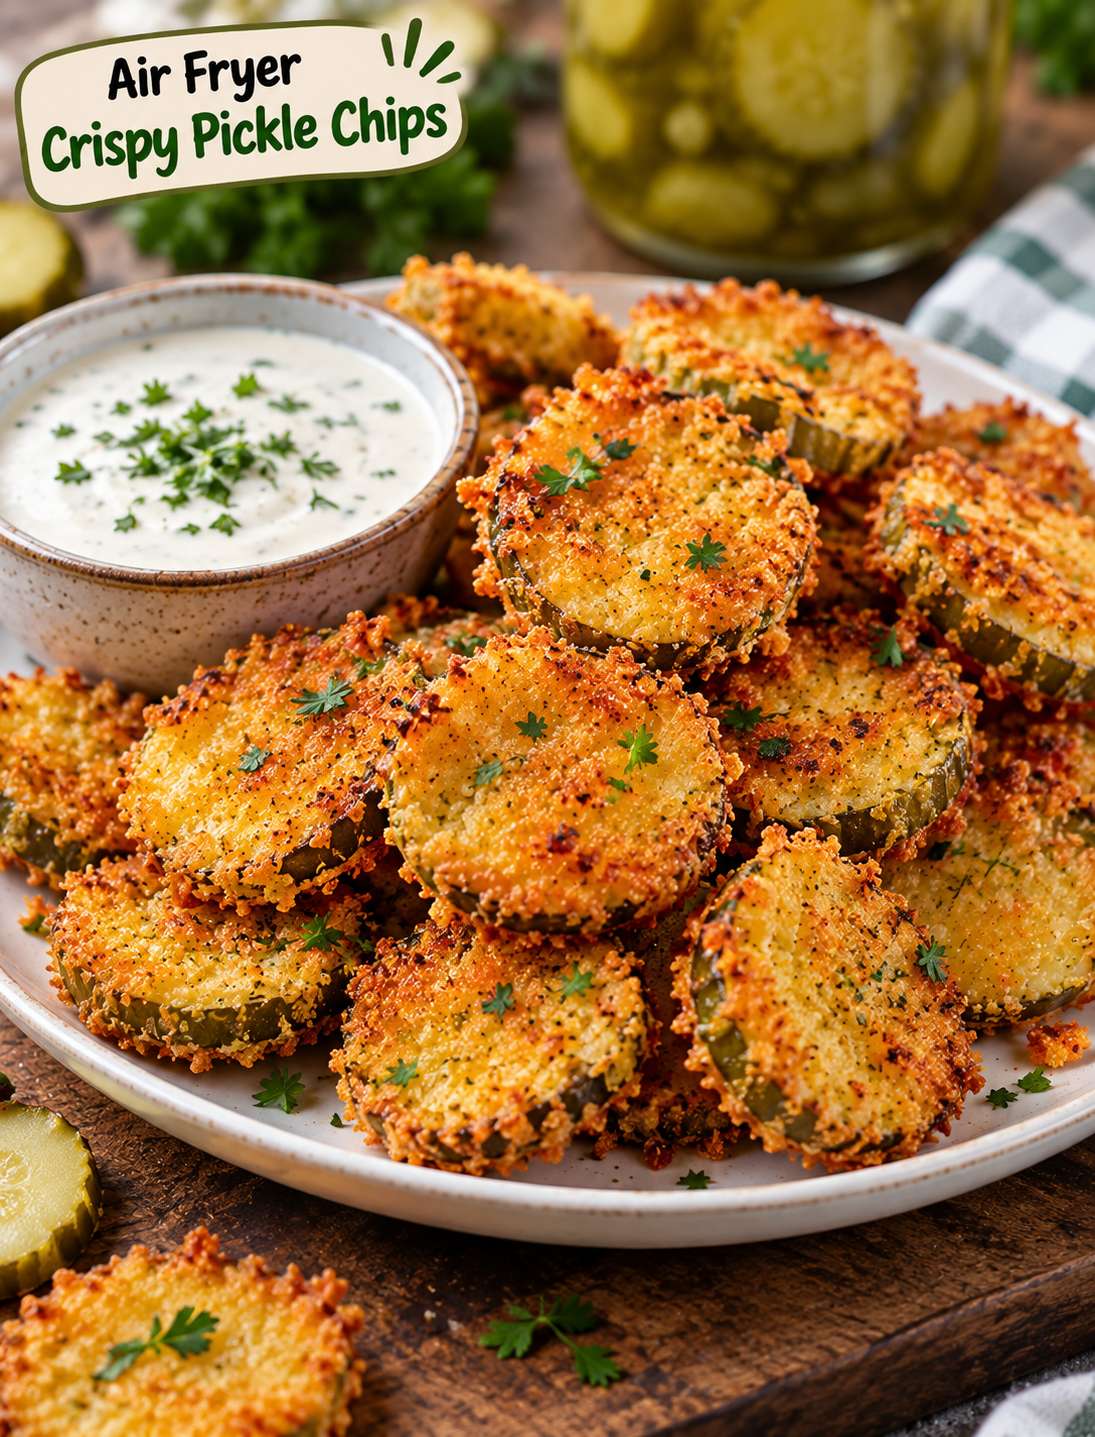
Black Pepper Chicken (Air Fryer Recipe)

Black Pepper Chicken (Air Fryer Recipe)

Bring bold Asian-inspired flavors to your kitchen with this easy Black Pepper Chicken made in the air fryer. Tender chicken is seasoned with soy sauce, oyster sauce, garlic, onion powder, and generous cracked black pepper before being cooked alongside colorful peppers and onion.

Everything is finished with a quick sweet-savory sauce featuring soy, honey, and toasted sesame oil. Serve it over fluffy rice or noodles for a fast and flavorful homemade dinner.

Prep Time: 15 minutes
Marinating Time: 15–30 minutes
Cook Time: 12–16 minutes
Sauce Time: 5 minutes
Total Time: 32–51 minutes
Servings: 4

Ingredients

Main Ingredients

1.5 lbs boneless chicken thighs or breasts, cut into bite-sized pieces

1 large white or red onion, sliced

1 red bell pepper, chopped

1 green bell pepper, chopped

1 tablespoon olive oil or vegetable oil

Avocado oil cooking spray, optional

2 green onions, chopped

Fresh cilantro, for garnish

Chicken Marinade & Seasoning

2 tablespoons low-sodium soy sauce

1 tablespoon oyster sauce

1 tablespoon cornstarch

1 tablespoon coarsely cracked black pepper

1 teaspoon garlic powder

1 teaspoon onion powder

2 fresh garlic cloves, minced

Stir-Fry Finishing Sauce

¼ cup soy sauce

1 tablespoon honey or maple syrup

1 teaspoon toasted sesame oil

1 teaspoon cornstarch

2 tablespoons water

Instructions

Prepare the Chicken

Place the bite-sized chicken pieces in a large mixing bowl. Add the low-sodium soy sauce, oyster sauce, cornstarch, coarsely cracked black pepper, garlic powder, onion powder, and minced fresh garlic.

Toss thoroughly until the chicken is evenly coated. The cornstarch creates a light coating that helps the seasoning cling to the chicken while also helping retain moisture during air frying.

For deeper flavor, cover and refrigerate the chicken for 15–30 minutes.

Prepare the Vegetables

While the chicken marinates, slice the onion and chop the red and green bell peppers into bite-sized pieces.

Keep the vegetables reasonably similar in size so they cook evenly. Pat them dry if they are particularly moist.

Toss the vegetables lightly with the olive oil. You can also use avocado oil cooking spray for a lighter coating.

Air Fry the Chicken

Preheat the air fryer to 400°F (200°C) for about 3 minutes, if your model requires preheating.

Arrange the chicken pieces in the air fryer basket in a single layer. Avoid overcrowding because too many pieces at once can prevent proper browning.

Air fry for about 6–8 minutes, then shake the basket or turn the chicken pieces. Continue cooking for another 5–8 minutes, or until the chicken is browned and fully cooked.

The exact cooking time depends on the size of the chicken pieces and the air fryer model. Check the thickest piece with an instant-read thermometer; chicken should reach 165°F (74°C) internally.

Air Fry the Vegetables

Add the sliced onion and bell peppers to the air fryer basket with the chicken during the final several minutes of cooking, or cook them separately if your basket is crowded.

Air fry until the vegetables are tender-crisp and lightly browned around the edges. You want them to retain some texture rather than becoming completely soft.

If your air fryer basket is small, cook the chicken and vegetables in separate batches and combine them afterward.

Make the Finishing Sauce

While the chicken and vegetables cook, combine the ¼ cup soy sauce, honey or maple syrup, and toasted sesame oil in a small saucepan or skillet.

In a separate small bowl, whisk the cornstarch with 2 tablespoons of water until smooth.

Bring the soy mixture to a gentle simmer over medium heat. Slowly whisk in the cornstarch slurry and cook for about 1–2 minutes, stirring constantly, until the sauce becomes glossy and lightly thickened.

Remove from the heat as soon as it reaches your preferred consistency.

Combine Everything

Transfer the cooked chicken and vegetables to a large bowl or skillet. Pour the warm finishing sauce over everything and toss gently until the chicken and vegetables are evenly coated.

Taste and adjust if needed. If you prefer more heat and pepper flavor, add another small pinch of freshly cracked black pepper.

Garnish and Serve

Transfer the Black Pepper Chicken to a serving dish and sprinkle generously with chopped green onions and fresh cilantro.

Serve immediately with steamed white rice, brown rice, fried rice, cauliflower rice, or noodles. The glossy sauce is especially delicious spooned over rice.

Tips

Use Freshly Cracked Black Pepper

Freshly cracked black pepper provides a much stronger aroma and bolder flavor than finely ground pepper. Since black pepper is the star ingredient, coarsely cracked pepper works particularly well.

Do Not Overcrowd the Air Fryer

Give the chicken enough room for hot air to circulate. If the basket is packed tightly, the chicken may steam instead of browning. Work in batches when necessary.

Cut Chicken Uniformly

Cut the chicken into similar-sized pieces so smaller pieces do not become dry before the larger pieces are cooked through.

Use Chicken Thighs for Extra Juiciness

Boneless chicken thighs are naturally more forgiving and remain juicy during air frying. Chicken breast can also be used when you prefer a leaner option.

Shake the Basket

Shaking or turning the chicken halfway through cooking helps the pieces brown more evenly and prevents one side from becoming too dark.

Watch the Sauce Carefully

The finishing sauce thickens quickly once the cornstarch slurry is added. Keep stirring and remove it from the heat once it becomes glossy and coats the back of a spoon.

Adjust the Pepper Level

One tablespoon of coarsely cracked pepper gives the recipe its signature flavor. If you prefer a milder dish, start with less and add more after cooking.

Keep the Vegetables Crisp

Avoid overcooking the bell peppers and onions. They should have a little bite to contrast with the tender chicken.

Variations

Make It Spicy

Add red pepper flakes, chili garlic sauce, or a pinch of cayenne to the finishing sauce for extra heat.

Add More Vegetables

Broccoli, mushrooms, snow peas, carrots, zucchini, or baby corn can be added for a more vegetable-packed meal.

Use Chicken Thighs or Breast

Both cuts work well. Thighs provide a richer, juicier result, while chicken breast offers a lighter option.

Make It Less Sweet

Reduce the honey or maple syrup to ½ tablespoon if you prefer a more savory black pepper sauce.

Add Ginger

Freshly grated ginger can be added to the marinade or finishing sauce for extra aromatic flavor.

Serve as Lettuce Wraps

Instead of rice, spoon the chicken and vegetables into crisp lettuce leaves. Add green onions, cilantro, and a little extra sauce.

Make a Rice Bowl

Serve the chicken over steamed jasmine rice and top with sesame seeds, green onions, cilantro, and extra vegetables.

Q&A

Can I use chicken breast instead of chicken thighs?

Yes. Chicken breast works very well in this recipe. Cut it into evenly sized pieces and avoid overcooking so it remains tender.

How much black pepper should I use?

The recipe uses 1 tablespoon of coarsely cracked black pepper for a bold signature flavor. You can reduce the amount for a milder dish or add more after cooking.

Can I make Black Pepper Chicken without an air fryer?

Yes. The chicken and vegetables can be cooked in a large skillet or wok over medium-high heat. Cook in batches if necessary, then combine everything with the finishing sauce.

Can I prepare the chicken ahead of time?

Yes. The chicken can be marinated several hours ahead and kept refrigerated until ready to cook. For best texture, cook it fresh when possible.

What should I serve with Black Pepper Chicken?

Steamed jasmine rice, brown rice, fried rice, cauliflower rice, and noodles all pair well with the savory sauce.

Can I store leftovers?

Yes. Store cooled leftovers in an airtight container in the refrigerator for up to 3–4 days. Reheat gently in an air fryer, skillet, or microwave until heated through.

Nutrition

Estimated nutrition per serving, based on 4 servings and without rice or optional garnishes:
Calories: 390 kcal
Protein: 39 g
Carbohydrates: 17 g
Fat: 18 g
Saturated Fat: 4 g
Fiber: 2 g
Sugar: 8 g
Sodium: 1,180 mg

Nutrition values are approximate and can vary depending on the chicken cut, soy sauce, oyster sauce, oil, and exact serving size.

Conclusion

If you love bold black pepper flavor and quick homemade meals, this air fryer chicken is an easy recipe to keep on repeat. The chicken develops a deliciously seasoned exterior while the peppers and onions add sweetness, color, and texture.

The savory finishing sauce brings all the ingredients together, creating a restaurant-style meal that is especially delicious with steamed rice, noodles, or fresh lettuce wraps.

Cheesy Taco Biscuit Ring* 

*Cheesy Taco Biscuit Ring* 


*Makes: 1 large pie / 6 servings*


*Ingredients:*


*For the beef:*

– 400g ground beef / keema – use chicken keema for halal / lighter version

– 1 small onion, finely chopped

– 1 packet taco seasoning – OR 1 tsp cumin, 1 tsp paprika, 1/2 tsp chili powder, 1/2 tsp garlic powder, salt, pepper

– 2-3 tbsp water

– 1 tbsp oil


*For the ring:*

– 1 can (8 pieces) crescent roll dough / biscuit dough / pizza dough – if you don’t have this, use canned croissant dough or homemade paratha dough cut in triangles

– 1 1/2 cups shredded cheese – mozzarella + cheddar mix for that melted look in your photo

– 1 tbsp melted butter for brushing


*Method:*


*1. Cook meat:* Heat oil, add onion, saute 2 mins. Add keema, break it up. Cook until brown. Add taco seasoning + 3 tbsp water. Mix well. Cook until water dries. Let it cool slightly – this is important.


*2. Assemble:* Grease a round pie dish. Open crescent dough. Place triangles around the edge of the dish with the pointy side hanging OUT and thick side inside, overlapping a little to make a full ring like in your photo. It should look like a sun.


*3. Fill:* Spoon the cooked taco meat into the middle ring area. Sprinkle 1 cup cheese over the meat.


*4. Fold:* Fold the pointy ends of the dough OVER the meat towards the center, tucking slightly. It will make that golden biscuit ring border you see. The center stays open.


*5. Top:* Sprinkle remaining 1/2 cup cheese in the center on top of meat. Brush biscuit edges with melted butter.


*6. Bake:* Bake at 190°C / 375°F for 18-22 mins until biscuits are deep golden brown and puffed up.


*7. Serve:* Let it sit 5 mins, then slice. Serve with sour cream, salsa or ketchup.


It comes out exactly like your picture – crispy buttery ring outside, saucy cheesy taco meat inside.

Tips to get that perfect golden ring + cheesy center.


*1. Cool the meat first:* If you put hot keema directly, it will make the dough soggy and raw at the bottom. Let it cool 10 mins.


*2. Dough placement:* Overlap the thick parts of the triangles inside the dish. If you leave gaps, the cheese will leak out the bottom. The thin pointy ends should hang outside the dish, then you fold them back in.


*3. Don’t use too much liquid:* Cook keema until completely dry. Any water = soggy crust. The meat should be moist, not saucy.


*4. Cheese trick:* Use 2 cheeses – 1 cup INSIDE with meat, 1/2 cup on TOP in center at the end. This gives you that extra melted layer you see in the middle of your photo.


*5. Butter brush = golden color:* Brush the biscuit ring with melted butter + a pinch of garlic powder before baking. That’s how you get that deep golden brown shine.


*6. Bake bottom rack:* Place pie dish on lower rack for first 15 mins so bottom of biscuits cooks, then move to middle. No more raw dough underneath.


*7. Rest 5 mins before cutting:* If you cut immediately, it will fall apart. 5 mins rest helps cheese set slightly.


Use chicken keema for halal version – stays juicier!

Mediterranean Grilled Chicken with Creamy Garlic Sauce

Mediterranean Grilled Chicken with Creamy Garlic Sauce

Juicy grilled chicken gets a Mediterranean makeover with a zesty marinade made from fresh lemon, garlic, oregano, cumin, and paprika. Grilling brings out a deliciously smoky, lightly charred exterior while keeping the inside tender and flavorful.

The finishing touch is a creamy garlic sauce made with Greek yogurt, mayonnaise, lemon, and fresh parsley. It is an easy combination that works perfectly for weeknight dinners, meal prep, wraps, and Mediterranean-style bowls.

Prep Time: 15 minutes
Marinating Time: 30 minutes to 2 hours
Cook Time: 12–16 minutes
Total Time: 57 minutes to 2 hours 31 minutes
Servings: 4–6

Ingredients

For the Grilled Chicken & Marinade

700g to 2 lbs boneless, skinless chicken breasts or thighs, cut into bite-sized pieces

3 tablespoons olive oil

Juice of 1 fresh lemon, approximately 3 tablespoons

3–4 cloves garlic, finely minced

1½ teaspoons dried oregano

1 teaspoon ground cumin

1 teaspoon paprika

½ teaspoon ground coriander, optional

Salt, to taste

Black pepper, to taste

For the Creamy Garlic Sauce

½ cup plain Greek yogurt

2 tablespoons mayonnaise

2 cloves garlic, finely grated or minced

1 tablespoon lemon juice

1 teaspoon olive oil

Salt, to taste

Fresh parsley, chopped, for garnish

Instructions

Prepare the Chicken Marinade

Place the chicken pieces in a large bowl. Add olive oil, fresh lemon juice, minced garlic, dried oregano, cumin, paprika, optional ground coriander, salt, and black pepper.

Toss thoroughly until every piece of chicken is evenly coated with the marinade. The olive oil helps keep the chicken moist while the lemon, garlic, and Mediterranean spices infuse it with flavor.

Cover the bowl and refrigerate for at least 30 minutes. For deeper flavor, marinate for up to 2 hours.

Prepare the Creamy Garlic Sauce

While the chicken marinates, make the sauce. Add Greek yogurt, mayonnaise, grated or minced garlic, lemon juice, olive oil, and a pinch of salt to a small bowl.

Stir until completely smooth and creamy. Taste and adjust the seasoning as desired. If you prefer a brighter sauce, add a little extra lemon juice.

Cover and refrigerate until ready to serve. Letting the sauce rest for a short time allows the garlic flavor to develop.

Prepare the Grill

Preheat an outdoor grill or grill pan over medium-high heat. Lightly oil the grates or pan to help prevent sticking.

Remove the chicken from the refrigerator and allow it to sit for a few minutes while the grill heats. Do not leave raw chicken at room temperature for an extended period.

Grill the Chicken

Thread the chicken pieces onto skewers if desired, or place them directly onto the hot grill.

Grill for approximately 5–8 minutes per side, depending on the size of the pieces and whether you are using chicken breasts or thighs. Turn the chicken occasionally so it develops an even golden-brown exterior with attractive grill marks.

Cook until the chicken is fully cooked through. The safest way to check is with an instant-read thermometer; chicken should reach an internal temperature of 165°F (74°C) at the thickest piece.

Avoid repeatedly pressing the chicken with a spatula, as this can release flavorful juices and make the meat drier.

Rest and Finish

Transfer the grilled chicken to a clean plate and allow it to rest for about 5 minutes. This gives the juices time to redistribute throughout the meat.

Sprinkle with fresh chopped parsley just before serving.

Serve with Garlic Sauce

Spoon the creamy garlic sauce over the grilled chicken or serve it on the side for dipping.

For a complete Mediterranean-style meal, serve the chicken with warm pita bread, cucumber and tomato salad, roasted vegetables, couscous, rice, hummus, or a simple green salad.

Tips

Choose the Right Chicken

Chicken thighs are naturally juicy and forgiving on the grill, while chicken breasts offer a leaner option. If using breasts, cut them into evenly sized pieces so they cook at the same rate.

Do Not Over-Marinate

The lemon juice adds wonderful flavor, but very long exposure to acidic marinades can affect the texture of chicken. For this recipe, 30 minutes to 2 hours provides plenty of flavor.

Cut Pieces Evenly

Try to keep the chicken pieces similar in size. Very small pieces can dry out before larger pieces are cooked through.

Preheat the Grill Properly

A properly heated grill creates better browning and helps prevent the chicken from sticking. Give the grill enough time to become hot before adding the chicken.

Oil the Grill Grates

A light coating of oil on clean grill grates can reduce sticking and help produce attractive grill marks. Use tongs and a lightly oiled paper towel if needed.

Avoid Crowding

Leave a little space between chicken pieces so heat can circulate around them. Overcrowding can cause the chicken to steam instead of developing a nicely grilled exterior.

Use a Thermometer

Color alone is not always a reliable indicator of doneness. Check the thickest chicken piece and make sure it reaches 165°F (74°C).

Let the Chicken Rest

Resting for about 5 minutes after grilling helps the meat remain juicy and tender when served.

Balance the Sauce

The creamy sauce should taste fresh and tangy rather than overly heavy. Adjust it with a little extra lemon juice, salt, or Greek yogurt according to your preference.

Variations

Make It Spicier

Add ¼–½ teaspoon cayenne pepper or red pepper flakes to the chicken marinade. You can also add a little chili powder for a warmer flavor.

Use Chicken Thighs

Boneless, skinless chicken thighs make an especially juicy version of this recipe. They are also more forgiving if they stay on the grill for an extra minute or two.

Add Fresh Herbs

Add chopped fresh parsley, mint, or cilantro to the marinade for a brighter herbaceous flavor.

Make a Cucumber Garlic Sauce

Add finely grated and squeezed cucumber plus a little fresh dill to the creamy garlic sauce for a tzatziki-inspired variation.

Add Mediterranean Vegetables

Grill zucchini, bell peppers, red onion, or cherry tomatoes alongside the chicken. Serve everything together for an easy grilled platter.

Turn It into Pitas

Slice the grilled chicken and stuff it into warm pita bread with lettuce, tomato, cucumber, red onion, and creamy garlic sauce.

Make a Bowl

Serve the chicken over rice, couscous, quinoa, or bulgur with fresh vegetables, feta, olives, and a spoonful of garlic sauce.

Q&A

Can I use chicken thighs instead of chicken breasts?

Yes. Boneless, skinless chicken thighs work extremely well and tend to remain particularly juicy on the grill.

How long should I marinate the chicken?

Marinate the chicken for at least 30 minutes and up to 2 hours. This gives the seasonings enough time to flavor the chicken without leaving it in the acidic lemon marinade for too long.

Can I cook this chicken without a grill?

Yes. A grill pan or large skillet can be used over medium-high heat. Cook the chicken in batches if necessary so the pieces have enough room to brown properly.

Can I make the creamy garlic sauce ahead of time?

Yes. The sauce can be prepared several hours ahead and refrigerated until serving. In fact, resting the sauce allows the garlic and lemon flavors to become more pronounced.

How do I know when the chicken is done?

Use an instant-read thermometer and check the thickest piece. Chicken should reach an internal temperature of 165°F (74°C).

What should I serve with Mediterranean grilled chicken?

Serve it with pita, hummus, rice, couscous, roasted vegetables, Greek salad, cucumber salad, olives, or grilled vegetables.

Nutrition

Estimated nutrition per serving, based on 6 servings and including the creamy garlic sauce:
Calories: 355 kcal
Protein: 38 g
Carbohydrates: 5 g
Fat: 20 g
Saturated Fat: 4 g
Fiber: 1 g
Sugar: 2 g
Sodium: 510 mg

Nutrition values are approximate and can vary depending on the chicken cut, mayonnaise, yogurt, oil, and exact portion size.

Conclusion

With tender grilled chicken, bold Mediterranean spices, and a cool creamy garlic sauce, this recipe delivers plenty of flavor without requiring complicated preparation. The combination of lemon, oregano, cumin, paprika, and garlic creates a delicious marinade that works especially well over an open flame.

Serve it with fresh vegetables and warm pita for a complete meal, or use the leftovers in wraps and grain bowls for an easy next-day lunch.