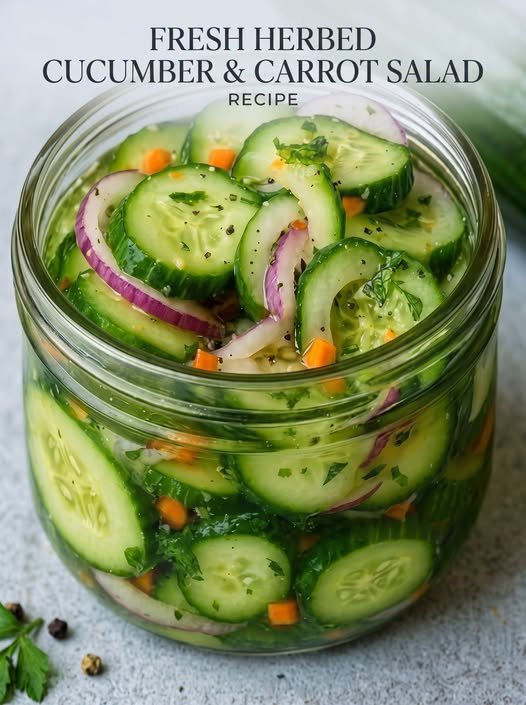
Fresh Pickled Cucumber Salad

Fresh Pickled Cucumber Salad

If you’re looking for a low-calorie healthy side dish, this fresh pickled cucumber salad is crisp, tangy, and incredibly refreshing. Made with simple pantry ingredients like vinegar, herbs, and olive oil, it’s a quick refrigerator pickle recipe that requires no canning. This salad pairs beautifully with grilled chicken, seafood, sandwiches, or barbecue dishes and is ideal for summer gatherings or weekly meal prep.


Ingredients (Serves 4–6)

  • 4 cups thinly sliced fresh cucumbers (English or Persian preferred)

  • ½ red onion, thinly sliced

  • 2 tablespoons finely diced carrots (optional for color and crunch)

  • 2 tablespoons fresh dill or parsley, chopped

  • ½ cup white vinegar or apple cider vinegar

  • ½ cup cold filtered water

  • 1 tablespoon organic sugar or honey

  • 1 teaspoon sea salt

  • ½ teaspoon freshly ground black pepper

  • ½ teaspoon dried oregano

  • 1 tablespoon extra virgin olive oil

  • Optional: 1 minced garlic clove or red pepper flakes


Instructions

  1. Wash cucumbers thoroughly and slice into thin rounds. For best texture, use a mandoline slicer for uniform cuts.

  2. Place cucumbers, red onion, carrots, and fresh herbs in a large bowl or glass mason jar.

  3. In a separate bowl, whisk together vinegar, water, sugar, salt, pepper, oregano, and olive oil until fully dissolved.

  4. Pour the brine over the vegetables, ensuring everything is submerged.

  5. Cover and refrigerate for at least 1 hour. For deeper flavor, chill for 4–24 hours before serving.


Flavor Profile & Benefits

This quick pickled cucumber salad delivers a balance of tangy acidity, subtle sweetness, and herbal freshness. It’s naturally gluten-free, keto-friendly (if using a sugar substitute), and ideal for clean eating meal plans. Cucumbers are hydrating and rich in antioxidants, making this dish excellent for digestion and weight management.

Store in an airtight container for up to 3 days in the refrigerator. Stir before serving.

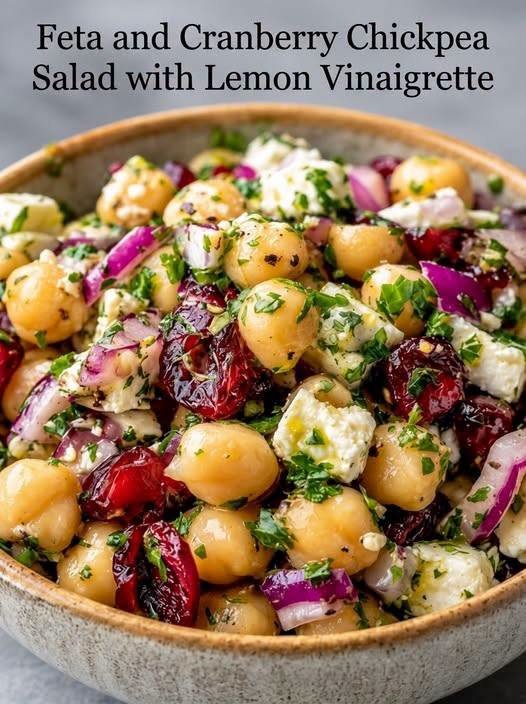
Feta and Cranberry Chickpea Salad with Lemon Vinaigrette

Feta and Cranberry Chickpea Salad with Lemon Vinaigrette
Servings & Prep Time
Yield:** 6 side-dish servings or 4 main-course servings
Prep Time:** 15 minutes
Total Time:** 15 minutes (plus optional chilling time)
The Ingredients
The Salad Base:
2 cans (15 oz each)** chickpeas (garbanzo beans), thoroughly drained and rinsed
1 cup** dried cranberries
1/2 cup** feta cheese, crumbled
1/2 small** red onion, finely diced
1 cup** cucumber, diced (English or Persian cucumbers work best as they are seedless and less watery)
The Lemon Vinaigrette:
1/4 cup** extra virgin olive oil
3 tbsp** fresh lemon juice (about 1 large lemon)
1 tsp** Dijon mustard (helps bind the oil and lemon juice together)
1 tsp** honey or maple syrup (to balance the tartness of the lemon)
1/2 tsp** kosher salt
1/4 tsp** freshly cracked black pepper
Step-by-Step Instructions
**1. Prepare the Chickpeas**
Pour the chickpeas into a fine-mesh strainer and rinse them thoroughly under cold water to remove the starchy canning liquid. Shake off the excess water, then spread the chickpeas onto a clean kitchen towel or paper towels. Gently pat them completely dry. Dry chickpeas absorb the lemon vinaigrette much better than wet ones.
**2. Prep the Vegetables**
Dice the cucumber into uniform, bite-sized pieces. Finely dice the red onion. If you are sensitive to the strong, pungent bite of raw red onions, place the diced onions in a small bowl of ice water for 5 to 10 minutes, then drain and dry them thoroughly before adding them to the salad.
**3. Whisk the Vinaigrette**
In a small bowl or a glass jar with a tight-fitting lid, combine the extra virgin olive oil, fresh lemon juice, Dijon mustard, honey, salt, and black pepper. Whisk vigorously (or shake the jar) until the dressing is completely smooth, emulsified, and slightly thickened.
**4. Assemble and Toss**
In a large serving bowl, combine the dried chickpeas, dried cranberries, diced cucumber, and diced red onion. Pour the lemon vinaigrette over the top. Use a large spoon to toss the ingredients gently until everything is evenly coated in the dressing.
**5. Add the Feta and Chill**
Gently fold in the crumbled feta cheese at the very end. Adding the feta last prevents it from breaking down completely and turning the dressing cloudy. While you can serve this immediately, covering the bowl and chilling it in the refrigerator for 30 minutes allows the chickpeas to marinate and the flavors to beautifully meld together.

Light and Creamy Healthy Ranch Chicken Salad

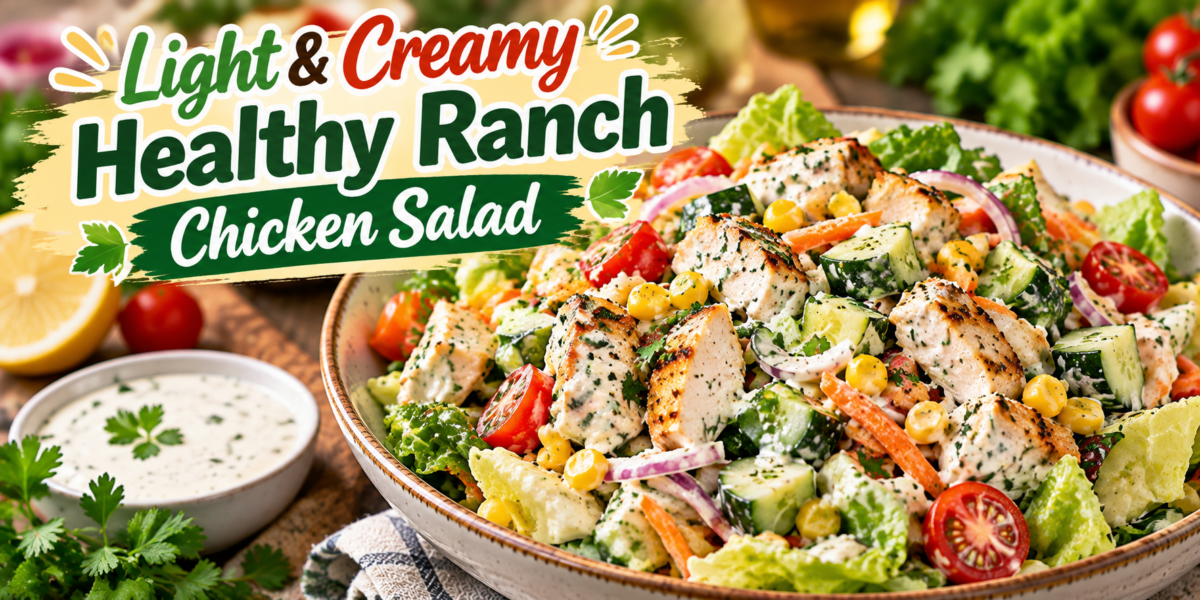
Healthy Ranch Chicken Salad with grilled chicken, lettuce, tomatoes, cucumber, corn, carrots, and creamy ranch dressing

Light and Creamy Healthy Ranch Chicken Salad

Light and Creamy Healthy Ranch Chicken Salad is a fresh, flavorful, and satisfying meal made with tender chicken, crisp vegetables, creamy ranch dressing, and simple herbs. It offers the familiar flavor of ranch dressing while keeping the meal fresh and balanced.

This Ranch Chicken Salad is perfect for lunch, dinner, meal prep, or a quick family meal. The chicken provides protein, while crunchy lettuce, cucumber, tomatoes, carrots, and red onion add freshness and texture.

The creamy dressing is made with Greek yogurt, light mayonnaise, fresh lemon juice, ranch seasoning, garlic, and herbs. Greek yogurt gives the dressing a smooth texture and a pleasant tang without making the salad feel too heavy.

You can serve this salad in a large bowl, place it inside a whole-grain wrap, or spoon it over toasted bread. It is also easy to customize with your favorite vegetables and toppings.

The best part about this recipe is how quickly it comes together. Once the chicken is cooked, the rest of the preparation is simple. You can even prepare the chicken and dressing ahead of time and assemble the salad when you are ready to eat.

This Ranch Chicken Salad brings together creamy, crunchy, savory, and fresh flavors in every bite. It is a practical recipe for busy days when you want something homemade without spending a long time in the kitchen.

Prep Time: 15 minutes
Cook Time: 15 minutes
Total Time: 30 minutes
Servings: 4 servings

Ingredients

For the Chicken

For this recipe, use 1 1/2 pounds of boneless, skinless chicken breasts.

Add 1 tablespoon of olive oil to the chicken.

Season it with 1 teaspoon of garlic powder, 1 teaspoon of onion powder, and 1 teaspoon of dried parsley.

Next, add 1/2 teaspoon of paprika, 1/2 teaspoon of black pepper, and 1/2 teaspoon of salt.

Finally, add 1/2 teaspoon of dried dill for extra flavor.

For the Salad

6 cups chopped romaine lettuce

1 cup cherry tomatoes, halved

1 cup cucumber, diced

1/2 cup shredded carrots

1/3 cup red onion, thinly sliced

1/2 cup sweet corn

1/3 cup chopped fresh parsley

1/4 cup sliced green onions

1/4 cup shredded cheddar cheese, optional

For the Creamy Ranch Dressing

1/2 cup plain Greek yogurt

2 tablespoons light mayonnaise

2 tablespoons buttermilk

1 tablespoon fresh lemon juice

1 teaspoon ranch seasoning

1/2 teaspoon garlic powder

1/2 teaspoon dried dill

1/4 teaspoon black pepper

Salt to taste

1 tablespoon chopped fresh parsley

Step-by-Step Instructions

Prepare the Chicken

Start by patting the chicken breasts dry with paper towels. This helps the seasoning stick to the surface.

Place the chicken on a clean cutting board. If the breasts are very thick, gently pound them to an even thickness.

In a small bowl, combine olive oil, garlic powder, onion powder, dried parsley, paprika, black pepper, salt, and dried dill.

Rub the seasoning mixture over both sides of the chicken.

Allow the chicken to rest for about 10 minutes while you prepare the other ingredients.

Cook the Chicken

Heat a large skillet over medium heat.

Place the seasoned chicken in the skillet. Cook for about 6 to 8 minutes on the first side.

Turn the chicken and cook for another 5 to 7 minutes, depending on thickness.

The chicken should reach an internal temperature of 165°F.

Remove the chicken from the skillet and let it rest for 5 minutes.

Resting allows the juices to settle and helps keep the chicken tender.

Slice the chicken into thin strips or bite-sized pieces.

The seasoned chicken becomes the main protein in this Ranch Chicken Salad and adds a warm, savory flavor to the fresh vegetables.

Prepare the Vegetables

While the chicken rests, prepare the vegetables.

Wash the lettuce, tomatoes, cucumber, carrots, parsley, and green onions.

Chop the romaine lettuce into bite-sized pieces.

Cut the cherry tomatoes in half.

Dice the cucumber into small pieces.

Slice the red onion very thinly.

Add the lettuce, tomatoes, cucumber, carrots, red onion, corn, parsley, and green onions to a large salad bowl.

If you are using cheddar cheese, add it at this stage.

Make the Creamy Ranch Dressing

In a small bowl, combine Greek yogurt, light mayonnaise, buttermilk, lemon juice, ranch seasoning, garlic powder, dried dill, and black pepper.

Whisk until smooth.

Add fresh parsley and stir again.

Taste the dressing and add a small amount of salt if needed.

If the dressing is too thick, add another teaspoon of buttermilk.

If you prefer a stronger ranch flavor, add a little more ranch seasoning.

For a brighter flavor, add a few extra drops of lemon juice.

The creamy dressing gives this Ranch Chicken Salad its signature flavor while keeping the texture smooth and fresh.

Assemble the Salad

Add the sliced chicken to the bowl of vegetables.

Drizzle the ranch dressing over the top.

Start with a small amount of dressing. You can always add more later.

Use salad tongs to gently toss everything together.

Make sure the dressing lightly coats the lettuce, vegetables, and chicken.

Avoid mixing too aggressively because the tomatoes and other soft ingredients can become crushed.

Serve immediately for the best texture.

Your Ranch Chicken Salad is now ready to enjoy.

Tips for the Best Ranch Chicken Salad

Choose chicken breasts that are similar in thickness. This helps them cook evenly.

Do not overcook the chicken. Remove it from the heat as soon as it reaches 165°F.

Let the chicken rest before slicing. This helps keep it juicy.

Use crisp romaine lettuce for a sturdy salad base.

Dry the vegetables well after washing them. Extra water can make the dressing watery.

Prepare the dressing separately if you are making the salad ahead.

Add dressing just before serving for the freshest texture.

Use fresh lemon juice instead of bottled lemon juice when possible.

Fresh dill can also be used instead of dried dill.

For a lighter Ranch Chicken Salad, reduce the mayonnaise and use additional Greek yogurt.

If you enjoy extra crunch, add sunflower seeds, pumpkin seeds, or chopped almonds.

Healthy Ingredient Swaps

This recipe is flexible, so you can make simple changes based on your preferences.

Use grilled chicken instead of skillet-cooked chicken for a smoky flavor.

You can replace chicken breast with leftover roasted chicken.

For a lower-fat dressing, use nonfat Greek yogurt and skip the mayonnaise.

For extra fiber, add black beans or chickpeas.

If you want more vegetables, add bell peppers, celery, broccoli, or shredded cabbage.

Use reduced-fat cheddar if you want to keep the cheese lighter.

For a dairy-free option, use dairy-free yogurt, mayonnaise, and ranch seasoning.

These changes allow you to create a Ranch Chicken Salad that fits your personal eating style.

Serving Suggestions

Serve the salad in a large bowl as a complete lunch or dinner.

For a more filling meal, serve it with whole-grain bread or a small baked potato.

You can also place the chicken and vegetables inside a whole-grain tortilla to make a ranch chicken wrap.

Another option is to serve the salad over quinoa or brown rice.

For a summer meal, pair it with fresh fruit such as watermelon, berries, or melon.

If you are serving guests, place the dressing in a small bowl on the side.

This lets everyone choose how much dressing they want.

For meal prep, divide the vegetables and chicken into separate containers. Keep the dressing separate until you are ready to eat.

This makes Ranch Chicken Salad convenient for work lunches and busy weekdays.

Health Benefits

Chicken is a good source of protein and can help make a meal more satisfying.

Greek yogurt adds protein and calcium while giving the dressing a creamy texture.

Romaine lettuce contributes fiber, vitamins, and minerals.

Tomatoes provide antioxidants and natural sweetness.

Cucumber adds hydration and crunch.

Carrots provide beta-carotene and a bright color.

Red onion adds flavor and plant compounds while keeping the recipe simple.

Using Greek yogurt in the dressing can reduce the amount of mayonnaise needed.

The combination of lean protein, vegetables, and a yogurt-based dressing makes this Ranch Chicken Salad a practical option for a balanced meal.

Storage and Meal Prep

Store the cooked chicken in an airtight container in the refrigerator for up to 4 days.

Keep the chopped vegetables in a separate container.

Store the ranch dressing in a sealed jar or container.

Do not mix the dressing with the salad until you are ready to eat.

When stored separately, the lettuce stays crisp and fresh.

For meal prep, place chicken at the bottom of the container, followed by sturdy vegetables such as carrots and cucumber.

Keep lettuce in a separate compartment if possible.

Add the dressing immediately before serving.

This method helps keep your Ranch Chicken Salad fresh and crunchy for several days.

How to Make the Salad More Filling

If you want a larger meal, add cooked quinoa, brown rice, or roasted potatoes.

You can also add chickpeas, black beans, or boiled eggs.

Avocado is another delicious addition. Its creamy texture works especially well with ranch dressing.

For extra crunch, add pumpkin seeds, sunflower seeds, walnuts, or sliced almonds.

If you want more vegetables, add roasted corn, bell peppers, cabbage, or broccoli.

For a higher-protein meal, increase the amount of chicken or add a boiled egg.

These additions can turn Ranch Chicken Salad into a more substantial meal while keeping the preparation simple.

Flavor Variations

Spicy Ranch Chicken Salad

Add sliced jalapeños and a pinch of cayenne pepper to the chicken seasoning.

You can also add hot sauce to the dressing.

Avocado Ranch Salad

Add diced avocado just before serving.

The creamy avocado pairs beautifully with the tangy ranch dressing.

Southwest Style

Add black beans, corn, avocado, tomatoes, and a little chili powder.

Serve with lime wedges for extra freshness.

Bacon Ranch Version

Add a small amount of cooked turkey bacon or regular bacon for a smoky flavor.

Mediterranean-Inspired Version

Add cucumber, tomatoes, olives, parsley, and a little feta cheese.

Use lemon juice and herbs to brighten the dressing.

Each variation gives Ranch Chicken Salad a different flavor while keeping the basic preparation easy.

Common Mistakes to Avoid

Do not overcook the chicken because dry chicken can make the salad less enjoyable.

Do not add dressing too early when preparing the salad for later.

Avoid using wet lettuce because excess water can dilute the dressing.

Do not slice the chicken immediately after cooking. Give it a few minutes to rest.

Avoid adding too much salt before tasting the dressing.

Ranch seasoning and cheese can already contain salt.

Do not add too much dressing at once. Start with a small amount and increase as needed.

Keeping these simple points in mind will help you make a fresh and flavorful Ranch Chicken Salad every time.

Cooking Notes

For the best flavor, season the chicken evenly.

Use a meat thermometer to check the chicken rather than relying only on cooking time.

The dressing can be prepared one day ahead.

If the dressing thickens in the refrigerator, stir in a teaspoon of buttermilk before serving.

Use fresh herbs whenever possible.

For a stronger lemon flavor, add extra fresh lemon juice. A small amount of honey can make the dressing slightly sweeter. To boost the ranch flavor, gradually increase the amount of ranch seasoning.

Frequently Asked Questions

Can I use leftover chicken?

Yes. Leftover grilled, roasted, or baked chicken works very well.

Can I make the dressing ahead?

Yes. Store the dressing in an airtight container in the refrigerator for up to 4 days.

Can I use iceberg lettuce?

Yes. Iceberg lettuce provides extra crunch and works well in this recipe.

Can I make this salad without mayonnaise?

Yes. Replace the mayonnaise with additional Greek yogurt.

Can I use bottled ranch dressing?

Yes, but homemade yogurt ranch dressing gives you more control over the ingredients and flavor.

Can I make this salad dairy-free?

Yes. Use dairy-free yogurt, mayonnaise, buttermilk alternatives, and ranch seasoning.

How can I make the salad spicy?

Add jalapeño, cayenne pepper, crushed red pepper, or hot sauce.

Can I use chicken thighs?

Yes. Boneless, skinless chicken thighs are a flavorful alternative to chicken breast.

Is this recipe good for meal prep?

Yes. Store the chicken, vegetables, and dressing separately and combine them before eating.

How can I make the dressing thinner?

Add a small amount of buttermilk or water and whisk until the desired consistency is reached.

Nutrition Information

Approximate nutrition per serving:

Calories: 390 kcal

Protein: 38g

Carbohydrates: 18g

Fat: 19g

Fiber: 5g

Sugar: 7g

Sodium: 620mg

Nutrition values are estimates and may vary depending on the exact ingredients, dressing quantity, and serving size.

Final Thoughts

Light and Creamy Healthy Ranch Chicken Salad is an easy way to enjoy a flavorful meal with plenty of fresh vegetables and satisfying protein.

The seasoned chicken provides a savory base, while the crisp vegetables add color and texture. The Greek yogurt ranch dressing brings everything together with a creamy, tangy finish.

You can keep the recipe simple or customize it with avocado, beans, corn, seeds, cheese, or extra vegetables.

It is also a practical choice for meal prep because the main components can be prepared ahead and stored separately.

Whether you need a quick lunch, a healthy dinner, or a convenient work meal, Ranch Chicken Salad offers a simple combination of fresh ingredients and satisfying flavors.

With its creamy homemade dressing, tender chicken, crunchy vegetables, and flexible serving options, this recipe can easily become part of your regular weekly meal plan.
Air Fryer Apple Butter Brie Bites

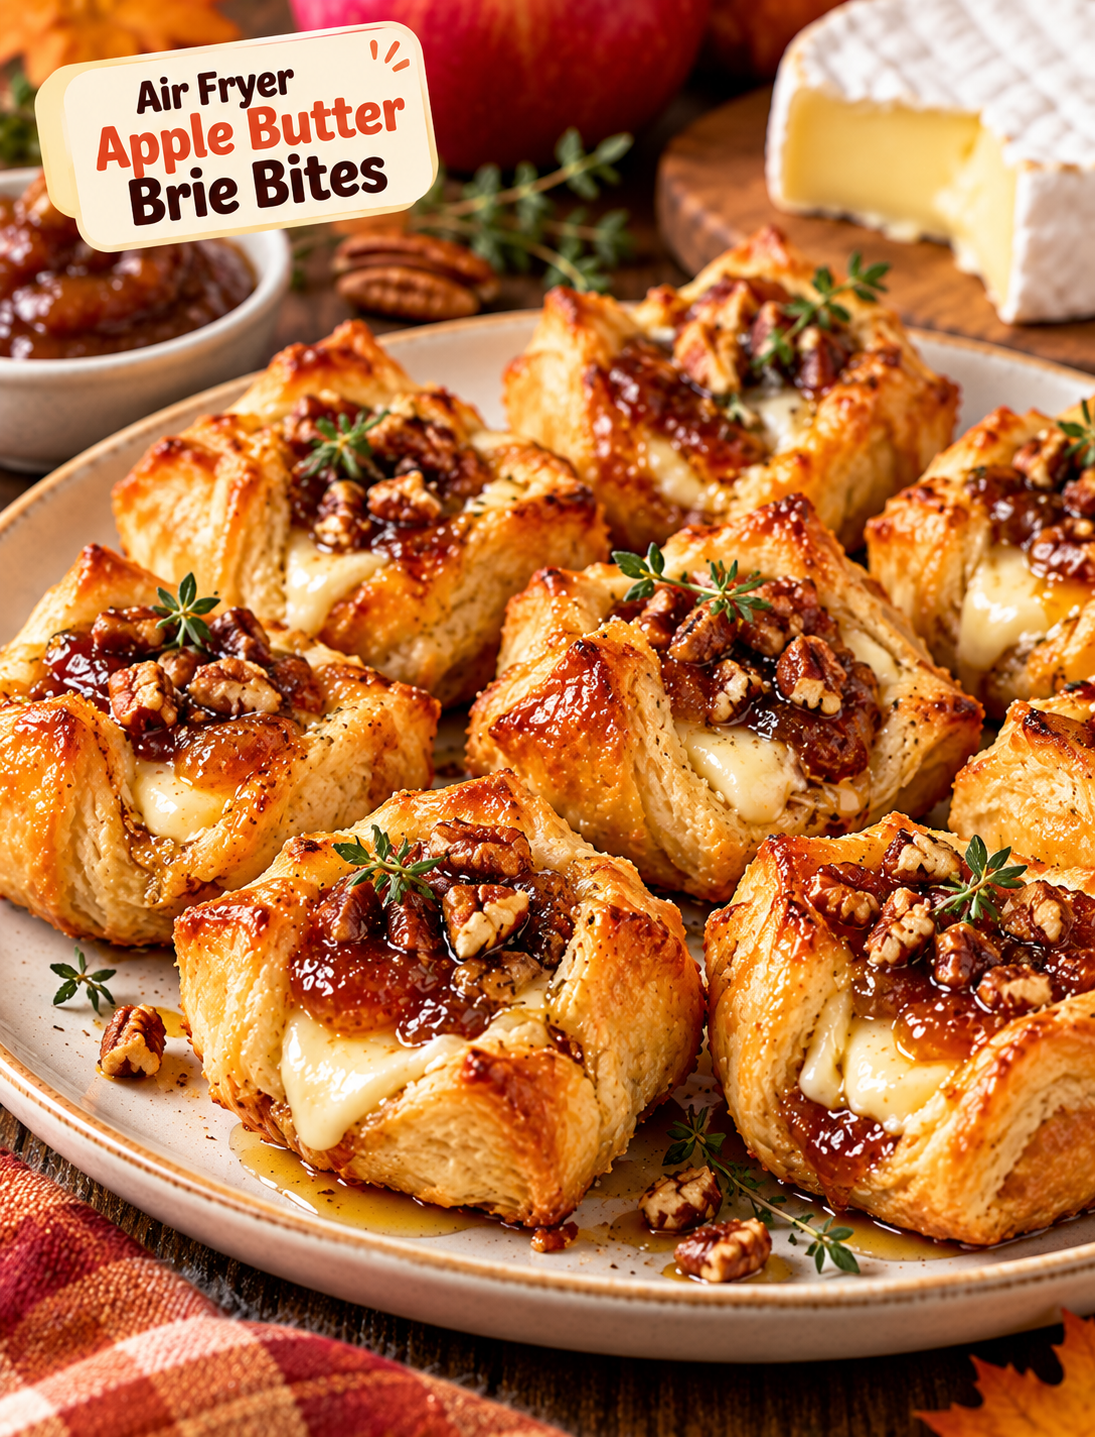
Air Fryer Apple Butter Brie Bites with golden puff pastry, melted Brie, apple butter, pecans, honey, and fresh thyme

Air Fryer Apple Butter Brie Bites

Air Fryer Apple Butter Brie Bites are a simple fall appetizer made with flaky puff pastry, creamy Brie cheese, sweet apple butter, and crunchy pecans. The air fryer turns the pastry golden and crisp while the Brie becomes warm and creamy inside.

These bite-sized appetizers bring together sweet, creamy, buttery, and slightly nutty flavors in every bite. They are easy to prepare and work well for Thanksgiving, Friendsgiving, holiday parties, game-day gatherings, or a cozy weekend snack.

The combination of apple butter and Brie gives these pastry bites a classic fall flavor without requiring a long cooking process. A small drizzle of honey and a sprinkle of fresh thyme add a bright finish that balances the richness of the cheese.

Why You’ll Love These Brie Bites

  • Quick preparation: The puff pastry makes the recipe simple without homemade dough.
  • Air fryer friendly: Hot circulating air creates a crisp, golden pastry shell.
  • Perfect fall flavor: Apple butter, Brie, pecans, and thyme create a seasonal combination.
  • Easy to serve: Each bite is small enough for guests to enjoy without utensils.
  • Great for parties: You can prepare several batches for a holiday appetizer table.
  • Make-ahead friendly: The assembled bites can be chilled before cooking.
  • Sweet and savory: Creamy Brie balances the sweetness of apple butter and honey.

Ingredients You’ll Need

  • 1 sheet frozen puff pastry, thawed
  • 6 ounces Brie cheese
  • ½ cup apple butter
  • ¼ cup finely chopped pecans
  • 1 large egg
  • 1 tablespoon water
  • 1 tablespoon honey
  • 1 teaspoon fresh thyme leaves
  • ¼ teaspoon ground cinnamon
  • Pinch of salt
  • Cooking spray

Choose a good-quality apple butter with a thick texture. A thick spread stays inside the pastry better than a thin apple sauce.

Use Brie that is cold when you cut it because chilled cheese is easier to portion into small pieces.

For a nut-free version, replace the pecans with pumpkin seeds or simply leave them out.

How to Prepare the Puff Pastry

Thaw the puff pastry according to the package instructions, but keep it cool rather than letting it become soft and sticky.

Place the pastry on a lightly floured surface and gently roll it out to smooth any creases.

Cut the sheet into 12 equal squares using a sharp knife or pizza cutter.

Keep the pastry pieces chilled if they become difficult to handle. Cold pastry puffs better and is easier to seal.

Step-by-Step Instructions

Step 1: Cut the Brie

Remove the Brie from its packaging and cut it into 12 small pieces.

You can leave the rind on because it is edible and becomes soft as the cheese warms. If you prefer a smoother filling, trim the rind before cutting.

Keep the cheese chilled until you are ready to assemble the bites.

Step 2: Prepare the Egg Wash

Crack the egg into a small bowl and add 1 tablespoon of water.

Whisk until completely combined.

The egg wash helps the pastry develop a shiny golden surface during air frying.

Step 3: Season the Apple Butter

Place the apple butter in a small bowl.

Stir in the cinnamon and a tiny pinch of salt.

The cinnamon enhances the warm apple flavor while the salt keeps the filling from tasting overly sweet.

Step 4: Assemble the Pastry Bites

Place one puff pastry square on your work surface.

Add approximately 1 teaspoon of apple butter to the center.

Place one piece of Brie on top of the apple butter.

Add a small pinch of chopped pecans.

Avoid adding too much filling because excess moisture can cause the pastry to open during cooking.

Step 5: Seal the Bites

Bring two opposite corners of the pastry toward the center.

Pinch them together gently, then bring the remaining corners upward and press them together.

Make sure the seams are sealed firmly.

If the pastry feels too soft, refrigerate the assembled bites for about 10 minutes before cooking.

Step 6: Brush With Egg Wash

Place the filled pastry bites in a single layer on a plate or small tray.

Brush the tops lightly with the egg wash.

Do not soak the pastry because excess egg wash can drip into the air fryer basket and make cleanup harder.

Sprinkle a few chopped pecans over the tops if desired.

Step 7: Preheat the Air Fryer

Preheat the air fryer to 350°F (175°C) for approximately 3 minutes.

Lightly spray the basket with cooking spray.

Preheating helps the puff pastry begin rising as soon as it enters the basket.

Step 8: Air Fry the Brie Bites

Place the pastry bites in the air fryer basket with space between each piece.

Avoid overcrowding because the hot air needs room to circulate around the pastry.

Air fry at 350°F for 8–11 minutes, or until the pastry is puffed and golden brown.

Check the bites around the 8-minute mark because air fryer models can vary in cooking speed.

Step 9: Finish With Honey and Thyme

Carefully remove the bites from the air fryer.

Let them cool for 3–5 minutes before serving because the melted Brie will be very hot.

Drizzle a small amount of honey over the tops.

Finish with fresh thyme leaves and a few extra chopped pecans.

Serve while warm for the best combination of crisp pastry and creamy cheese.

Tips for Perfect Apple Butter Brie Bites

Keep the puff pastry cold while assembling the appetizers. Warm pastry becomes difficult to seal and may not puff as well.

Do not overfill each pastry square. A small amount of apple butter and Brie is enough to create a rich filling.

Seal every pastry corner firmly before air frying. Open seams can allow melted cheese and apple butter to escape.

Leave space between the bites in the air fryer basket. Crowding traps moisture and can make the pastry less crisp.

Check the bites early during the first batch. Cooking times can vary depending on the size and power of your air fryer.

Let the cooked bites rest briefly before serving. This allows the melted filling to settle and makes them easier to eat.

Flavor Variations

Cranberry Apple Brie Bites

Add ½ teaspoon of dried cranberries to each pastry before sealing. The tart cranberry flavor works well with apple butter and creamy Brie.

Maple Pecan Brie Bites

Replace the honey drizzle with pure maple syrup and add extra toasted pecans after cooking.

Bacon Brie Bites

Add a small amount of finely crumbled cooked bacon with the Brie. The salty bacon creates a stronger sweet-and-savory flavor.

Spiced Apple Brie Bites

Add a small pinch of nutmeg and ground ginger to the apple butter for a warmer fall spice profile.

Rosemary Brie Bites

Replace the thyme with finely chopped fresh rosemary for a more savory herb flavor.

What to Serve With Apple Butter Brie Bites

These appetizers pair well with other fall-inspired foods.

Serve them alongside a charcuterie board with sliced apples, grapes, crackers, cured meats, and additional cheese.

For Thanksgiving, they pair nicely with turkey, roasted vegetables, cranberry sauce, and a simple green salad.

For a holiday party, serve them with sparkling cider, apple cider, or another nonalcoholic seasonal drink.

A small bowl of honey or apple butter on the side also works well for dipping.

How to Store and Reheat

Allow leftover bites to cool completely before storing them.

Place them in an airtight container and refrigerate for up to 3 days.

For the best texture, reheat them in the air fryer at 325°F for 3–5 minutes.

Avoid reheating them in the microwave because the puff pastry can become soft instead of crisp.

If preparing them ahead for a party, assemble the uncooked bites, cover them, and refrigerate them for several hours before air frying.

Frequently Asked Questions

Can I use crescent dough instead of puff pastry?

Yes, but the texture will be softer and breadier; puff pastry provides the crisp, flaky layers that work best for this recipe.

Do I need to remove the Brie rind?

No, the rind is edible and softens when heated, but you can remove it if you prefer a smoother filling.

Can I make these without pecans?

Yes, simply leave them out or replace them with pumpkin seeds for a nut-free alternative.

Can I prepare these ahead of time?

Yes, assemble the bites several hours ahead and refrigerate them until you are ready to air fry.

Why did my Brie leak out?

Overfilling or poorly sealed pastry can cause the cheese to escape; use smaller portions and firmly pinch the seams closed.

Can I use apple pie filling instead of apple butter?

Apple butter works better because it is thick and concentrated, while pie filling contains larger pieces and more moisture.

How long should I air fry Brie bites?

Most batches take 8–11 minutes at 350°F, but check early because air fryer models vary.

Can I freeze these appetizers?

Yes, freeze the assembled uncooked bites in a single layer, then transfer them to a freezer container and cook from frozen with a few extra minutes added.

Final Thoughts

Air Fryer Apple Butter Brie Bites are an easy way to bring warm fall flavors to your table without spending hours in the kitchen. The flaky pastry, creamy Brie, sweet apple butter, crunchy pecans, and fresh thyme create a balanced bite that feels special but remains simple to prepare.

They are especially useful when you need an appetizer for Thanksgiving, Friendsgiving, holiday entertaining, or a casual fall gathering. The small size makes them easy to serve, while the air fryer keeps the pastry crisp and golden.

For the best results, keep the pastry cold, avoid overfilling, seal the edges carefully, and give each bite enough room in the air fryer basket. Serve them warm with a light honey drizzle for a simple appetizer that combines the best flavors of the season.

Air Fryer Sweet Potato Hasselback Bites

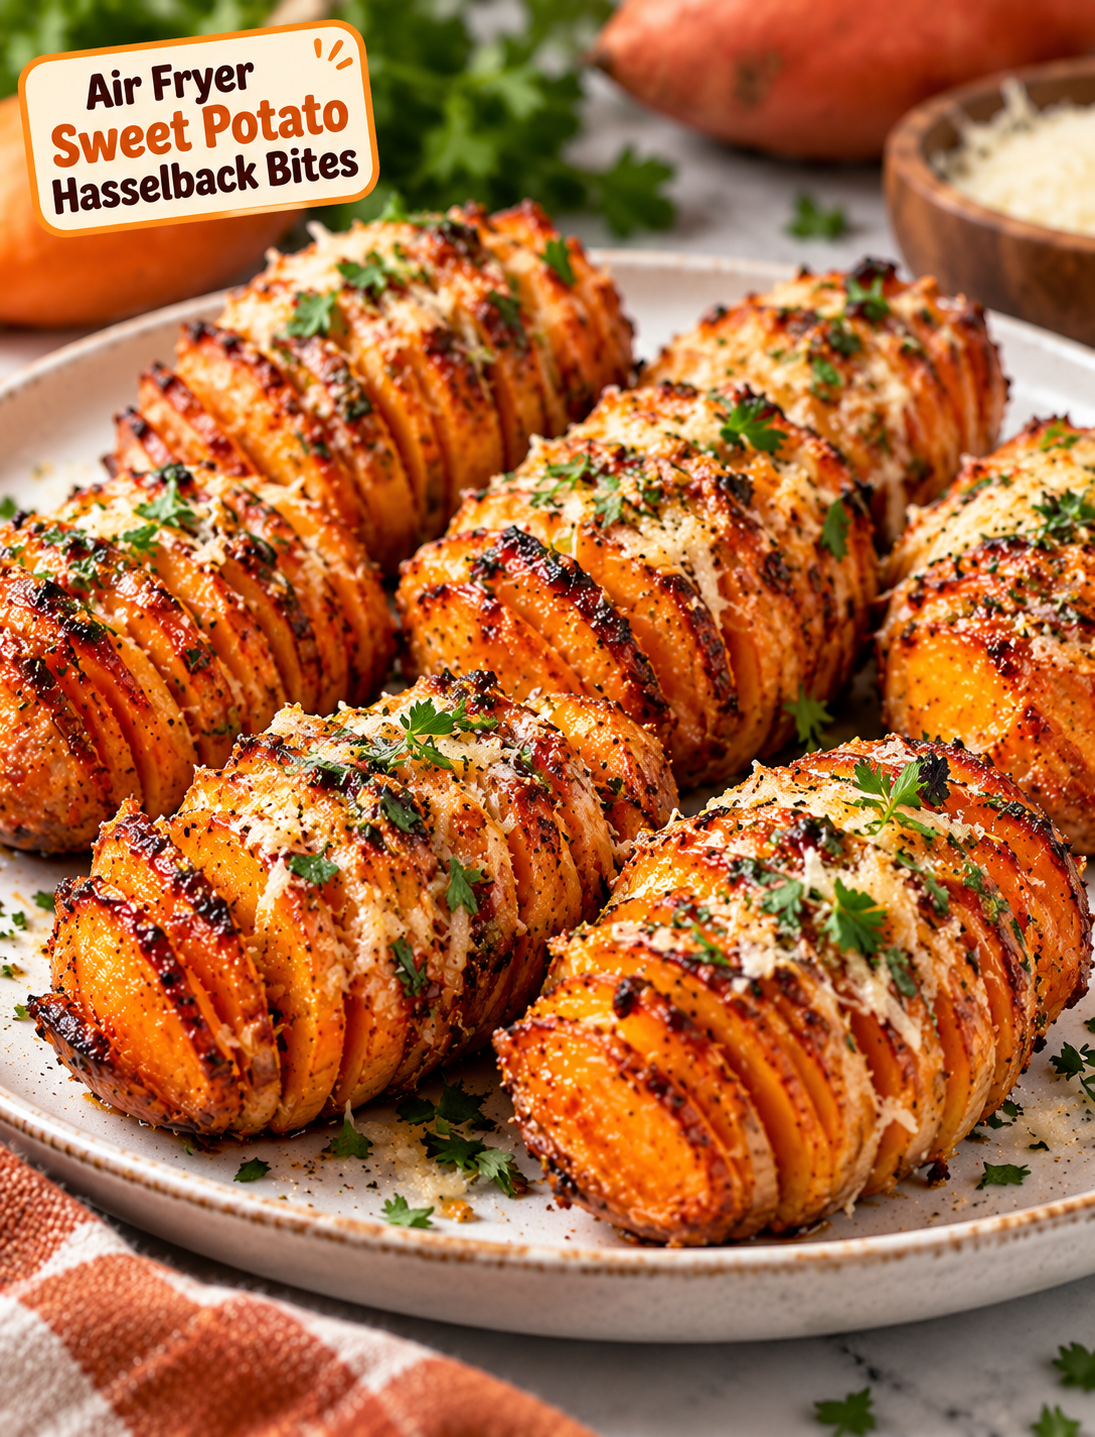
Air fryer sweet potato Hasselback bites with crispy edges, maple glaze, garlic, Parmesan, and fresh parsley

Air Fryer Sweet Potato Hasselback Bites

Air Fryer Sweet Potato Hasselback Bites are a simple way to turn sweet potatoes into a crispy, flavorful side dish or appetizer. Thin cuts let the edges become golden and crisp while the center stays soft and tender.

This recipe combines sweet potatoes with olive oil, garlic, rosemary, and a touch of maple syrup. The result is a sweet and savory bite with caramelized edges and a soft middle.

These bite-sized potatoes are easy enough for a weeknight meal and special enough for Thanksgiving, Friendsgiving, holiday parties, or fall gatherings. The air fryer also cooks them faster than a traditional oven while giving the outside a delicious roasted texture.

Why You’ll Love These Sweet Potato Bites

  • Crispy edges: Thin Hasselback cuts create plenty of golden, crunchy edges.
  • Tender center: The sweet potato stays soft inside as it cooks.
  • Simple ingredients: You only need a few pantry staples and fresh sweet potatoes.
  • Air fryer friendly: No large baking sheet or long oven preheating is needed.
  • Great for entertaining: The small portions make them easy to serve as finger food.
  • Flexible flavor: You can make them sweet, savory, spicy, or a combination of all three.
  • Naturally colorful: Their golden-orange color makes them stand out on a holiday table.

Ingredients You’ll Need

  • 3 medium sweet potatoes, preferably similar in size
  • 2 tablespoons olive oil
  • 1 tablespoon melted unsalted butter
  • 1 tablespoon pure maple syrup
  • 1 teaspoon garlic powder
  • ½ teaspoon smoked paprika
  • ½ teaspoon dried rosemary
  • ½ teaspoon kosher salt
  • ¼ teaspoon black pepper
  • 2 tablespoons finely grated Parmesan cheese
  • 1 tablespoon chopped fresh parsley

For a slightly spicy version, add a small pinch of cayenne pepper or crushed red pepper flakes.

How to Cut Hasselback Sweet Potatoes

The key to this recipe is making thin slices without cutting completely through each potato.

Place a sweet potato on a cutting board and position a chopstick or the handle of a wooden spoon along each long side. Make thin cuts across the potato about ⅛ inch apart.

The chopsticks stop the knife before it reaches the bottom, keeping the slices connected.

Try to keep the cuts as even as possible. Thin, consistent slices cook more evenly and create better crispy edges.

If your sweet potatoes are large, cut them into smaller sections before making the Hasselback cuts. This creates more manageable bite-sized portions.

Step-by-Step Instructions

Step 1: Prepare the Sweet Potatoes

Wash the sweet potatoes thoroughly and scrub away any dirt.

Pat them completely dry with paper towels. Dry potatoes brown better and help the seasoning stick to the surface.

Cut off any uneven ends, then slice the potatoes into smaller sections if needed.

Step 2: Make the Seasoning Mixture

Add olive oil, melted butter, maple syrup, garlic powder, smoked paprika, rosemary, salt, and black pepper to a small bowl.

Whisk until the mixture is well combined.

The maple syrup adds a mild sweetness, while smoked paprika and garlic balance the flavor.

Step 3: Make the Hasselback Cuts

Place each sweet potato section between two chopsticks or wooden spoon handles.

Use a sharp knife to make thin cuts across the potato.

Leave the bottom intact so the slices remain attached.

Do not cut too deeply because the pieces can separate during cooking.

Step 4: Season the Potatoes

Brush the seasoned oil mixture over the sweet potatoes.

Gently brush between some of the cuts so the seasoning reaches the inside edges.

Avoid forcing the slices apart because they can break.

For extra flavor, reserve a little seasoning mixture for brushing halfway through cooking.

Step 5: Preheat the Air Fryer

Preheat the air fryer to 375°F (190°C) for about 3 minutes.

Preheating helps the potatoes begin cooking immediately and encourages better browning.

Lightly spray the air fryer basket with cooking spray if needed.

Step 6: Air Fry the Sweet Potatoes

Place the prepared sweet potatoes in the air fryer basket with the cut sides facing upward.

Keep the pieces in a single layer and leave space between them for proper air circulation.

Air fry at 375°F for 18–25 minutes, depending on the size and thickness of the potatoes.

After about 10–12 minutes, carefully brush them with the remaining seasoning mixture.

Continue cooking until the edges are crisp and the centers are fork-tender.

Larger pieces may need a few additional minutes.

Step 7: Add Parmesan

Once the potatoes are almost completely cooked, sprinkle the grated Parmesan over the tops.

Return them to the air fryer for 2–3 minutes.

The cheese should melt and develop lightly browned edges.

Watch closely during this final stage because Parmesan can brown quickly.

Step 8: Finish and Serve

Carefully transfer the sweet potato bites to a serving plate.

Sprinkle with fresh parsley and serve while warm.

For an extra fall-inspired finish, drizzle a very small amount of maple syrup over the top just before serving.

Tips for Extra-Crispy Hasselback Bites

Use sweet potatoes that are similar in size so they cook at roughly the same rate.

Keep the slices thin and even to create more crispy edges.

Do not overcrowd the air fryer basket because trapped steam can prevent browning.

Pat the potatoes dry before adding the seasoning mixture.

For deeper browning, brush the exposed edges with a little olive oil halfway through cooking.

If your air fryer runs hot, reduce the temperature slightly and extend the cooking time to prevent the edges from burning before the centers become tender.

Flavor Variations

Maple Cinnamon

Skip the garlic and smoked paprika. Use maple syrup, cinnamon, butter, and a small pinch of salt for a sweeter side dish.

Garlic Parmesan

Leave out the maple syrup and add extra garlic powder, Parmesan, and Italian seasoning.

Spicy Sweet Potato Bites

Add cayenne pepper or crushed red pepper flakes to the seasoning mixture for a sweet-and-spicy flavor.

Honey Herb

Replace maple syrup with honey and use fresh thyme or rosemary for a bright, savory finish.

Bacon Cheddar

Top the cooked potatoes with shredded cheddar cheese and finely crumbled cooked bacon. Air fry for another 1–2 minutes until the cheese melts.

What to Serve With Sweet Potato Hasselback Bites

These crispy sweet potato bites work well with roasted chicken, turkey, pork tenderloin, steak, or grilled salmon.

For a holiday meal, serve them alongside turkey, green beans, cranberry sauce, and a simple salad.

They can also be served as an appetizer with a creamy garlic dip, maple Dijon sauce, or herbed yogurt.

For brunch, pair them with scrambled eggs, turkey sausage, or a vegetable frittata.

How to Store and Reheat

Allow leftovers to cool before placing them in an airtight container.

Refrigerate for up to 3–4 days.

To reheat, place the bites in the air fryer at 350°F for 4–6 minutes, or until heated through and crisp again.

Avoid microwaving when possible because it can make the edges soft.

Frequently Asked Questions

Can I use large sweet potatoes?

Yes. Large sweet potatoes work well, but cut them into smaller sections so they cook more evenly.

Do I need to peel sweet potatoes?

No. The skin is edible and becomes slightly crisp during air frying, but you can peel them if preferred.

Why are my sweet potatoes not crispy?

Overcrowding, excess moisture, or thick slices can reduce crispiness; keep the pieces dry and arrange them in a single layer.

Can I make these without Parmesan?

Yes. Simply omit the Parmesan or replace it with another hard grated cheese that browns well.

Can I prepare them ahead of time?

Yes. Make the Hasselback cuts and seasoning several hours ahead, then refrigerate the prepared potatoes until ready to cook.

What temperature should sweet potatoes reach?

Sweet potatoes should be tender enough to pierce easily with a fork; unlike meat, they do not require a specific internal temperature for safety.

Can I use frozen sweet potatoes?

Fresh sweet potatoes are recommended because frozen pieces can release extra moisture and may not hold the Hasselback cuts well.

Can I make these spicy?

Yes. Add cayenne pepper, chili powder, or crushed red pepper flakes to the seasoning mixture for extra heat.

Final Thoughts

Air Fryer Sweet Potato Hasselback Bites are an easy way to make a simple vegetable feel special. The thin cuts create crispy, caramelized edges while the center stays soft and tender. Maple, garlic, smoked paprika, rosemary, and Parmesan add a balanced sweet-and-savory flavor.

They are a great choice for weeknight dinners, Thanksgiving, Friendsgiving, holiday gatherings, or fall parties. Serve them warm with roasted chicken, turkey, steak, or your favorite dipping sauce.

For the best texture, keep the slices thin, avoid overcrowding the air fryer, and serve the bites soon after cooking. Once you try this method, sweet potatoes may become one of your favorite air fryer side dishes.

Creamy Spinach & Mushroom Pasta Recipe

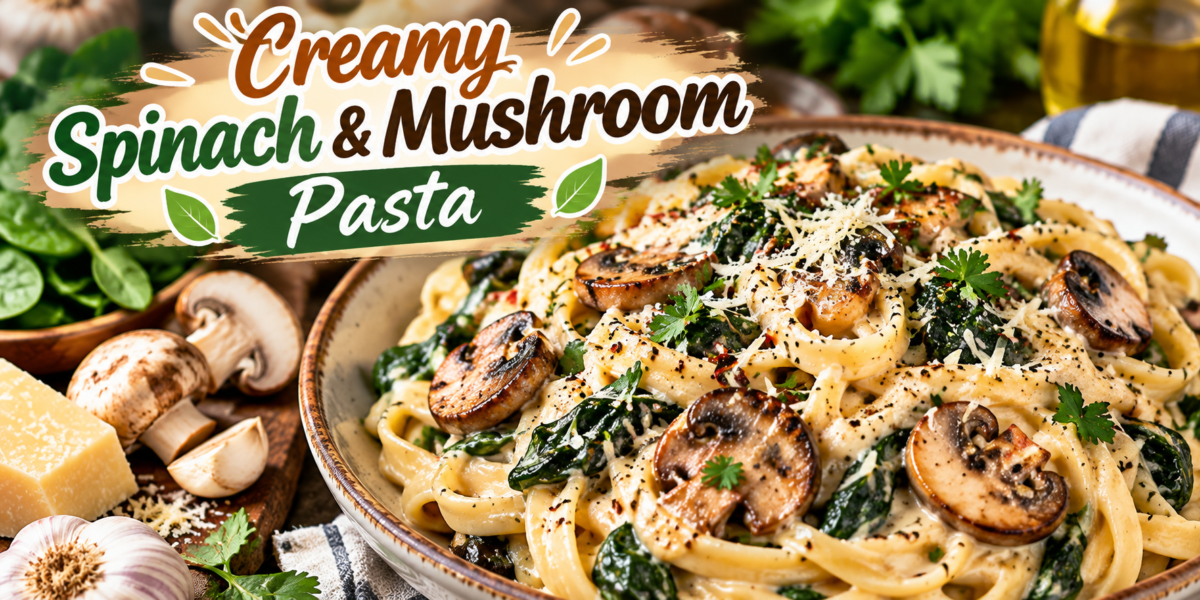
Creamy spinach mushroom pasta with sautéed mushrooms, fresh spinach, Parmesan cheese, and herbs

Creamy Spinach & Mushroom Pasta Recipe

Creamy Spinach & Mushroom Pasta is a comforting dinner made with tender pasta, golden mushrooms, fresh spinach, garlic, Parmesan cheese, and a smooth cream sauce. This easy recipe brings together simple ingredients and rich flavor in one skillet.

This Spinach Mushroom Pasta is a practical choice for busy weeknights. The mushrooms add a deep savory taste, while spinach brings freshness and color. Garlic, Parmesan, and Italian herbs create a creamy sauce that coats every strand of pasta.

The recipe is simple enough for beginners and satisfying enough for the whole family. You can make it with penne, fettuccine, linguine, spaghetti, or your favorite short pasta. It also works well when you need a meatless dinner that still feels filling.

Fresh spinach cooks quickly and blends into the sauce without making the dish heavy. Mushrooms add a tender, meaty texture and help make every bite more satisfying. A little lemon juice at the end brightens the creamy sauce.

This Spinach Mushroom Pasta can be served as a complete meal with a simple salad and warm bread. It is also easy to customize with chicken, shrimp, extra vegetables, or a lighter sauce.

Whether you are looking for a quick weekday dinner or a comforting family meal, this recipe is an excellent choice. The creamy sauce, earthy mushrooms, and fresh spinach create a combination that feels special without requiring complicated cooking.

Prep Time: 15 minutes
Cook Time: 25 minutes
Total Time: 40 minutes
Servings: 4 servings

Ingredients

For the Pasta

12 ounces pasta

1 tablespoon salt for the pasta water

1 tablespoon olive oil

For the Creamy Mushroom Sauce

2 tablespoons olive oil

3 tablespoons butter

12 ounces fresh mushrooms, sliced

1 small yellow onion, finely chopped

4 cloves garlic, minced

5 ounces fresh baby spinach

1 cup heavy cream

1/2 cup low-sodium vegetable broth

3/4 cup freshly grated Parmesan cheese

1 teaspoon dried Italian seasoning

1/2 teaspoon dried oregano

1/4 teaspoon red pepper flakes, optional

1/2 teaspoon black pepper

1/2 teaspoon salt, or to taste

1 tablespoon fresh lemon juice

2 tablespoons fresh parsley, chopped

Optional Toppings

Extra Parmesan cheese

Fresh parsley

Red pepper flakes

Freshly cracked black pepper

Lemon wedges

Step-by-Step Instructions

Cook the Pasta

Bring a large pot of water to a boil. Add the salt and cook the pasta according to the package directions.

Cook the pasta until it is al dente. This means the pasta should be tender but still have a slight bite.

Before draining, reserve about 1 cup of pasta water. Drain the pasta and set it aside.

The reserved pasta water can help loosen the sauce later. This simple step is especially useful when making Spinach Mushroom Pasta because Parmesan and cream can create a thick sauce.

Cook the Mushrooms

Heat a large skillet over medium-high heat. Add the olive oil and butter.

Add the sliced mushrooms in an even layer. Cook for 5 to 7 minutes.

Stir the mushrooms occasionally until they become golden brown and tender.

Avoid adding too many mushrooms at once. A crowded skillet can cause the mushrooms to release too much moisture. They may steam instead of browning.

Well-browned mushrooms give Spinach Mushroom Pasta a deeper savory flavor.

Add the Onion and Garlic

Add the chopped onion to the skillet. Cook for 3 to 4 minutes until it becomes soft and lightly golden.

Next, add the minced garlic. Cook for about 30 seconds. Stir constantly so the garlic does not burn.

Add the Italian seasoning, dried oregano, black pepper, and red pepper flakes if you are using them.

These simple seasonings create a flavorful base for the creamy sauce.

Add the Spinach

Add the fresh spinach to the skillet in small batches.

Stir gently after each addition. The spinach will wilt quickly as it touches the hot mushrooms and onions.

Cook for about 2 minutes until the spinach is soft but still bright green.

Fresh spinach works especially well in Spinach Mushroom Pasta because it adds color and freshness without requiring a long cooking time.

Make the Creamy Sauce

Reduce the heat to medium-low.

Pour the heavy cream and vegetable broth into the skillet. Stir gently to combine all the ingredients.

Allow the sauce to simmer for 3 to 4 minutes. Do not let the cream boil aggressively.

Add the Parmesan cheese gradually. Stir after each addition until the cheese melts into the sauce.

If the sauce looks too thick, add a few tablespoons of reserved pasta water.

Continue adding small amounts until the sauce reaches a smooth and creamy consistency.

The sauce should lightly coat the back of a spoon. It should not be watery or overly thick.

Combine the Pasta and Sauce

Add the cooked pasta directly to the skillet.

Use tongs or a large spoon to gently toss the pasta with the creamy mushroom sauce.

Cook for another 1 to 2 minutes. This allows the pasta to absorb the sauce and helps all the flavors come together.

Taste the dish and adjust the salt or black pepper if needed.

The final Spinach Mushroom Pasta should be creamy, savory, fresh, and balanced.

Finish With Lemon and Herbs

Turn off the heat.

Add the fresh lemon juice and chopped parsley. Toss gently.

The lemon juice adds brightness and balances the rich cream and Parmesan.

Serve immediately with extra Parmesan, fresh parsley, black pepper, and red pepper flakes if desired.

A small squeeze of fresh lemon over each serving adds an extra layer of flavor.

Tips for the Best Recipe

Use fresh mushrooms for the best texture. Cremini, baby bella, white button, or a mixture of mushrooms all work well.

Slice the mushrooms evenly so they cook at the same rate.

Clean mushrooms quickly and dry them well before cooking. Avoid leaving them soaked in water.

Cook the mushrooms over medium-high heat. Proper browning creates a deeper savory taste.

Do not add the cream while the skillet is extremely hot. Lower the heat first to keep the sauce smooth.

Add Parmesan gradually. This helps it melt into the sauce instead of forming clumps.

Keep some pasta water before draining. It is useful for adjusting the sauce.

Fresh lemon juice should be added at the end for the best flavor.

For richer Spinach Mushroom Pasta, add a little extra Parmesan before serving.

If you want more texture, reserve a few golden mushrooms and place them on top before serving.

Easy Variations

Add Chicken

Cook sliced chicken breast in the skillet before making the sauce. Season it with salt, pepper, garlic powder, and Italian seasoning.

Remove the chicken while preparing the mushrooms. Return it to the skillet with the cooked pasta.

Add Shrimp

Season peeled shrimp with garlic, black pepper, and a little paprika.

Cook the shrimp until they turn pink and are fully cooked. Remove them from the skillet and add them back at the end.

Make It Spicy

Increase the red pepper flakes or add a small amount of crushed chili pepper.

You can also add a few sliced jalapeños for a stronger kick.

Add More Vegetables

Bell peppers, zucchini, broccoli, peas, and sun-dried tomatoes can all work well.

Add firm vegetables earlier so they have enough time to cook.

Make It Lighter

Use half-and-half instead of heavy cream. You can also reduce the Parmesan and increase the vegetable broth.

Make It Extra Creamy

Add one or two tablespoons of cream cheese with the Parmesan.

Stir until completely smooth.

These variations make Spinach Mushroom Pasta flexible enough to suit different tastes and ingredients.

Serving Suggestions

Serve this creamy pasta while it is hot and freshly prepared.

A simple green salad with lemon dressing makes a refreshing side. Roasted broccoli or asparagus also pairs well with the creamy sauce.

Warm garlic bread is another excellent choice. It can be used to scoop up any remaining sauce from the plate.

For a Mediterranean-style meal, serve the pasta with tomatoes, cucumber, olives, and a small amount of feta cheese.

This Spinach Mushroom Pasta also works well as a family dinner because it can be served directly from the skillet.

For a dinner party, garnish each plate with Parmesan, parsley, and a few thin mushroom slices.

You can also serve it with grilled vegetables for a colorful and balanced dinner.

Health and Nutrition Benefits

Mushrooms provide several vitamins and minerals while adding a satisfying texture to the meal.

Spinach is a nutrient-rich leafy green that contributes vitamins, minerals, and antioxidants.

Pasta provides carbohydrates that can supply energy. Parmesan and cream add protein and fat for a satisfying meal.

Olive oil adds unsaturated fat to the recipe.

You can increase the vegetable content by adding broccoli, zucchini, peppers, or peas.

For a more balanced plate, pair Spinach Mushroom Pasta with a large serving of fresh vegetables or salad.

Nutrition depends on the specific ingredients and portion sizes used.

Storage Instructions

Allow leftovers to cool slightly before storing.

Place the pasta in an airtight container and refrigerate it for up to 3 days.

Cream sauces can thicken as they cool. Add a splash of milk, cream, broth, or water before reheating.

Reheat gently in a skillet over low to medium heat. Stir frequently to prevent the sauce from sticking.

You can also reheat individual portions in the microwave. Heat in short intervals and stir between each interval.

For the best texture, avoid overheating the pasta.

This Spinach Mushroom Pasta is best enjoyed fresh, but careful reheating can keep the leftovers creamy and flavorful.

Meal Prep Tips

If you want to prepare this recipe ahead, cook the pasta slightly under al dente.

This helps prevent it from becoming too soft after reheating.

Prepare the mushroom and spinach sauce separately if you plan to eat the meal over several days.

Store the pasta and sauce in separate containers when possible. Combine them during reheating.

Keep extra Parmesan and fresh parsley separate until serving.

You can also prepare the mushrooms, onions, and garlic in advance. Store them in the refrigerator and finish the sauce when you are ready to cook.

For busy weekdays, Spinach Mushroom Pasta can be portioned into containers for quick lunches or dinners.

Why This Recipe Works

The success of this recipe comes from building flavor in simple stages.

First, the mushrooms are browned to create a rich savory base.

Next, onions and garlic add sweetness and aroma.

Spinach adds freshness without requiring much cooking time.

The cream and Parmesan then create a smooth sauce. Pasta water helps the sauce cling to the noodles.

Lemon juice provides a bright finish and prevents the creamy flavors from becoming too heavy.

The combination creates a balanced dish with creamy, savory, fresh, and slightly tangy flavors.

That balance is what makes Spinach Mushroom Pasta such a satisfying comfort food.

Cooking Notes

Use a wide skillet so the mushrooms have enough space to brown.

Keep the heat moderate when adding cream and cheese.

Taste before adding extra salt because Parmesan already contains salt.

If your sauce becomes too thick, add pasta water one tablespoon at a time.

If the sauce becomes too thin, simmer it gently for another minute or two.

Add fresh herbs after turning off the heat for a brighter flavor.

For the best presentation, serve the pasta immediately after tossing it with the sauce.

Frequently Asked Questions

Can I use frozen spinach?

Yes. Thaw the spinach and squeeze out excess water before adding it to the skillet.

What mushrooms are best for this recipe?

Cremini, baby bella, white button, shiitake, or a combination can be used.

Can I make this recipe without heavy cream?

Yes. Half-and-half or evaporated milk can be used for a lighter sauce.

Can I make it vegetarian?

Yes. Use vegetable broth and Parmesan suitable for your dietary preference.

Can I use another pasta shape?

Yes. Penne, linguine, fettuccine, spaghetti, shells, and bow-tie pasta all work well.

Can I add protein?

Yes. Chicken, shrimp, salmon, or white beans can be added.

Why is my sauce too thick?

Cream and Parmesan naturally thicken as they cook. Add reserved pasta water gradually until the sauce reaches the right consistency.

How can I prevent the sauce from becoming grainy?

Keep the heat moderate and add Parmesan gradually. Avoid boiling the cheese and cream mixture.

Can I freeze the finished pasta?

Cream-based pasta can be frozen, but the sauce may change texture after thawing. For the best results, enjoy it fresh or refrigerate leftovers for a few days.

How can I make the recipe more flavorful?

Brown the mushrooms well, use fresh garlic and herbs, and finish with lemon juice and Parmesan. These simple steps make Spinach Mushroom Pasta taste richer without adding complicated ingredients.

Nutrition Information

Approximate nutrition per serving:

Calories: 560 kcal

Protein: 18g

Carbohydrates: 63g

Fat: 27g

Fiber: 5g

Sugar: 5g

Sodium: 620mg

These values are estimates and can change based on pasta type, cream, cheese, and serving size.

Final Thoughts

Creamy Spinach & Mushroom Pasta is a simple comfort meal that combines everyday ingredients with rich homemade flavor.

The mushrooms provide a savory foundation, while spinach adds color and freshness. Parmesan and cream create a smooth sauce that coats the pasta beautifully.

This recipe is easy enough for a regular weeknight but flavorful enough for a casual dinner with guests.

You can keep it vegetarian or add chicken, shrimp, or beans for extra protein. You can also adjust the vegetables and seasonings based on what you have available.

With a few basic cooking techniques and a skillet, you can create a creamy meal without complicated steps.

If you enjoy creamy pasta dishes with vegetables, Spinach Mushroom Pasta is a recipe worth adding to your regular dinner rotation.