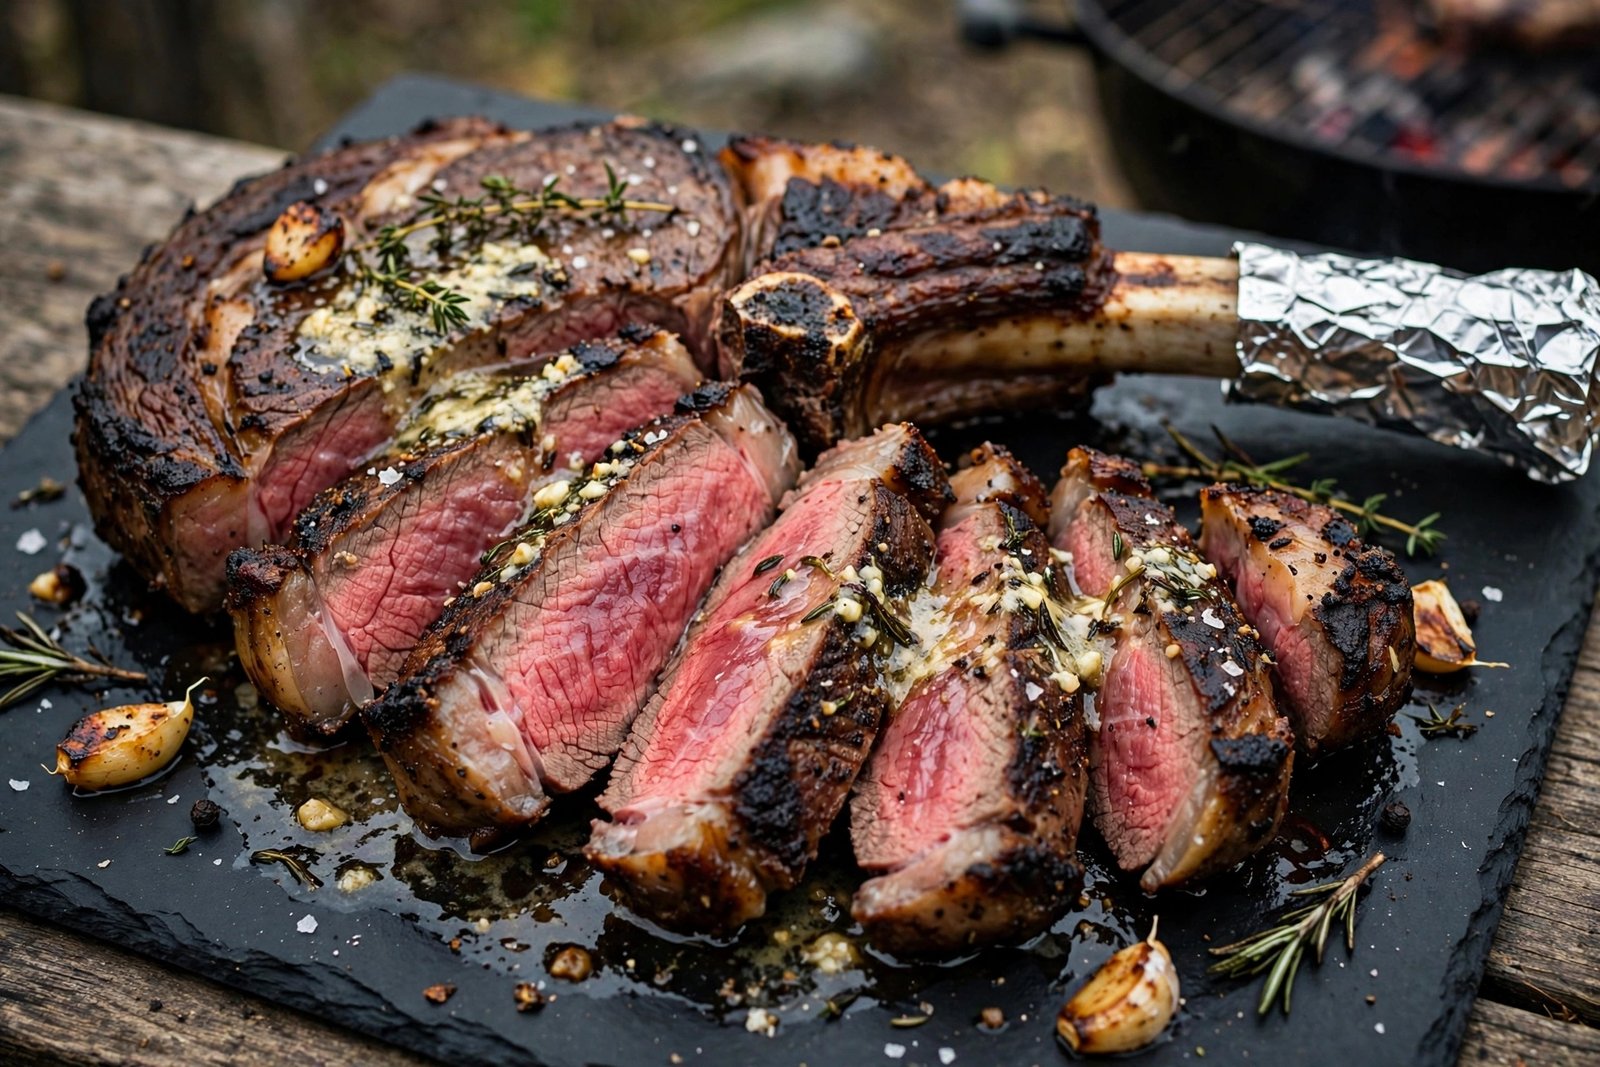
Garlic Butter Tomahawk Steak* – juicy pink inside, charred crust outside:

 *Garlic Butter Tomahawk Steak*- juicy pink inside, charred crust outside:


*Ingredients:*


*For Steak:*

– 1 Tomahawk Steak – 1 to 1.2 kg, about 2-2.5 inch thick (bring to room temp 1 hour before)

– 1 tbsp olive oil

– 1.5 tsp coarse salt

– 1 tsp black pepper crushed

– 1 tsp garlic powder

– 1 tsp smoked paprika


*For Garlic Butter:*

– 50g butter (soft)

– 4 garlic cloves – finely minced

– 1 tbsp fresh parsley chopped

– 1 tbsp fresh rosemary chopped

– 1 tsp lemon juice


*Method:*


*1. Prep Steak:* Pat steak 100% dry with tissue paper. This is important for crust. Rub olive oil, then salt, pepper, garlic powder, paprika on all sides.


*2. Sear First:* Heat grill or heavy cast iron pan on very high heat. Add a little oil. Sear the tomahawk 3-4 mins per side until dark brown crust forms . Also sear the edges.


*3. Garlic Butter Baste:* Lower heat to medium. Add butter, minced garlic, rosemary in the pan. Tilt pan and spoon melted garlic butter over the steak continuously for 2 minutes. Wrap the bone with foil.


*4. Finish in Oven (to get that perfect pink center):*

Preheat oven to 200°C (400°F).

Place steak on a tray and cook:

– For rare/medium-rare . 10-12 minutes

– For medium: 14-16 minutes


Use a meat thermometer if you have one: 54°C for medium-rare, 60°C for medium.


*5. REST – Most Important:* Take out and put on board, cover loosely with foil, rest for 10-15 minutes. Don’t cut early or all juice will come out.


*6. Slice & Serve:* Slice against the grain as shown in your video and pour the garlic butter from the pan on top.


Serve with grilled veggies, fries, or chimichurri.


*Pro Tip:* For extra smoky flavor, grill over charcoal for last 2 mins.

Tips for perfect *Garlic Butter Tomahawk Steak*


*1. Room Temp is Must:* Take steak out of fridge 45-60 mins before cooking. Cold steak will burn outside but stay raw inside.


*2. Dry = Crust:* Pat it completely dry with paper towels. Any moisture = no crust. That’s how you get that dark charred outside.


*3. Don’t Rush the Sear:* Pan / grill must be smoking hot. Don’t move the steak for 3-4 mins. Let it form that crust, then flip only once.


*4. Foil The Bone:* Always wrap the long bone in foil like in your video. Otherwise it burns black and looks bad.


*5. Butter Burns Fast:* Add butter only after you sear. If you add it at the start, garlic will burn and taste bitter. Add butter + garlic at the end and baste.


*6. For That Pink Center:* Don’t cook fully on grill. Sear on grill/pan, then finish 10-12 mins in oven at 200°C. This is the only way to get medium-rare edge to edge.


*7. Thermometer Trick:* If you want it perfect every time:

– 52-54°C = Medium rare

– 58-60°C = Medium

– Over 65°C = well done and dry


*8. REST – Don’t Skip:* Rest 10-15 mins on board, not on a plate. If you cut immediately, all the juice runs out and it becomes dry.

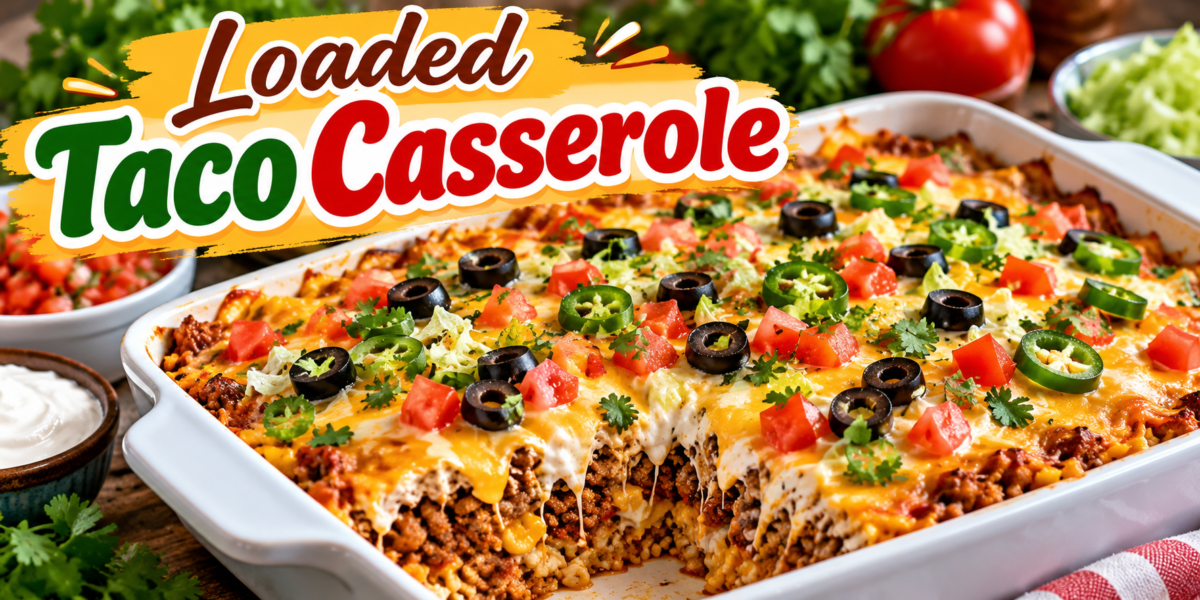
Loaded Taco Casserole

Loaded Taco Casserole with seasoned beef, rice, beans, corn, melted cheese, tomatoes, jalapeños, and cilantro

Loaded Taco Casserole

Loaded Taco Casserole is a hearty, cheesy, and flavorful dinner that brings together seasoned ground beef, tender rice, creamy sauce, melted cheese, tomatoes, jalapeños, black olives, and fresh cilantro in one comforting dish. It is easy to assemble, family-friendly, and perfect for busy weeknights.

The beauty of this recipe is its flexibility. You can prepare it with ground beef, ground turkey, or shredded chicken. Rice makes the casserole filling, while taco seasoning, salsa, and cheese create plenty of bold flavor. Fresh toppings add brightness and crunch after baking.

This Loaded Taco Casserole is also a practical choice for meal prep. The leftovers reheat well, making it useful for lunches and quick dinners throughout the week.

Prep Time: 20 minutes
Cook Time: 30 minutes
Total Time: 50 minutes
Servings: 8
Course: Dinner
Cuisine: Mexican-inspired American

Ingredients

For the Beef Mixture

Ground beef: 1 1/2 pounds
Olive oil: 1 tablespoon
Yellow onion: 1 small, diced
Garlic cloves: 3, minced
Taco seasoning: 1 packet
Chili powder: 1 teaspoon
Ground cumin: 1/2 teaspoon
Smoked paprika: 1/2 teaspoon
Black pepper: 1/2 teaspoon
Salsa: 1 cup
Diced tomatoes: 1 can, drained
Corn kernels: 1 cup
Black beans: 1 can, drained and rinsed

For the Rice Layer

3 cups cooked white or brown rice

1/2 cup salsa

1/2 teaspoon salt

1/4 teaspoon black pepper

1 tablespoon fresh cilantro, chopped

For the Creamy Layer

1 cup sour cream

4 ounces cream cheese, softened

1/2 cup salsa

1/2 teaspoon garlic powder

1/4 teaspoon cumin

For the Cheese Topping

2 cups shredded Mexican-blend cheese

1 cup shredded cheddar cheese

For the Toppings

1 large tomato, diced

1 jalapeño, thinly sliced

1/3 cup sliced black olives

1/4 cup chopped fresh cilantro

2 green onions, sliced

1 avocado, diced, optional

Fresh lime wedges, optional

Step-by-Step Instructions

Prepare the Rice

Start with cooked rice that has cooled slightly.

Place the rice in a large bowl.

Add salsa, salt, black pepper, and chopped cilantro.

Stir gently until everything is evenly combined.

White rice gives the casserole a classic texture. Brown rice adds a slightly nuttier flavor and more texture.

If you are using leftover rice, break up any large clumps before mixing.

The rice should remain fluffy rather than becoming mashed.

Set it aside while you prepare the beef mixture.

Cook the Ground Beef

Heat a large skillet over medium-high heat.

Add olive oil and allow it to warm.

Add the diced onion.

Cook for about 3 minutes, stirring occasionally.

The onion should become soft and slightly translucent.

Add the ground beef.

Break it apart with a wooden spoon or spatula.

Cook until the beef is browned and no longer pink.

Drain excess grease if necessary.

Add the minced garlic.

Cook for about 30 seconds.

The garlic should become fragrant without turning dark.

Add taco seasoning, chili powder, cumin, smoked paprika, and black pepper.

Stir thoroughly so the spices coat the beef.

This seasoned mixture creates the bold foundation of the Loaded Taco Casserole.

Add the Vegetables

Pour the salsa into the skillet.

Add drained diced tomatoes.

Stir in corn and black beans.

Mix everything together.

Reduce the heat to medium-low.

Allow the mixture to simmer for about 5 minutes.

The salsa adds moisture while the tomatoes provide a light acidity.

Corn adds natural sweetness, while black beans provide a hearty texture.

Keep the mixture thick.

A watery filling can make the finished casserole difficult to slice.

Remove the skillet from the heat once the ingredients are hot and well combined.

Make the Creamy Layer

Place softened cream cheese in a mixing bowl.

Add sour cream and salsa.

Sprinkle in garlic powder and cumin.

Stir until the mixture becomes smooth.

If the cream cheese is too firm, allow it to sit at room temperature for a little longer before mixing.

You can also microwave it for a few seconds, but do not overheat it.

The creamy layer creates a smooth contrast against the seasoned beef and rice.

For a milder casserole, use mild salsa.

A medium or spicy salsa will give the dish more heat.

Prepare the Baking Dish

Preheat your oven to 375°F (190°C).

Lightly grease a 9-by-13-inch baking dish.

A ceramic or glass baking dish works well.

Spread the seasoned rice across the bottom.

Press it gently into an even layer.

Do not compact the rice too firmly.

A light, even layer keeps the texture pleasant after baking.

Add the Beef Layer

Spoon the seasoned beef mixture over the rice.

Spread it evenly from edge to edge.

Try to keep the layer consistent so every serving contains beef, beans, corn, and tomatoes.

The combination of rice and seasoned beef gives the Loaded Taco Casserole its hearty structure.

Add the Creamy Layer

Spoon the sour cream mixture over the beef.

Use the back of a spoon or an offset spatula to spread it gently.

The creamy mixture does not need to reach every tiny corner.

An even layer across most of the surface is enough.

Avoid pressing down too hard because you do not want to disturb the beef underneath.

Add the Cheese

Sprinkle the Mexican-blend cheese over the creamy layer.

Follow with the shredded cheddar.

Try to cover the surface evenly.

The cheese will melt into a golden, bubbling layer during baking.

For extra flavor, you can use Monterey Jack, pepper Jack, or a combination of cheddar and mozzarella.

Freshly shredded cheese often melts more smoothly than pre-shredded varieties.

Bake the Casserole

Cover the baking dish loosely with aluminum foil.

Place it in the preheated oven.

Bake for approximately 20 minutes.

Remove the foil.

Continue baking for another 8 to 10 minutes.

The cheese should be completely melted and lightly golden around the edges.

If you want a more browned topping, switch the oven to broil for 1 to 2 minutes.

Watch carefully during broiling because cheese can brown quickly.

Remove the dish from the oven.

Allow it to rest for about 10 minutes before adding fresh toppings.

Resting helps the layers settle and makes serving easier.

Add Fresh Toppings

Scatter diced tomatoes over the warm casserole.

Add sliced jalapeños, black olives, green onions, and fresh cilantro.

For extra creaminess, add diced avocado.

Serve with fresh lime wedges.

The fresh toppings provide color and balance the rich cheese and creamy layers.

This combination makes the Loaded Taco Casserole look just as inviting as it tastes.

Tips for the Best Results

Use cooked rice that is fluffy rather than wet.

Drain canned beans and tomatoes thoroughly.

Keep the beef mixture thick before assembling the casserole.

Allow cream cheese to soften before making the creamy layer.

Use freshly shredded cheese when possible.

Do not overbake the casserole.

Let the finished dish rest before cutting.

Add avocado only after baking.

Fresh cilantro and lime should also be added at the end.

For a crispier cheese topping, bake uncovered during the final few minutes.

These small techniques help create a flavorful Loaded Taco Casserole with distinct layers and a satisfying texture.

Easy Ingredient Substitutions

Ground turkey can replace ground beef.

Shredded cooked chicken also works well.

For a vegetarian version, replace the beef with extra black beans, pinto beans, or lentils.

Brown rice can replace white rice.

Quinoa is another option if you want a different grain.

Greek yogurt can replace some or all of the sour cream.

Pepper Jack cheese can replace cheddar when you want extra heat.

Monterey Jack creates an especially creamy topping.

Fresh bell peppers can be added to the beef mixture.

You can also use frozen corn when fresh corn is unavailable.

The flexible ingredients make this Loaded Taco Casserole easy to adapt to what you already have in your kitchen.

How to Make It Spicier

Choose hot salsa instead of mild salsa.

Add extra jalapeño slices to the topping.

A pinch of cayenne can be mixed into the beef.

You can also add crushed red pepper flakes.

Pepper Jack cheese provides another layer of heat.

For a smoky spicy flavor, add a little extra smoked paprika.

Keep the toppings separate when serving so each person can adjust the heat.

This approach makes the Loaded Taco Casserole suitable for both mild and spicy food lovers.

How to Make It Kid-Friendly

Use mild taco seasoning and mild salsa.

Skip the jalapeños if your family does not enjoy spicy food.

You can leave out black olives or onions for picky eaters.

Serve diced avocado, tomatoes, and cilantro on the side.

Let children choose their own toppings.

Ground turkey can also be used for a lighter-tasting filling.

The familiar combination of rice, beef, cheese, and creamy sauce makes the casserole approachable for younger diners.

Serving Suggestions

Serve warm portions with a simple green salad.

Fresh guacamole makes an excellent side.

Salsa and sour cream can be served separately.

Warm tortilla chips add a crunchy contrast.

You can also serve the casserole with corn salad or roasted vegetables.

For a complete Mexican-inspired dinner, add black beans, fresh pico de gallo, and lime wedges.

A bowl of fresh fruit can provide a refreshing finish.

The rich layers of the Loaded Taco Casserole pair especially well with crisp and fresh side dishes.

Make-Ahead Instructions

The casserole can be assembled several hours before baking.

Prepare the rice, beef mixture, and creamy layer.

Layer everything in the baking dish.

Cover tightly with foil.

Refrigerate until you are ready to bake.

Take the dish out of the refrigerator while the oven preheats.

Because the casserole starts cold, you may need to add several minutes to the baking time.

Always make sure the center is hot before serving.

For the freshest texture, add tomatoes, avocado, cilantro, and other fresh toppings after baking.

Storage Instructions

Allow leftovers to cool before storing.

Place individual portions in airtight containers.

Refrigerate for up to 3 to 4 days.

Keep fresh toppings separate when possible.

Reheat individual portions in the microwave or oven until heated through.

Add fresh cilantro, tomatoes, avocado, and lime after reheating.

The flavors often become even more developed after the casserole rests overnight.

That makes Loaded Taco Casserole particularly useful for planned lunches and busy weekday dinners.

Freezing Instructions

You can freeze the casserole before or after baking.

For best texture, assemble the casserole without fresh toppings.

Wrap the baking dish tightly with plastic wrap and aluminum foil.

Freeze for up to 2 months.

Thaw overnight in the refrigerator before baking.

If freezing individual portions, place them in freezer-safe containers.

Allow frozen portions to thaw before reheating whenever possible.

Fresh toppings should always be added after reheating.

Common Mistakes to Avoid

Do not use overly wet rice.

Avoid adding undrained tomatoes or beans.

Do not leave excess grease in the beef mixture.

Avoid spreading the creamy layer while the beef is extremely hot.

Do not use too much salsa in the filling.

Excess moisture can make the layers loose.

Avoid overbaking because the rice can become dry.

Do not add avocado before baking.

Wait until the casserole has finished cooking.

Allowing the casserole to rest before serving also helps the layers stay together.

Frequently Asked Questions

Can I use ground turkey instead of beef?

Yes. Ground turkey is an easy substitute and works well with the taco seasoning and other ingredients.

Can I use chicken?

Absolutely. Shredded cooked chicken can replace the ground beef. Rotisserie chicken is a convenient option.

Can I make this casserole vegetarian?

Yes. Increase the beans and add vegetables such as bell peppers, zucchini, or corn.

What rice works best?

White rice, brown rice, and even leftover seasoned rice can work. Make sure the rice is cooked before assembling.

Can I use different cheese?

Yes. Cheddar, Monterey Jack, Pepper Jack, Colby, or a Mexican cheese blend are all suitable choices.

Can I make it without sour cream?

Greek yogurt is a good alternative. It creates a creamy layer while adding a slightly tangy flavor.

How do I prevent a watery casserole?

Drain canned vegetables thoroughly and avoid adding too much salsa. The beef mixture should be thick before layering.

Can I prepare it the night before?

Yes. Assemble the casserole, cover it, and refrigerate it. Add some extra baking time because the dish will be cold.

Can I freeze leftovers?

Yes. Store cooled portions in freezer-safe containers and thaw them in the refrigerator before reheating.

What toppings go best with it?

Tomatoes, avocado, cilantro, green onions, jalapeños, olives, lime, salsa, and sour cream are all delicious options.

Nutrition Information

Approximate nutrition per serving:

Calories: 560 kcal
Protein: 31g
Carbohydrates: 48g
Fat: 27g
Fiber: 7g
Sugar: 6g
Sodium: 980mg

Nutrition values are estimates and may vary depending on the ingredients, brands, cheese, seasoning, and serving size used.

Why You Will Love This Recipe

There is something especially comforting about a hot casserole covered with bubbling melted cheese.

This recipe combines several familiar ingredients into one easy meal.

The seasoned beef provides savory flavor.

Rice makes each serving filling.

Black beans and corn add texture.

Salsa brings tomatoes and spices into the filling.

The creamy layer adds richness.

Melted cheese creates the golden topping that makes the casserole so inviting.

Fresh vegetables provide a crisp contrast after baking.

Another advantage is how easy the recipe is to customize.

You can change the protein, rice, cheese, beans, spice level, or toppings.

That flexibility makes Loaded Taco Casserole useful when you need to cook with ingredients already available in your pantry.

The casserole is also convenient for gatherings.

You can prepare a large baking dish and let everyone add their favorite toppings.

For family dinners, place toppings in small bowls and allow everyone to build their own serving.

Final Thoughts

Loaded Taco Casserole brings together seasoned beef, fluffy rice, black beans, corn, tomatoes, creamy sauce, and plenty of melted cheese.

The layers create a satisfying combination of textures and flavors.

Fresh toppings such as avocado, cilantro, jalapeños, tomatoes, and green onions add color and brightness.

The recipe is simple enough for a weeknight but substantial enough for a family gathering.

You can prepare it ahead, refrigerate it, and bake it when needed.

Leftovers are easy to store and reheat, which makes the recipe especially useful for busy schedules.

For a milder version, choose mild salsa and skip the jalapeños.

For more heat, add spicy salsa, pepper Jack cheese, or extra chili.

Ground turkey or chicken can replace the beef, while extra beans can create a vegetarian version.

The result is a flexible meal that can be adapted to different tastes without complicated cooking.

Serve each portion with fresh lime, salsa, guacamole, or a crisp salad.

For the best presentation, add colorful toppings just before serving.

The combination of creamy, cheesy, savory, fresh, and slightly spicy flavors makes Loaded Taco Casserole a comforting dinner that is easy to prepare and enjoyable to share.

With simple ingredients and straightforward steps, this casserole can become a reliable addition to your family dinner rotation.
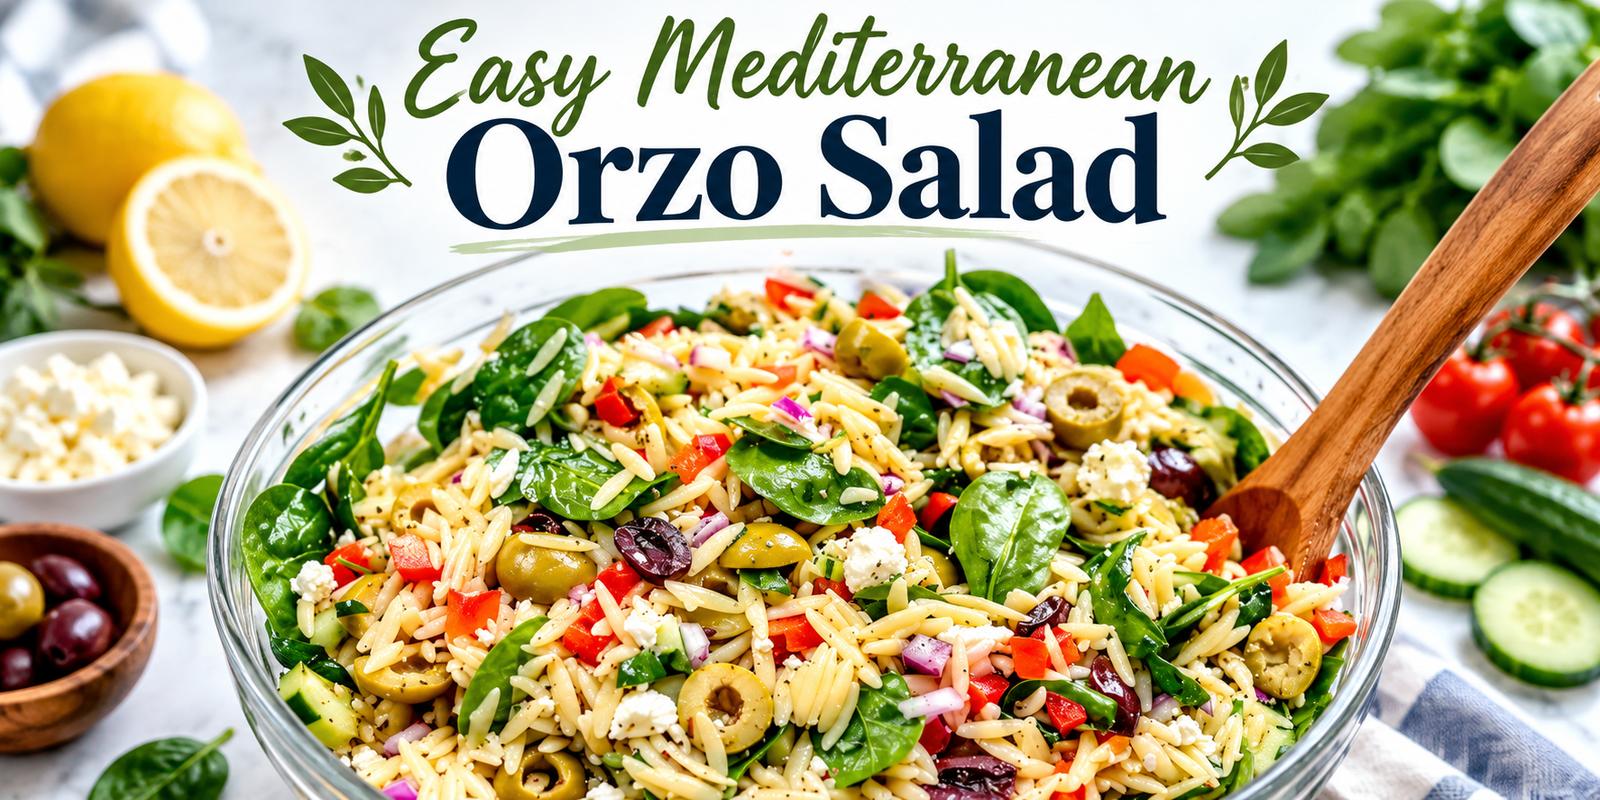
Easy Mediterranean Orzo Salad Recipe

Easy Mediterranean Orzo Salad with orzo pasta, spinach, cucumber, tomatoes, olives, feta cheese, and fresh herbs

Easy Mediterranean Orzo Salad Recipe

Easy Mediterranean Orzo Salad is a fresh, colorful, and flavorful dish made with tender orzo pasta, juicy tomatoes, crisp cucumber, olives, feta cheese, fresh herbs, and a bright lemon dressing. It is light enough for lunch but filling enough to serve as a side dish for chicken, seafood, or grilled vegetables. This salad is also excellent for meal prep because the flavors become even better after chilling.

Prep Time: 20 minutes
Cook Time: 10 minutes
Total Time: 30 minutes
Servings: 6

Ingredients

For the Orzo Salad

1½ cups uncooked orzo pasta

1½ cups cherry tomatoes, halved

1 large cucumber, diced

½ cup red onion, finely chopped

½ cup Kalamata olives, sliced

¾ cup crumbled feta cheese

½ cup roasted red peppers, chopped

¼ cup fresh parsley, finely chopped

2 tablespoons fresh dill, chopped

2 tablespoons fresh mint or basil, chopped

2 cups baby spinach or arugula, optional

For the Lemon Herb Dressing

¼ cup extra virgin olive oil

3 tablespoons fresh lemon juice

1 teaspoon lemon zest

1 tablespoon red wine vinegar

1 teaspoon Dijon mustard

1 garlic clove, finely minced

1 teaspoon dried oregano

½ teaspoon salt

¼ teaspoon black pepper

½ teaspoon honey, optional

Step-by-Step Instructions

Cook the Orzo

Bring a large pot of salted water to a boil.

Add the orzo and cook according to the package instructions until tender but still slightly firm.

Avoid overcooking the pasta because very soft orzo can make the finished salad mushy.

Drain the cooked orzo well.

Rinse it briefly under cool water to stop the cooking process.

Allow it to drain completely before transferring it to a large mixing bowl.

Prepare the Vegetables

While the orzo is cooking, prepare the vegetables.

Cut the cherry tomatoes in half.

Dice the cucumber into small pieces.

Finely chop the red onion.

Slice the Kalamata olives.

Chop the roasted red peppers.

Finely chop the parsley, dill, and mint or basil.

Keeping the vegetables approximately the same size makes the salad easier to eat and gives every bite a good balance of ingredients.

Make the Lemon Herb Dressing

Add olive oil to a small bowl.

Pour in fresh lemon juice and red wine vinegar.

Add lemon zest, Dijon mustard, minced garlic, oregano, salt, and black pepper.

Add honey if you prefer a slightly softer and more balanced acidity.

Whisk until the dressing looks smooth and combined.

Taste and adjust the seasoning.

Add more lemon for brightness or additional black pepper for a stronger flavor.

Combine the Salad

Place the cooled orzo in a large serving bowl.

Add the tomatoes, cucumber, red onion, olives, roasted red peppers, parsley, dill, and mint.

If using spinach or arugula, add it now.

Pour approximately three-quarters of the dressing over the salad.

Toss gently until everything is evenly coated.

Add the crumbled feta cheese.

Toss again very gently so the feta does not completely break apart.

Add more dressing if needed.

Chill Before Serving

The salad can be served immediately, but chilling it for about 20 to 30 minutes allows the flavors to develop.

Cover the bowl and refrigerate.

Before serving, stir the salad gently.

Taste again and add another squeeze of lemon, a drizzle of olive oil, or additional herbs if needed.

Why You’ll Love Easy Mediterranean Orzo Salad

Easy Mediterranean Orzo Salad combines simple ingredients with plenty of fresh flavor.

Orzo gives the salad a satisfying pasta base.

Cucumber provides crunch.

Cherry tomatoes bring sweetness and juiciness.

Kalamata olives add a salty Mediterranean flavor.

Feta provides a creamy and tangy contrast.

Fresh parsley, dill, and mint make the salad taste light and refreshing.

The lemon dressing brings everything together without making the dish feel heavy.

It is also extremely flexible.

You can serve it alone or combine it with chicken, shrimp, salmon, or other protein.

Tips for the Best Mediterranean Orzo Salad

Do Not Overcook the Orzo

Cook the pasta until just tender.

Overcooked pasta can become soft after absorbing the dressing.

Drain the Pasta Well

Excess water can dilute the dressing.

Let the cooked orzo drain thoroughly before combining it with the other ingredients.

Use Fresh Lemon

Fresh lemon juice and zest create a much brighter dressing.

Add Feta Last

Adding feta after the other ingredients have been mixed helps keep some larger pieces intact.

Adjust the Dressing Before Serving

Orzo can absorb dressing while sitting.

If the salad seems dry after refrigeration, add another small drizzle of olive oil and lemon juice.

Chop Ingredients Evenly

Smaller, evenly chopped vegetables make the salad easier to serve and ensure every spoonful contains several ingredients.

Easy Variations

Chicken Mediterranean Orzo Salad

Add grilled or roasted chicken.

Cut the chicken into small pieces and mix it into the salad.

Shrimp Orzo Salad

Add grilled or sautéed shrimp for a seafood version.

Chickpea Orzo Salad

Add one drained can of chickpeas.

This makes the salad more filling while keeping it meat-free.

Avocado Orzo Salad

Add diced avocado shortly before serving.

Do not add it too early because avocado can darken.

Extra Vegetable Orzo Salad

Add zucchini, artichoke hearts, spinach, broccoli, or roasted eggplant.

Spicy Mediterranean Orzo Salad

Add crushed red pepper flakes or a small amount of chopped chili to the dressing.

For another colorful and flavor-packed salad, try our Zesty Mexican Grilled Taco Salad with grilled ingredients, crisp vegetables, and a zesty dressing.

Another Fresh Salad to Try

If you enjoy colorful salads packed with fresh vegetables and bold flavors, you may also like our Zesty Mexican Grilled Taco Salad.

Internal link placement: Is paragraph ko Easy Variations ke baad rakhein aur sirf Zesty Mexican Grilled Taco Salad words par apna internal link lagayein.

A Mediterranean Chicken Recipe to Serve with Orzo

For a complete Mediterranean-inspired dinner, serve this salad alongside Mediterranean Garlic Butter Chicken Bites. The lemon, garlic, herbs, and fresh vegetables in both recipes pair especially well together.

Internal link placement: Is paragraph ko What to Serve with Mediterranean Orzo Salad se bilkul pehle rakhein aur sirf Mediterranean Garlic Butter Chicken Bites words ko link karein.

What to Serve with Mediterranean Orzo Salad

This salad works well as both a main dish and a side dish.

Serve it with grilled chicken for a protein-rich dinner.

Grilled salmon is another excellent choice.

You can also pair it with shrimp, roasted chicken, grilled lamb, or Mediterranean meatballs.

For a vegetarian meal, serve the salad with hummus, pita bread, roasted vegetables, or falafel.

It also works well alongside:

Grilled zucchini

Roasted asparagus

Garlic bread

Greek-style vegetables

Cucumber yogurt sauce

Grilled halloumi

Roasted potatoes

For another colorful and flavor-packed salad, try our Zesty Mexican Grilled Taco Salad with grilled ingredients, crisp vegetables, and a zesty dressing.

Meal Prep Instructions

Easy Mediterranean Orzo Salad is particularly convenient for meal prep.

Prepare the pasta, vegetables, and dressing.

Combine everything except delicate greens and avocado.

Divide the salad into airtight containers.

Store in the refrigerator.

Before eating, add fresh greens or avocado if desired.

You may also need to add a small amount of lemon juice or olive oil because the pasta absorbs some of the dressing during storage.

Storage Instructions

Place leftover orzo salad in an airtight container.

Store it in the refrigerator for up to 3 days.

Stir before serving.

If the salad looks slightly dry, add a small drizzle of olive oil and a squeeze of fresh lemon.

Freezing is not recommended.

Fresh cucumber, tomatoes, herbs, and feta can lose their ideal texture after freezing and thawing.

Frequently Asked Questions

What is orzo?

Orzo is a small pasta shaped somewhat like large grains of rice.

Despite its appearance, traditional orzo is pasta rather than rice.

Can I make Mediterranean Orzo Salad ahead of time?

Yes.

You can prepare it several hours or even a day before serving.

For the freshest texture, add delicate greens immediately before serving.

Can I serve this salad warm?

Yes.

You can serve it slightly warm, at room temperature, or chilled.

For a classic pasta salad texture, allow the orzo to cool first.

Can I replace feta cheese?

Yes.

Goat cheese can work well.

Fresh mozzarella is another option if you prefer a milder cheese.

You can also leave the cheese out entirely.

Can I use green olives?

Yes.

Use any olives you enjoy.

Kalamata olives provide a stronger Mediterranean flavor, while green olives can taste brighter and saltier.

What can I use instead of orzo?

Small pasta shapes such as ditalini or small shells work well.

You can also use couscous, quinoa, or another grain, although the final dish will have a different texture.

Can I make it dairy-free?

Yes.

Leave out the feta cheese or use a suitable dairy-free alternative.

The remaining ingredients are naturally easy to adapt.

How can I add more protein?

Add grilled chicken, shrimp, salmon, tuna, chickpeas, white beans, or lentils.

Servings & Nutrition

Servings: 6

Estimated nutrition per serving:

Calories: 310

Protein: 9 g

Carbohydrates: 38 g

Fat: 14 g

Fiber: 4 g

Sugar: 5 g

Sodium: 480 mg

Nutrition values are estimates and will vary depending on the exact ingredients and portion sizes.

Final Thoughts

Easy Mediterranean Orzo Salad is a simple recipe filled with fresh vegetables, herbs, feta, olives, tender pasta, and bright lemon flavor.

It works equally well for lunch, dinner, picnics, gatherings, or meal prep.

The recipe can also be customized easily with chicken, shrimp, chickpeas, avocado, or additional vegetables.

Serve it chilled for a refreshing summer meal or pair it with warm grilled chicken or seafood for a more filling dinner.

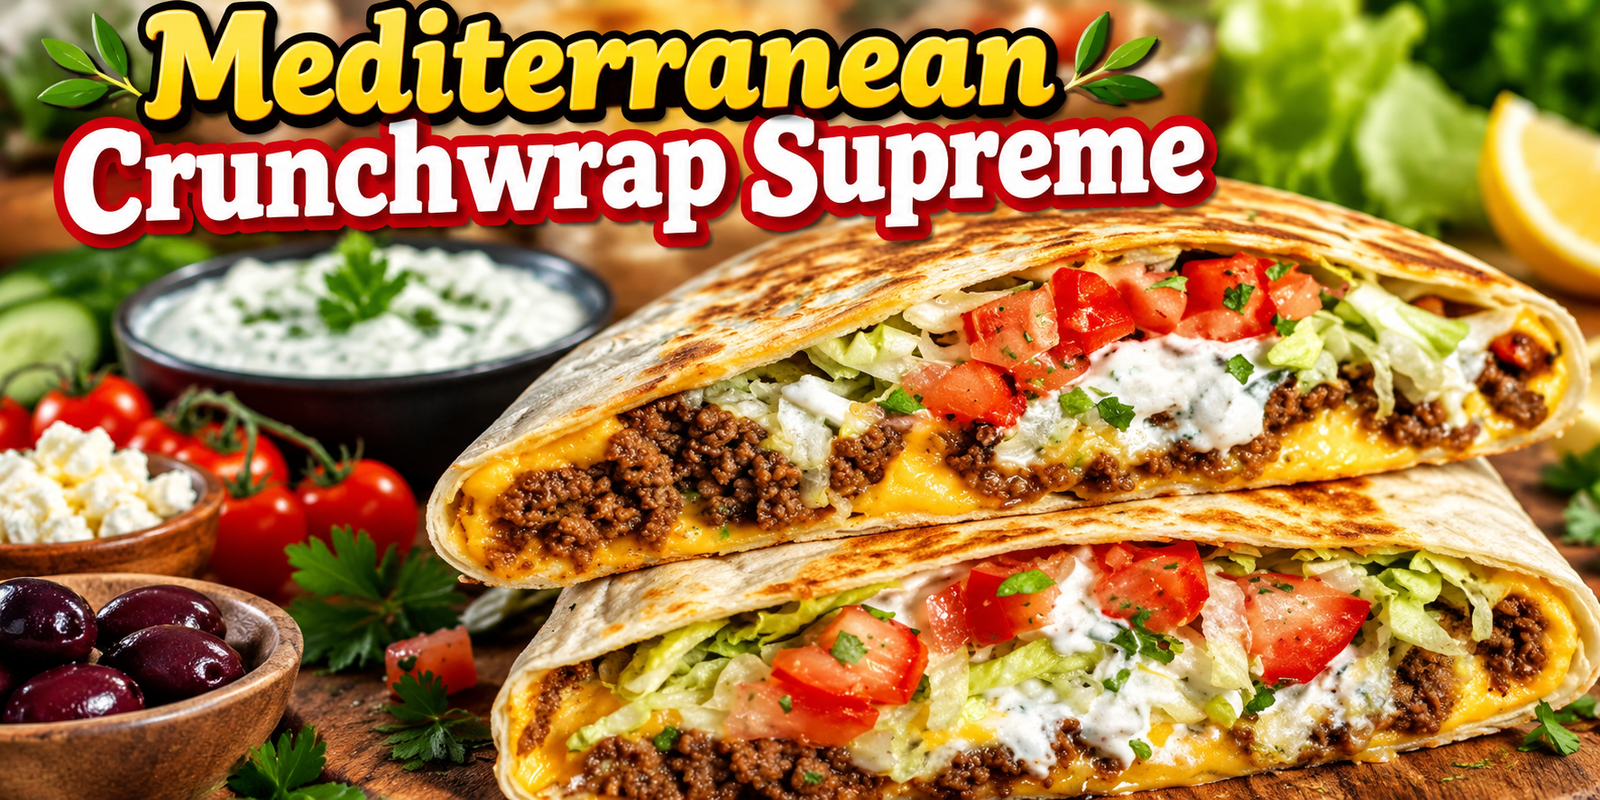
Mediterranean Crunchwrap Supreme

Mediterranean Crunchwrap Supreme filled with seasoned meat, hummus, feta, olives, cucumber, tomatoes and tzatziki

Mediterranean Crunchwrap Supreme

Mediterranean Crunchwrap Supreme is a crispy, golden tortilla packed with savory seasoned meat, creamy hummus, crunchy vegetables, salty feta, olives, tzatziki, and a crisp pita layer in the center. It combines the fun, layered texture of a classic crunchwrap with fresh Mediterranean-inspired ingredients.

It works especially well for lunch, an easy family dinner, or meal prep when you prepare the fillings ahead. The combination of warm seasoned beef or lamb, cool cucumber, juicy tomatoes, feta, hummus, and tzatziki gives every bite a mix of creamy, crunchy, fresh, and savory flavors.

Prep Time: 20 minutes
Cook Time: 15 minutes
Total Time: 35 minutes
Servings: 4 Crunchwraps

Ingredients 

For the Mediterranean Meat Filling

1 lb ground beef or ground lamb

1 tablespoon olive oil

1 small red onion, finely chopped

2 garlic cloves, minced

1 teaspoon ground cumin

1 teaspoon smoked or sweet paprika

½ teaspoon ground coriander

½ teaspoon dried oregano

½ teaspoon salt

¼ teaspoon black pepper

1 tablespoon fresh lemon juice

For the Crunchwrap Layers

4 large flour tortillas

½ cup hummus

4 small toasted pita rounds or a handful of pita chips

1 cup cherry tomatoes, chopped

1 cup cucumber, diced

1 cup shredded romaine lettuce

½ cup crumbled feta cheese

½ cup sliced Kalamata olives

½ cup tzatziki sauce

Optional Additions

Fresh parsley

Fresh mint

Sliced red onion

Roasted red peppers

Baby spinach

Red pepper flakes

Harissa sauce

For Cooking

1–2 teaspoons olive oil or cooking spray

Step-by-Step Instructions

Prepare the Mediterranean Meat

Heat one tablespoon of olive oil in a large skillet over medium heat.

Add the finely chopped red onion.

Cook for about 2 minutes until it begins to soften.

Add the minced garlic and stir for approximately 30 seconds.

Do not allow the garlic to burn.

Add the ground beef or lamb.

Use a wooden spoon to break the meat into small pieces.

Cook until the meat is browned and completely cooked through.

Drain excess fat if necessary.

Add cumin, paprika, coriander, oregano, salt, and black pepper.

Stir well so the spices coat the meat evenly.

Cook for another 1–2 minutes.

Finish with fresh lemon juice.

Remove the pan from the heat and set the filling aside.

Prepare the Fresh Ingredients

While the meat cooks, prepare the vegetables.

Dice the cucumber.

Chop the cherry tomatoes.

Shred the lettuce.

Slice the olives.

Crumble the feta cheese.

Having everything ready before assembling makes the process much easier.

Warm the Tortillas

Warm each large flour tortilla for about 10–15 seconds.

You can use a dry skillet or microwave.

The goal is simply to make the tortillas soft and flexible.

Cold tortillas are more likely to tear while folding.

Assemble the Mediterranean Crunchwrap Supreme

Place one large tortilla on a clean work surface.

Spread approximately 2 tablespoons of hummus in the center.

Leave plenty of space around the edges.

Add a layer of seasoned meat over the hummus.

Place a toasted pita round or a few crisp pita chips on top.

This creates the crunchy center.

Add chopped tomatoes.

Add diced cucumber.

Top with shredded lettuce.

Sprinkle feta cheese over the vegetables.

Add sliced Kalamata olives.

Finish with a spoonful of tzatziki.

Do not overfill the wrap.

Too much filling makes folding difficult and can cause the tortilla to open during cooking.

How to Fold a Crunchwrap

Starting at one edge of the tortilla, fold it inward toward the center.

Continue folding the tortilla around the filling in overlapping sections.

You should create a round or slightly hexagonal parcel.

Hold the folds together gently.

Place the folded side down first when cooking.

The heat helps seal the tortilla.

Cook the Crunchwrap

Heat a clean skillet over medium heat.

Lightly brush with olive oil or use cooking spray.

Place the crunchwrap seam-side down.

Cook for about 2–3 minutes.

Press gently with a spatula.

When the bottom is golden brown and sealed, carefully flip it.

Cook the other side for another 2–3 minutes.

The tortilla should be golden, crisp, and slightly toasted.

Repeat with the remaining crunchwraps.

Serve

Let each Mediterranean Crunchwrap Supreme rest for about 1 minute.

Slice in half.

Serve warm with extra tzatziki, hummus, or lemon wedges.

You can also add chopped parsley or mint before serving.

Why You’ll Love Mediterranean Crunchwrap Supreme

There are several reasons this recipe makes an excellent easy meal.

The outside is warm and crispy.

Inside, you get creamy hummus and tzatziki.

The meat adds savory flavor and protein.

Cucumber and lettuce provide freshness.

Tomatoes add juiciness.

Feta and olives bring the salty Mediterranean flavors that make the wrap especially satisfying.

The crispy pita layer in the center gives the Mediterranean Crunchwrap Supreme its signature crunch.

It is also easy to customize.

You can adjust the meat, vegetables, cheese, sauces, and spice level depending on your preferences.

Tips for the Best Mediterranean Crunchwrap Supreme

Warm the Tortillas First

This is one of the most important steps.

Warm tortillas are much easier to fold.

Don’t Overfill

A little of each ingredient is enough.

Overfilling makes the crunchwrap difficult to close.

Use a Crisp Center

Toasted pita, pita chips, or crispy flatbread all work.

The crunchy layer should stay relatively dry.

Keep Wet Ingredients Controlled

Use only a small amount of tzatziki inside.

Too much sauce can make the tortilla soggy.

Cook Seam-Side Down First

This seals the folds and helps the crunchwrap keep its shape.

Use Medium Heat

Very high heat can burn the tortilla before the center becomes warm.

Easy Variations

Chicken Mediterranean Crunchwrap

Replace ground beef with finely chopped grilled chicken.

Season the chicken with oregano, paprika, cumin, garlic, and lemon.

Vegetarian Mediterranean Crunchwrap

Replace the meat with seasoned chickpeas.

You can also use falafel, grilled eggplant, or roasted cauliflower.

Extra Cheesy Version

Add shredded mozzarella with the feta.

The mozzarella melts while the feta provides salty Mediterranean flavor.

Spicy Mediterranean Crunchwrap

Add harissa to the hummus.

You can also sprinkle red pepper flakes over the meat.

Greek-Style Crunchwrap

Add spinach, artichokes, sun-dried tomatoes, feta, and olives.

Shrimp Crunchwrap

Use seasoned grilled shrimp instead of beef or lamb.

What to Serve with Mediterranean Crunchwrap Supreme

These crunchwraps are filling enough to serve on their own.

However, simple sides can turn them into a larger meal.

Serve with Greek salad.

Cucumber tomato salad also works well.

You can add roasted vegetables or lemon potatoes.

A bowl of hummus and sliced vegetables makes an easy side.

For a fresh, colorful recipe with a different flavor profile, you can also try our Zesty Mexican Grilled Taco Salad.

Best internal-link placement: Add that sentence at the end of this “What to Serve” section. Highlight only Zesty Mexican Grilled Taco Salad in WordPress and attach your internal link to it.

Another Mediterranean Chicken Recipe to Try

If you enjoy the garlic, herb, and lemon flavors in Mediterranean cooking, try our Mediterranean Garlic Butter Chicken Bites for another quick dinner option.

Make-Ahead Instructions

The components can be prepared in advance.

Cook the meat and refrigerate it in an airtight container.

Chop the cucumber, tomatoes, and olives separately.

Keep lettuce dry and refrigerated.

Store hummus and tzatziki separately.

When you are ready to eat, warm the meat and assemble the crunchwraps.

This method keeps the vegetables fresher and prevents the tortilla from becoming soggy.

Storage Instructions

Cooked crunchwraps are best eaten fresh.

If you have leftovers, allow them to cool.

Wrap them in foil or place them in an airtight container.

Refrigerate for up to 2 days.

The fresh vegetables may soften during storage.

For the best results, prepare only as many crunchwraps as you plan to eat.

How to Reheat

A skillet gives the best texture.

Heat the crunchwrap over medium-low heat for several minutes on each side.

You can also reheat it in an oven at 350°F until warm and crisp.

Avoid relying on the microwave if possible because it can soften the tortilla.

Frequently Asked Questions

Can I use chicken instead of beef?

Yes.

Cooked chopped or shredded chicken works very well.

Season it with oregano, cumin, paprika, garlic, and lemon.

Can I make Mediterranean Crunchwrap Supreme vegetarian?

Yes.

Use falafel, chickpeas, grilled halloumi, eggplant, or roasted vegetables instead of meat.

What can I use instead of pita chips?

Use tortilla chips or crispy flatbread.

You can also toast a small piece of pita bread until crisp.

Can I use regular black olives?

Yes.

Kalamata olives provide a stronger Mediterranean flavor, but black or green olives can also be used.

Can I prepare the crunchwrap ahead of time?

Preparing the ingredients ahead works better than fully assembling the wrap.

Fresh tomatoes, cucumber, lettuce, and sauce can make a stored crunchwrap soggy.

Can I bake Mediterranean Crunchwrap Supreme?

Yes.

Place assembled crunchwraps seam-side down on a baking sheet.

Bake at approximately 425°F until golden and crisp, flipping once if needed.

Can I make it spicy?

Yes.

Add harissa, chili flakes, cayenne pepper, or spicy hummus.

Can I use Greek yogurt instead of tzatziki?

Yes.

Plain Greek yogurt works well.

Add lemon, garlic, cucumber, and herbs if you want it to taste closer to tzatziki.

Servings & Nutrition

Servings: 4

Estimated nutrition per serving:

Calories: 470

Protein: 26 g

Carbohydrates: 38 g

Fat: 24 g

Fiber: 5 g

Sugar: 4 g

Sodium: 620 mg

Actual nutrition will vary depending on the tortilla, meat, hummus, cheese, sauces, and portion sizes used.

Final Thoughts

Mediterranean Crunchwrap Supreme combines a crispy tortilla with warm seasoned meat and fresh Mediterranean ingredients.

Hummus adds creaminess.

Feta and olives bring salty flavor.

Tomatoes, cucumber, and lettuce add freshness.

The crunchy pita layer makes every bite more interesting.

You can prepare the ingredients ahead, customize the filling, or turn it into a vegetarian, chicken, or spicy version.

It is an easy option when you want a Mediterranean-inspired meal that feels a little more fun than a traditional wrap.

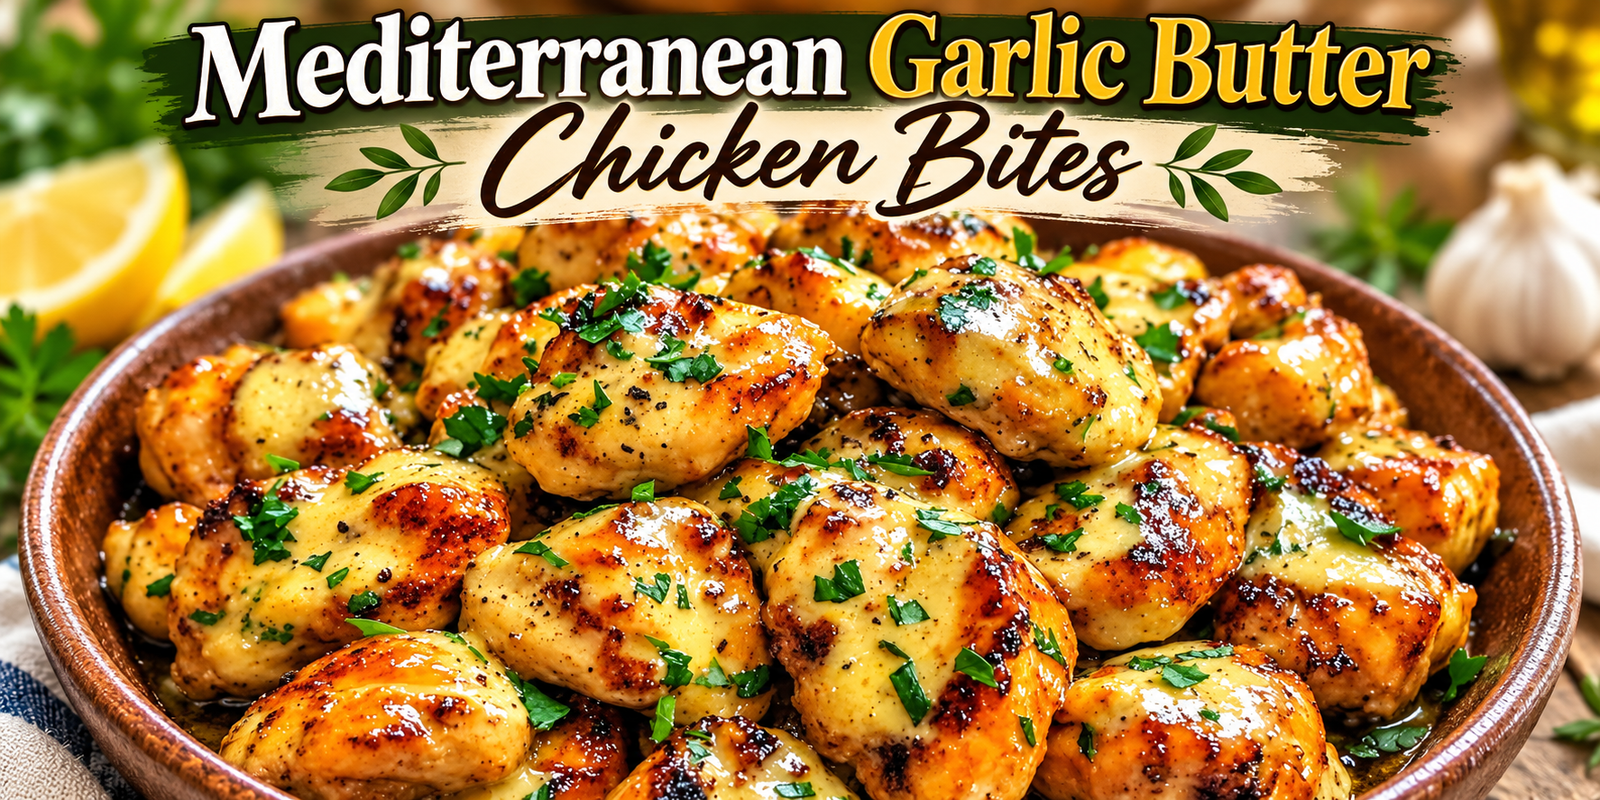
Mediterranean Garlic Butter Chicken Bites

Mediterranean Garlic Butter Chicken Bites in a bowl with golden juicy chicken pieces coated in garlic butter sauce and fresh parsley

Mediterranean Garlic Butter Chicken Bites

Mediterranean Garlic Butter Chicken Bites are juicy, golden pieces of chicken cooked in a rich garlic butter sauce with lemon, herbs, and Mediterranean-inspired seasonings. This quick skillet recipe is full of flavor, easy to prepare, and perfect for lunch, dinner, meal prep, or serving with rice, pasta, potatoes, vegetables, or salad.

The combination of tender chicken, garlic, butter, oregano, parsley, paprika, and fresh lemon creates a bright and savory dish that comes together quickly. It is especially useful when you need a simple dinner without spending too much time in the kitchen.

Prep Time: 10 minutes
Cook Time: 15 minutes
Total Time: 25 minutes
Servings: 4

Ingredients 

For the Chicken

1½ lb boneless, skinless chicken breasts or chicken thighs, cut into bite-size pieces

1 tablespoon olive oil

1 teaspoon paprika

1 teaspoon dried oregano

½ teaspoon garlic powder

½ teaspoon onion powder

½ teaspoon salt

¼ teaspoon black pepper

For the Garlic Butter Sauce

3 tablespoons unsalted butter

4 garlic cloves, finely minced

1 tablespoon fresh lemon juice

1 teaspoon lemon zest

1 tablespoon chopped fresh parsley

1 teaspoon chopped fresh dill, optional

½ teaspoon dried oregano

¼ teaspoon red pepper flakes, optional

Optional Mediterranean Add-Ins

½ cup cherry tomatoes, halved

¼ cup sliced olives

¼ cup crumbled feta cheese

1 tablespoon capers

Fresh basil or parsley

Step-by-Step Instructions

Prepare the Chicken

Pat the chicken dry with paper towels.

This step helps the chicken brown better in the skillet.

Cut the chicken into even bite-size pieces so they cook at the same speed.

Place the chicken in a bowl.

Add paprika, oregano, garlic powder, onion powder, salt, and black pepper.

Toss until all the chicken pieces are evenly coated with seasoning.

Heat the Skillet

Place a large skillet over medium-high heat.

Add the olive oil.

Let the oil heat for about 30 seconds.

The skillet should be hot before adding the chicken.

Cook the Chicken

Add the seasoned chicken in a single layer.

Do not overcrowd the skillet.

If necessary, cook the chicken in two batches.

Let the chicken cook without moving it for about 2 to 3 minutes.

This helps create a golden crust.

Stir and continue cooking for another 4 to 5 minutes.

Cook until the chicken is golden on the outside and fully cooked through.

The internal temperature should reach 165°F or 74°C.

Transfer the chicken to a plate.

Make the Garlic Butter Sauce

Reduce the heat to medium-low.

Add the butter to the same skillet.

Once melted, add the minced garlic.

Cook for about 30 seconds.

Stir constantly so the garlic does not burn.

Add lemon juice, lemon zest, oregano, parsley, and red pepper flakes if using.

Stir everything together.

Return the Chicken to the Skillet

Add the cooked chicken back to the pan.

Toss the chicken in the garlic butter sauce until every piece is coated.

Cook for another 1 to 2 minutes.

This allows the chicken to absorb the lemon, garlic, and herb flavors.

Add Optional Mediterranean Ingredients

If using cherry tomatoes, olives, or capers, add them during the final minute.

Stir gently.

Remove the skillet from the heat.

Sprinkle feta cheese over the top if desired.

Finish with extra parsley or basil.

Serve immediately.

Why You’ll Love Mediterranean Garlic Butter Chicken Bites

This recipe is simple but packed with flavor.

The chicken cooks quickly because it is cut into small pieces.

The garlic butter sauce gives the dish richness.

Fresh lemon keeps it bright and balanced.

Mediterranean herbs add savory flavor without making the recipe complicated.

You can also customize the dish easily.

Add vegetables, olives, feta, or chili flakes depending on what you have available.

For a cozy and comforting chicken dinner, try our Crockpot Chicken and Dumplings, an easy slow cooker recipe perfect for family meals.

Tips for the Best Chicken Bites

Dry the Chicken First

Moisture prevents browning.

Patting the chicken dry helps create a better golden crust.

Use a Hot Skillet

A properly heated skillet helps sear the chicken quickly.

This keeps the outside golden while the inside stays juicy.

Do Not Overcrowd the Pan

Too much chicken in the skillet can create steam.

Cook in batches if needed.

Use Fresh Garlic

Fresh garlic gives the sauce the strongest flavor.

Avoid overcooking it because burned garlic tastes bitter.

Add Lemon at the End

Fresh lemon tastes brightest when added near the end of cooking.

Use Chicken Thighs for Extra Juiciness

Boneless chicken thighs work especially well because they stay tender and juicy.

Easy Variations

Mediterranean Garlic Butter Chicken with Spinach

Add 2 cups of fresh baby spinach during the final few minutes.

Cook until wilted.

Garlic Butter Chicken with Tomatoes

Add halved cherry tomatoes to the skillet after the chicken is cooked.

Let them soften slightly in the sauce.

Chicken Bites with Feta

Sprinkle crumbled feta over the finished dish.

The feta adds salty, creamy flavor.

Spicy Garlic Butter Chicken

Add red pepper flakes or a pinch of cayenne.

Creamy Garlic Butter Chicken

Add ¼ cup of heavy cream after the garlic cooks.

Stir until creamy.

Then return the chicken to the skillet.

Garlic Butter Chicken and Vegetables

Add zucchini, bell peppers, mushrooms, or asparagus.

Cook the vegetables before making the sauce.

What to Serve with Mediterranean Garlic Butter Chicken Bites

These chicken bites pair well with many side dishes.

Serve them with rice for a simple meal.

You can also serve them with:

Roasted potatoes

Mashed potatoes

Orzo

Couscous

Quinoa

Pasta

Garlic bread

Roasted vegetables

Greek salad

Cucumber tomato salad

The chicken also works well inside wraps or pita bread.

If you enjoy bright lemon and herb flavors, you may also like our Perfectly Seared Scallops in Creamy Lemon-Herb Sauce for another elegant Mediterranean-inspired meal.

Meal Prep Instructions

This recipe is a good option for meal prep.

Cook the chicken and allow it to cool.

Divide it into airtight containers.

Add rice, quinoa, or roasted vegetables.

Store the containers in the refrigerator.

For best quality, enjoy within 3 days.

Keep fresh garnishes such as parsley, feta, and lemon wedges separate until serving.

Storage Instructions

Allow leftovers to cool completely.

Transfer them to an airtight container.

Store in the refrigerator for up to 3 days.

The garlic butter sauce may thicken when cold.

This is normal.

How to Reheat

Reheat the chicken in a skillet over low heat.

Add a small splash of water, chicken broth, or butter if needed.

Stir gently until warmed through.

You can also use the microwave.

Heat in short intervals to avoid drying out the chicken.

Can You Freeze Mediterranean Garlic Butter Chicken Bites?

Yes.

Allow the chicken to cool completely.

Place it in a freezer-safe container.

Freeze for up to 2 months.

Thaw overnight in the refrigerator.

Reheat gently in a skillet.

Add fresh lemon juice and parsley after reheating to refresh the flavor.

Frequently Asked Questions

Can I use chicken thighs instead of chicken breasts?

Yes.

Chicken thighs are an excellent choice because they are naturally juicy and flavorful.

Can I make this recipe dairy-free?

Yes.

Replace butter with olive oil or a dairy-free butter substitute.

Can I add vegetables?

Yes.

Zucchini, bell peppers, mushrooms, spinach, asparagus, and tomatoes all work well.

Can I make it spicy?

Yes.

Add red pepper flakes, cayenne pepper, or chopped fresh chili.

Can I use bottled lemon juice?

Fresh lemon juice is recommended for the best flavor.

Bottled juice can be used if necessary.

Can I make it ahead of time?

Yes.

Cook the chicken ahead and refrigerate it.

Reheat gently before serving.

What can I use instead of butter?

Olive oil works well.

You can also use a combination of olive oil and a small amount of butter.

Can I serve this over pasta?

Yes.

Toss the chicken and garlic butter sauce with cooked pasta.

Add Parmesan or feta if desired.

Servings & Nutrition

Servings: 4

Estimated nutrition per serving:

Calories: 330

Protein: 38 g

Carbohydrates: 4 g

Fat: 18 g

Fiber: 1 g

Sugar: 1 g

Sodium: 480 mg

Nutrition values are estimates and may vary depending on the type of chicken, butter, seasonings, and optional ingredients used.

Final Thoughts

Mediterranean Garlic Butter Chicken Bites are quick, flavorful, and easy enough for busy weeknights.

The chicken turns golden and juicy in the skillet, while the garlic butter sauce adds richness and fresh Mediterranean flavor.

Lemon, oregano, parsley, and optional feta or olives make the dish bright and satisfying.

You can serve these chicken bites with rice, pasta, potatoes, vegetables, or salad.

They are also easy to prepare ahead, making them useful for both family dinners and meal prep.

Spinach, Sun-Dried Tomato & Feta Crustless Quiche

Spinach, Sun-Dried Tomato & Feta Crustless Quiche

Ingredients

8 large eggs
½ cup milk
½ cup heavy cream
2 cups fresh spinach, roughly chopped
½ cup sun-dried tomatoes, drained and chopped
¾ cup crumbled feta cheese
½ cup shredded mozzarella cheese
¼ cup finely chopped red onion
2 cloves garlic, minced
1 tablespoon olive oil
½ teaspoon dried oregano
½ teaspoon salt
¼ teaspoon black pepper
¼ teaspoon red pepper flakes, optional
2 tablespoons fresh parsley, chopped

Instructions

Preheat your oven to 375°F (190°C). Lightly grease a 9-inch pie dish or similar baking dish with olive oil or nonstick cooking spray.
Heat the olive oil in a skillet over medium heat. Add the chopped red onion and cook for 2–3 minutes until softened. Add the minced garlic and cook for another 30 seconds.
Add the chopped spinach and cook for 1–2 minutes, just until wilted. Remove from the heat and allow the mixture to cool slightly.
In a large mixing bowl, whisk together the eggs, milk, heavy cream, oregano, salt, black pepper, and red pepper flakes. Whisk until smooth and well combined.
Stir the cooled spinach mixture and chopped sun-dried tomatoes into the egg mixture. Add the crumbled feta and shredded mozzarella, reserving a small amount of feta for the top if desired.
Pour the mixture into the prepared baking dish and spread the ingredients evenly. Sprinkle the remaining feta and fresh parsley over the surface.
Bake uncovered for 35–40 minutes, or until the center is set and the top is lightly golden. The quiche should be firm around the edges with only a slight jiggle in the center.
Remove from the oven and let it rest for 5–10 minutes before slicing. This allows the eggs to finish setting and makes the quiche easier to serve.
Serving Suggestions
Serve warm with a fresh tomato and cucumber salad, roasted potatoes, avocado, or toasted whole-grain bread. It also makes an excellent brunch dish alongside fresh fruit.