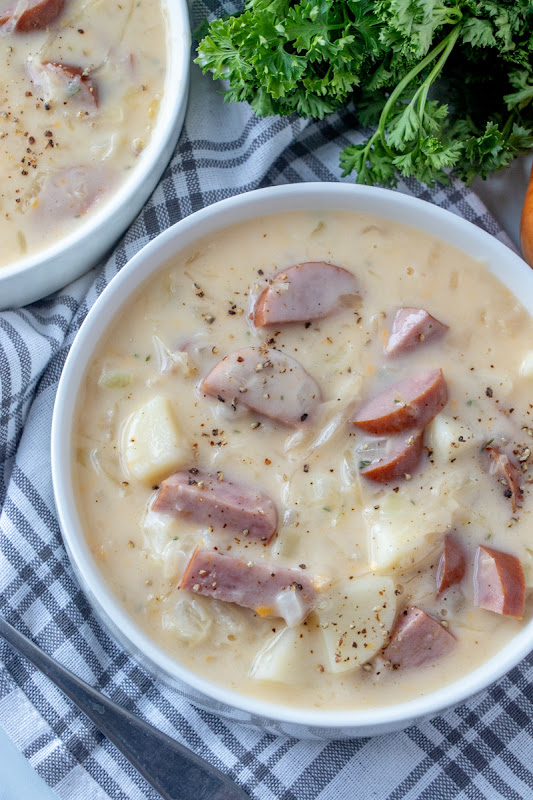
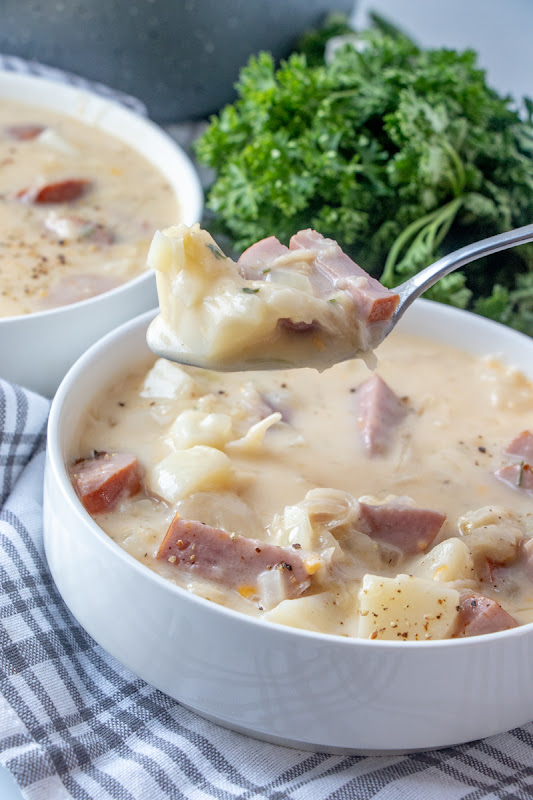
Creamy German Sausage, Potato and Sauerkraut Soup Recipe

Delicious and easy 30 minute meal! Perfect for weeknight lunch or dinner and the sauerkraut adds a surprising touch of flavor in this German inspired soup.

YIELD: 6 servings

PREP TIME: 5 Min

COOK TIME: 20 Min

TOTAL TIME: 25 Min


INGREDIENTS:
  • 4 tablespoons butter
  • 1 medium onion, finely diced
  • 1/4 cup flour
  • 1 1/2 cups chicken broth
  • 2 1/2 cups milk
  • 1 – 14 ounce Polska Kielbasa, halved and sliced
  • 1 1/2 cups cooked diced potatoes
  • 1 cup sauerkraut
  • 1/2 teaspoon dried parsley
  • 1 cup shredded cheddar cheese
  • black pepper
INSTRUCTIONS:
  1. In a large saucepan, melt butter over medium heat.
  2. Add onions and saute for about five minutes, until tender.
  3. Add flour, stirring until completely combined. Cook for one minute, then add the chicken broth and milk.
  4. Turn heat to medium high, then cook stirring often until broth begins to thicken.
  5. Reduce heat to medium then add kielbasa, diced potatoes, sauerkraut and parsley. Simmer for five minutes, then add shredded cheddar.
  6. Stir to combine and remove from heat. Serve sprinkled with black pepper.
NUTRITIONAL INFO:

Calories./389.38/Fat/26.79/Sat.Fat/13.24/Carbs/23.48/Fiber/2.30/Netcarbs/21.18/Sugar/8.16/Protein/14.68/Sodium/1051.89/Cholesterol/74.22

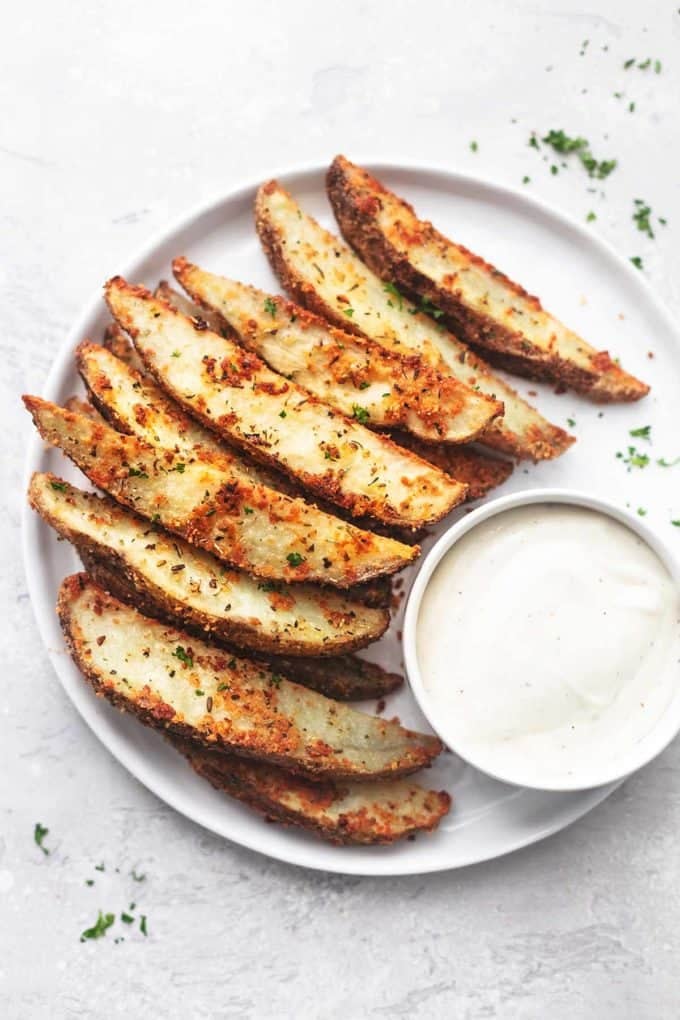
Baked Garlic Parmesan Potato Wedges

This easy recipe for Baked Garlic Parmesan Potato Wedges will blow you away with its simplicity and fantastic garlic, Italian herbs, and parmesan flavors! They make a great side dish or appetizer for parties too!

This latest semi-french fry recipe is sort of blowing my mind. So crispy and loaded with yummy garlic and Italian flavors. I could never turn down garlic and cheese on fries and I think you won’t be able to, either! 

IDEAS FOR DIPPING GARLIC PARMESAN POTATO WEDGES
  • Because what are fries without dip?!
  • The first time I made these roasted potato fries, I dipped them in blue cheese dressing with freshly chopped parsley. Oh my heaven.
  • Ketchup, cause, it’s a natural relationship.
  • Chimichurri: don’t knock it till you try it! In fact, don’t dip, just dump the chimichurri all over the fries and eat with a fork (or your hands, no judgment).
  • Queso dip! Cheese on cheese on cheese!
  • Crab and artichoke dip? Sure! 
  • If you love blue cheese dip, you’ll probably also want to go ahead and make this Greek Yogurt Ranch.
  • Plain old mustard is great, but honey mustard is much, much better!
  • For a little bit of heat in your dip, try this chipotle ranch version of a typical ranch dip.
HOW TO CUT POTATO WEDGES
  1. I rinse my potatoes under cold water, rubbing off any dirt first. Then I cut off any bad spots or “eyes” that are starting to grow.
  2. Then, I dry the potatoes off (so they aren’t slippery when you’re trying to cut them) and place them on a cutting board.
  3. Grab a large, sharp knife for cutting these into wedges. Place the potato down longside away from you and slice right down the middle, lengthwise.
  4. Turn the two cut halves down on the flat side/inside and cut those in half again. (Placing them flat side down ensures they won’t roll and lessens the chances that you’ll cut yourself.)
  5. Finally, carefully cut each quarter-wedge in half through the center. Ta da!
  6. If you have particularly large potatoes, you can cut some sections again. They should all be roughly about an inch in width to make them bake more evenly.

This easy recipe for Baked Garlic Parmesan Potato Wedges will blow you away with its simplicity and fantastic garlic, Italian herbs, and parmesan flavors! They make a great side dish or appetizer for parties too! 

Prep Time:15min

Cook Time:30min

Total Time:45min

Servings:4 servings

Ingredients:

  • 3-4 large russet potatoes, sliced into wedges
  • 4 tablespoons olive oil
  • 2 teaspoons salt
  • 2 teaspoons garlic powder
  • 2 teaspoons Italian seasoning
  • ½ cup shredded parmesan cheese
  • optional: fresh parsley (or cilantro), ranch or blue cheese dressing for dipping

Instructions:

  1. Preheat oven to 375. Lightly grease a large baking sheet and set aside.
  2. Place potato wedges in a large bowl. Drizzle with olive oil and toss to coat.
  3. In a small bowl whisk together salt, garlic powder, and Italian seasoning.
  4. Sprinkle potato wedges with the shredded cheese, tossing to coat, then sprinkle with the seasoning mixture.
  5. Place potato wedges on prepared baking sheet in a single layer with skin-sides-down.
  6. Bake for 25-35 minutes until potatoes are fork-tender and golden.
  7. Sprinkle with freshly chopped parsley and dressing for dipping.

Notes:

Serve with your favorite dipping sauce – we love ranch dressing!

Nutritional Info:

Calories: 404 kcal, Carbohydrates: 52 g, Protein: 11 g, Fat: 18 g, Saturated Fat: 4 g, Cholesterol: 11 mg, Sodium: 1369 mg, Potassium: 1201 mg, Fiber: 4 g, Sugar: 2 g, Vitamin A: 128 IU, Vitamin C: 16 mg, Calcium: 193 mg, Iron: 3 mg

Twix Cookies Recipe

These twix cookies have a shortbread cookie, caramel filling, and chocolate topping – just like a twix candy bar!

How cute are these Twix cookies? If you love Twix candy bars then these cookies are for you! They are the perfect combination of shortbread, caramel, and chocolate. Just typing that out makes me want to make more of these – yum!!

It goes without saying that they are delicious, but I also love how pretty they are – cute little round cookies with yummy layers of candy on top. And believe it or not, they really do taste just like a Twix candy bar!

I made these for my Christmas cookie trays this year and they are almost always the first ones to disappear when I set them out! I guess people just love the flavor of Twix. 🙂 Plus how fun is it to have a cookie version of a classic candy bar? I might try this with all my favorite candy bars!

Just like their candy counterparts, these cookies consist of three layers – a shortbread cookie on the bottom, creamy caramel in the middle, and chocolate on top. Yum!! Each layer is easy to make, and the only time consuming part is spreading the caramel and chocolate on each cookie. It’s worth it though, when you end up with a small army of delicious Twix cookies. 🙂

We couldn’t stop eating these – they are crunchy and creamy and sweet and delicious. Plus, they look really pretty on a cookie tray!

If you like Twix candy bars, you need to try these cookies – you will love them!

Twix Cookies Recipe 

YIELD: Makes about 36 cookies

INGREDIENTS:
Cookie:
  • 1 1/2 cups unsalted butter, softened
  • 1 cup powdered sugar
  • 1 tsp vanilla
  • 3 cups flour
  • 3/4 tsp salt
Caramel layer:
  • 15 oz of caramel (I used Kraft caramel bits)
  • 2 Tbsp evaporated milk
  • Chocolate layer:
  • 2 cups milk chocolate chips
  • 2 tsp shortening
INSTRUCTIONS:
  1. Make the cookies: Preheat oven to 350 degrees F. In a large bowl, cream butter and sugar together. Add vanilla, flour and salt and mix until well combined.
  2. On a lightly floured surface, roll the dough out to 1/2 inch thick. With a small biscuit cutter, cut out cookies and place on a cookie sheet lined with parchment paper or a silicone liner. Bake for 14-16 minutes, or until cookies are set and just beginning to brown on the bottom. Remove from oven and let cookies cool completely.
  3. Combine caramel and evaporated milk in a microwave safe bowl and melt according to package directions. Spread over cooled cookies and let set.
  4. In a small microwave safe bowl, melt chocolate chips and shortening in 30 second increments, stirring in between each increment until melted and smooth. Spread over the tops of cooled caramel.
  5. Let chocolate set before eating and serving.

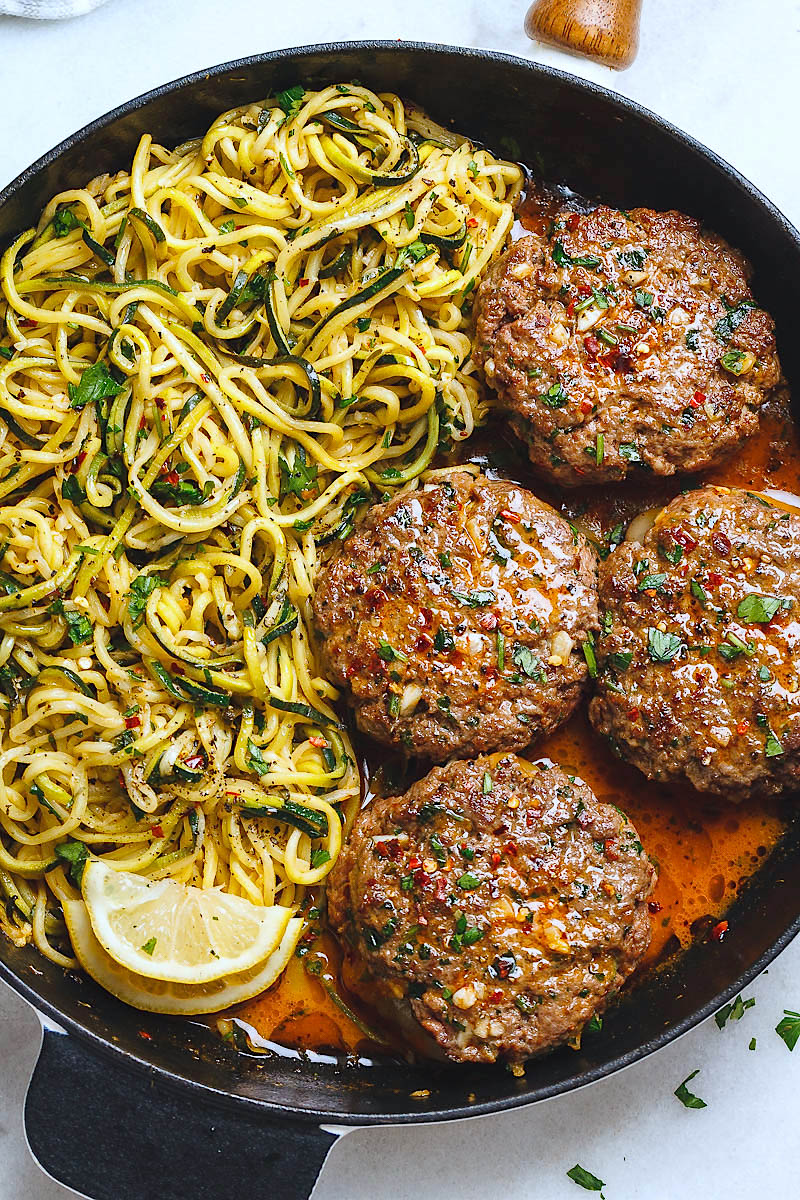
Cheesy Garlic Burgers with Lemon Butter Zucchini Noodles

These garlic butter burgers with zucchini noodles make a delicious low-carb/keto dinner you’ll remember for a long time. A super twist on the classic beef burger recipe!

Cheesy Garlic Burgers with Lemon Butter Zucchini Noodles – Rich and juicy, you’ll instantly fall in love with these cheesy stuffed burger steaks made in one pan with plenty of lemon butter zucchini noodles. This complete low carb dinner is keto, gluten-free, and paleo-friendly. It all looks way too simple to taste as delicious as it does, but believe us, it does!

Ingredients:
  • 1 1/4 lb (650g) lean ground beef
  • 5 garlic cloves, minced
  • 1/2 cup chopped fresh parsley, divided
  • 1 teaspoon crumbled beef bouillon cube
  • Crushed red chili pepper flakes, optional
  • 1 tablespoon steak seasoning (we used Mc Cormick’s Grill Mates Hamburger)
  • 4 medium zucchini, spiralized or julienned
  • 4 cheese slices (cheddar, mozzarella, provolone…)
  • 2+2 tablespoons butter
  • 1 tablespoon hot sauce (we used Sriracha)
  • Salt and fresh cracked pepper
  • 1 teaspoon Italian seasoning
  • Juice of 1/2 lemon + lemon slices, for garnish
Instructions:
  1. To make the cheesy garlic burgers with lemon butter zucchini noodles: Add ground beef to a medium bowl, breaking it up as you do.
  2. Sprinkle with steak seasoning, red chili pepper flakes, fresh cracked black pepper, half of the minced garlic, bouillon cube, and parsley.
  3. Mix with a fork or by hand until the ingredients are just combined.
  4. Divide the seasoned ground beef into 8 even portions and form into round patties (you can use a ring mold).
  5. Top half of beef patties with a slice of cheese and arrange another beef puck on top to make the “sandwich”.
  6.  Melt 2 tablespoons butter in a large skillet over medium-high heat. Cook the beef patties 5 to 6 minutes on each side, depending on the desired doneness.
  7. While cooking, baste the beef with the mix of butter and juices. Remove to a clean plate and set aside.
  8.  In the same skillet melt 2 tablespoons butter; then add remaining garlic, lemon juice, hot sauce, Italian seasoning, and red pepper flakes.
  9. Stir in the fresh parsley, then add the zucchini noodles and toss for two to three minutes to cook it up.
  10. Allow the cooking juices to reduce for one minute if the zucchini renders too much water.
  11. Push zucchini on one side of the skillet and add the beef patties back to the pan and reheat for a minute or two.
  12. Serve the cheesy garlic burgers with lemon butter zucchini noodles immediately with a lemon slice on the side. Enjoy!

Tips for the cheesy burgers and zucchini recipe:
  • Zucchini tends to render a lot of water when cooking, so you can sprinkle with salt after spiralizing and allow to sit for a couple of minutes to take off excess water.
  • Rinse well to get rid of salt and drain thoroughly in a colander before cooking.
  • Let sit the ground beef on the counter to bring it in at room temperature. The burgers will cook more evenly.
How and how long to keep the cheesy beef burgers and zucchini noodles?

You can keep the cheesy beef burgers and zucchini for up to 2 days in an airtight container stored in your refrigerator. Reheat covered in a skillet with a dash of water to loosen up the sauce

Meatloaf Recipe

This is a Meatloaf recipe for people who love their Meatloaf oozing with flavour, moist and tender yet not crumble apart when sliced, and a sticky caramelised meatloaf glaze . It’s so much more than just a giant hunk of ground beef in a loaf shape!

A loaf made entirely of meat. What’s not to love? (Vegetarians are excused 😉)

It’s economical. It’s quick to prepare. It’s a classic family favourite. And leftovers make terrific sandwiches.

If you think that Meatloaf is really just a giant beef burger shaped like a loaf, it’s time to abandon that misconception! Meatloaf shouldn’t taste like a hamburger! Meatloaf has more flavour because whereas you wouldn’t eat a hamburger without toppings, sauces, cheese and a bun, you can certainly eat Meatloaf plain because it’s so juicy and tasty!

The secret to making a meatloaf taste really good is to use fatty beef, plenty of flavourings and to grate your onion instead of dicing it.

Meatloaf is so much more than a giant hunk of ground beef in a loaf shape. It should ooze with flavour, be moist and tender yet not crumble apart when sliced. And the caramelised glaze is the crowning glory!

Prep Time: 15 mins

Cook Time: 1 hr 15 mins

Total Time: 1 hr 30 mins

Ingredients:

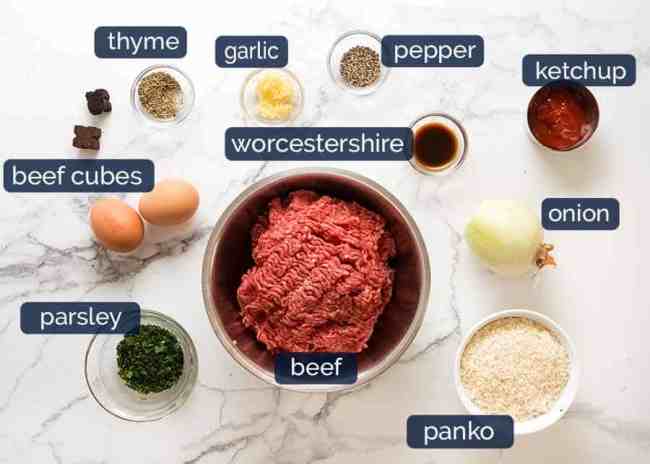
  • 1 cup panko breadcrumbs (Note 1)
  • 1 large onion , grated (brown, yellow)
  • 1 kg / 2 lb ground beef (mince) , preferably not lean
  • 2 eggs
  • 3 garlic cloves , minced
  • 1 tsp Worcestershire Sauce
  • 1/4 cup tomato ketchup
  • 1/4 cup chopped parsley (optional), or 2 tsp dried parsley or basil
  • 1 tsp dried thyme
  • 2 beef bouillon cubes , crumbled or 2 tsp beef powder (Note 2)
  • 1 tsp black pepper
  • Meatloaf Glaze:
  • 1/2 cup tomato ketchup
  • 2 tbsp cider vinegar
  • 1 tbsp brown sugar , lightly packed
Instructions:
  1. Preheat oven to 180C/350F. Oil or spray a loaf tin. (Note 3)
  2. Glaze: Mix together in a small bowl. Set aside.
  3. Meatloaf: Place breadcrumbs in a very large bowl. Grate over onion. Mix so the breadcrumbs are all wet. (Note 4)
  4. Add remaining ingredients. Mix well using your hands. Form into a loaf shape, pinching together then smoothing over creases and cracks (helps prevent cracks during baking).
  5. Transfer into loaf tin. Brush generously with glaze, using about 1/2.
  6. Bake for 45 minutes. Remove from oven and brush with most of the remaining glaze. If there is excess fat pooling, scoop/pour it off.
  7. Bake for a further 30 minutes. Remove from oven.
  8. Stand for 10 minutes before turning out and cutting into thick slices. You will probably get a bit of crumbling just on the edges of the first couple of slices, this is normal and indicative of the tenderness of the meatloaf (zero crumble indicates firm packed harder meatloaf which isn’t as enjoyable!).
  9. Ideal served with a dollop of ketchup, creamy mashed potatoes and steamed vegetables.
Notes:
  • Panko breadcrumbs are larger than normal breadcrumbs so they make the meatloaf softer. Nowadays they are found in most supermarkets here in Australia, usually in both the Asian section and alongside normal breadcrumbs.
  • Bouillon cubes adds so much better flavour to the meatloaf compared to just plain salt. Best subs: chicken or veg bouillon or stock powder. Salt sub: 1.5 tsp salt.
  •  Pan size: My loaf pan is 23 x 13 x 6 cm / 9 x 5 x 2.5″. As long as you have one about this size, this recipe will work fine though it might be flatter or taller.
  •  Grated onion – a highly effective and efficient technique to make meatloaf more tender (soaked breadcrumbs puff up when baked) and adds savoury onion flavour without the need to separately fry diced onion.

 Nutrition per serving, assuming 8 servings.

Nutritional Info:

Serving: 179g | Calories: 404cal | Carbohydrates: 15g | Protein: 24g | Fat: 26g | Saturated Fat: 10g | Cholesterol: 129mg | Sodium: 607mg | Potassium: 468mg | Sugar: 7g | Vitamin A: 175IU | Vitamin C: 2.3mg | Calcium: 52mg | Iron: 3.3mg

Egg Roll Stir Fry Recipe

A stir-fry recipe with cabbage and all the flavor of an egg roll without the wrapper! Like an unstuffed egg roll in a bowl!

So… you may have noticed I’m cooking a lot of recipes these days that are low carb and gluten free. Well, lemme tell you, there’s a reason. The minute I turned forty last year the pounds started packing on.

I’m a big gal. And that’s fine. I came to terms with the fact I ain’t ever going to be a size two 15 years ago. But even us big girls have a range we like to stay in.

And I stepped way out of that range this past year so I’m trying to get back in it again.

And you know what’s working for me? I’m trying to just eat meat and vegetables. I have dairy too and some nuts here and there if I get snacky but for the most part, it’s just meat and vegetables for me.

No flour, sugar, rice, potatoes, pasta or bread.

And it’s working! I’ve lost 12 pounds in the last three weeks and I haven’t been hungry once. I guess it helps that I really, really, honest to God, do love vegetables.

On Sundays I cook up whole batches of yummy vegetables and soups & stews to eat off of during the week. And you know what? I look forward to meal time!

So anyway, I came across this recipe from Once a Mom Always a Cook and just knew I had to try it! I LOVE EGG ROLLS. And the thought of being able to get all those yummy flavors in a dish I could enjoy without a shred of guilt sounded good to me!

This is delicious and it heats up beautifully too! I can’t wait to make this again!

Egg Roll Stir-Fry Recipe 

Yield: 4-6 Servings

PREP TIME: 10 Min

COOK Time: 20 Min

Total Time: 30 Min

A skillet recipe with cabbage and all the flavor of an egg roll without the wrapper! Like an unstuffed egg roll stir-fry in a bowl!

INGREDIENTS:
  • 1 lb. ground beef, pork or turkey
  • 1 large onion, diced
  • 1 small head of cabbage
  • 2-3 carrots
  • 4-5 cloves garlic, minced
  • 1 tablespoon grated fresh ginger
  • 1/2 teaspoon black pepper
  • 2 tablespoons sesame oil
  • 1 tablespoon vegetable oil
  • 1/4 cup soy sauce
INSTRUCTIONS:
  1. Cook and crumble ground meat with onions in a very large skillet until meat is cooked through. Do not drain.
  2. You’ll need to select a skillet large enough to contain all the cabbage – divide everything evenly into two skillets if necessary.
  3. While meat and onions are cooking, cut cabbage into thin shreds; set aside.
  4. Peel carrots with a vegetable peeler then either dice small or use the peeler to shave off thin slices; set aside.
  5. Combine garlic, ginger, pepper, sesame oil, vegetable oil and soy sauce in a small bowl and stir to combine; set aside.
  6. Add cabbage and carrots to ground meat then cook and stir over medium-high heat for 3-4 minutes.
  7. Add soy sauce mixture then stir well.
  8. Reduce heat to medium and continue cooking for 5-10 minutes or until cabbage is tender.
NOTES:
  • Substitute two bags coleslaw mix for cabbage and carrots if desired.
  • I like ground pork or white turkey in this best!
  • Substitute 1 teaspoon ground ginger for fresh if needed.

Did you make this recipe?